Mark Knapp
Dealer - Purveyor
Much, much better. Way to go. I'm also impressed with how well you can take suggestions from other people. Some people have trouble with that.
Much, much better. Way to go. I'm also impressed with how well you can take suggestions from other people. Some people have trouble with that.


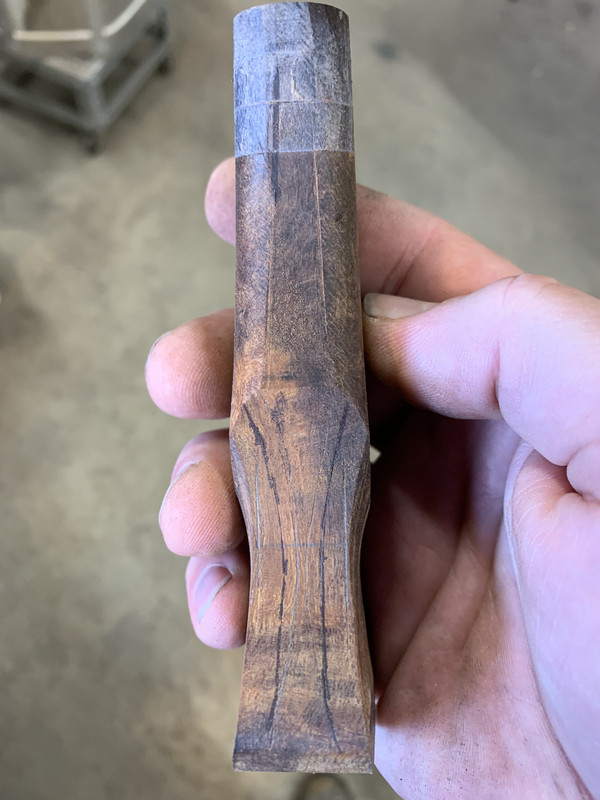
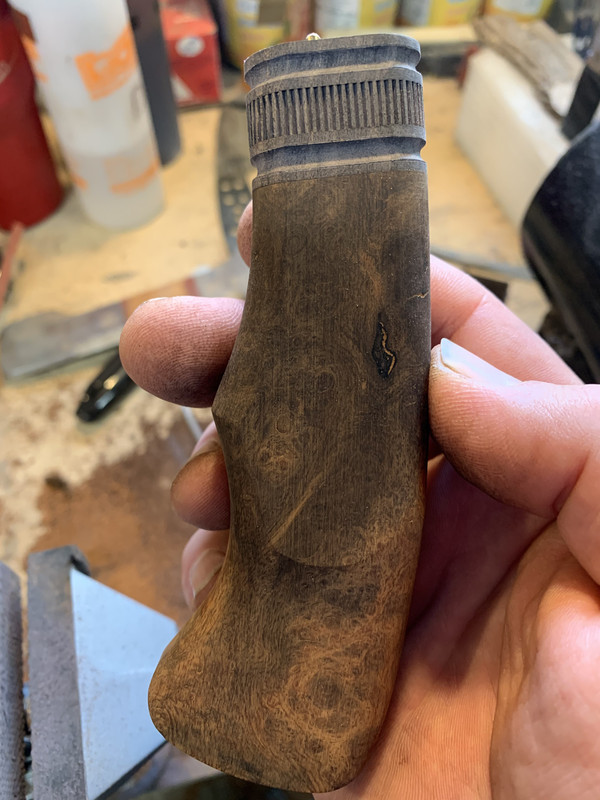
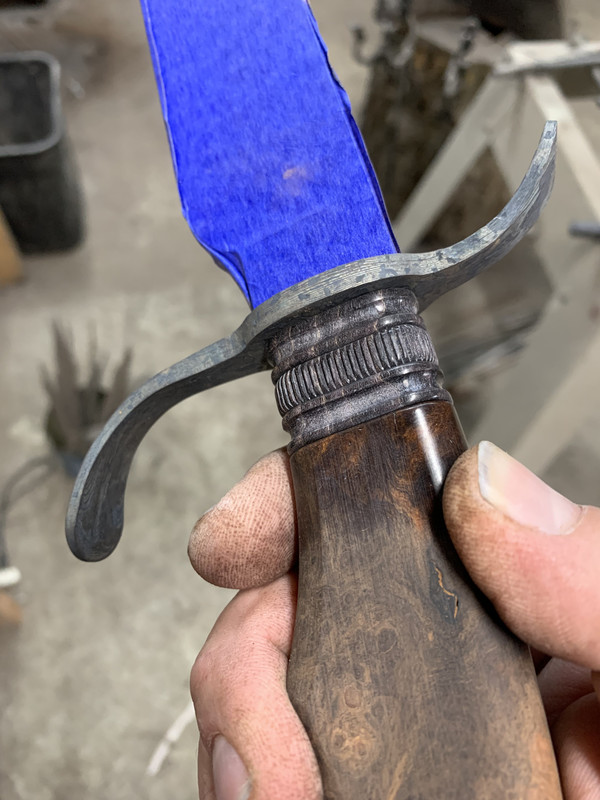
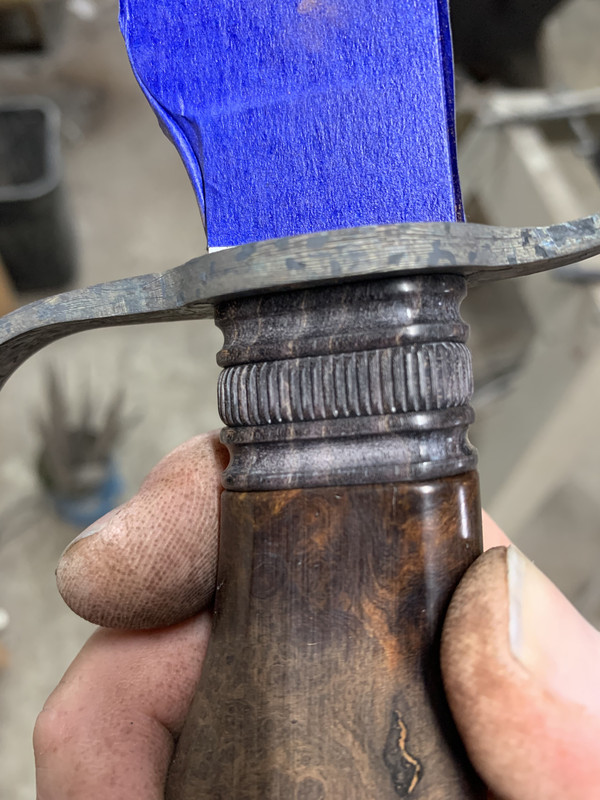
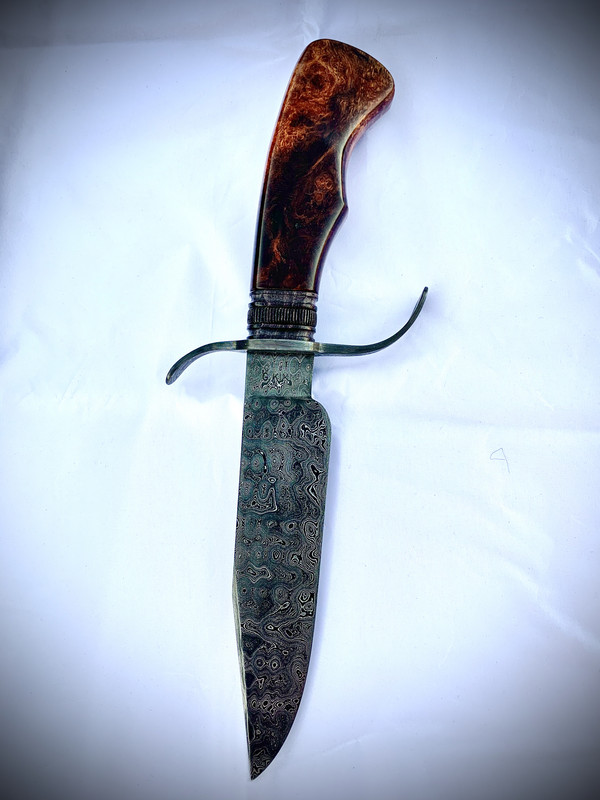
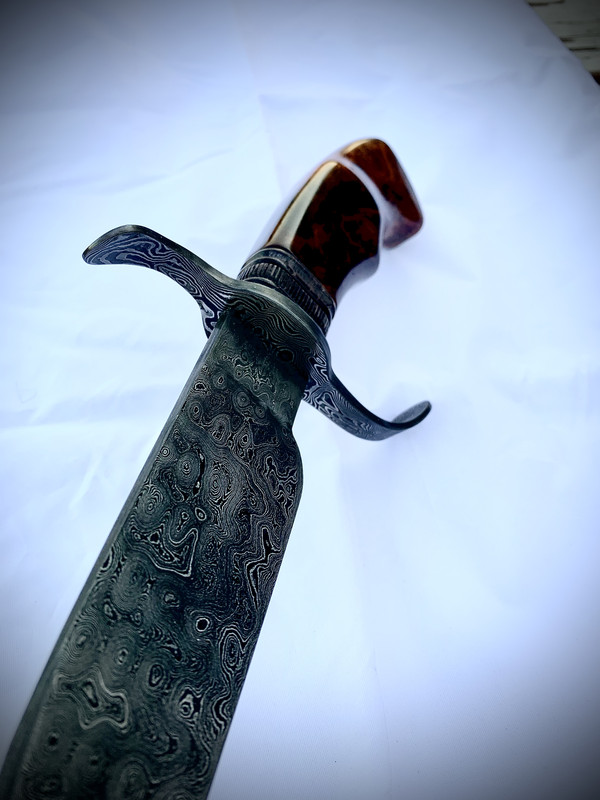
 Gene you knocked this one out of the park, with that combination. What are the spacers made from. I like that kind of (dusty look) for lack of a better terminology!!
Thanks for that explanation Gene. Sure saves us newbies a ton of experimentation.The spacers are quilted maple that has been dyed black and stabilized. I was hoping they would come out pure black, but I like this look too. I think they would look real good with wrought iron.
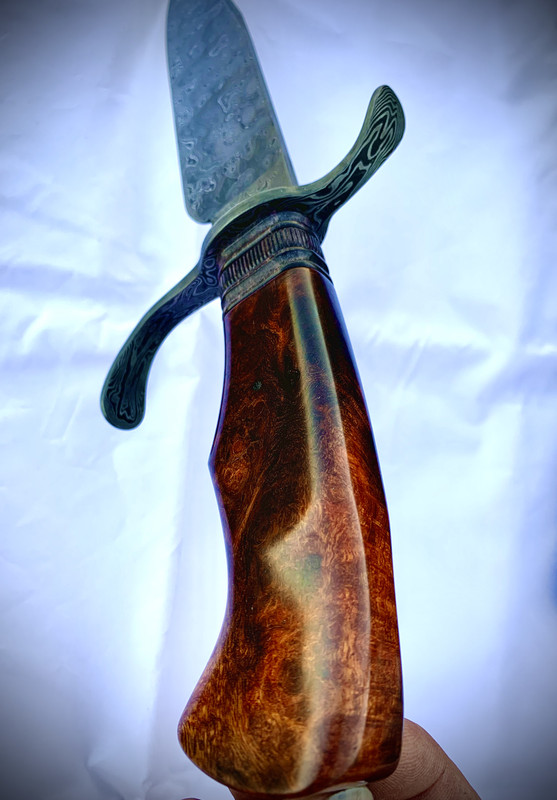
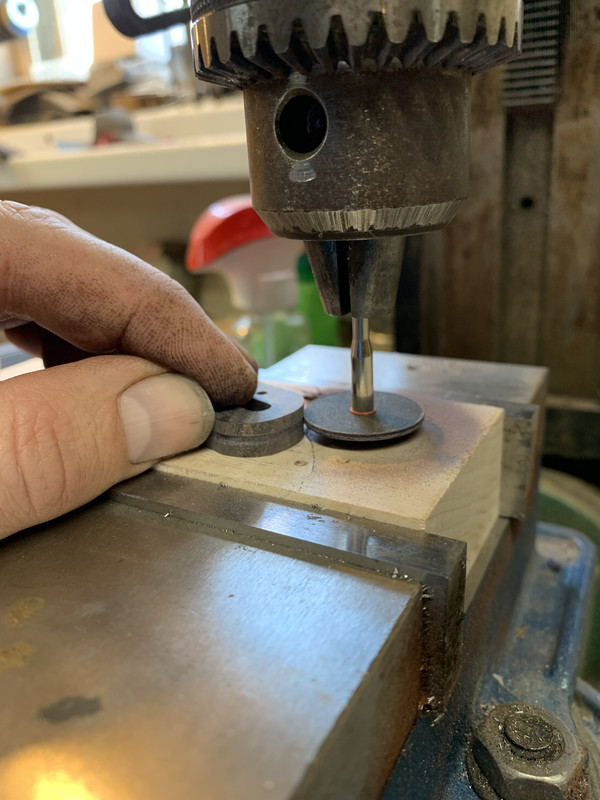
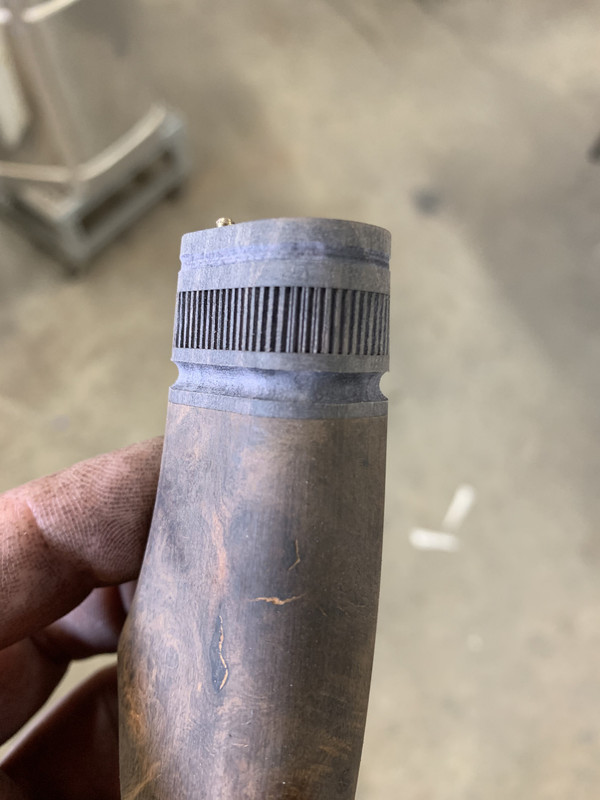
The center spacer was done with a checkering file then I rounded the edges over with 400 grit sandpaper. On the outside spacers, I used the mandrel for a dremel tool in the drill press with 2 cutting wheels on it to cut a starting groove in them. Then I scribed a line around them .065" in on each edge with calipers. I used a 5/32" round file to file the groove in between the scribe lines, then rounded the edges over.
Gene
Thanks for that explanation Gene. Sure saves us newbies a ton of experimentation.
Gene how did you do the coined edge?? Was it done with a Checkering File?