First Folder. Now a WIP

Entropy762

Well-Known Member
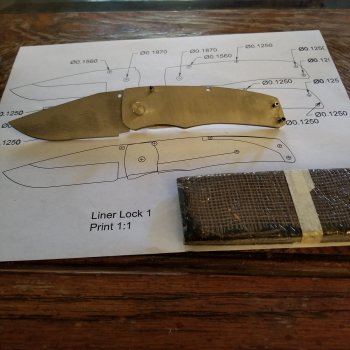
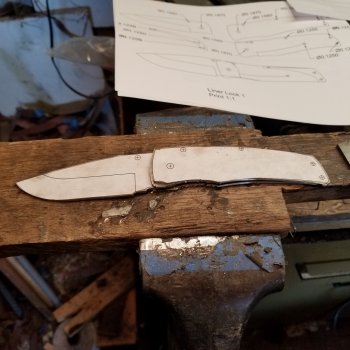
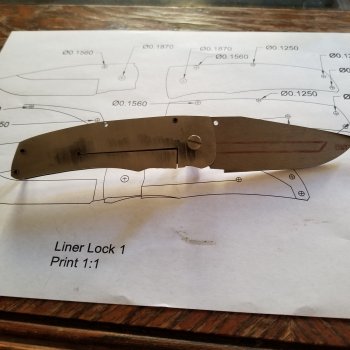
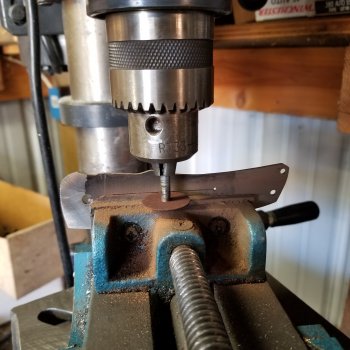
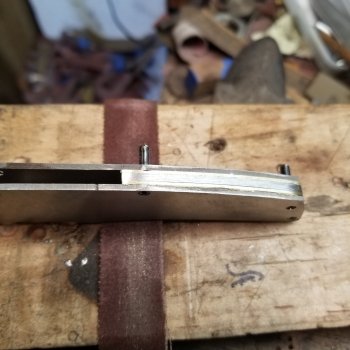
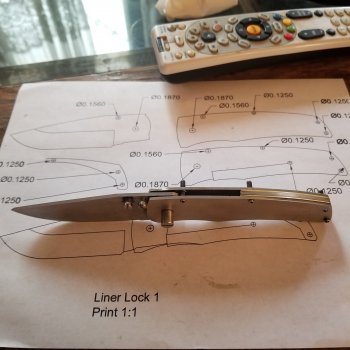
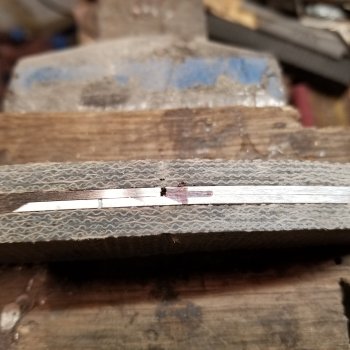
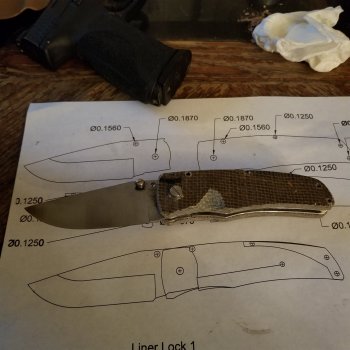
Well after messing around with the Draftsight CAD program I came up with a rough design for a liner lock. The blade is O1 and still needs work. The liners are from a sheet of SS I got at work. Unfortunately it seems non heat treatable so I have come up with a way to lock the blade open. This is the first time going from CAD to cutting steel. It's a fun process.


Jake
 

Attachments

  • 20181016_172918.jpg
    20181016_172918.jpg
    544.4 KB · Views: 24
  • 20181016_135134.jpg
    20181016_135134.jpg
    541.5 KB · Views: 24
Really nice job. Especially for a first folder.

If you're talking about the lock bar, you should be able to bend it over to lock the blade open.
 
Thanks guys.
The lock bar is from a piece of stainless steel I got from work. I don't think it's heat treatable to get a spring temper to it. I'd like to try Ti but that stuff is too expensive and I wouldn't want to mess it up. I'm thinking of a different style of locking system. Maybe an Axis style lock.

Jake
 
Looking good, Jake. Folders are a big undertaking, but with enough patience and perseverance, I believe that anyone can make one. I agree with Mike that you can still use your stainless steel liner and cut out a lock bar. It really doesn't have to be all that springy. The travel on a lock bar is so small that you should be just fine without heat treating the steel.
 
Thanks Brandant. I'll try what Mike suggested.

I just checked the stainless with a magnet and it sticks. I don't know if that matters or not.

Jake
 
Last edited:
I cut the lock bar. The stainless seems to have enough spring for it to function. The stop pin needs to be moved a little forward.

Nevermind I didn't have the stop pin all of the way in. The blade locks up with a satisfying click.

Now I have to think about what I'm going to do about the detent

Jake
 

Attachments

  • 15398194419211472926888.jpg
    15398194419211472926888.jpg
    507.6 KB · Views: 11
  • 20181017_152750.jpg
    20181017_152750.jpg
    594 KB · Views: 11
Last edited:
Daniel, I put off this for too long. I thought I needed a milling machine. Work with what you got. I do have a 9x20 lathe that I'm going to use to make the final pivot pin. My advice is go ahead and do it

Jake
 
You're moving along nicely, Jake. Glad to see that the liners are going to work for you.

Just a little advice for the detent, if you don't mind me sharing. I try to keep mine up as high and as forward as I can, i.e. as close to where you drilled your relief hole as you can. This will keep the ball in contact with the blade tang as much as possible for a smooth action. To locate the hole hole in the blade tang I undersize the initial hole in the lockbar (#60 drill), close and clamp the blade against the stop pin, and drill through the lockbar to locate the hole in the blade. After that you can upsize the holes and set your detent ball. I hope that makes sense. I have a bunch of WIP's over on the blog page of my website of how I make my linerlocks if you care to take a look. The Robinson Edge
Hope this helps.
 
Brandant, your idea for locating the detent pin worked great. Since I don't have any small ball bearings I used a screw. One problem might be the hole is too close to the front of the lock bar. No big deal I can make another one.

Jake
 
Brandant, your idea for locating the detent pin worked great. Since I don't have any small ball bearings I used a screw. One problem might be the hole is too close to the front of the lock bar. No big deal I can make another one.

Jake
I've never seen the detent done with a screw, but I suppose it would work if you rounded off the tip nicely and locked the treads in place so that they don't move. I'm interested to see what you come up with.

Even if your detent is close to the front of the lock bar, as long as your detent doesn't break through the face of the lockbar, it should still work. Part of building folders is determining what works for you and what doesn't. If you consider the first few knives that you make as learning tools, and don't focus on getting the first one perfect, you'll be better off. Just make one, take a long hard look at what worked and what didn't and make those adjustments on the next knife. Rinse and repeat a few times and your on your way to the addiction of folders.
 
The screw will be loctited and staked in place. Another issue is the thumb stud is placed too far back. I really can't get enough leverage to open it. I'm going to make another hole a little forward of the first one. This is a great learning experience.

Jake
 
Finished the spacer. Drilled and tapped a new thumb stud hole. It opens easier now. I think the next one I do will have a proper ball bearing for the detent. The set screw will work but it's not optimal.

Jake
 

Attachments

  • 20181024_152148.jpg
    20181024_152148.jpg
    420.4 KB · Views: 6
  • 15404242918401987361559.jpg
    15404242918401987361559.jpg
    469.9 KB · Views: 6
Oops. Well I'm still going to finish this one.

Jake
 

Attachments

  • 20181025_171429.jpg
    20181025_171429.jpg
    491.6 KB · Views: 8
  • 15405192173011120305815.jpg
    15405192173011120305815.jpg
    499.3 KB · Views: 8
The journey of this build is continued in the New Knife Makers forum. Thanks for all the help guys.

Jake
 
Back
Top