Forge Pics

Josh Dabney

Moderator
Hey fellas,

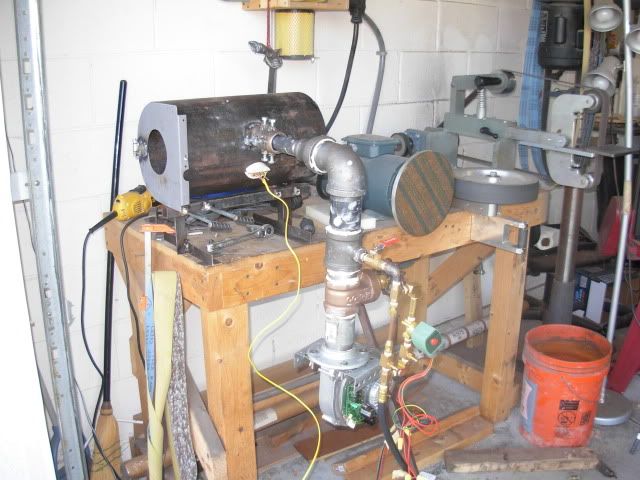
I've been slowly but surely working on my PID controlled forge build for the last couple weeks and thought I'd share my excitement and a couple pics with you guys.

After experiencing much trouble and frustration with my mig welder and being on the brink of admitting defeat I finally accidentally figured out that the 110 outlet I use as my 110v shop power is actually on one of the inside circiuts and the resulting drawdown was my main problem with the welder.

Most of my build time was wasted figuring this out and the actual fabrication time wasn't really all that much.

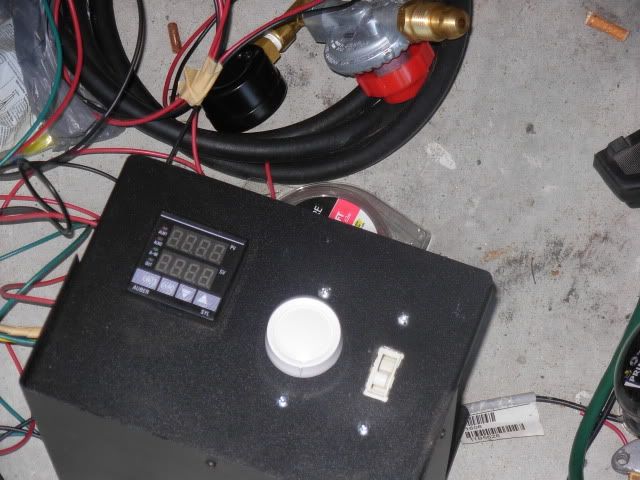
I had a pretty good grasp on the wiring for the controller so mounting the components and pre wiring everything went smoothly and took maybe an hour and a half.

A big thanks out to Stacy Apelt for sharing his design and also to Nathan Burgess for doing a WIP on his build as that info was EXTREMELY helpfull.

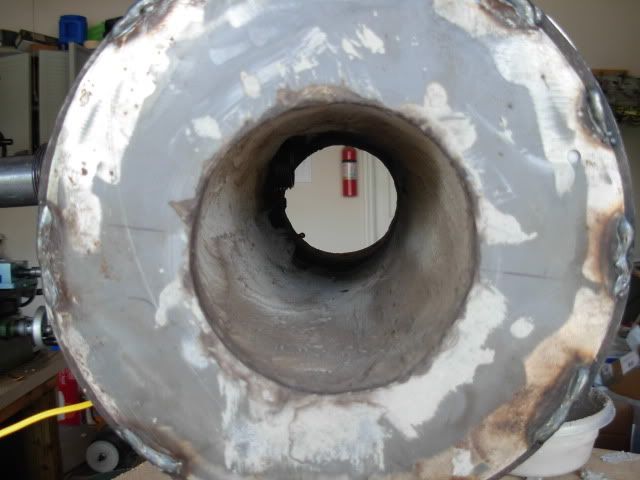
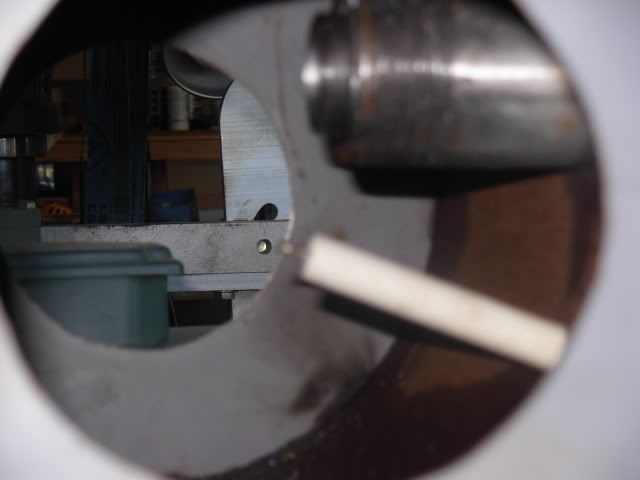
In spite the hideous looking but functional welding I think this is the UGLIEST thing I was ever proud of :biggrin:

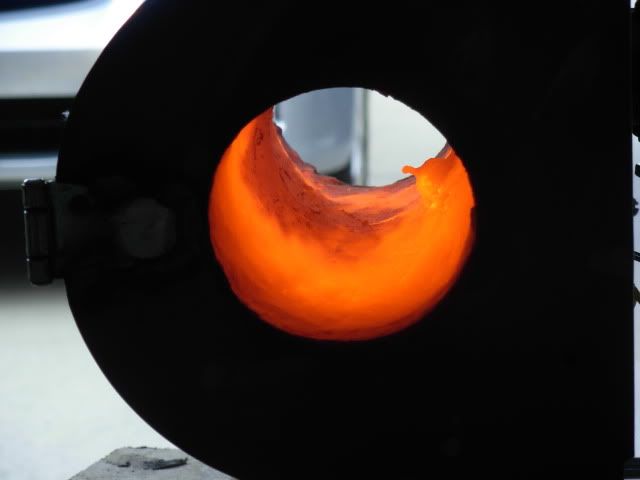
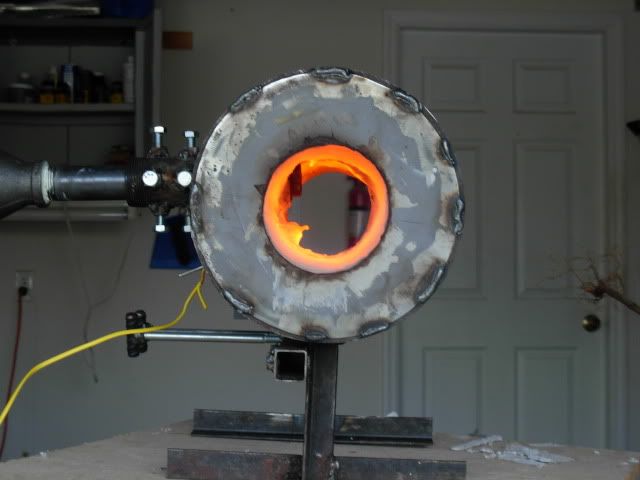
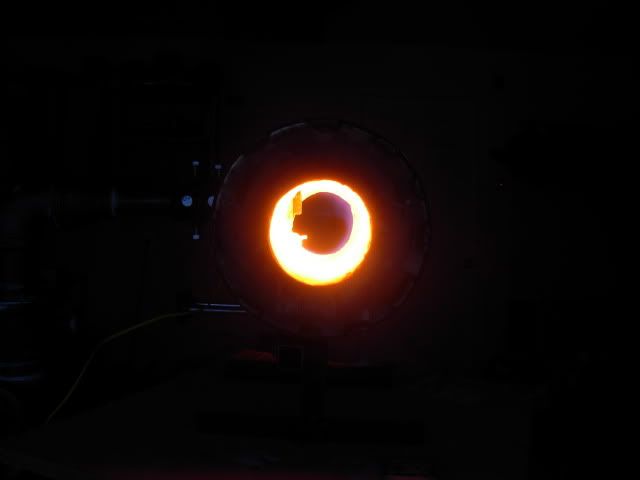
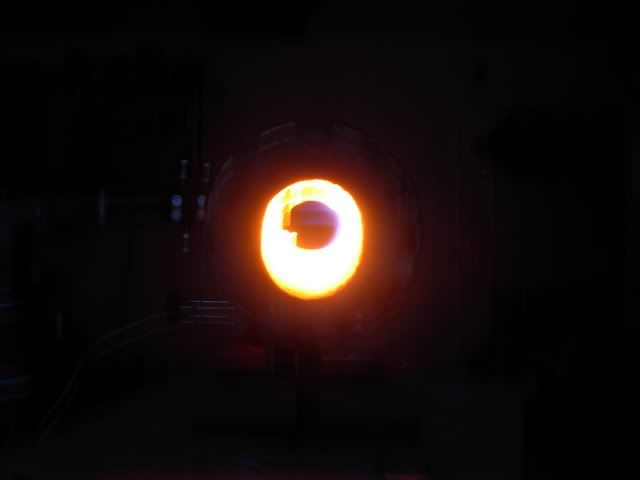
I lined her with Ins Wool and put the first coat of satanite on last night so she's on the way to completion.

forge006.jpg

forge008.jpg

forge007.jpg


Josh:biggrin:
 
I like the your hi - low gas setup. Looking forward to hearing how well it works.

I have been doing a bit of the same kind of stuff with a toaster oven for tempering and a D. Fogg style drum forge for heat treating. Stacy Apelt's post were EXTREMELY helpful.

Now to build that electric HT oven.


Seth
 
Seth,

I'm looking forward to playing with it myself ! I'll let you know how it goes. In testing out the operation and adjusting the set temp around ambient temp the PID is cycling the solenoid at 2 degrees above and below the set temp so It's working properly and I think the accuracy of it's functioning is going to be a product of tuning and adjustment of the burner and airflow.

Between the forge and Evenheat I should be good to go

Josh
 
That's some massive piping from the blower to the forge, 3" ?

Looks good, I need to redo my forge, reline etc. maybe upgrade to PID. I'll pay attention.
 
Mark,

The burner piping is 2" from the blower to the burner tube which is 1" I ordered the forced air burner kit (un-assembled) from this page-
http://elliscustomknifeworks.hightemptools.com/burners.html

It's the 3rd item from the top.

I priced out the parts from local sources but Darrins price is about the same and comes with everything you need while locating certain fittings locally was impossible so I ordered from him. Figured I could manage to assemble it myself so I got the kit instead of the assembled burner.

The section of 2" pipe beneath the gate valve and the flange to connect the blower to came from Lowes. Darren has the 2" pipe nipples but not the flange

Also from Darrin-
Regulator with guage & 10 ft hose, fitting to connect hose to propane tank, and 2 needle valves.

Solenoid and blower from e-bay

PID, relay, heat sink, and box from http://auberins.com/

The rest of the fittings for the 2-stage burner came from Lowes also.

Nathans info is so good that it's really not worth doing another WIP-
Nathan's (Silver Pilate) site- http://www.burgessknives.com/

Direct to his forge lining tutorial- http://www.burgessknives.com/8201/28801.html
Direct to his 2-stage propane control tutorial- http://www.burgessknives.com/8201/30201.html

Not really much to add to this but if you want part #'s for the pid etc. just ask

I will report my experiences back here for everyones curiosity and questions once I get it up and running.

Take care,
Josh
 
Perhaps I should've mentioned the forge body is an 8" ID pipe and 15" in length.

Another thing thats noteworthy for those who might fabricate their own forge in this fashion. It took me 2 1/2 hours to drill the 2" hole in the body using a 1/2" Milwaukee drill and a hole saw with Mobile 1 for cutting fluid. Other methods of making the hole like plasma cutter or Oxy torch may be a more effective way to go but I went with what I had available.

-Josh
 
Did someone tell you that an 8" pipe would work? I have an 8" pipe that I thought to build into a forge and was told that there wouldn't be enough air flow after the insulation was added. If you say different, I'm game on!

Note: the guy doing the talking also made forges for resale.

I'm very interested to see how yours performs as I'm set to go if you give the 'all clear'!
 
VaughnT,

I'm certainly NO authority on forge building but check out Darrin Ellis' 8" horizontal here-
http://elliscustomknifeworks.hightemptools.com/forges.html

I had considered using one layer of wool when lining the forge to get a 6" chamber but I layed out the burner placement for a 4" interior so I went ahead with a double layer of 1" wool and ended up with a 4"x15" chamber or there abouts

Perhaps fellas with more experience will chime in but I'm thinking this should be sufficient interior room. The 8" pipe was given to me by fellow KD-er and friend Mike Barton so I went with what I had. I do think my interior wouldn't be the best for forging damascus billets but it's gonna be awhile before I get to that point and I'll probably build a horizontal then.

-Josh
 
Progress Continues

I put the second coat of satanite in the forge yesterday which made today the christening first firing of the forge :eek:

No problems though :biggrin:

She had no problem going right up to 2100 and I have no question that 2300 would be easily attainable.

Of course I played around with it for awhile but decided just maybe I should read the PID directions. I noticed that no matter the temp the solenoid was cycling 5 seconds on then 5 seconds off which kept the temp to a 30 to 40 degree range at 2100.

I learned via those pesky directions that the PID isn't pre-set to auto-tune itself so next time I fire it up I'll set it to auto tune and see how she does for maintaining the set temp.

I definately feel that with some fine tuning I should be able to get some much tighter temp control.

It may be a little while before I fire it again. I ran her today sitting on a board on top of a trashcan just because I couldn't resist lighting it up but I need to get a permanent, stable, non-flamible home for her to sit on. I'm thinking that the bottom cabinet of a roll-away tool box is gonna be the ticket but haven't decided for sure yet.

As they say... This thread is worthless without pics ! So here's some random shots I snapped.

forge011.jpg

forge013.jpg

forge012.jpg

LOW BURN
forge015.jpg

HIGH BURN
forge014.jpg


I'll update again after some more time spent playing with it

Josh
 
Last edited:
Thanks for the info, Josh. The guy I was talking to made very nice forges out of 10" pipe and was saying that the heat circulation was cut a good bit when you shrank down the chamber size. I thought this was a bit weird considering the number of one-brick and coffee-can forges you see, but what do I know.....

Like you, I'm a long way from doing any complicated blacksmithery. My blades OAL won't be more than 15", so stealing your design would be a win/win situation for me. I'm definitely going to start some fabbing!

As for a table, think junked bbq grill. I see tons of cheap units on the side of the road or around defunct houses, and they are great for mobile tables. Free for the taking, and more than enough room to store a propane tank underneath.
 
Back
Top