For wood handles here's the two methods I use(neither involve true-oil which I find excruciatingly slow!):
The first is sand to finish and using an artists brush coat with a UV epoxy and cure in sunlight or with UV cure light. (I use the cure light) Rock hard in 3 minutes. Sand again for finish and if needed (pores etc) do another coat and cure and finish sand. Then buff. This is REALLY a fast finish. It also takes some technique. Buffs out AMAZING!
Method two is the one I prefer as I don't have to be on my A game. When getting close to finish sanding on the handle use minwax pre-stain sealer. It's very "watery"and dries very quick. When sanding leave some dust in the pores and then with a very soft flat artists brush do one quick coat of sealer. If you brush over twice you'll pull your dust out of the pores. In about 15 minutes you can sand again and then fill pores. when pores are good then you sand for final shape and seal again. When everything is dried and epoxied then I lower the knife into a small crockpot of hot carnuba wax. Then I lower it into a small hot empty crockpot and let the extra drip off. Then buff.. that's it. Finish is hard and amazing.
Since my long term goal is semi-production knives, I have been putting in serious hours on every aspect of finishing knives. Give either a try before critiquing....lol. I'm not saying this is the best method, and maybe guys are faster than me with true oil....but I get bogged down on finishing and needed something that will work on less than full custom knives.
I love oak handles. They remind me of grandpas old carbon steel kitchen knives. But i hate the pores. Since I developed that last method I am finishing up some red oak handles for a skinning knife I started months ago and then regretted the oak handles. Not any more lol....
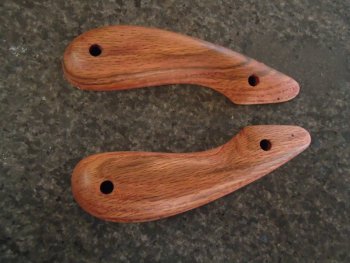
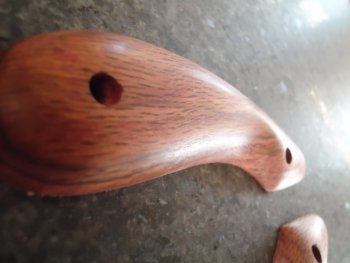
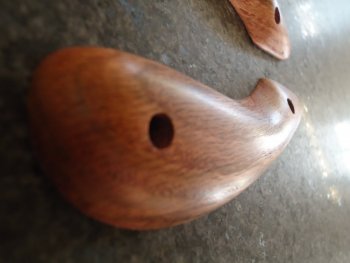
You can see open pores where I have been reshaping (I kind of bounce back and forth between filling pores and shaping the handle as I always see need for change/improvement on feel/asthetics of the handles) Those pores will fill very quickly. On the higher part of the handle the pores are completely filled.)but that may change today if I don't like the feel on the blade...lol) This method allows easy change as I don't have huge amounts of time invested in finishing.
The two tiny holes in the tip of the handles are some kind of bug hole....still need to fill those and remove some red stain marks. I'm sanding with 320 grit in the pics. the pre-stain sealer dries hard and doesn't leave sand marks on the wood easily.
this last method is very quick on maple. I have also done an entire birch gunstock this way and it was quick!
I'll post the finished knife when it's done.
I put this post up as I am also new to this craft and perhaps these two methods will help streamline things for new guys (and old guys that are not mired in tradition...no offense meant...if it's working for you...cool.

) when I get to the semi-production point I hope to be using the epoxy on a small conveyor belt with a gang of lights...but that's a ways off!
Hope this helps.


