John Wilson's KITH WIP - folder COMPLETE

Thank you for posting this! The OCD grinding calls my name on every knife.

Me too. It’s easy to end up with a toothpick. The thing is you can always grind more on it later. (Things I have to repeat over and over in my head.)

The process for making folders has improved my fixed blade making process immensely. Doing folders has forced me to count my steps. Think ahead so that I can do something once at the appropriate time instead of doing it early and having to do it again.
 
I really enjoy this WIP and the information that comes with it John. Thanks for the WIP and the detail that you put into it. I am so looking forward to see the end result of this WIP
 
Onto bolsters

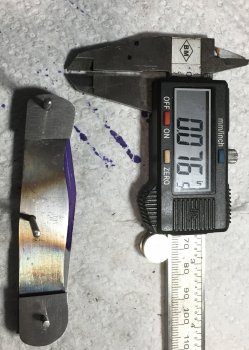
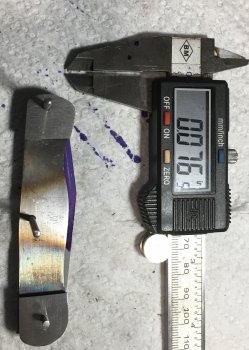
Bolsters on a slipjoint are functional. They provide the thickness needed for the pivot pin and the butt-end pin as well as act like bumpers when you drop your knife like I always seem to do.

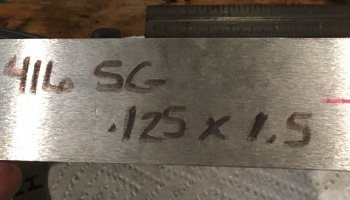
I use 1/8 inch thick 416ss for the bolsters. This seems really thin until you consider the liner is also .050 thick. That’s a total thickness of .185 per side before we do any grinding and shaping. On a little slipjoint that is more than plenty.
 

Attachments

  • 579885E1-0FDE-4E86-A092-184A12B55CED.jpeg
    579885E1-0FDE-4E86-A092-184A12B55CED.jpeg
    684 KB · Views: 2
How big to make te bolsters? How to put them in the right place? How big should the scales be?

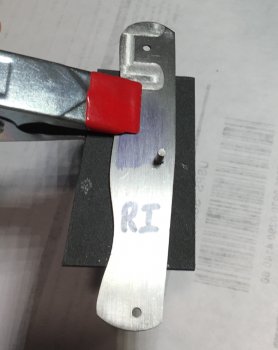
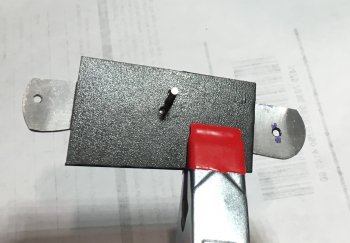
This is all personal preference. It’s also a chicken-and-egg thing. I decided to fashion the handle around the scales. I made a scale size-template which locates on the knife’s center pin. That way all I have to do it butt my bolster pieces up against the scale template.
 

Attachments

  • D7B9DF55-5817-41AB-84A8-1680118D0164.jpeg
    D7B9DF55-5817-41AB-84A8-1680118D0164.jpeg
    377.4 KB · Views: 8
  • 08F28C76-E3E7-4944-AB39-8F1AEEAC8861.jpeg
    08F28C76-E3E7-4944-AB39-8F1AEEAC8861.jpeg
    460.3 KB · Views: 9
  • DDECE44B-29F4-4922-BA82-4552514FCE24.jpeg
    DDECE44B-29F4-4922-BA82-4552514FCE24.jpeg
    340.5 KB · Views: 9
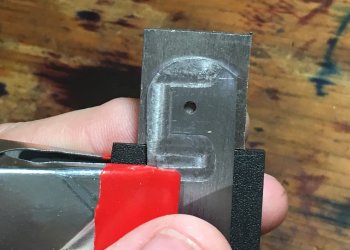
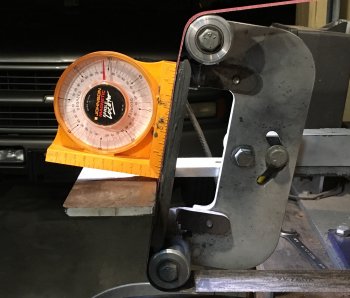
I bevel the edge of the bolster 10 degrees on the sode that will contact the scale. This hides any imperfections in the scale-to-bolster joint and makes for a very clean line. It also captures the scales so that if there is movement due to humidity and such the scale can’t pull away from the liner.
 

Attachments

  • AAE2EF0C-4905-47C0-9A60-C117E29BBC71.jpeg
    AAE2EF0C-4905-47C0-9A60-C117E29BBC71.jpeg
    1 MB · Views: 12
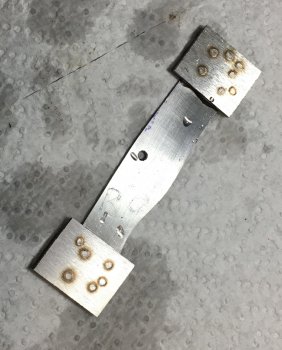
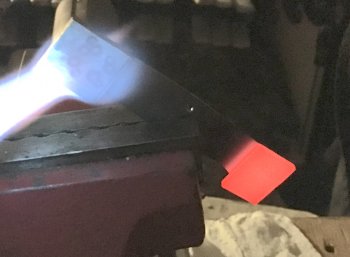
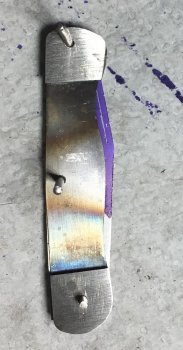
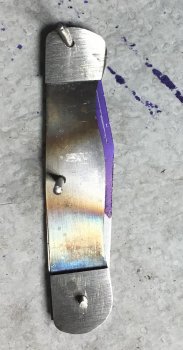
The bolsters are spot welded to the liners. A trick from Don Robinson’s “Slipjoints: My Way” (a book everyone ought to have) is to heat the bolsters to red after spot welding. This will get rid of any visible spots from the welding process.
 

Attachments

  • 5305510D-433E-4756-9B5B-6953E4AA426B.jpeg
    5305510D-433E-4756-9B5B-6953E4AA426B.jpeg
    777.2 KB · Views: 9
  • 0E313E2A-E609-4E54-908C-BC3EC3402967.jpeg
    0E313E2A-E609-4E54-908C-BC3EC3402967.jpeg
    831.9 KB · Views: 9
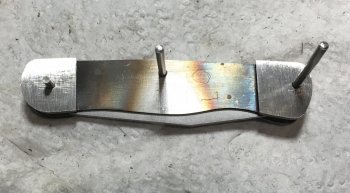
With the bolster material now fixed firmly in place by spot welding, I can drill the through-holes through the bolster using the liner as the drill guide since it already has the holes in it.

Then I trim the excess from the bolsters *almost* to the edge of the liner. Remember- don’t get all OCD. If you compulsively grind every time you handle the pieces there’ll be nothing left. Our final outline of the knife is just an idea at this point. The liners are not finish ground, so there’s no sense in thinking that they are a good reference to grind to, anyway. We will do final shaping at the very end.

With thr knife loosely assembled you can see where you want to cut the finger pull.
 

Attachments

  • 3A66414F-4F29-41C6-9115-7FD61B946CC2.jpeg
    3A66414F-4F29-41C6-9115-7FD61B946CC2.jpeg
    814.7 KB · Views: 7
  • AFE53442-B22F-465E-95D6-1BC8930A12EC.jpeg
    AFE53442-B22F-465E-95D6-1BC8930A12EC.jpeg
    877.9 KB · Views: 7
  • 08A163D3-67F1-475C-AC4D-5891C2A03711.jpeg
    08A163D3-67F1-475C-AC4D-5891C2A03711.jpeg
    517.3 KB · Views: 7
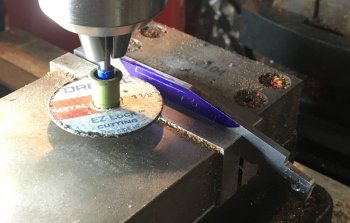
I cut long linear finger pulls. I like the look. I locate the pull .075” from the spine. That sounds like a lot, but the cutting process is going to widen that line. Rounding the spine when we grind the blade is also going to take away some of that.

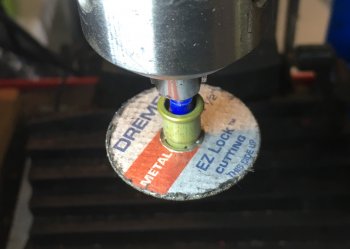
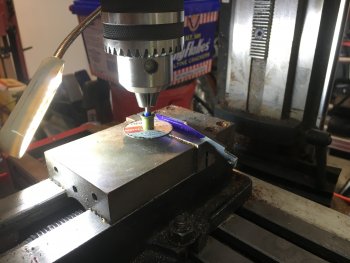
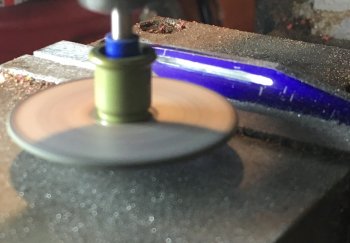
I use a Dremel metal-cutting wheel chucked up in the drill chuck in my milling machine. I align the cutter to the layout line.

To cut, I advance the cutter .005 at a time and feed to the rightmost point. Advance .005 and feed to the leftmost point. Repeat, repeat, repeat until I have cut the pull .050” deep.
 

Attachments

  • C680027E-AC6E-48D4-AF58-AFDA859F46FB.jpeg
    C680027E-AC6E-48D4-AF58-AFDA859F46FB.jpeg
    877.9 KB · Views: 7
  • BF8A53D9-8E7E-4B3B-B49D-C0F7BD192126.jpeg
    BF8A53D9-8E7E-4B3B-B49D-C0F7BD192126.jpeg
    517.3 KB · Views: 8
  • B2C28A1A-9FA5-4EA4-9E7C-5E78BBDEB60B.jpeg
    B2C28A1A-9FA5-4EA4-9E7C-5E78BBDEB60B.jpeg
    532.6 KB · Views: 7
  • 28C318E8-55F6-4BA0-88AC-201ED4192226.jpeg
    28C318E8-55F6-4BA0-88AC-201ED4192226.jpeg
    1.9 MB · Views: 8
  • DA87A16D-44B2-485E-87DF-A65597ED0D28.jpeg
    DA87A16D-44B2-485E-87DF-A65597ED0D28.jpeg
    556.9 KB · Views: 7
  • 59F2DB2D-4E57-4F53-87DC-B58060B696B1.jpeg
    59F2DB2D-4E57-4F53-87DC-B58060B696B1.jpeg
    328.3 KB · Views: 7
Thats as far as we go until the blade is heat treated.

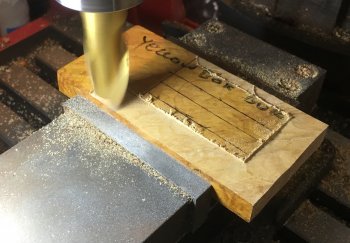
Now we turn our attention to making scales. I’m going to use Yellow Bok Burl.
 
Of all things, here’s what I use my milling machine for the great majority of the time: flattening blocks and scales. Yes, this seems like overkill and completely unnecessary if you don’t have a mill. But let me show you some of the reasons I do it.

For one thing, nothing natural on this planet is as flat as we think it is. If it isn’t flat then two sides certainly aren’t parallel. And if they aren’t parallel the thickness definitely is not uniform. Drilling holes in polygonal shapes often causes problems with pins lining up and gaps between the scale and tang. Flatness is your friend because without it there can be no squareness.

Here’s another thing. Sometimes you need to see what awaits you under the surface.

I take a skim cut and adjust my cut down until I have skinmed the lowest recess. We aren’t making a laboratory reference here, just knock it down to flat. Flip it over and repeat.

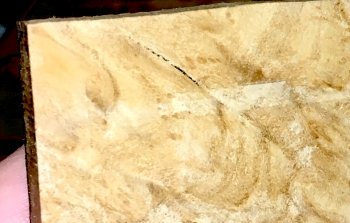
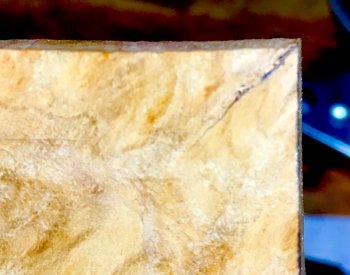
Well looky here: multiple cracks I could not see before!

We can now lay out the cuts for out scales making sure not to include any cracks.
 

Attachments

  • 43930783-3D3C-4E6E-8BCB-572C3F13C7EE.jpeg
    43930783-3D3C-4E6E-8BCB-572C3F13C7EE.jpeg
    1.2 MB · Views: 10
  • C4FA8D78-E731-447C-A846-05984295BC06.jpeg
    C4FA8D78-E731-447C-A846-05984295BC06.jpeg
    308.6 KB · Views: 10
  • 7472069E-4A3A-4A7C-AB2C-5A78CD2FA8A2.jpeg
    7472069E-4A3A-4A7C-AB2C-5A78CD2FA8A2.jpeg
    402.7 KB · Views: 9
That is a very slick bit about heating the weld spots to red to make them disappear.
Now I'm off to research "spot welding", to see what that entails as I know little about different types of welding.
Excellent work and tutorial!
 
Back
Top