Dennis Morland
KNIFE MAKER
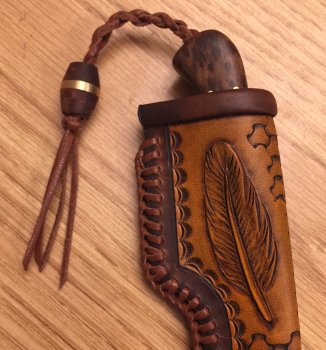
A work of art and an example of fine craftsmanship, my hat is off to you sir!
Lots of firsts for me in that picture. First carving. First lined/rolled over sheath. First sheath with double loop stitch. Luckily it all came together.