kevin - the professor
Well-Known Member
Hello Everyone,
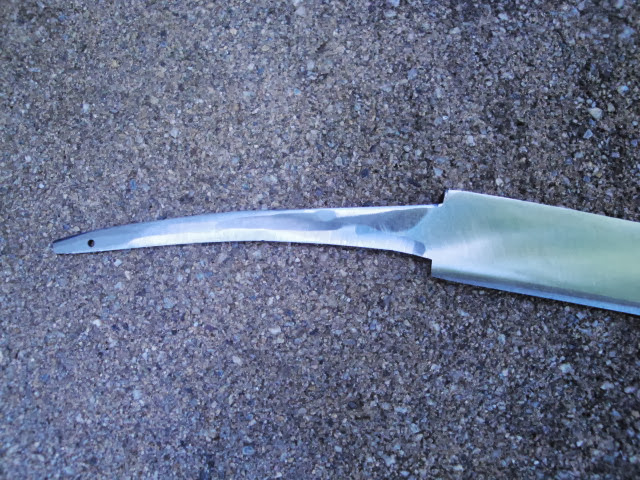
Well, this one has survived heat treatment and grinding, which are the places I usually ruin them. So, it looks like this one will live. It is a stout and wide cutter.
24.5" working length (guard to tip)
1.20 wide
.30 thick at guard,
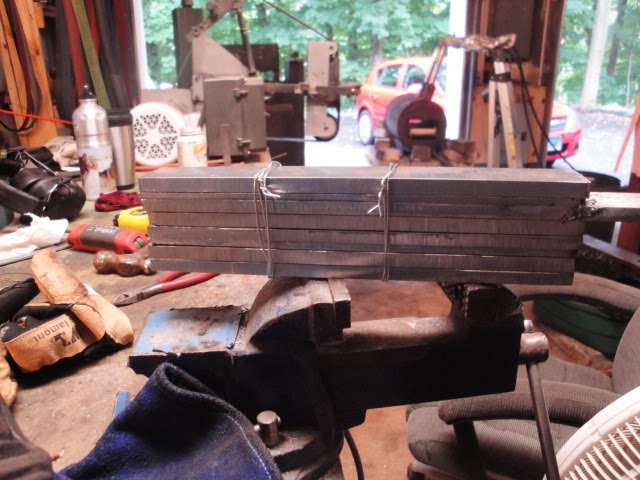
Here I decided to stick a huge billet together. The big pieces are w2 and 1075, the thinner ones are 1020. This one is 3(w2) : 3(Aldo's 1075) : 1 (1020). I pulled about 30% of this steel out and set it aside after welding and drawing, and the rest proceeded with the remaining 70%.
Everything ground CLEAN on my belt grinder, and with a slight crown. Welded at the ends.
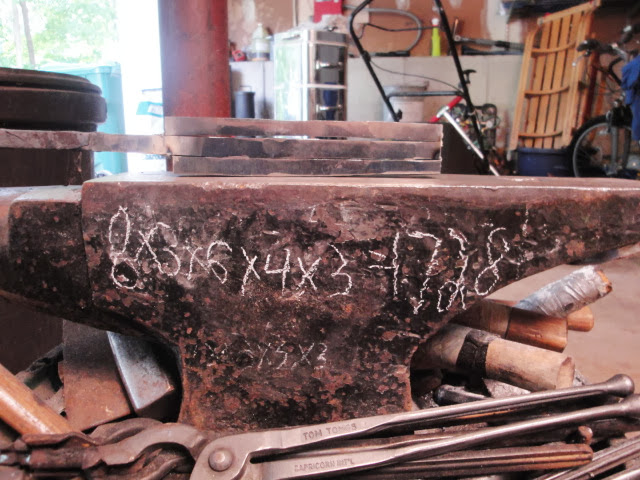
Skip forward to the final weld. You can see the total number of layers and welding history on the side of the anvil.

Forged preform, no bevels yet.
Bevels forged. Notice where some flux squirted out of that huge billet and burned a hole through my running shoe.
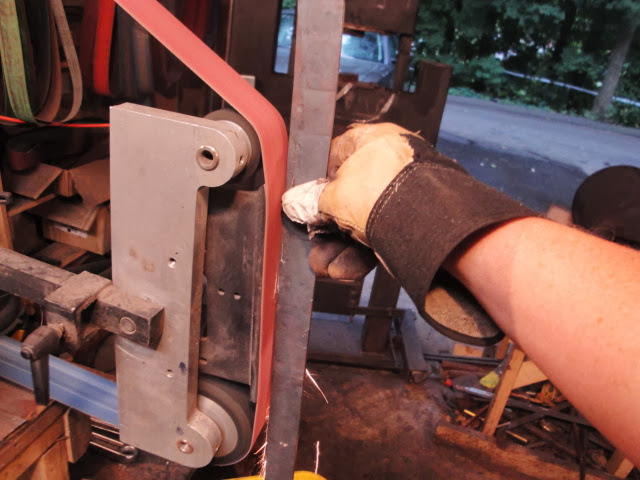
I do this to the edge and spine to get the profile tapers and everything smooth. Then, I take a grinding magnet and do the same thing to the flats to make sure they are relatively flat.
It is important to get the tapers just right and all of the dimples and dents out, without putting any more in with the grinder (for a LONG time, the biggest risk for me on a blade was that I would get it almost done and then dig it into the edge of the platen and ruin the grind).
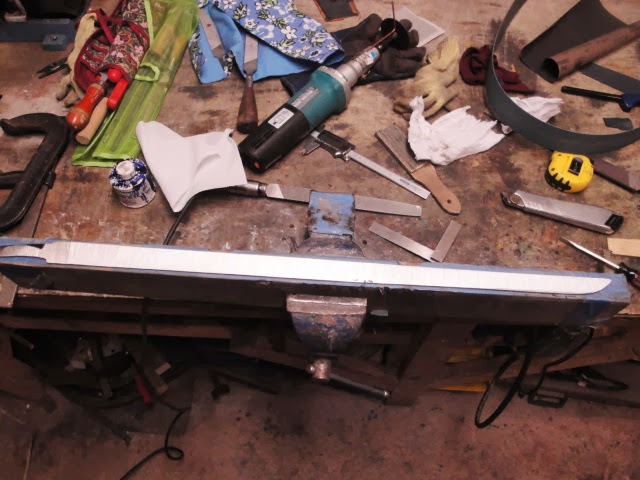
rough ground
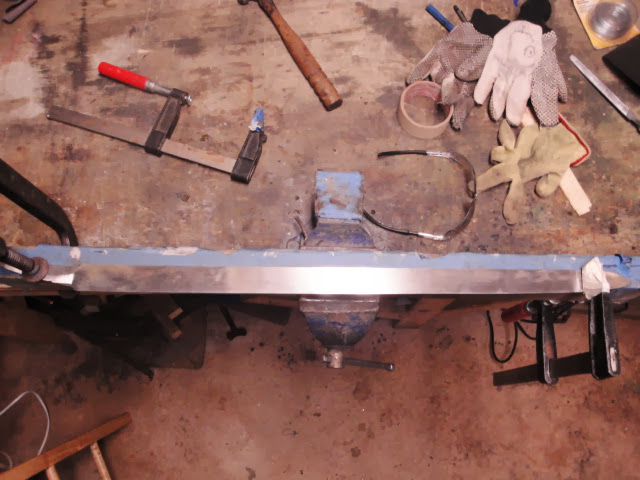
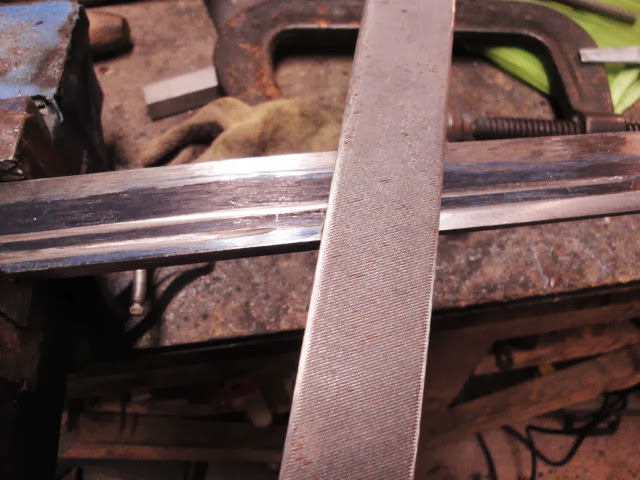
Ground and filed. Draw-filing is a MUST on a sword (on everything for me). This is the best chance to get everything totally flat.
After this, the fullers are cut in, and then the blade is curved prior to heat treatment.
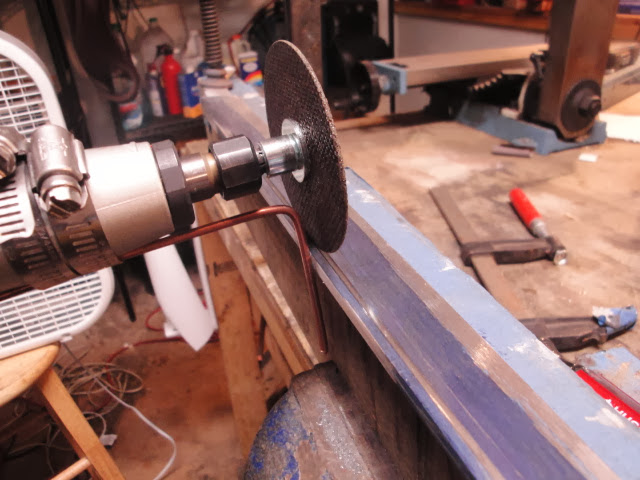
I cut the fullers in with a variable speed die grinder. That is a welding rod, bent, and held on with hose clamps. You can set the distance from the spine or from the edge, and it will track the same every time. I suggest filing the spine smooth first and deburring. You can see the first fuller, and the line in the dykem where the second will be cut.
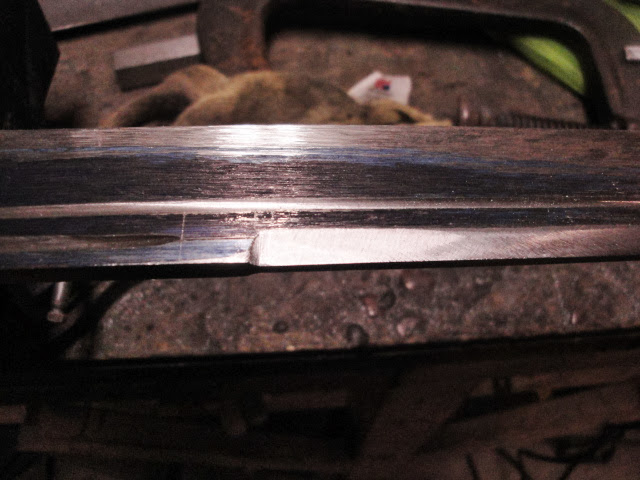
I cut the plunges in for the blind false edge with a non-tapering round file. Then, I used files with the edges ground safe to file in the meat of the edge (12" mill, 12" smooth, 6" smooth).
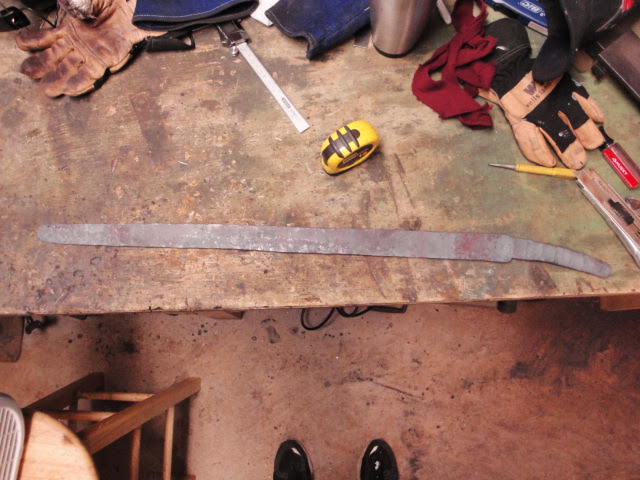
Here it is, roughed in.

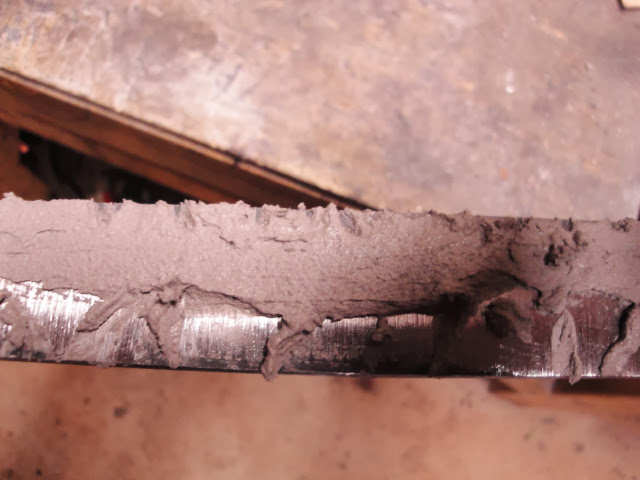
Here you can see the clay on the blade. I was very careful with this clay application. I wanted to get a blade that was more springy than a Japanese blade, at least traditionally. The spine is scraped clean. Also, about every .25", I scraped a bit of clay off of the top of the flat. Also, per the advice on Bob Engnath's site on clay hardening, I scraped the clay so that it was very thin at the last couple of millimeters near the spine.
This shows where I took small cuts out of the clay along the spine to get a little more springy blade. This worked, and the blade is very stiff and springy. it does not take a set easily (which made straightening harder, but was worth it in the end).

So, here it is now, grinding done. Time to hand polish some, then start the fittings.

The blue is dykem, so I could get the blind false edge cleaned up.
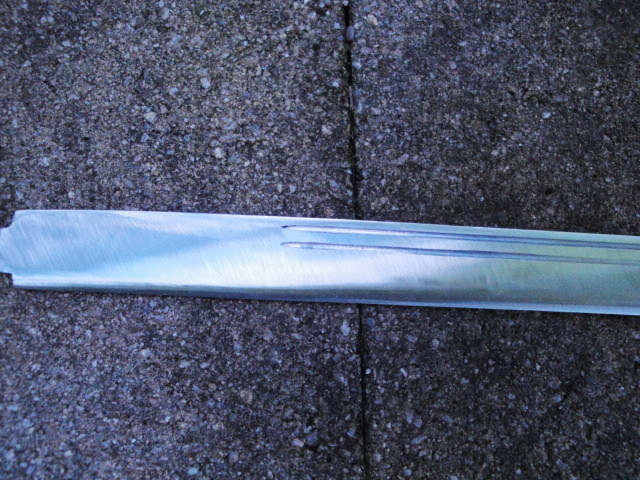
Fullers... the, "dremel on steroids," approach works pretty good.

Blind false edge.
Thanks for looking at all of these. I have high hopes for this blade, and I can't wait to see the heat treatment effects and the pattern (shuangxue or hamon and hada, depending upon idiom).
More to come when I get some progress on the fittings.
take care,
Kevin
Well, this one has survived heat treatment and grinding, which are the places I usually ruin them. So, it looks like this one will live. It is a stout and wide cutter.
24.5" working length (guard to tip)
1.20 wide
.30 thick at guard,
Here I decided to stick a huge billet together. The big pieces are w2 and 1075, the thinner ones are 1020. This one is 3(w2) : 3(Aldo's 1075) : 1 (1020). I pulled about 30% of this steel out and set it aside after welding and drawing, and the rest proceeded with the remaining 70%.
Everything ground CLEAN on my belt grinder, and with a slight crown. Welded at the ends.
Skip forward to the final weld. You can see the total number of layers and welding history on the side of the anvil.
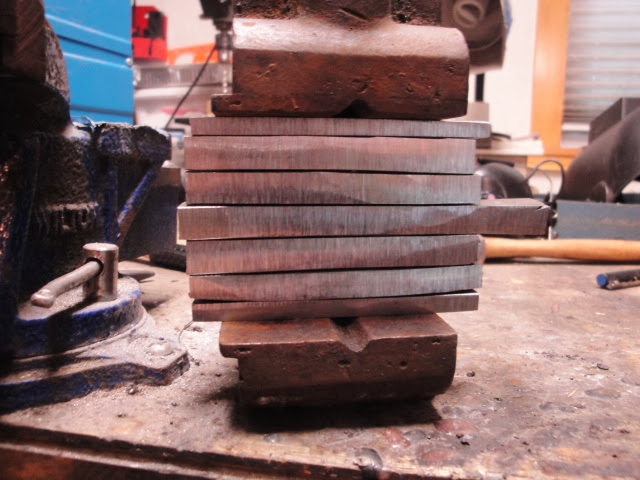
Forged preform, no bevels yet.
Bevels forged. Notice where some flux squirted out of that huge billet and burned a hole through my running shoe.
I do this to the edge and spine to get the profile tapers and everything smooth. Then, I take a grinding magnet and do the same thing to the flats to make sure they are relatively flat.
It is important to get the tapers just right and all of the dimples and dents out, without putting any more in with the grinder (for a LONG time, the biggest risk for me on a blade was that I would get it almost done and then dig it into the edge of the platen and ruin the grind).
rough ground
Ground and filed. Draw-filing is a MUST on a sword (on everything for me). This is the best chance to get everything totally flat.
After this, the fullers are cut in, and then the blade is curved prior to heat treatment.
I cut the fullers in with a variable speed die grinder. That is a welding rod, bent, and held on with hose clamps. You can set the distance from the spine or from the edge, and it will track the same every time. I suggest filing the spine smooth first and deburring. You can see the first fuller, and the line in the dykem where the second will be cut.
I cut the plunges in for the blind false edge with a non-tapering round file. Then, I used files with the edges ground safe to file in the meat of the edge (12" mill, 12" smooth, 6" smooth).
Here it is, roughed in.
Here you can see the clay on the blade. I was very careful with this clay application. I wanted to get a blade that was more springy than a Japanese blade, at least traditionally. The spine is scraped clean. Also, about every .25", I scraped a bit of clay off of the top of the flat. Also, per the advice on Bob Engnath's site on clay hardening, I scraped the clay so that it was very thin at the last couple of millimeters near the spine.
This shows where I took small cuts out of the clay along the spine to get a little more springy blade. This worked, and the blade is very stiff and springy. it does not take a set easily (which made straightening harder, but was worth it in the end).
So, here it is now, grinding done. Time to hand polish some, then start the fittings.
The blue is dykem, so I could get the blind false edge cleaned up.
Fullers... the, "dremel on steroids," approach works pretty good.
Blind false edge.
Thanks for looking at all of these. I have high hopes for this blade, and I can't wait to see the heat treatment effects and the pattern (shuangxue or hamon and hada, depending upon idiom).
More to come when I get some progress on the fittings.
take care,
Kevin
Last edited: