First posted

W

Wassomeoneelse

Guest
Well guys, all comments, criticisms, and helpful suggestions are being pleaded for. This is my first two Sheaths that I feel confident enough about to post. I have made around maybe 10 sheaths before these. The fixed blade sheath is a right handed version of a left handed sheath that fits a Cattaraugus 250Q combat knife that saw service during WW2 in the Pacific Theatre. I am in the process of redoing the handle on it and thought it would be neat to redo the sheath for the gentleman who owns it. The pocket/folding knife sheath is just a pattern I saw online and decided to give it a try. Thanks for looking.
Bryan
 

Attachments

  • SANY0128.jpg
    SANY0128.jpg
    97.8 KB · Views: 58
  • SANY0127.JPG
    SANY0127.JPG
    70.8 KB · Views: 38
  • SANY0126.JPG
    SANY0126.JPG
    64.1 KB · Views: 64
  • SANY0124.JPG
    SANY0124.JPG
    67.6 KB · Views: 45
  • SANY0122.jpg
    SANY0122.jpg
    93.1 KB · Views: 46
Welcome Bryan, good to see ya here.Your off to a good start, your stitching looks pretty good considering your experience level.The other issues are purely cosmetic and will get better with practice.On your fixed blade sheath, where you folded over the belt loop, it looks like you stopped at the mouth of the sheath.It would look better IMO if you thinned down the end (on the flesh side) and ran it down about an inch or so into the main body of the sheath.You can then make some small wedges about an inch long and glue them to the welt and it will open the mouth more.Sounds like a pain but works in the long run.
The dyeing is a bit uneven, but try deglazing your sheath with Denatured alcohol prior to dyeing, and apply your dye fairly heavy in a swirling motion and it will help even it out.I am happy to see someone dyeing the inside of the sheath.It's one of my major pet peeves when seeing others work.Remember to seal the inside too.All in all your doing good , lets see some more.Dave:)
 
Thanks Dave,

Dave,
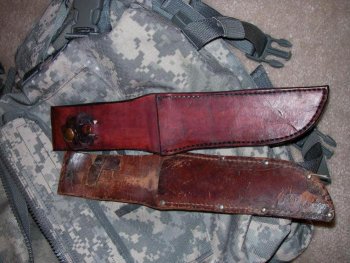
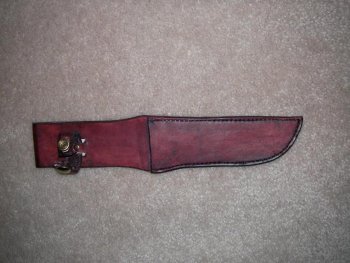
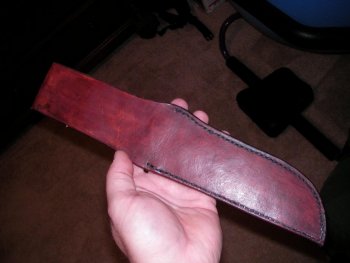
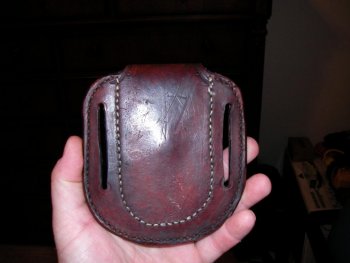
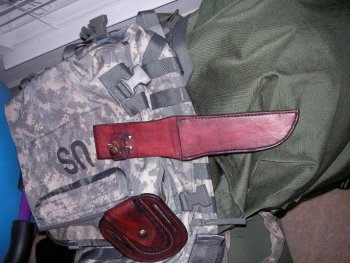
Thanks for the valuable feedback and positive response. I feel the same way about the fold needing to feed into the mouth of the sheath a little more. But it is almost an exact copy of the sheath that the knife came with. I did not want to stray to far away from how the original looked. There are three differences between the sheaths.... Old military sheath was left handed, had rivets in it and was not dyed (that I can tell). The new one is for a right hander, is dyed and has no rivets.
In my next sheath, I will apply what you told me about using small wedges to open up the mouth of the sheath.
On my dying job, I had no idea what I was doing. I just used a small paper towel and went to town with it. I could tell that the color was thicker looking in some areas than others. Just didnt know how to go about fixing that on my next one. I will "deglaze" the leather next time before applying dye. I will also do some research on that and figure out exactly what is happening with that leather when I do that.
As far as applying dye to the inside and back of my leather sheaths, it just doesnt make sense in my book to have the front all pretty then turn it over and see white/tan leather. I think the only thing that would change that is if maybe die would run onto clothing or something like that. But I am sure I will change my mind on a lot of the way I am doing things so far as I get more experience.
Again, thanks for the feedback. Look forward to more comments and observations.
Bryan

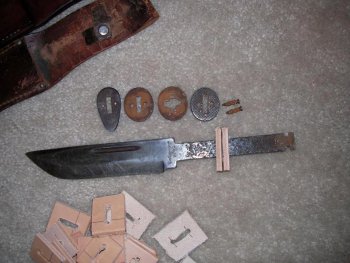
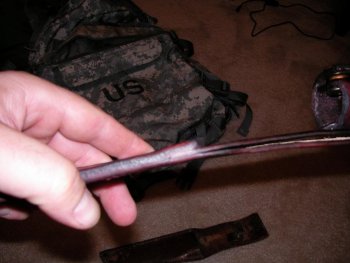
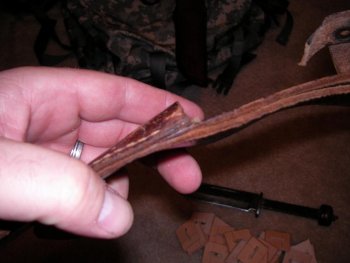
PS I have added pics of both the knife and the old sheath. I forgot to mention that this knife served in New Guinea. I guess that after looking at it, the sheath was dyed. Ooops.
 
Last edited by a moderator:
Too late

Wanted to add pics, but started new reply.
 

Attachments

  • SANY0136.JPG
    SANY0136.JPG
    85.5 KB · Views: 11
  • SANY0135.jpg
    SANY0135.jpg
    97.7 KB · Views: 12
  • SANY0134.jpg
    SANY0134.jpg
    97.7 KB · Views: 12
  • SANY0133.JPG
    SANY0133.JPG
    82.3 KB · Views: 13
  • SANY0132.JPG
    SANY0132.JPG
    53.6 KB · Views: 12
Main picture showing both sheaths.
 

Attachments

  • SANY0131.jpg
    SANY0131.jpg
    93.3 KB · Views: 17
Nice job Bryan. The only thing that I could add to what Dave said is that after you deglaze and get ready to dye the sheath make sure it is a little damp or wet. That will help to work the dye in more evenly.
 
Thanks Dave. I was only dying when it was dry. I learn something new everyday.
Rusty, Hey buddy! Yeah, I was at a local shoe/cobbler store and they took a gander at it and figured it out. I guess he was very familiar with stuff like that. I have to credit him with it. I am still thinking about that Adler sewing machine they have for sale. I just dont know about it. I will call you later this week to chat man.
Take care.
Bryan
 
Back
Top