antigoth24
Well-Known Member
I have recently been very inspired by the work of Claudio Sobral and his harpoon points in particular, if you haven't seen his work you need to check it out! This recent inspiration resulted in the idea for a "go mai" harpoon point, go mai being five layers (if I have that correct) as opposed to san mai which has three. I had some left over 700 layer PW billet put together from 15N20, 1084, and 1095; I thought this would be the perfect core for this camp chopper and decided to give it a go.
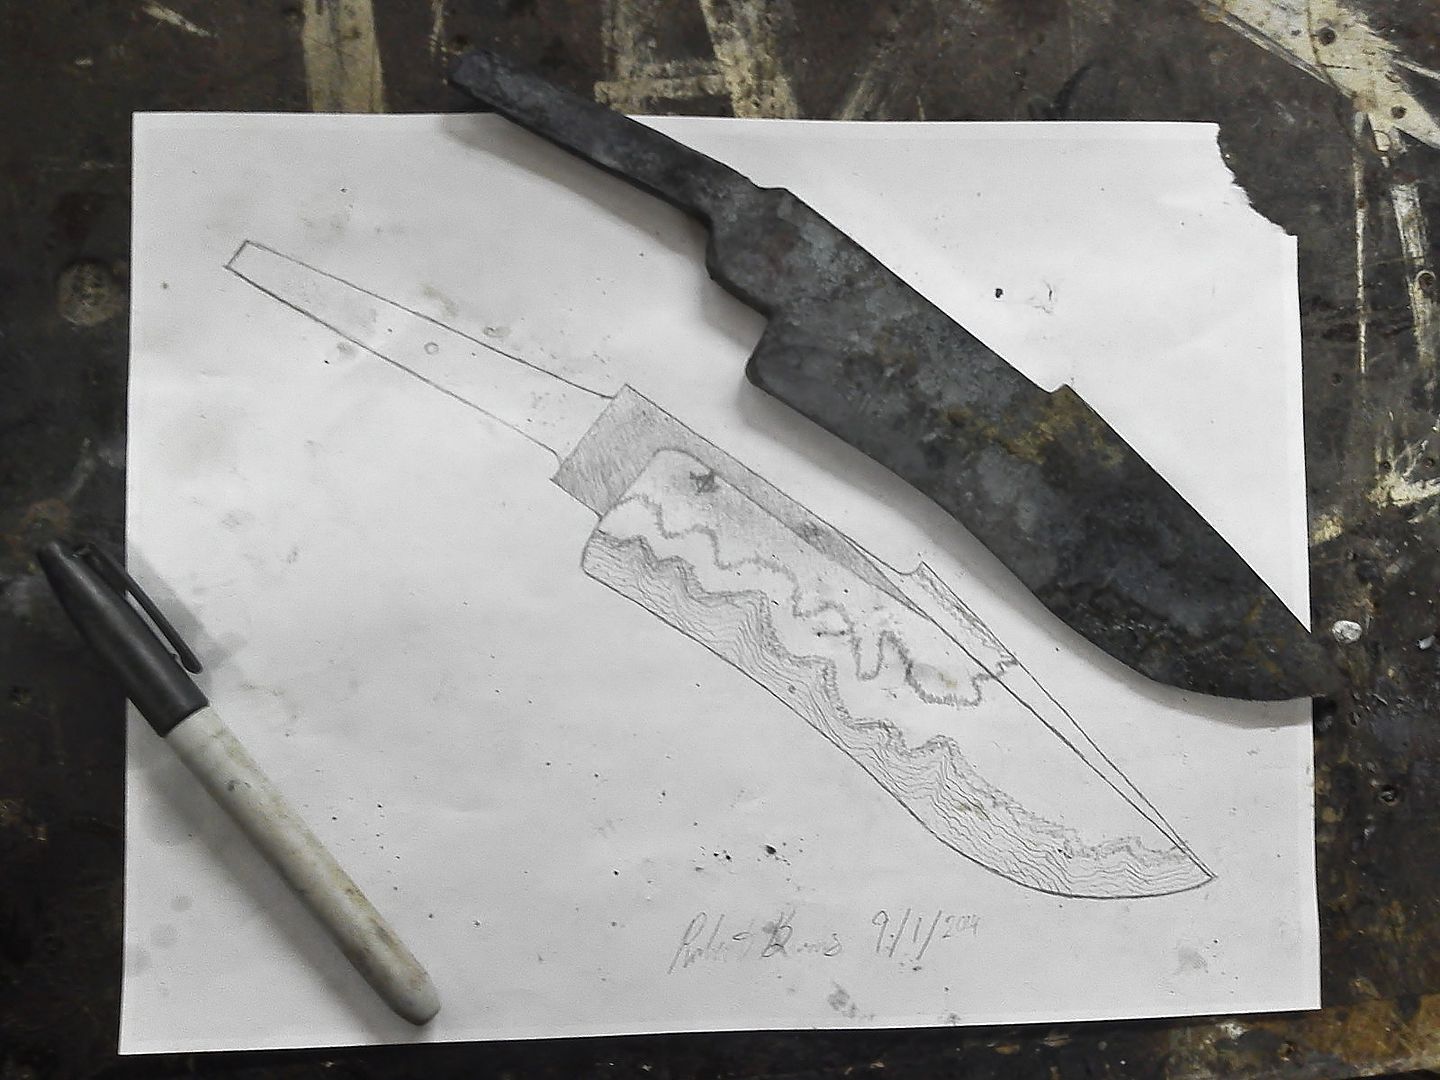
Here is the concept drawing:
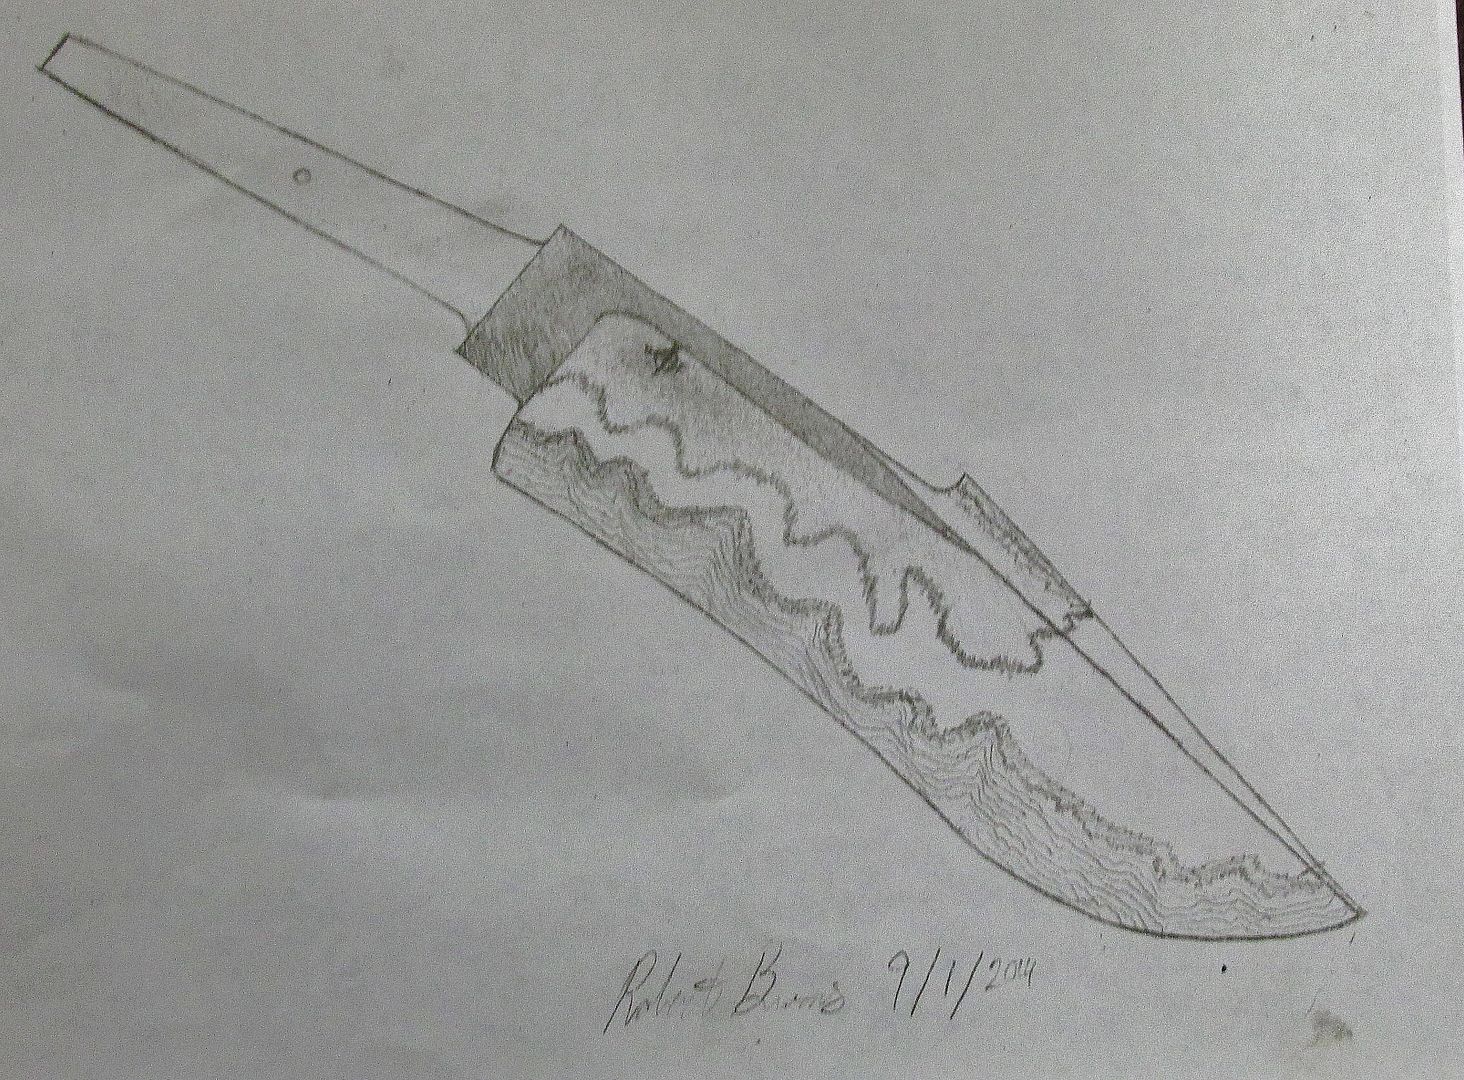
In this drawing the blade is 1 3/4 inches wide and 7/34 inches long.
After getting the image in my head on paper I was able to tack a billet together. For the center core I cut the remaining PW billet in half and stacked it together to achieve the appropriate thickness for the core. I then placed a 1/8 inch piece of 15N20 on either side and placed two pieces of 1/4 inch W2 on either side of the 15N20. Because the PW billet is the same material being welded to its self I am treating it as "1" layer instead of two resulting in "five" layers.
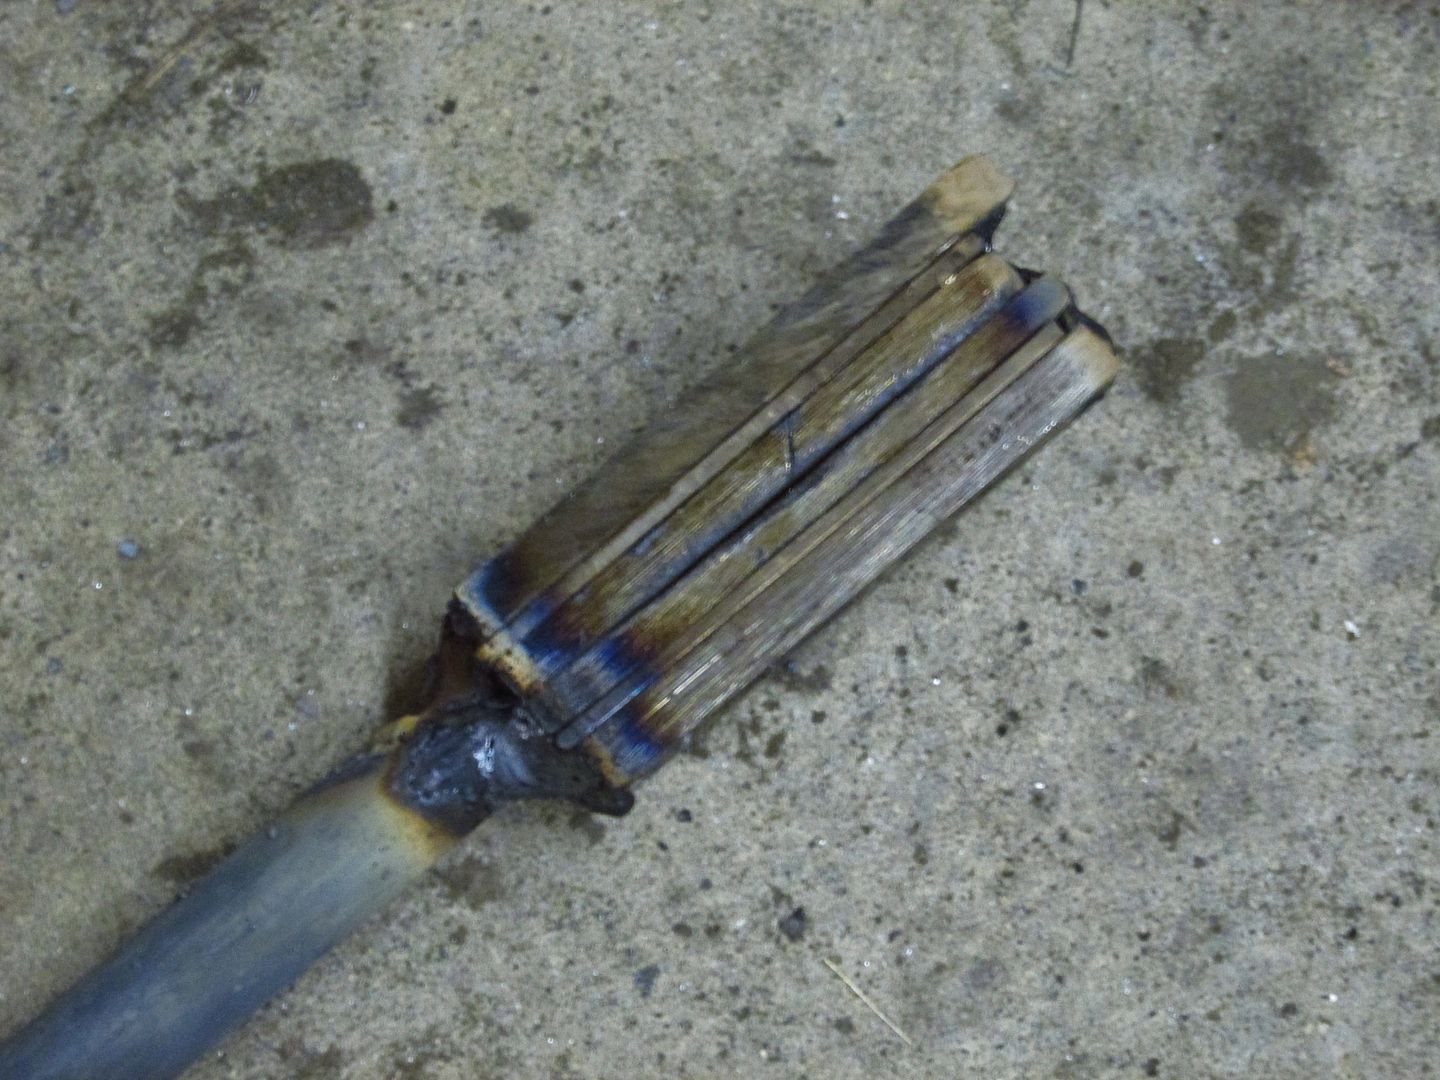
I then welded the billet together and ground the edge to check for weld flaws:
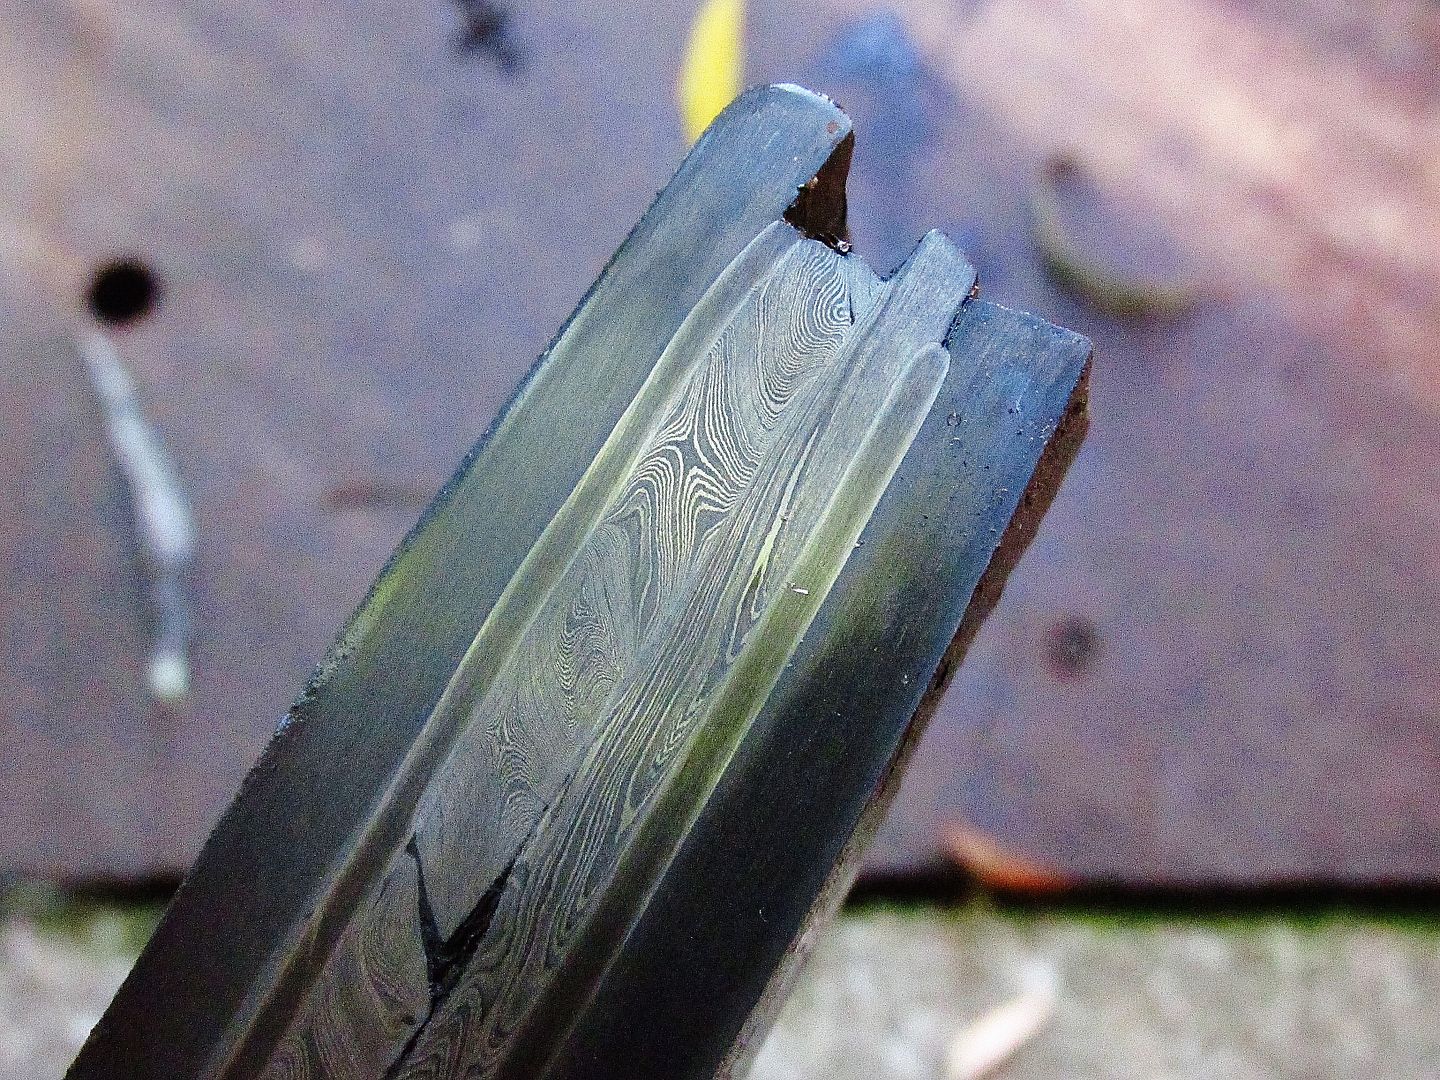
A quick etch to see if everything is centered. (On one side of the billet there was a small portion of the original PW billet that had a heavy hammer mark in it. In this photo it looks like a weld flaw but is not and came out later on in the forging process.
I then drew out the billet, forged, and profiled the blade. (Sorry I didn't get any photos of the steps in between). :
I then rough ground the blade:
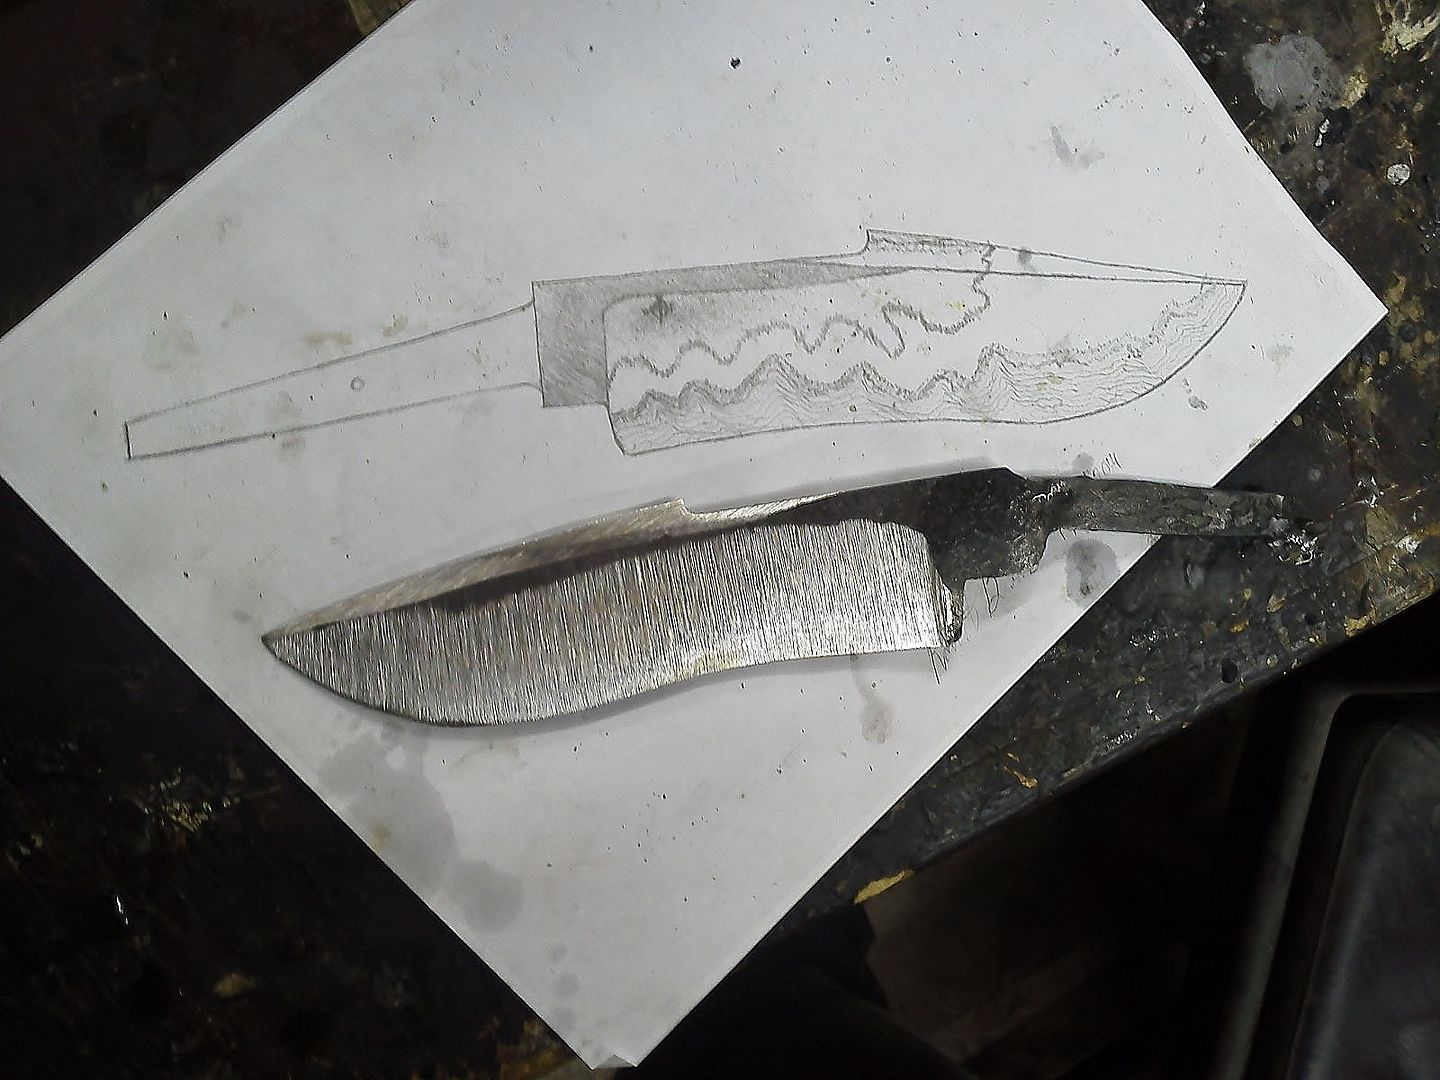
At this point I leave the plunge lines rough as I will refine them with files later on.
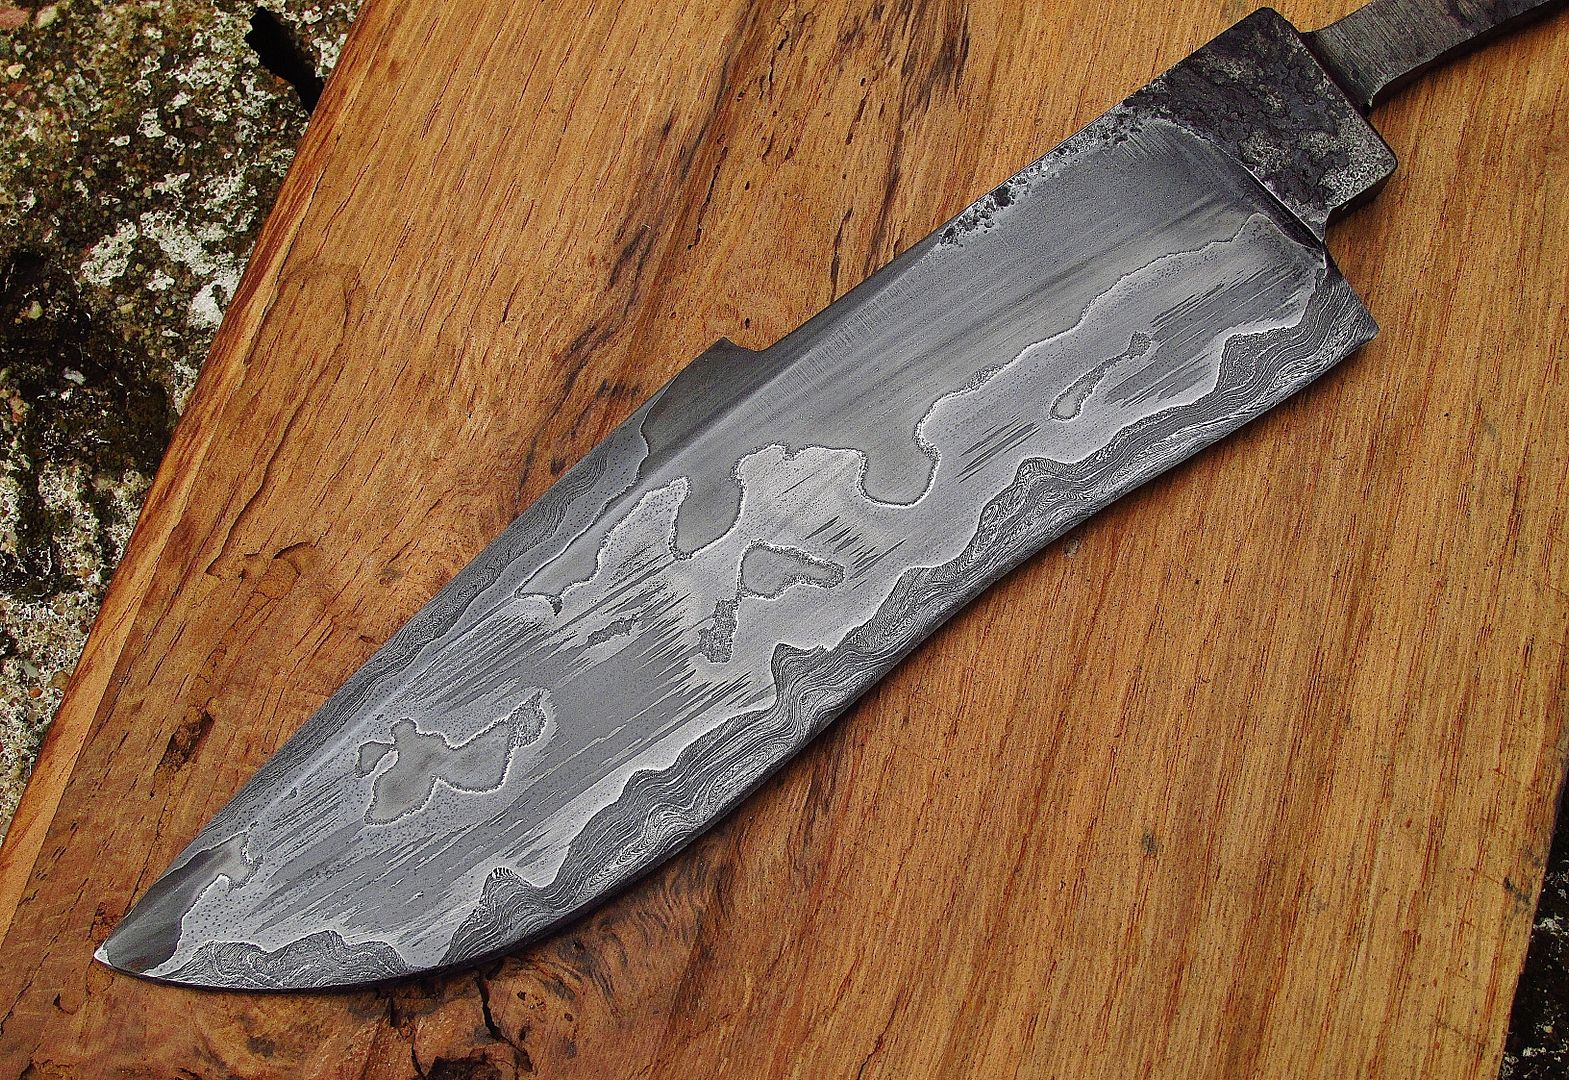
A quick dip in acid to see what is going on:

Then after much polishing (5 hours 37 minutes and 15 seconds of polishing)") I ended up with this:
I ended up with this:
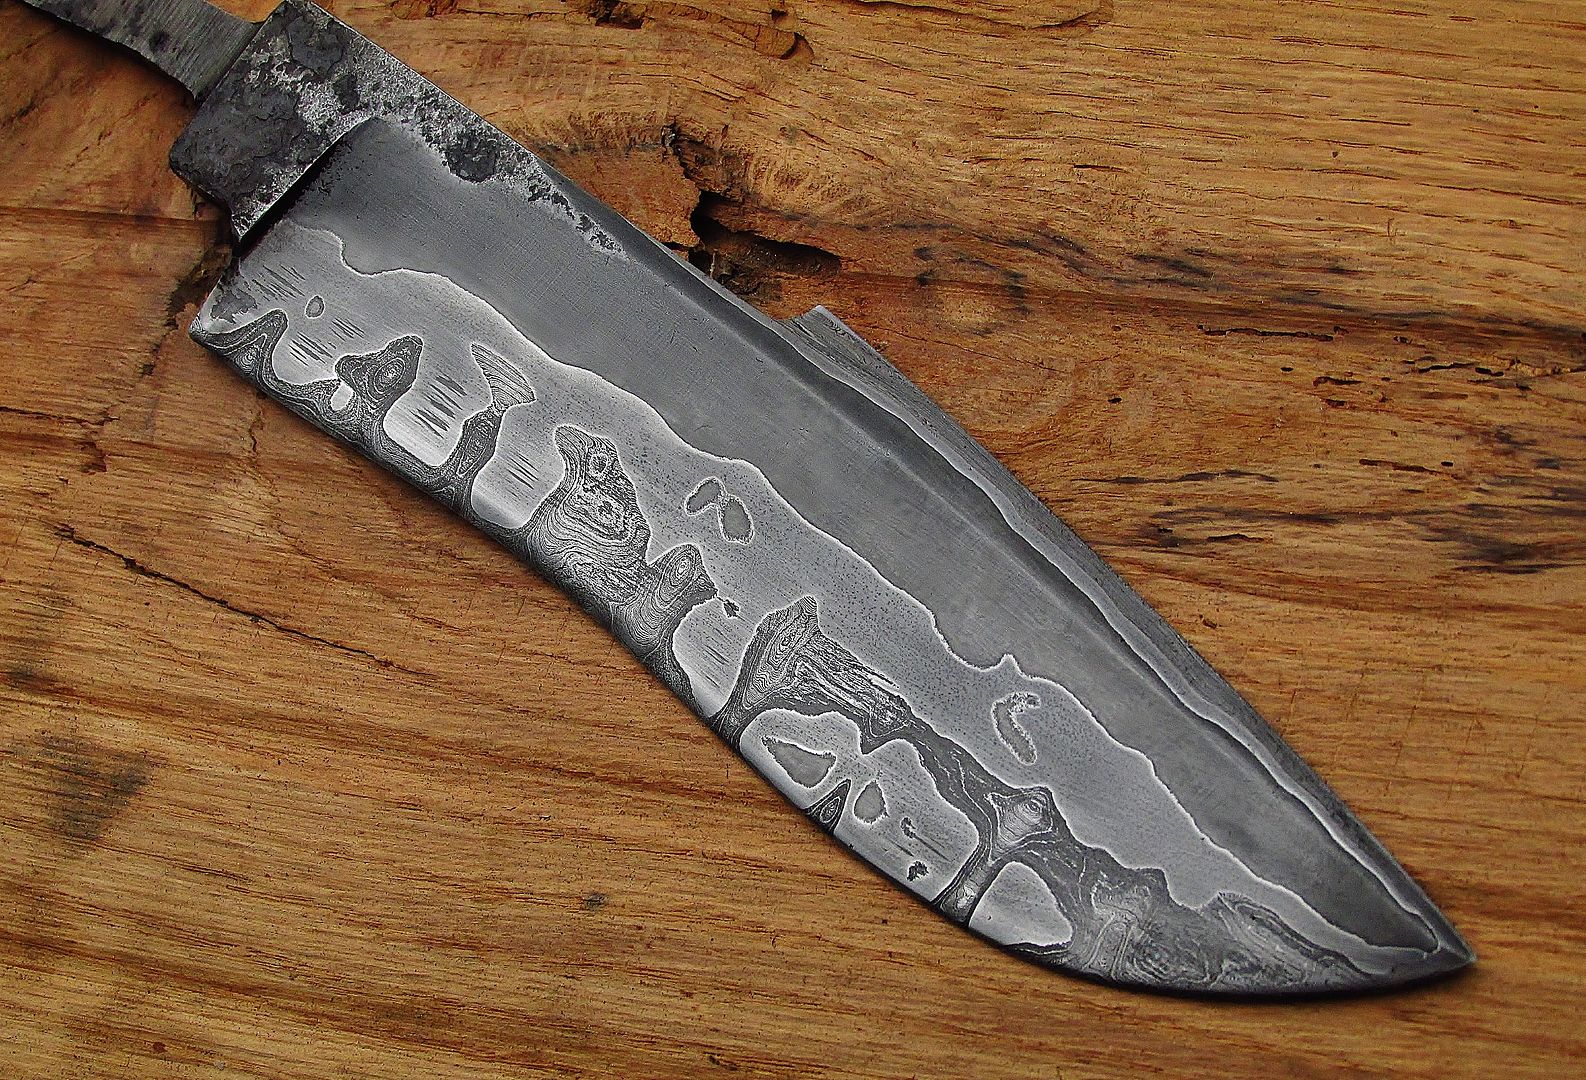
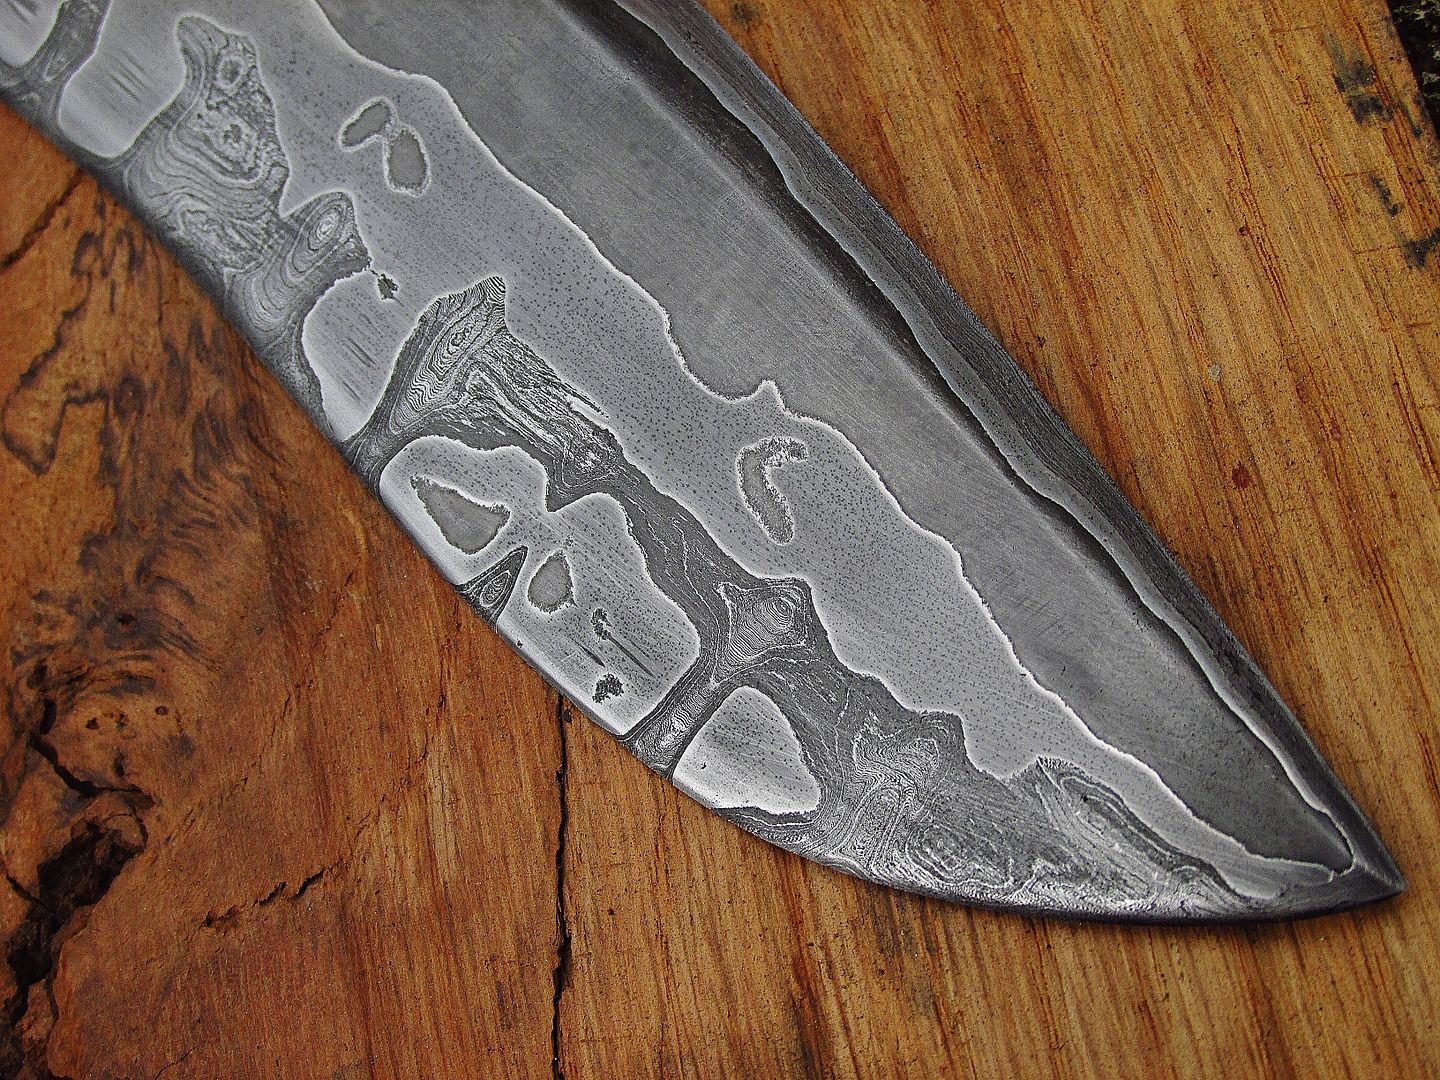
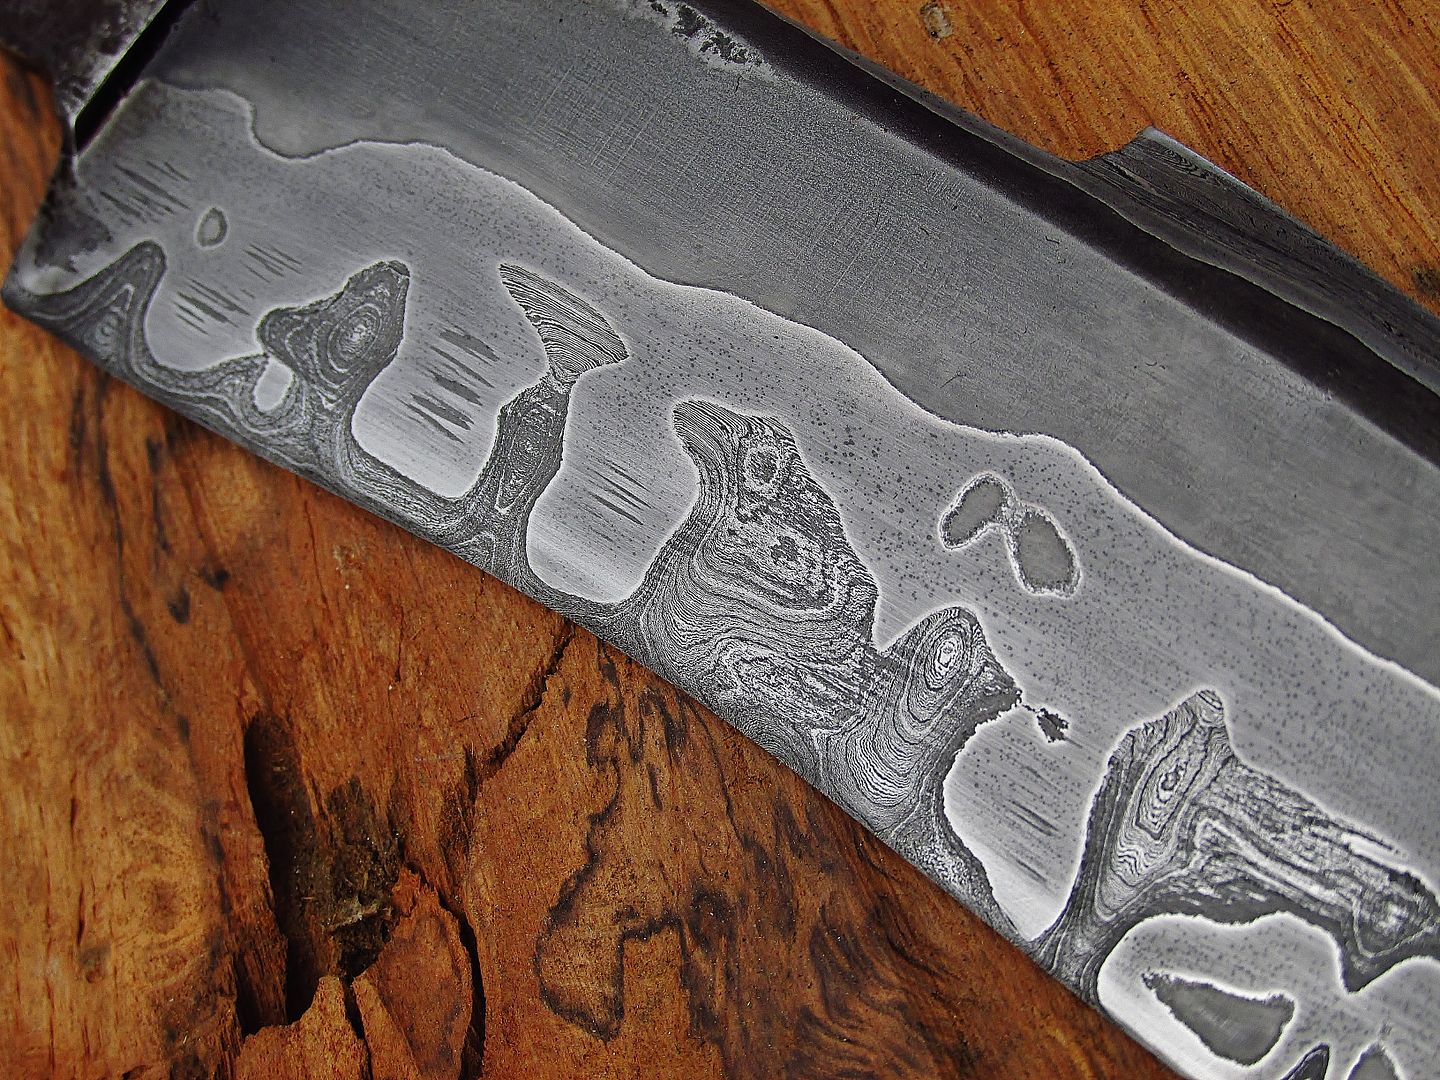
I have been experimenting with this "grunge" look while etching. After polishing to 2000 grit and buff I etch it briefly and then scuff it with 320 grit in random places to let the acid eat in more deeply in those places. I know this look isn't everyone's cup of tea but I like it in certain styles, this effect worked better on one side then the other, but overall I am pleased with how this blade is coming out.
More photos to follow. Thanks for looking.
Robert
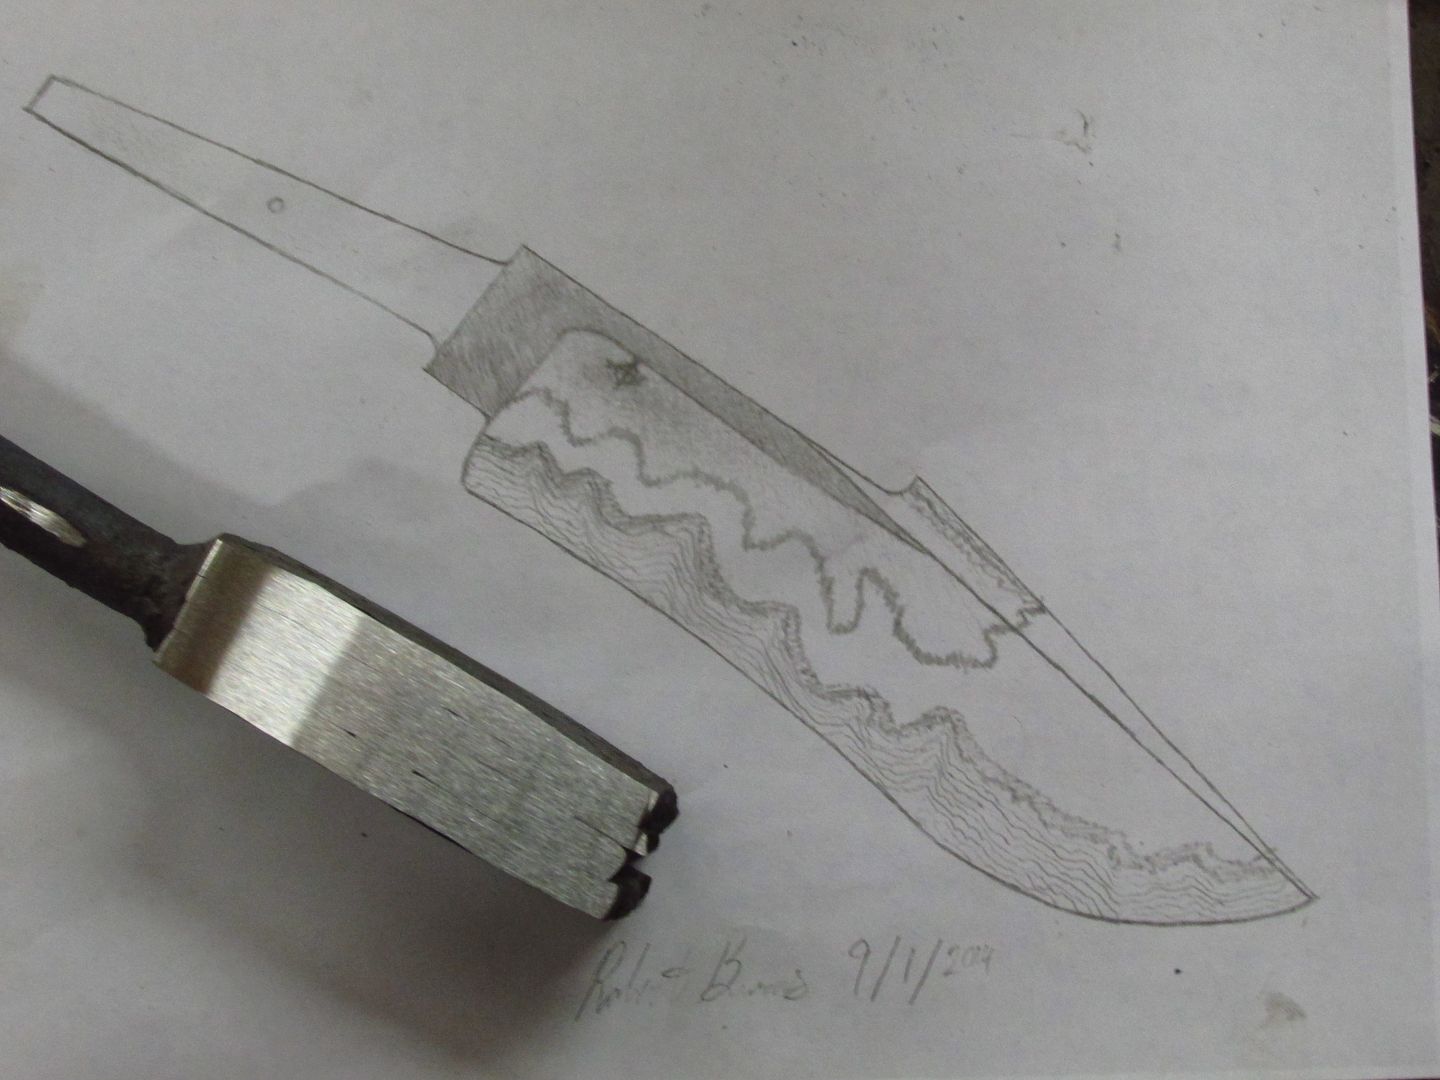
Here is the concept drawing:

In this drawing the blade is 1 3/4 inches wide and 7/34 inches long.
After getting the image in my head on paper I was able to tack a billet together. For the center core I cut the remaining PW billet in half and stacked it together to achieve the appropriate thickness for the core. I then placed a 1/8 inch piece of 15N20 on either side and placed two pieces of 1/4 inch W2 on either side of the 15N20. Because the PW billet is the same material being welded to its self I am treating it as "1" layer instead of two resulting in "five" layers.

I then welded the billet together and ground the edge to check for weld flaws:

A quick etch to see if everything is centered. (On one side of the billet there was a small portion of the original PW billet that had a heavy hammer mark in it. In this photo it looks like a weld flaw but is not and came out later on in the forging process.

I then drew out the billet, forged, and profiled the blade. (Sorry I didn't get any photos of the steps in between). :

I then rough ground the blade:

At this point I leave the plunge lines rough as I will refine them with files later on.
A quick dip in acid to see what is going on:

Then after much polishing (5 hours 37 minutes and 15 seconds of polishing)
I ended up with this:


I have been experimenting with this "grunge" look while etching. After polishing to 2000 grit and buff I etch it briefly and then scuff it with 320 grit in random places to let the acid eat in more deeply in those places. I know this look isn't everyone's cup of tea but I like it in certain styles, this effect worked better on one side then the other, but overall I am pleased with how this blade is coming out.
More photos to follow. Thanks for looking.
Robert


