posting pics via attachment..
Hover your mouse cursor over the image to make it larger.
Type your post as normal in the Advanced Post screen.
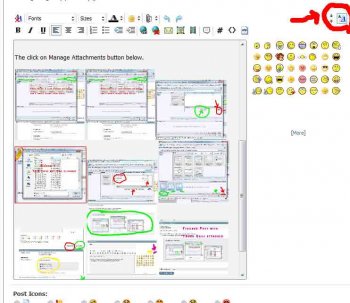
Below the message you will a button "Manage Attachments" Click it.
This screen pops up. Click Add file button (green arrow)
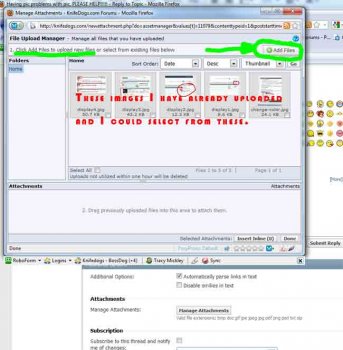
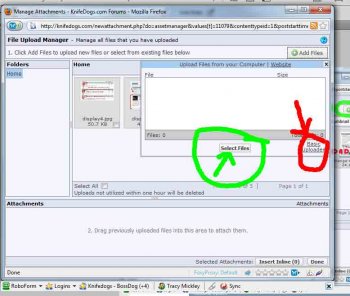
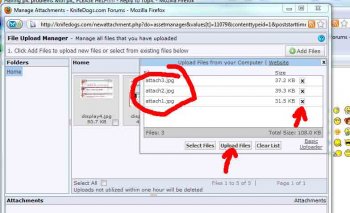
Another box pops up giving you two methods to select and upload files. Click the Select Files (green) box this time.
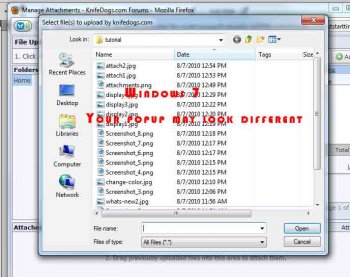
An operating system box opens. I have Windows 7. Your selection box will depend on which version of Windows or Mac you have. Select the files you want as attachments. The limit is 10.
Now that you have the files selected, you have to upload them.
See the files all have an X and then click Upload Files (red)
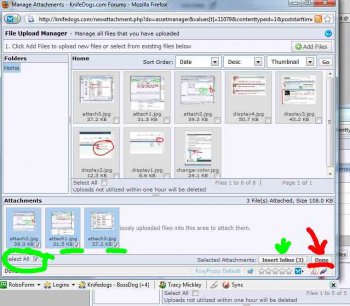
Click Done! (red) This gives your post thumbnail images in a box at the bottom of the message.
That is it! Click submit to finalize your post for attached thumbnails or continue to read on for more advanced use of attached images.
Now... if you want the images be 'in line' with the message like this tutorial instead of at the bottom of the message as thumbnails, keep reading.
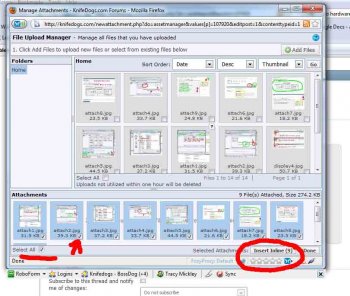
Instead of hitting Done, click the Insert Inline button. Note there are 3 images in this example and they have check marks to select them. Note the Insert Image button has a 3 showing 3 message will be inserted directly into the message. These images will not be in thumbnails at the bottom but will be right in the message post.
Click Insert Image and then Done to close the box.

You can see the files attached to the message. You can Preview or Submit now.
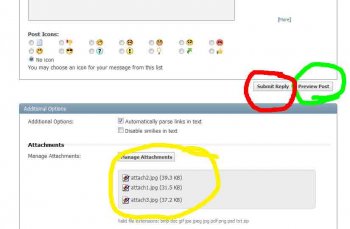
Here is a preview of the post (message).
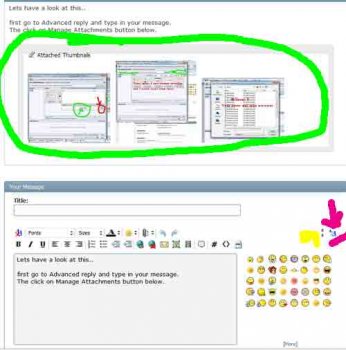
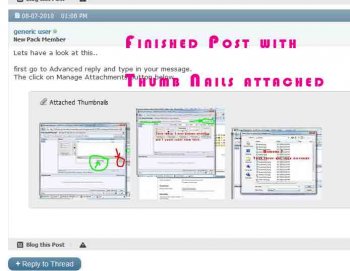
Here is the final message apperance when the files are attached as a regular attachment and not inserted inline like these tutorial images are.
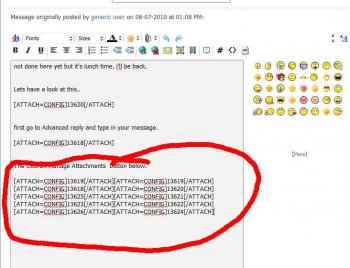
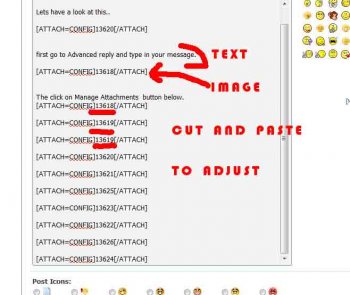
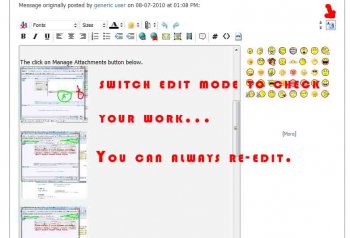
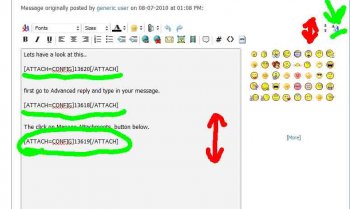
Click Edit Post, Go Advanced. You will get a screen like this. Note in the upper right the red arrows (up or down) will enlarge the editing box. The A/a (green upper right) changed editing mode. Click it to switch to text and you will see the forum code for the attachments. Just cut and paste these forum code snippets to move the image around inside of your message.
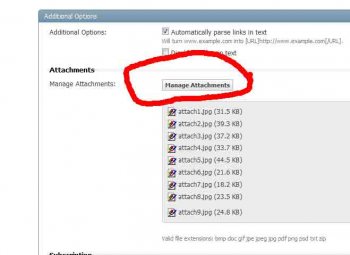
If you don't see the code, the images are probably not Inserted Inline. Click the manage attachments and bring up the box that allows you move the files around.
Hover your mouse cursor over the image to make it larger.
Type your post as normal in the Advanced Post screen.
Below the message you will a button "Manage Attachments" Click it.
This screen pops up. Click Add file button (green arrow)

Another box pops up giving you two methods to select and upload files. Click the Select Files (green) box this time.

An operating system box opens. I have Windows 7. Your selection box will depend on which version of Windows or Mac you have. Select the files you want as attachments. The limit is 10.

Now that you have the files selected, you have to upload them.
See the files all have an X and then click Upload Files (red)

Click Done! (red) This gives your post thumbnail images in a box at the bottom of the message.

That is it! Click submit to finalize your post for attached thumbnails or continue to read on for more advanced use of attached images.
Now... if you want the images be 'in line' with the message like this tutorial instead of at the bottom of the message as thumbnails, keep reading.
Instead of hitting Done, click the Insert Inline button. Note there are 3 images in this example and they have check marks to select them. Note the Insert Image button has a 3 showing 3 message will be inserted directly into the message. These images will not be in thumbnails at the bottom but will be right in the message post.
Click Insert Image and then Done to close the box.

You can see the files attached to the message. You can Preview or Submit now.

Here is a preview of the post (message).

Here is the final message apperance when the files are attached as a regular attachment and not inserted inline like these tutorial images are.

Click Edit Post, Go Advanced. You will get a screen like this. Note in the upper right the red arrows (up or down) will enlarge the editing box. The A/a (green upper right) changed editing mode. Click it to switch to text and you will see the forum code for the attachments. Just cut and paste these forum code snippets to move the image around inside of your message.

If you don't see the code, the images are probably not Inserted Inline. Click the manage attachments and bring up the box that allows you move the files around.


