Lightbox pics..how do they look?

Tod Lowe

Well-Known Member
Thanks to the people who posted the light box tutorials. I decided to make the cardboard box one because of the size and ease of putting it out of the way when not in use. I used white sheets on the sides and top and have a 100 watt daytime full spectrum bulb coming thru the top.

The camera is a kodak easy share z612 6 mp. I had it on auto with the flash off.
What changes could I nake on the camera and possible lighting changes in the box. Basically im asking for any tips or ideas you guys might have. Here are the first pics.
It looks like you will have to click them two times or the quality sucks.
 

Attachments

  • shots from the lightbox 018.jpg
    shots from the lightbox 018.jpg
    91.2 KB · Views: 110
  • shots from the lightbox 022.jpg
    shots from the lightbox 022.jpg
    91.7 KB · Views: 113
  • shots from the lightbox 027.jpg
    shots from the lightbox 027.jpg
    91.8 KB · Views: 88
  • shots from the lightbox 028.jpg
    shots from the lightbox 028.jpg
    94.2 KB · Views: 108
The pictures look nice. I have a light box I made and some pictures look better by leaving the camera flash on. Also changing the color of sheet helps with some materials. I use two lights coming through the sides with a tissue type paper that comes in shoe boxes in my cutouts.
 
I'm no photographer but have looked at alot of professional pictures and one thing I noticed is in all your pictures I found myself looking at something other than the knife. Take it for what it's worth. I like the looks of the 3/4th knife.
 
I think the white background is limiting the exposure to the subject. Try a little darker background.

I'm by far no expert, just what I've read elsewhere.
 
You can try changing your white balance a little.
Also like Mark said try a different color background, also take a couple with the flash on and see how they turn out.

If you can put your camera in a manual mode try using different shutter speeds and aperture.

IF you can try to write down what settings you use for each picture then when you find ones you are happy with you will know what to use next time!!
 
Shank man,

I'm the same place as you with attempting to imrove my pics.

I've looked at every lightbox tutorial out there and started like this-
clear tote from lowes for box $5 on clearance sale so I thought I'd give it a shot.
3 100watt daylight flourescents.
camera on auto everything with flash off.

I started by covering the sides back and bottom with glossy white shelving paper and took a few but still had a bit of glare / hot spots or whatever it's called.

I saw a non-knife-forum tutorial that recommended open sides with the diffuser (White trash bag) over the hole so I peeled the sides off and draped the bag over the sides.

This seemed to make a big improvement.

Some of my pics of the 12 I took are still a little blurry which I attribute to handheld camera and no flash so my next step is gonna be a tri-pod.

I do agree whith what other said about your pics. Still room for improvement somewhere???, LOL. The dark colors in the backround definatly detract from the pic quality IMHO. I too am diggin the knives though !

Here are a couple of my latest pics and of the way I set up the box and lights.

shotgunStevedagger021.jpg

shotgunStevedagger026.jpg

shotgunStevedagger029.jpg

shotgunStevedagger034.jpg


Hope you don't mind me jumping in on your thread ! I was thinking we could learn together.

Thanks to Bigern26 for his simplified tutorial. I think it helped me to get started on the right foot.

-Josh
 
Thanks for the replies, opinions and tips guys.
These pics dont look good on this website for some reason. I need to figure out how to put them up like Josh did.

The first pics I took i just had the white cloth in the box. They looked dull and not very bright and detailed. I added the dark cap and the pics looked better. Does this make sense?

I had made the box to small also.:( Im think about redoing it. It was cheap enough.:D

I had actually thought about using a plastic tote Josh and now I think I will. It will be easier to store and I wont have to worry about my 5 year old crashing into it.
Im off the next three days so I will tinker and try some ideas you guys gave me.
Thanks.
 
If you have a second light source, try playing around with more indirect lighting such as aiming two lights from the front into the top of the box, or some other way to get the white balance and desired shadowing effects.
 
I rigged up a little light box just now using a clear box, two white trash bags, and two low wattage desk lamps. I had my camera on the macro setting and no flash. I took two quick pics of a BC knife:
attachment.php

attachment.php


Here's what my setup looks like. Very basic.
attachment.php
 

Attachments

  • HPIM1876.jpg
    HPIM1876.jpg
    97.5 KB · Views: 149
  • HPIM1877.jpg
    HPIM1877.jpg
    94.3 KB · Views: 146
  • HPIM1878.jpg
    HPIM1878.jpg
    91.2 KB · Views: 148
I rigged up a little light box just now using a clear box, two white trash bags, and two low wattage desk lamps. I had my camera on the macro setting and no flash. I took two quick pics of a BC knife:
attachment.php

attachment.php


Here's what my setup looks like. Very basic.
attachment.php

Try having the lights shine through the sides of the box, that might reduce the glare. they are good pics but the glare reduces the feel for the knife.
 
I think they look a heck of a lot crisper than just snapping a pic with a camera. I agree with playing around with some different colors other than white. Maybe it's just having the other things in the pics with it but like someone else mentioned I found myself drawn to looking at everything and not focusing on the knife. Maybe the white would be good if the was perfectly flat and there was nothing else in the pic but the knife. If you want say, a camo background grab some camo fabric from a hobby shop and try that. Overall though I think the lighting looks pretty good considering the setup.
 
Try having the lights shine through the sides of the box, that might reduce the glare. they are good pics but the glare reduces the feel for the knife.
Here's what I got through the sides. I wasn't sure how to approach taking a picture of a mirror-like shine, but I think this helped a lot. Again, this is with macro and no flash. No white balance editing done or anything.
attachment.php
 

Attachments

  • HPIM1880.jpg
    HPIM1880.jpg
    98.1 KB · Views: 62
Here's what I got through the sides. I wasn't sure how to approach taking a picture of a mirror-like shine, but I think this helped a lot. Again, this is with macro and no flash. No white balance editing done or anything.
attachment.php

I like it alot better than the first, now if you have 1 more light have it shine through the top and it will give the blade even more detail, If it has a little glare put a white sheet or white garbage bag between the container and the light,
that will give it the soft glow and should have no glare!
 
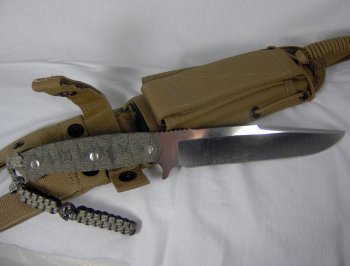
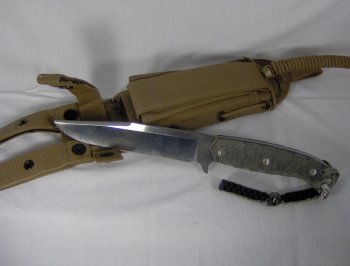
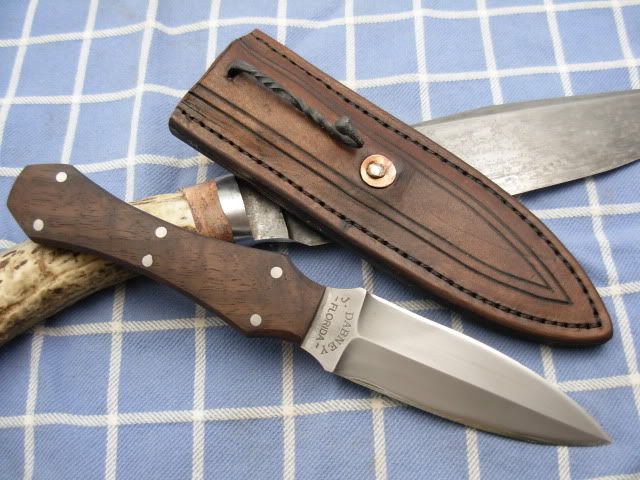
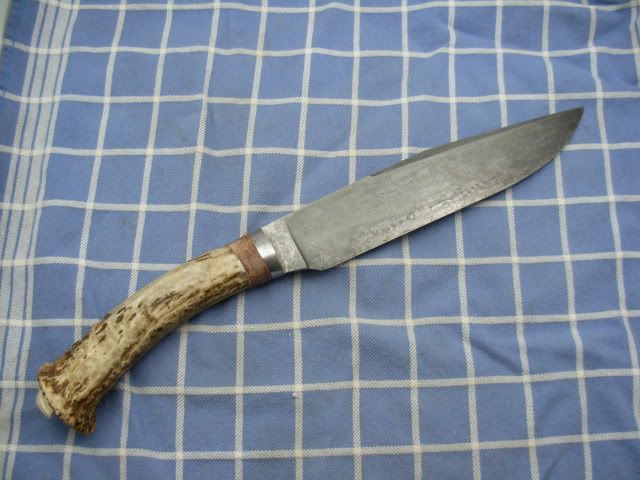
I begin by saying that those are beautiful knives! And yes, you definitely need to capture them in a photograph. This may get a little “windy” so please forgive me.

I am not familiar with your camera and I am assuming it is a “point and shoot”. You are very limited with these types of cameras, but on the bright side if you have a manual setting you can still achieve good results.

This is the short and sweet of it. Photography is about light. A camera will attempt to balance the light to an 18% grey. That is why the exposure changed when you added the dark cap. When a camera is set to full auto it balances everything: film speed, f/stop, shutter, light, etc.

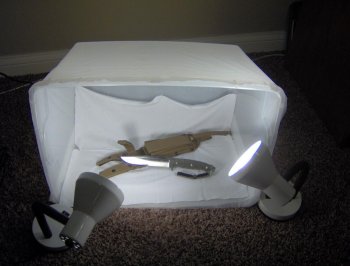
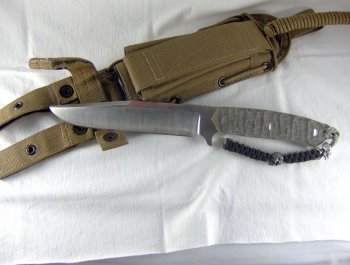
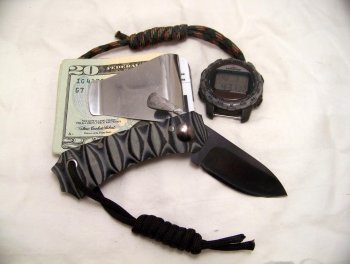
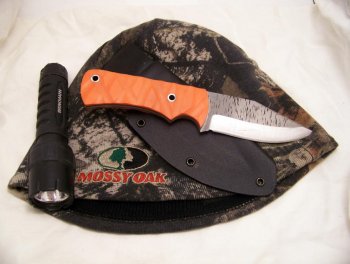
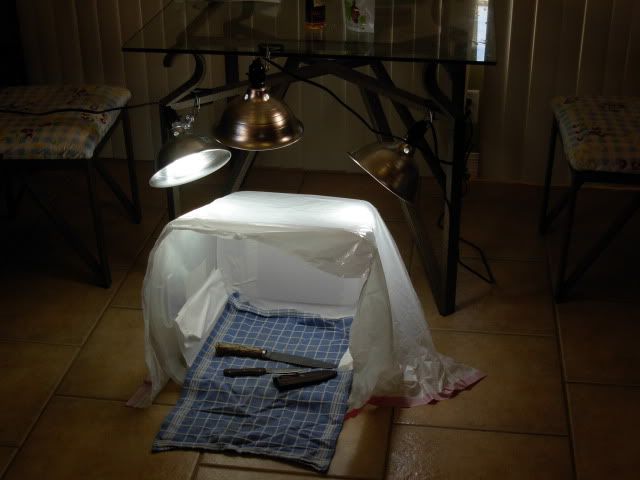
The background you are using is fine. The background changes depending on the target or the results you are seeking to achieve. If you want a high contrast between the background and the target such as a dark knife, you would use a light background, and conversely a light colored knife against a dark background. The purpose of a light box is to diffuse the light evenly and eliminate shadowing so the eye is drawn to the target. In viewing your photos I saw very little shadowing, and in fact, you light box is working very well. I agree with other comments though in that you may be getting it a little “too busy” with the additional items placed in the photograph, but in your defense, including the money clip with the friction knife was an excellent idea as a scale.

Don’t change anything with your light box yet, instead try the following steps first. I sue the same kind of set up in the lab and get great results. You WILL get the results you are seeking within around 6 photographs if your camera allows it, and you follow them to the “T”.

Set the camera to manual.

Set your image size to the highest quality possible (I believe you stated your camera was a 6mp).

Set you camera “film speed” to ISO/ASA (even though it is a digital this is still applicable) to 200. This is a relatively “slow” film speed and gives much higher saturation resulting in better enlargements which allows you to crop the photo without losing any detail.

Set your f/stop to f/ 5.6. The f/stop is considered very “wide” at this setting allowing a lot of light into the camera and at a wide setting your depth of field is shallow. A shallow depth of field simply means that things that are on the same plane will be in focus, those that are not, will be out of focus. A “high” f/stop lets a small amount of light in through the lens but gives you a greater depth of field. Don’t get hung up on this! All of your photos are going to be at a wide f/stop anyways.

So, again, set your f/stop to f/5.6 (or wider if your camera will allow it) Set your shutter speed to 100th of a second.

Take the photo. If the photo is over exposed (too bright), change your shutter speed to 125th of a second (faster shutter speed) and keep doing this incrementally until the photo is exposed correctly. If the photo is underexposed (too dark), slow down the shutter speed to 1/60 of a second. If it is still underexposed lower it again to 1/50th but this will be the slowest you can set it shooting freehand. If you are still underexposed after this photo you will need to place the camera on a tripod

Best option: Place the camera on a tripod. If you don’t have a tripod, stack up books or whatever you have and then place a towel or a hunk of Play-Do on top. This will allow you manipulate the camera some and then take your hands away. Be careful not to get the Play-do in any of the camera’s components! Also, you will need to use the camera’s timer (or a shutter release cord or remote). Remember for anything slower than 1/50 shutter speed it will require hands free operation.

Another option for free hand photos would be to change the film speed to 400 (stay with me, I know it can get confusing). This is a “faster” film speed which means it requires less light for development. Enlargements will not be as high quality as a film speed of 200, but they should be adequate.

If you have had to change the film speed to 400 start of with an f/stop of 5.6 and the shutter at 1/200 and check you results. From there follow the steps I previously described for getting the correct exposure.

Note: An excellent program to check your results is Microsoft Picture Manager. When you open the photo in this program right click on the image and select properties. In the right hand drop down panel you can select camera properties and click on more. This will give you the camera settings used in that particular photo (shutter speed, f/stop etc.).

I reckon you will think I’m pokin’ fun, but that would be far from the truth. I used to make the “The Idiot’s Guide to Photography” required reading for all new hires. It is an excellent book and teaches far beyond the basics without all of the boring crap that is often stuffed into photography books. You will not be disappointed.

And finally, an SLR (single lens reflex) camera is the way to go. For a relatively inexpensive camera I recommend the Canon EOS “Rebel”. I am not a Canon rep either; they just make a good product.

I hope this helps. If you any additional help, give me a shout.

Curtis
 
I forget to add this, bigern26 made a good point with "If it has a little glare put a white sheet or white garbage bag between the container and the light,
that will give it the soft glow and should have no glare!" If you are getting glare in a particaul spot do as he said, move a white piece of paper or material between the light source and you photo target. All you are doing is diffusing the light.
 
Curtis,

Wow ! This is exactly the info that's usually missing from pic tutorials. Very Informative and thank you for typing it all out !

Photography for Dummies ! I love those books and never even thought of it. It's now on my "must have" list.

Thanks again for the info and revealing yourself as a photo-guru, LOL. I guess I'll know who to ask if I start playing with manual setting on the camera. (Nikon Cool Pix 7.2mp)

I'll DEFINATLY be getting a tripod now that you've explained why it's necessary.

Thanks again, Josh
 
Thanks everybody for the tips and sharing your set ups.Something to be learned from everybody.

Curtis. It took me a half hour to figure my camera settings out. Its the first time it has been on the "m" mode.:D
This camera was purchased to take pictures from my treestand so i went with the 12x zoom. Not really needed for knife pics!:D I was able to get all the settings you recomended so i should be in business.
Thanks for the slr camera recomendation also.

Im off to waste some film.....er pixels.
Thanks!
 
Curtis
I cant thank you enough. The kind of details you added are exactly what I needed. Most all tutorials focus (no pun intended:)) on the light box, making the assumption the reader knows how to take a good picture.

Sean
 
Maybe between the how to on making the light box and Curtis's instruction we can get this moved into the tutorial section so it doesn't get buried in here.
 
Back
Top