Multi-part handle

Brad Walker

Well-Known Member
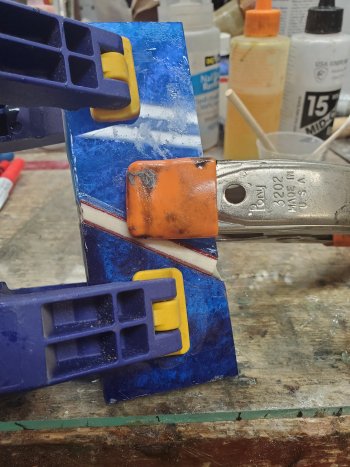
Happy Monday!! Short version: I would love to see your set-up for gluing multi-part handles together.

The story behind the question. So I tried my first multi-part handle using some scrap handle material I had. I was actually please with how it looked when I got done. However, I ended up with gaps on the end. I laid the pieces on another scale wrapped in wax paper. The small pieces of liner were sticking out on both sides so I'm really not sure what I did wrong. They appeared when I sanded the edges. I could dig out the epoxy but it was too deep to salvage due to how much reshaping I would have to do to the blade. Wide open to suggestions and comments I love the look so this is something I definitely plan to do more of in the near future.

20210718_153746.jpg20210718_153802.jpg
 
You are correct!! I just repeated the process on another set and actually paid attention to the base as you mentioned! When I applied pressure with the clamps, the small pieces of liner moved. Totally missed that last time. I took a small pick and pushed them back into place and reclamped. Thanks a bunch!!
 
Yep, it's the consequence of the horizontal clamping. The clamp squeezes the epoxy and the smaller parts "squirt" up. Then the epoxy fills the void.
 
Yup the bits and pieces do move. First set I did the spacers in the middle were cut at an angle! Not knowing what I was doing it was a cluster til I had just about every clamp I owned and could fit on those scales. I almost always use longer setting epoxy which thank God I had used so it gave me some time! Everything done on knives is a learning curve!
 
I recently switched to slow setting epoxy, not by choice but Combat Abrasives was out of fast, and I am really liking it much better. I don't feel as rushed and I'm not making as many mistakes!! Well, except for the one above. :D
 
Gluing multi-part handles together all at once is a hassle and prone to screw-ups.

Here's what I do. Stack all the spacers, glue them together with thin CA glue. Then glue them to the end of one of your big handle scales, with excess all around, no need to line anything up. After the glue dries, grind the eccess off of the inside of the scales and then glue the other big part of the scale on. Then, glue the whole assembly to your liners that go along the tang of the knife. Again, I glue all the tang liners together first then glue them to the scales.

I clamp assemblies down to a flat surface with wax paper on it. It peels off the wax paper nicely. Then skim sand it flat on the bottom. Doing it this way you can do perfect compound bevels and dovetails with all the corners perfectly sharp and crisp.
 
I also do the pieces on wax paper with excess using thin CA glue and flatten them before epoxying to liners. I'm typically doing a 45 joint which are difficult to clamp so I hold them together tightly with my fingers on the wax paper on my surface plate and wick the CA into the joint.
 
Just tried this method on some cut off scrap pieces I saved for this sort of thing. Worked pretty good. I did manage to glue a couple Fingers! LOL!! But I'm sure after a couple more I'll get my process down and not manage to glue my hand to the scales!!
 

Attachments

  • 20210723_152014.jpg
    20210723_152014.jpg
    1.8 MB · Views: 21
Just tried this method on some cut off scrap pieces I saved for this sort of thing. Worked pretty good. I did manage to glue a couple Fingers! LOL!! But I'm sure after a couple more I'll get my process down and not manage to glue my hand to the scales!!
I should have warned you about gluing your fingers. I've done it more than once...
 
I won't say it's right or it's wrong, this is just how I do it. I spot glue my mirrored pieces together, and square em up together. That makes sure they're a dead match from left to right. This doesn't have a spacer between the two colors, but if it did I'd just cut a little over size piece(s) and layer them in during glue up. I pop them apart, degrease, butter all contact surfaces and simply press them together on a flat surface covered in wax paper. Once you push 'em together, they kinda get suctioned. Epoxy shrinks a bit when it's dry, and there you have it, no glue line. Tomorrow I will flatten the backside and glue liners on. 61CB971C-18BA-4397-8785-F3D2DAA75182.jpeg9A8A65AB-DF4F-4C98-9661-479AFF85B652.jpeg9EE07B63-B898-4524-A665-422C7B71B014.jpeg
 
Ok, a few more pitchers. We have (mostly) peeled the scales off of the wax paper. Joint looks good all around so I square up on the long sides and the bottom side. The important thing to remember is that by limiting the number of things that line up at each step, the easier it is to make it "perfect." First step was each color matching each other, then having a flat, square surface to glue to the other color. So I'm only worrying about one direction for each glue joint.

With the sides trued up and one side dead flat, putting on the liners is as easy as finishing the prep work and clamping flat pieces.
75226D79-AD60-4864-9492-1A6BE38FE7F9.jpeg043AEB14-9D55-4D51-86FF-091B86DDEE00.jpegAEF7A0DC-0E4C-401F-80A9-B9074FB26980.jpeg
 
Ok. Here's a quick run through after liners are on. Scales get squared all the way around, glued together, drilled, counterbored, test fit, profiled, front edge finished, final fit tested, glued up.

One note on drilling through both scales. If the world is perfectly square to you drill press table, it don't matter how you do it. Your holes will be straight. But the world hasn't any consideration for your drill press table, and a degree or two will run out far enough to mess up fastener alignment. The reason this works is because the blade is used for a template, and the insides of the scales are right together so there can be no misalignment. Pitchers.
390B3894-7B42-4879-9BC1-9BCA3EDB2F3D.jpegD016C708-CECD-4D20-AE86-1D90E5E6D66C.jpegE793CBC7-3C4F-4E9E-B111-61199724D368.jpeg63242791-8816-4292-958A-C550F4970D65.jpeg21093ABE-564C-44A9-81C9-A03DF52A3A52.jpegDF4FF5CC-B8B1-4474-871D-411178C5AEC4.jpeg9337504B-B9A9-4F8A-838C-C67C3BF1A6F1.jpegB4B443BF-468B-42F4-B70C-FFF8D5DC81F0.jpegB440DF7E-E3DF-44BA-AC5F-CF3D8F7B12E8.jpegC9915296-8E9E-4107-9F31-0E80A670FDBD.jpeg
 
Back
Top