Mark Barone
Well-Known Member
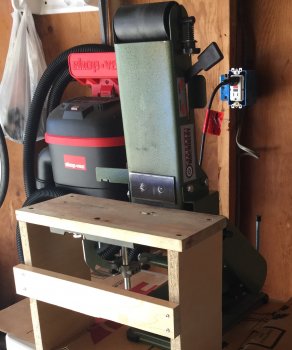
I know this topic might be overdone but I thought I'd share mine.
It's ok for now until I get a big boy sander.
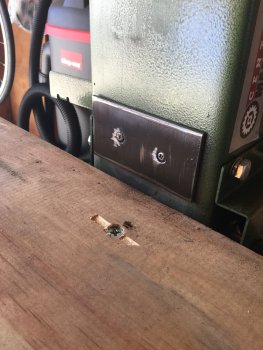
1. I added a 2x4 piece of blade steel to the original platen. I probably should have made it 4 x 4 but it's tall enough for now. I also thought the smaller the platen the flatter it would stay. This allows a way for the sanding belt to hang over either side of the new platen and gives you away of getting plunge lines. I used metal screws and sanded the heads flush with the new platen. Oh and I thought it would make the belt too tight because I added thickness , but it works fine.
Fun Fact : Round the corners just a hair on the right and left sides of your new platen or the sharp metal edges will tear apart the edge of your 15 dollar belt ...especially while tracking . I've done it.
2. The sander comes with a work table but it's not big enough to slide a jig on it. I used precision pine and particle board (sarcasm) to give a stable surface, if you can weld, you may want to use longerlasting materials.
3. I just use 60 grit to make the bevel and 220 to make it finer. Then hand sand . My biggest challenge. I've tried many more grit steps on this sub par sander and it just creates too many funny marks. I know I'll have to frequently monitor the levelness. Is that a word?
So i am hoping to give some beginners like me ideas and hopefully others will improve on mine.
Retro


Last edited:
