I finally got off the procrastination kick and knuckled down to meet the deadline. A few design changes and some other ideas, and this is what popped out.
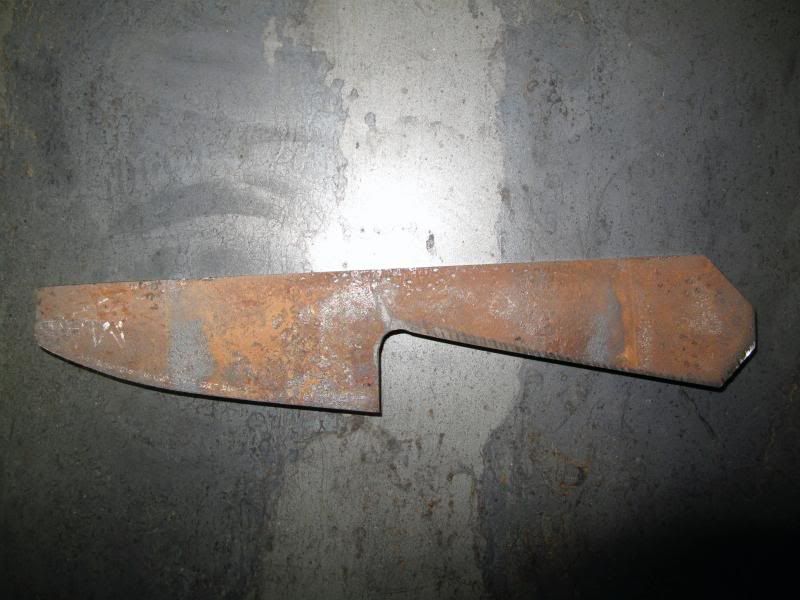
Started out as a bit of leaf spring that I had to sand and file almost to half the original thickness.

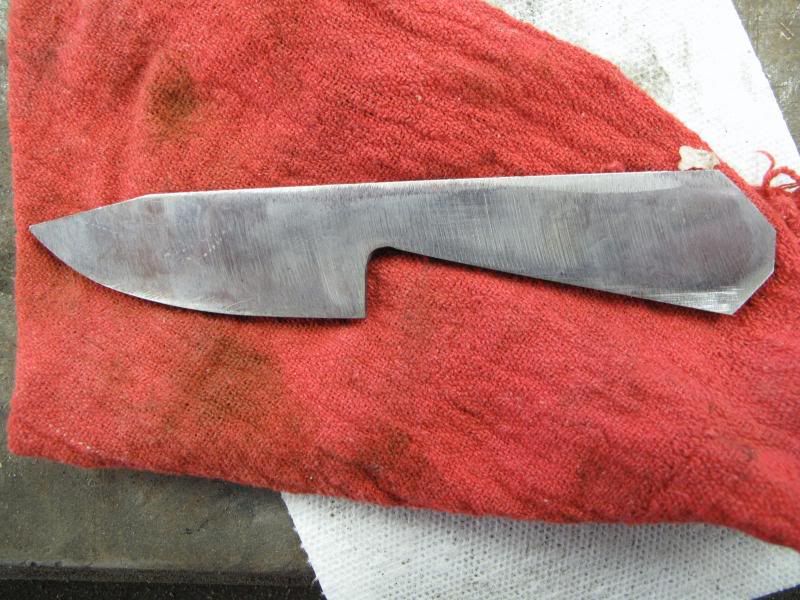
Then to the files to refine the shape. This was done before I built my grinder, and I learned a lot about filing and such. I'm soooo glad I have a grinder!
At this point, it's down about a sixteenth in thickness from the original quarter-inch. There was a lot of rust pitting to get out, and some waves that didn't get flattened when I pounded it straight.
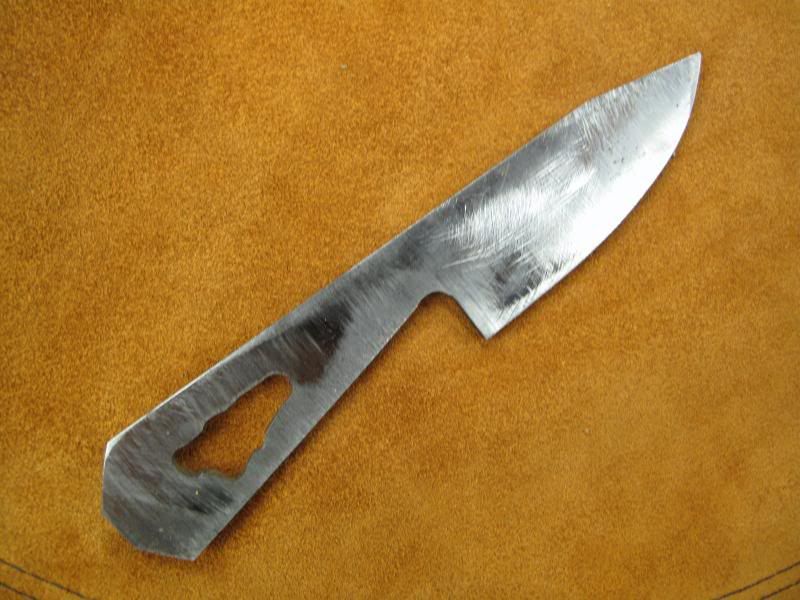
A big lightening hole. It's still a bit handle-heavy, but comfortably so.
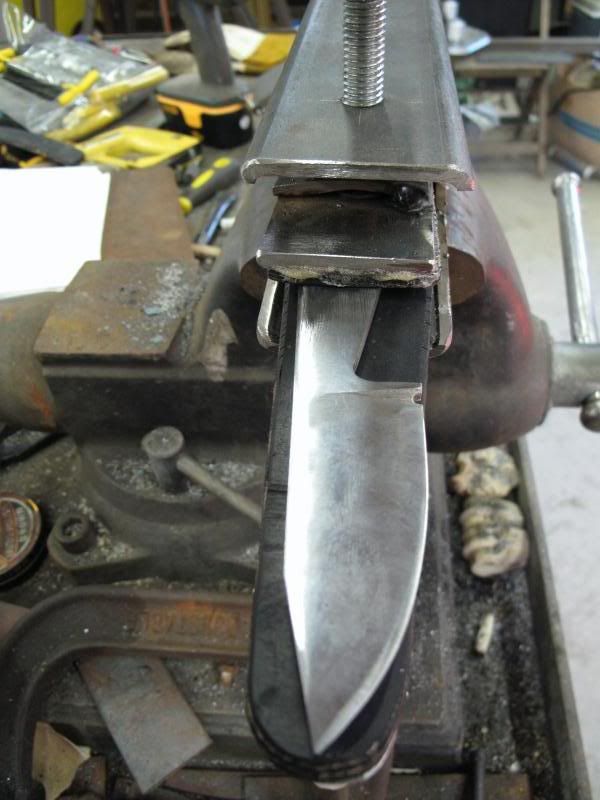
Mounted in my brand-new knifemaker's vise! I was so tired of trying to make do with the jerry-rigged vise that I took a couple days off and wound up with this. Works like a charm.
Here you can see the plunge cuts have been placed and the bevels started. Lots of hours to get to this point, but it was fun to watch it come out of the blank I started with.
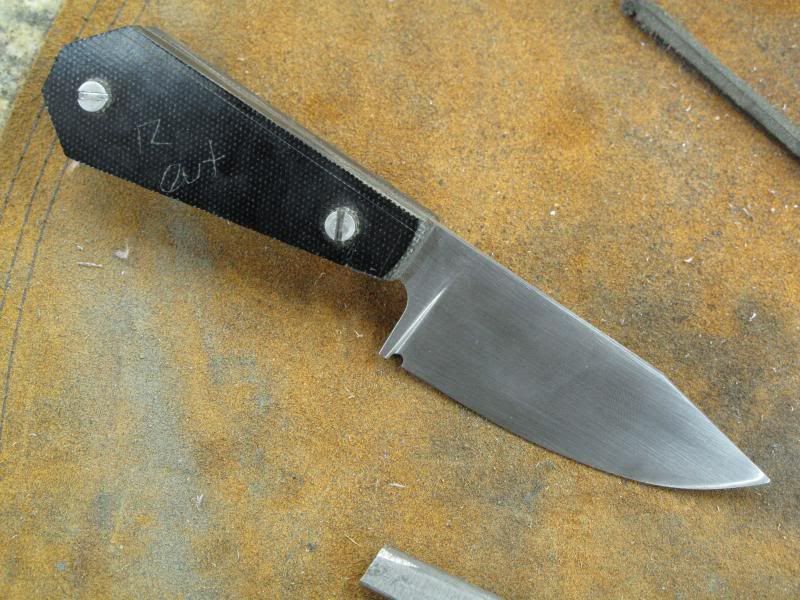
Now, I'm installing the handles to check for fit before sending the blade off for heat-treat. I chose black canvas micarta for the scales as I wanted this to be a durable EDC type knife..... and that's what I had laying around.
I just got the blade back from HT and decided to get it all together. I wasn't sure about the grip texture, so I thought to play a bit with my Small Wheel Attachment and ended up with a flint-knapped look that was incredibly easy to do and provides a very sure grip.


Voila!
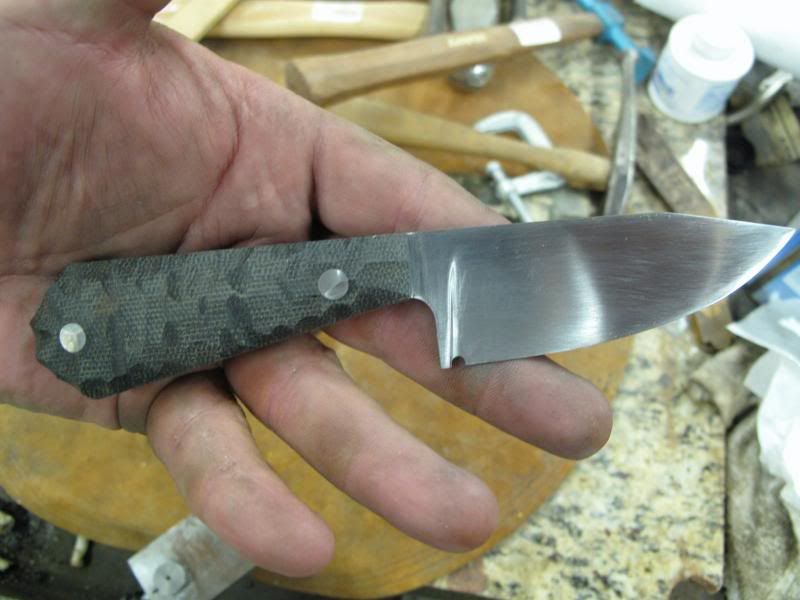
Fairly happy with the results. The blade is just under 4" so it should be legal in most areas of the country, and the handle is just a hair shorter than the blade to aid in daily carry. It's a very positive grip no matter how you wield the knife. Should be great for hunting or GP around the homestead.
Hope ya'll've enjoyed the walkthrough. If you'll excuse me, though, I really need to get started on the next blade....
Started out as a bit of leaf spring that I had to sand and file almost to half the original thickness.
Then to the files to refine the shape. This was done before I built my grinder, and I learned a lot about filing and such. I'm soooo glad I have a grinder!
At this point, it's down about a sixteenth in thickness from the original quarter-inch. There was a lot of rust pitting to get out, and some waves that didn't get flattened when I pounded it straight.
A big lightening hole. It's still a bit handle-heavy, but comfortably so.
Mounted in my brand-new knifemaker's vise! I was so tired of trying to make do with the jerry-rigged vise that I took a couple days off and wound up with this. Works like a charm.
Here you can see the plunge cuts have been placed and the bevels started. Lots of hours to get to this point, but it was fun to watch it come out of the blank I started with.
Now, I'm installing the handles to check for fit before sending the blade off for heat-treat. I chose black canvas micarta for the scales as I wanted this to be a durable EDC type knife..... and that's what I had laying around.
I just got the blade back from HT and decided to get it all together. I wasn't sure about the grip texture, so I thought to play a bit with my Small Wheel Attachment and ended up with a flint-knapped look that was incredibly easy to do and provides a very sure grip.
Voila!
Fairly happy with the results. The blade is just under 4" so it should be legal in most areas of the country, and the handle is just a hair shorter than the blade to aid in daily carry. It's a very positive grip no matter how you wield the knife. Should be great for hunting or GP around the homestead.
Hope ya'll've enjoyed the walkthrough. If you'll excuse me, though, I really need to get started on the next blade....
