My first knife, handle help

sicilian767

Well-Known Member
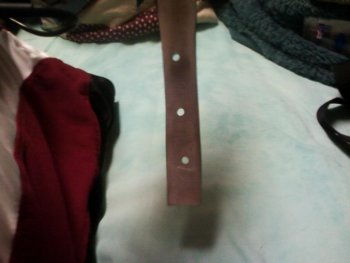
Hey guys, so this is a continuation of my older thread of my first real knife. My parents were very generous to me, and bought me a drill press for knife making. I drilled the holes in the handle with no problem at all, so looks like it was a good thing I didn't quench the handle. I'll post a picture with this thread, and I know, I messed up with the alignment. I assumed I could just eyeball it and I ended up being a bit off on my first hole. So my plan for the next knife is to draw a line down the handle, with dots to make it as symmetrical as possible.

This knife was really my learning curve. I think I'll post a new thread talking about all the things I learned in the process once I finish the knife. I'm glad a I made a few mistakes though, because that's often the best way to learn.

But in any case, I need help from you guys on proper attachment of the handle. I have the wood, I have the holes in the tang drilled, and my question to you is how do you bolt on the handle pieces while at the same time making it flush? Can one of y'all do a quick video tutorial, or know of one already on youtube? Sorry for the seemingly simple question.

Also, where would y'all recommend buying the bolts and pins for the handle? Feel free to post a link where I can buy them.

Thanks a ton! Really appreciate it from y'all

Also, the hole size is 3/16 of an inch.
 

Attachments

  • 0611132038.jpg
    0611132038.jpg
    74 KB · Views: 45
I give Boss Dog all the business I can; click on the "Midwest Knifemakers Supply" button on the bar next to Forum and it'll take you right there.
 
I figured out my plan guys. And yeah, I've been very impressed with USA knife maker. I'm probably going to go to them for all of my knife making needs. Great customer service, great products, and they have it all.
 
Depending on your plan, you can always use a round file and oval the hole out so you can center your pin. You'll want to finish the blade end of the scales with the shape you want, mirrored from side to side, before you mount them as it's impossible to get in that 90 degree corner after they're glued and pinned on. Believe me, things go wrong when you do it the first time - you'll learn with your mistakes and if you keep up your ambition you'll become better and better with each knife.
 
Put out sand paper sheets on a piece of glass for flatness and sand the inside of the scales to at least 220 girt. You can get the Devcon syringe 2 ton epoxy at most hardware store. Do not get the five minute. You will need to play around with it longer than that.

Frank is correct about finishing the front of your scales to final polish, At least 400 grit and buff the front with any kind of wood wax, this helps you remove any epoxy you may get up there during assemble.

Boss dog will sell. Loveless style bolts and the needed step drill for installation.

These are the strongest fastener I have found and use them 99% of the time. On very small knives I use 3/32" nickel silver pins.

Does that help?

Laurence

www.rhinoknives.com
 
Yes, thank you all for all your tips!! I'm gonna order the pins from usaknifemaker tomorrow, and hopefully they'll get here either by Saturday or next week. For now, I'm going to finish shaping the handle, and buy some finer grit sandpaper at the hardware store till my pins get here. I have a pretty good idea what I'm going to do. I watched USA Knifemaker's video on youtube on how to attach a handle, and it was really informative and helpful. One thing I gotta say, is thank God for belt sanders lol.
 
Also, great advice on the epoxy. I saw even a pro struggle with the 5 minute epoxy in the video. So the 30 minute epoxy should work out great! Pictures should be up next week, and then I'll be on to working on the sheath. After that, I'll have a finished knife :D
 
To get your holes lined up when you are laying them out, get yourself a pair of dividers. I use one point to follow the contour of the handle, and scribe a line down the handle with the other. This keeps the holes centered. Just a thought.
Here's a link to McMaster Carr but there are other sources....
http://www.mcmaster.com/#marking-dividers/=n5pdhs
 
Also, if you're not already using one, invest in a decent center punch, and pre-punch your holes where you want to drill them.

Not only does this help your drill bit to "stay on point", but it also gives a visual cue on where/how your holes will center up and be located before you actually commit to drilling them.

Yeah, I was actually wanting to do that, but the only thing I had available for a center punch was my knife, and I didn't wanna damage the tip. I probably should of waited and bought a center punch......but I assumed it would be fine. I think I'll invest in one for future knives and projects. There's actually several things I'm trying to invest in for future knives, including sandpaper, a riveter for making sheaths, pins, an anvil, hammers for the anvil, and eventually somewhere down the road I'm gonna try to save for a nice belt grinder. The last one will save a lot of time and effort, and probably help make better quality knives.
 
Back
Top