Stormcrow
Well-Known Member
I've finally got the ball rolling on everything and am working on the first batch of tomahawks since getting my new heat treatment furnace set up. I'm first working on taking care of military orders, then will work on the rest in order.
Here's the first batch of five. I plan on working on six at a time in the future, but I wanted to get these finished and to the customers ASAP.
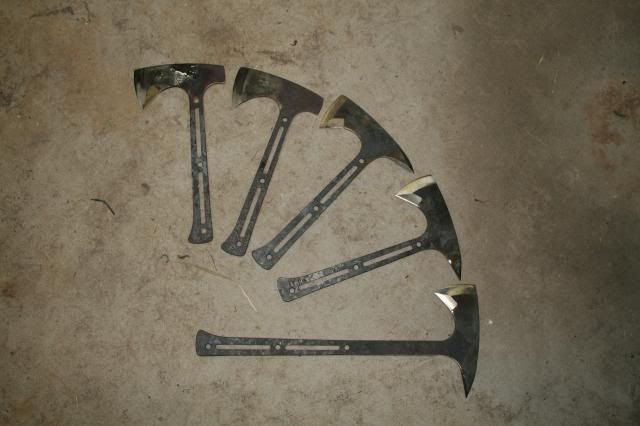
All of them have sharpened inner beards except the second hammer poll from the left. I know some of them are hard to see in the pic. It was taken under fluorescent lights at night in my shop.
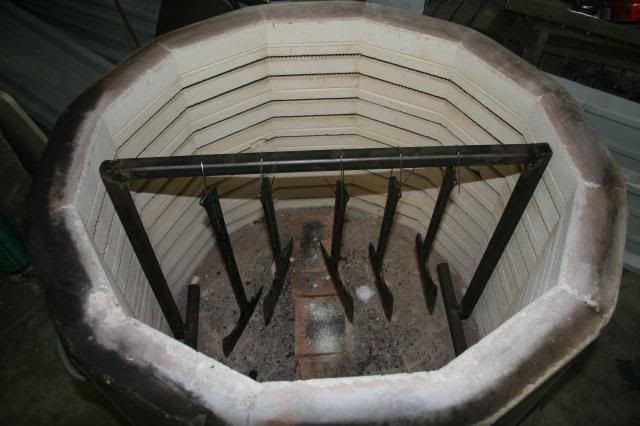
Here they are on the combination tempering/coating baking rack in the big 3 phase kiln that I use for such operations. At this point, they've been normalized, ground, and hardened.
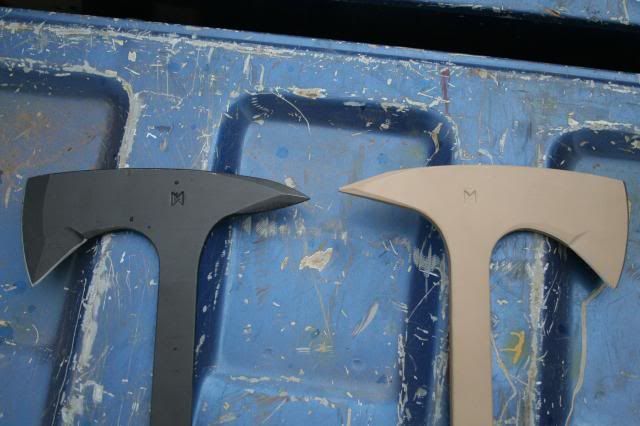
And the two heat treatment devices side-by-side. The new furnace, dedicated to the hardening phase, is on the right. The 3 phase kiln, dedicated to tempering and baking on the finish, is on the left. The first tempering cycle is just starting and the kiln isn't up to temp yet.

The rack I use for normalizing is to the right of the furnace, with only one foot visible. The quench tank is just out of the shot on the right and forward.
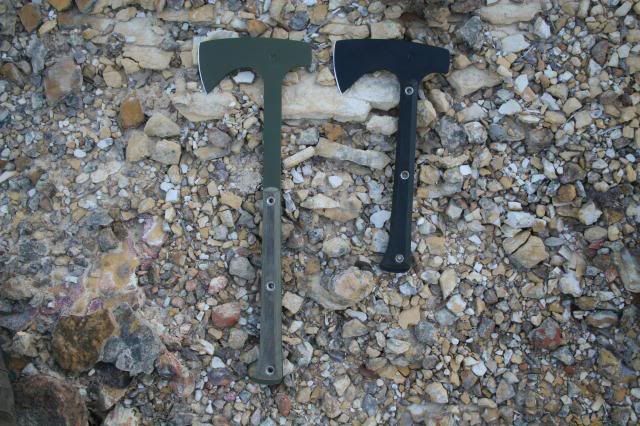
Also, after wrestling with the idea for a while, I've decided to name my models. Model names for blades can get really gimmicky for some folks, but I wanted something straightforward that would be evocative of the intended use.
So, I chose War Chief, Wrecker, and Woodsman.
War Chief (combat spike) on the left, Wrecker (pry spike) on the right.
And Woodsman (hammer poll):
I have a pretty good handful of orders to get made, and should start putting up some finished pictures in the next few days, all going well.")
Here's the first batch of five. I plan on working on six at a time in the future, but I wanted to get these finished and to the customers ASAP.

All of them have sharpened inner beards except the second hammer poll from the left. I know some of them are hard to see in the pic. It was taken under fluorescent lights at night in my shop.
Here they are on the combination tempering/coating baking rack in the big 3 phase kiln that I use for such operations. At this point, they've been normalized, ground, and hardened.

And the two heat treatment devices side-by-side. The new furnace, dedicated to the hardening phase, is on the right. The 3 phase kiln, dedicated to tempering and baking on the finish, is on the left. The first tempering cycle is just starting and the kiln isn't up to temp yet.

The rack I use for normalizing is to the right of the furnace, with only one foot visible. The quench tank is just out of the shot on the right and forward.
Also, after wrestling with the idea for a while, I've decided to name my models. Model names for blades can get really gimmicky for some folks, but I wanted something straightforward that would be evocative of the intended use.
So, I chose War Chief, Wrecker, and Woodsman.
War Chief (combat spike) on the left, Wrecker (pry spike) on the right.

And Woodsman (hammer poll):

I have a pretty good handful of orders to get made, and should start putting up some finished pictures in the next few days, all going well.


