bladegrinder
Well-Known Member
Justin, the thread I use is white Tandy brand I buy from Springfield leather. I've bought their brand but it's kind of an off white color so I use Tandy brand...#1220. I believe it's #5 in size.
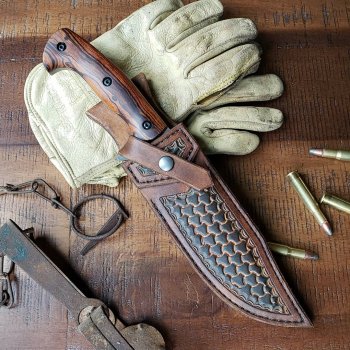
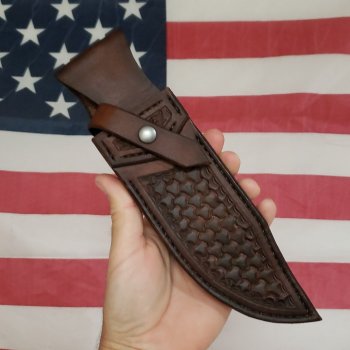
I use a #5 and #6 stitching wheel to mark my stitch holes and I use an awl to punch my holes, it's seems like I'm alone in the part of using an awl instead of a drill but that's the way I've been doing it for years and I'm happy with the way I do it and the results I get. it takes me about 5 min. to make my holes in a standard sheath.
As far as the roughness on the inside, when the leather is flat I use a little gum tragacanth and rub it on the rough side and smooth it down with a piece of smooth bone. I also use the gum to finish the edges, I believe it works better than plain water.
speaking of water, I only use distilled water, no tap or well water.
When I have everything cut out and sanded-shaped just how I want it, I lay it out and put a moderate amount of neetsfoot oil on it, the next day it will look like you never did it...but it's in there, and it helps to keep the leather supple and not get funky or have creases at the bends, I also think it helps with applying the stain. I use a dauber for the stain and apply 4-5 coats, almost to where it won't take anymore and wipe the last coat with some paper towels.
After everything dries up it's ready to glue up and stitch. when it's finished I use and old cotton tee shirt and rub the daylights out of it to remove any dye pigment on the surface.
At the very end, I use an airbrush and put a couple light coats of resolene. I let that dry until the next day, then I put on a coat of Montana pitch blend, I let it sit for another day then hand buff it with a clean piece of tee shirt.
While my process differs from others....because everybody does things differently and seems to be drawn out and takes a few days, I'm happy with the finished product. and like knife making...this is no race to the finish.
if someone is paying big bucks for a knife they expect a nice sheath to go with it. that's why I say sheaths help sell knives.
I've seen people at shows with knives for sale with no sheath at all, while that's probably better that having a crappy sheath sitting next to it I just don't get that business model.
I've been carving some of my sheaths with a swivel knife and trying inlays and I believe their getting better, it just takes time and trying different things just like knife making.
Everybody's got their favorite knife they make but we all know change is good. it's the same doing leather, you just got to keep at it. even if it may not be as interesting or as fun as making a knife, I believe the end product is a direct refection on your over all knife making skills.
And to that......I hope to see more fellow knifemakers here jump on the leather band wagon and add more tips for us that do leatherwork.
EDIT: I also use the harness needles that Gene posted above....


