You are using an out of date browser. It may not display this or other websites correctly.
You should upgrade or use an alternative browser.
You should upgrade or use an alternative browser.
Stitching
- Thread starter Kevin Zito
- Start date
Kevin Zito
KNIFE MAKER
Too expensive lol.Sometimes it's a sewing machine...
Kevin Zito
KNIFE MAKER
Hmmm I guess I do know someone who can “hypothetically” stitch them for someone on a fancy machine lol.not saying to buy one...just when I see perfect stitches that's what I usually think.
Without a machine it’s all about how hard you pull once you’ve made the stitch. Consistent tension, is the key. Also it doesn’t hurt to wet the leather a little bit as you stich. I’m not saying I can do it like that, but I’ve seen it done and I’ve been taught that way.
Also you can run your stitching wheel back over the thread and it will help seat it in the grooves and leave a more pronounced stitch line.
Also you can run your stitching wheel back over the thread and it will help seat it in the grooves and leave a more pronounced stitch line.
Kevin Zito
KNIFE MAKER
Thanks for the responses and information. I think I must just be pulling too tight.
C Craft
Well-Known Member
Kevin not sure if this will help or not you can use a leather groover, to make a track for the stitching! 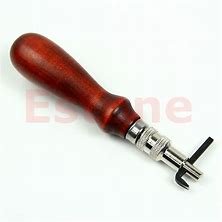 Layout down that track with a stitching wheel.
 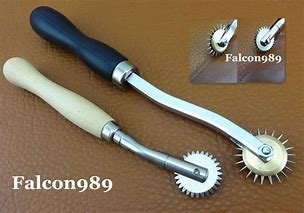 Or the multi stitch approach works as well!
 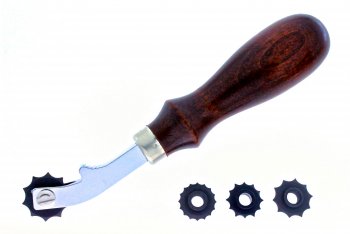 Use only the best linen thread!
 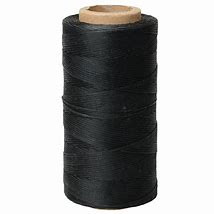 Wax it with a blend of beeswax and paraffin wax!! About a sixty/forty mix. Anyway heavier on the beeswax. You can buy already waxed thread but it is more expensive and in my experience you will still need to wax the thread yourself!! Wax the piece you got to sew with. Pull the stitch down to the bottom and stop, if you are having to bear down on it something is wrong. Anytime you notice the thread hard to pull, stop and rewax the thread. You will accomplish this easy with the waxed lined.
When done stitching go back over the stitching with a wheel and it make all of it lay down evenly!! Hope this helps!!
You will be surprised at the difference!!
 Layout down that track with a stitching wheel.
  Or the multi stitch approach works as well!
  Use only the best linen thread!
  Wax it with a blend of beeswax and paraffin wax!! About a sixty/forty mix. Anyway heavier on the beeswax. You can buy already waxed thread but it is more expensive and in my experience you will still need to wax the thread yourself!! Wax the piece you got to sew with. Pull the stitch down to the bottom and stop, if you are having to bear down on it something is wrong. Anytime you notice the thread hard to pull, stop and rewax the thread. You will accomplish this easy with the waxed lined.
When done stitching go back over the stitching with a wheel and it make all of it lay down evenly!! Hope this helps!!
You will be surprised at the difference!!
Kevin Zito
KNIFE MAKER
Thanks, CC! I’m going to order one of those wheel things and I’m definitely going to try the wax. I’m using waxed thread, but as you said, I might need more. Thanks for the response.Kevin not sure if this will help or not you can use a leather groover, to make a track for the stitching! View attachment 66048Layout down that track with a stitching wheel. View attachment 66049Or the multi stitch approach works as well! View attachment 66050Use only the best linen thread! View attachment 66051Wax it with a blend of beeswax and paraffin wax!! About a sixty/forty mix. Anyway heavier on the beeswax. You can buy already waxed thread but it is more expensive and in my experience you will still need to wax the thread yourself!! Wax the piece you got to sew with. Pull the stitch down to the bottom and stop, if you are having to bear down on it something is wrong. Anytime you notice the thread hard to pull, stop and rewax the thread. You will accomplish this easy with the waxed lined.
When done stitching go back over the stitching with a wheel and it make all of it lay down evenly!! Hope this helps!!
You will be surprised at the difference!!
C Craft
Well-Known Member
Kevin when I am stitching I always keep a ball of wax nearby and if I feel the thread dragging I grab it and wax the thread again. Think of it this way, you are pulling the length of the thread thru the hole each time and the friction of pulling it thru the hole continually drags against the thread, stripping the wax off!! The stitch wheel is a trick I learned from a DVD set by Chuck Burrows! https://www.amazon.com/Custom-Knife-Sheaths-Chuck-Burrows/dp/B001HWBVJY
In fact there is a lot of good info on those DVD's. As he says on the DVD's it is the small details that make the difference in an average sheath and a professional sheath!!
Another source for learning all the in and outs is Paul Long! He is the sheath Guru. That is what he does. He is not a knife maker he says but I have built a lot of sheaths for knives!!
https://www.amazon.com/Knife-Sheath...&sr=1-2-fkmr1&keywords=Paul+Long+sheath+maker
https://www.amazon.com/Folder-Sheat...&sr=1-1-fkmr1&keywords=Paul+Long+sheath+maker
Here is some good info!! https://knifedogs.com/threads/sheathmaking-tips-and-tricks-and-getting-started.728/
Here is some more of Paul's work!
https://knifedogs.com/threads/paul-long-sheaths.24251/
Doug Lester
Well-Known Member
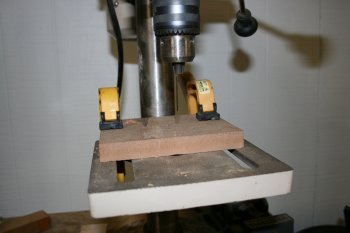
This is a jig that I made to use with my counter top drill press. The board has two holes in it. One is in the center so that I can pre punch holes in flat leather. I have another hole at the edge of the board that allow me to have the edge of the sheath flat while do the hole punching. The drapery needle that I have chucked up pre-punches the holes for the sewing needles that I use later. (Ignore the fact that the needle is not chucked up straight in the jaws of the chuck)
You don't drill the holes in, you just push the needle through. It make sewing a lot easier later on and it's way easier to use than an awl.
Other than that I would highly recommend that you get a stitching pony if you don't have one already. It's like a third hand that holds you sheath in place while you do your stitching with your other two. Learn the saddle stitch and you'll not need to learn any other.
Doug

Kevin Zito
KNIFE MAKER
Thanks, CC! Yeah that guy is a beast!!! This is great information!!!Kevin when I am stitching I always keep a ball of wax nearby and if I feel the thread dragging I grab it and wax the thread again. Think of it this way, you are pulling the length of the thread thru the hole each time and the friction of pulling it thru the hole continually drags against the thread, stripping the wax off!! The stitch wheel is a trick I learned from a DVD set by Chuck Burrows! https://www.amazon.com/Custom-Knife-Sheaths-Chuck-Burrows/dp/B001HWBVJY
In fact there is a lot of good info on those DVD's. As he says on the DVD's it is the small details that make the difference in an average sheath and a professional sheath!!
Another source for learning all the in and outs is Paul Long! He is the sheath Guru. That is what he does. He is not a knife maker he says but I have built a lot of sheaths for knives!!
https://www.amazon.com/Knife-Sheath...&sr=1-2-fkmr1&keywords=Paul+Long+sheath+maker
https://www.amazon.com/Folder-Sheat...&sr=1-1-fkmr1&keywords=Paul+Long+sheath+maker
Here is some good info!! https://knifedogs.com/threads/sheathmaking-tips-and-tricks-and-getting-started.728/
Here is some more of Paul's work!
https://knifedogs.com/threads/paul-long-sheaths.24251/
Kevin Zito
KNIFE MAKER
This is fantastic!!! Question: what size thread do you use, and do you know the size of the needle?This is a jig that I made to use with my counter top drill press. The board has two holes in it. One is in the center so that I can pre punch holes in flat leather. I have another hole at the edge of the board that allow me to have the edge of the sheath flat while do the hole punching. The drapery needle that I have chucked up pre-punches the holes for the sewing needles that I use later. (Ignore the fact that the needle is not chucked up straight in the jaws of the chuck)
You don't drill the holes in, you just push the needle through. It make sewing a lot easier later on and it's way easier to use than an awl.
Other than that I would highly recommend that you get a stitching pony if you don't have one already. It's like a third hand that holds you sheath in place while you do your stitching with your other two. Learn the saddle stitch and you'll not need to learn any other.
Doug
View attachment 66056
Doug Lester
Well-Known Member
I'm not sure of the size of the drapery needle anymore. Just get one that looks like it's just a little larger than the needles you hand sew with.
I second keeping a block of bee's wax handy. I drag my thread through the block several times before I start to stitch.
Doug
I second keeping a block of bee's wax handy. I drag my thread through the block several times before I start to stitch.
Doug
C Craft
Well-Known Member
Thanks, CC! I’m going to order one of those wheel things and I’m definitely going to try the wax. I’m using waxed thread, but as you said, I might need more. Thanks for the response.
Those wheel things are overstitch wheel for leather. The reason for multiple wheels is each one denotes how many stitches per inch, (or how close the stitch holes). Some like the interchangeable wheels and some like to have one for each different stitch layouts! Once you cut the grove for the thread to lay into. Then you run the wheel down groove and it lays out the spacing for the stitches. You use the marks to drill/awl the holes. Then when finished stitching you roll it back over the thread, and it lays down any unruly stitches!!
Here is what the stitching pony looks like! https://www.bing.com/images/search?q=stitching+pony+plans&qpvt=stitching+pony+plans&FORM=IGRE
You can build it where you can sit and use it between your legs or just clamp it down to a flat surface. They are not hard to build!
Robert66
Well-Known Member
A while ago I found out that a seriously ill young male leatherworker had died leaving loads of gear including 2 sewing machines in his will, the downside was his solicitor being the administrator sent it all to auction despite his mother wanting to do a deal with with me.
I have learned that the auction was a flop not yielding much dosh.
Shame.
I have learned that the auction was a flop not yielding much dosh.
Shame.

