antigoth24
Well-Known Member
Well I have had this project kicking around in my head for a while and finally have some time to get around to it. I have been entranced by Japanese blades (as many of us are) for some time, specifically in hamon and hada development. It was last year when I saw some of J.D. Smith's work that I became really inspired to try my hand at it; BUT in an American style. Can anyone say harpoon point bowie? This will be a pretty detailed WIP thread that will be done in live time, so any questions or pointers are always welcome. ")
I started working on this project about two weeks ago and in a somewhat unorthodox manner. It started off in the usual manner for me of first getting my ideas down on paper and then roughing out a wooden template to use for measurements while forging.
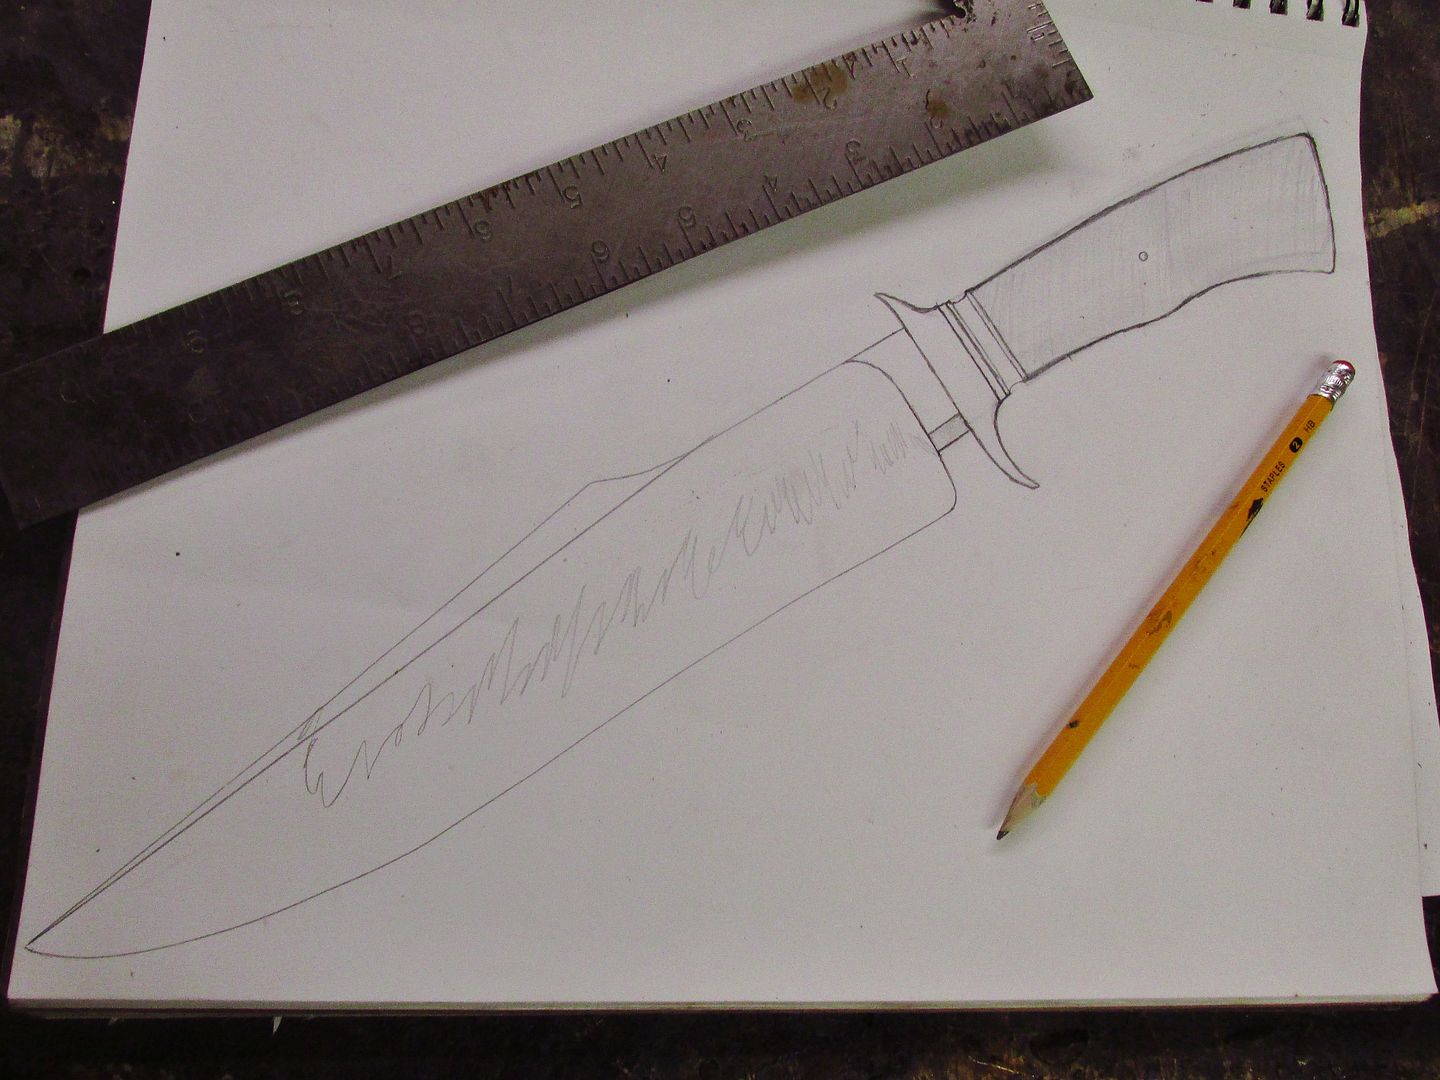
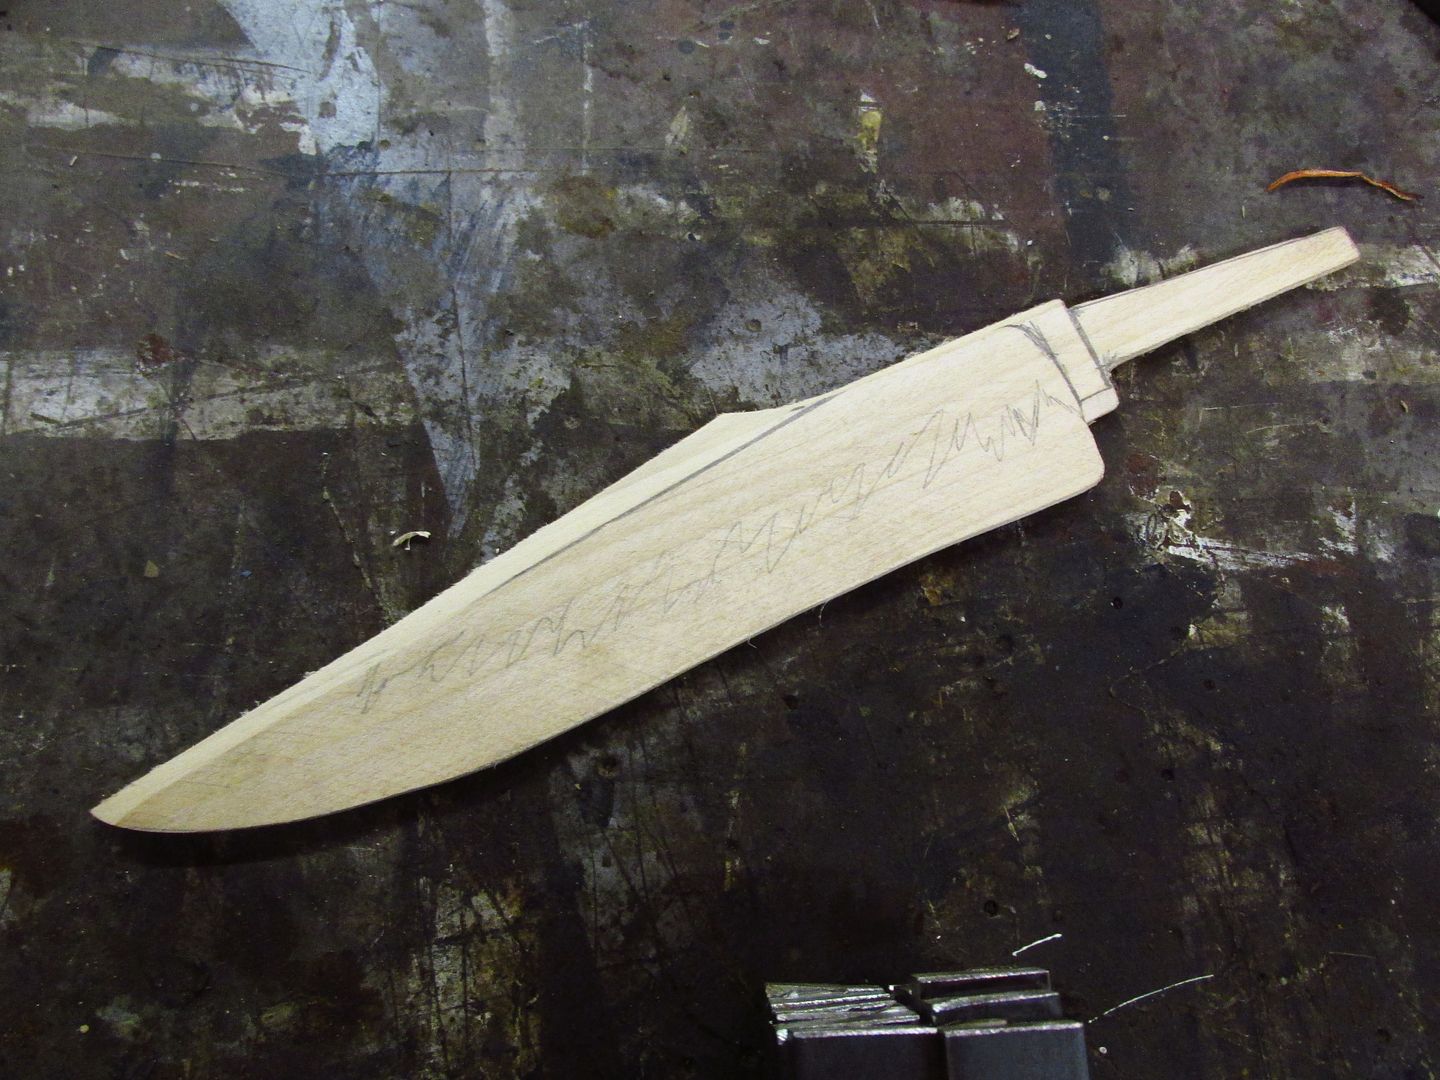
This is going to be a fairly large blade at 10 1/2 inches long x 2 inches wide. My plan is to have damascus and bronze spacers with a handle made from block carbon fiber and AAA curly koa. Everything about this knife is supposed to be a blend between Asian and American styles, old and modern techniques/materials. I'm pretty pleased with the overall design, although the handle shape still requires some tweaking.
The next thing I had to do was sit down and figure out my blade and guard steel mixes and patterns. As I said before I wanted this blade to have a fairly prominent hada and be able to produce a very vibrant hamon. So after looking around at other peoples work I saw that a mix of 1045 and 1095 or W2 produced very good results, so I decided I would work with that as well. But never being able to leave well enough alone I decided to change the mix up slightly and give it more of a Japanese flavor, so I got in touch with Aldo to get some Hitachi #2 blue sand steel (the same as is used in Japanese cutlery and sometimes swords). Metallurgically speaking Hitachi #2 and 1095 are fairly similar in their make up the primary difference being that Hitachi #2 has approximately 1.16% carbon whereas 1095 has .96% carbon. So when doing some off the cuff calculations with the 1045 dropping the overall carbon content a fair amount the resulting steel should average out to near a 1084 equivalent. Which is perfect for a heavy bowie/ chopping knife. The only dilemma I faced at this point was that I now had to wait for the hitachi #2 to come in the mail and I began to grow antsy wanting to start this project, and so I did.
I decided for the guard I wanted to do a simple low layer but tightly twisted damascus so that is where I started.
Prepping materials:
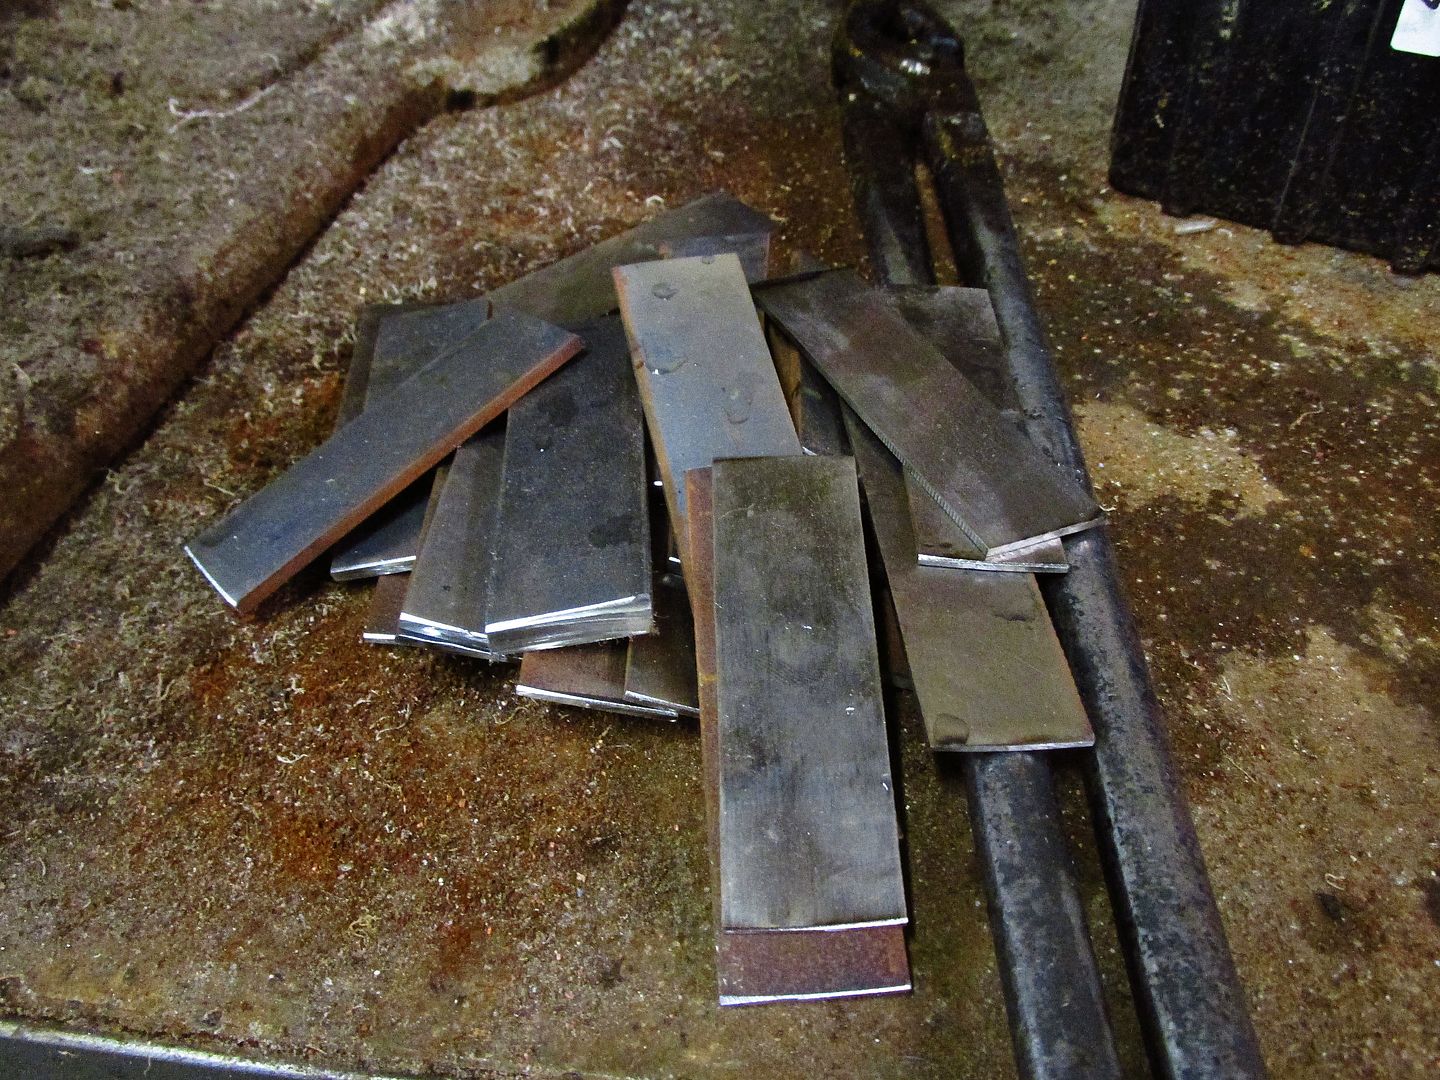
On the left you see the material for the guard and spacer while on the right part of the stack for the blade. I was running low on 1.5" width stock so I decided to use my remainder of my 1" stock and consolidate it into more usable material. This is a relatively simple thing to do as you weld to parrallel stack together and now have double your stock size.
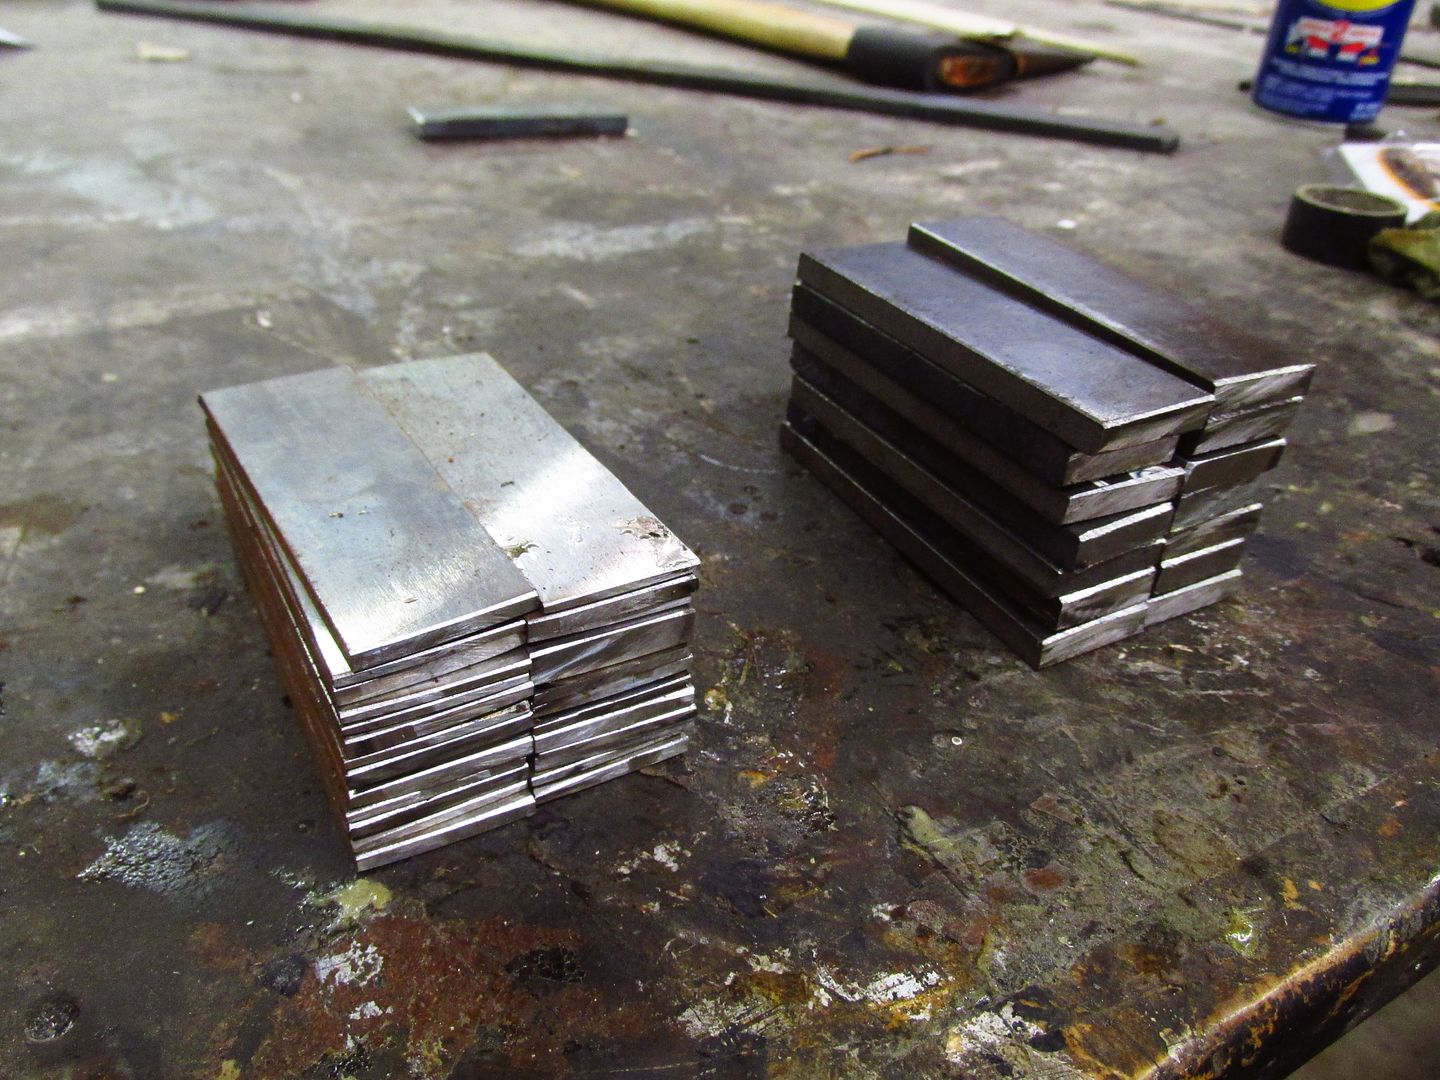
At this point the billet is 3.5 in x 2.5 in x 2 in and 14 layers so there is plenty of meat there to work with.
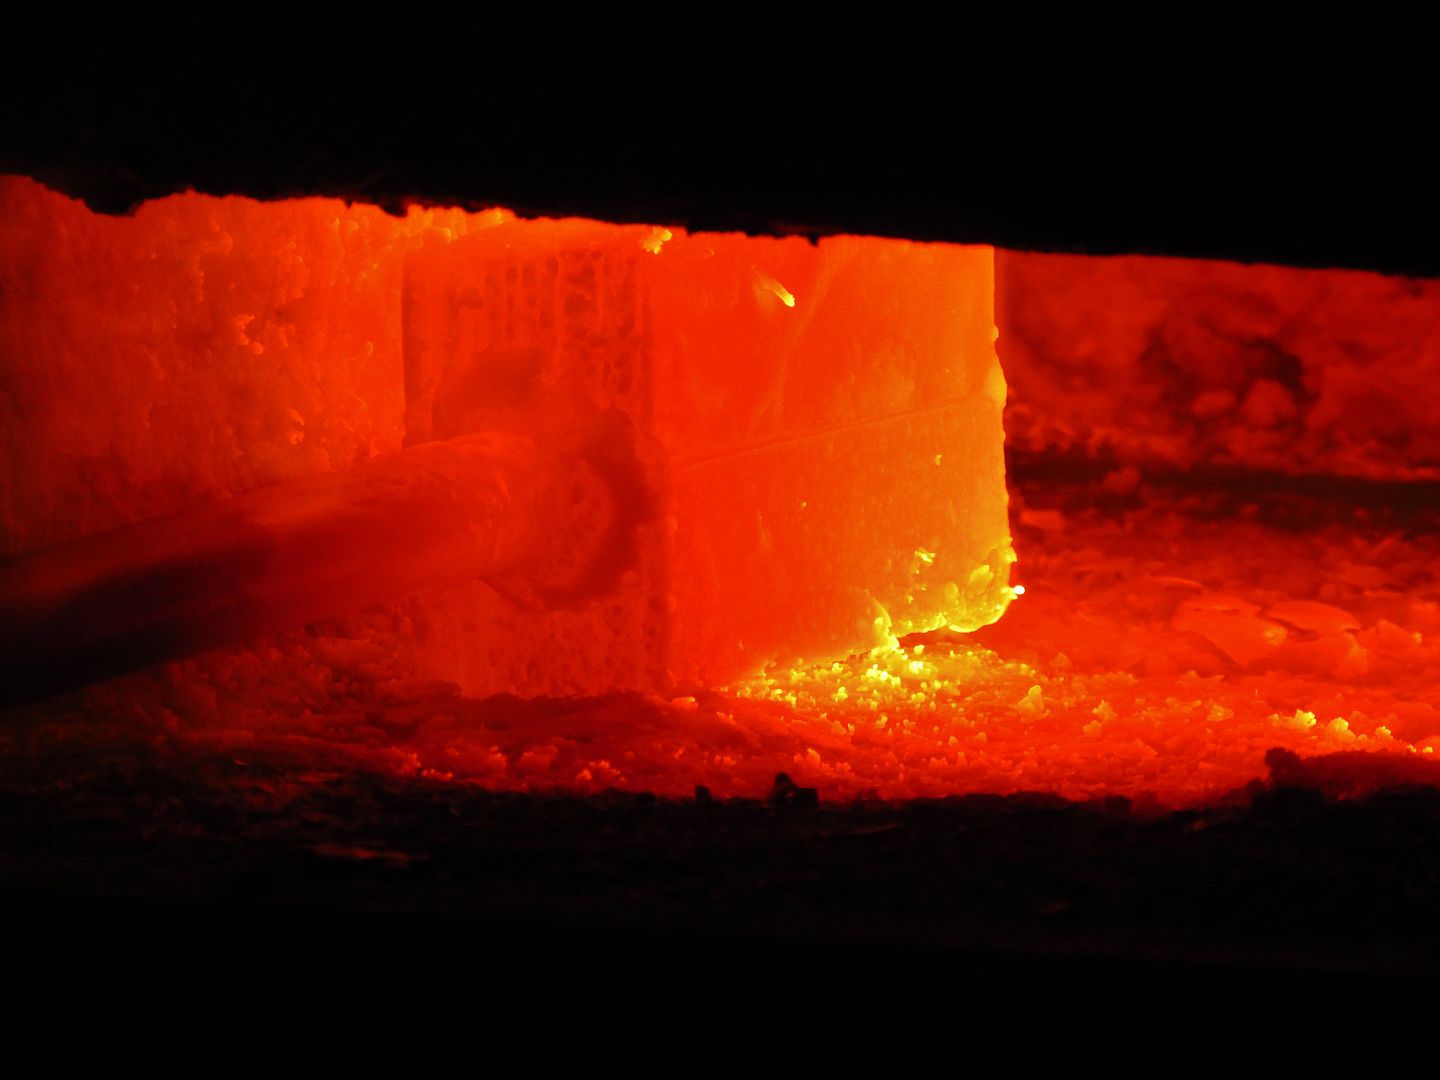
Heating up to welding temp:
Drawing out to twice its length under the powerhammer: (this tool has made my life so much easier!)
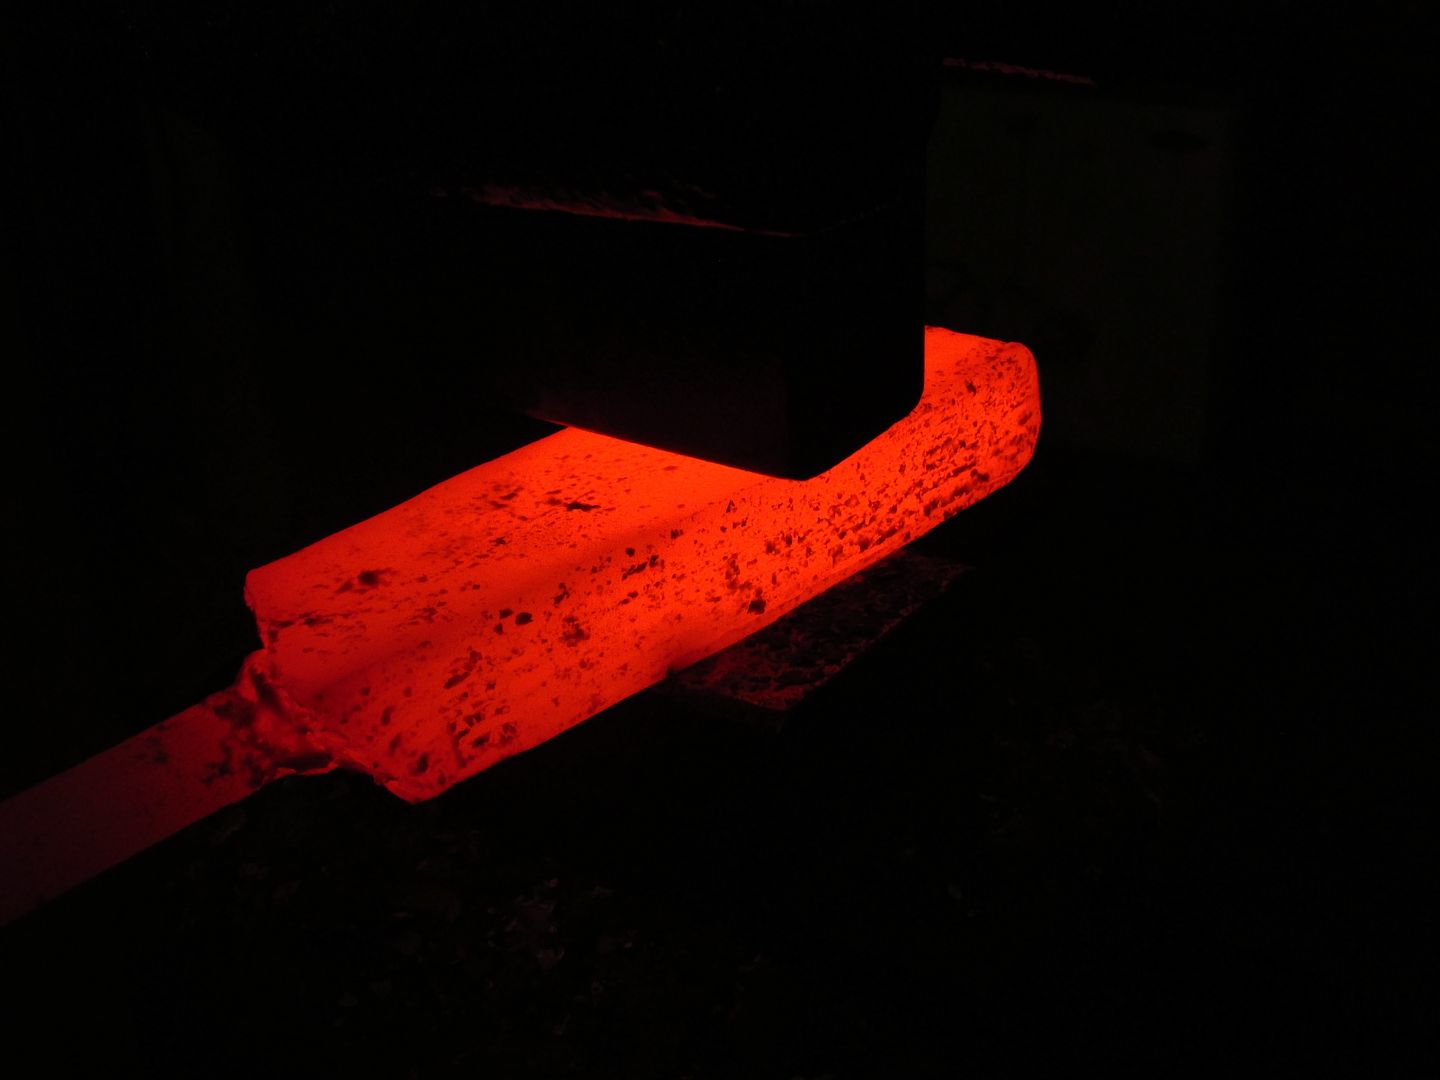
It is then cut and folded and prepared for another welding pass.
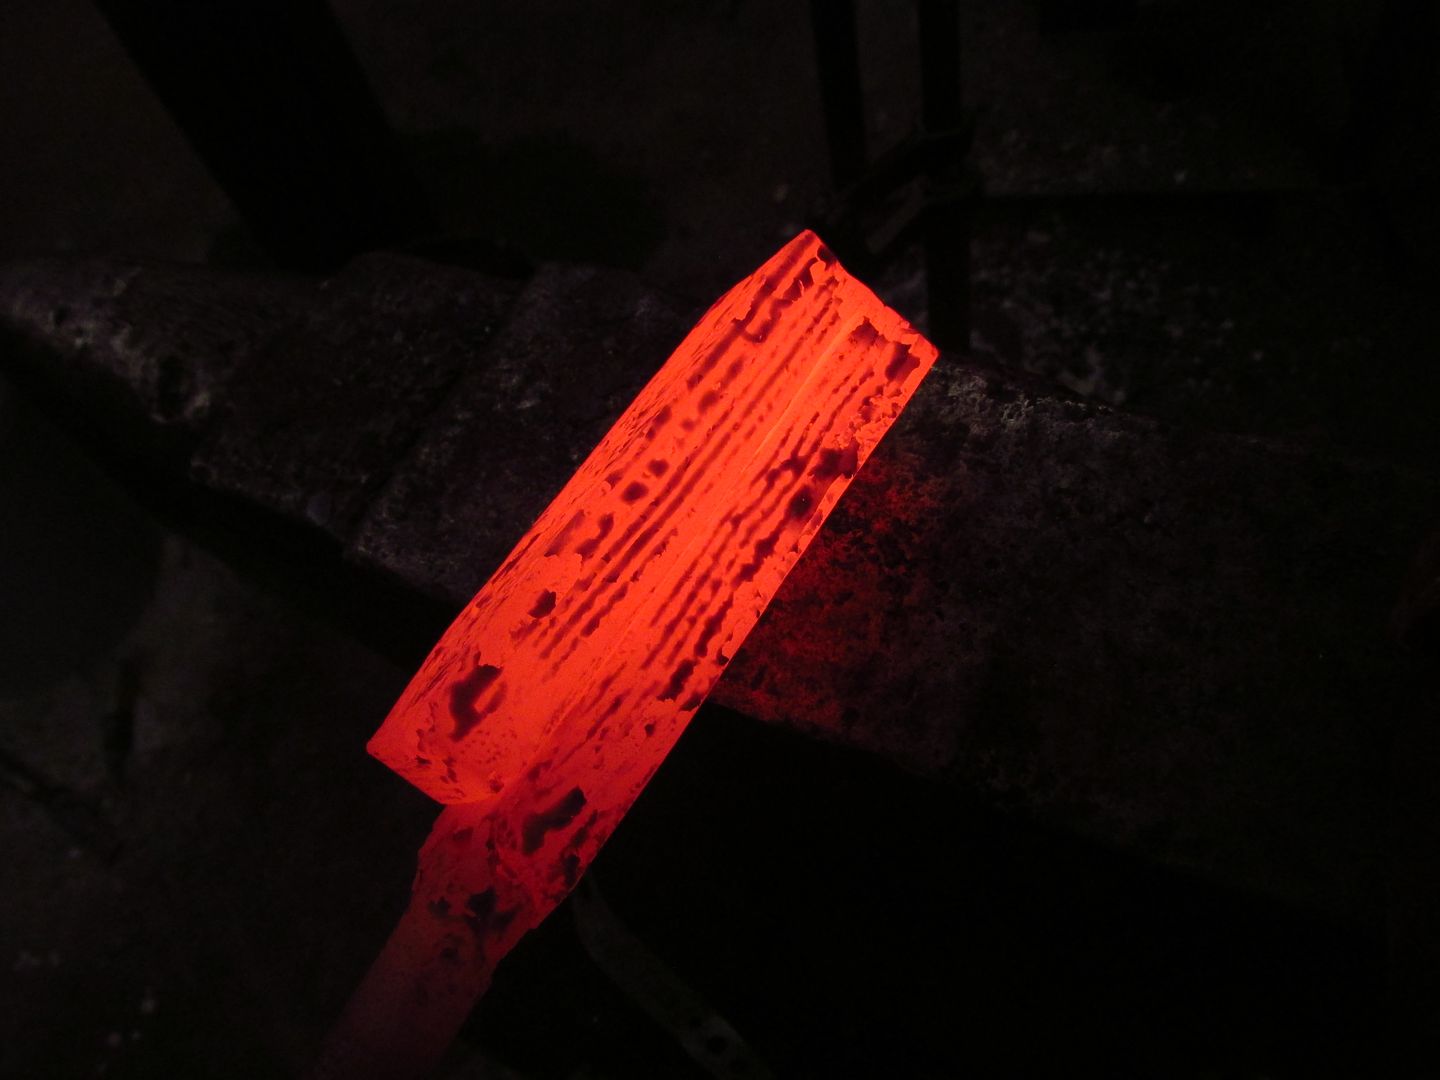
After the next welding (28 layers) I draw it to 1 1/2 inch square and prepare for twisting.

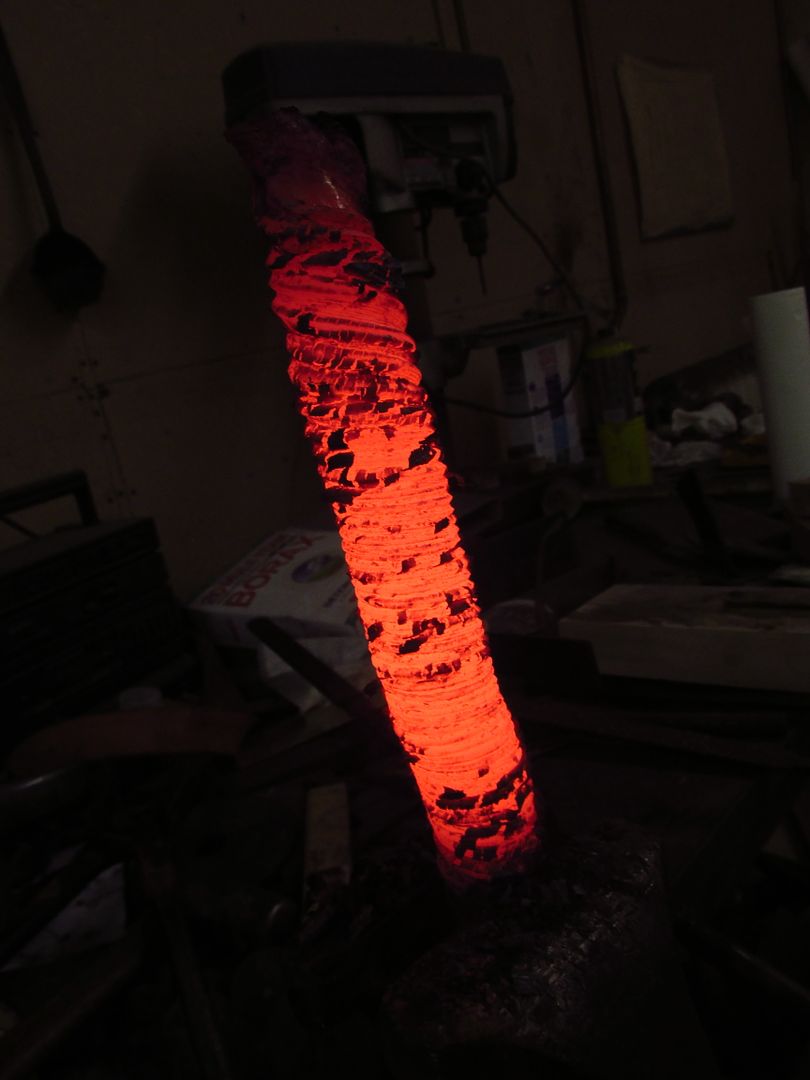
Then let the twisting commence!
I ended up giving it a few more twists after this shot but I felt it was close enough to not require an additional photo. I have to say this idea for the guard and spacer was definitely inspired by Karl Anderson's recent twist bowie, and while this does not yet resemble the level of twist he did it was sufficient for style I was going for. It was also very exciting because this was the largest bar of damascus I have ever twisted and so tightly.
Next I flattened it into a 1 1/4 in x 1/2 in x 12 inch bar, quickly ground the surface and etched to check the pattern:
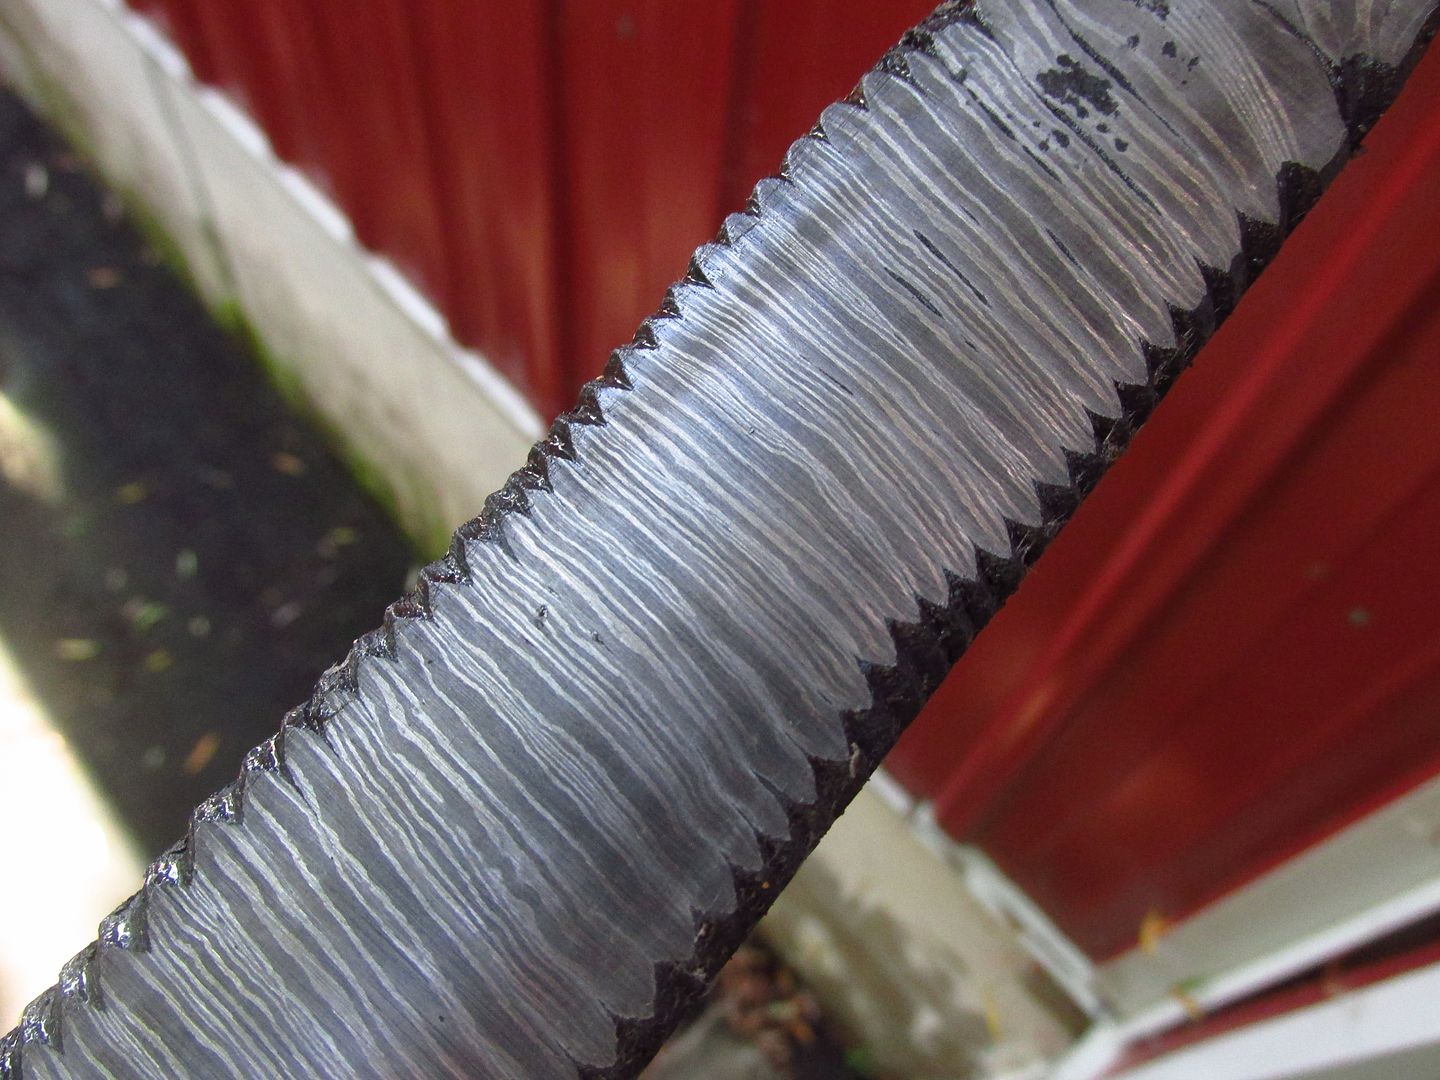
Nice and tight.
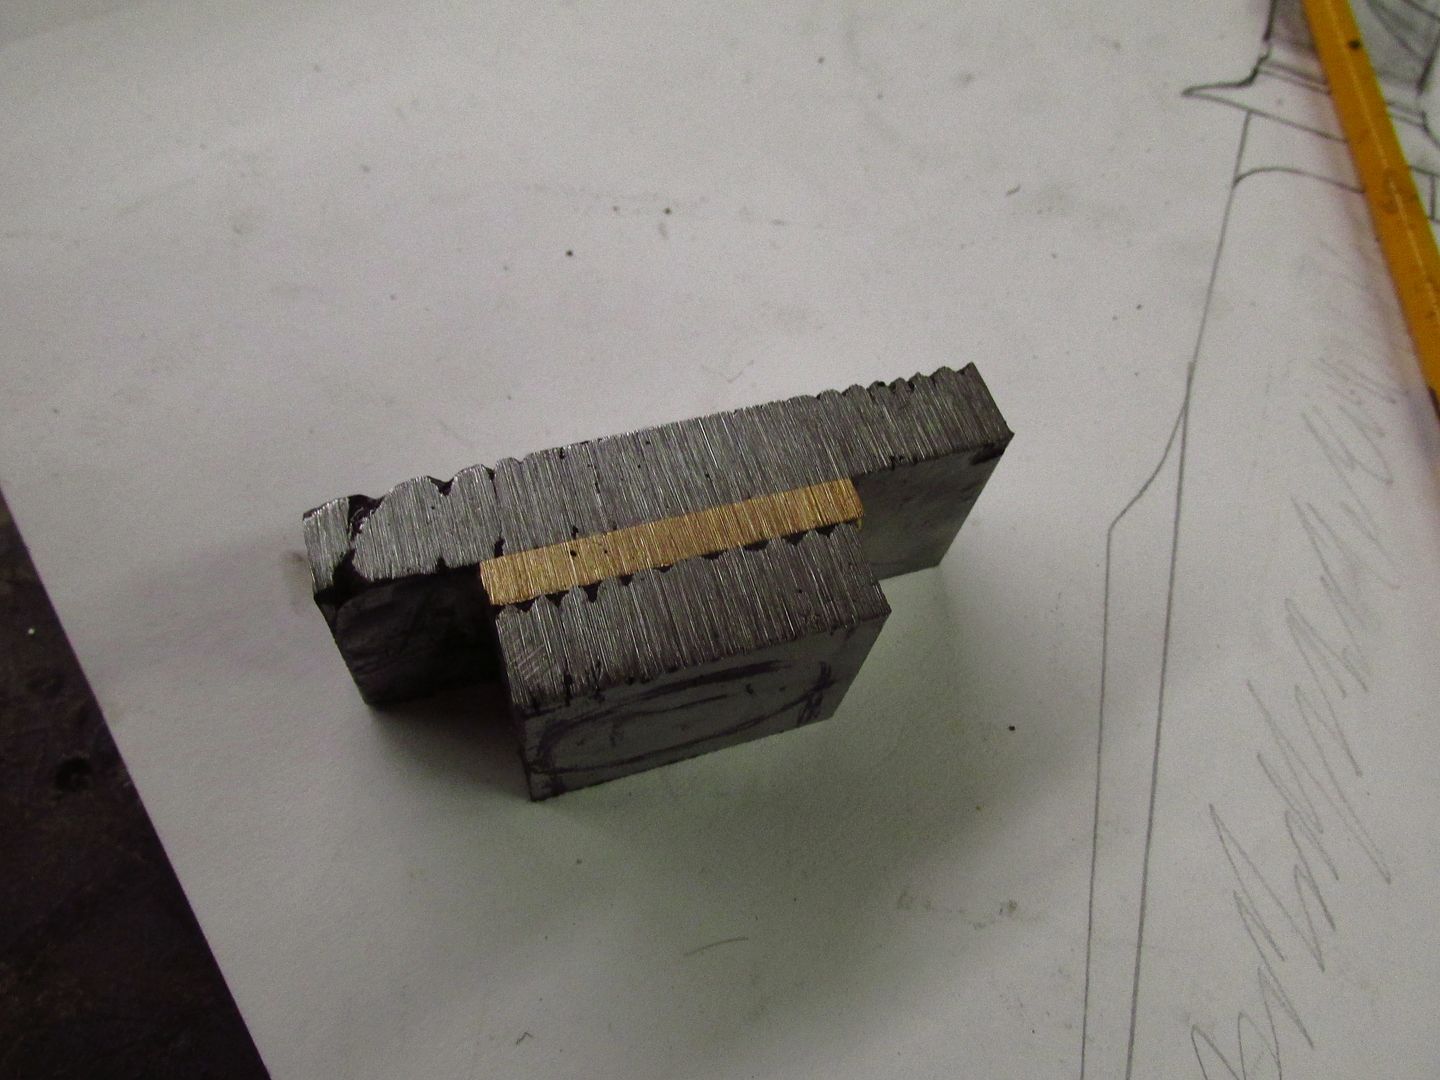
I next started to cut the pieces I needed do to length.
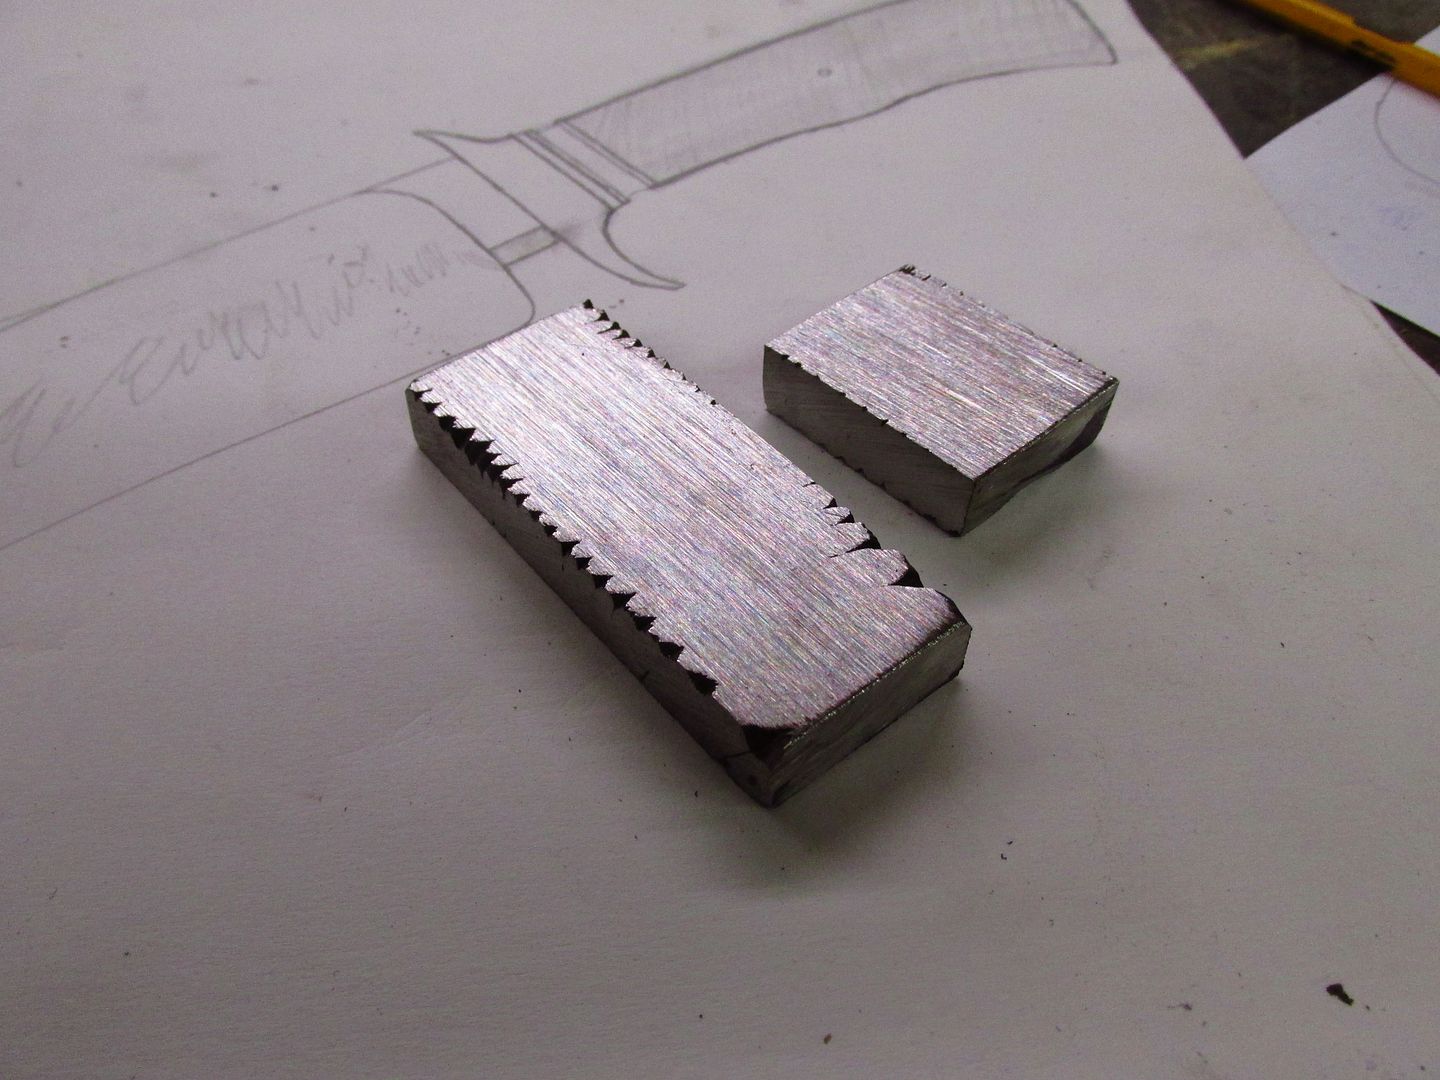
Then I cut the bronze spacer as well and brought it to slightly over 1/8 inch thick:
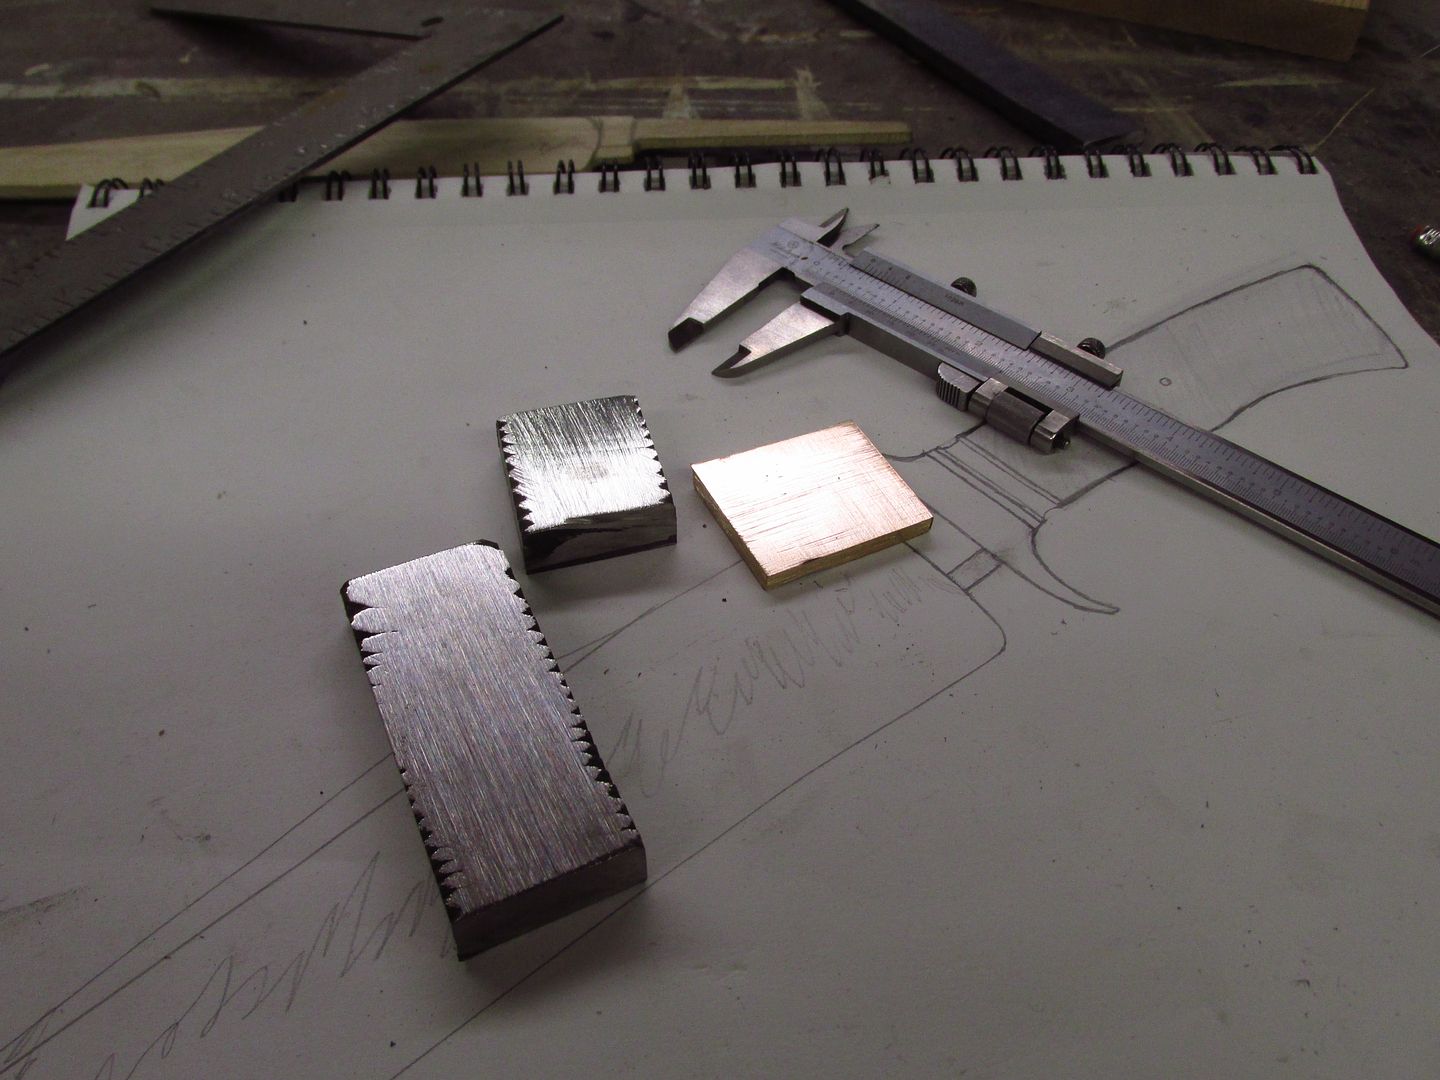
That this point all of the spacers and guard are roughly flattened on my grinder, but now I start to sand them on a granite block to get them closer to true flatness.
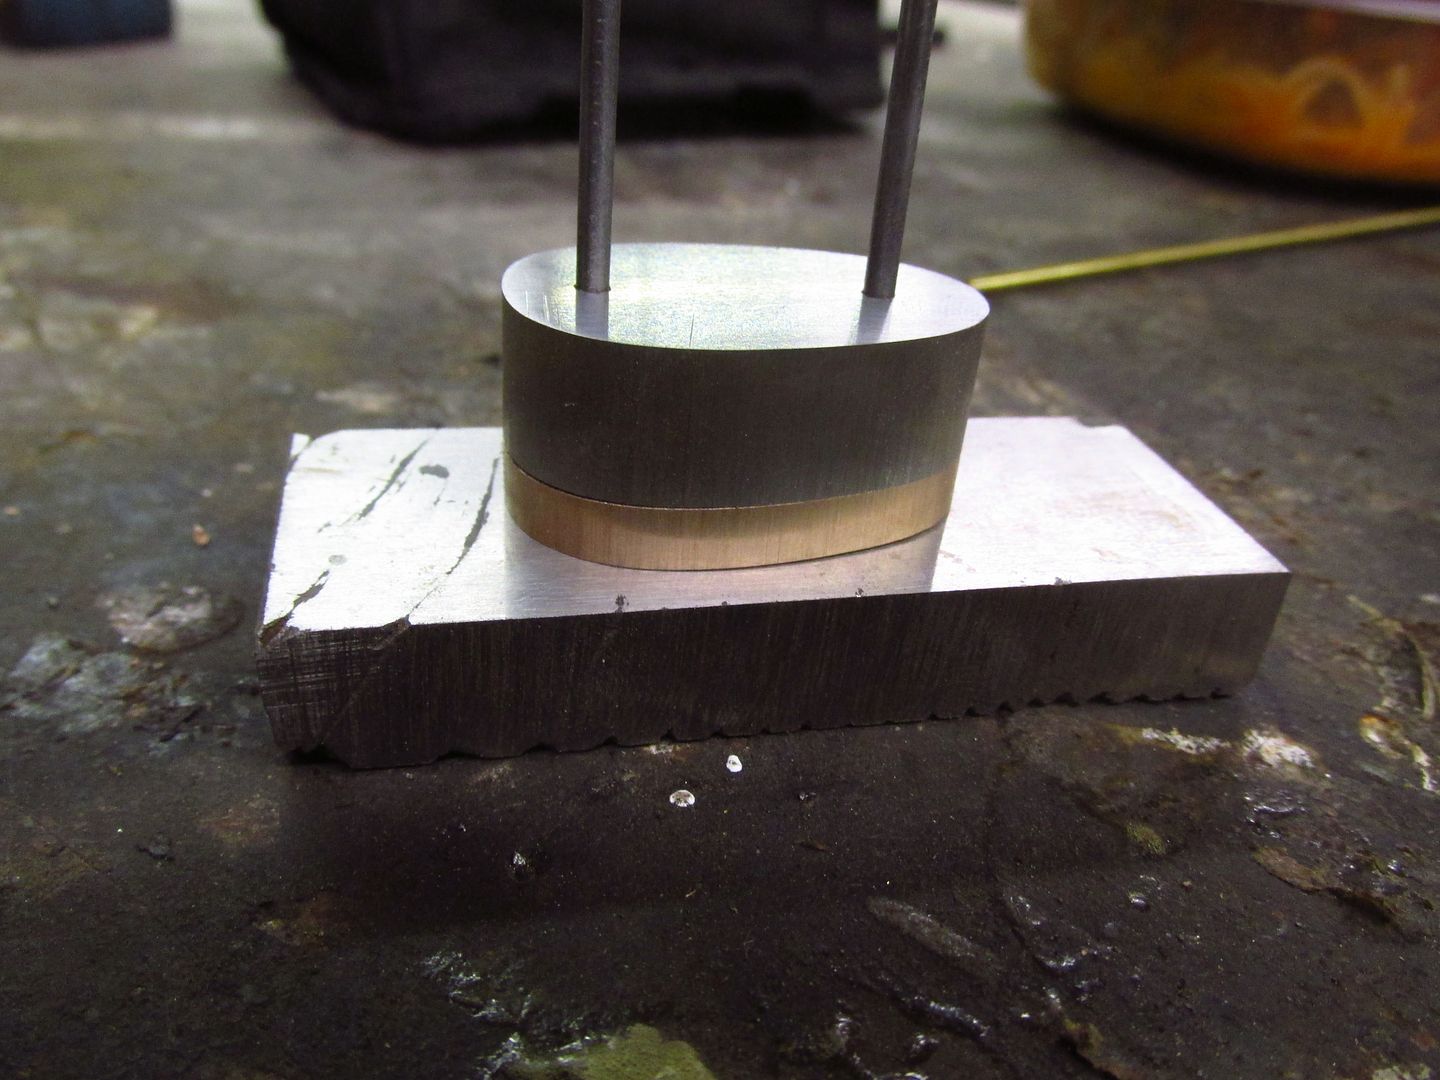
Then I superglue then together to prepare them for have pin hole drilled.
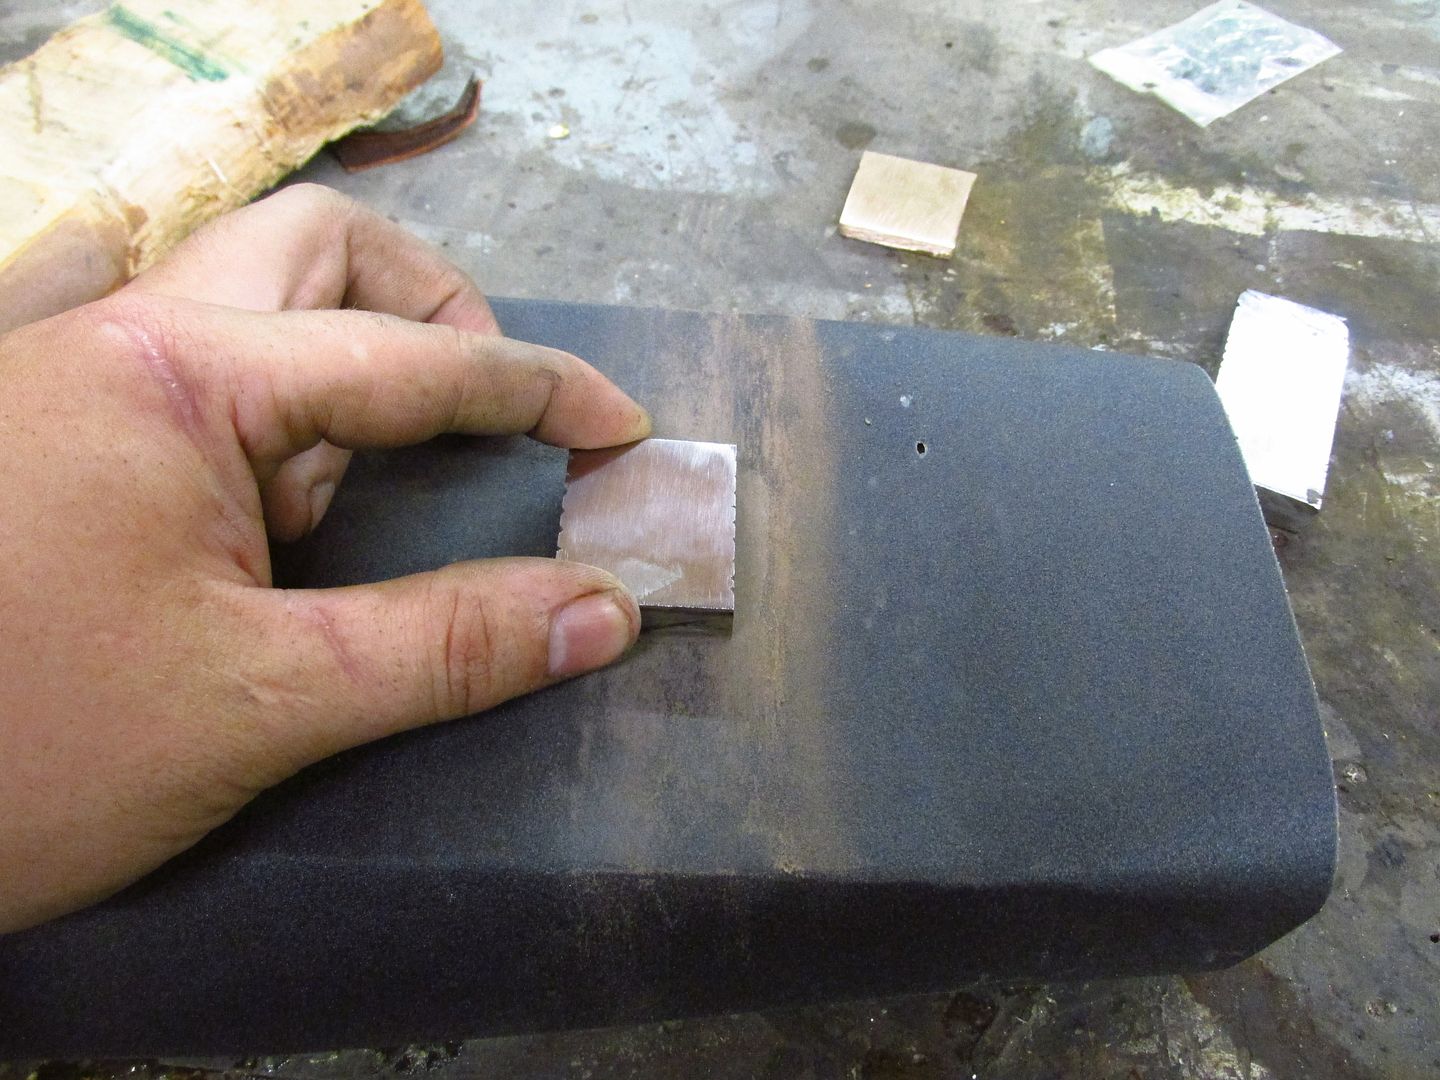
At this point I was going back and forth because the scale from the twists was messing with my eye (even when using high powered lighting to check and see if the seems were close) so I ground in slightly to check.
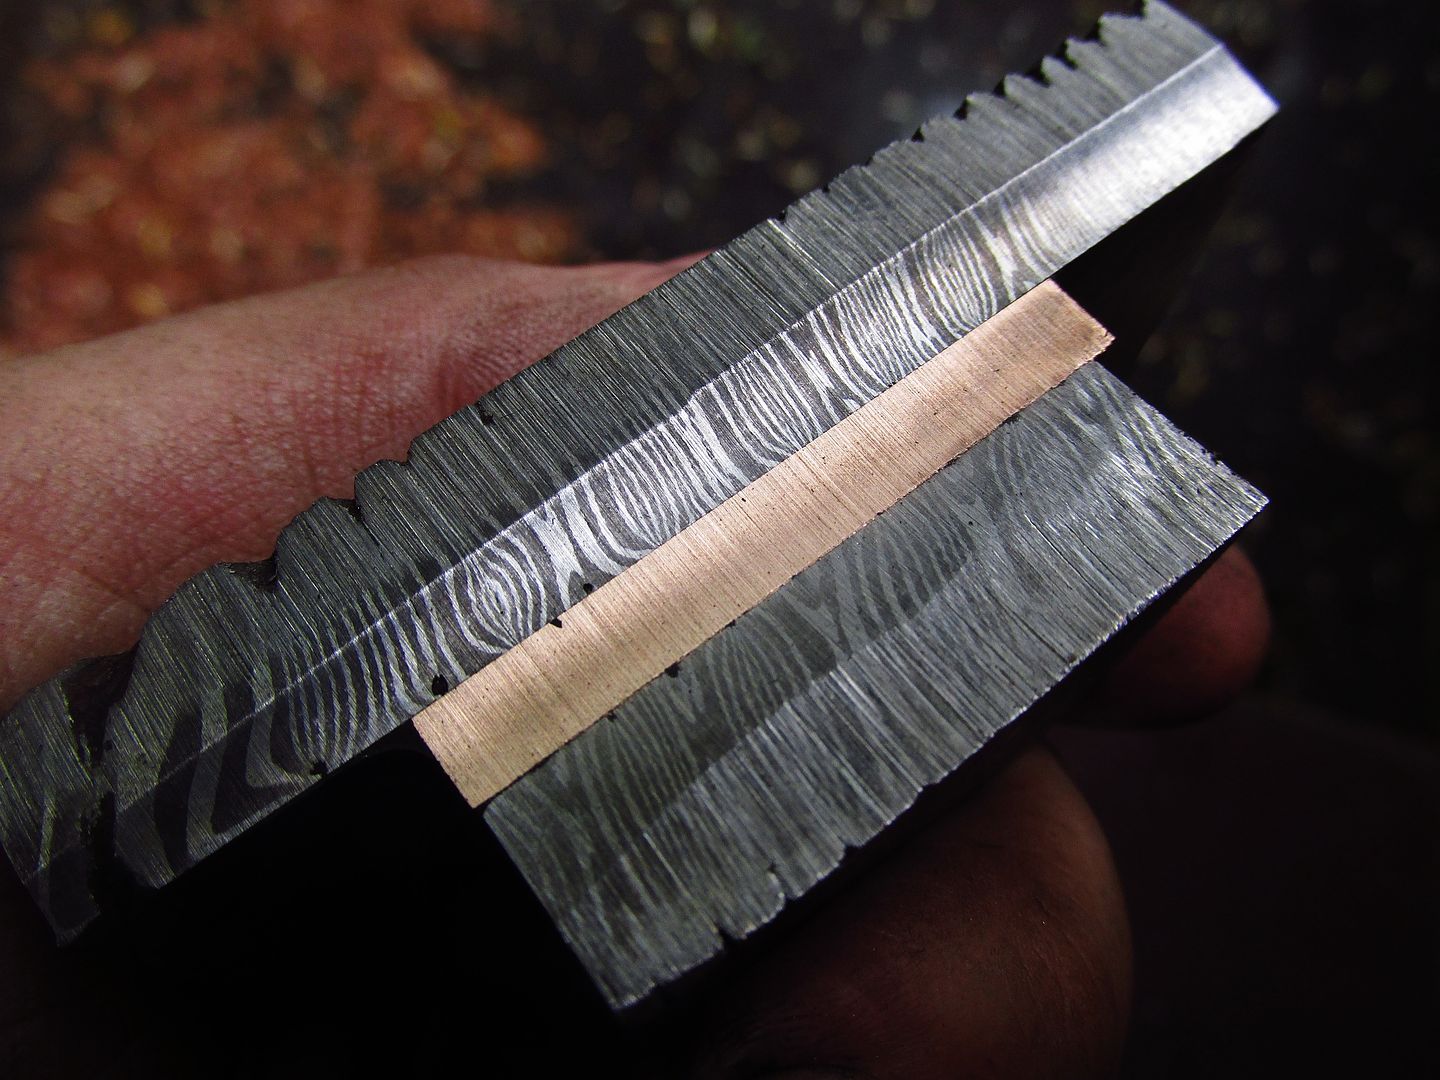
Okay so maybe I snuck in a light dabbing of acid with a Q-tip to check the pattern but the joint looks pretty good. Close enough to drill the pin holes anyway.
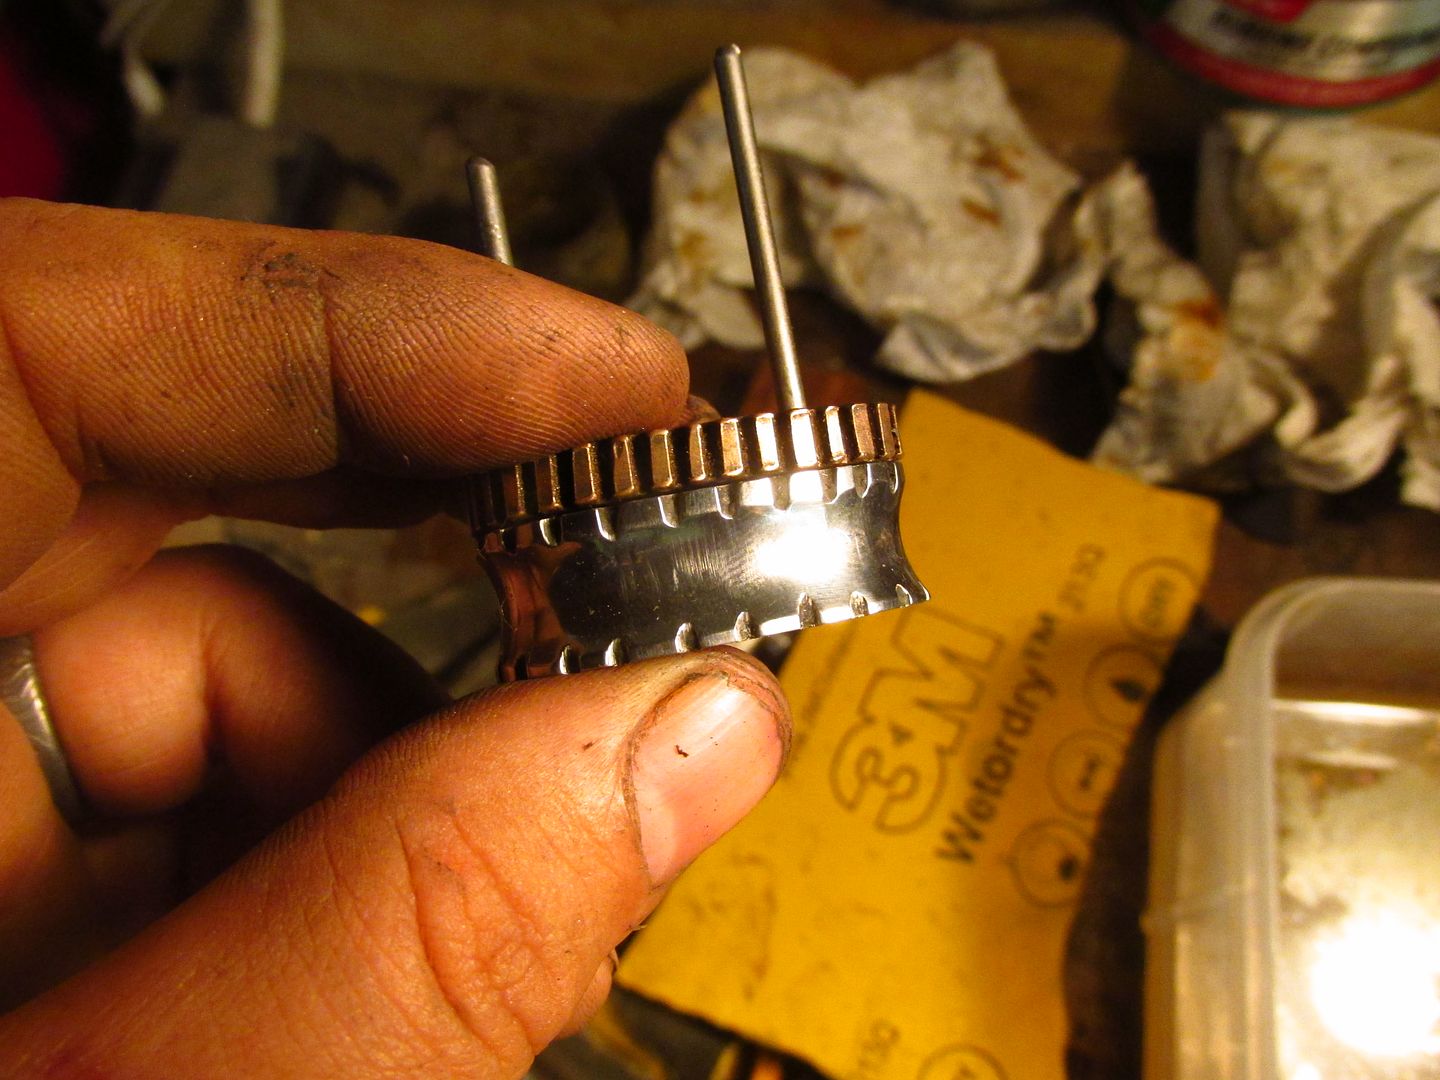
Here I have drilled the pin holes and started to shape the first two spacers. If you look closely on the right side you will see a small shadow which implies a gap, What happened here was that when removing one of the pins after shaping them I bent it slightly so it caused the one side to kick up in this photo. When I made a new pin a little later we were back to no gap (Pheww..that was close)
At this point I could have stopped and waited for the hitachi steel to arrive but I still had a couple of days left so I started to rough in the detail on the spacers.
I started by measuring and taping of the damascus spacer to make a nice center line to use as a guide for a small cut off disk:
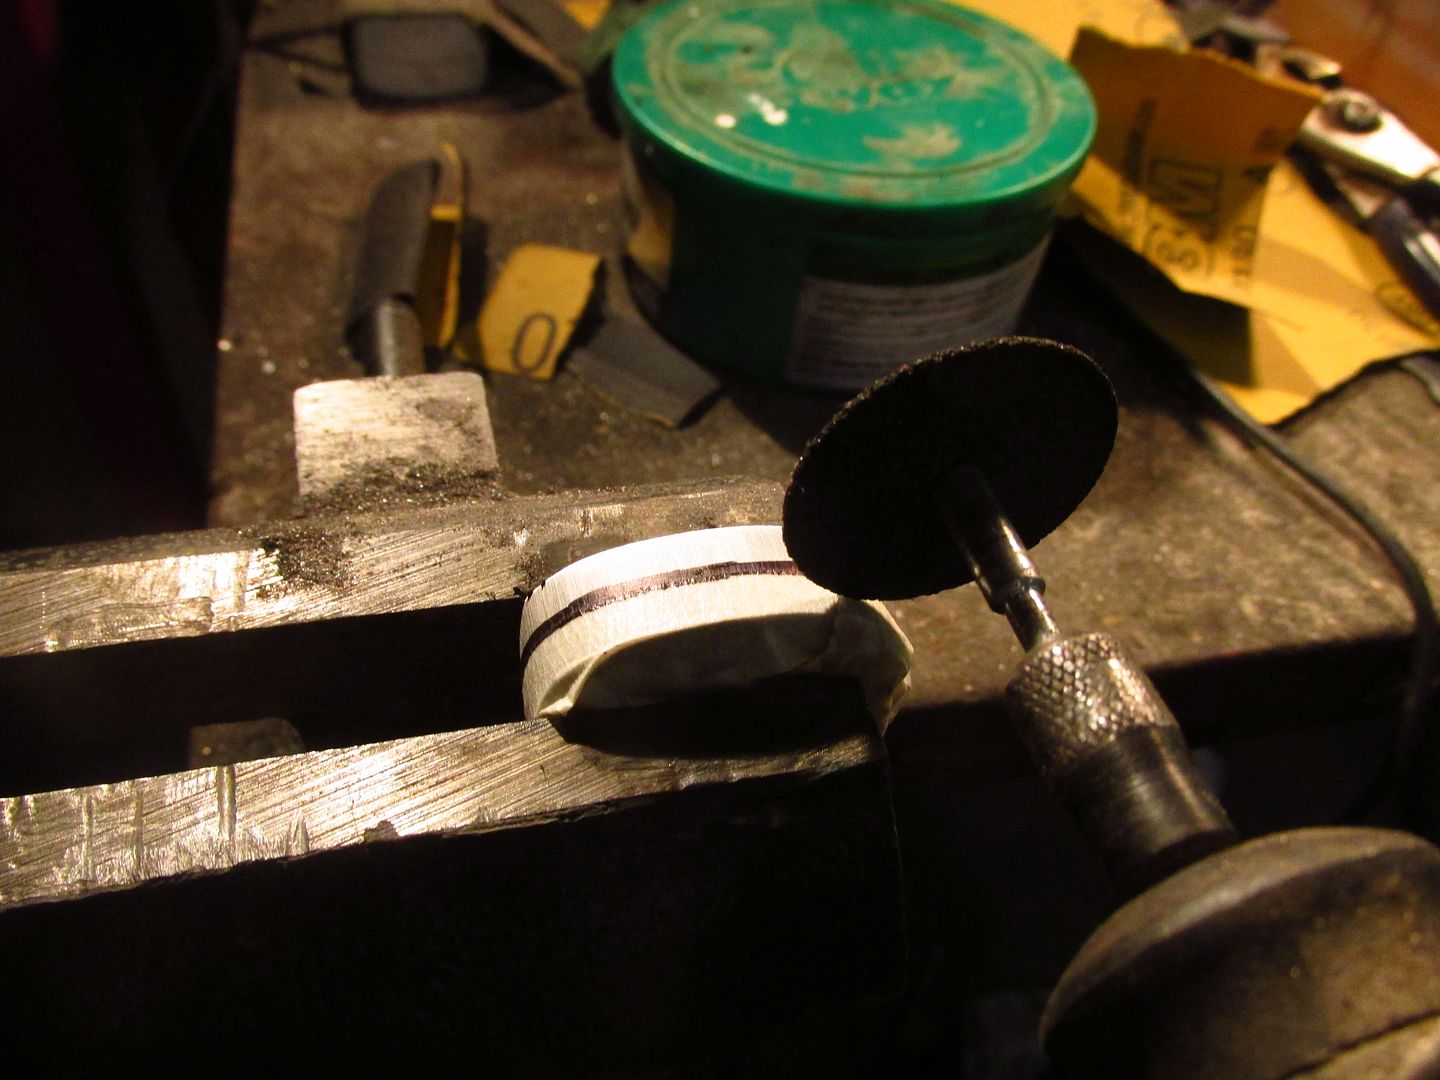
I use this center groove as a guide for using a file or dremel to help keep things more in line.
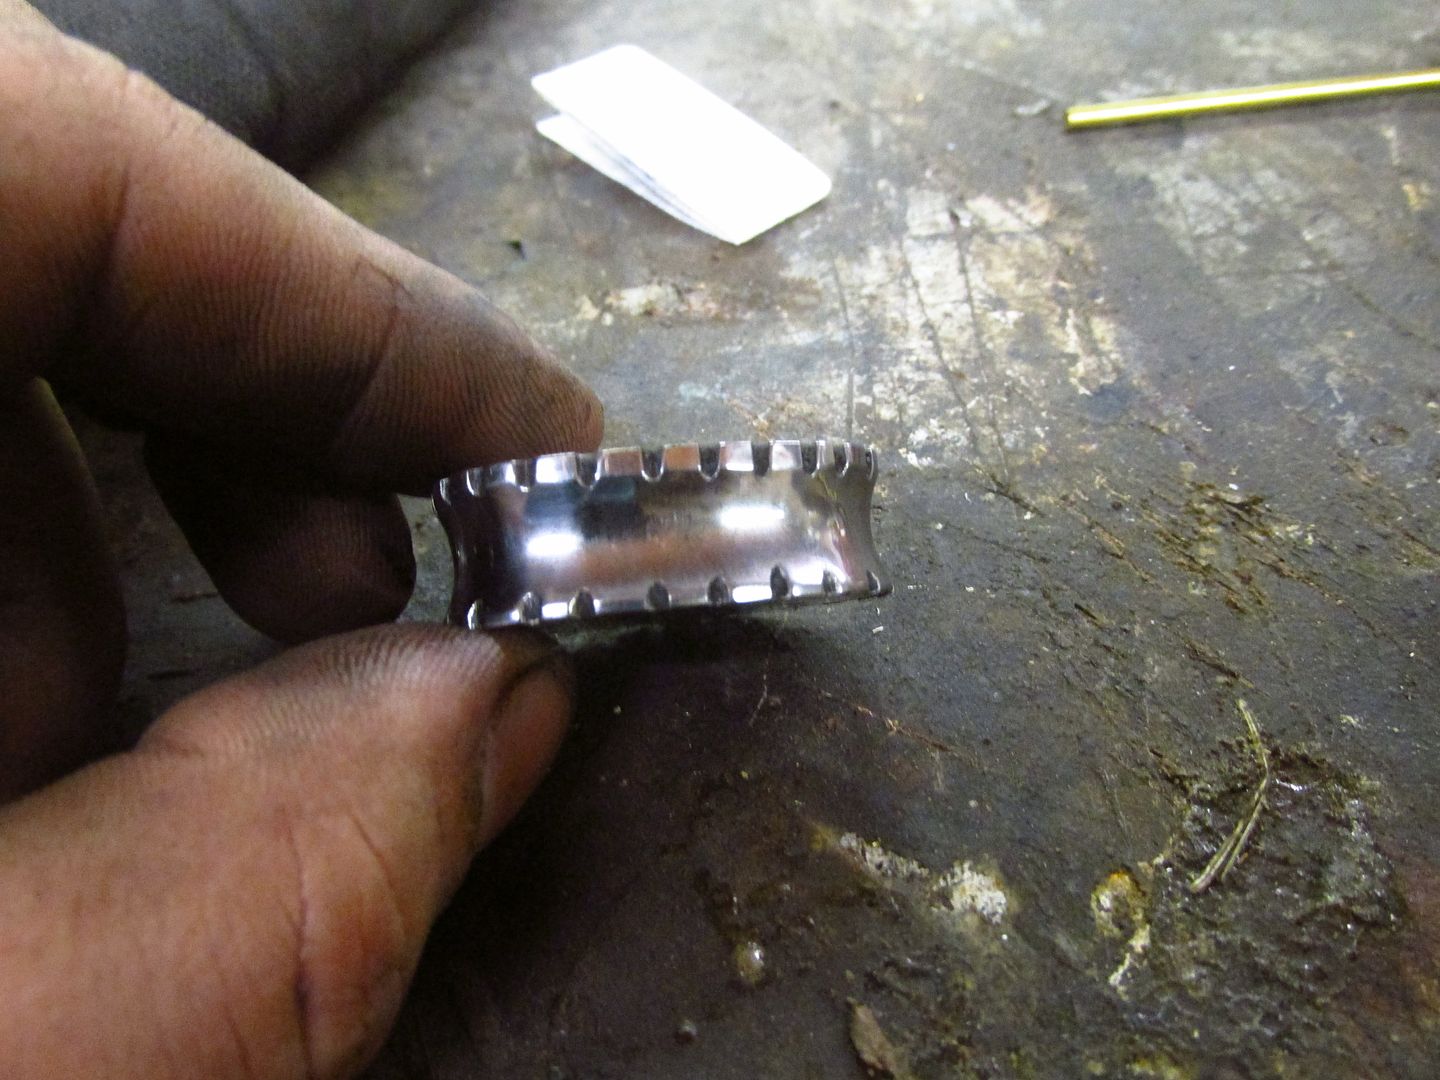
Here is the spacer after using the drum sander attachment and the cut off disk. This is how is looks buffed at 120 grit from the scotchbrite wheel.
Later on when I am getting closer to fitment I will go back and clean everything up with files and sand to 600 grit before buffing.
And the same goes for the bronze spacer, roughed in with a cutting disk and then go back with files.
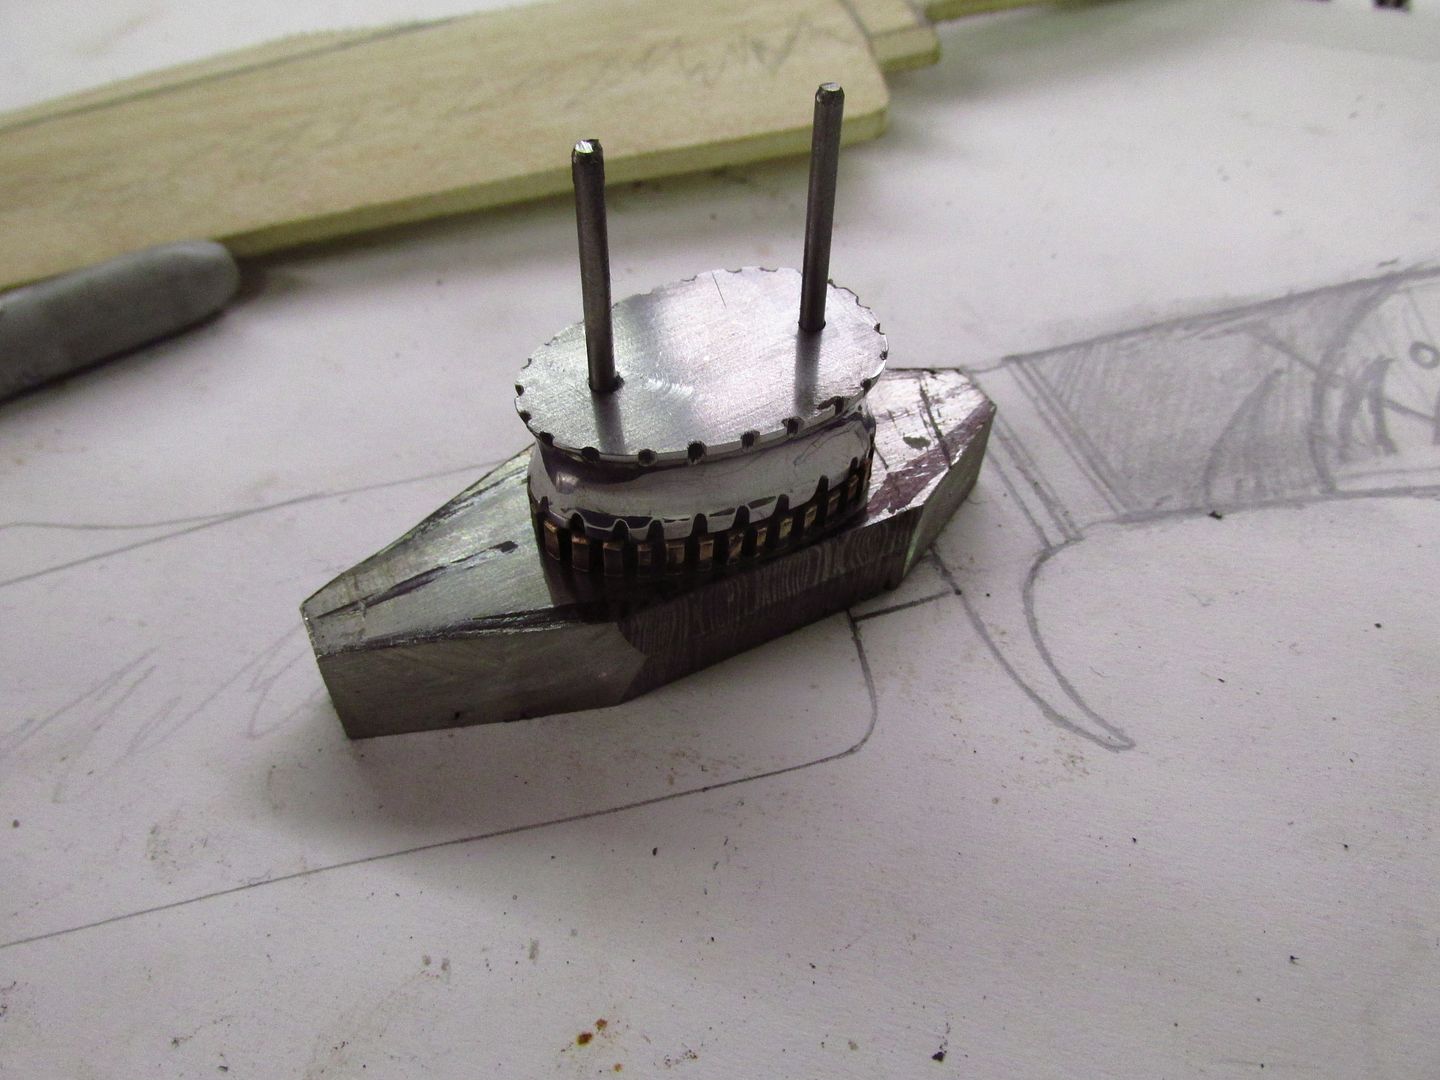
Then I cut the corners off of the guard piece to start to rough in the shape, leaving two sides square to hold in the vice while drilling the tang holes. This is as far as I will go before working on the blade.
This brings us nearly up to date with my current progress on this project, aside from my work yesterday which is where is gets exciting! More to come later.
I started working on this project about two weeks ago and in a somewhat unorthodox manner. It started off in the usual manner for me of first getting my ideas down on paper and then roughing out a wooden template to use for measurements while forging.


This is going to be a fairly large blade at 10 1/2 inches long x 2 inches wide. My plan is to have damascus and bronze spacers with a handle made from block carbon fiber and AAA curly koa. Everything about this knife is supposed to be a blend between Asian and American styles, old and modern techniques/materials. I'm pretty pleased with the overall design, although the handle shape still requires some tweaking.
The next thing I had to do was sit down and figure out my blade and guard steel mixes and patterns. As I said before I wanted this blade to have a fairly prominent hada and be able to produce a very vibrant hamon. So after looking around at other peoples work I saw that a mix of 1045 and 1095 or W2 produced very good results, so I decided I would work with that as well. But never being able to leave well enough alone I decided to change the mix up slightly and give it more of a Japanese flavor, so I got in touch with Aldo to get some Hitachi #2 blue sand steel (the same as is used in Japanese cutlery and sometimes swords). Metallurgically speaking Hitachi #2 and 1095 are fairly similar in their make up the primary difference being that Hitachi #2 has approximately 1.16% carbon whereas 1095 has .96% carbon. So when doing some off the cuff calculations with the 1045 dropping the overall carbon content a fair amount the resulting steel should average out to near a 1084 equivalent. Which is perfect for a heavy bowie/ chopping knife. The only dilemma I faced at this point was that I now had to wait for the hitachi #2 to come in the mail and I began to grow antsy wanting to start this project, and so I did.
I decided for the guard I wanted to do a simple low layer but tightly twisted damascus so that is where I started.
Prepping materials:

On the left you see the material for the guard and spacer while on the right part of the stack for the blade. I was running low on 1.5" width stock so I decided to use my remainder of my 1" stock and consolidate it into more usable material. This is a relatively simple thing to do as you weld to parrallel stack together and now have double your stock size.

At this point the billet is 3.5 in x 2.5 in x 2 in and 14 layers so there is plenty of meat there to work with.
Heating up to welding temp:

Drawing out to twice its length under the powerhammer: (this tool has made my life so much easier!)

It is then cut and folded and prepared for another welding pass.

After the next welding (28 layers) I draw it to 1 1/2 inch square and prepare for twisting.

Then let the twisting commence!

I ended up giving it a few more twists after this shot but I felt it was close enough to not require an additional photo. I have to say this idea for the guard and spacer was definitely inspired by Karl Anderson's recent twist bowie, and while this does not yet resemble the level of twist he did it was sufficient for style I was going for. It was also very exciting because this was the largest bar of damascus I have ever twisted and so tightly.
Next I flattened it into a 1 1/4 in x 1/2 in x 12 inch bar, quickly ground the surface and etched to check the pattern:

Nice and tight.
I next started to cut the pieces I needed do to length.

Then I cut the bronze spacer as well and brought it to slightly over 1/8 inch thick:

That this point all of the spacers and guard are roughly flattened on my grinder, but now I start to sand them on a granite block to get them closer to true flatness.

Then I superglue then together to prepare them for have pin hole drilled.

At this point I was going back and forth because the scale from the twists was messing with my eye (even when using high powered lighting to check and see if the seems were close) so I ground in slightly to check.

Okay so maybe I snuck in a light dabbing of acid with a Q-tip to check the pattern but the joint looks pretty good. Close enough to drill the pin holes anyway.
Here I have drilled the pin holes and started to shape the first two spacers. If you look closely on the right side you will see a small shadow which implies a gap, What happened here was that when removing one of the pins after shaping them I bent it slightly so it caused the one side to kick up in this photo. When I made a new pin a little later we were back to no gap (Pheww..that was close)

At this point I could have stopped and waited for the hitachi steel to arrive but I still had a couple of days left so I started to rough in the detail on the spacers.
I started by measuring and taping of the damascus spacer to make a nice center line to use as a guide for a small cut off disk:

I use this center groove as a guide for using a file or dremel to help keep things more in line.
Here is the spacer after using the drum sander attachment and the cut off disk. This is how is looks buffed at 120 grit from the scotchbrite wheel.
Later on when I am getting closer to fitment I will go back and clean everything up with files and sand to 600 grit before buffing.

And the same goes for the bronze spacer, roughed in with a cutting disk and then go back with files.

Then I cut the corners off of the guard piece to start to rough in the shape, leaving two sides square to hold in the vice while drilling the tang holes. This is as far as I will go before working on the blade.

This brings us nearly up to date with my current progress on this project, aside from my work yesterday which is where is gets exciting! More to come later.


