twist continues

prisonbreak

Well-Known Member
the latest twists, black/green micarta with micarta pin and copper bolster, and black/white micarta, the white looks more cream and even looks like bone and with copper bolster, got more work involved to finish them, both were long kitchen knives
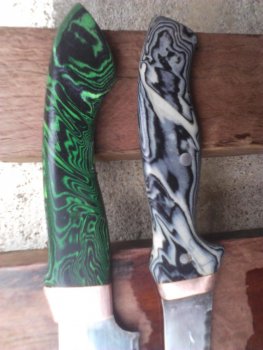
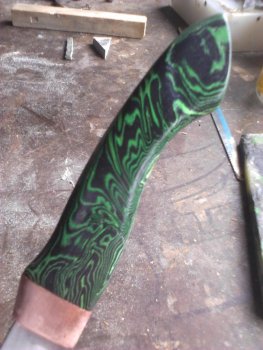
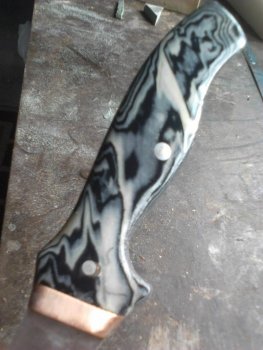
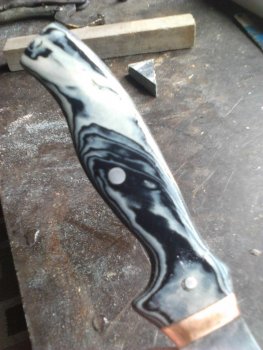
 

Attachments

  • IMG_20121201_140140.jpg
    IMG_20121201_140140.jpg
    87.9 KB · Views: 33
  • IMG_20121201_140231.jpg
    IMG_20121201_140231.jpg
    92.9 KB · Views: 37
  • IMG_20121201_140318.jpg
    IMG_20121201_140318.jpg
    90.7 KB · Views: 35
  • IMG_20121201_140432.jpg
    IMG_20121201_140432.jpg
    91.8 KB · Views: 27
  • IMG_20121201_140533.jpg
    IMG_20121201_140533.jpg
    92 KB · Views: 30
I have seen this done before and was not impress but man you impressed me with these! now you got me wanting to try it dadgum you LOL Great Job!
 
thanx dallas1 :) check my other posts for other random patterns and there's one post thats shows my method, all handles are make from cotton fabric, except one from neon green chiffon and purple velvet
 
Green is my fave color i have bin wanting to do a bird and trout for myself now i know what handle i want on it lol. if i don't make the micarta myself i may be hitting you up for a piece if you sell it.
 
thanx dallas1 :) check my other posts for other random patterns and there's one post thats shows my method, all handles are make from cotton fabric, except one from neon green chiffon and purple velvet

You previously linked to the Ariel Salaverria's tutorial, but I am a little unclear on how the corn kernels are used. Is that what you use? Could you explain that a little better?

I guess my question is, wouldn't they kernels show as you were sanding/shaping the handle?
 
i didnt use corn kernels, i went to supermarket and just found small hard round thingys, anything thats hard will do, lolz........like peas.............then a made a small wooden box, cut 60 pieces of cotton, 30 each of black and white, a little smaller than the inside of box. Rubbed a little vaseline on inside of box to act as a release agent for the epoxy, laid grease proof paper inside box to wrap fabric up after applying resin. Apply resin to each piece, alternating the black, white, black, or whatever colours you use, after all pieces are coated in resin wrap it up in the grease proof paper (baking paper) then just randomly place those hard round thingys on top. You should have a piece of wood cut the size of the inside of box, place that on top and clamp down with G-clamps. After that period of letting it fully harden, take out of box and peel off that paper, takes time but you could sand it off................the round hard thingys leave a indentation on the surface, so what i had to do was hacksaw, sand that layer off ( 3mm/4mm thickness) it didn't look much to be honest the first time i saw it after taking out of box i thought oh bugger, it didnt work, then thought again and decide to cut of top surface, it actually looked like the surface of the moon with mini craters, lolz IMG_20120902_113531.jpg
 
when i say hard thingys like peas, i meant the size of a pea. The wood clamped on top pushs the hard thingys into the fabric causing them to push the black into the white fabric etc
 
Ah, I see. Thanks for the explanation. I wasn't sure if they just went on top and were removed, or if they were placed within the layers as well.
 
Back
Top