wmhammond
Well-Known Member
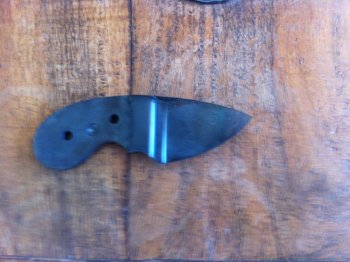
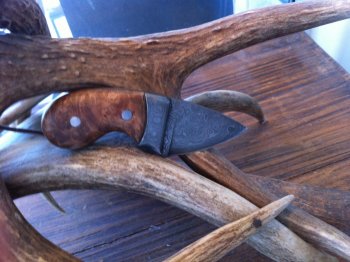
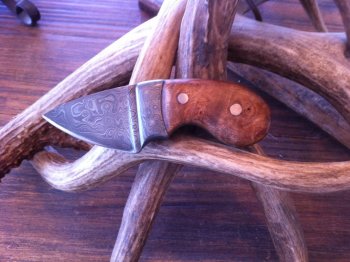
OK, you guys, here comes another WIP. The first one, of my Etching Power Supply, was small potatoes compared to this one. This one will be of my very first, fully completed knife - I hope it gets completed, anyway. So what is it and how did I decide on this particular one? It’s a neck knife - 4 ½” total length, Damascus steel (1095 & 15n20 – 189 layers) purchased on ebay from India. It will have matching Damascus bolsters and a stabilized (by me personally in my home built vacuum set-up) Myrtle burl handle.
THE DESIGN: I have a Harbor Freight 30” Grinder and I have probably spent 15 – 20 hours “practice grinding”. I didn’t think it was “practice grinding” while I was doing it but most of what I did ended up in the trash so now I’ve decided it was “practice”. My conclusion from that “practice” was that it is easier to grind a short blade on a 30” grinder than it is to grind a long blade. Also, a thicker piece of metal gives you a little more room for error than a thin piece, thus I settled on short and thick.
THE PATTERN: I freehanded the pattern on graph paper with a pencil with a big eraser. Criteria was a neck knife, short blade and still a good full feel in the hand so it had to be short and thick but as light as possible so it could be worn around the neck. Here is what I came up with:
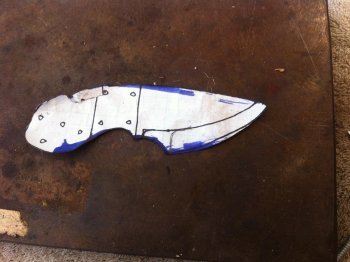
Bolsters? Why bolsters, this is your first knife. I like bolsters and from what I have seen bolsters are just like the handle itself – they’er just a handle made from steel instead of wood and from what I have done I believe I can handle (no pun intended) it. To make it a little easier, I decided to use the same steel as the blade so that whatever mistakes I make are harder to see.
THE STEEL: Damascus, why Damascus, I mean this is your first knife. Simple, my grinding errors on the blade will be harder to see once the Damascus is etched out. The billet was 12” long X 1 3/4” wide X ¼” thick and I paid $35 on ebay and, man, was it hard. I transferred my paper pattern to cereal box cardboard.
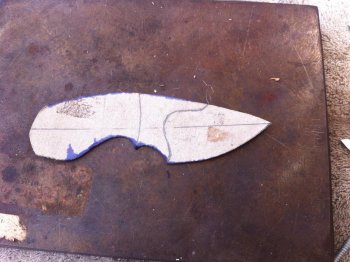
and laid out the steel. I hacked off the knife billet with a hack saw and then the bolster pieces with a hack saw. The steel was so hard that I annealed it all in my DIY home annealing station:
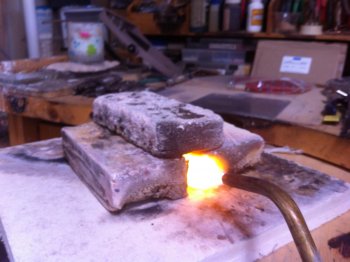
A few soldering boards and blocks – worked like a charm.
THE METHOD: After I laid out the knife on the steel I cut out the rough profile with a hack saw and then refined the profile with my 6” shop grinder and my 30” belt grinder. After it was laid out I drilled my bolster pin holes and my handle pin holes. Next I switched to the handle wood. I selected it from my home woodworking lumber and decided on a great looking piece of Myrtle Burl. I cut out two scales to size on my band saw and then hardened them in my DIY home Vacuum set-up.
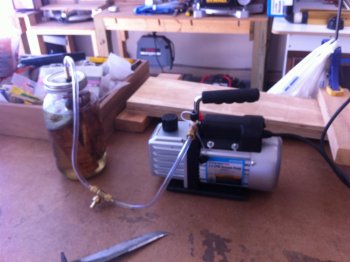
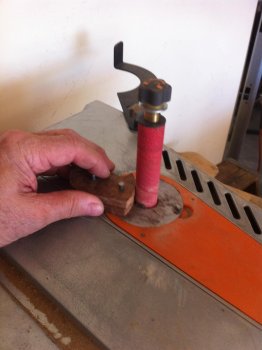
I built this set-up from a Harbor freight Vacuum pump, a couple of Bell Jars and some fittings and tubing and used Minwax Wood Hardener as my hardening medium. I then cut out the rough shape on my Scroll saw and drilled them using the guide holes on the knife blank. Once they were drilled I pinned them together and shaped the front edge where they will join with the bolsters on my oscillating spindle sander.
Next I had to grind my blade, and honestly, I dreaded it. Through my “Practice Grinding” I had devised a very simple grinding jig – nothing more than a 2X4 cut to a specific angle that I could screw my blade to with a wood screw. Simple, easy and pretty much Fool Proof.
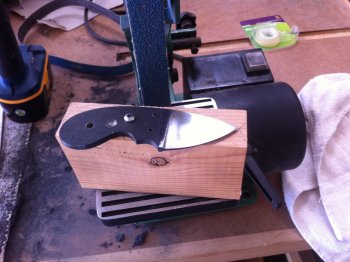
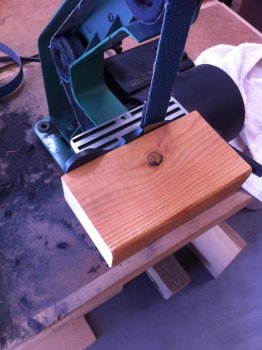
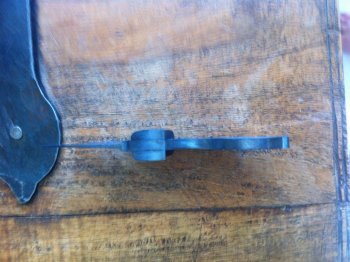
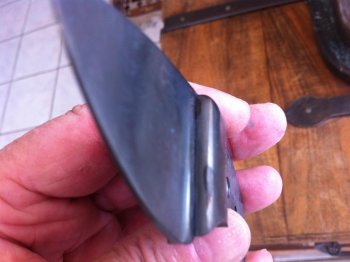
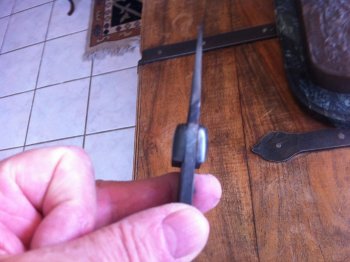
Did I say “pretty much”? well, I ment not so much. I had decided to leave the upper portion of the blade flat with the handle and extend the bolster down the distal portion of the blade for a thumb grip. My calculation was that a 2* angle would allow me to grind about half way up the blade and still leave about 1/16” along the cutting edge of the blade. Well, not so much. In order to get the edge down to 1/16” I ended up having to grind all the way to the top of the blade. So now I had a full flat grind on the blade. Time to do a mid-fabrication product modification caused by a mid-fabrication human f___ up.
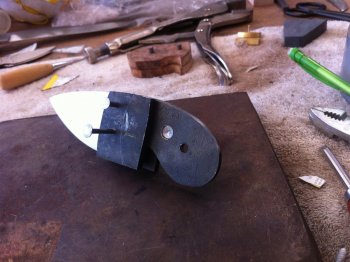 Remod:
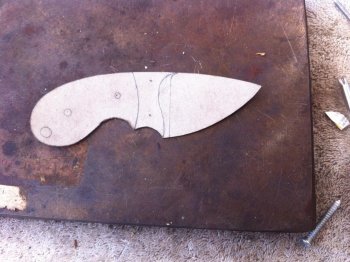
So I had to redesign the shape of my bolsters because there was no longer a flat edge along the top of the blade to allow the thumb rest portion of the bolster to fit tight to the blade. Anyway, using the 30” grinder I cut the flat grind down to 220 grit. Then I hand sanded it from 220 down to 400.
Next I started on the bolsters. Hack sawed them to rough size with the hack saw. Using the knife blank I drilled the pin holes in the bolsters. In preparing to do this, I realized that all my pin material was either brass or stainless steel. I didn’t think stainless would look so great on the Damascus so I pulled out some #8 framing nails and decided to use them. Hopefully that explains the bizarre picture above. So far so good with them but I don’t know how they will end up looking. We’ll see. So I pinned the Bolsters together and began grinding them to size starting on the front end of them where they will sit next to my plunge line and then the tops and bottoms – the easy part. The difficulty will be grinding the bolster/handle fit line.
So, as of now, I have my blade hand sanded down to 400 grit, my wood handles stabilized, drilled and cut to rough size and my bolsters ground on three sides and ready to be fit to the wood scales.
NEXT STEPS:
Harden my blade: After some research I have decided to save some money and quench it in a 10% brine solution. I think my blade is thick enough to withstand the stress of this procedure but we’ll see, this may all come to an abrupt end if I hear the dreaded “Ping”. Then I will temper this little sucker in my wife’s toaster oven.
Grind the bolster/wood handle fit. Slow and easy.
Pin, peen and silver solder the bolsters to the blade
Etch the blade and the bolsters in a 3/1 Ferric Chloride solution.
Cut a secondary grind on my knife blade to get the edge down to ready to be sharpened
Attach the wood scales to the blade
Finish the handle and bolsters
Etch my makers mark into the blade
Sharpen the blade
Make a sheath
Obviously I'm struggling but I feel pretty good about it all so far. Please chime in on my progress so far and on my plan going forward. I'm badly in need of advice. Thanks for coming along,
Wallace
THE DESIGN: I have a Harbor Freight 30” Grinder and I have probably spent 15 – 20 hours “practice grinding”. I didn’t think it was “practice grinding” while I was doing it but most of what I did ended up in the trash so now I’ve decided it was “practice”. My conclusion from that “practice” was that it is easier to grind a short blade on a 30” grinder than it is to grind a long blade. Also, a thicker piece of metal gives you a little more room for error than a thin piece, thus I settled on short and thick.
THE PATTERN: I freehanded the pattern on graph paper with a pencil with a big eraser. Criteria was a neck knife, short blade and still a good full feel in the hand so it had to be short and thick but as light as possible so it could be worn around the neck. Here is what I came up with:

Bolsters? Why bolsters, this is your first knife. I like bolsters and from what I have seen bolsters are just like the handle itself – they’er just a handle made from steel instead of wood and from what I have done I believe I can handle (no pun intended) it. To make it a little easier, I decided to use the same steel as the blade so that whatever mistakes I make are harder to see.
THE STEEL: Damascus, why Damascus, I mean this is your first knife. Simple, my grinding errors on the blade will be harder to see once the Damascus is etched out. The billet was 12” long X 1 3/4” wide X ¼” thick and I paid $35 on ebay and, man, was it hard. I transferred my paper pattern to cereal box cardboard.

and laid out the steel. I hacked off the knife billet with a hack saw and then the bolster pieces with a hack saw. The steel was so hard that I annealed it all in my DIY home annealing station:

A few soldering boards and blocks – worked like a charm.
THE METHOD: After I laid out the knife on the steel I cut out the rough profile with a hack saw and then refined the profile with my 6” shop grinder and my 30” belt grinder. After it was laid out I drilled my bolster pin holes and my handle pin holes. Next I switched to the handle wood. I selected it from my home woodworking lumber and decided on a great looking piece of Myrtle Burl. I cut out two scales to size on my band saw and then hardened them in my DIY home Vacuum set-up.

I built this set-up from a Harbor freight Vacuum pump, a couple of Bell Jars and some fittings and tubing and used Minwax Wood Hardener as my hardening medium. I then cut out the rough shape on my Scroll saw and drilled them using the guide holes on the knife blank. Once they were drilled I pinned them together and shaped the front edge where they will join with the bolsters on my oscillating spindle sander.

Next I had to grind my blade, and honestly, I dreaded it. Through my “Practice Grinding” I had devised a very simple grinding jig – nothing more than a 2X4 cut to a specific angle that I could screw my blade to with a wood screw. Simple, easy and pretty much Fool Proof.


Did I say “pretty much”? well, I ment not so much. I had decided to leave the upper portion of the blade flat with the handle and extend the bolster down the distal portion of the blade for a thumb grip. My calculation was that a 2* angle would allow me to grind about half way up the blade and still leave about 1/16” along the cutting edge of the blade. Well, not so much. In order to get the edge down to 1/16” I ended up having to grind all the way to the top of the blade. So now I had a full flat grind on the blade. Time to do a mid-fabrication product modification caused by a mid-fabrication human f___ up.
 Remod:
So I had to redesign the shape of my bolsters because there was no longer a flat edge along the top of the blade to allow the thumb rest portion of the bolster to fit tight to the blade. Anyway, using the 30” grinder I cut the flat grind down to 220 grit. Then I hand sanded it from 220 down to 400.
Next I started on the bolsters. Hack sawed them to rough size with the hack saw. Using the knife blank I drilled the pin holes in the bolsters. In preparing to do this, I realized that all my pin material was either brass or stainless steel. I didn’t think stainless would look so great on the Damascus so I pulled out some #8 framing nails and decided to use them. Hopefully that explains the bizarre picture above. So far so good with them but I don’t know how they will end up looking. We’ll see. So I pinned the Bolsters together and began grinding them to size starting on the front end of them where they will sit next to my plunge line and then the tops and bottoms – the easy part. The difficulty will be grinding the bolster/handle fit line.
So, as of now, I have my blade hand sanded down to 400 grit, my wood handles stabilized, drilled and cut to rough size and my bolsters ground on three sides and ready to be fit to the wood scales.
NEXT STEPS:
Harden my blade: After some research I have decided to save some money and quench it in a 10% brine solution. I think my blade is thick enough to withstand the stress of this procedure but we’ll see, this may all come to an abrupt end if I hear the dreaded “Ping”. Then I will temper this little sucker in my wife’s toaster oven.
Grind the bolster/wood handle fit. Slow and easy.
Pin, peen and silver solder the bolsters to the blade
Etch the blade and the bolsters in a 3/1 Ferric Chloride solution.
Cut a secondary grind on my knife blade to get the edge down to ready to be sharpened
Attach the wood scales to the blade
Finish the handle and bolsters
Etch my makers mark into the blade
Sharpen the blade
Make a sheath
Obviously I'm struggling but I feel pretty good about it all so far. Please chime in on my progress so far and on my plan going forward. I'm badly in need of advice. Thanks for coming along,
Wallace
Last edited:

