Using Torx screws for knife handles

Lerch

Well-Known Member
Hi guys,

Im getting ready to make some knives for some Tac Team guys in my local sheriffs department and instead of pins or ground off corby bolts i am wanting to use torx screws . Well I have never used them before and i have not been able to find where to buy the "stand offs" for the screws. I buy all my stuff from USAKnifemaker and Jantz (cause there in OK also) but i guess i am just not able to find where the stand offs are at. Also is there any kind of tutorial on this, i searched and was not able to find anything

thanks
steve
 
Okay, i found them now at USAknifemaker

Still a tutorial would be great, though i bet with a scrap piece of metal and some time i can figure it out :)
 
The Torx screws are OK, and would look good on an appropriately designed blade/handle combination such as a tactical.
They look best with scales that are flat in the area around the screw head.

Two advantages:
1. Extremely strong.
2. If you fit everything properly, you can avoid the use of epoxy and have removable scales.

The major drawback to them is that, most of the time, a lot of hand fitting is required to install them properly. But once you do a few, it becomes a very familiar process.

You're dealing with three pieces tailored to fit a specific outside dimension, since you don't finish grind them flush as you would with a Corby or Loveless.
Breaking it down, the Corby/Loveless designs are one screw and one nut, while this design is two screws threading into a "long nut".
So you have to determine total finished thickness of the scales first, then tailor the lengths of the individual components.
Best to use a drill press with accurate depth stop when you're countersinking.

Anytime I use these, I like to keep the dial calipers close. Also a calculator and pen/paper.
I'm left handed, so I try to keep my right hand clean for all the head-scratchin' goin' on. :biggrin:

The best way to get familiar with them is to practice on some scrap wood blanks the same thickness as your scales.
Use the same blade, because the thickness of the blade figures into all of it.
Keep track of how deep you're countersinking the holes for the screw heads and standoffs. When you have everthing fitting well, transfer the process to the "real" scales.
Soon you won't even need the practice blanks.


Good Luck,
Rob
 
thank ya for the info

My thinking of why i wanted to use the torx screws (besides the nice look for a tactical based knife) was the ability to grind and finish my scales but then be able to take the scales back off if the user wanted to keep them removable or also be able to go ahead and epoxy them down if desired as well.

For the countersinking would i use a 82degree bevel? i was thinking this is what i had seen before

thanks
steve
 
82 is pretty common but I suggest you double check your screw. I've had a few that differed in angle but I believe they were Hex Screws.
 
82 Deg countersink is the norm for most flat headed fastening hardware. If Usaknifemaker does not have the length threaded standoff you need just pick them up from McMaster.
I get the aluminum ones so I can easily shorten them if they are too long for the knife stock I am using.
I usually use 8-32 sized countersink screws and threaded standoffs.
Goodluck
CW
 
I just did my first one of these with parts from Tracy. I had button head screws, so I did my countersink with an end mill for a square bottomed hole.

I was thinking, could you not just tap the tang of the knife and avoid using the standoffs?
 
I was thinking, could you not just tap the tang of the knife and avoid using the standoffs?

That method is best reserved for the rare occasion where you're not worried about the fasteners lining up. By this I mean having one hole in the tang for each screw. The screw on one side of the knife would be offset from the other side.

For having the fasteners lined up against each other (two screws sharing the same threaded hole), it would have to be a very thick tang to get enough thread engagement.
How much room you have to play with really depends on the thickness of your tang in relation to the fineness of your threads.
But the typical thickness of a tang simply doesn't provide enough room.

Common screw sizes used for this sort of work are typically 8-32 and 4-40.
With the 8-32, that's a distance of .0313" for one thread engagement.
With the 4-40, it's .025" for one turn.

Let's say you want a minimum of two turns on each screw. You have two screws- one per side. So you multiply the distance for thread engagement times four (two screws with two turns each).
For the 8-32 screw, you need at the minimum .125", or a tang that's 1/8" thick.
For the 4-40 screw, the minimum tang thickness would drop to .100"

Those would be the minimums, and on paper it looks like you can get away with it, since we commonly work with tangs that meet that requirement.
BUT (there's always a "but") you would need to be very precise with the thickness of the scales and the length of the screws. They need to be the same length to ensure equal thread engagement, and the ends would need to be nearly perfectly square with the threads since the two screws are probably gonna butt up against each other for that minimum thread engagement.

In the end, it's a whole lot faster (and considerably easier) to use a standoff in the middle because it gives us plenty of thread engagement. Yes, we have the extra step of counterboring the inside of the scales for the standoff. But that's small potatoes compared to attempting to get exact thickness on the scales, and then getting exact screw lengths to fit flush while ensuring each screw has an equal amount of engagement in the middle.
Even if we do get lucky with that type of precision, we're really in trouble if a natural material is being used for the scales. Having two screws share the same threaded hole means tighter tolerances had to held for the minimum thread engagement, so if the scales swell then we have no room to back the screw out while maintaining thread engagement. If the scales shrink, then we have no way to tighten them up.

I understand the idea, because I tried it a long time ago (before I even knew what a standoff was).
After I spent considerable time messing up a bunch of screws, I thought to myself "There's gotta be a way to do this without becoming a machinist!"
That's when I decided to offset the screws on one side from the screws on the other side. We've all got a "wall of shame", and that knife definitely belongs on mine. But it was a quick fix for someone wanting easily replacable scales, and I didn't know at the time there was a better way. The guy liked it; I just prayed he didn't bring me another knife for the same treatment.


Rob
 
Hey Steve,
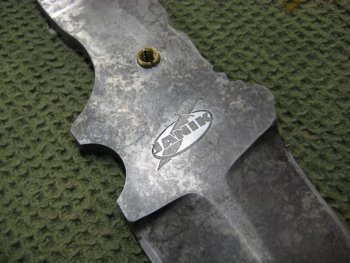
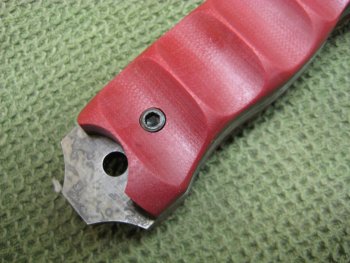
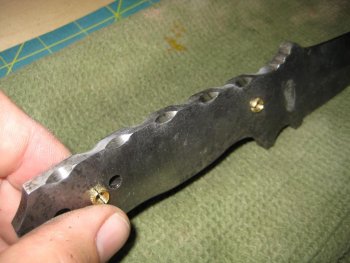
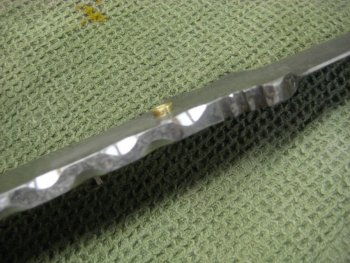
Here are a few pics. I turned the inserts from brass and knurled the outside so they could be fit snugly in shank. They are threaded 10-24. The bolts through the scales also have the heads turned down to .250" dia just to fit in my counterbore. I also counterbore the back of the scale to cover the insert.
attachment.php

attachment.php

attachment.php


ICE 005.jpgICE 011.jpgICE 006.jpgICE 007.jpg
 
I'm gona throw something out there that I've learned from experience.....although it's "cool" to use screws, with the idea that things can be disassembled, ask yourself....."Should I do it?" If you're not worried about seeing those knives again for repairs, and are willing to field calls about lost fasteners, stripped threads, etc. you might be OK. But if you build something that CAN be disassembled, rest assured that people WILL take it apart...and they will do it so much that parts will be lost, threads will be stripped, and various other problems will arise.

There was a time when I produced a good number of high end "take down" Bowies and Hunters.....and folks would tear them up. I've had folks strip threads, force parts back into the wrong places, and the ultimate....use channel lock pliers on the butt nut of a $3K bowie and twist off the tang threads in the process....then want me to repair their mess ups. As a general rule, if a person requests anything that is "take down" I either tell them that I'll build it as a "take down", but it will be "glued up" before delivery, OR they sign paperwork stating that my warranty will not cover damages caused from improper assembly/disassembly.
 
Thank you all

Thanks Steve for the pics, im a very visual person so that helps way more than just reading it!!

Thanks Mr Caffrey, i completely understand what your saying. Honestly i dont really care that much about disasembly of the handles, i really like the look of the torx heads but i did think the disasembly notion would help with possibly CeraKote'ing of the blade and spine once everything was ground to fit

looks like USAknifmaker is out of the torx screws i want right now so no big rush, the first few of these new tactical based knives i will do with good ole corby bolts!!

thanks
steve
 
well i got some from Tracy that should work, so i guess we will see here in a few days!!

thanks
steve
 
There is no substitute for a mechanical connection. Bolts of some kind are always superior to pins. If the bolts are epoxied in place there is no problem of "losing" them.
 
I like your reply Ed! And besides, the few times I have used screws, I was always concerned that if it was taken apart, would it really fit back exactly like before. It seems like either the scales or the tang would be slightly proud. Everytime I used them, I used epoxy & Loctite so they wouldn't come apart.
 
If the process is done correctly, you can disassemble and assemble as many times as you want and things will fit and align perfectly - each and every time. Differential expansion rates of dissimilar materials not considered;-)

I like your reply Ed! And besides, the few times I have used screws, I was always concerned that if it was taken apart, would it really fit back exactly like before. It seems like either the scales or the tang would be slightly proud. Everytime I used them, I used epoxy & Loctite so they wouldn't come apart.
 
Back
Top