You are using an out of date browser. It may not display this or other websites correctly.
You should upgrade or use an alternative browser.
You should upgrade or use an alternative browser.
2013 Knife Making Progress
- Thread starter Steven Long
- Start date
Steven Long
Well-Known Member
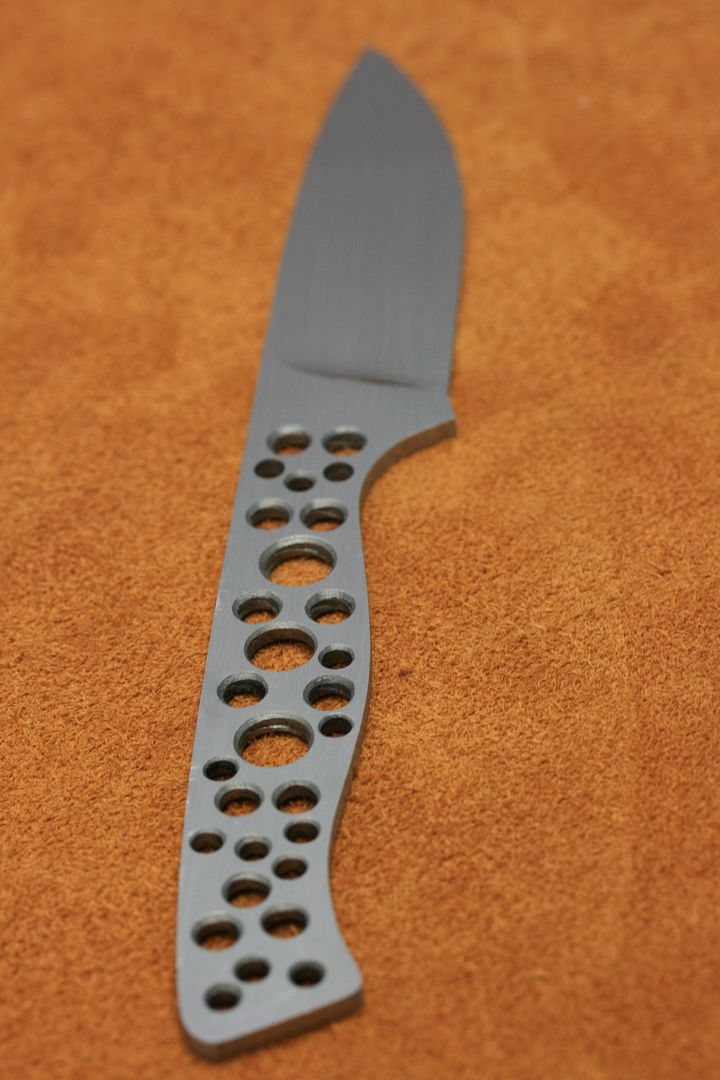
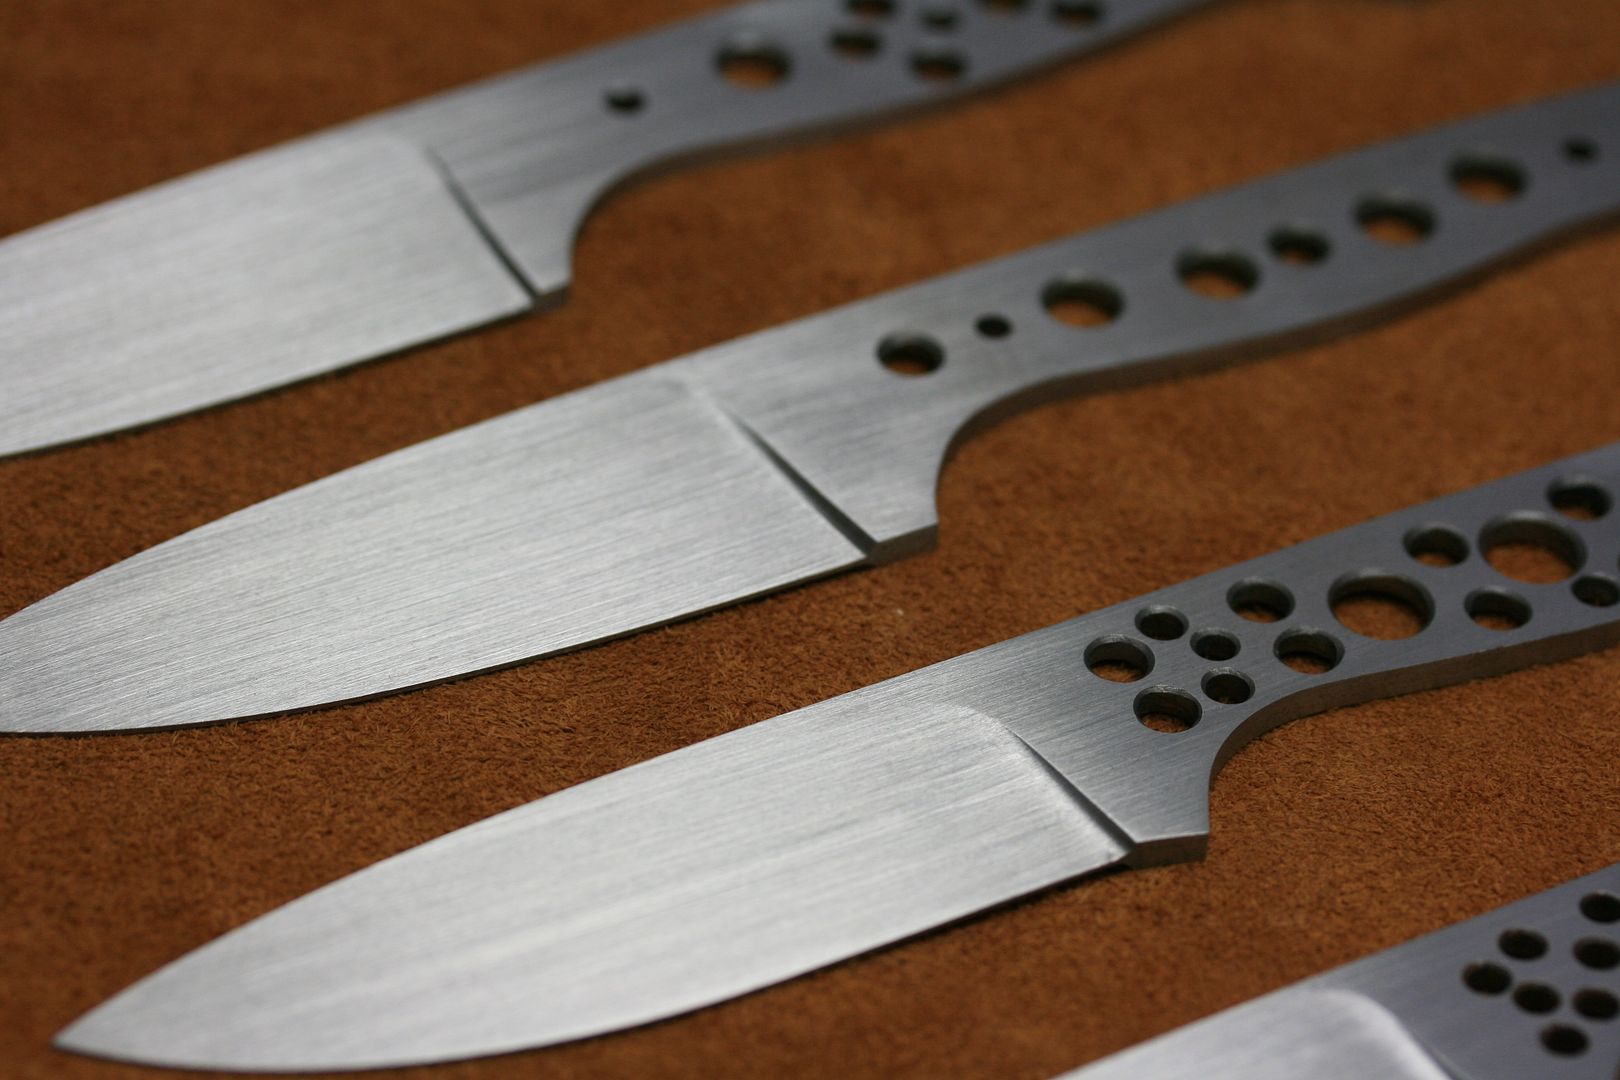
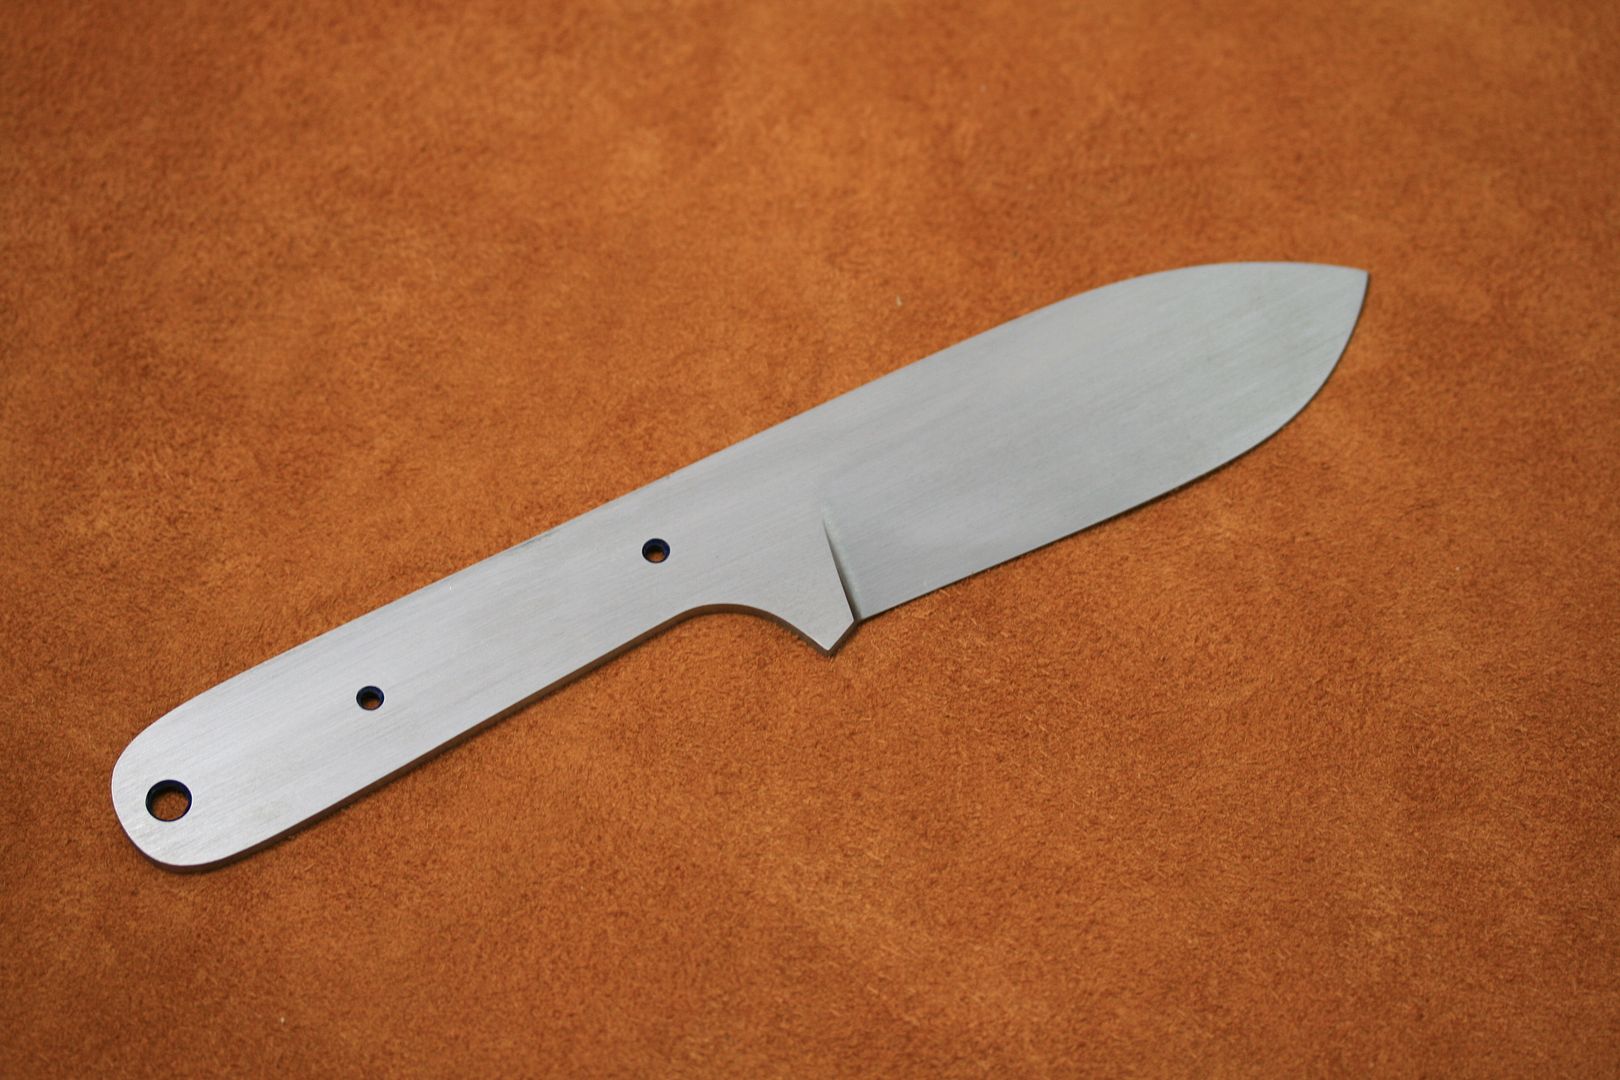
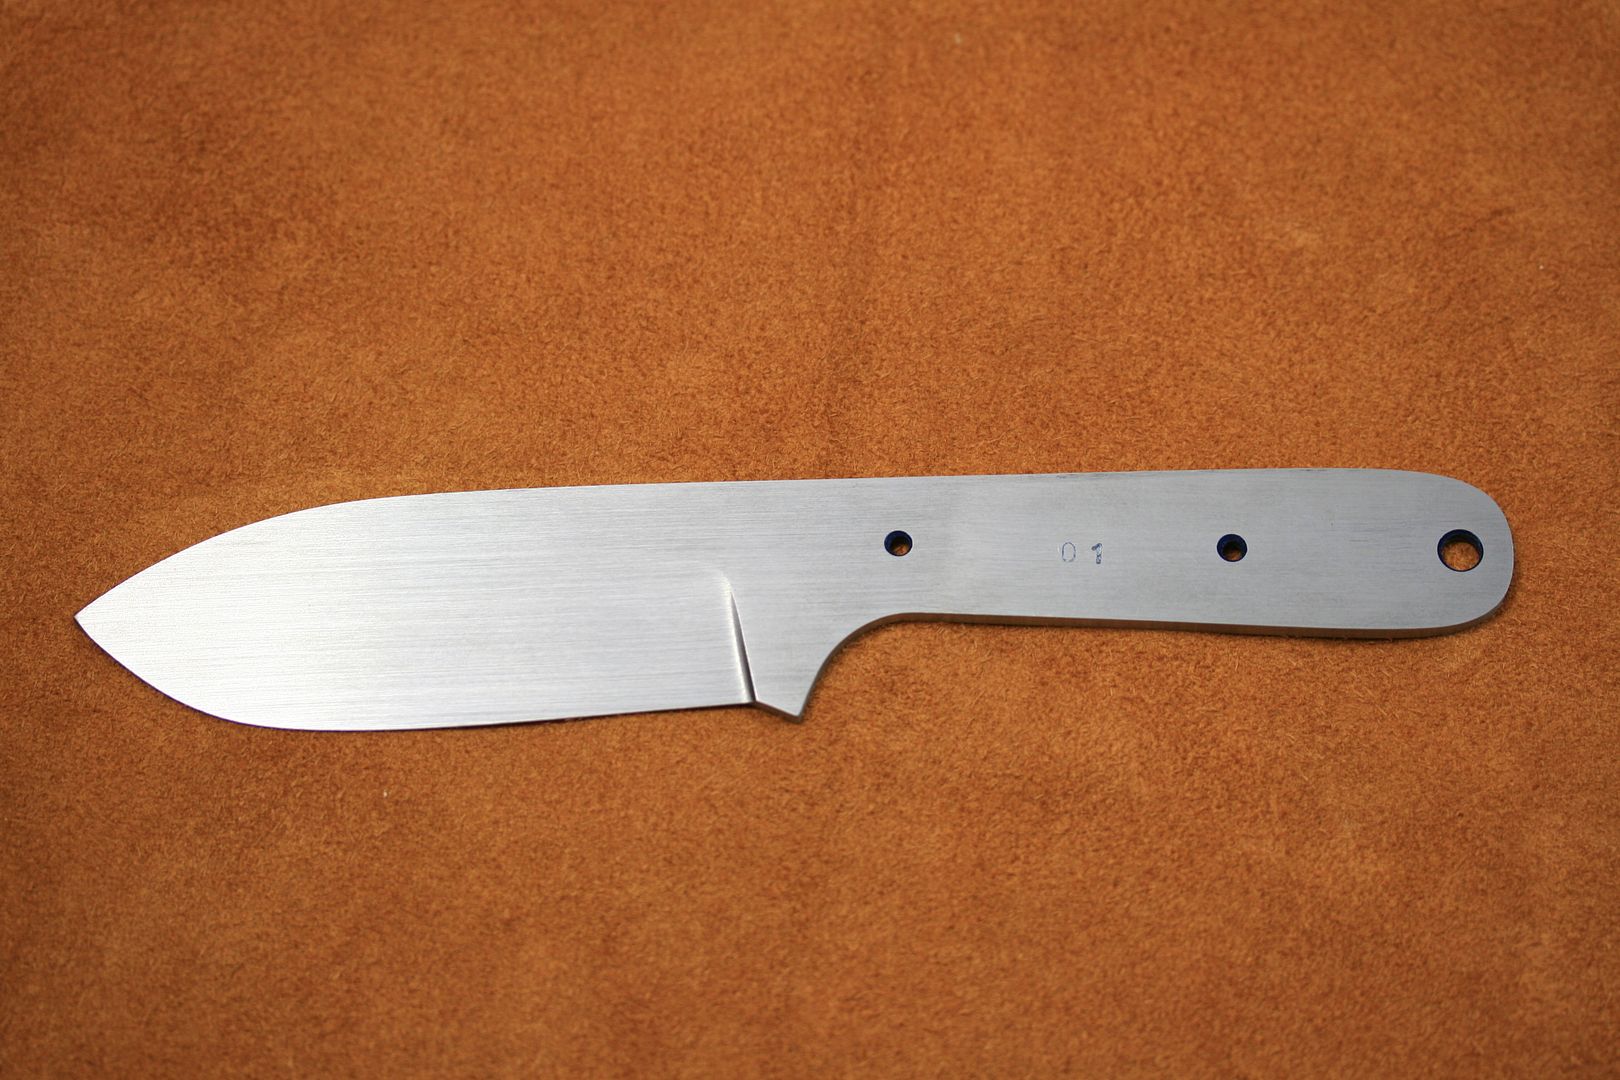
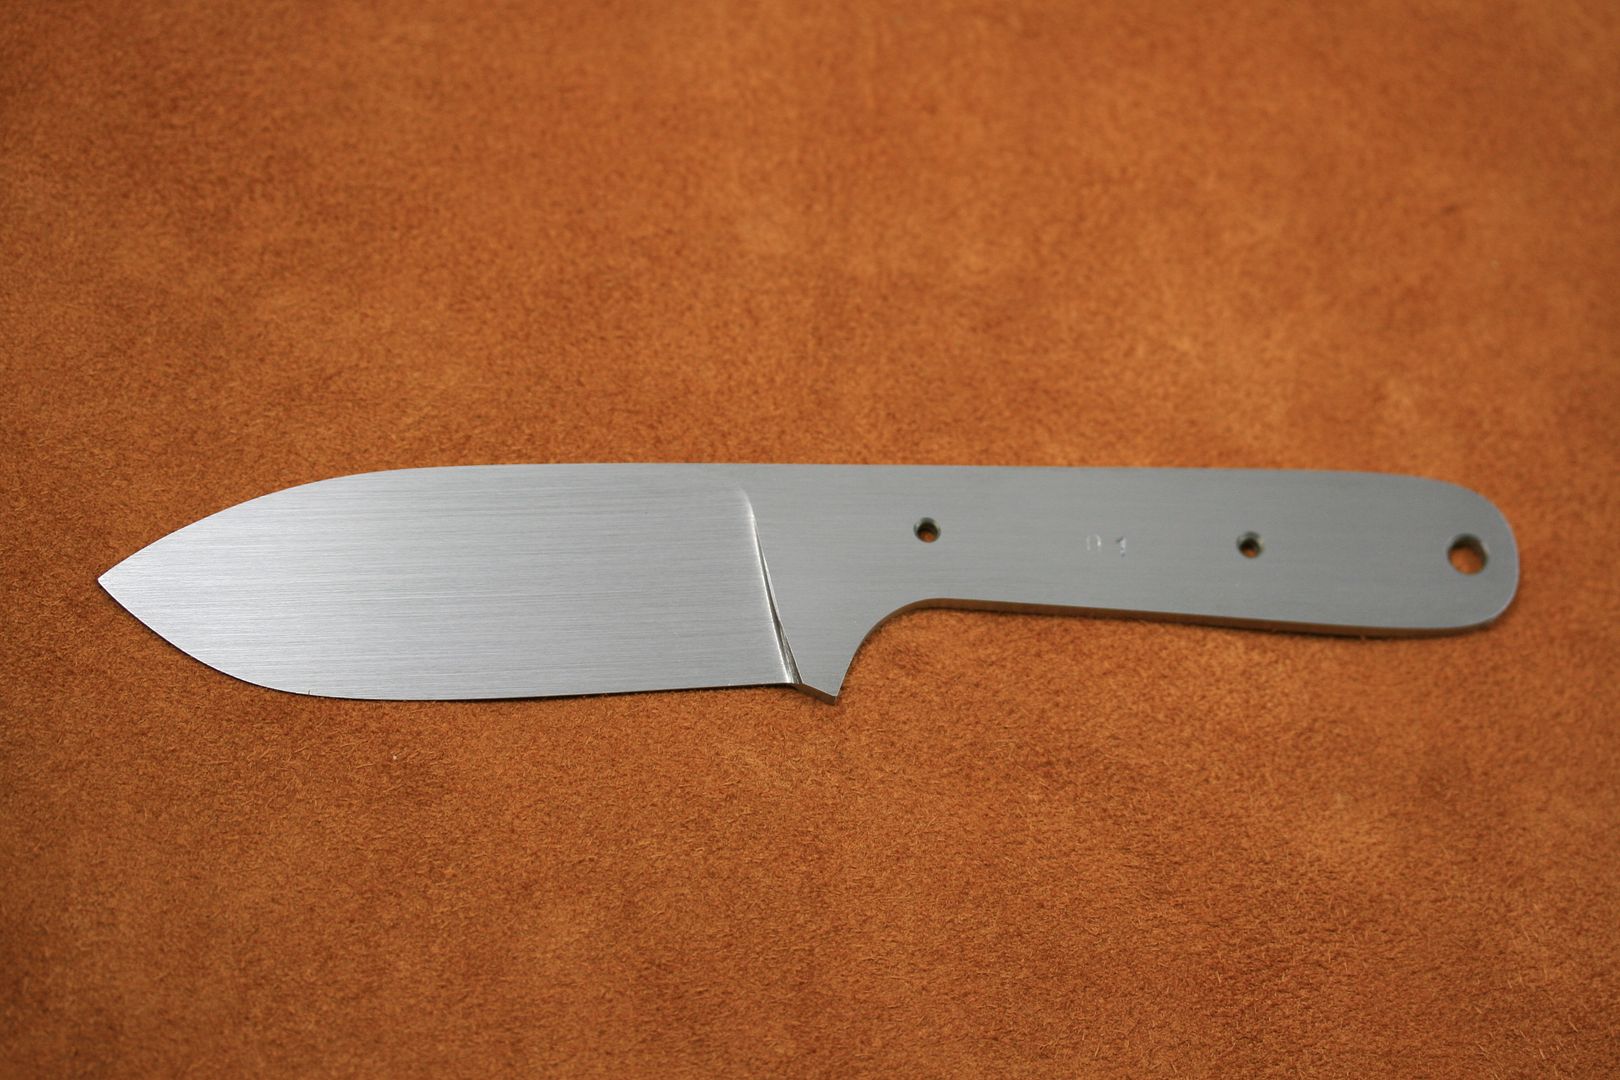
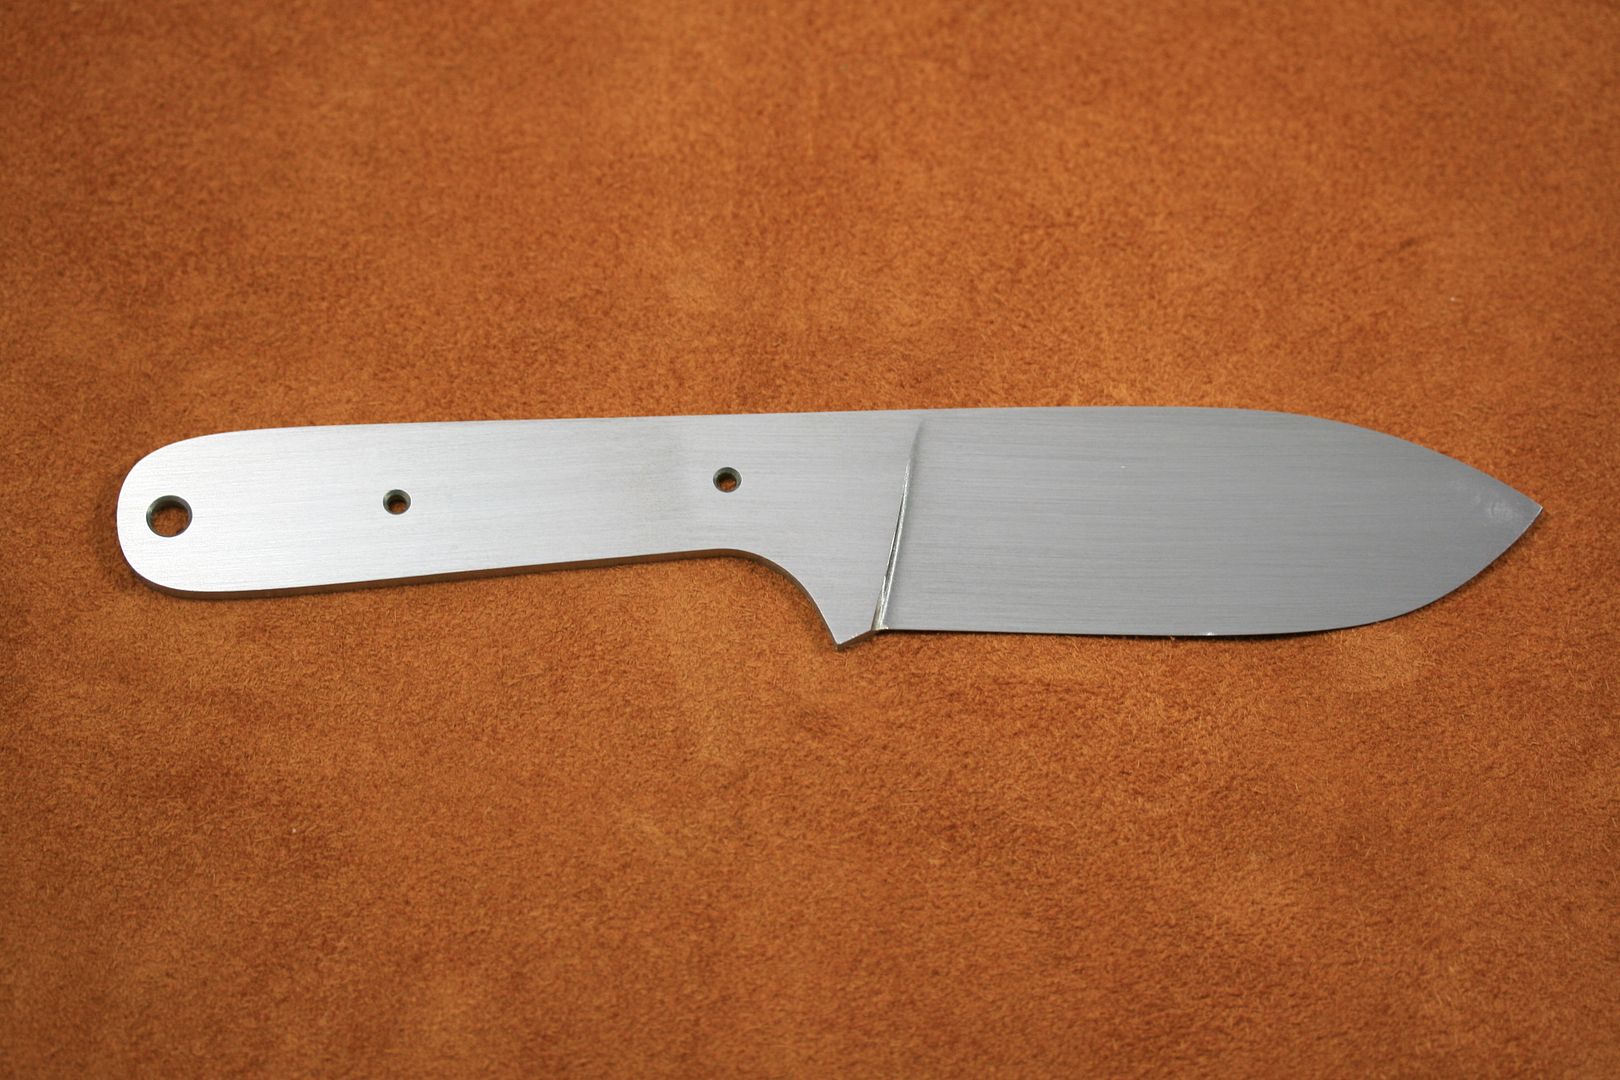
I got another one ready for heat treat today. I also ground in the bevels on one other one and drilled the holes. It just needs a little hand sanding and it will be ready tomorrow.
Was hoping to lower the top of the grind a little on this one, but I kept messing up, having to take it higher. I can't get consistent with grinding the bevels. I need way more practice.
I changed up the design a bit on the second in the batch. Squared the butt a little and shortened the width some. I might do this to the first one also (pictured on top)...
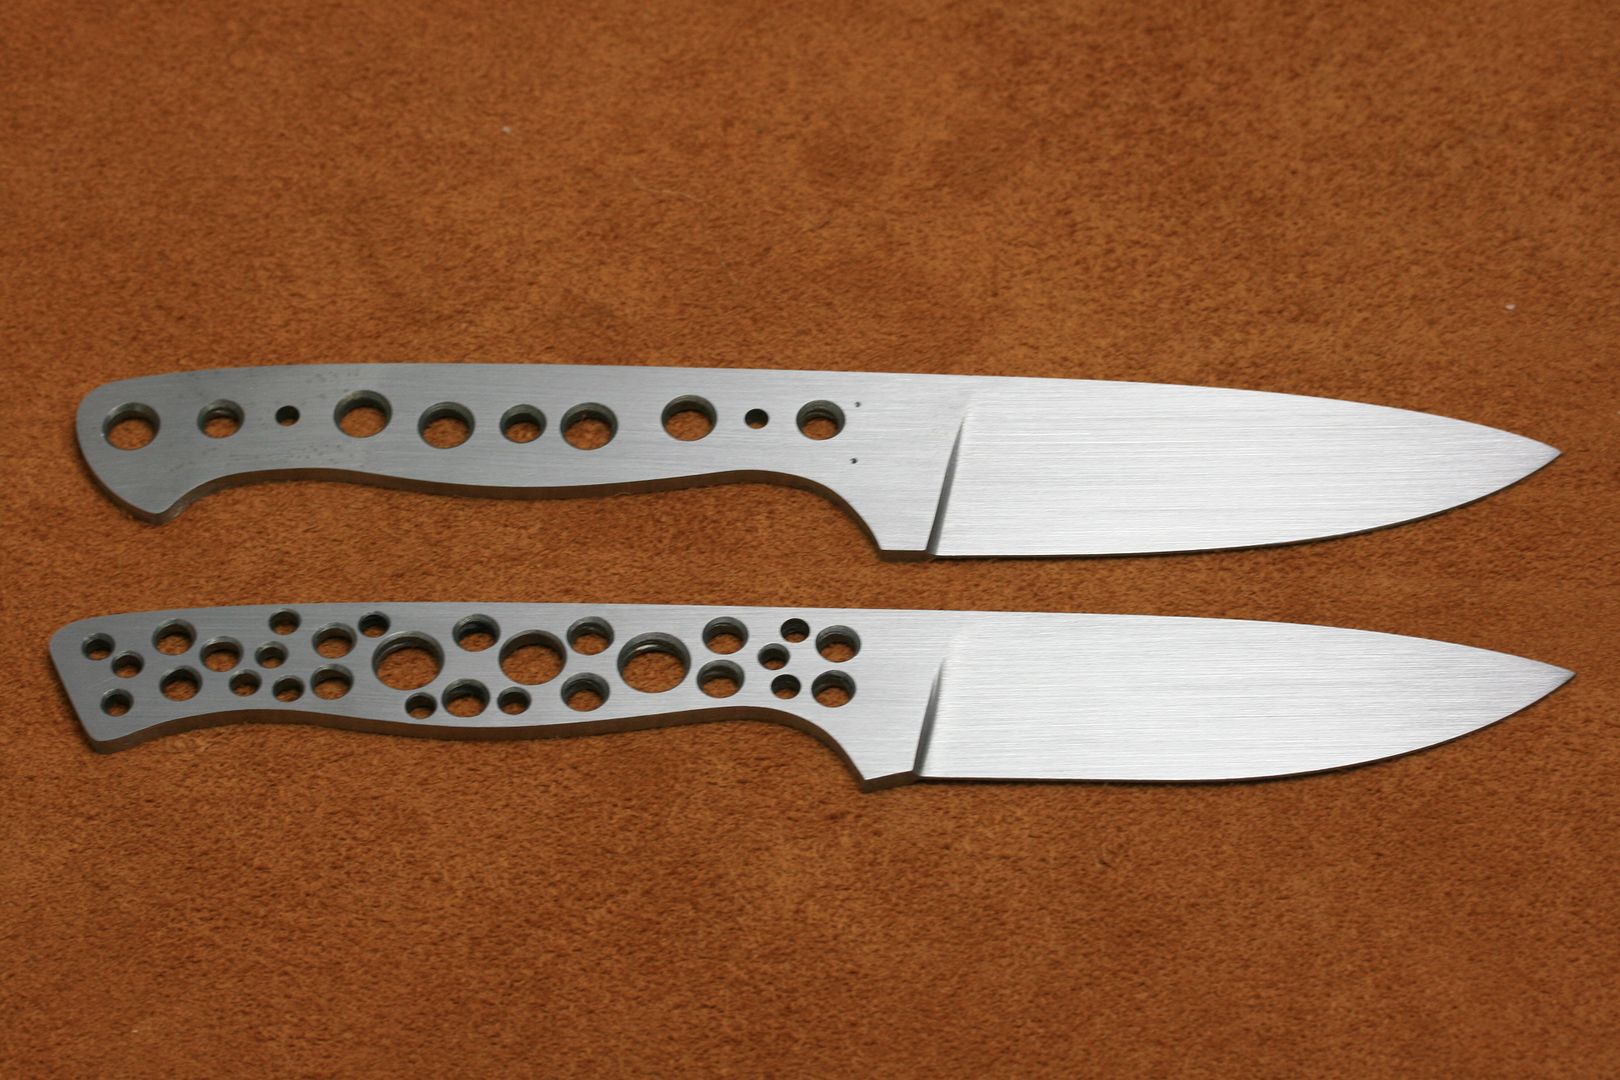
I like this one a lot better...
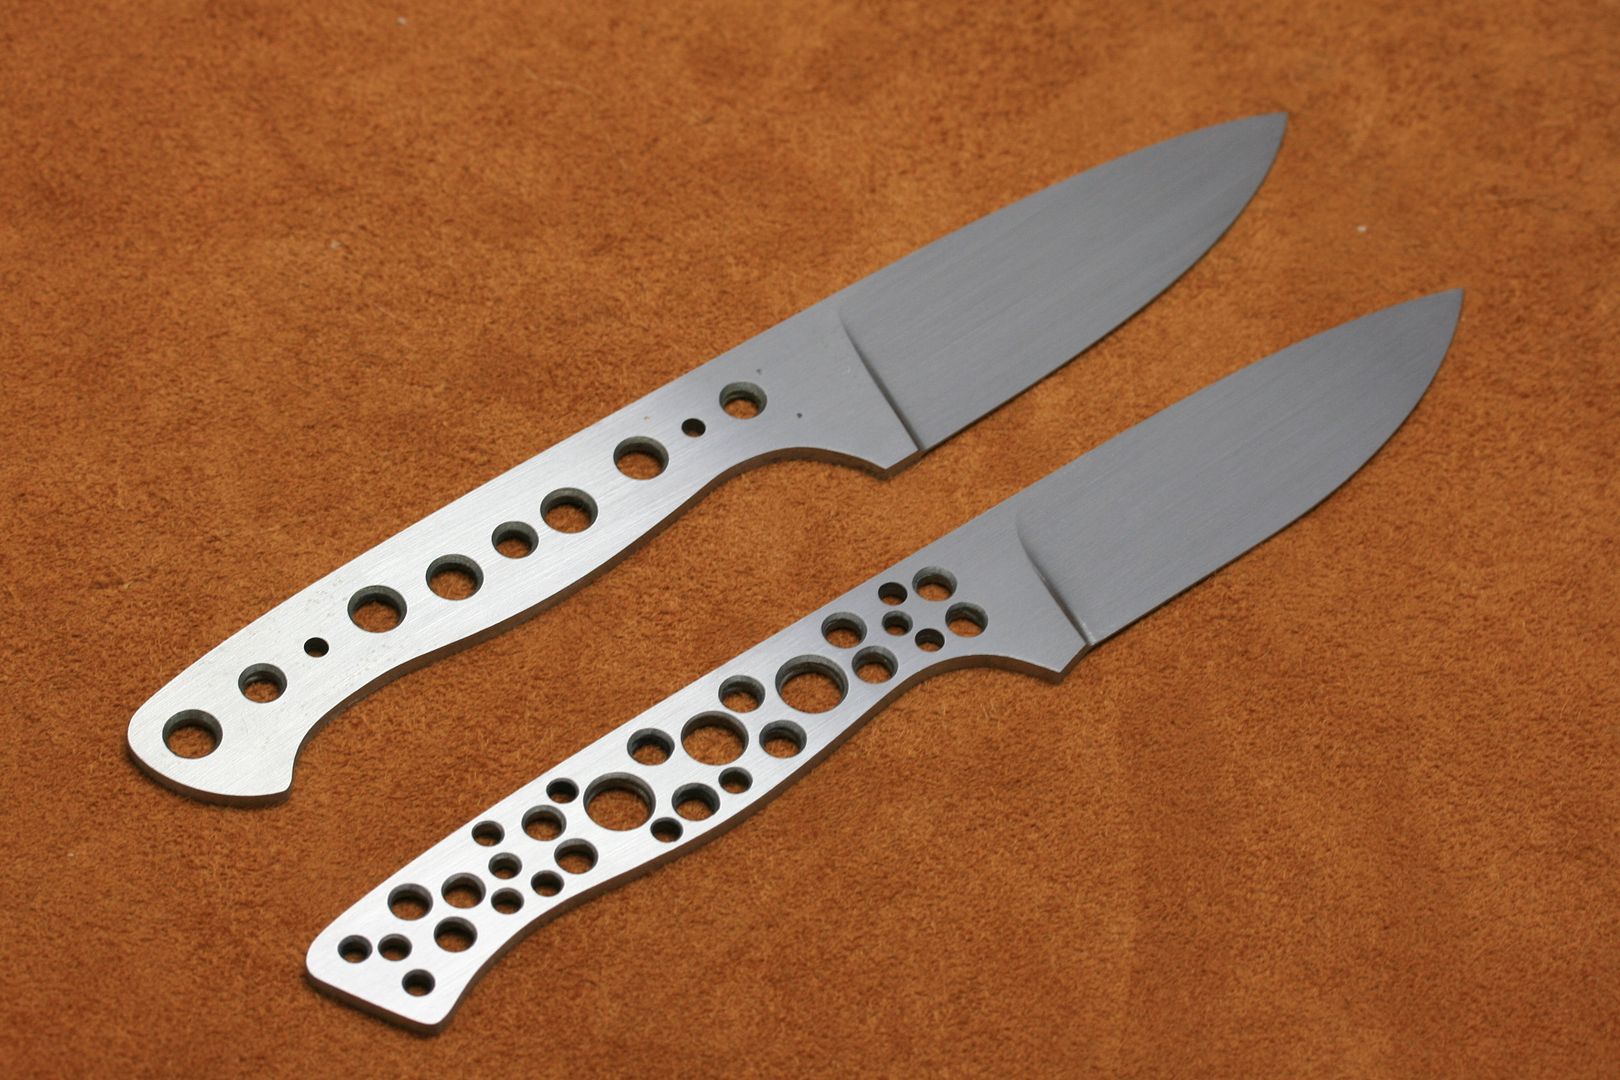
Dropping off #4 and #5 at heat treat tomorrow and still need to finish #3.
I also did my taxes, so next month I will finally be purchasing a KnifeDogs etching kit from USA Knife Maker Supply and some stencils from IMG. I really can't wait to put my makers mark on my knives. I will also order the grinder in a box next month and start the grinder build hopefully.
Thanks for looking!
Was hoping to lower the top of the grind a little on this one, but I kept messing up, having to take it higher. I can't get consistent with grinding the bevels. I need way more practice.
I changed up the design a bit on the second in the batch. Squared the butt a little and shortened the width some. I might do this to the first one also (pictured on top)...
I like this one a lot better...
Dropping off #4 and #5 at heat treat tomorrow and still need to finish #3.
I also did my taxes, so next month I will finally be purchasing a KnifeDogs etching kit from USA Knife Maker Supply and some stencils from IMG. I really can't wait to put my makers mark on my knives. I will also order the grinder in a box next month and start the grinder build hopefully.
Thanks for looking!
Steven Long
Well-Known Member
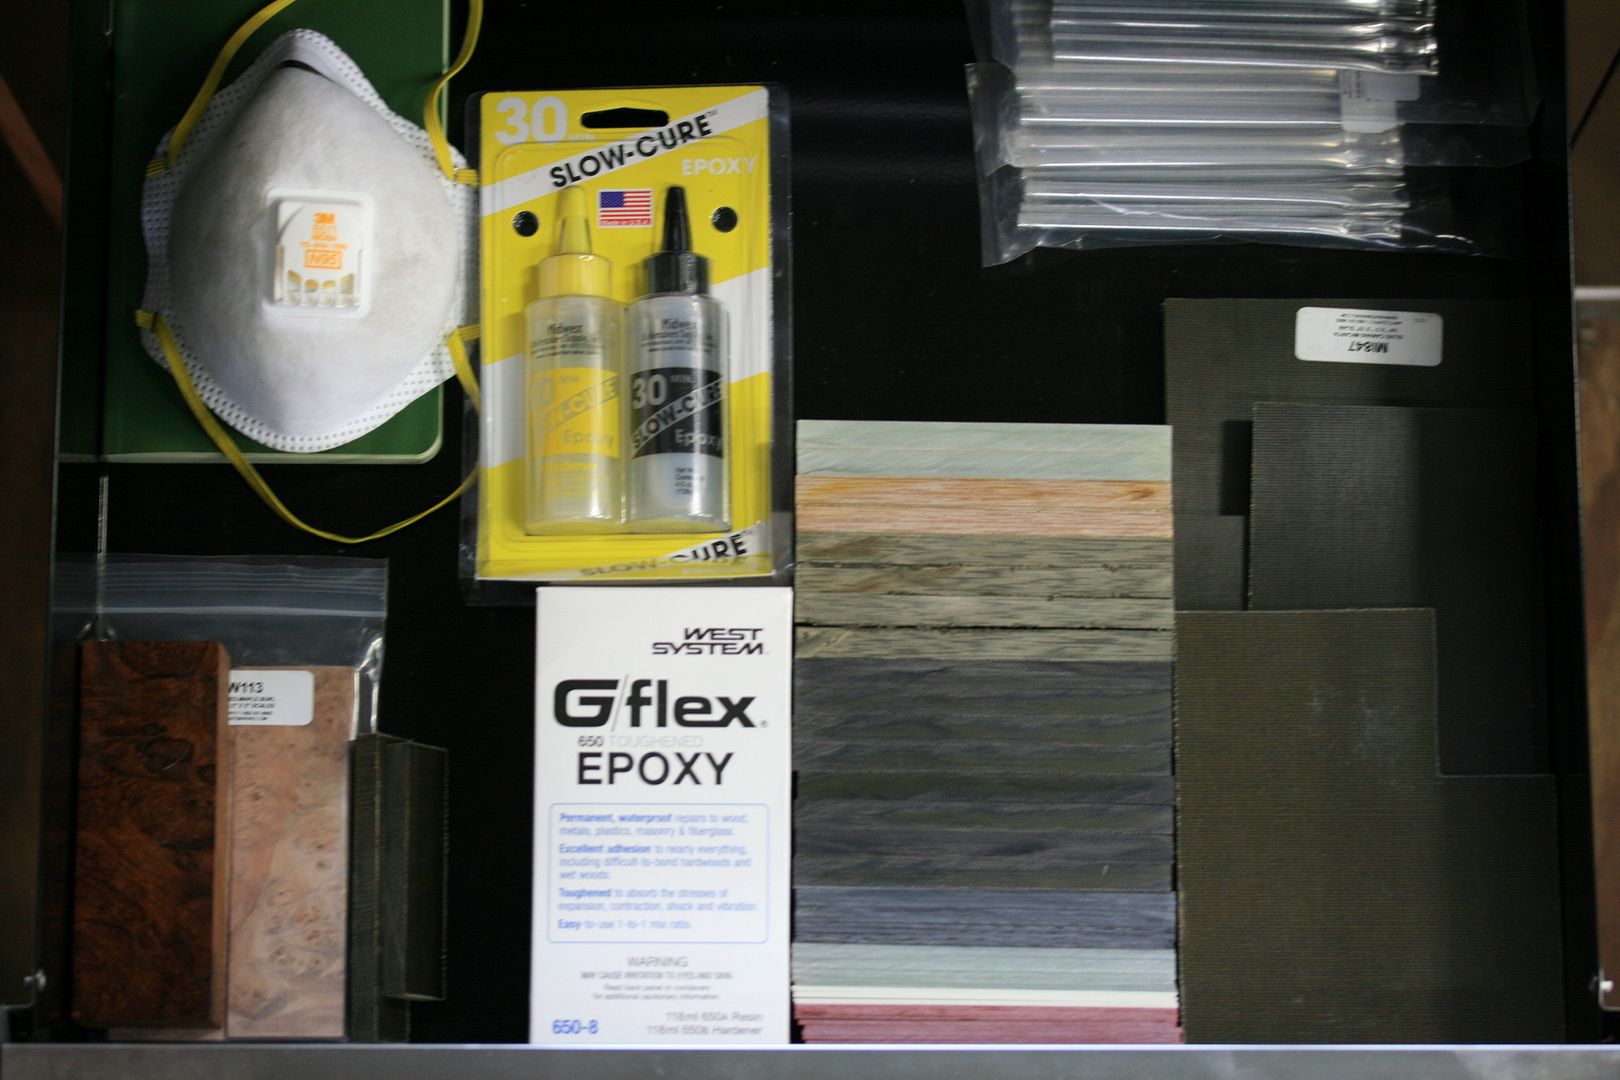
Back in the shop today after a few days off. I have been working on leather and drawing up new designs for knives. I wish the down time had fixed my back, but nope...
First off, I got a shipment of abrasives, handle material, steel, and a few other goodies...
The handle drawer. Finally getting some different materials to choose from...
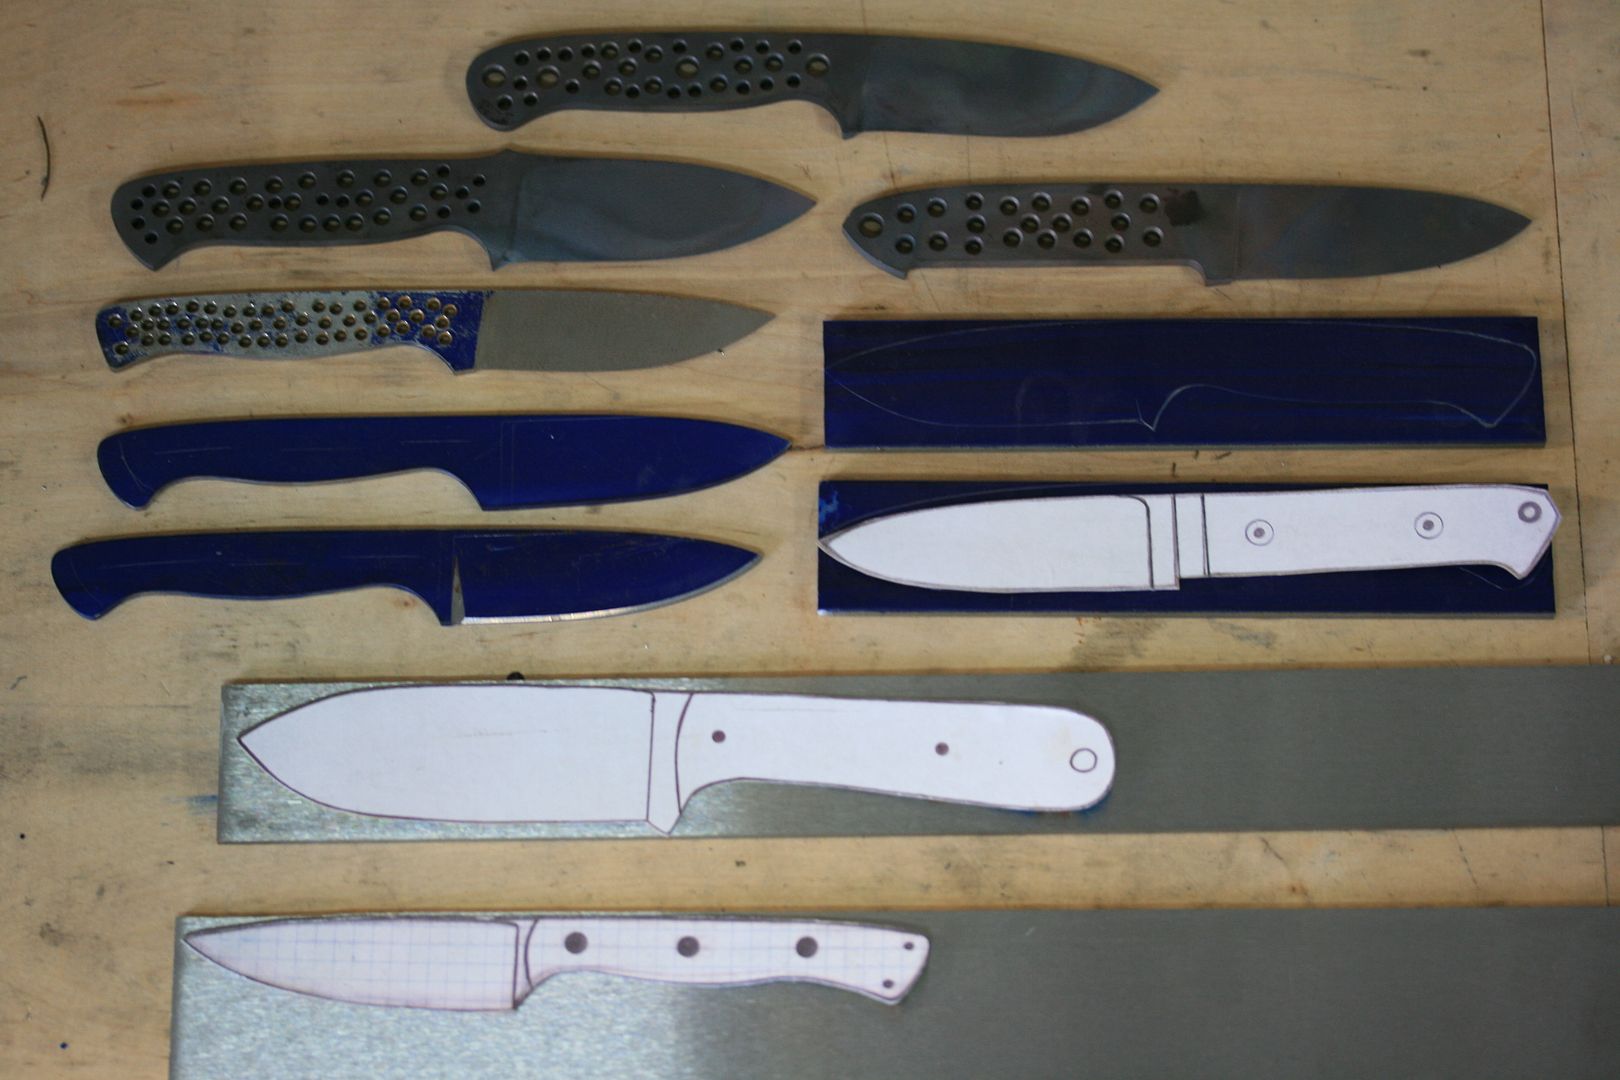
Pretty much the projects I have going on right now. I like to bounce around and keep it interesting. Working on the same project all day can wear me out...
A friend on another forum wanted me to make him a Kephart style knife so I drew one up and got to work...
- 5/32" O1
- 9 1/2" overall length
- 4 1/2" blade length
One side almost done sanding...

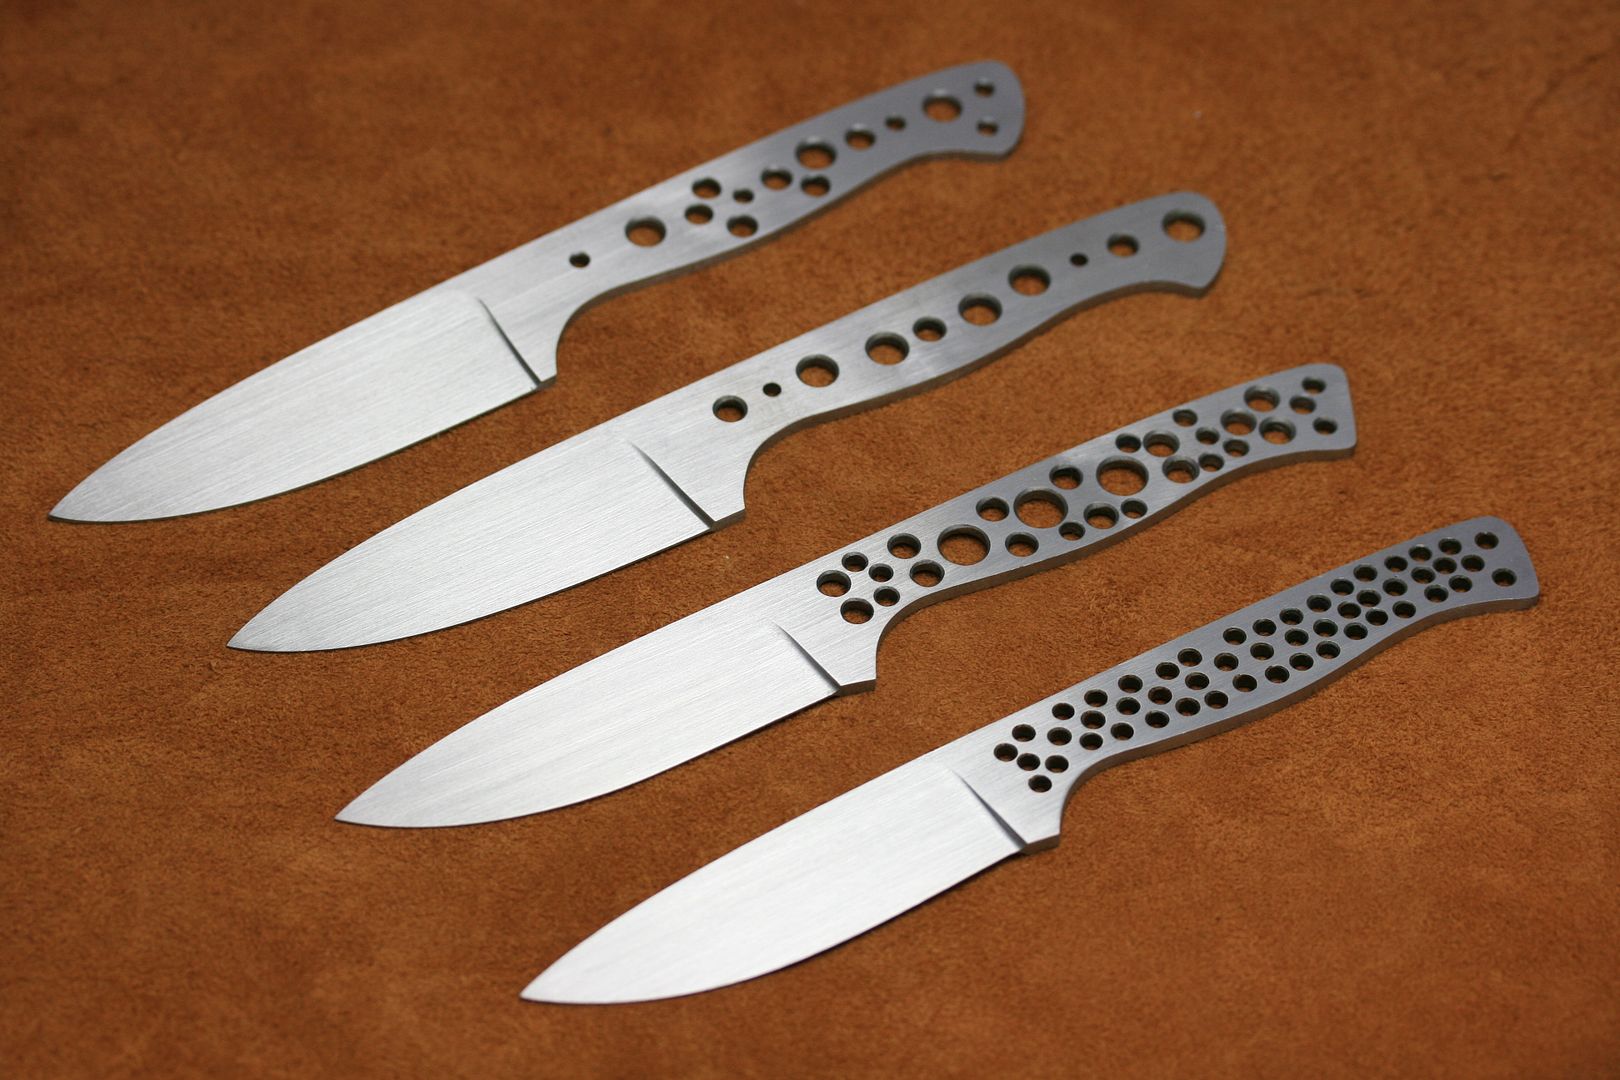
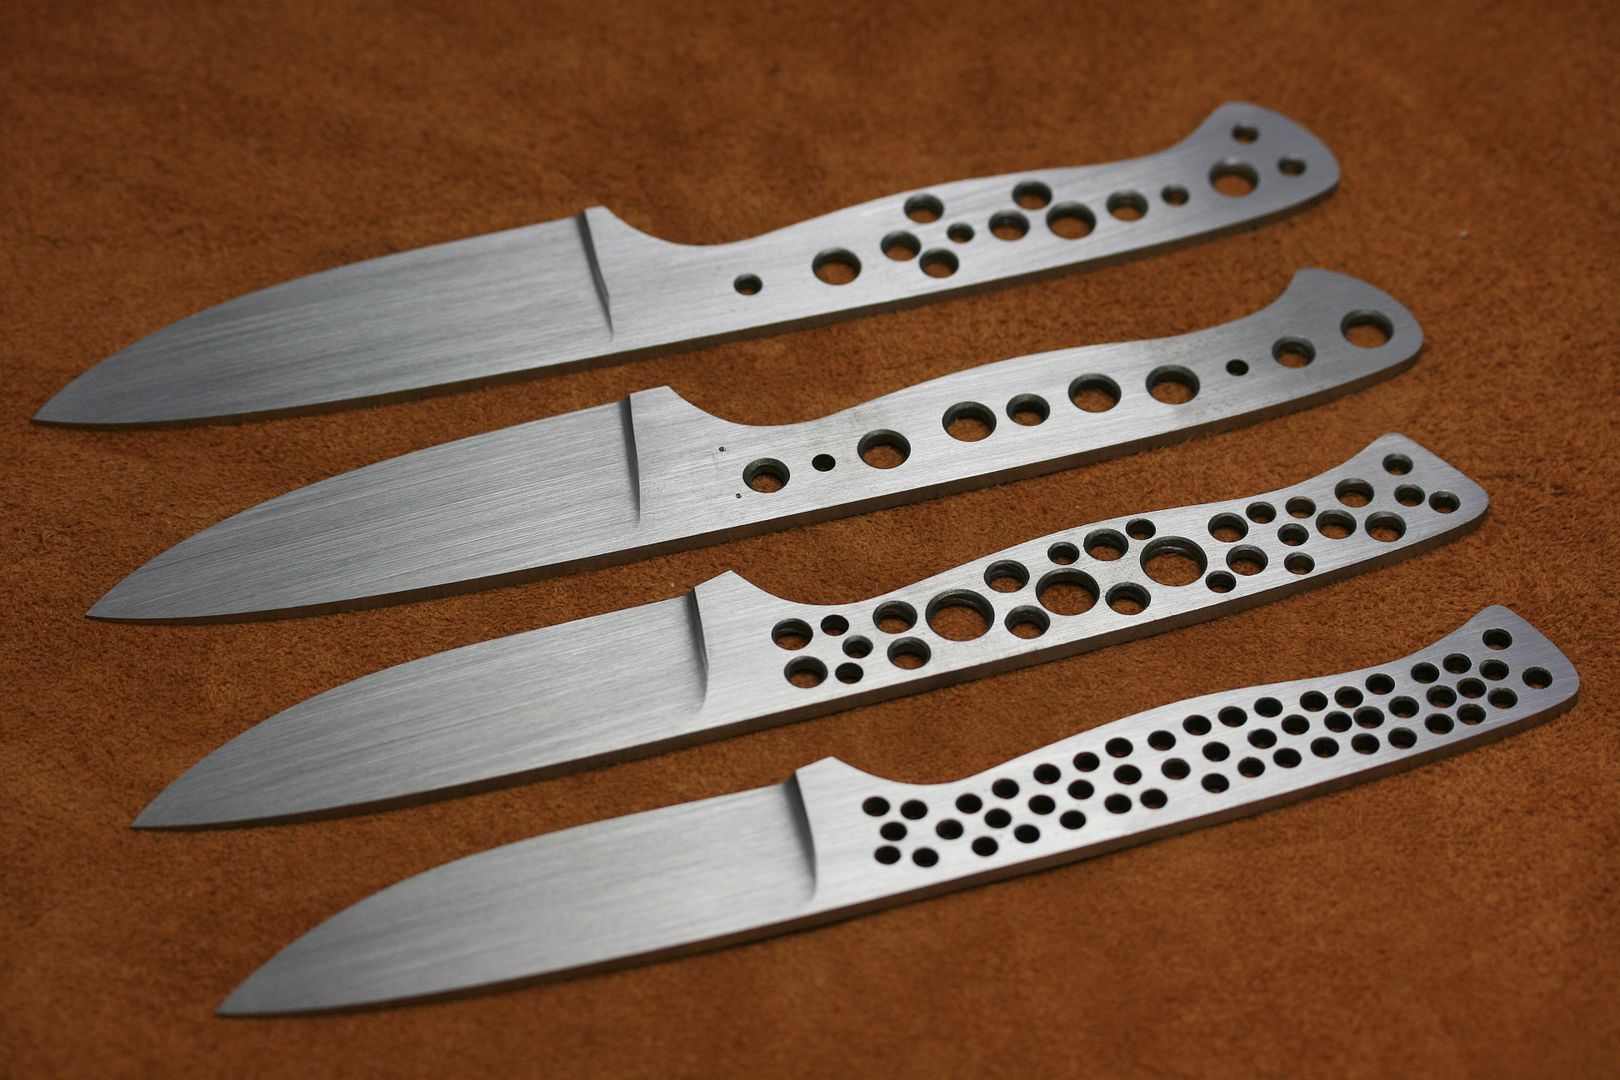
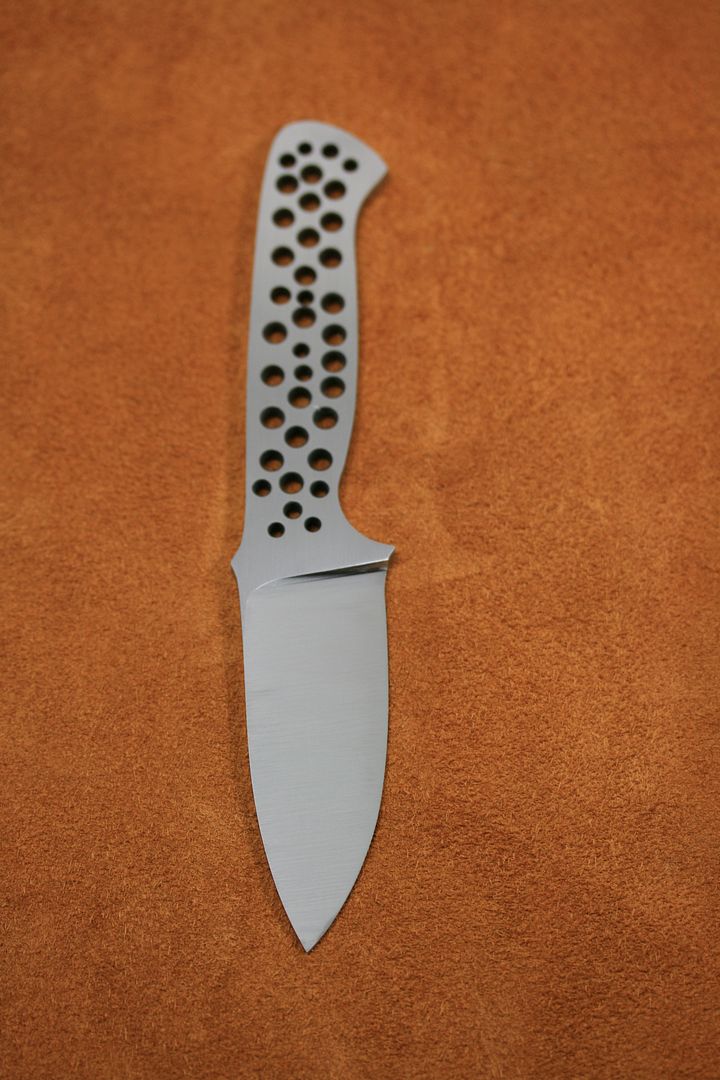
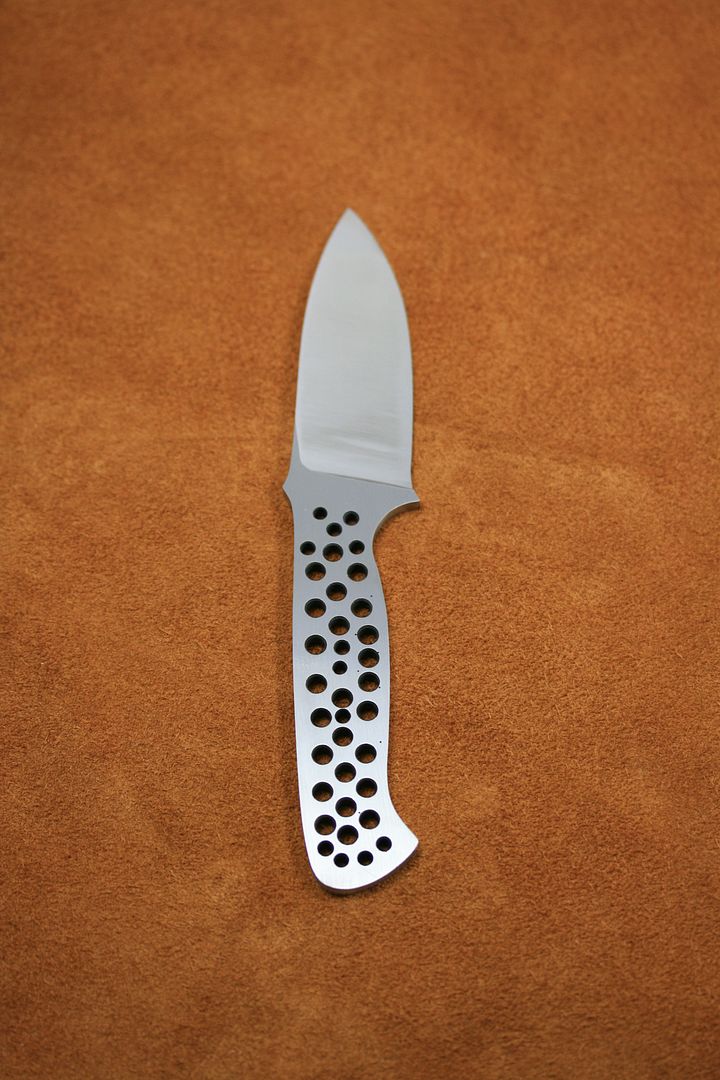
I also worked on another one of the small backpacker / paring knives. I now have 4 ready to go out to heat treat...
I am very excited because I just ordered an etching kit (KnifeDogs brand) from USA Knife Maker's Supply and plan on calling someone on Monday to get some stencils made.
That's about it for now. Thanks for looking!
First off, I got a shipment of abrasives, handle material, steel, and a few other goodies...
The handle drawer. Finally getting some different materials to choose from...
Pretty much the projects I have going on right now. I like to bounce around and keep it interesting. Working on the same project all day can wear me out...
A friend on another forum wanted me to make him a Kephart style knife so I drew one up and got to work...
- 5/32" O1
- 9 1/2" overall length
- 4 1/2" blade length
One side almost done sanding...
I also worked on another one of the small backpacker / paring knives. I now have 4 ready to go out to heat treat...
I am very excited because I just ordered an etching kit (KnifeDogs brand) from USA Knife Maker's Supply and plan on calling someone on Monday to get some stencils made.
That's about it for now. Thanks for looking!
Bruce Bump
Forum Owner-Moderator
Good looking blades. Ernie has grat prices on stencils. Let me know if you want his address.
Lagrange
Well-Known Member
I am truly loving this thread! I come in from working on knives and feel a little worn out, then I look at this thread and get all fired up again.
Sometimes I wish my body could keep up with my mind. I wake up thinking about knives or knife related stuff, and go to bed the same way. Your work shows you are destined for great things Steve...keep it up.
Sometimes I wish my body could keep up with my mind. I wake up thinking about knives or knife related stuff, and go to bed the same way. Your work shows you are destined for great things Steve...keep it up.
Steven Long
Well-Known Member
Good looking blades. Ernie has grat prices on stencils. Let me know if you want his address.
Thanks Bruce! I would definitely be interested in his address. I have not figured out who I am going to contact yet, so this would be great. I appreciate it...
I am truly loving this thread! I come in from working on knives and feel a little worn out, then I look at this thread and get all fired up again.
Sometimes I wish my body could keep up with my mind. I wake up thinking about knives or knife related stuff, and go to bed the same way. Your work shows you are destined for great things Steve...keep it up.
Eric, you are the man! Thank you sir! You just got me fired up. Luckily, it is raining over here again and I have no work today :biggrin:
I know what you mean. My schedule has turned into wake up at 6 or so, think knives, work on knives, go to sleep around 2am and dream knives. My back has taken a turn for the worse and just wish it could keep up.
I will be moving my shop to a spare room in the house that used to be the garage. I figure I could spend $1200 I don't have to insulate the shed and run power to it or move into the A/C and spend that money on a dust collection system. I am renting my house so the choice was obvious; dust collector. This is going to give me the chance to experiment with putting my tools at different heights to try and resolve my back pain. Looking forward to it and hope it doesn't make too much of a mess in the house. I think I am still going to shape my handles outside but everything else inside.
Thanks again for the comments and encouragement.
jonathan creason
Well-Known Member
Wow, your progress is amazing Steven.
Steven Long
Well-Known Member
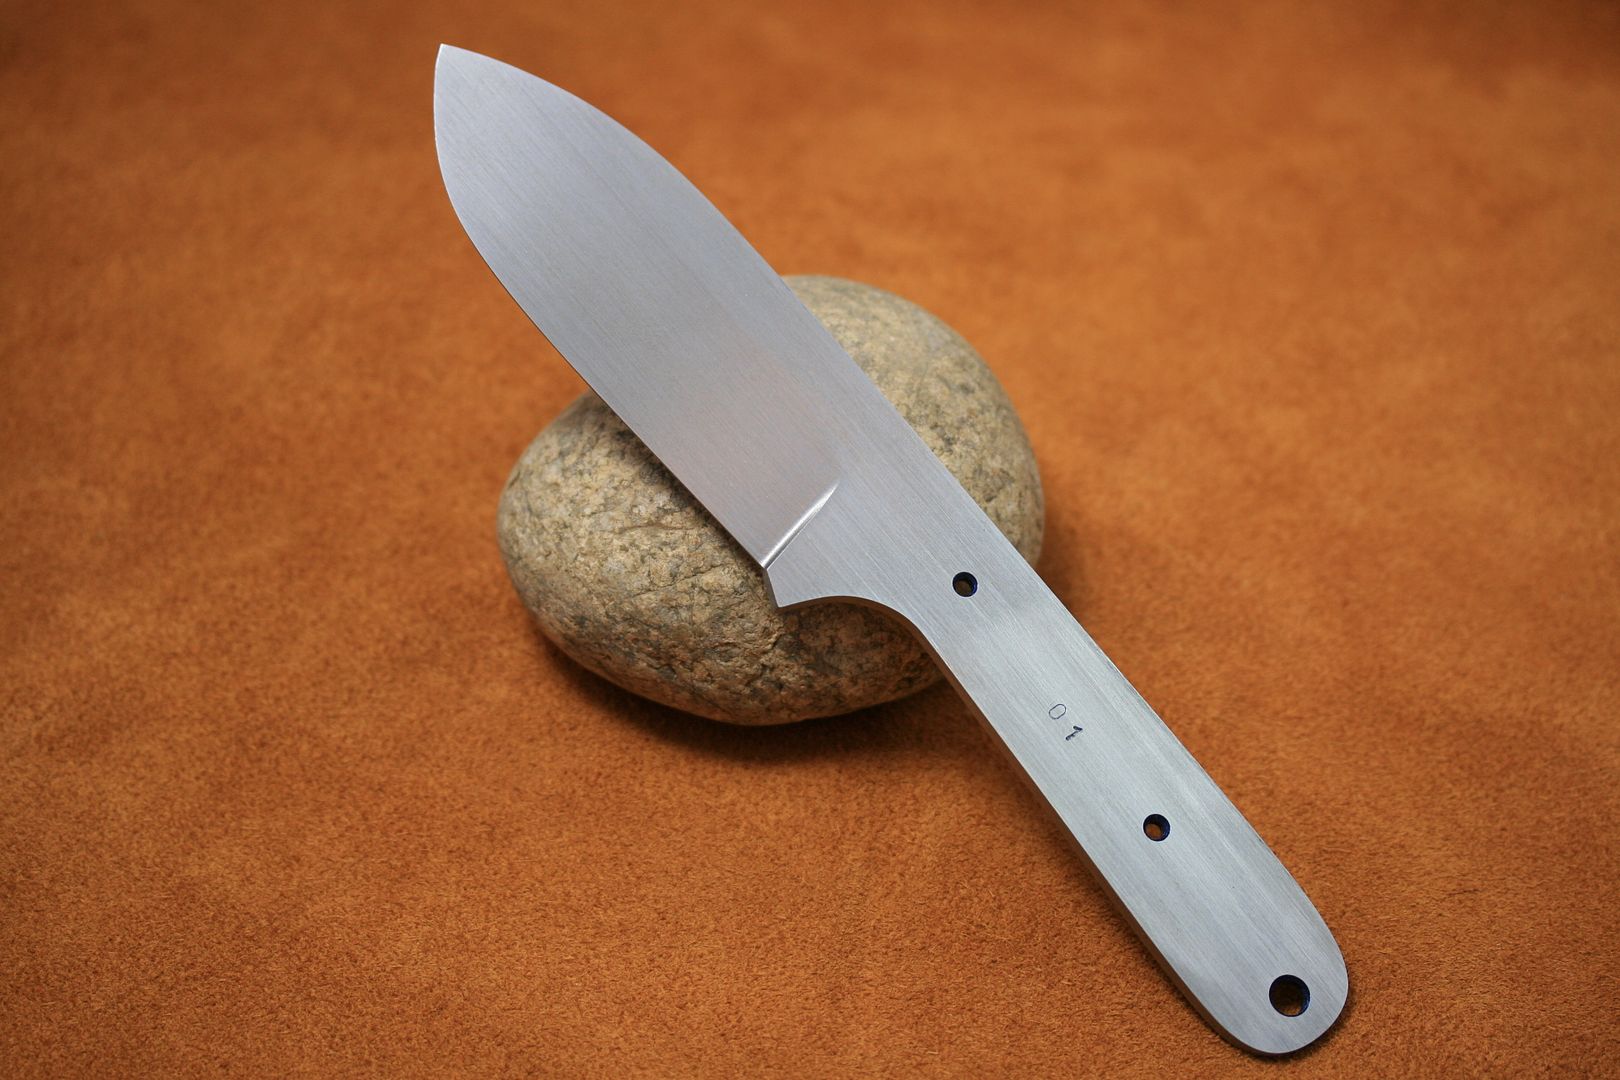
The giant Kephart is ready for heat treat except for a little cleaning. It is really not that big but the biggest I have worked on. I think it came out pretty good...

I am going to use Peter's Heat Treat this time and probably until I can get my own oven. The other place only treats air hardening materials and they also do not test the blades when complete from what I can tell. I am going to try and get a few more done since it will all be the same price and send them out later in the week. When they get back, I will be a busy man!
Thanks for looking!
Steven Long
Well-Known Member
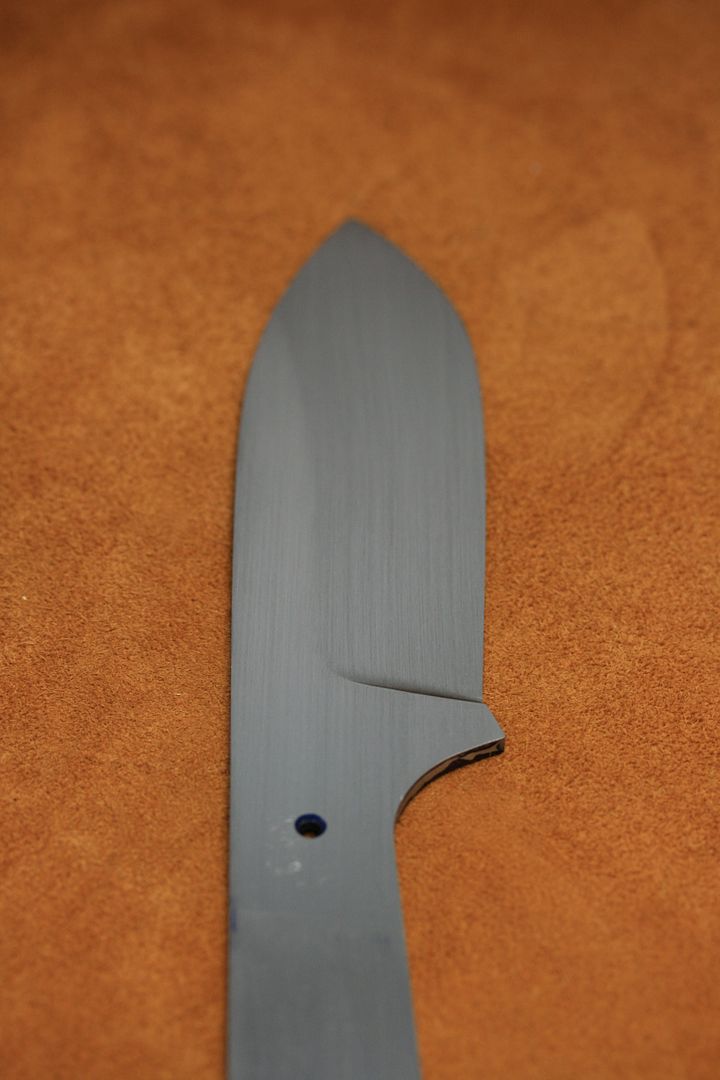
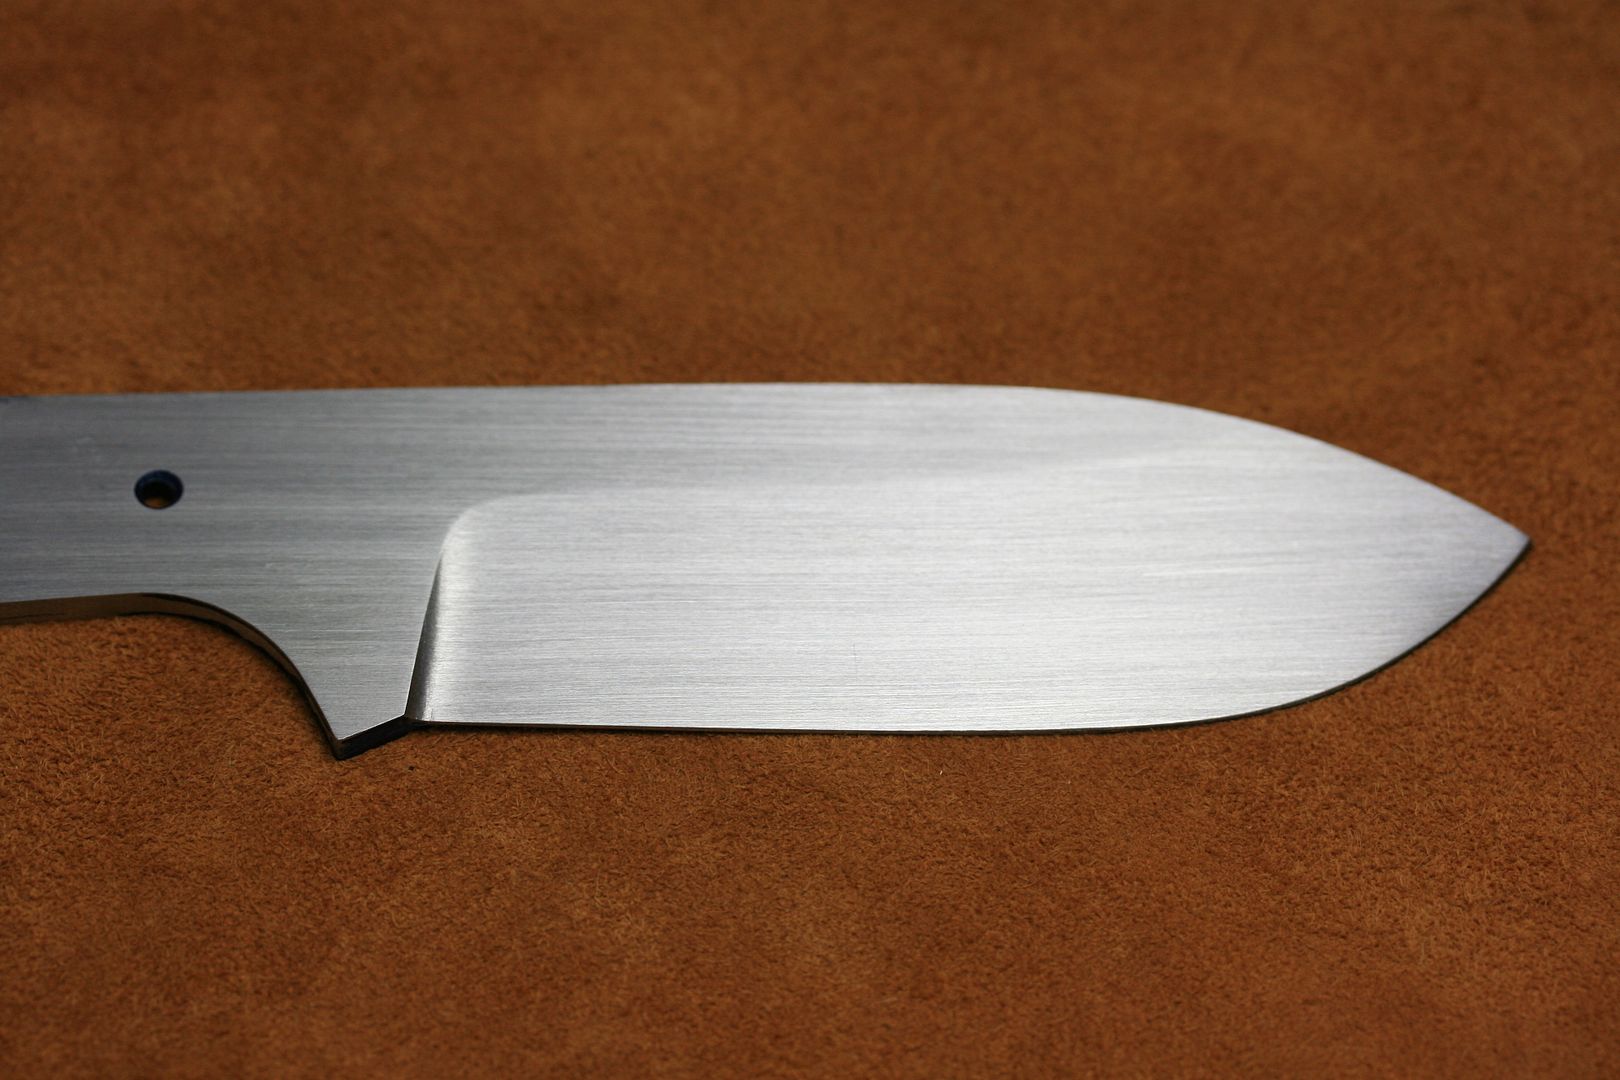
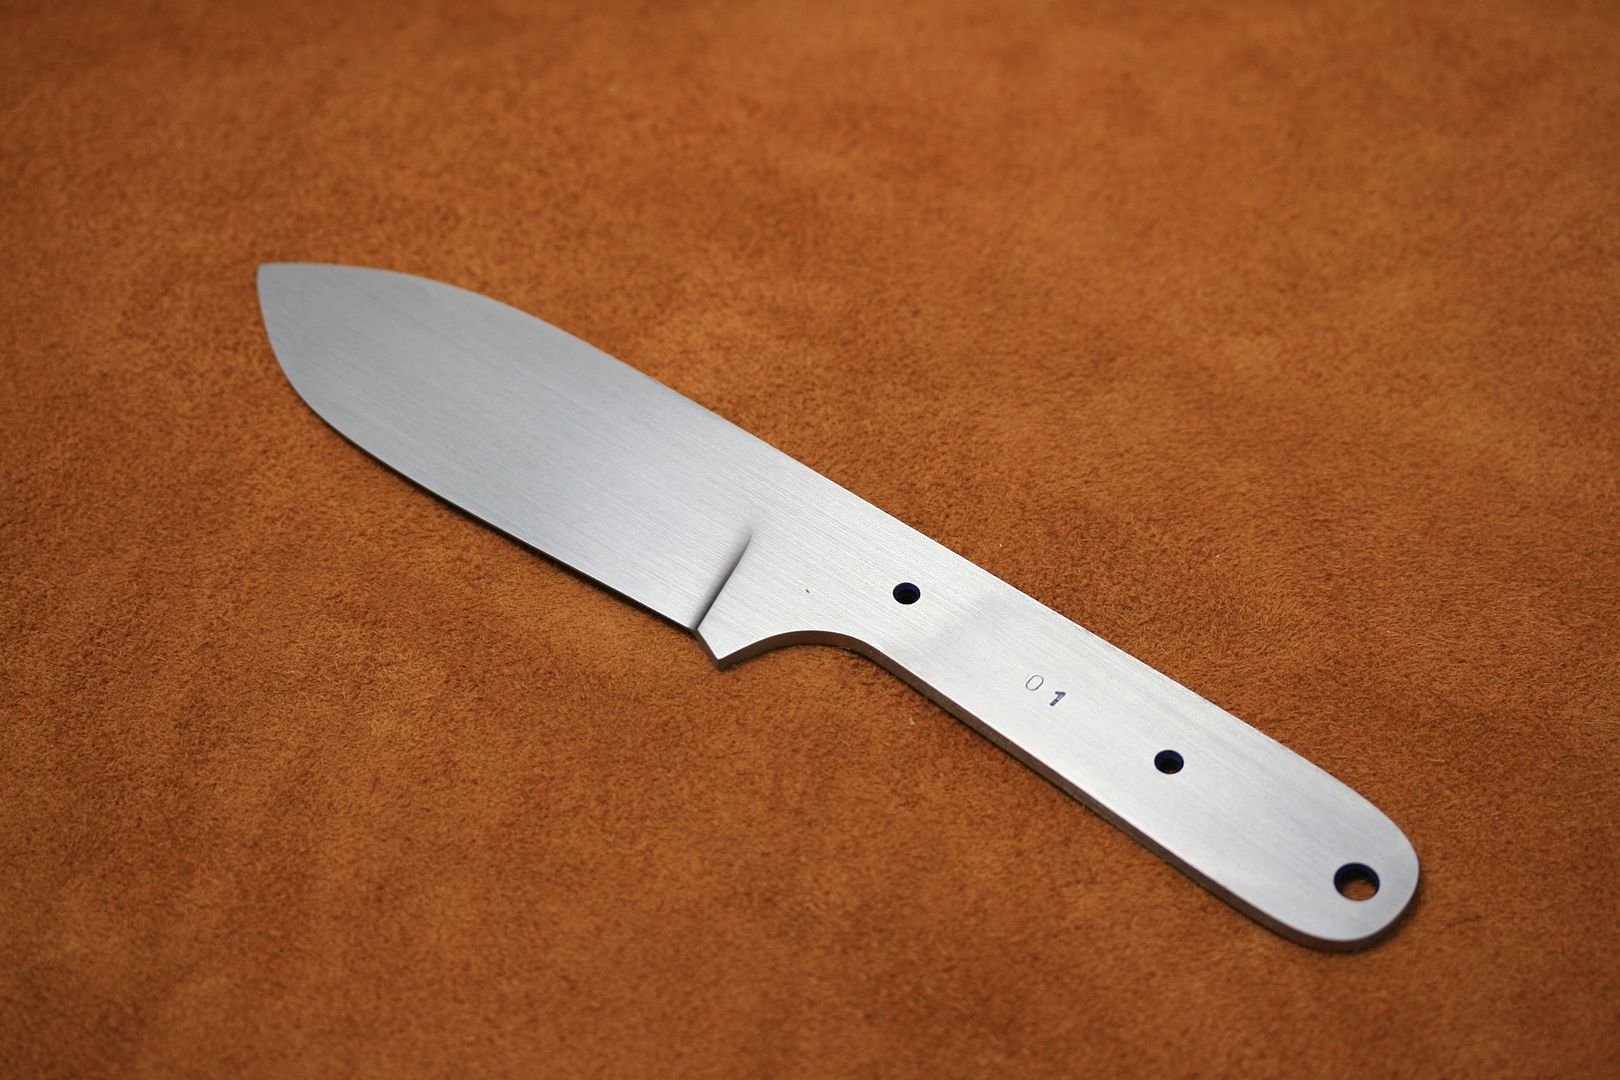
This one is almost ready for a handle. Needs a little more sanding on the blade and clean up in the holes. I tried finishing it on the grinder but it kept leaving scratches in weird spots. Not sure whats going on. I am going to try and figure out a way to get a new grinder in the near future. It would definitely make my life a little more pleasant.
Lagrange
Well-Known Member
Steve I think a guy like you would get a kick out of building his own grinder. You just have that hands on attitude. I built my own KMG clone and couldnt be happier. I started with a Sears 2 x 42 like the one you have. I still use it for odd jobs. There are a lot of different grinder styles out there and a lot to think about when you build one. I suggest you consider what you will want to use in the way of a work rest and perhaps which different types of adapters you want to be able to use on it.
I bought all of my steel from a local factory that has it's own machine shop. Fortunately they sell stock to the public and will cut it to size for you if you ask.
Building your own grinder may take some time, but it is worth it. When I hit the switch and it comes to life I always get a big smile.
Besides...you did want to do another WIP didnt you? Keep up the good work brother, and try not to let your back get you down. Make sure you have some place to sit from time to time. I have to stop and sit and let my back and legs rest on a regular basis or I will literally fall down.
Steven Long
Well-Known Member
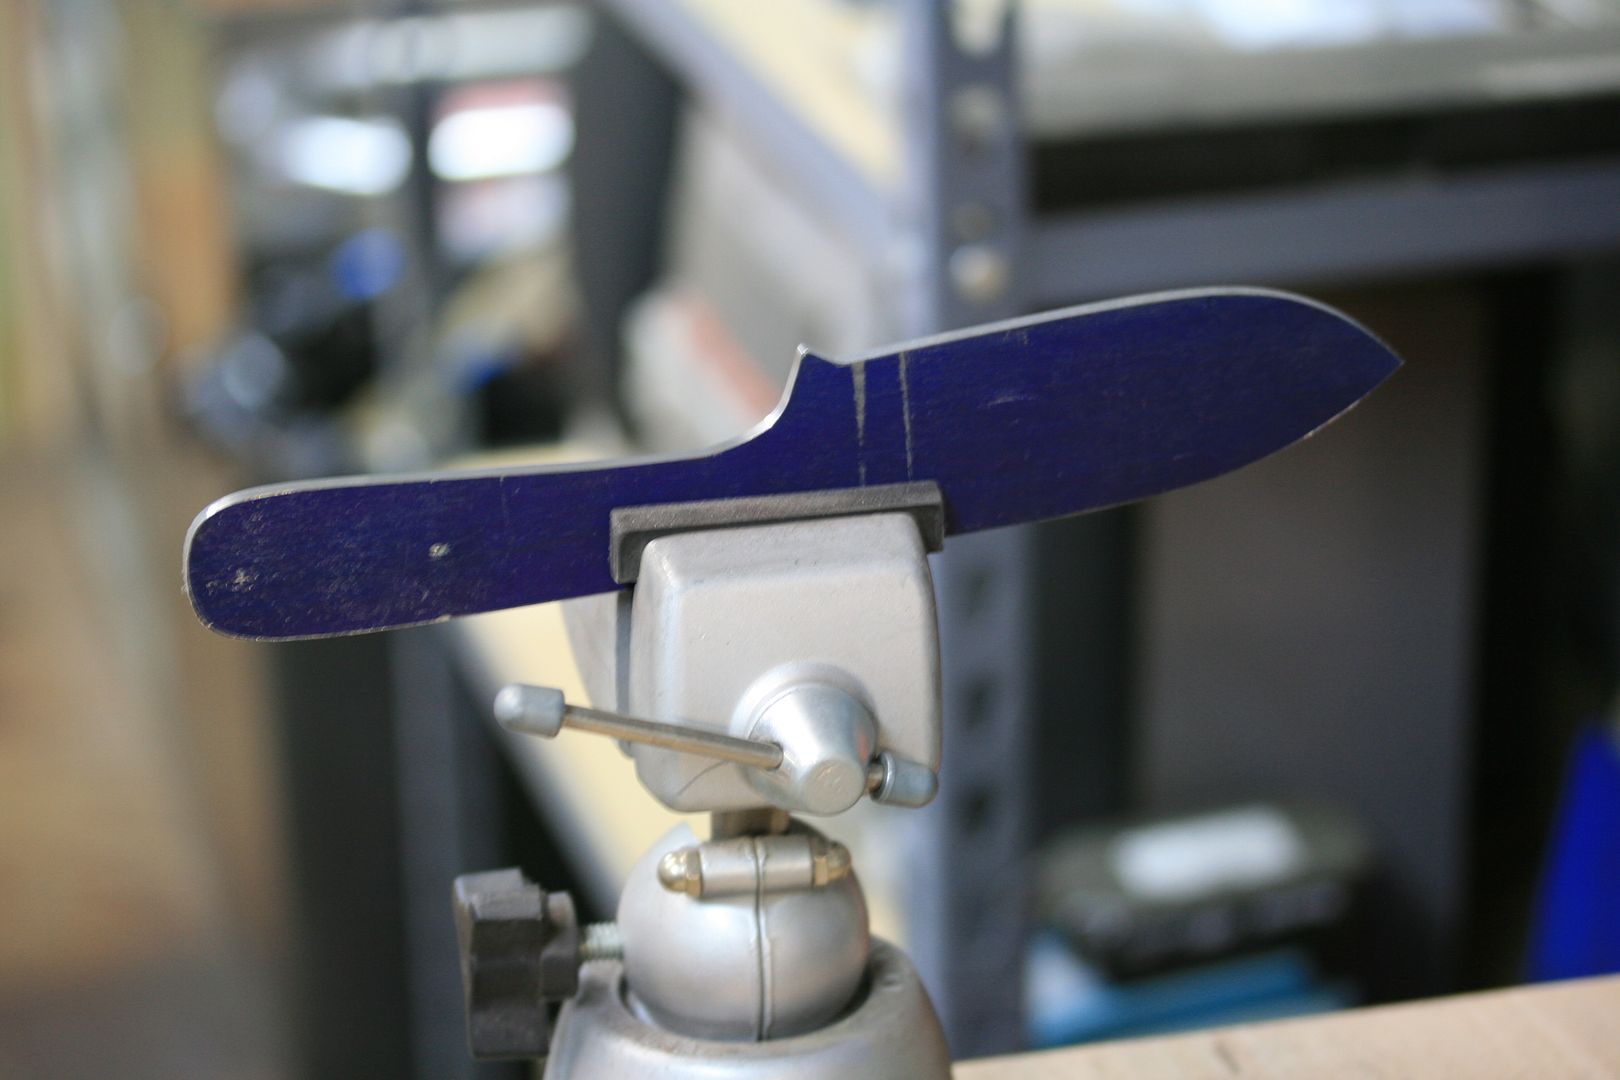
After staring at the Kephart for a while, I decided the height of the grind needed to be raised. I was having trouble keeping both sides even and ended up with a full height grind. I need to straighten out the plunge lines in the morning and finish cleaning her up. I think I might start on another one also.
If you notice, all of my in progress knives have full height grinds. These weren't planned that way. I just can't seem to keep the height symmetrical on both sides so they all end up going to the top.
If you notice, all of my in progress knives have full height grinds. These weren't planned that way. I just can't seem to keep the height symmetrical on both sides so they all end up going to the top.
Lagrange
Well-Known Member
Your issue here may be improper blade angle while grinding coupled with uneven pressure as you make your grind pass across the platen.
Have you thought of using Fred Rowe's bubble jig? Assuming you know the formula for finding the side of a triangle you can calculate the angle of the grind you need to reach the deisred grind hieght, and using Fred's jig you can maintain that angle until you reach your desired grind.
This is all based on what I have read. I dont have one or never used one, but I can see how it could be handy.
Steven Long
Well-Known Member
Eric, That is actually my plan but I will be hopefully be using the Grinder in a Box for the chassis. I have the parts priced out and just need some extra funds now to start it. I was going to order the GIB last week, but I decided that an etcher was more important at the moment. I can't wait to see my makers mark on some steel!
Thanks for the tips. I tried a few new things yesterday that really helped the back pain. I wore my hiking shoes in the shop, which have great support, and stretched yesterday morning before doing anything. The pain was still there but not as sharp as before.
I have read that your grinder should be belly button height; mine is right below chest high. What do you think a good height for a hand sanding platform is? Mine is set up right below my belly button. I get the most pain at the sanding area.
Steven Long
Well-Known Member
Your issue here may be improper blade angle while grinding coupled with uneven pressure as you make your grind pass across the platen.
Have you thought of using Fred Rowe's bubble jig? Assuming you know the formula for finding the side of a triangle you can calculate the angle of the grind you need to reach the deisred grind hieght, and using Fred's jig you can maintain that angle until you reach your desired grind.
This is all based on what I have read. I dont have one or never used one, but I can see how it could be handy.
Eric, I do believe you are right. When grinding, I look at the plunge facing me and line it up with the edge of the belt. It seems to be the right angle, but they always come out crooked. The pressure issue is something I am definitely working on. The bigger knife was a lot harder to get an even grind across the knife. The tip is still a little fat, which is what made me keep grinding away, leading to more problems.
I do have a bubble jig and is actually what has gotten me this far. I quit using it a while ago because I was focusing too much on the bubble and forgetting everything else. I am getting better results doing it freehand. I think I might just have to give it another try though.
Thanks for all of your help Eric!
Steven Long
Well-Known Member
I also forgot to mention that I have noticed my ceramic plate on the platen is crooked just a bit. The bottom is slightly moved to the right. Also the platen itself is crooked, the left side leans inward and the right side leans towards me. In the past, I knew this is causing some problems, but the more I think about it, the more I believe these issues are causing most of my headache. I have two new platens ordered that should be here on Thursday. I am going to use graphite paper on one and see if I get better results. If I do, I will order another ceramic platen and try my best to attach it exactly straight.
Last edited:
Lagrange
Well-Known Member
I did a lot of tweaking on my chraftsman. I have some shims in one of the two bolts to bring it straight. If I were serious about it I would have a platen mount ground for me to correct the problem. But it seems just fine with the shims. And like I said, I dont use it to grind blades anymore. But I wouldnt give it away, it is very useful for other things.
I hand sand at elbow height. I dont know if it is the optimal height or not. Most of my problem comes from standing. I'm a little short on legs and a little long on back pain. My (leg)s get tired quickly. But I have tried hand sanding while sitting and it is'nt comfortable.
Imagine a fat man sitting on a chair with his arms moving back and forth in a sanding motion. It takes a half hour for my belly to stop moving after I'm done sanding.
Steven Long
Well-Known Member
Imagine a fat man sitting on a chair with his arms moving back and forth in a sanding motion. It takes a half hour for my belly to stop moving after I'm done sanding.
Ahh man! That had me rolling on the floor.
It is funny that you mention the shims. As I was playing around with the grinder, adding washers here and there, my phone beeped and it was you posting to this thread telling me how you shimmed up your machine. Hopefully it's a sign of finally figuring out my problem. It did get straighter but not perfect, or even close, but better.
I think I might need to raise my sanding area. I have found that spreading my legs apart brings me closer to the platform (lower) and also seems to help the back issues out a little.
Thanks Eric! I needed a good laugh this morning...
Steven Long
Well-Known Member
Kephart WIP
So after wrecking my plan for the Kephart, I contacted the guy who the knife is going to and talked to him about the grind height. He really didn't care at first but after looking at pictures for a while, he decided he wanted about a 3/4 high grind. I don't blame him, I don't like the look of the full height grind on this knife and it is going to be mainly a fire prep / camp knife, so I figured a distal taper would not be best (am I right about this? I figure thicker spine = stronger knife)
Since this is the first knife I am parting with, I want it to be the best that I can possibly do. He is also going to test it for me and hopefully write up a good review on a bushcraft forum.
So I decided to add a WIP into my "WIP" thread. This is how I make a knife. I am sure there are many things that will be wrong so I hope some of you guys chime in and correct me.
For the more experienced guys, this will probably bore the crud out of you. This won't come even come close to Josh Dabney's WIP, but I am going to give it a try...
Kephart WIP
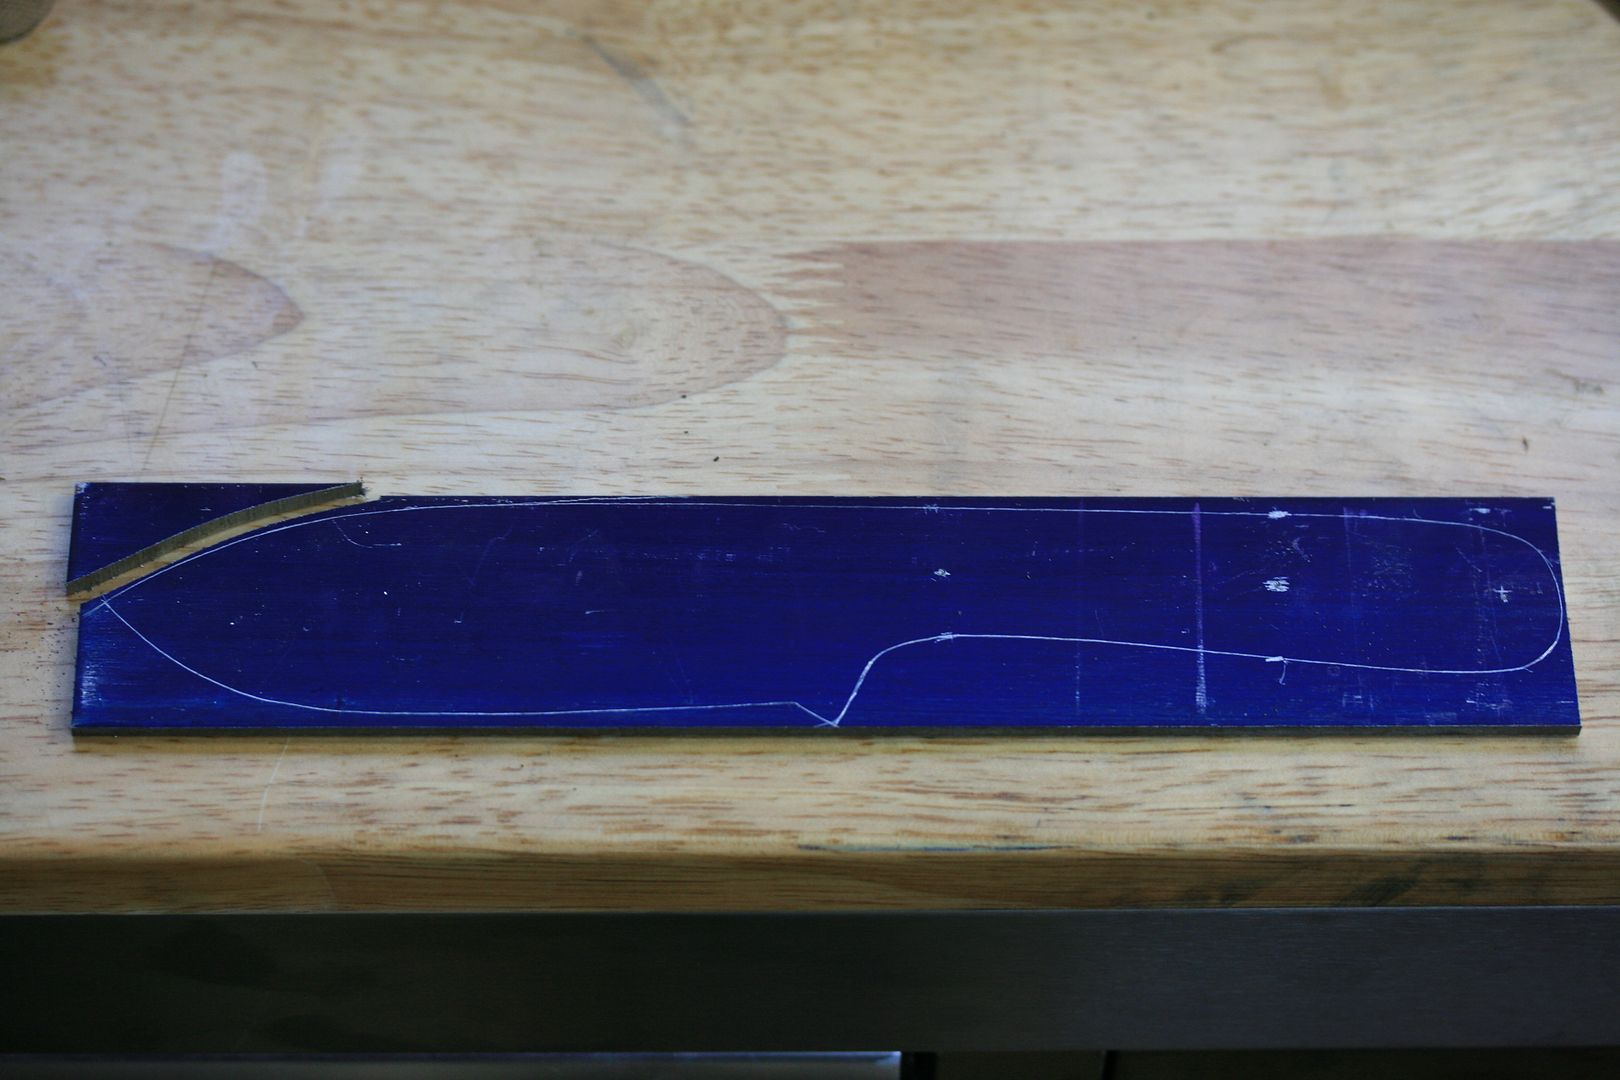
First off, I sketch my desired pattern in my sketch book using pencil. After erasing and tweaking for a while, I come up with what I am after. Next I copy the sketch and cut it out. Glue it to some thin cardboard laying around and let it dry. Once the glue has dried, I cut the template out. This is the design I am going for...
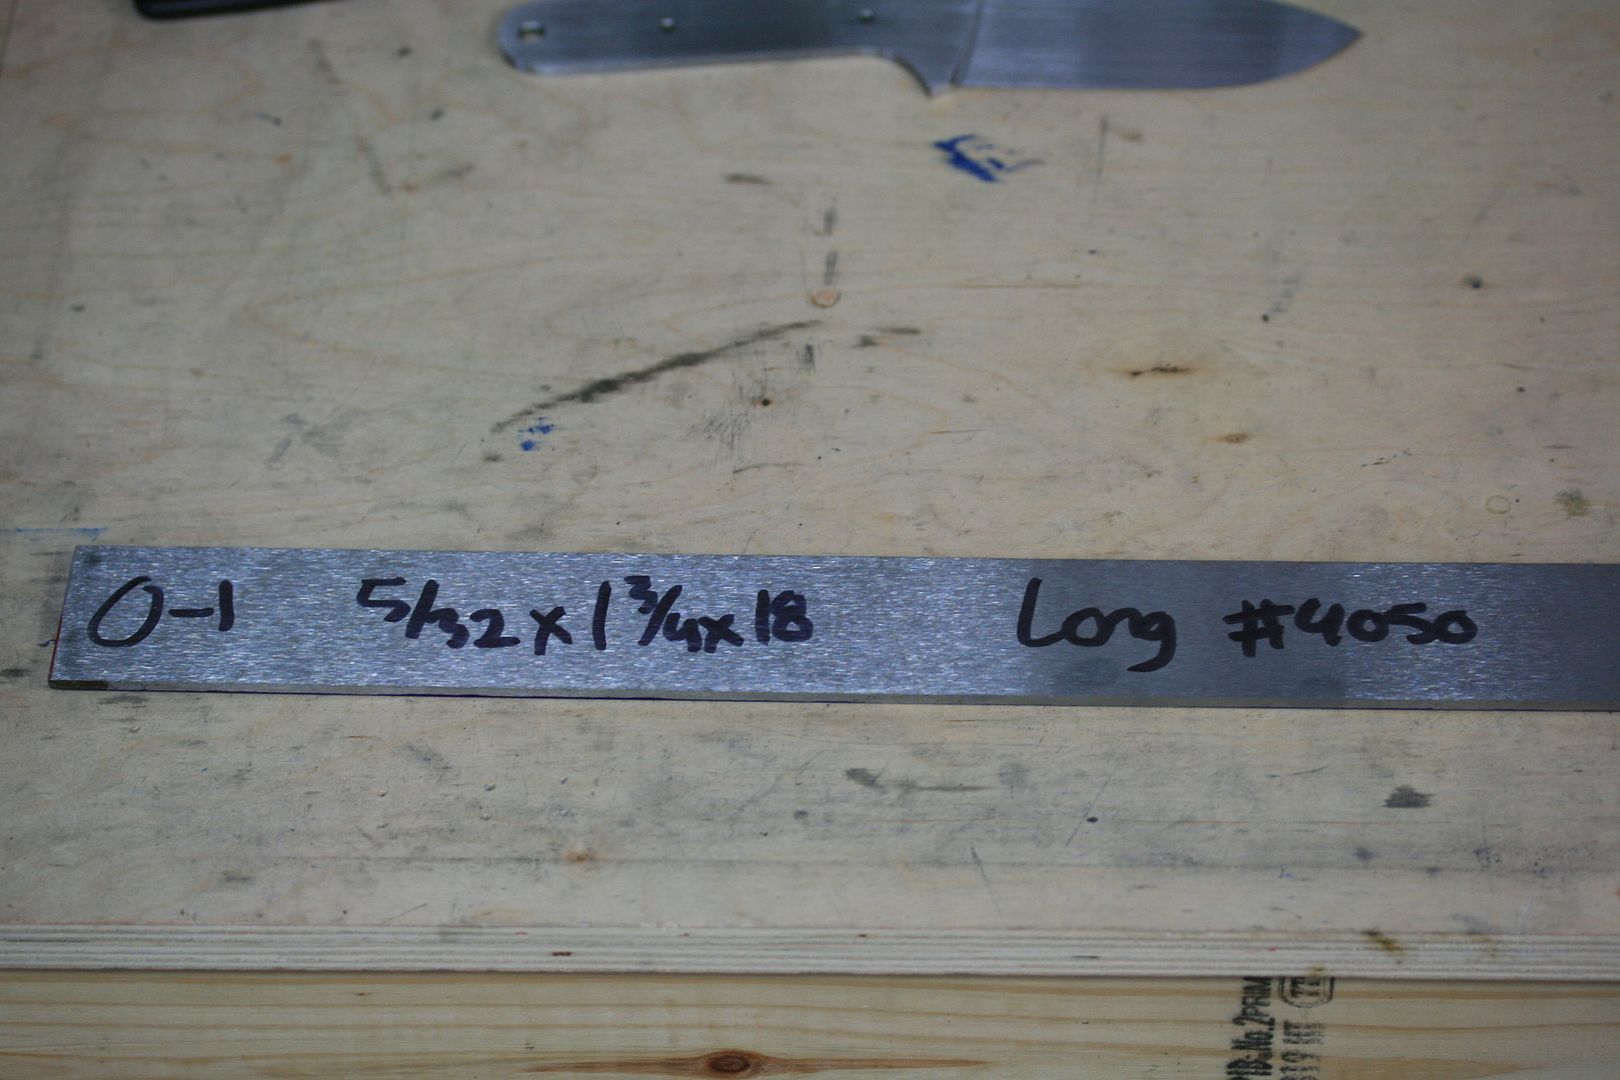
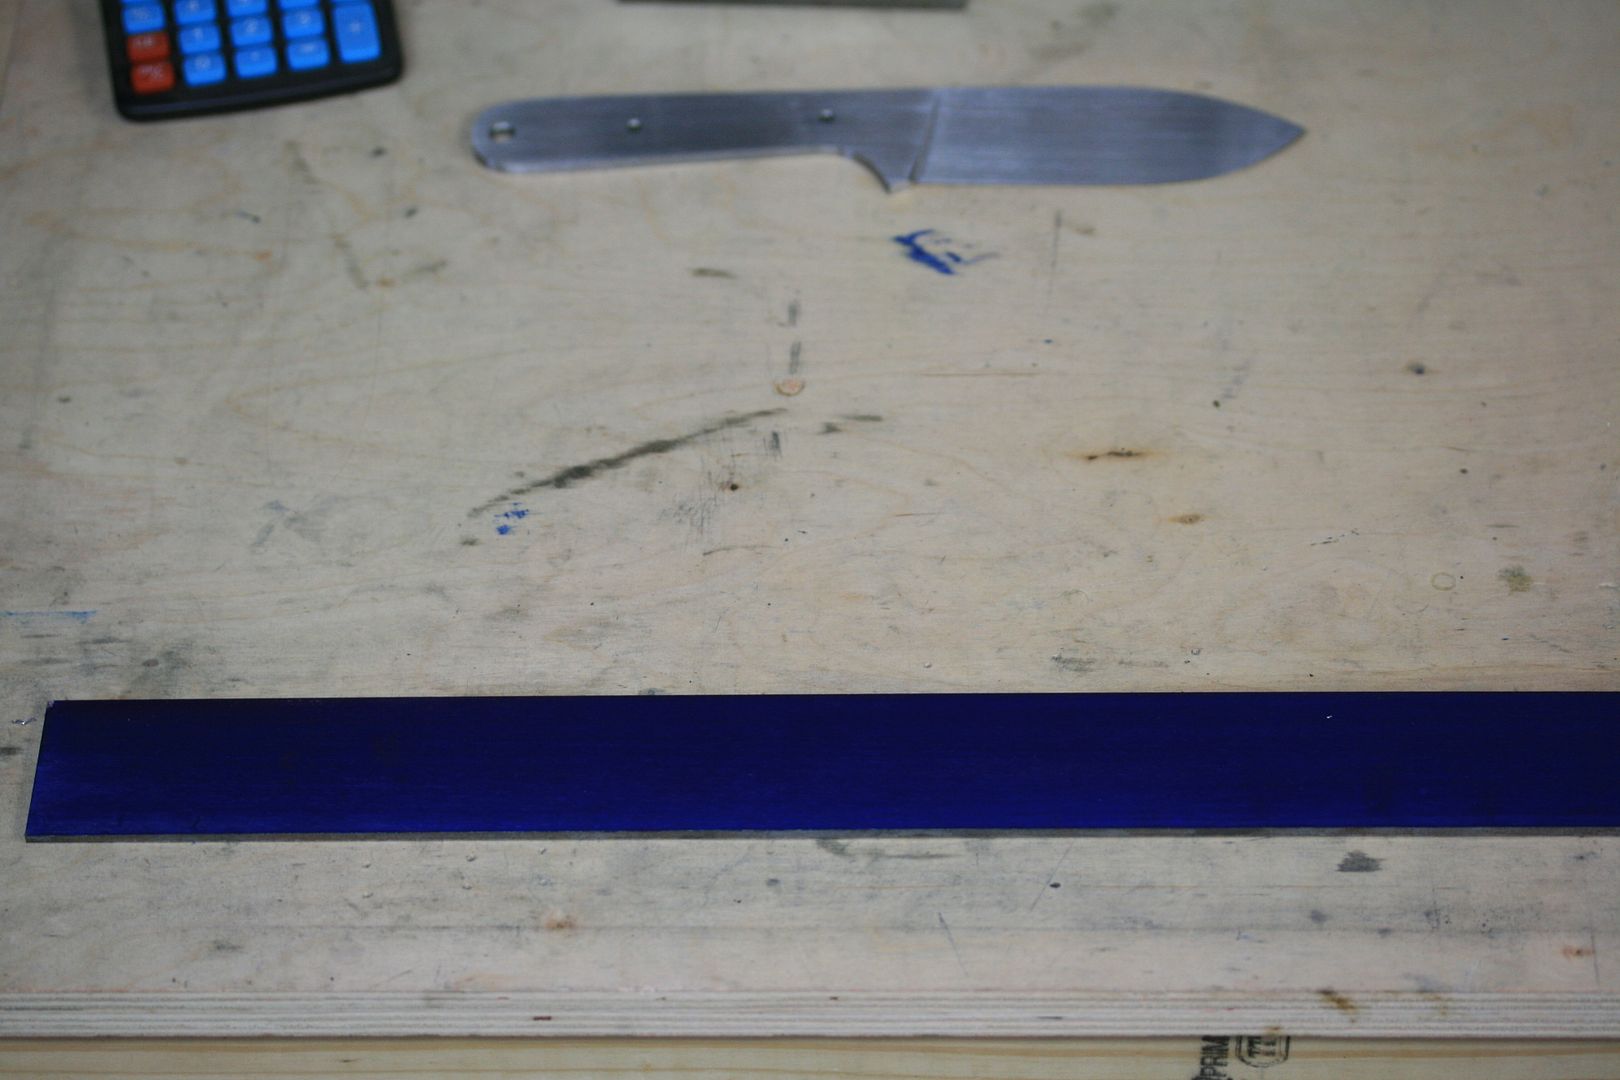
Time to prepare the steel. My choice (or really the customer's choice) is 5/32" x 1 3/4" O1 tool steel purchased from NJ Steel Baron.
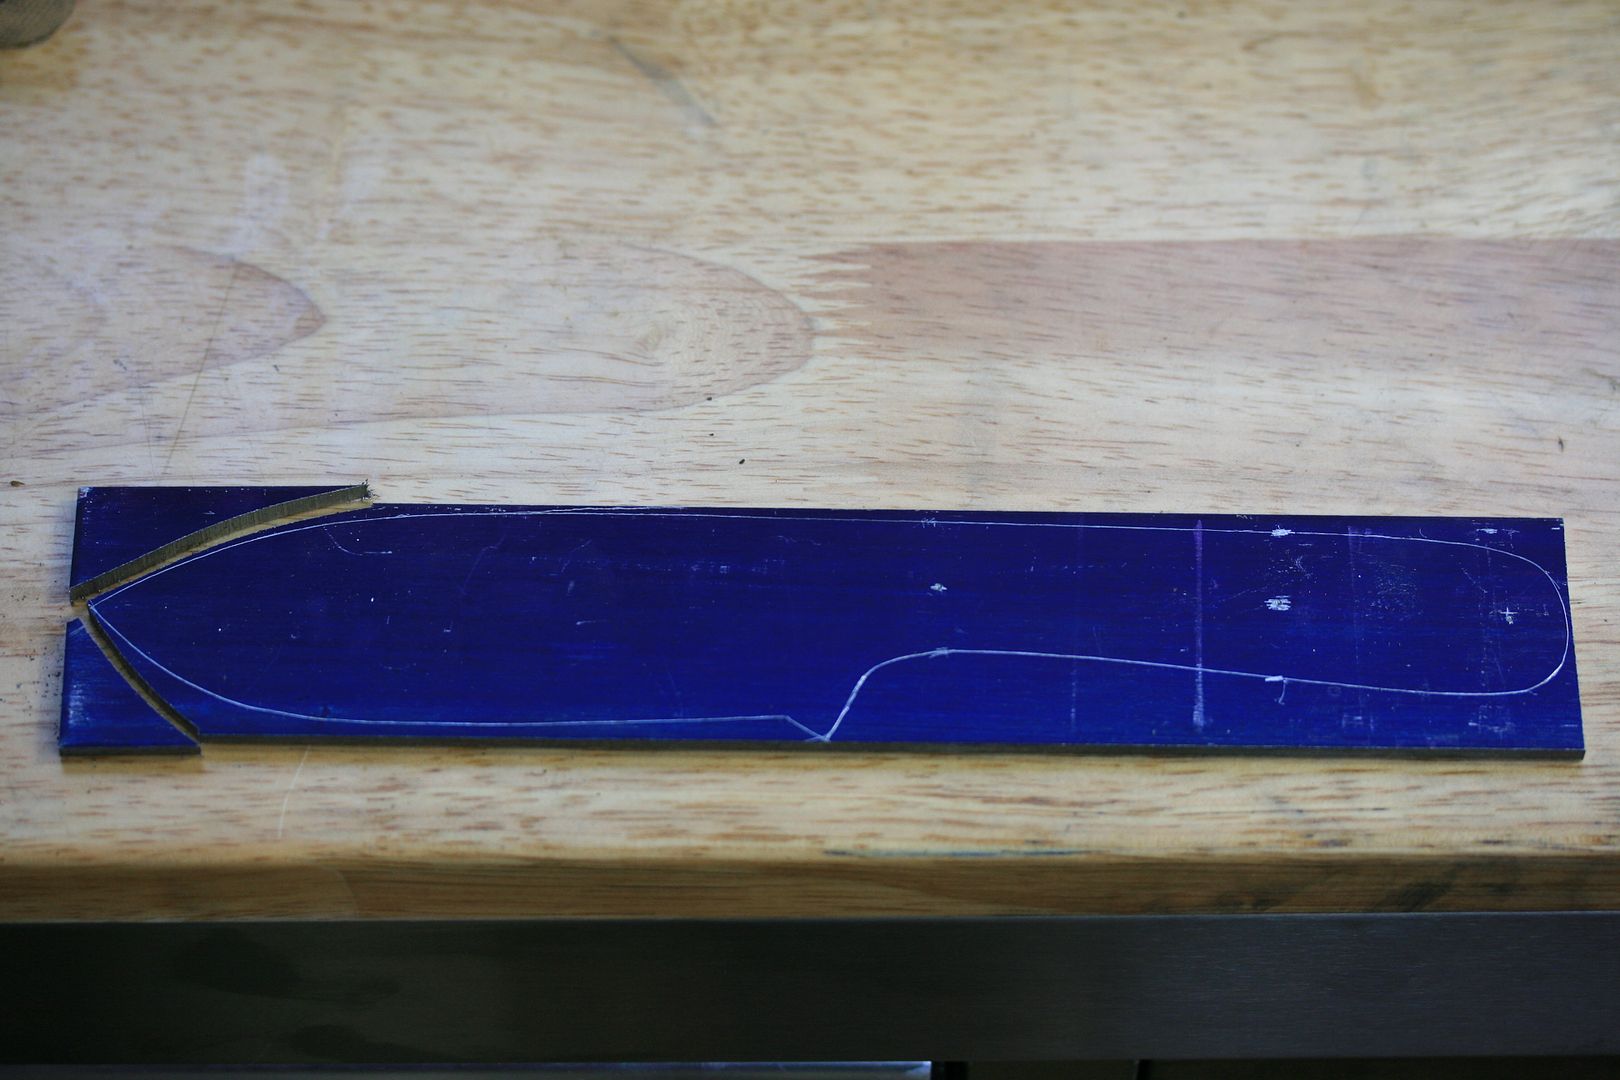
Layout blue dye so when I go to cut out the profile on the bandsaw, I will be able to see clearly. I used to not do this and when you scribe a line going in the same direction as the steel's grain, it becomes hard to see in different lighting and angles...
Clamp my cardboard pattern down and get ready to scribe. Something worth mentioning is that since this steel was not precision ground, I try to lay my pattern out in the middle of the steel. From what I have read and experienced in the past is that all of the edges are pinched down a bit from when they cut the steel to the desired size. This has caused me major headaches in the past and actually caused problems on the last Kephart. As you can see, there is not much wiggle room and I am basically to the edge. We will see how it comes out...
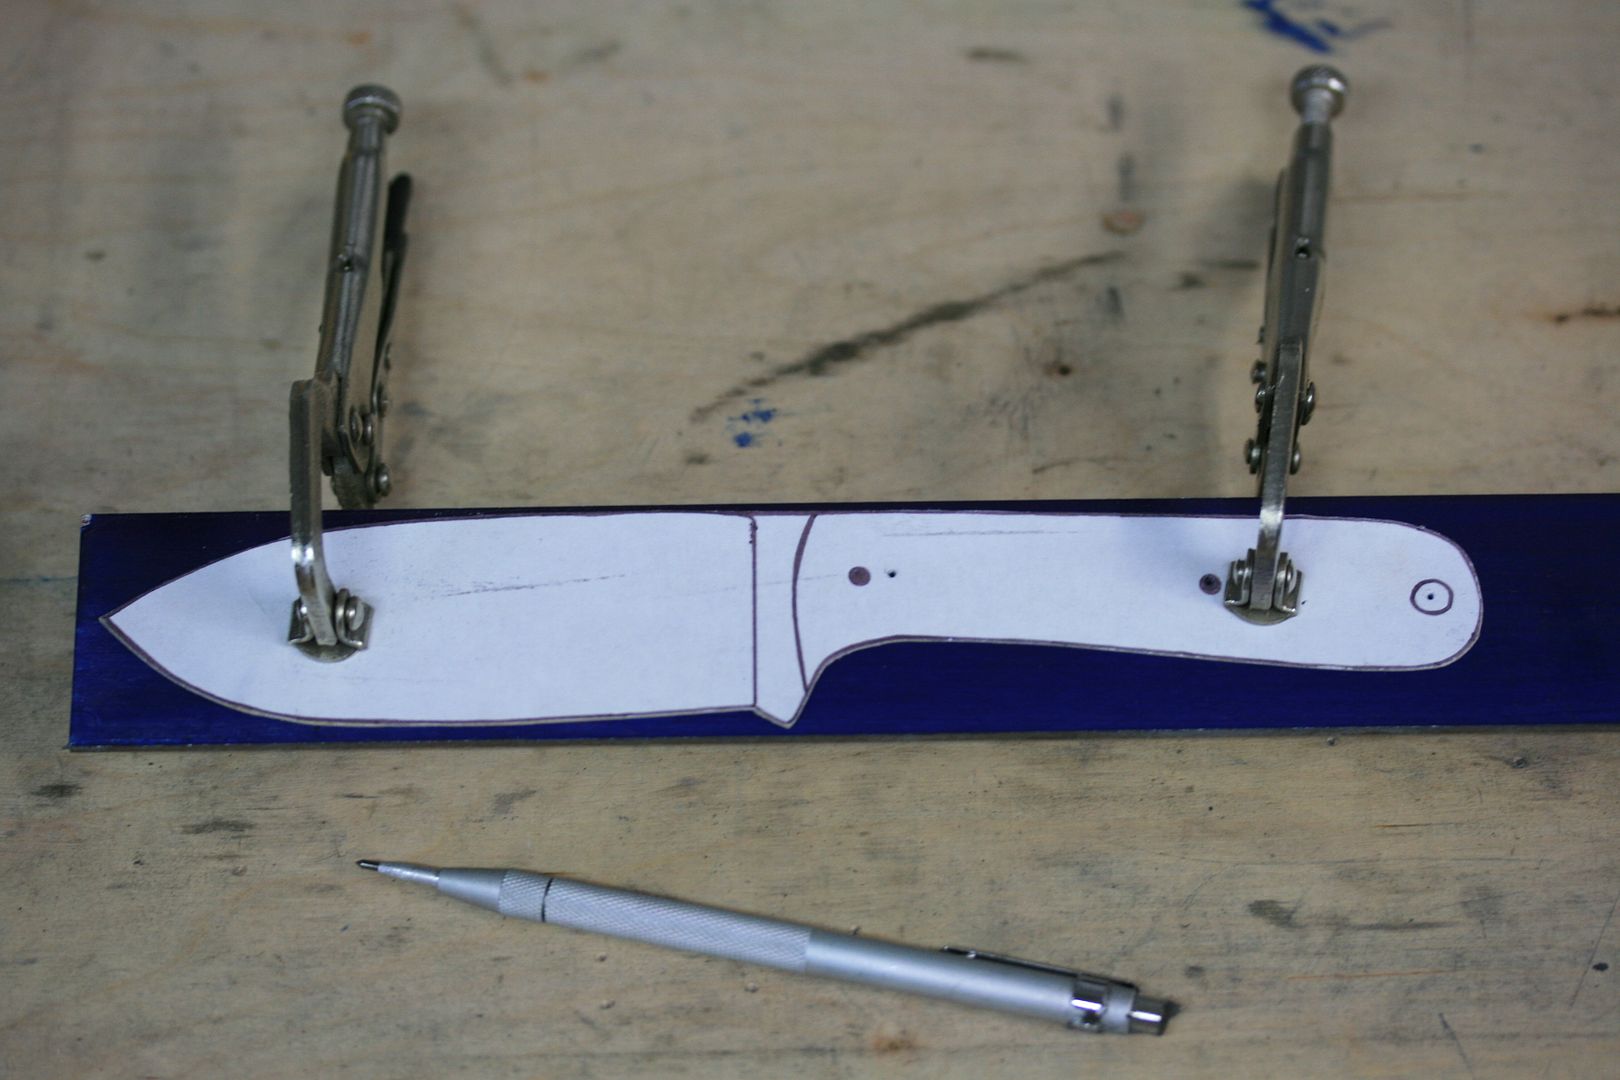
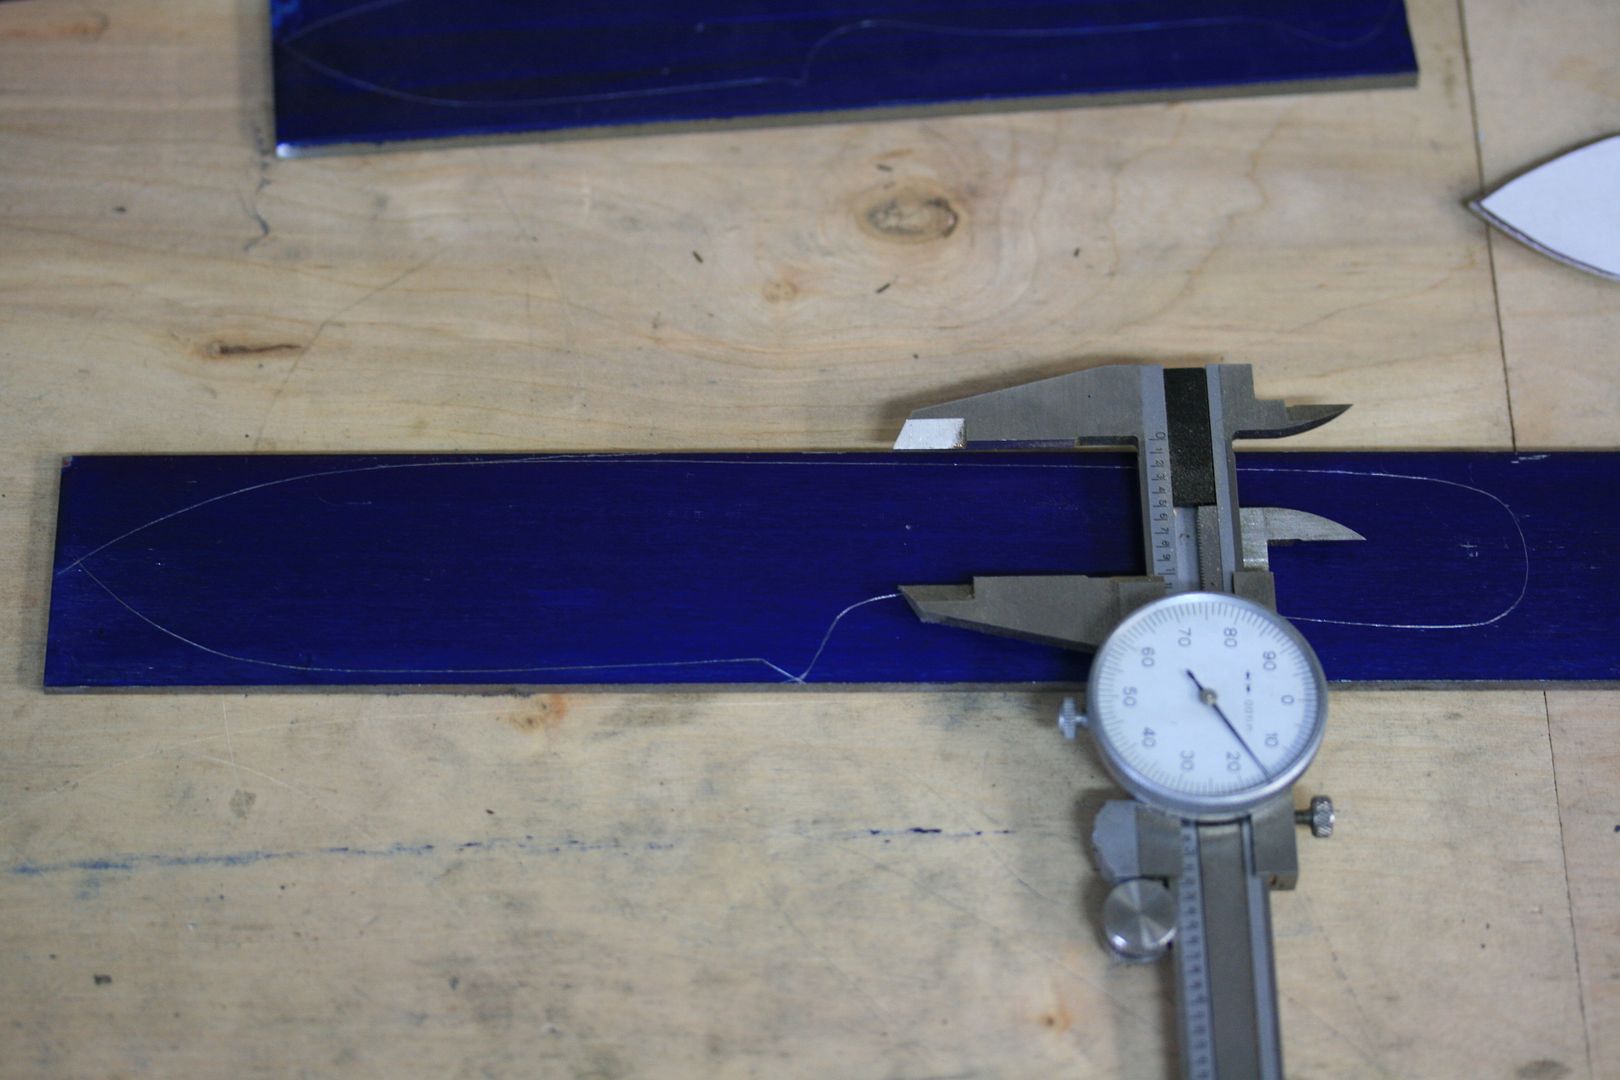
I scribe around the pattern a few times making sure not to dig into the template any and also scribe a dot where my holes will be drilled...
Next, to be safe, I measure the width of the tang in the area I want to drill. I divide it by two and scratch a line...
Placing a scale along the two pin holes gives me a straight line to know where to place the lanyard hole. I like the holes to be in a straight line when possible, especially with a handle like the Kephart has. After doing this, I use a punch to mark the three locations...

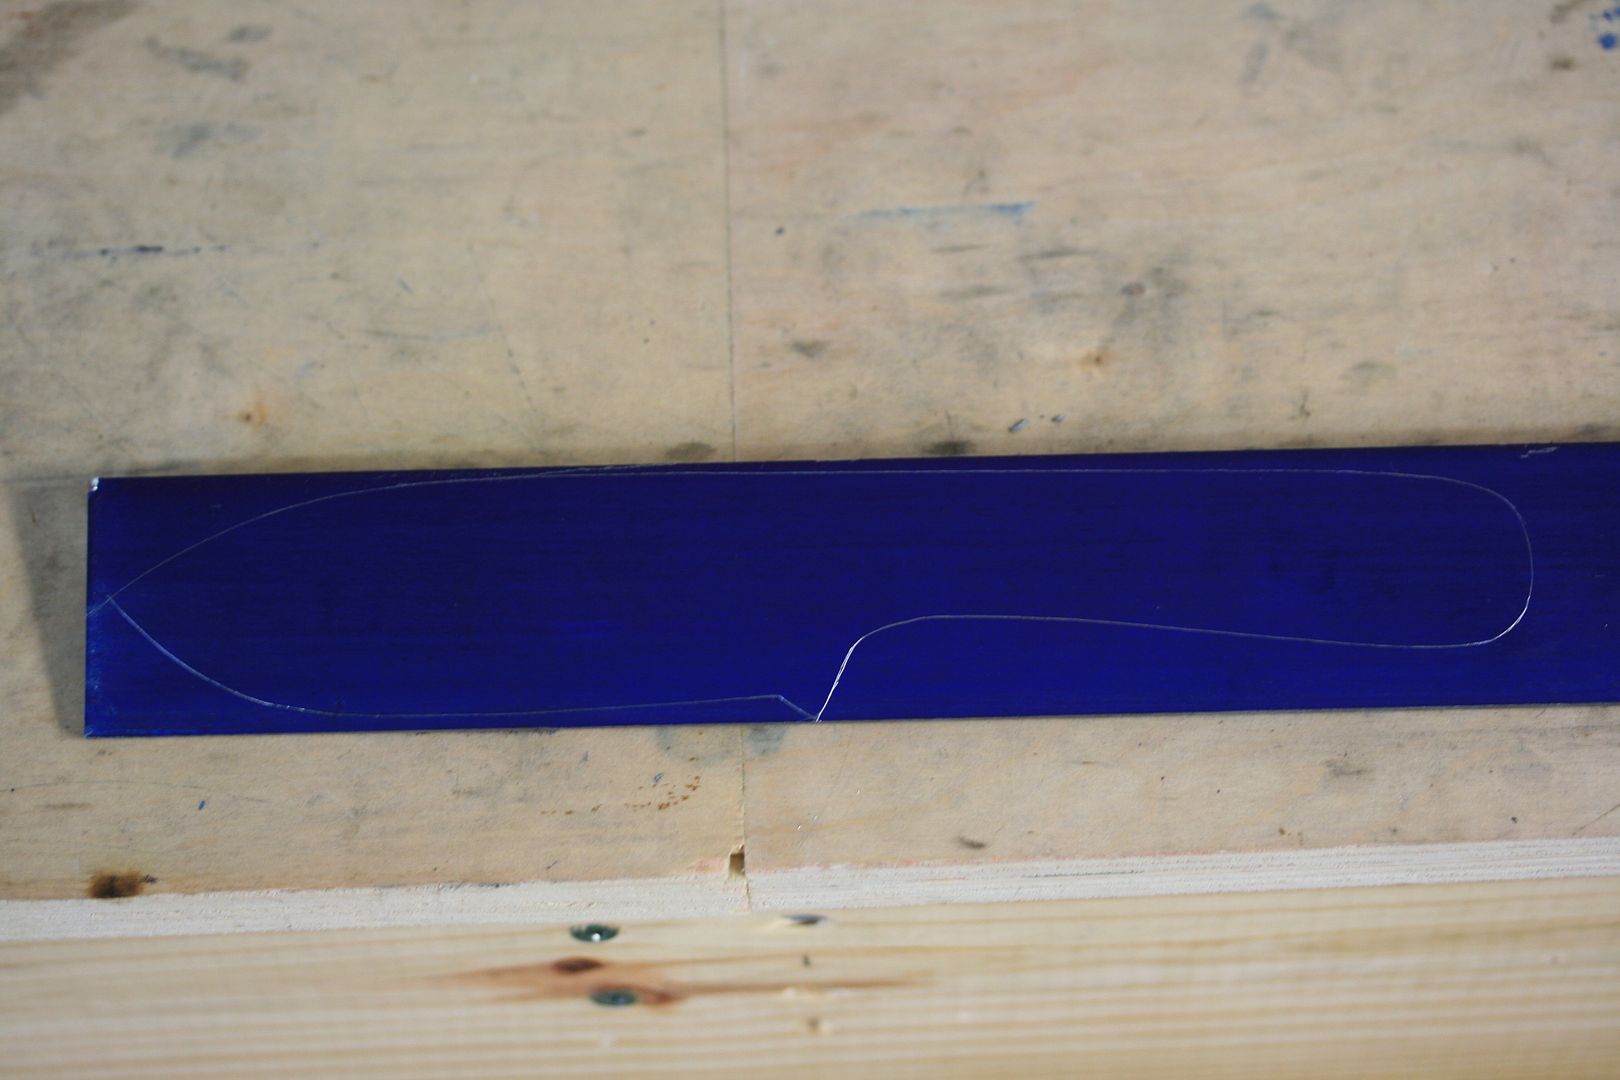
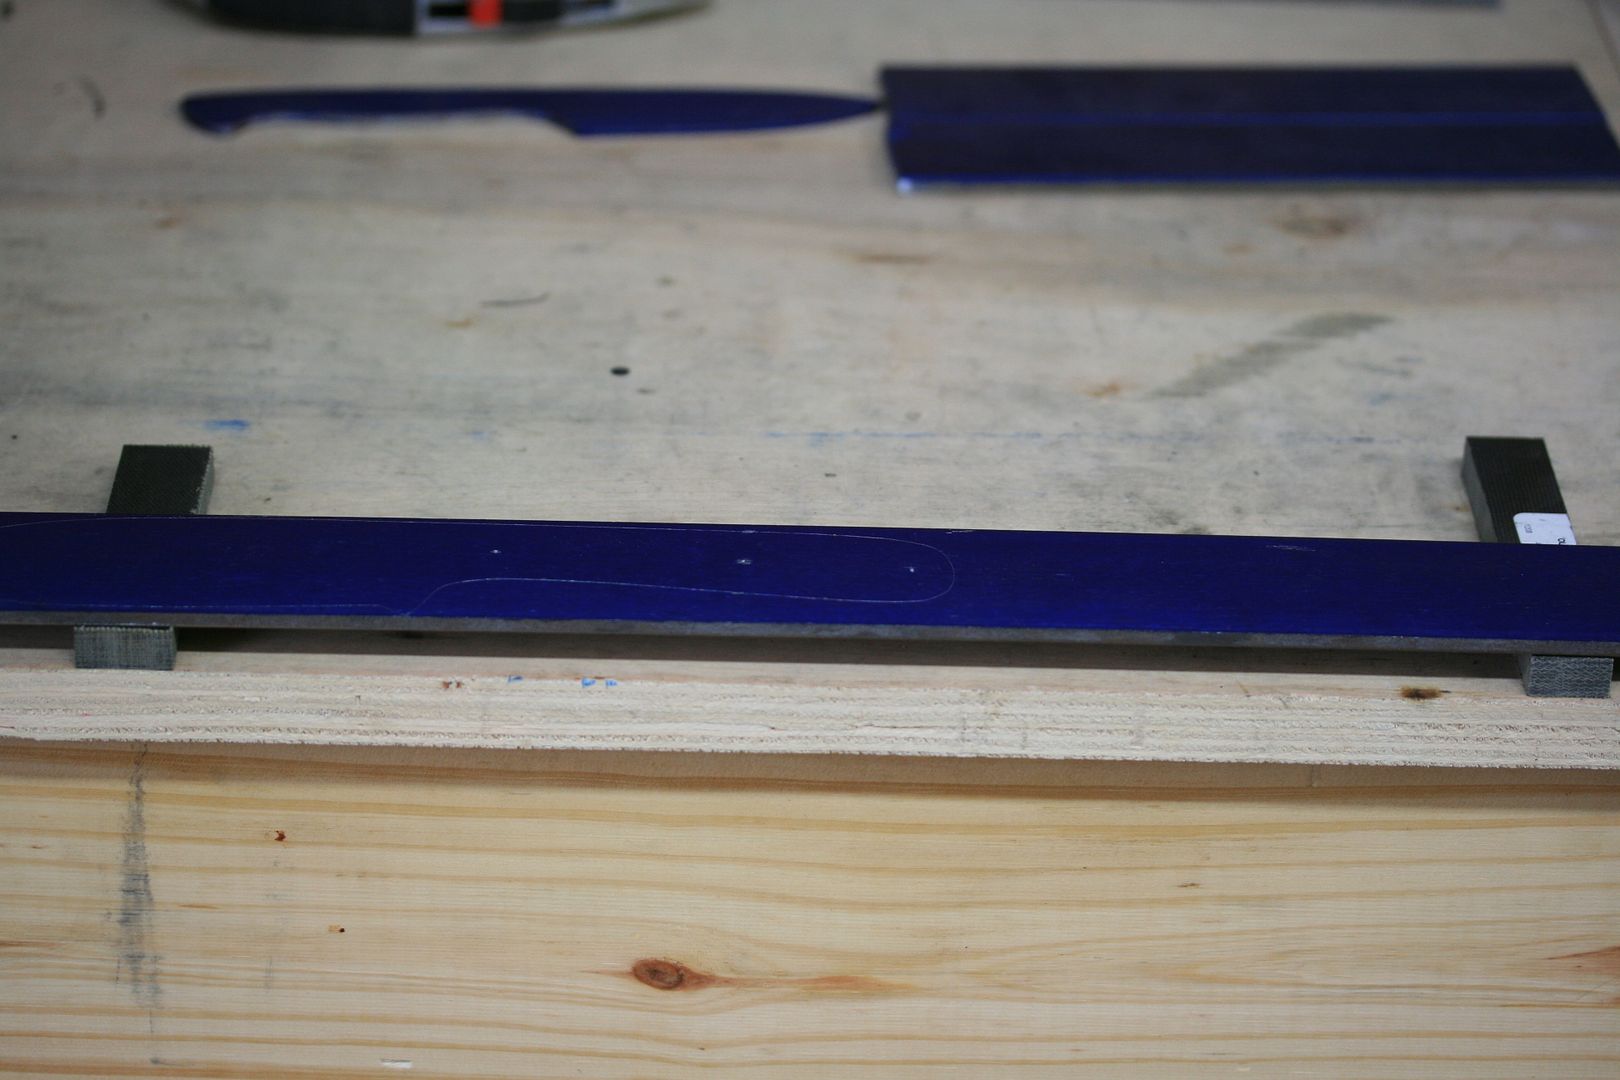
Now that I have the steel laid out and know where my knife will be cut out from, I check for the flatness of the steel. Unfortunately, as I mentioned earlier, this is not precision ground, so we have a nasty bow in the steel. After reading Josh's WIP, I decided to try straightening the steel using the method he used. This was the first time I have had to do this. Seems pretty straight forward though. I also decided to do it before cutting the blade out...
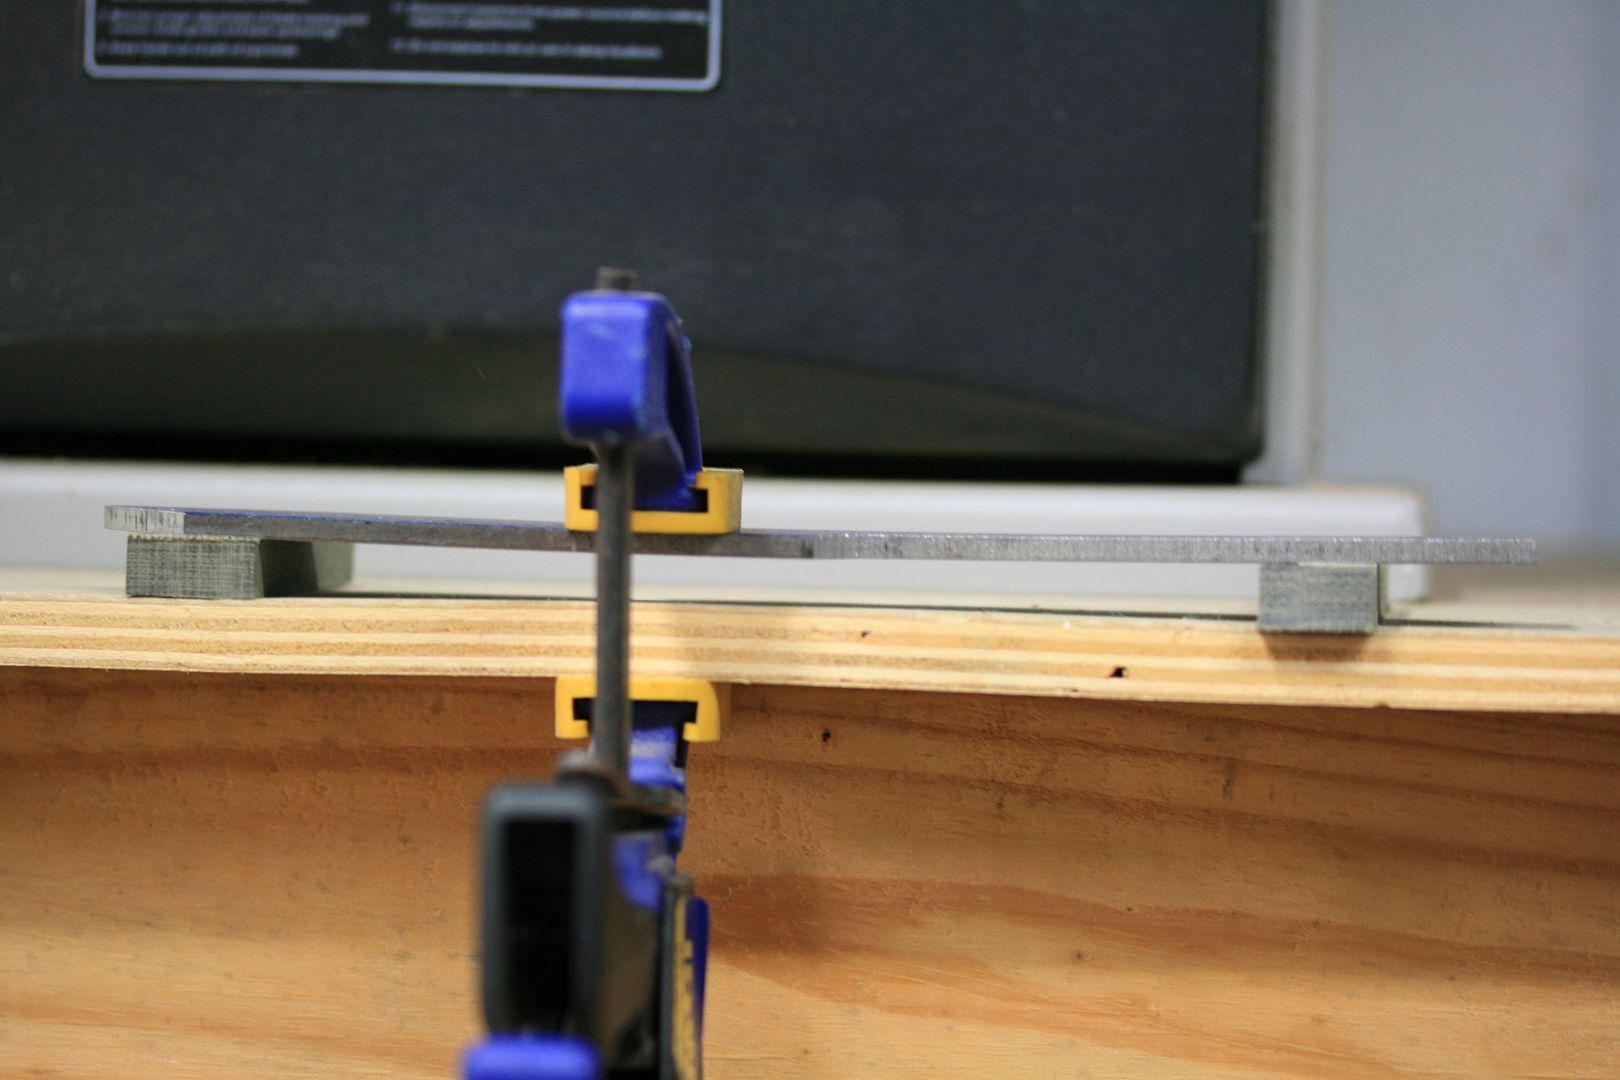
Find the middle of the bow and place both ends on something strong and elevated. My choice was 2 pieces of micarta that were laying next to me...
First I used this clamp; not enough pressure...
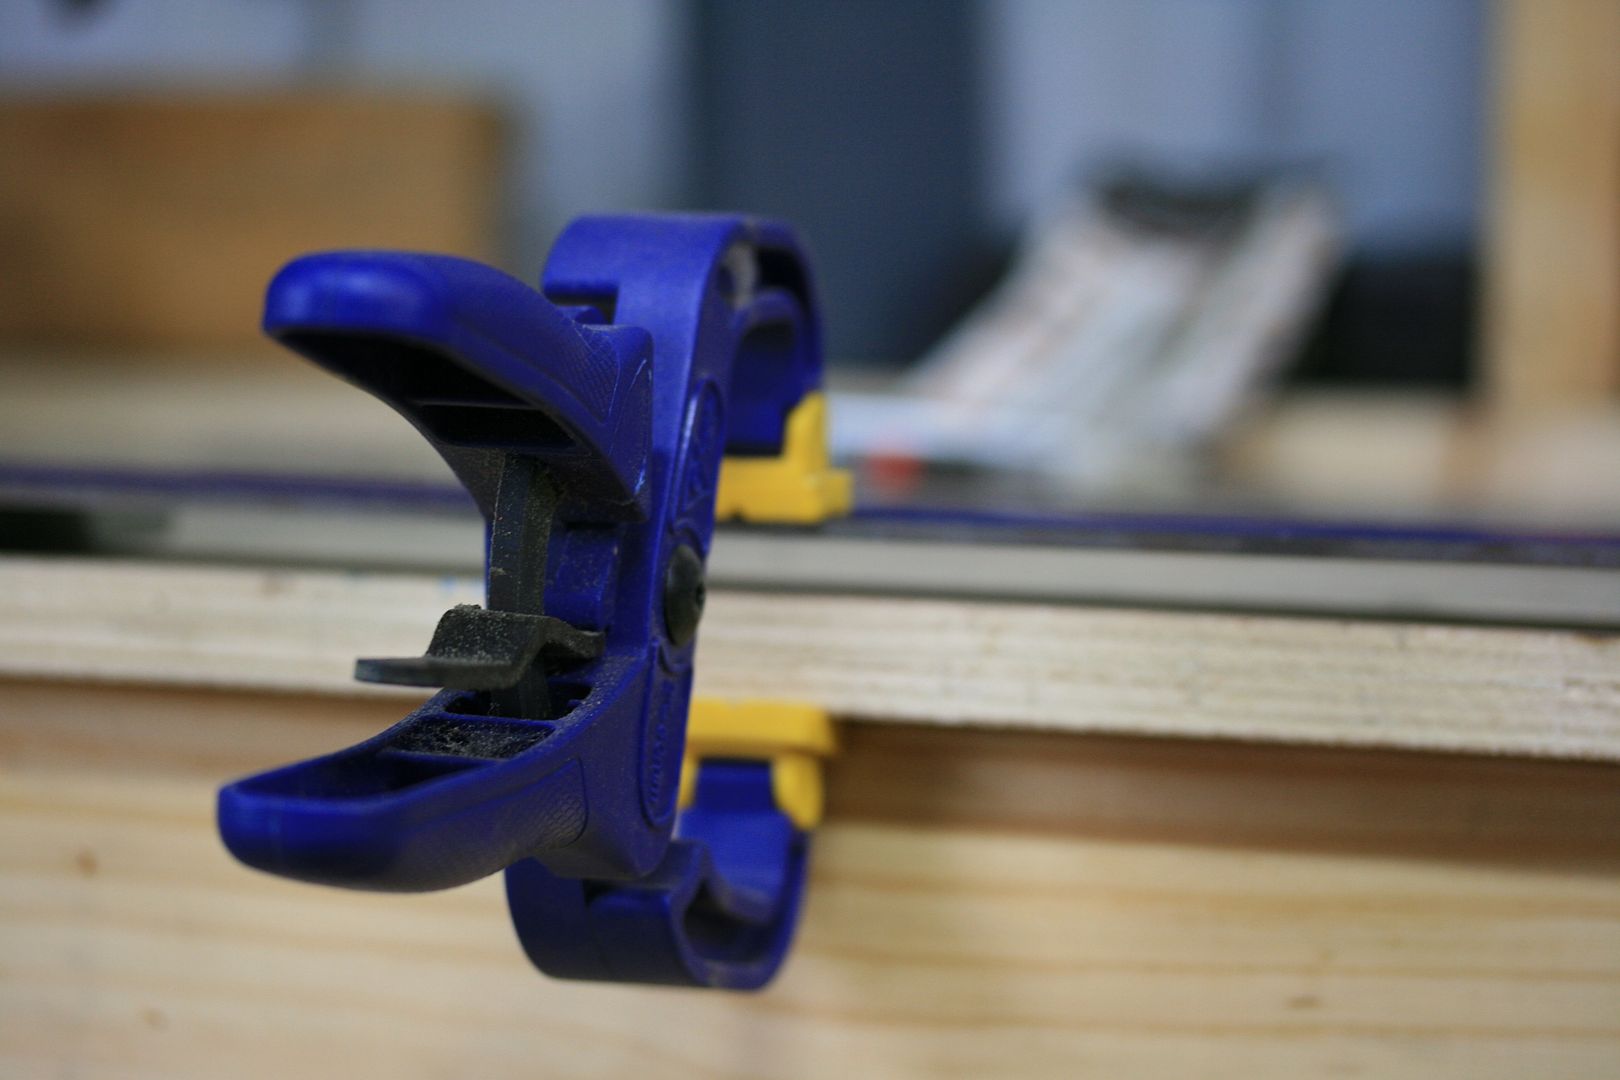
Then I tried this one with better results...
Pretty much flat. I am going to check it again once the blade is cut out...
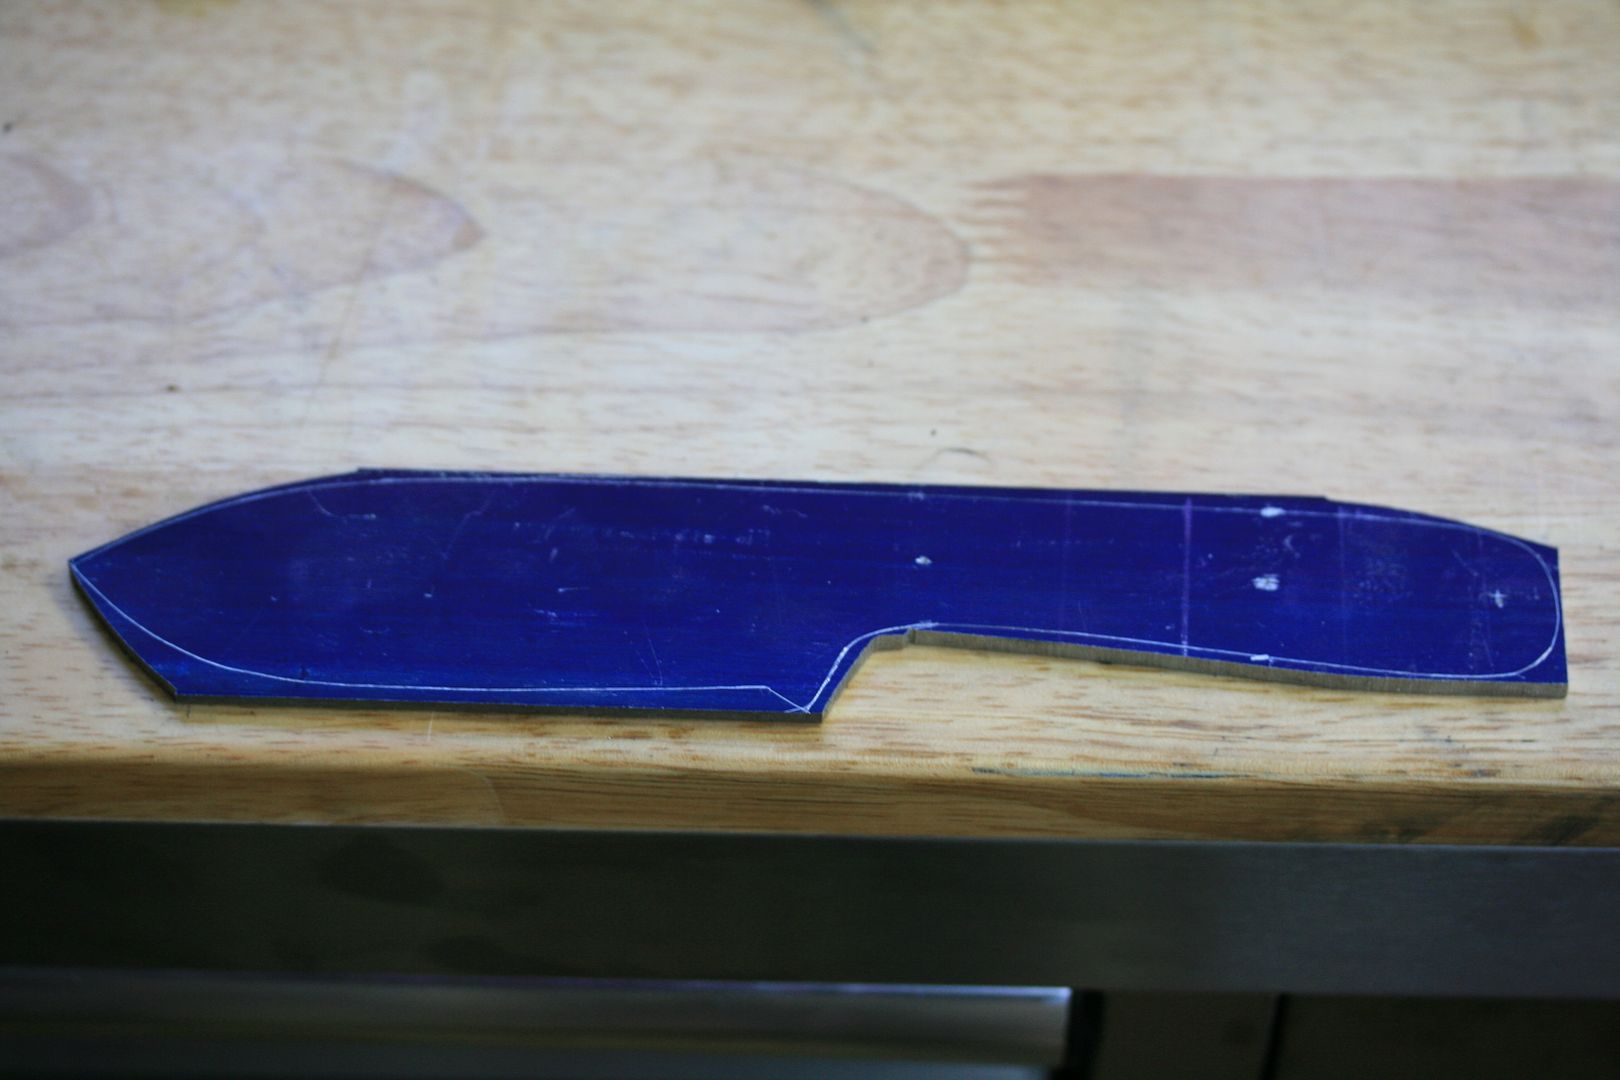
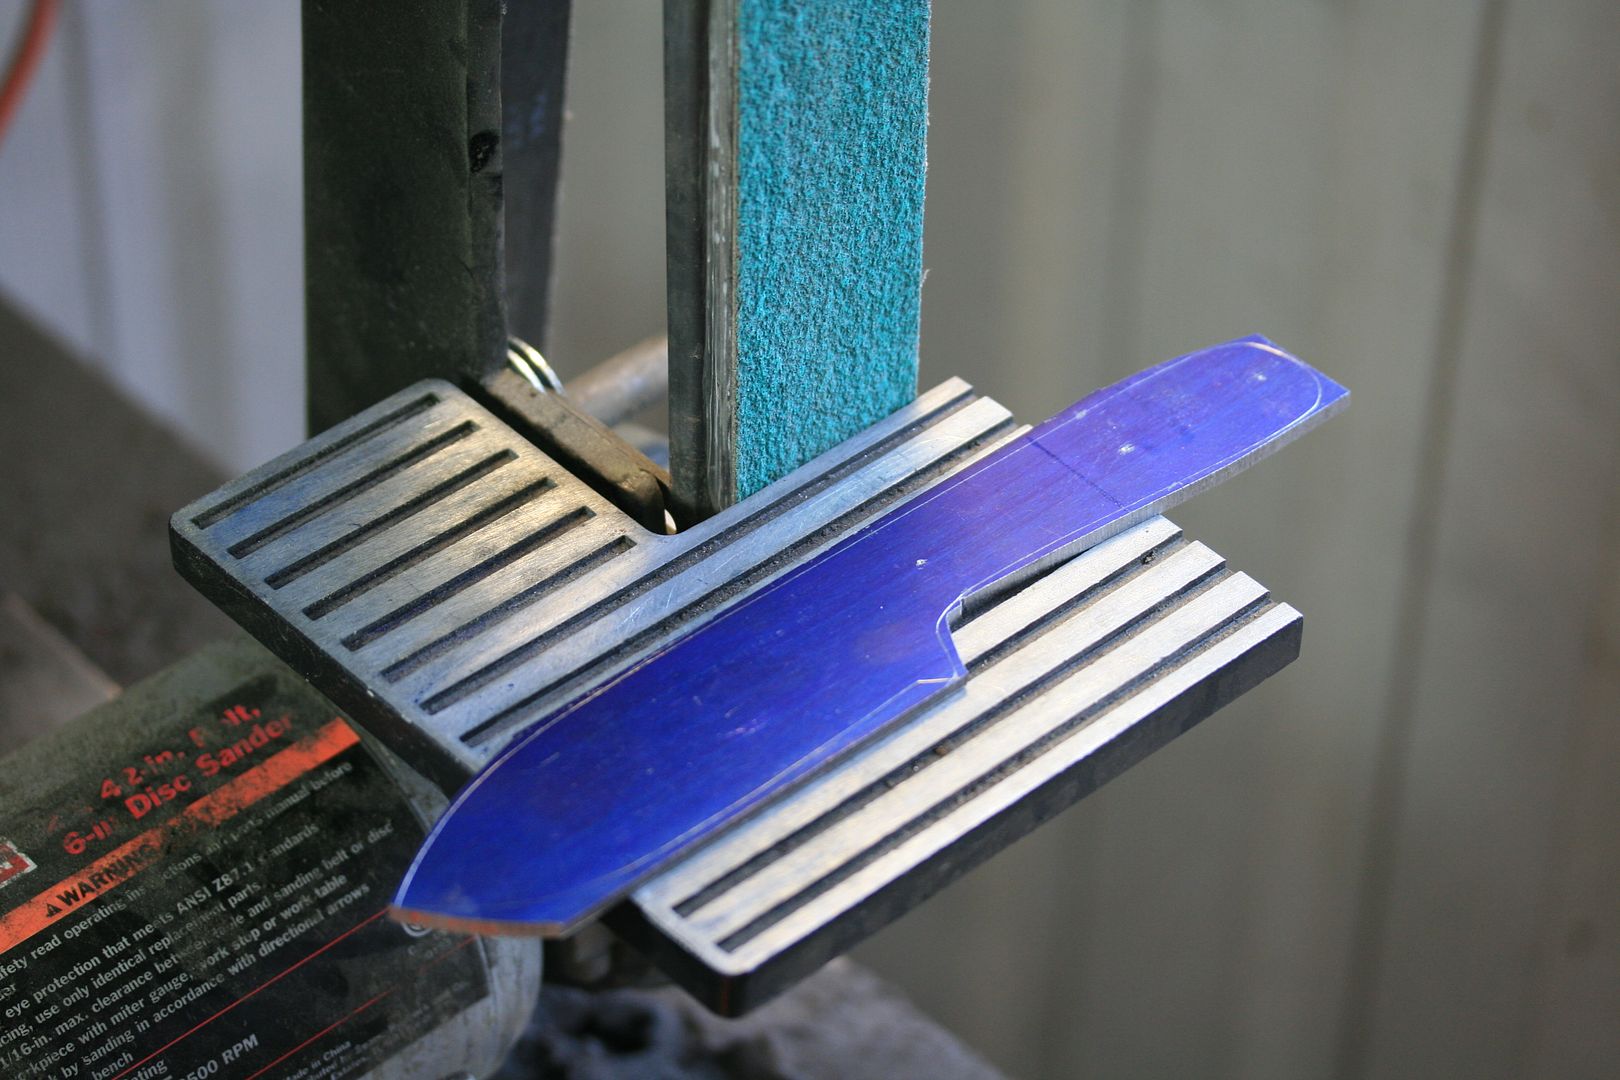
Bandsaw time. Using a metal cutting bandsaw, I cut as close to the scribe line as possible. With how fast the 2x42 belts get used up, getting close to the line saves me some money...

First cut the excess off the end...
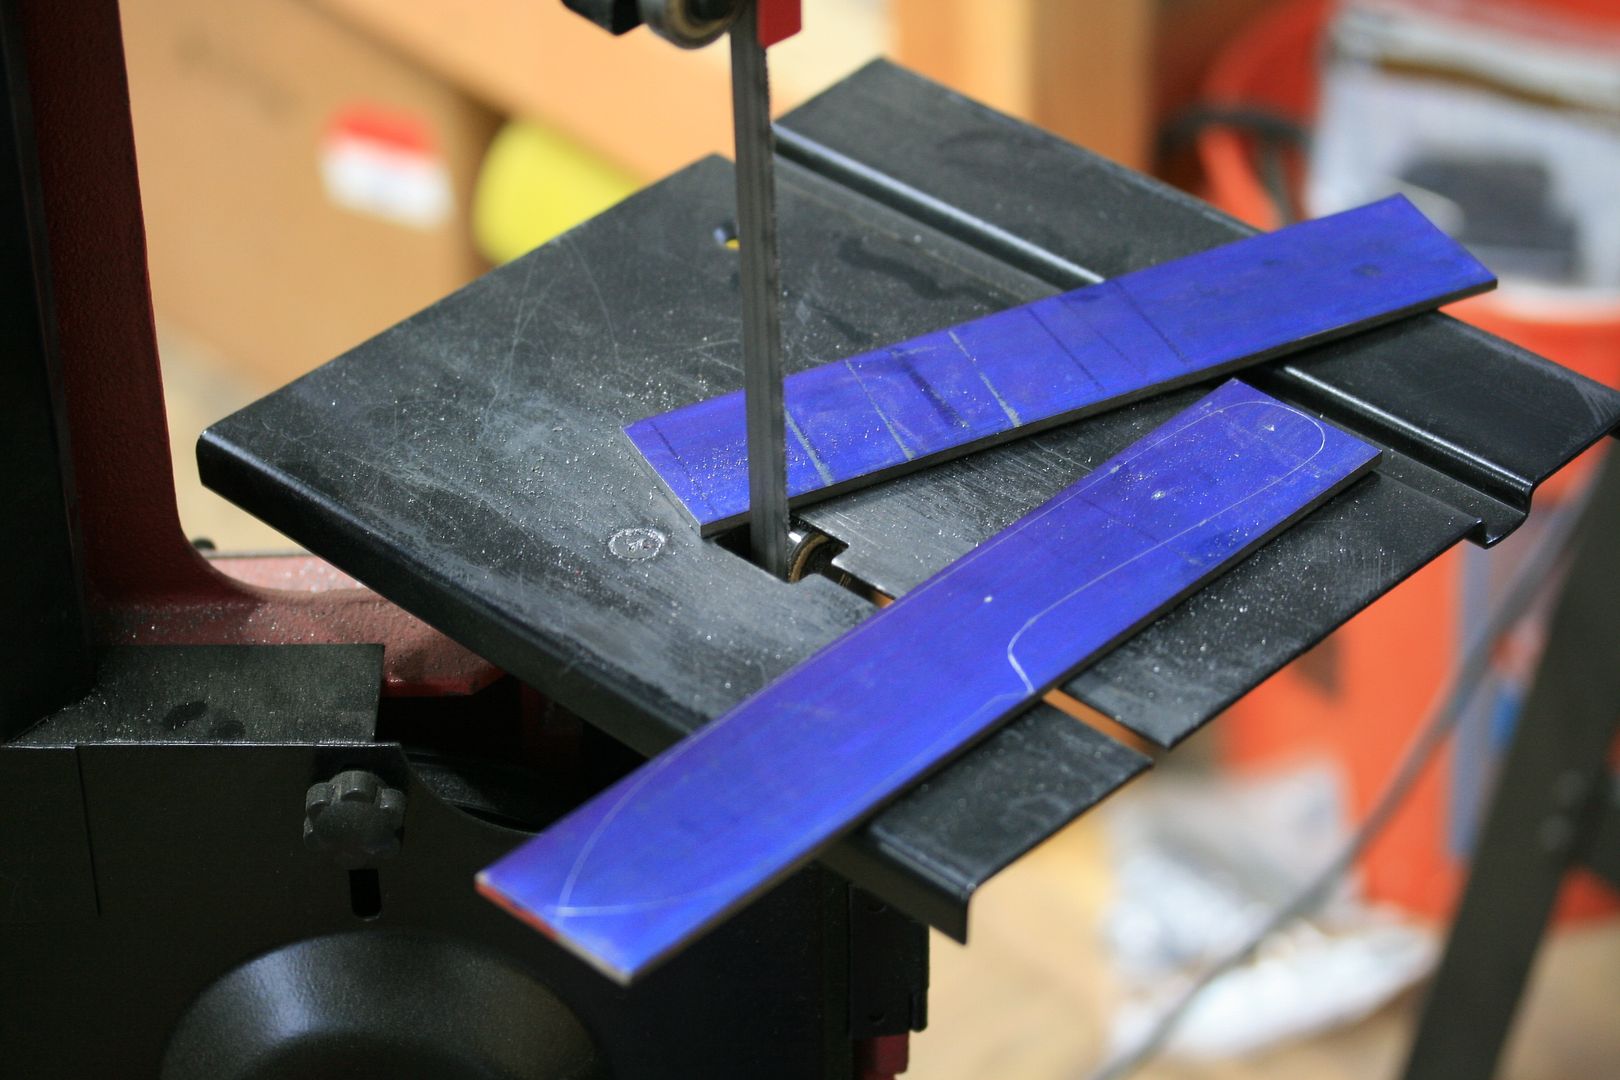
Then start following the pattern...
Now I have most of the steel off and almost ready for the grinder...
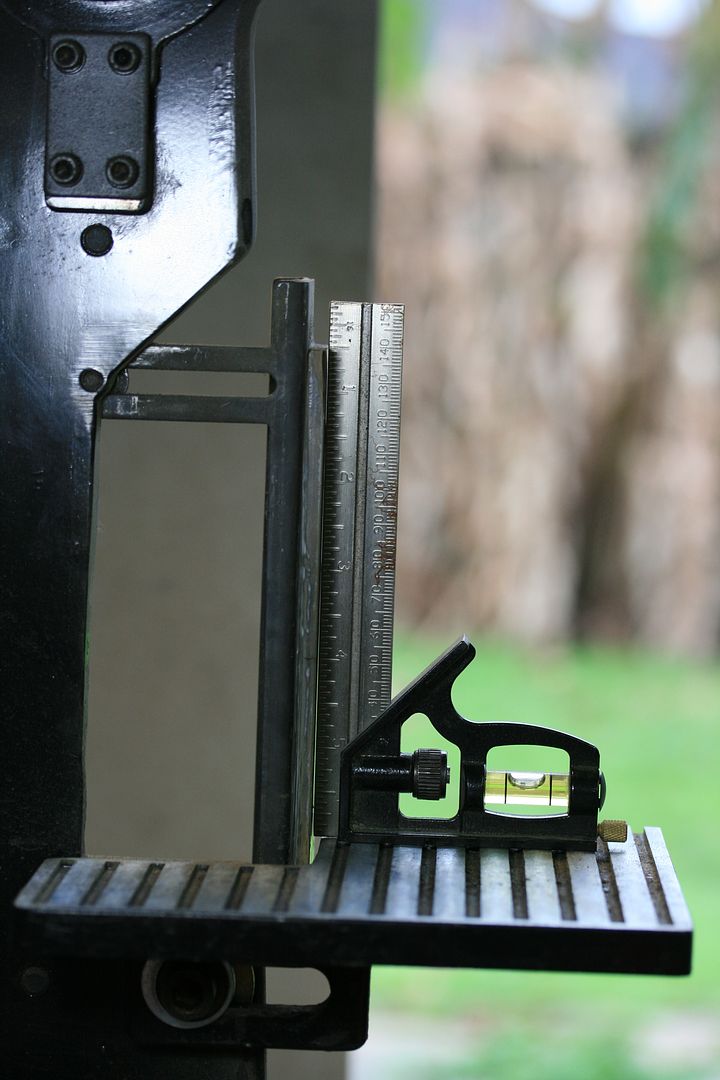
First I need to do some adjusting on the grinder. I have been having problems with it lately, so I thought this would be a good time to try and resolve the issues. First I leveled up my work rest...
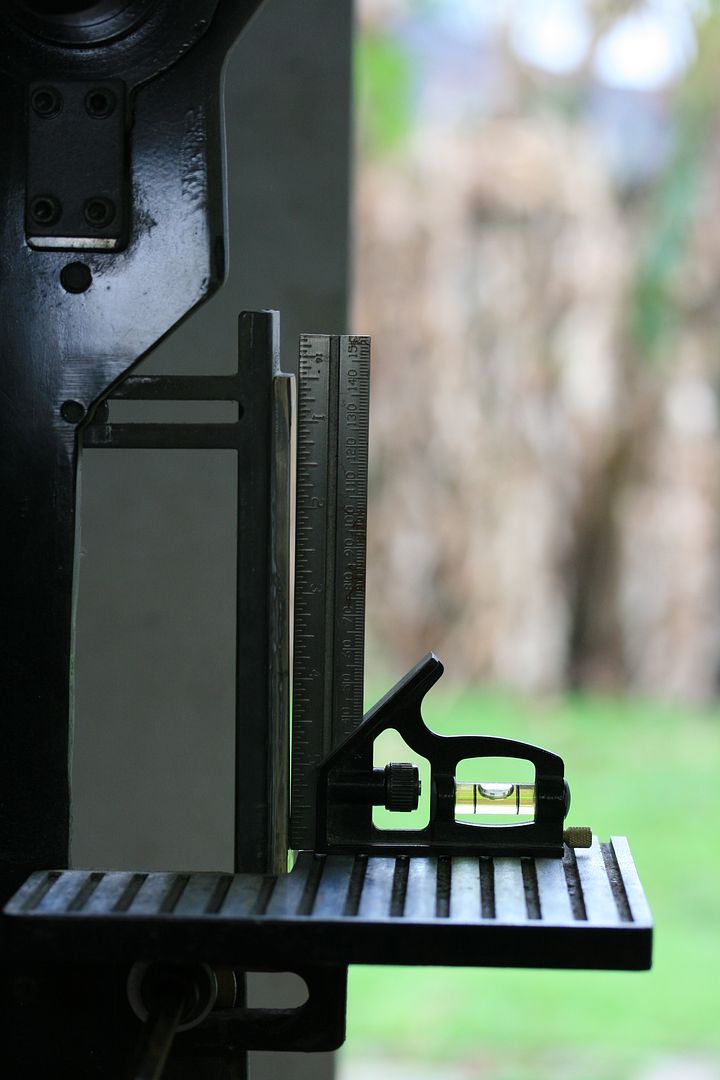
Shimmed up the platen because it was going crooked when tightening the bolts...
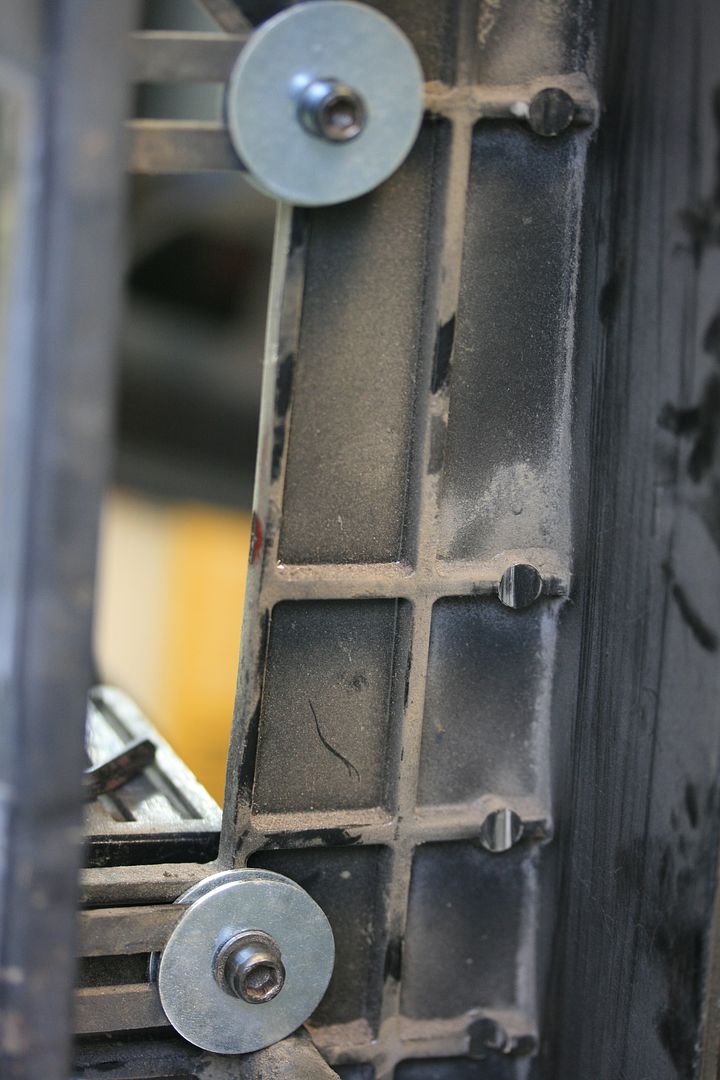
It definitely looks way better than before...
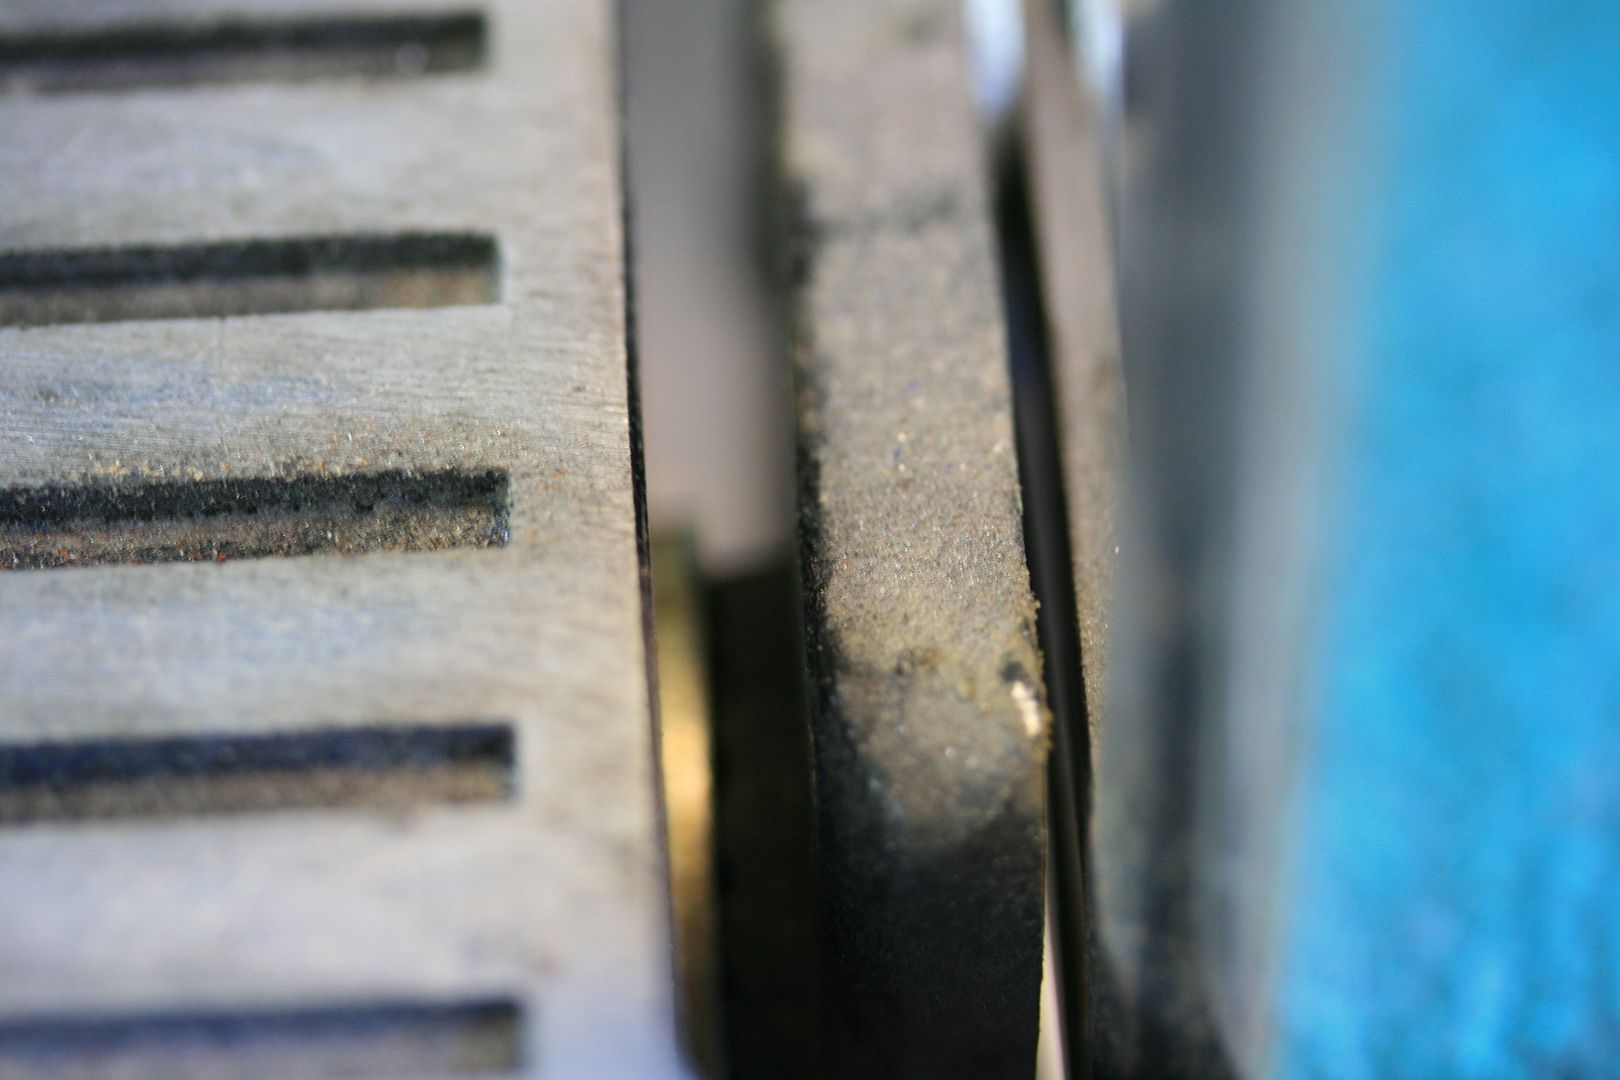
Next I made sure that my tool rest and platen were perpendicular to each other...
Put on a used 80 grit belt and I am ready to clean up the profile...
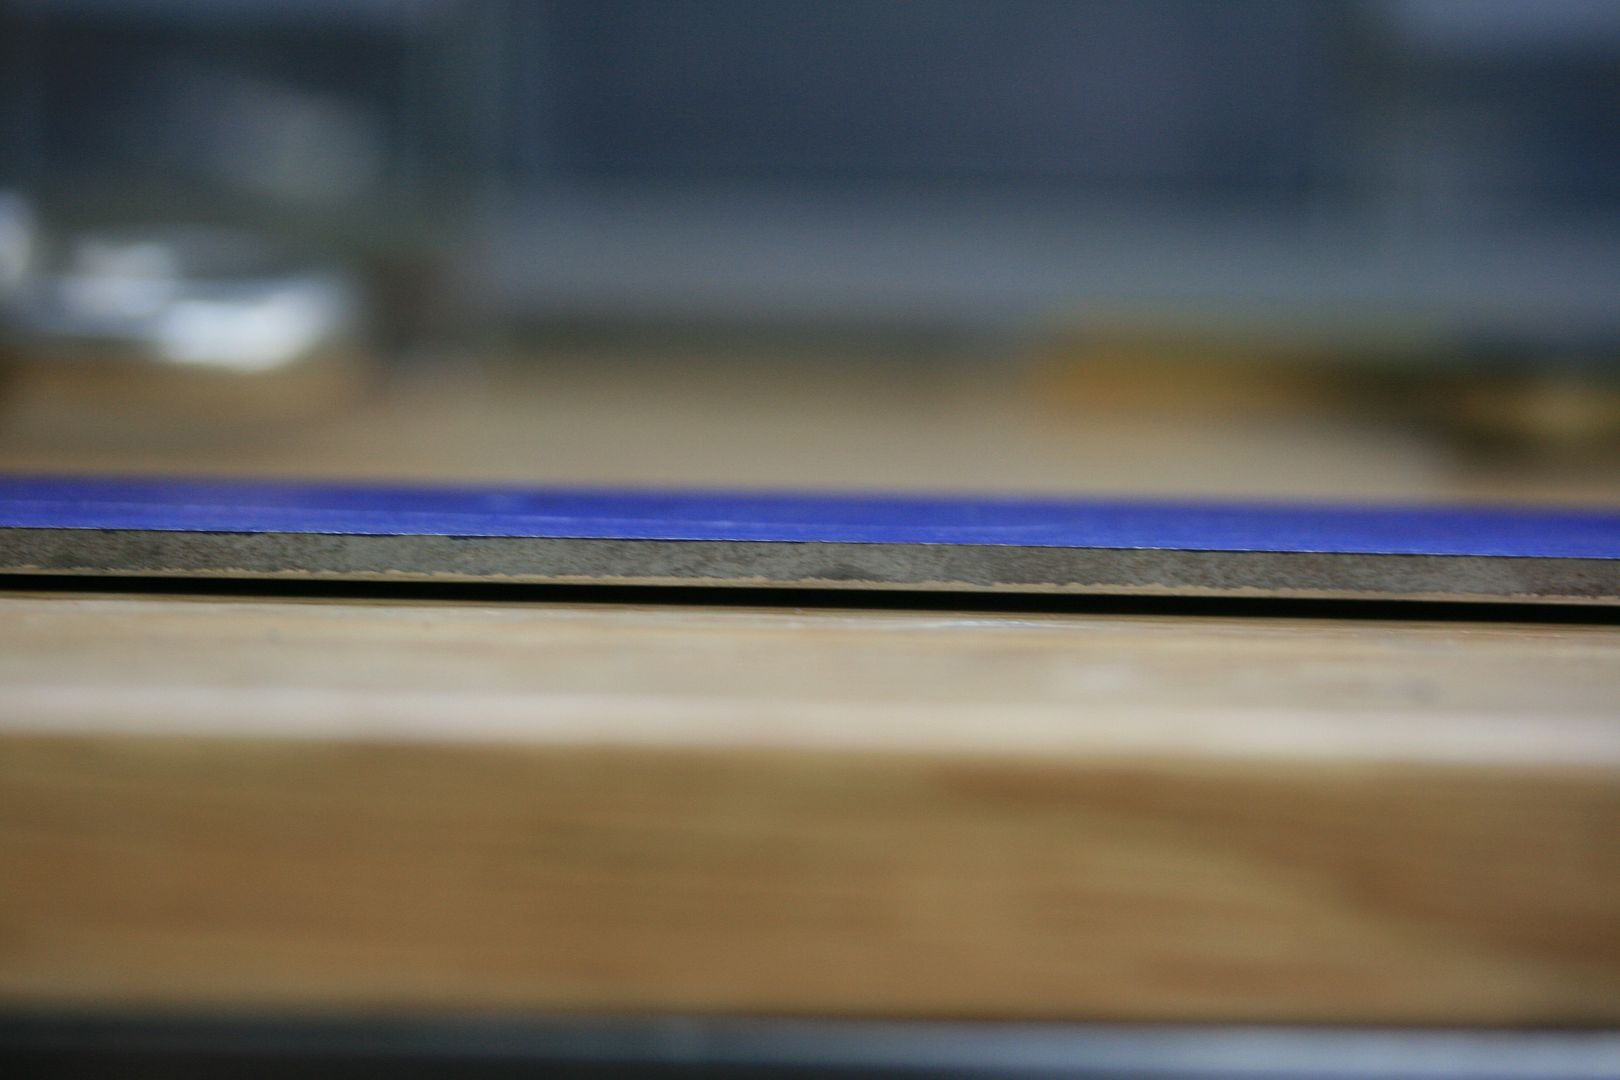
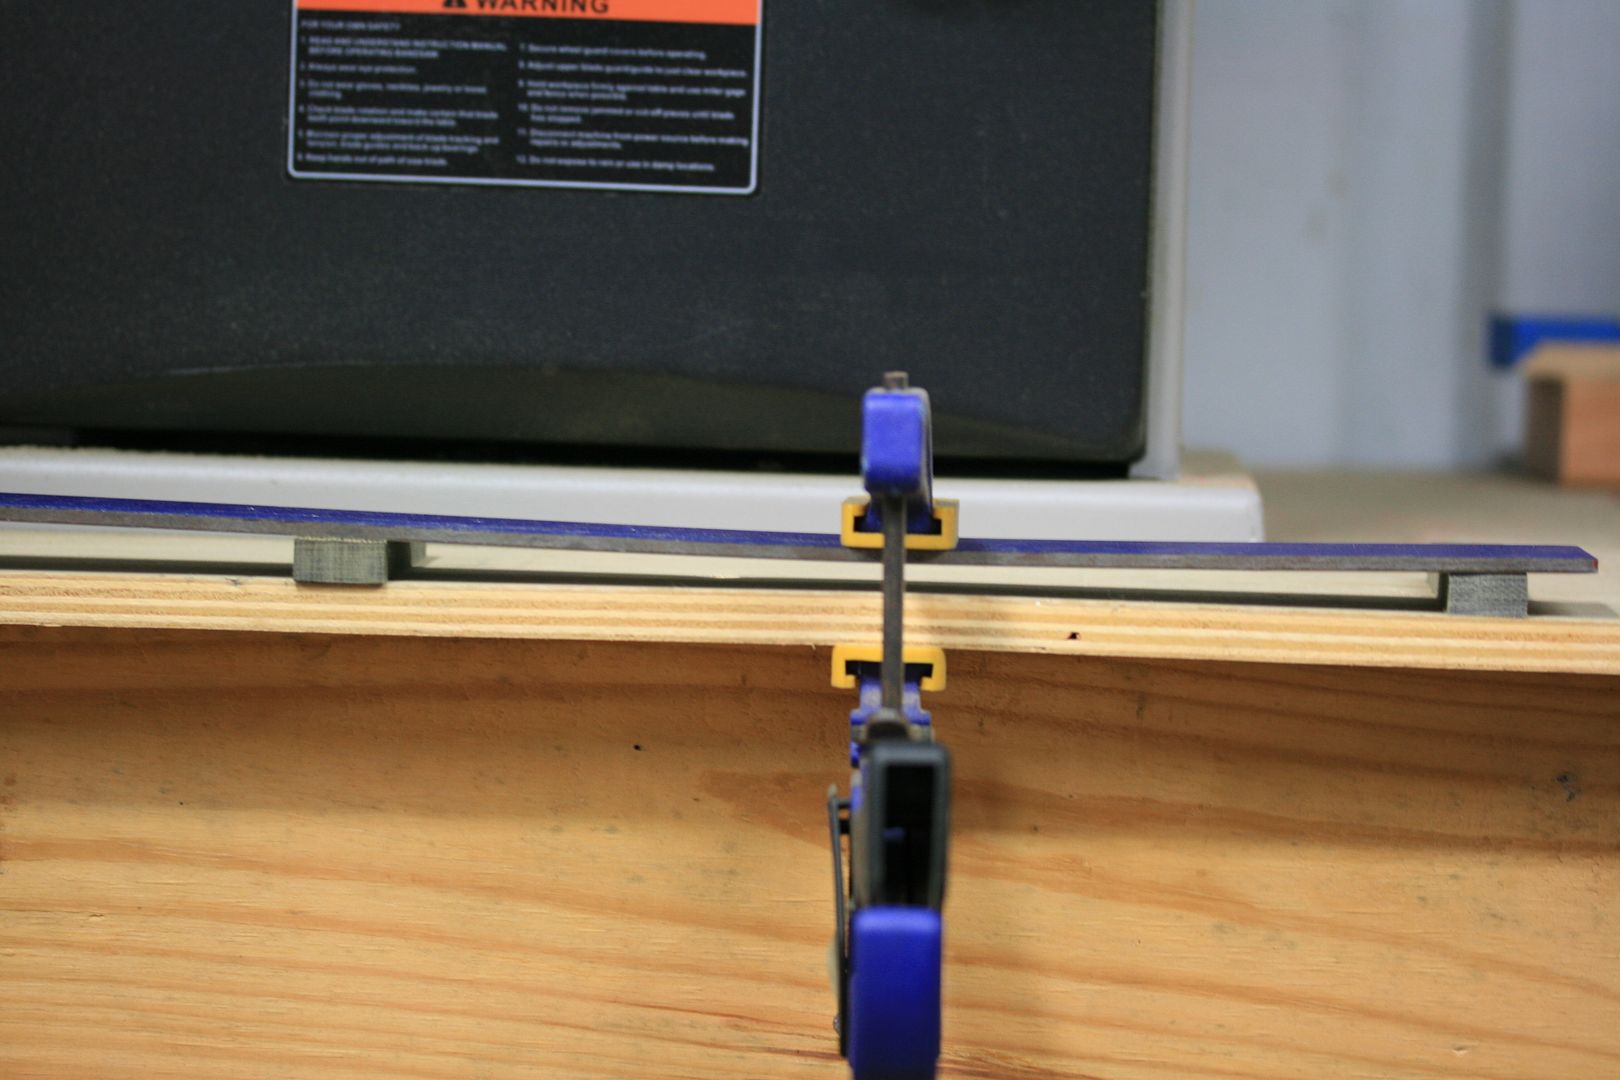
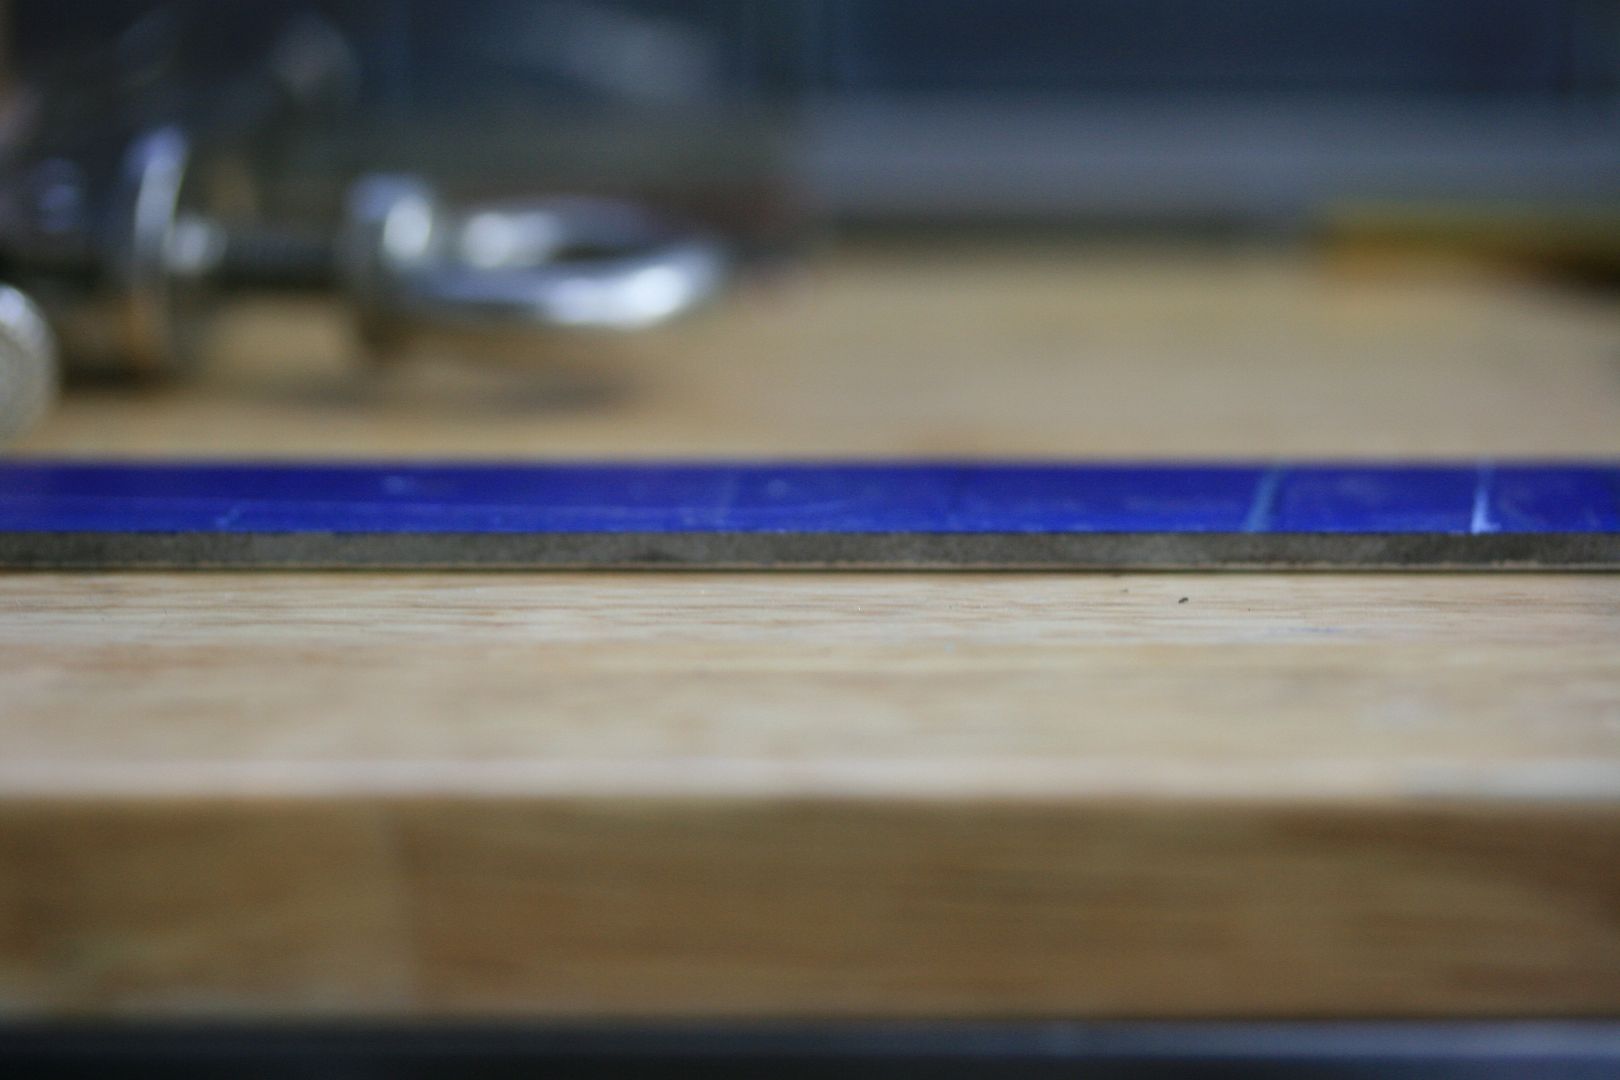
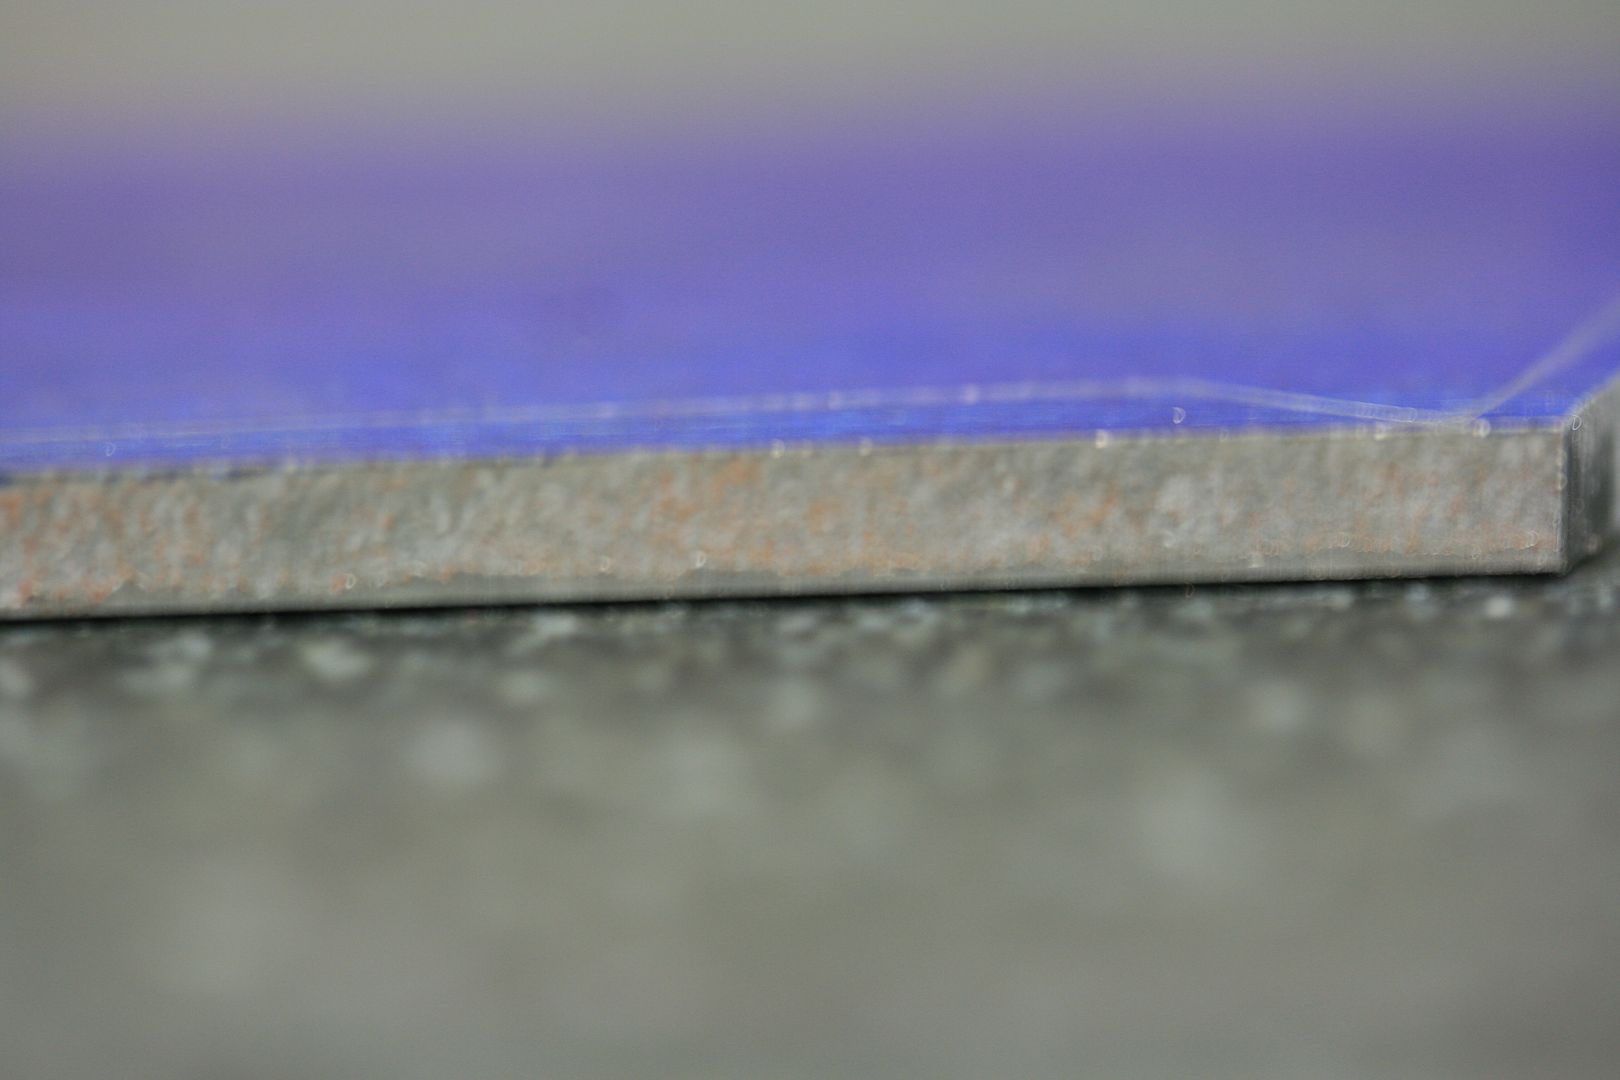
But first, I wanted to check the flatness of the blade again. Sure enough it wasn't straight. The picture really doesn't show it very good. For this I use my granite surface plate, which gets used a lot in my process...
Back to bending, checking, bending, checking. I actually found that using vise grips for this yielded better results...
After checking on the surface plate, the blade seems ready to go...
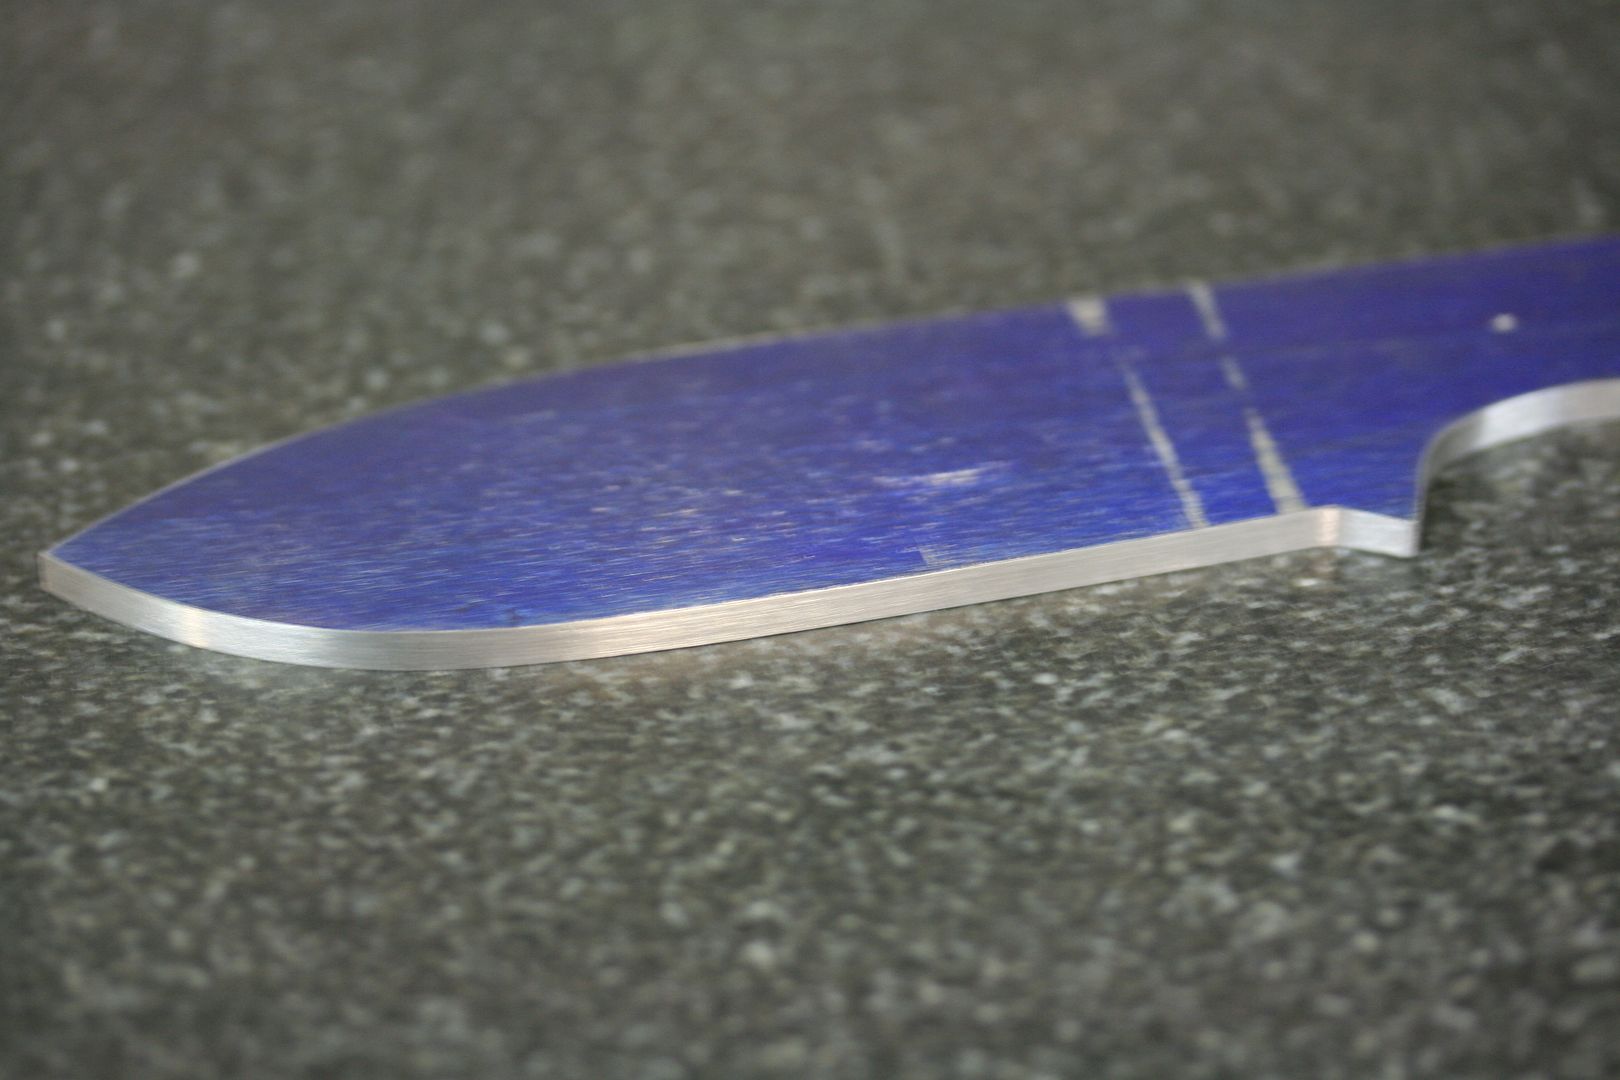
Using the 80 grit belt, I grind right up to my scribe line, making sure to not go past it or into it...
After the 80 grit, I move to 220 and grind right into the scribe line, being careful to not go past...
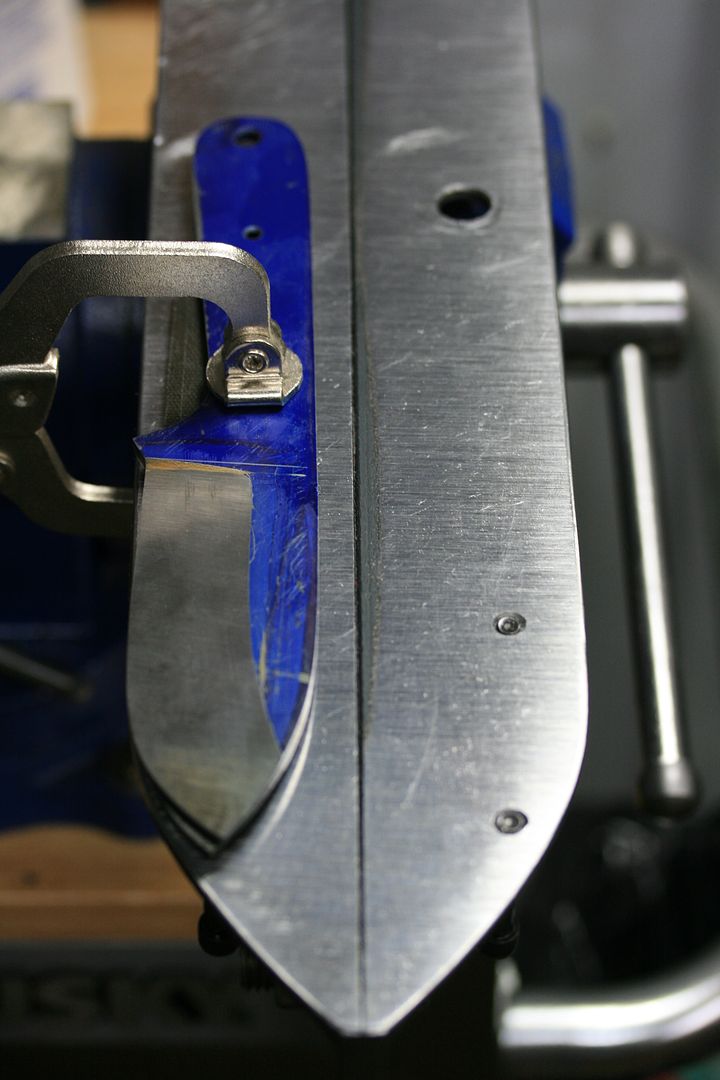
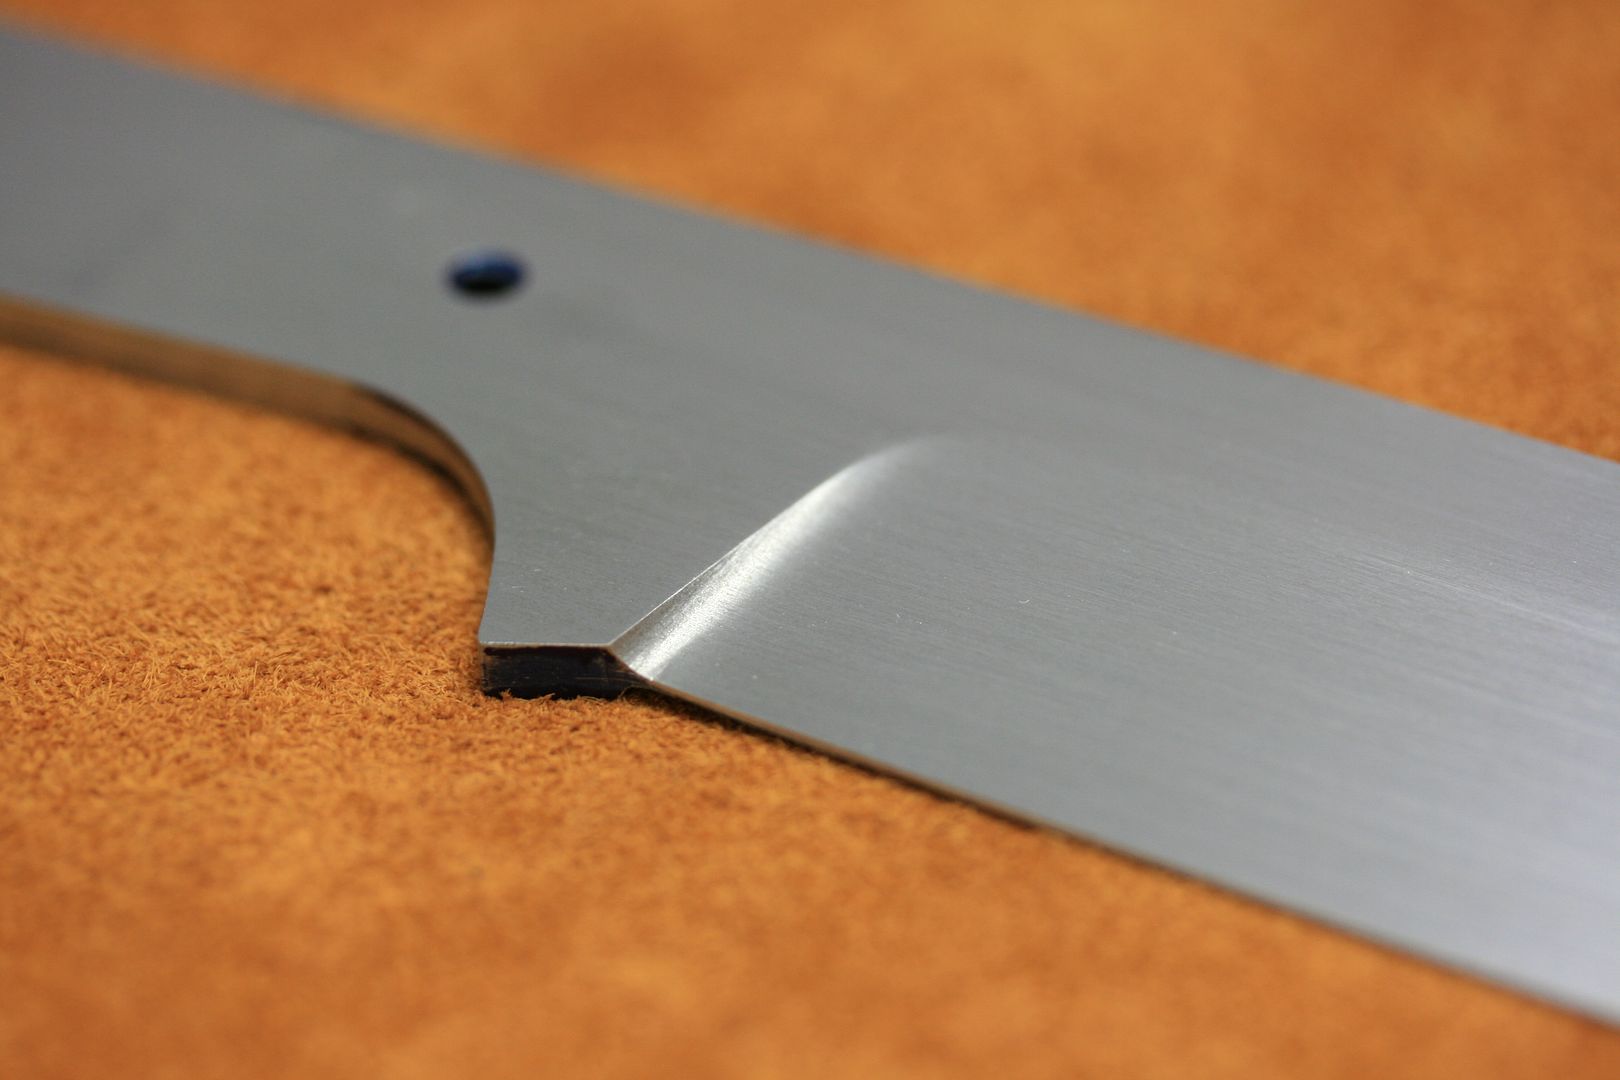
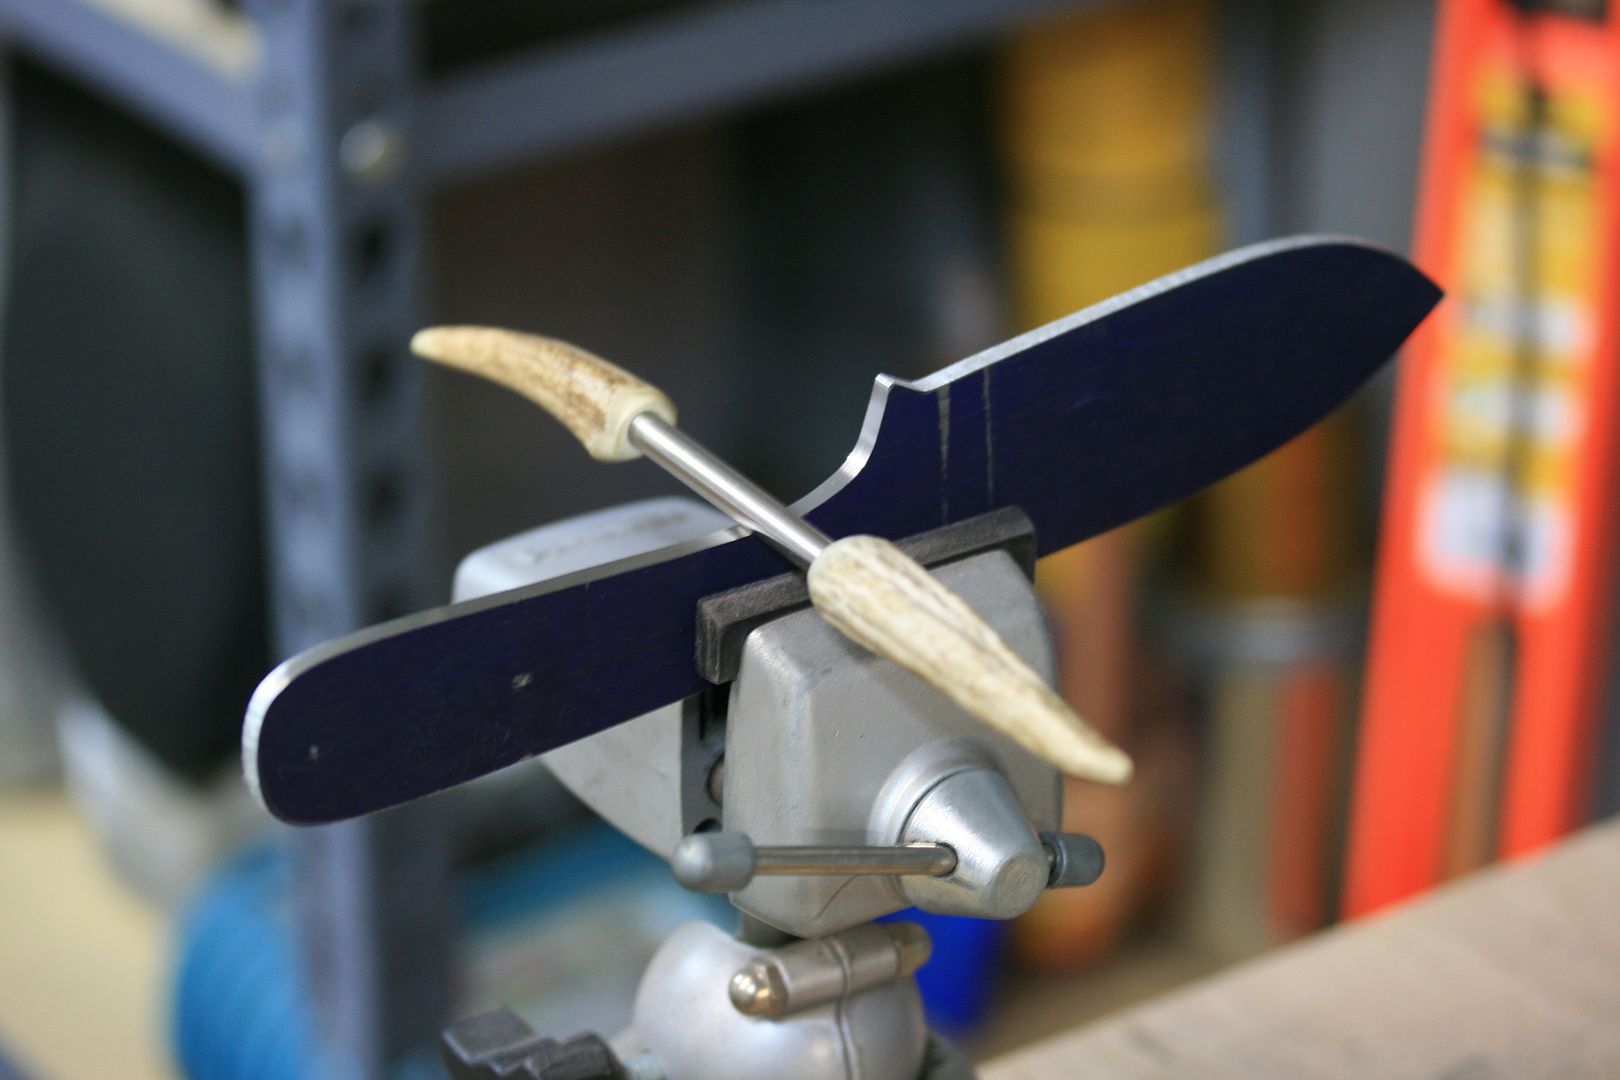
Since the grinder I use is lacking in a lot of things, I need to clean up the finger / guard area. Before this knife, I was using a half round file and then sanding the file marks out. The file work is easy but sanding the deep scratches out are another story. Eric was kind enough to post a thread about the way he worked around this problem. It is a wonderful idea. I feel like an idiot because after doing it the old way for all of my knives, and seeing his resolution to the file problem, I remembered that I had a dremel with a small wheel attachment. I went from spending 30 minutes or more to just under five minutes working in these areas. THANK YOU ERIC!!!!
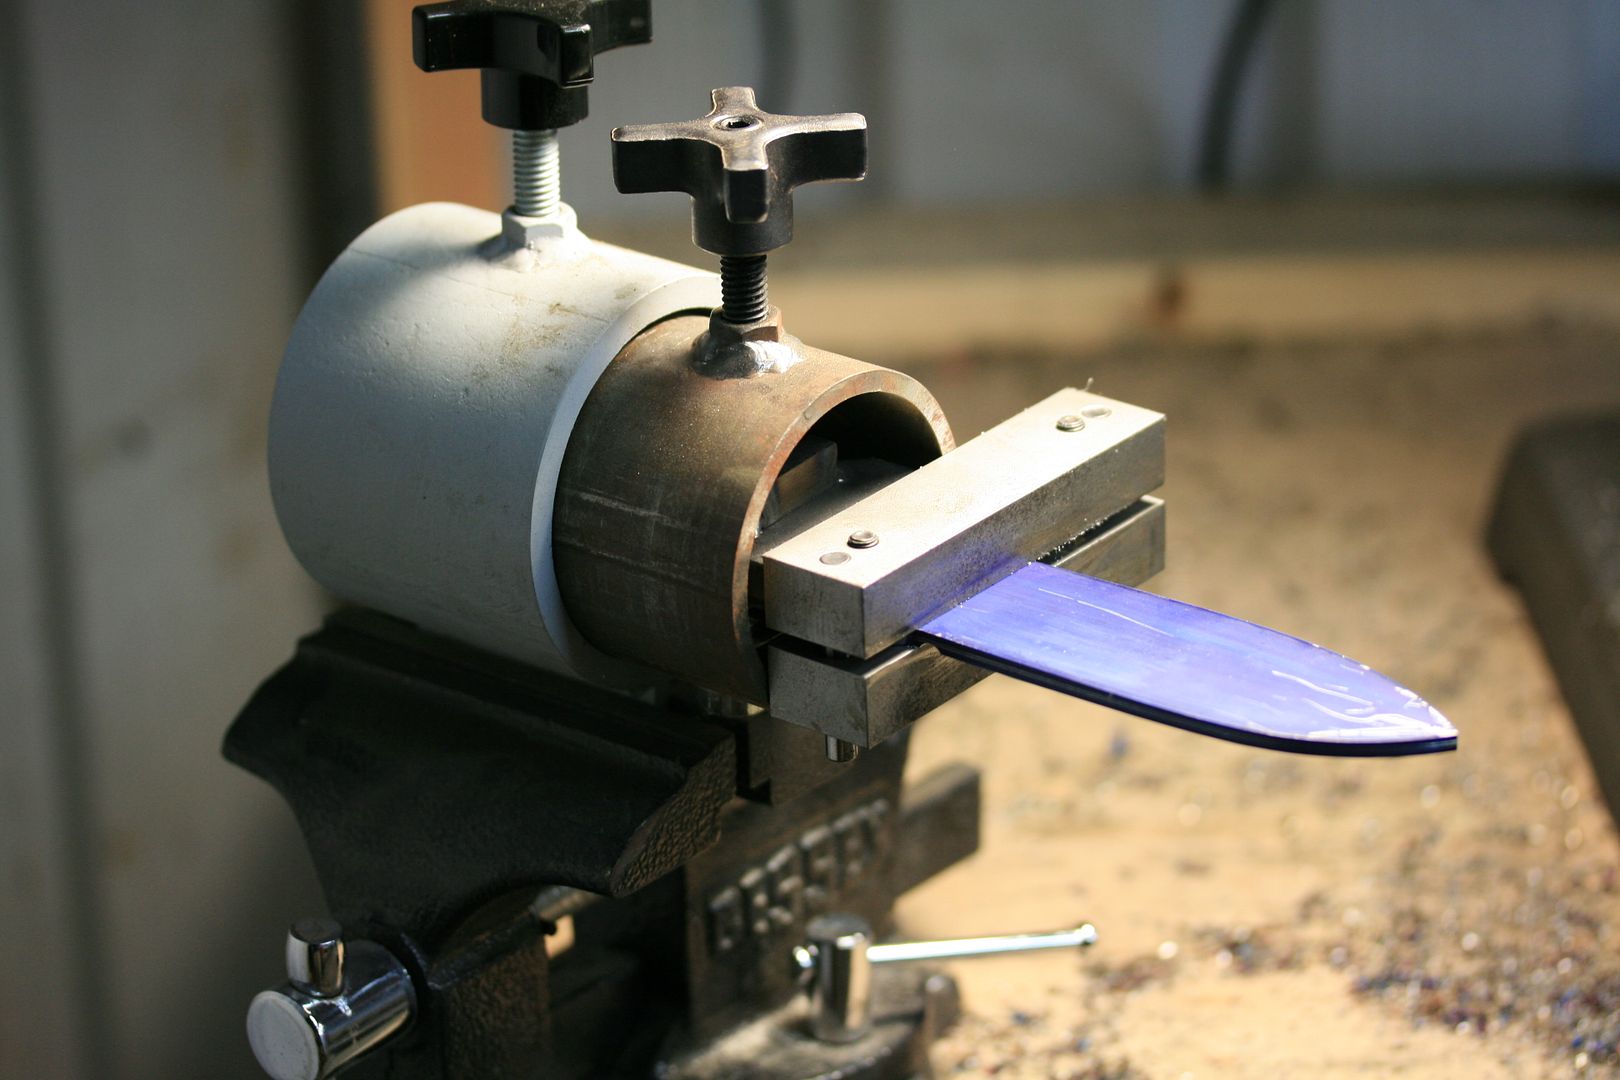
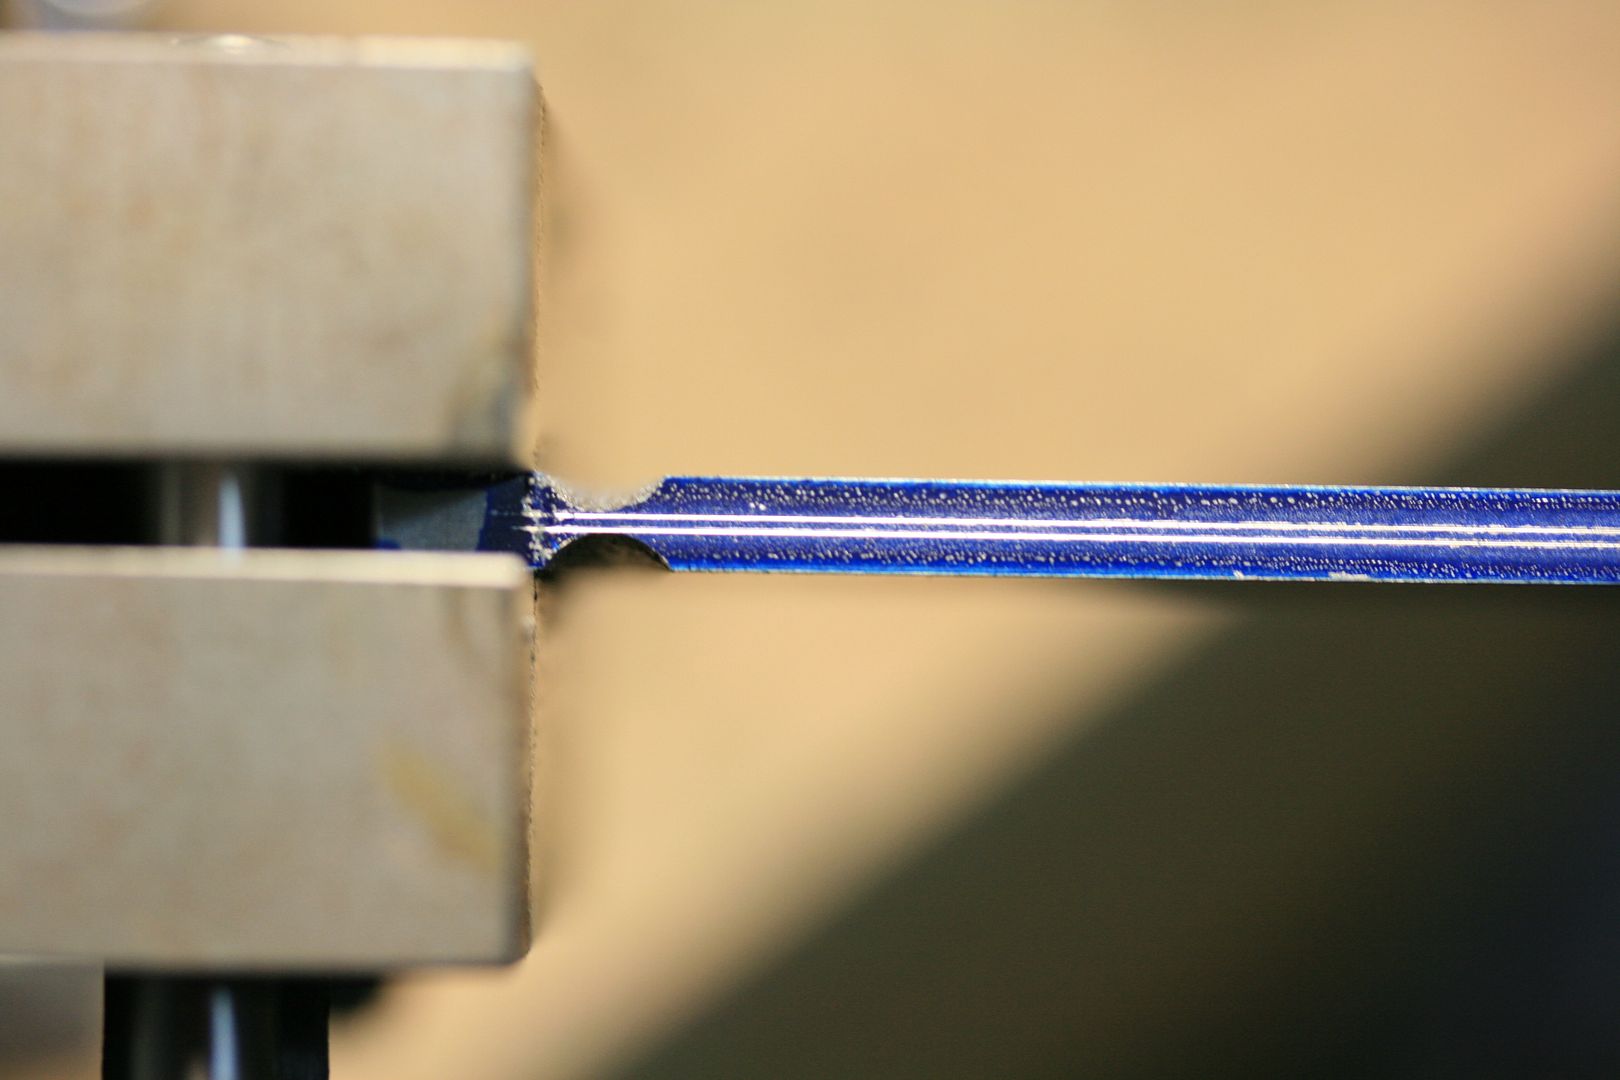
So I clamp the knife up in my panavise and go to town cleaning up the profile...
After using the dremel, I grab my little sanding tool made of antler and 1/4" steel tubing to clean it all up...
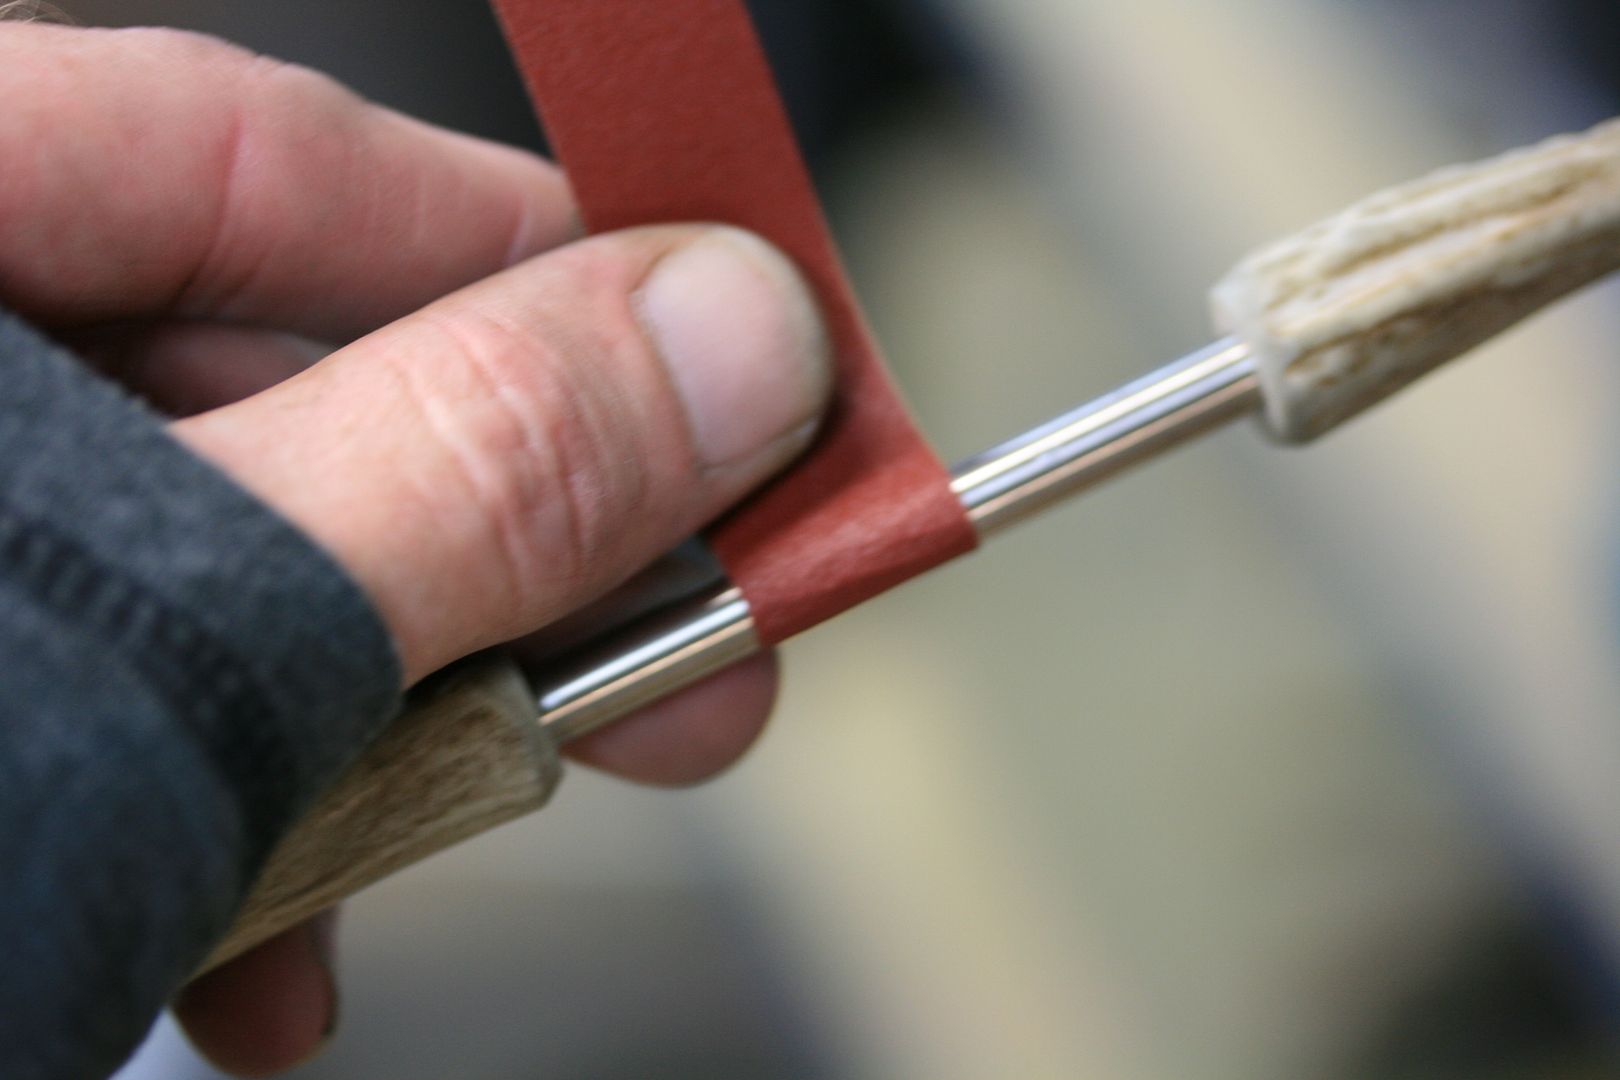
Or I use a half round file wrapped in sandpaper...
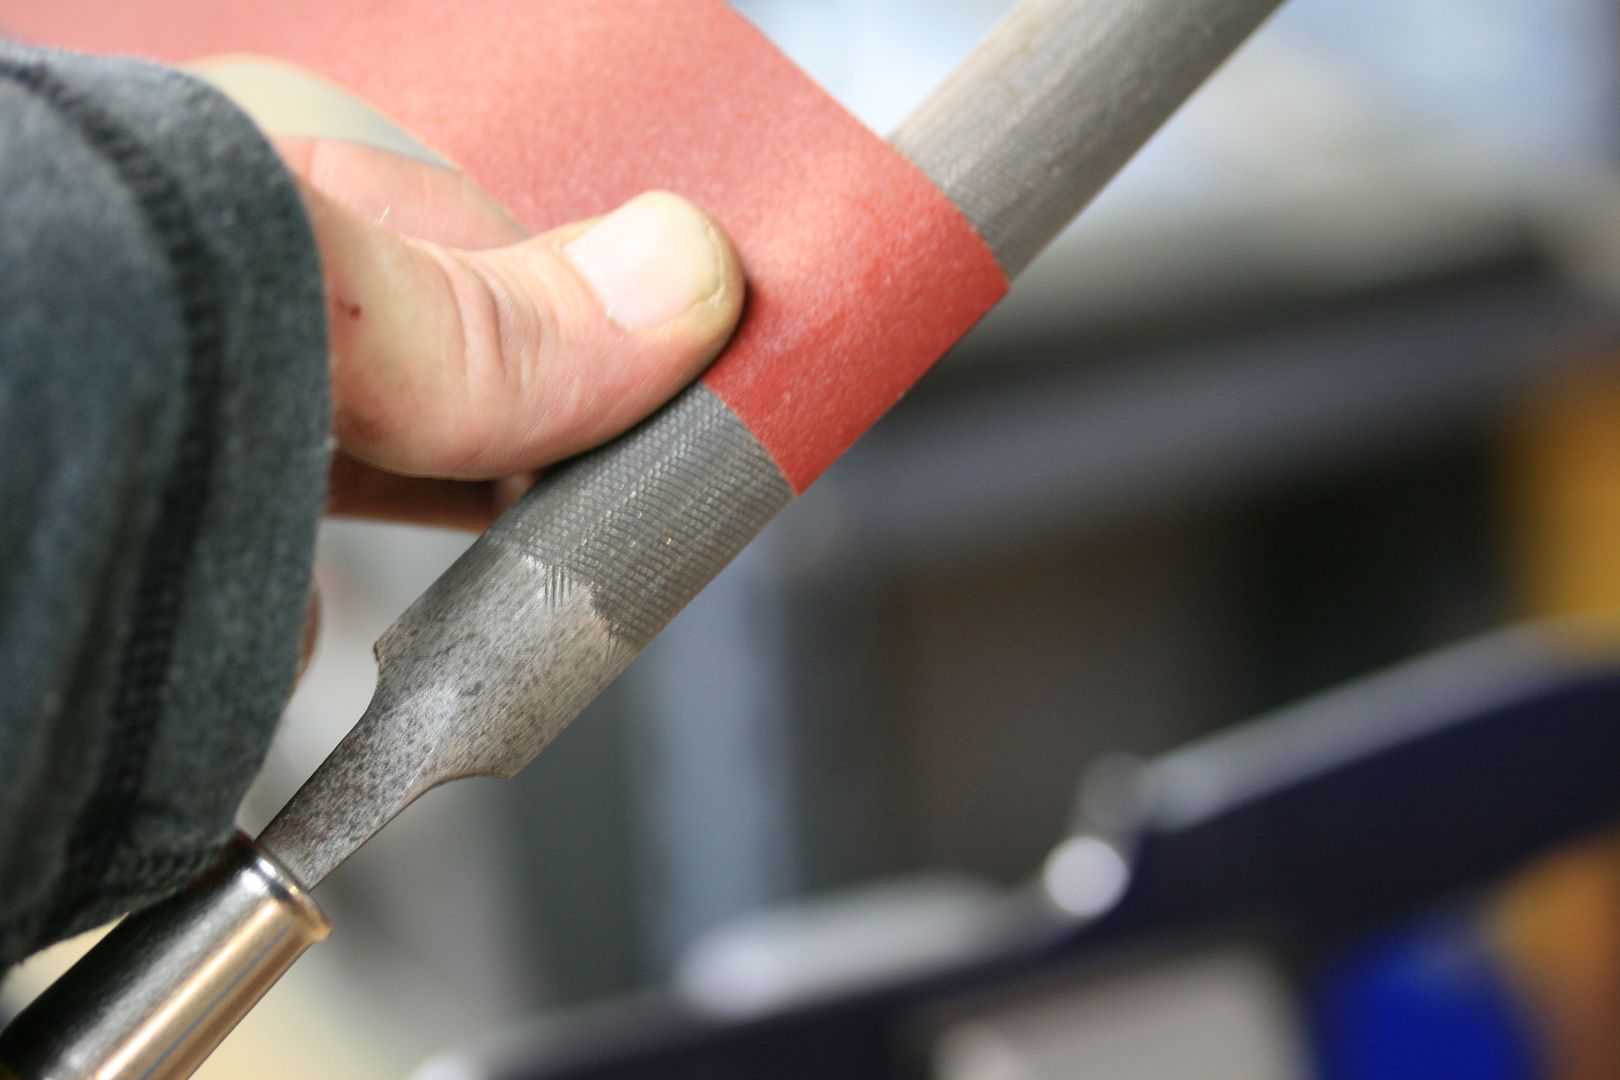
And this is what I use on all of the flatter areas...

Next, flip her over and do the spine...
Looking good...
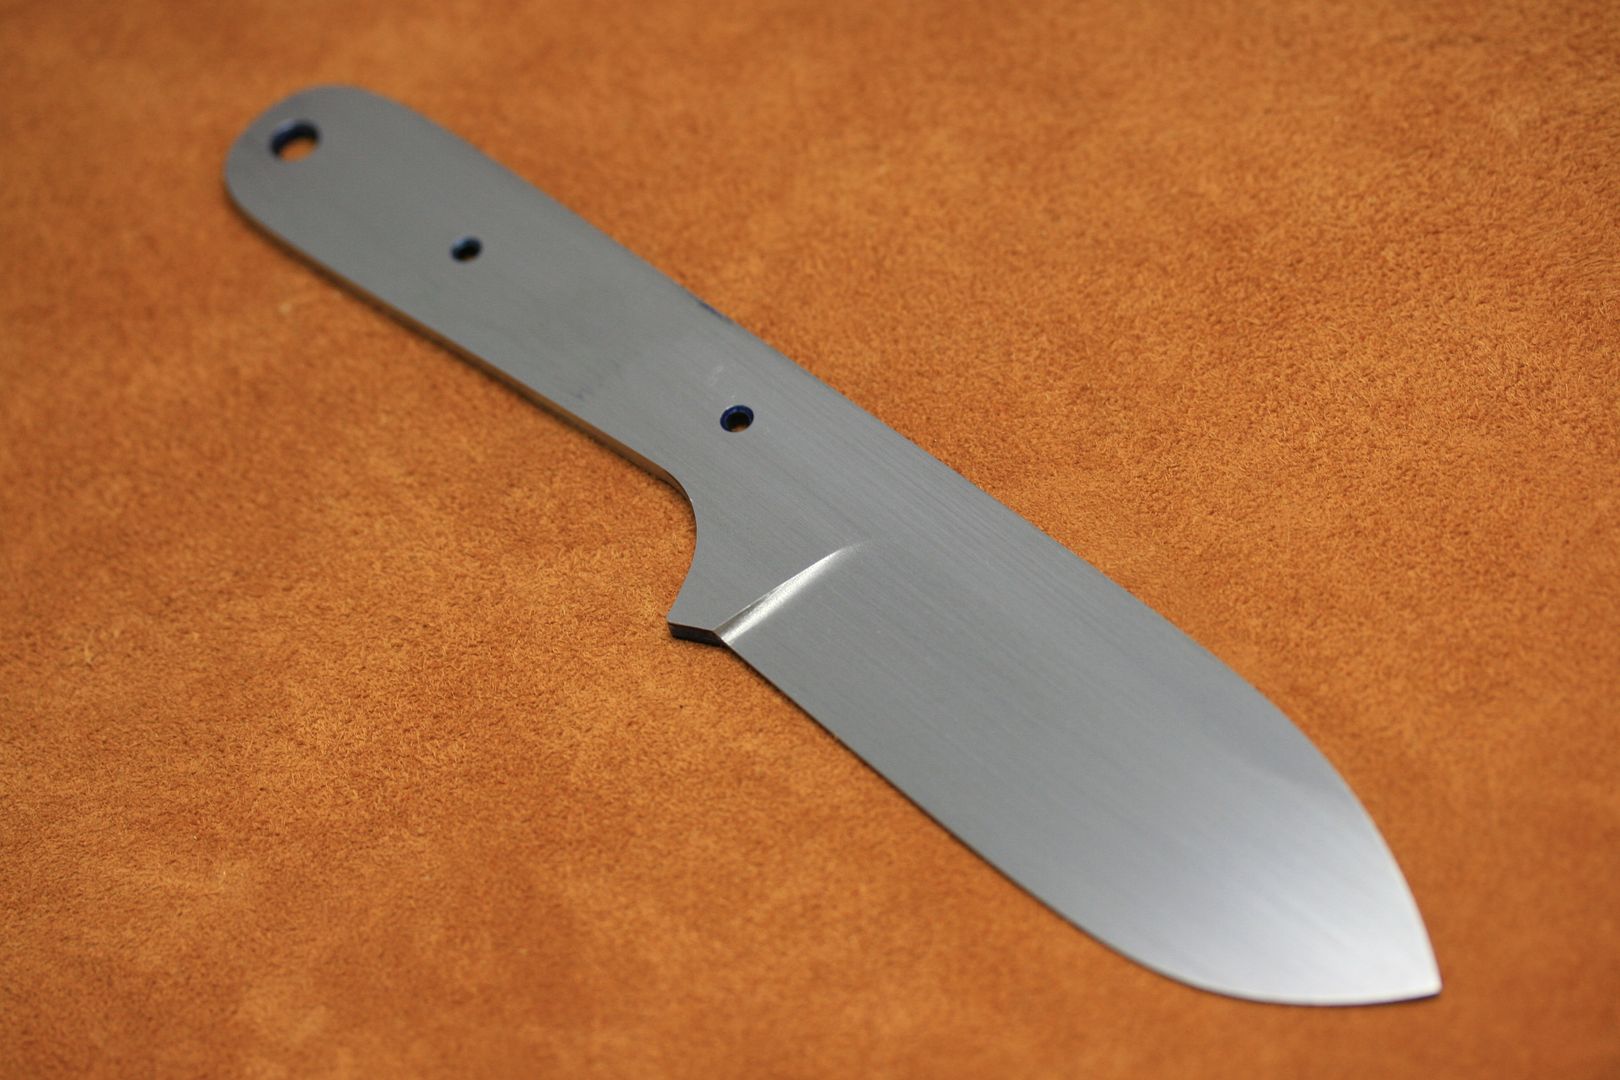
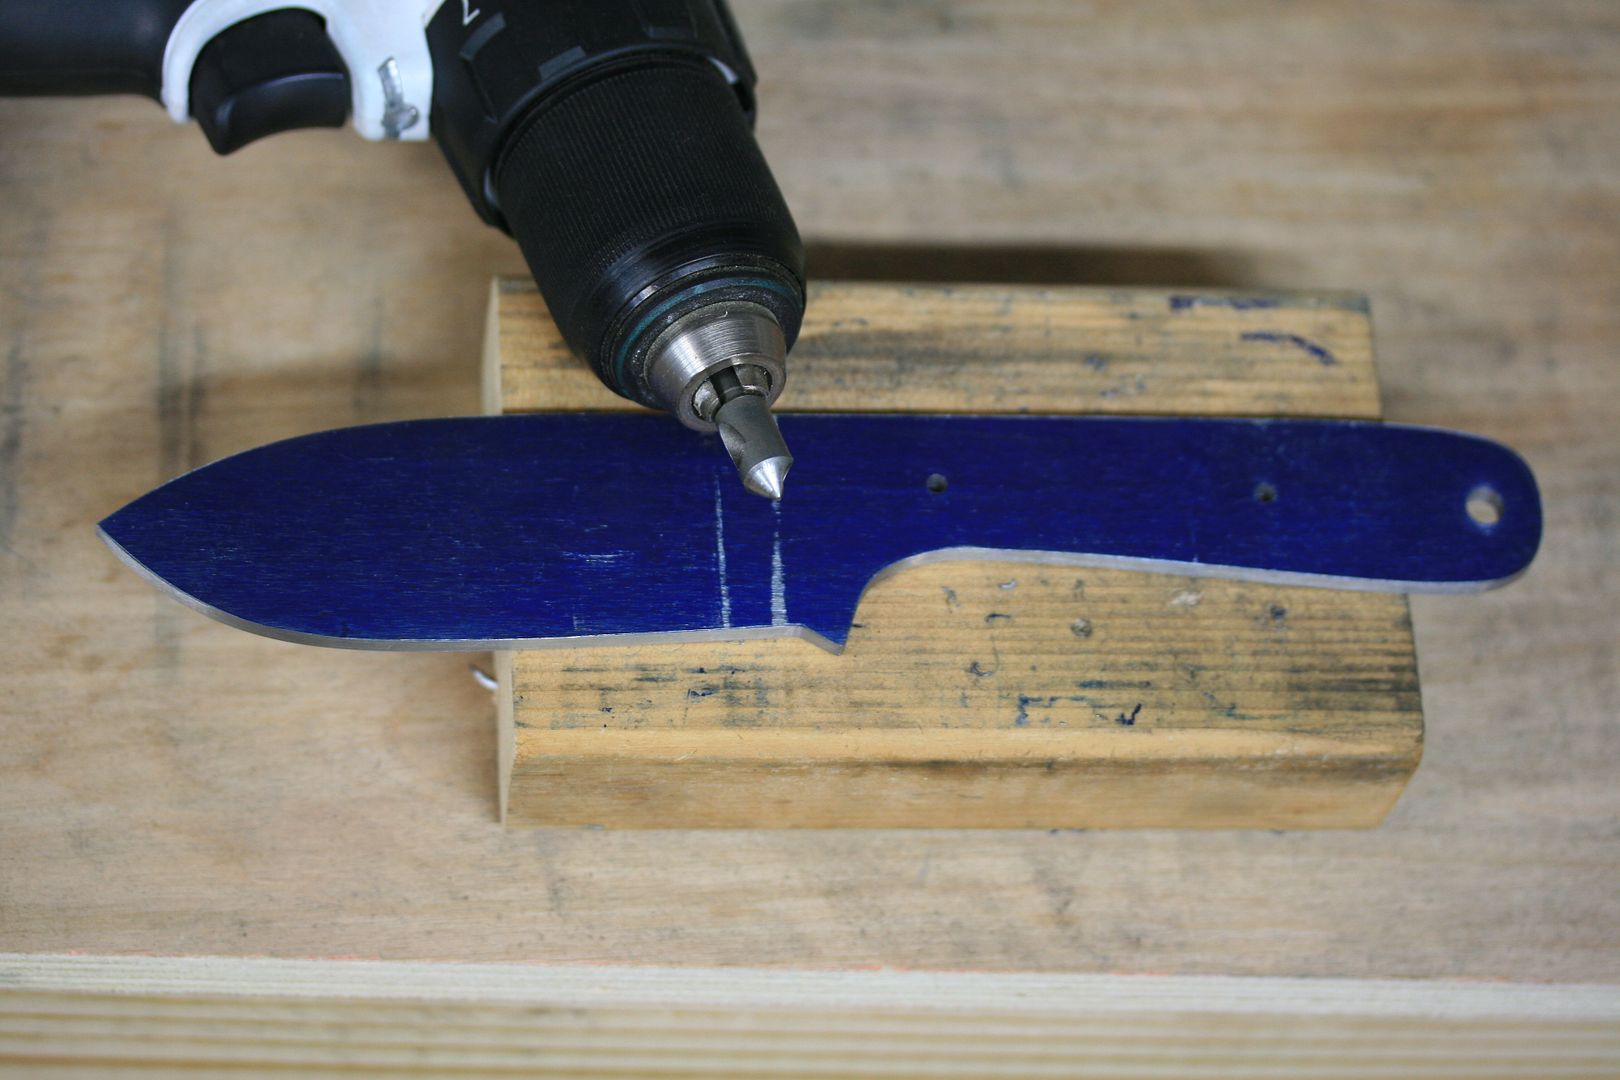
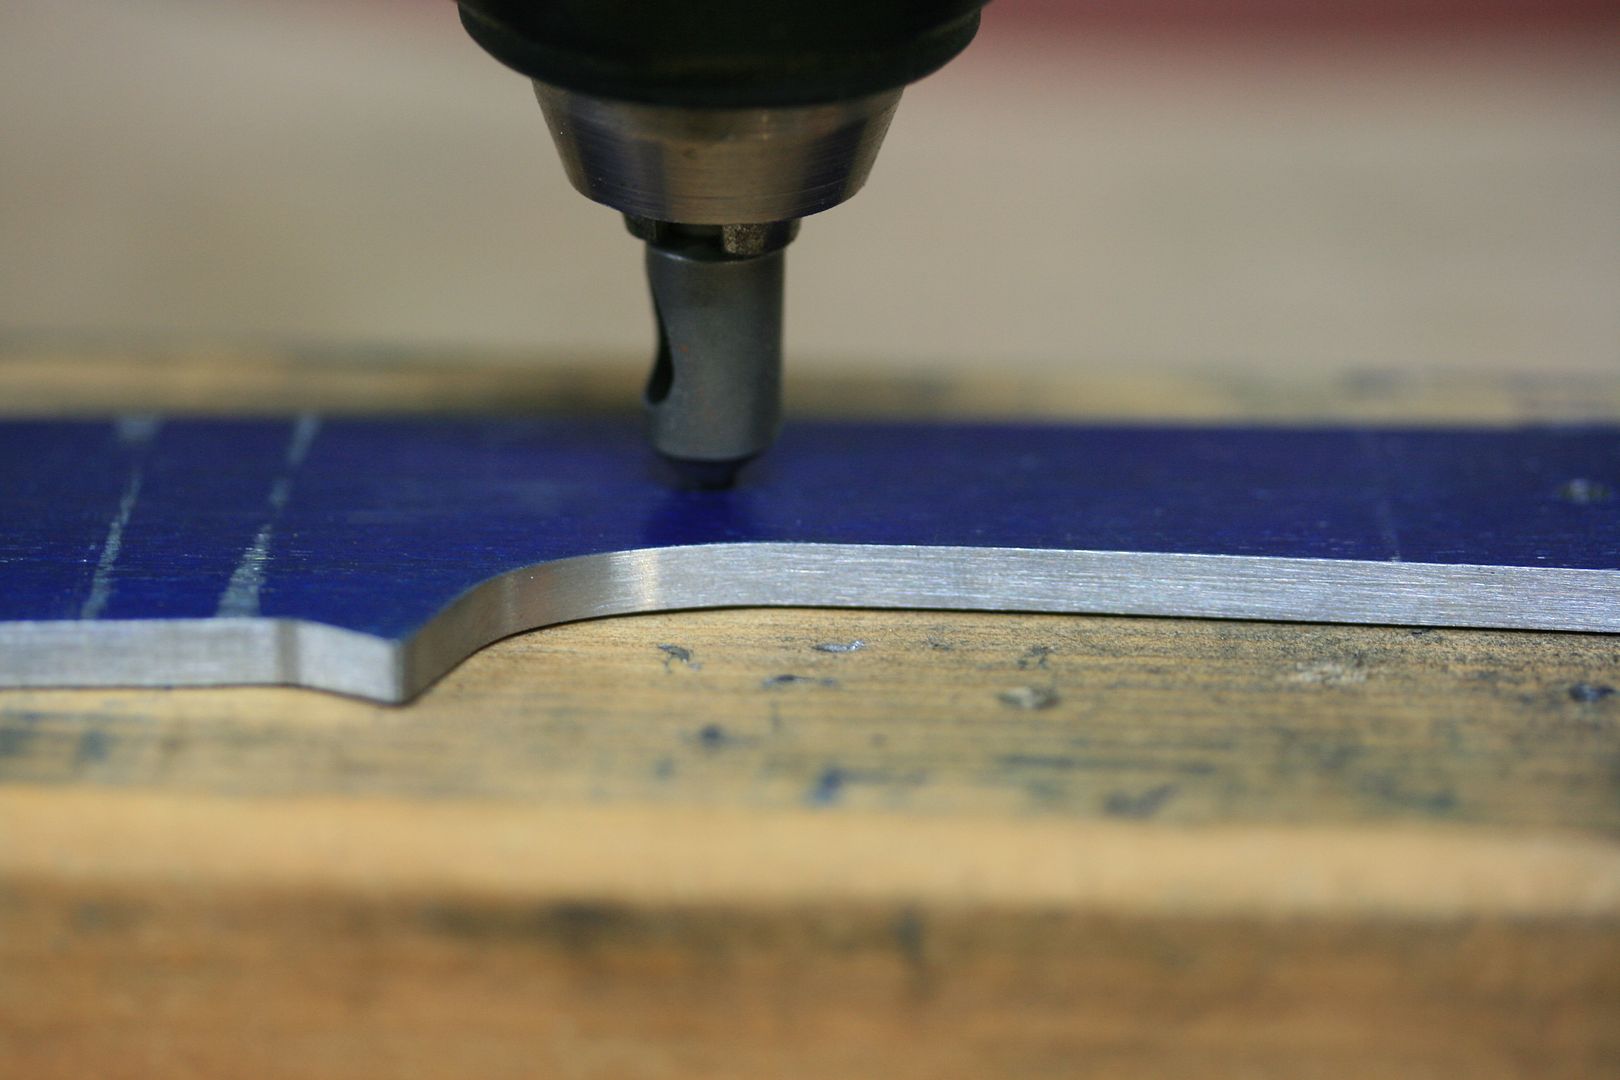
Now I drill my 1/8" holes using the drill press and also the 1/4" lanyard hole...
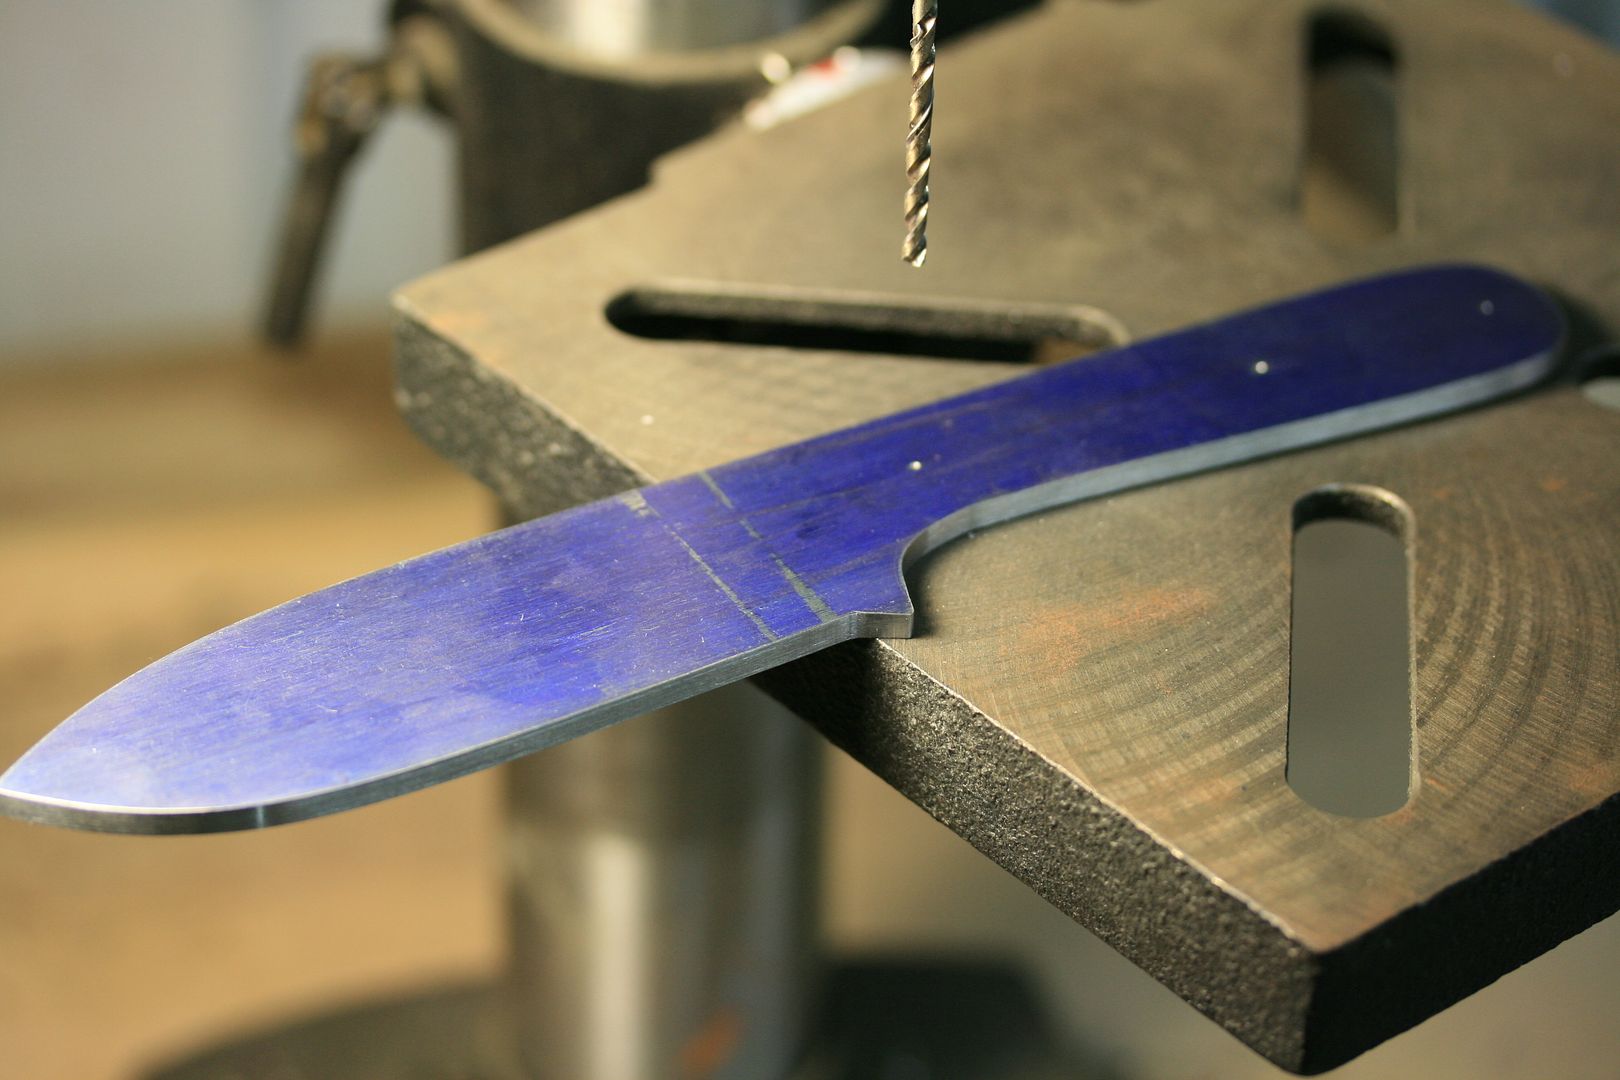
To clean them up, I use a countersinker in my power drill. I have found this to work better than my drill press...
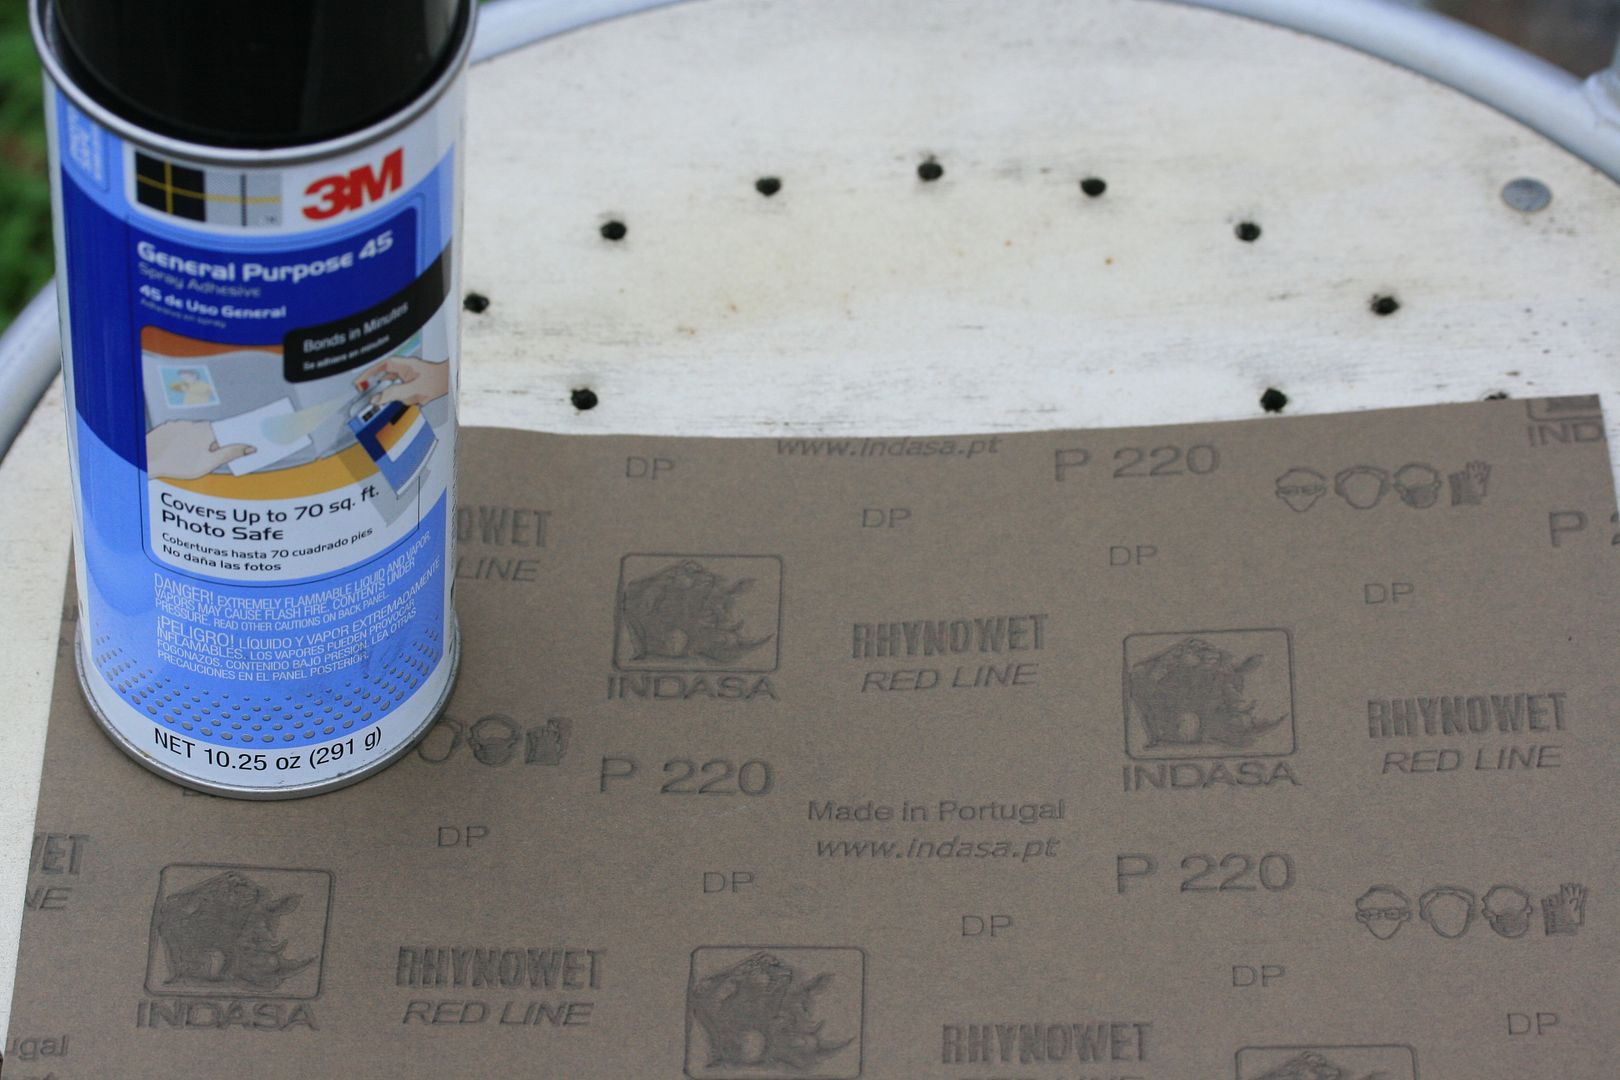
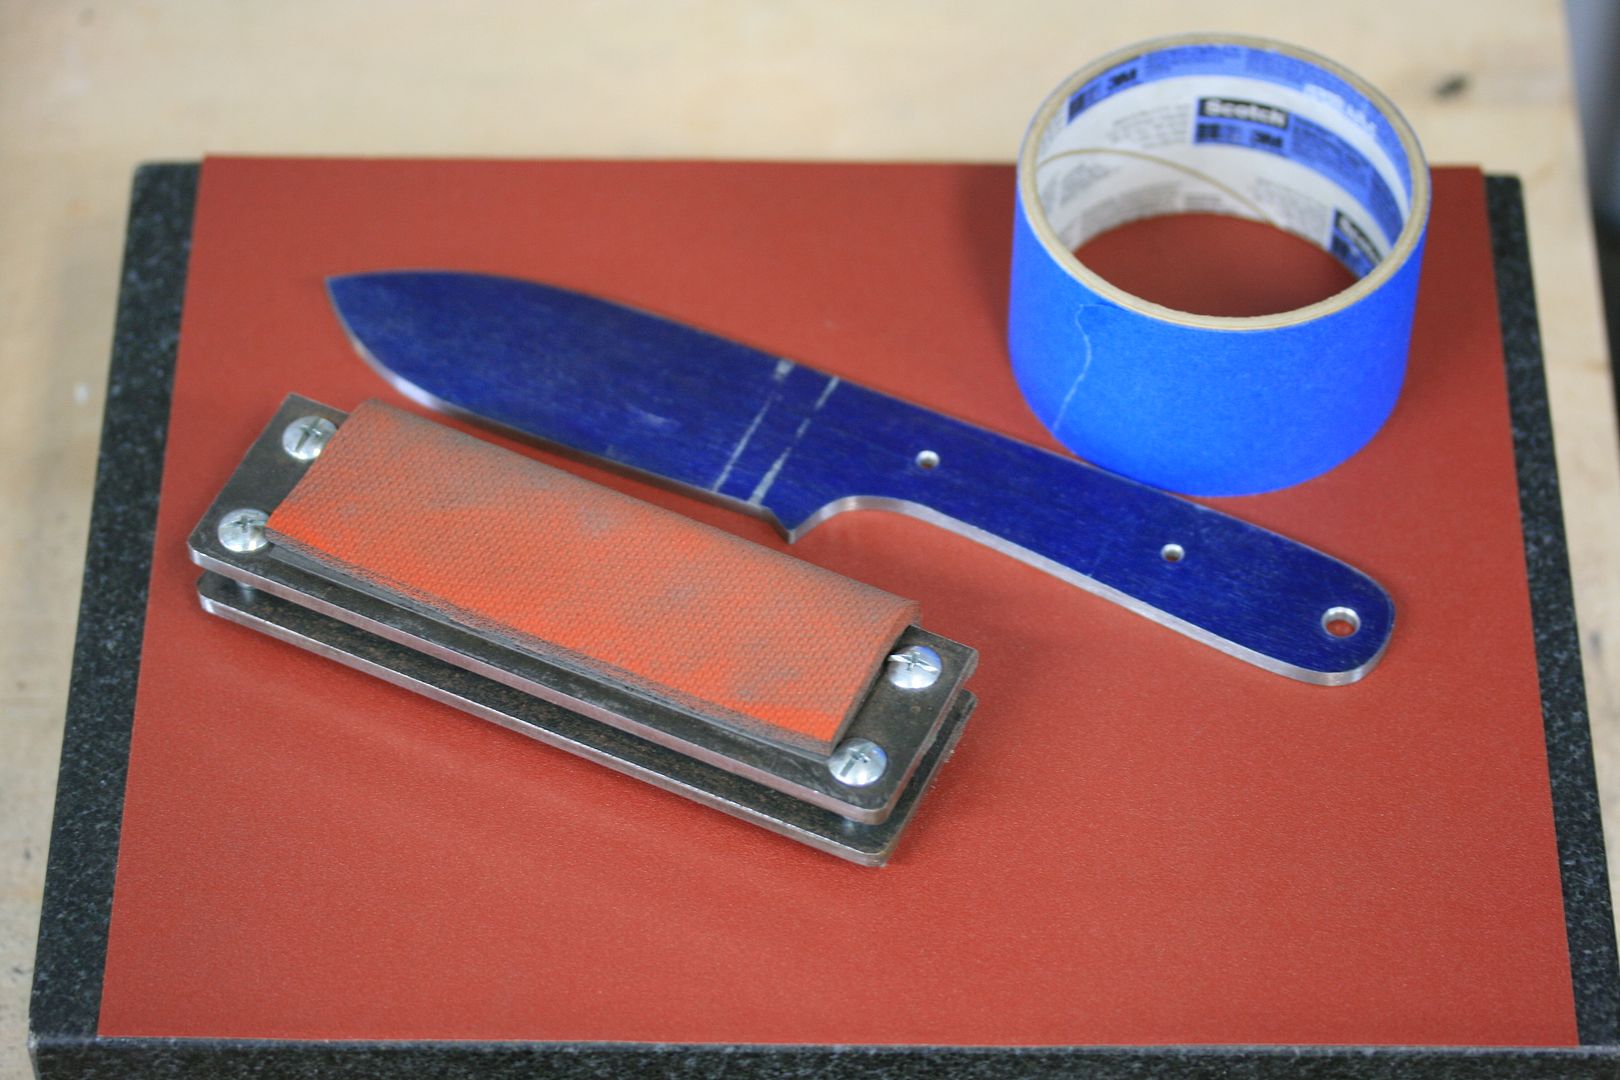
Now that the final shape of the knife is complete and cleaned up, it is time to sand her flat. Using my surface plate, 220 grit 9" x 11" sheet, magnet and tape...
First, I spray the sheet with a light coat of spray adhesive...
Let it sit for a second to get tacky...
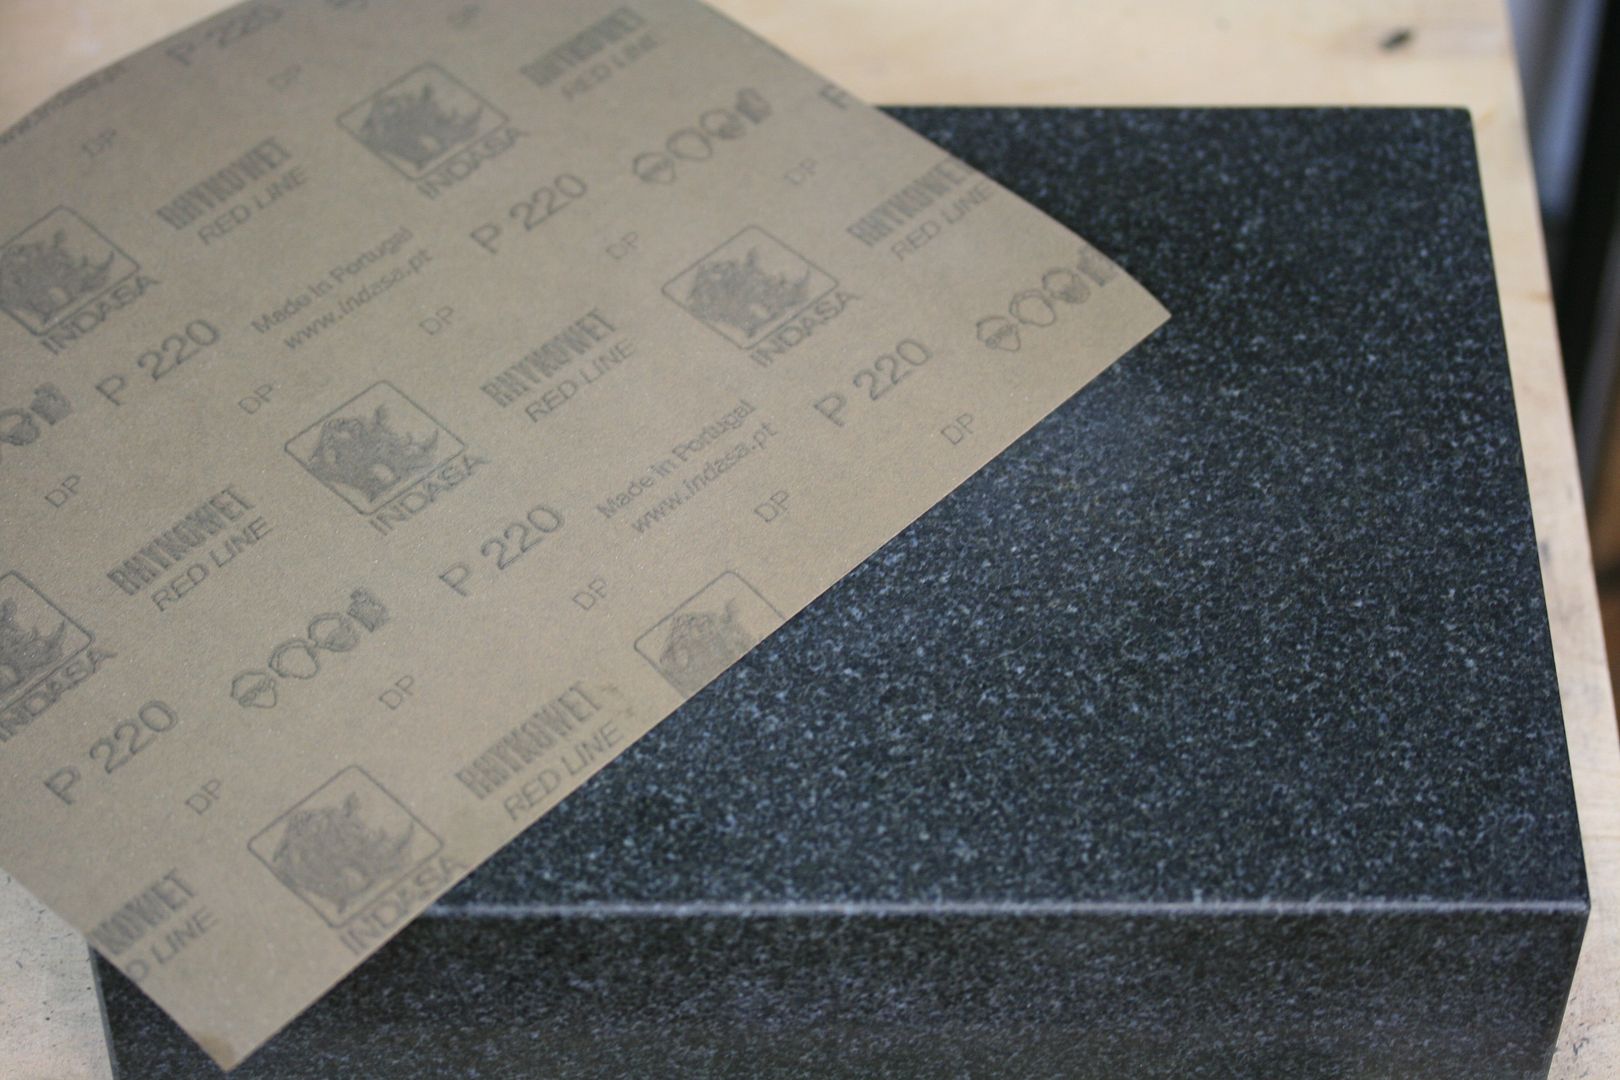
And place on granite...
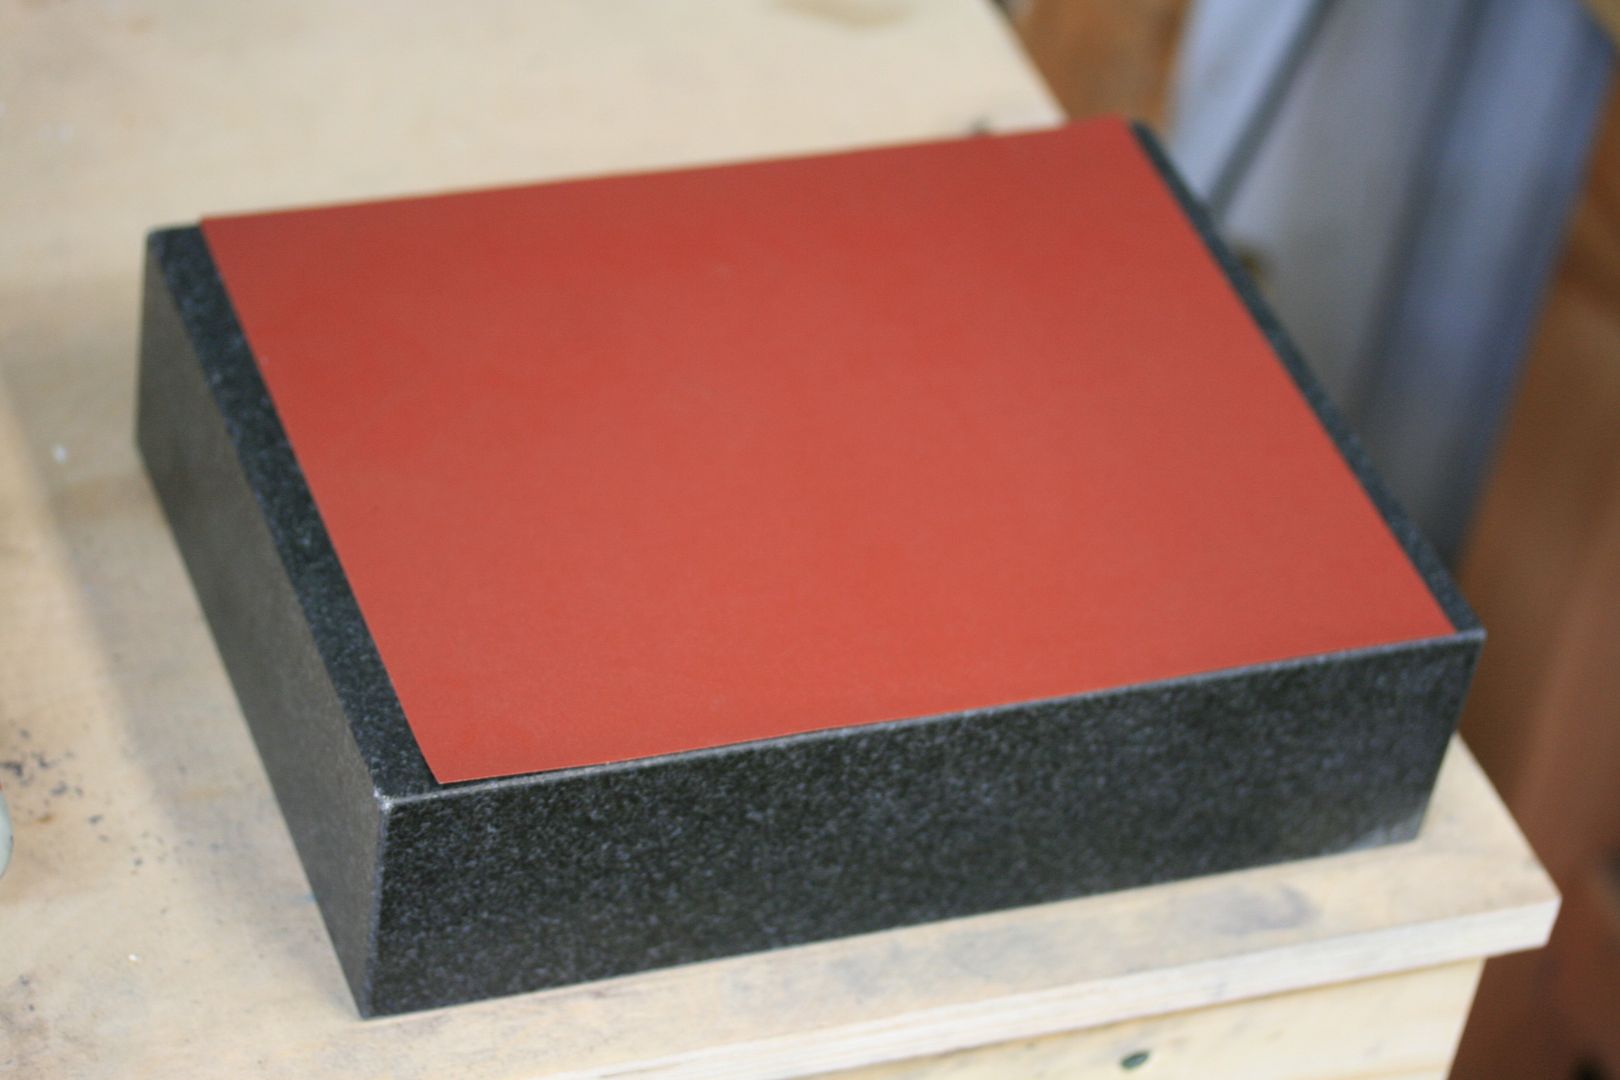
Getting ready to sand...
Continued...
So after wrecking my plan for the Kephart, I contacted the guy who the knife is going to and talked to him about the grind height. He really didn't care at first but after looking at pictures for a while, he decided he wanted about a 3/4 high grind. I don't blame him, I don't like the look of the full height grind on this knife and it is going to be mainly a fire prep / camp knife, so I figured a distal taper would not be best (am I right about this? I figure thicker spine = stronger knife)
Since this is the first knife I am parting with, I want it to be the best that I can possibly do. He is also going to test it for me and hopefully write up a good review on a bushcraft forum.
So I decided to add a WIP into my "WIP" thread. This is how I make a knife. I am sure there are many things that will be wrong so I hope some of you guys chime in and correct me.
For the more experienced guys, this will probably bore the crud out of you. This won't come even come close to Josh Dabney's WIP, but I am going to give it a try...
Kephart WIP
First off, I sketch my desired pattern in my sketch book using pencil. After erasing and tweaking for a while, I come up with what I am after. Next I copy the sketch and cut it out. Glue it to some thin cardboard laying around and let it dry. Once the glue has dried, I cut the template out. This is the design I am going for...
Time to prepare the steel. My choice (or really the customer's choice) is 5/32" x 1 3/4" O1 tool steel purchased from NJ Steel Baron.
Layout blue dye so when I go to cut out the profile on the bandsaw, I will be able to see clearly. I used to not do this and when you scribe a line going in the same direction as the steel's grain, it becomes hard to see in different lighting and angles...
Clamp my cardboard pattern down and get ready to scribe. Something worth mentioning is that since this steel was not precision ground, I try to lay my pattern out in the middle of the steel. From what I have read and experienced in the past is that all of the edges are pinched down a bit from when they cut the steel to the desired size. This has caused me major headaches in the past and actually caused problems on the last Kephart. As you can see, there is not much wiggle room and I am basically to the edge. We will see how it comes out...
I scribe around the pattern a few times making sure not to dig into the template any and also scribe a dot where my holes will be drilled...
Next, to be safe, I measure the width of the tang in the area I want to drill. I divide it by two and scratch a line...
Placing a scale along the two pin holes gives me a straight line to know where to place the lanyard hole. I like the holes to be in a straight line when possible, especially with a handle like the Kephart has. After doing this, I use a punch to mark the three locations...
Now that I have the steel laid out and know where my knife will be cut out from, I check for the flatness of the steel. Unfortunately, as I mentioned earlier, this is not precision ground, so we have a nasty bow in the steel. After reading Josh's WIP, I decided to try straightening the steel using the method he used. This was the first time I have had to do this. Seems pretty straight forward though. I also decided to do it before cutting the blade out...
Find the middle of the bow and place both ends on something strong and elevated. My choice was 2 pieces of micarta that were laying next to me...
First I used this clamp; not enough pressure...
Then I tried this one with better results...
Pretty much flat. I am going to check it again once the blade is cut out...
Bandsaw time. Using a metal cutting bandsaw, I cut as close to the scribe line as possible. With how fast the 2x42 belts get used up, getting close to the line saves me some money...
First cut the excess off the end...
Then start following the pattern...
Now I have most of the steel off and almost ready for the grinder...
First I need to do some adjusting on the grinder. I have been having problems with it lately, so I thought this would be a good time to try and resolve the issues. First I leveled up my work rest...
Shimmed up the platen because it was going crooked when tightening the bolts...
It definitely looks way better than before...
Next I made sure that my tool rest and platen were perpendicular to each other...
Put on a used 80 grit belt and I am ready to clean up the profile...
But first, I wanted to check the flatness of the blade again. Sure enough it wasn't straight. The picture really doesn't show it very good. For this I use my granite surface plate, which gets used a lot in my process...
Back to bending, checking, bending, checking. I actually found that using vise grips for this yielded better results...
After checking on the surface plate, the blade seems ready to go...
Using the 80 grit belt, I grind right up to my scribe line, making sure to not go past it or into it...
After the 80 grit, I move to 220 and grind right into the scribe line, being careful to not go past...
Since the grinder I use is lacking in a lot of things, I need to clean up the finger / guard area. Before this knife, I was using a half round file and then sanding the file marks out. The file work is easy but sanding the deep scratches out are another story. Eric was kind enough to post a thread about the way he worked around this problem. It is a wonderful idea. I feel like an idiot because after doing it the old way for all of my knives, and seeing his resolution to the file problem, I remembered that I had a dremel with a small wheel attachment. I went from spending 30 minutes or more to just under five minutes working in these areas. THANK YOU ERIC!!!!
So I clamp the knife up in my panavise and go to town cleaning up the profile...
After using the dremel, I grab my little sanding tool made of antler and 1/4" steel tubing to clean it all up...
Or I use a half round file wrapped in sandpaper...
And this is what I use on all of the flatter areas...
Next, flip her over and do the spine...
Looking good...
Now I drill my 1/8" holes using the drill press and also the 1/4" lanyard hole...
To clean them up, I use a countersinker in my power drill. I have found this to work better than my drill press...
Now that the final shape of the knife is complete and cleaned up, it is time to sand her flat. Using my surface plate, 220 grit 9" x 11" sheet, magnet and tape...
First, I spray the sheet with a light coat of spray adhesive...
Let it sit for a second to get tacky...
And place on granite...
Getting ready to sand...
Continued...
Steven Long
Well-Known Member
Kephart WIP Part 2
I tape up the magnet to help keep the grit from getting up in it and also protects the work piece a bit...
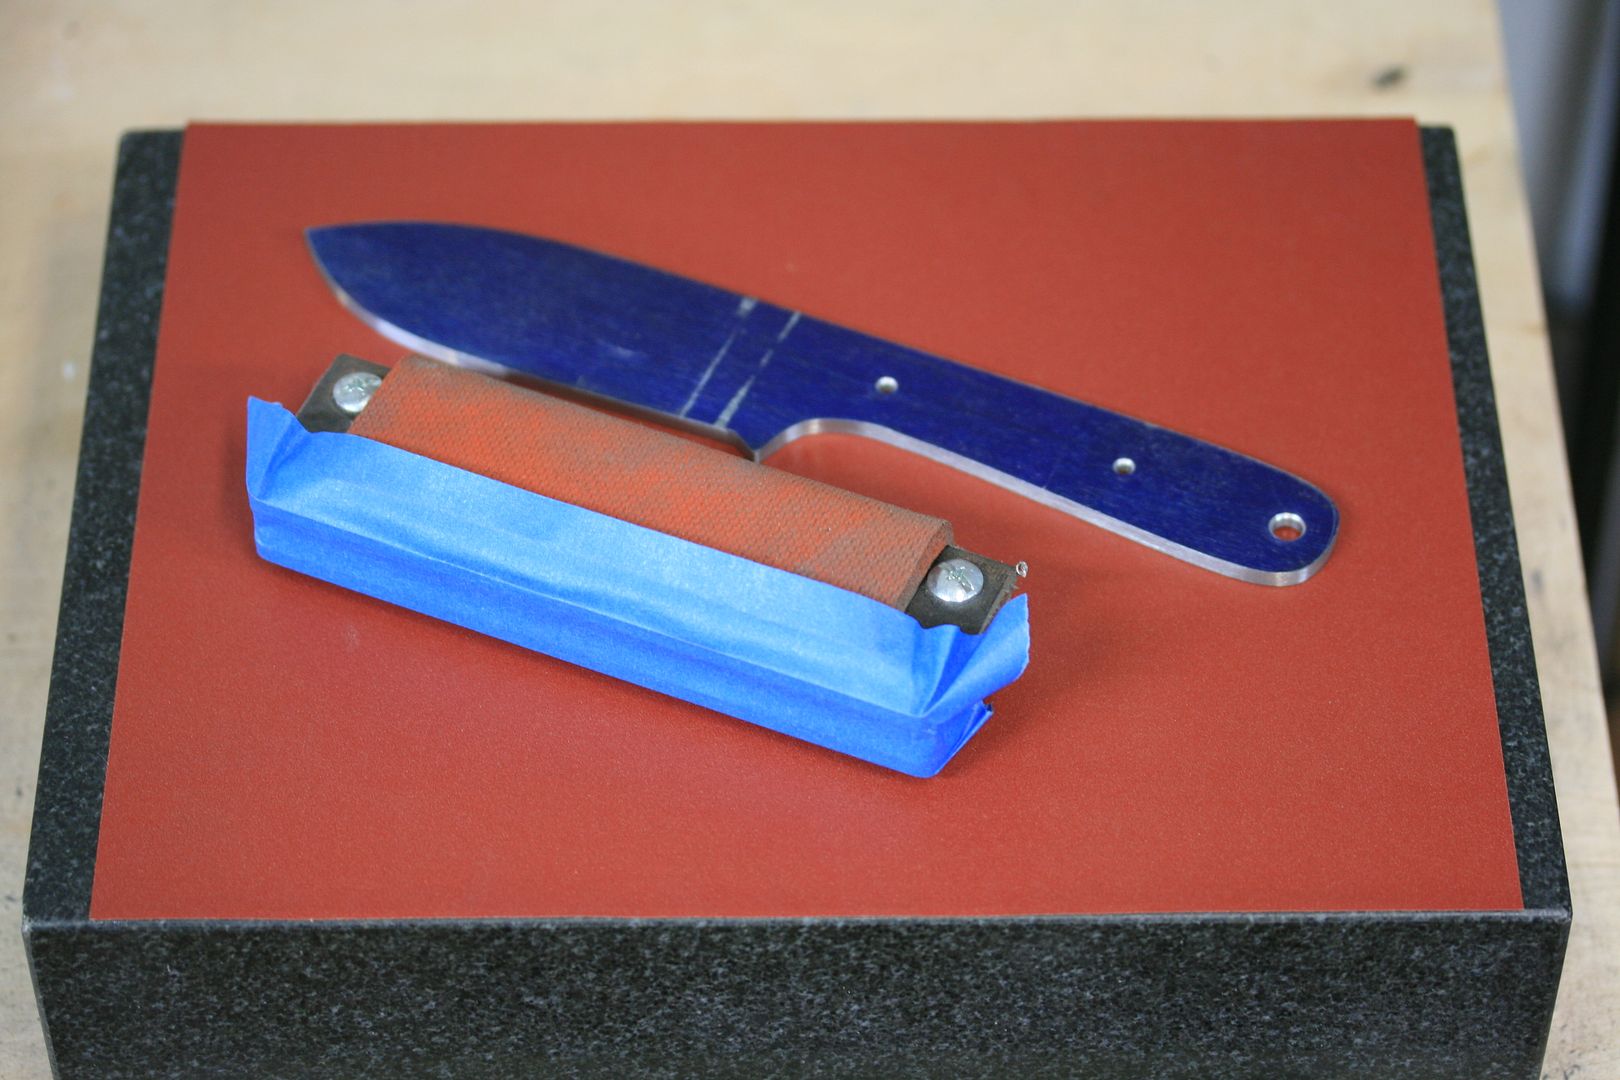
You can see that it is not flat at all...
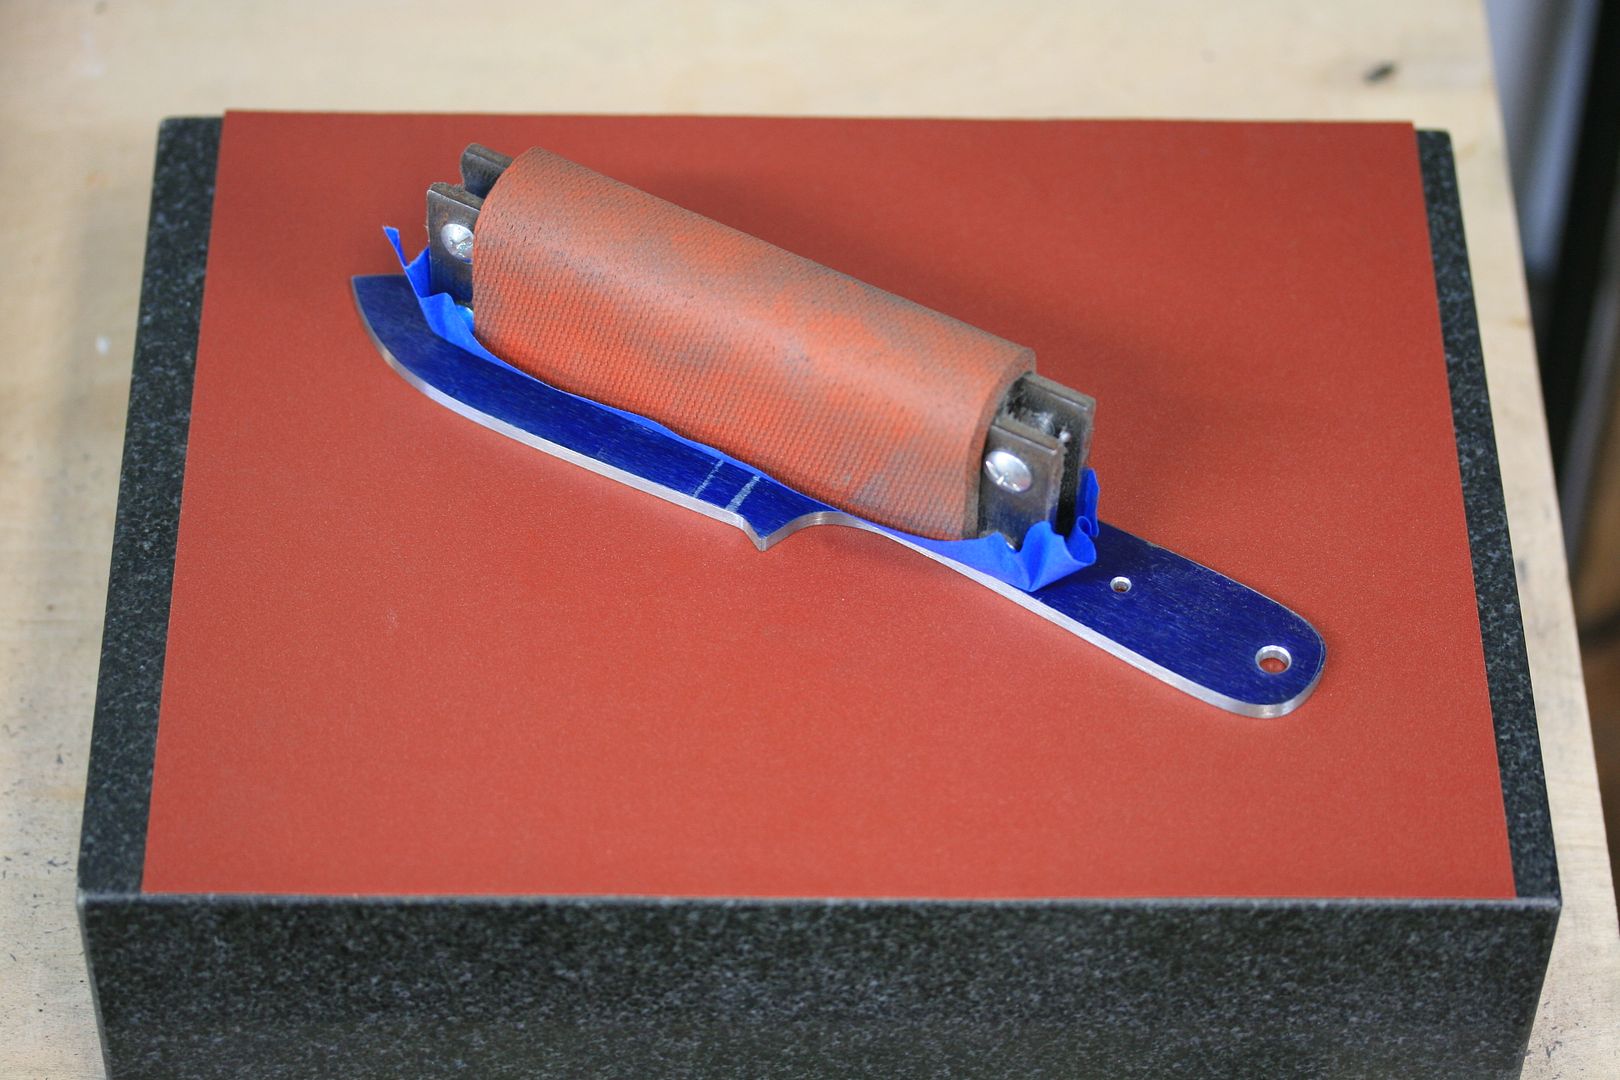
Starting to look better...
Now for the other side...

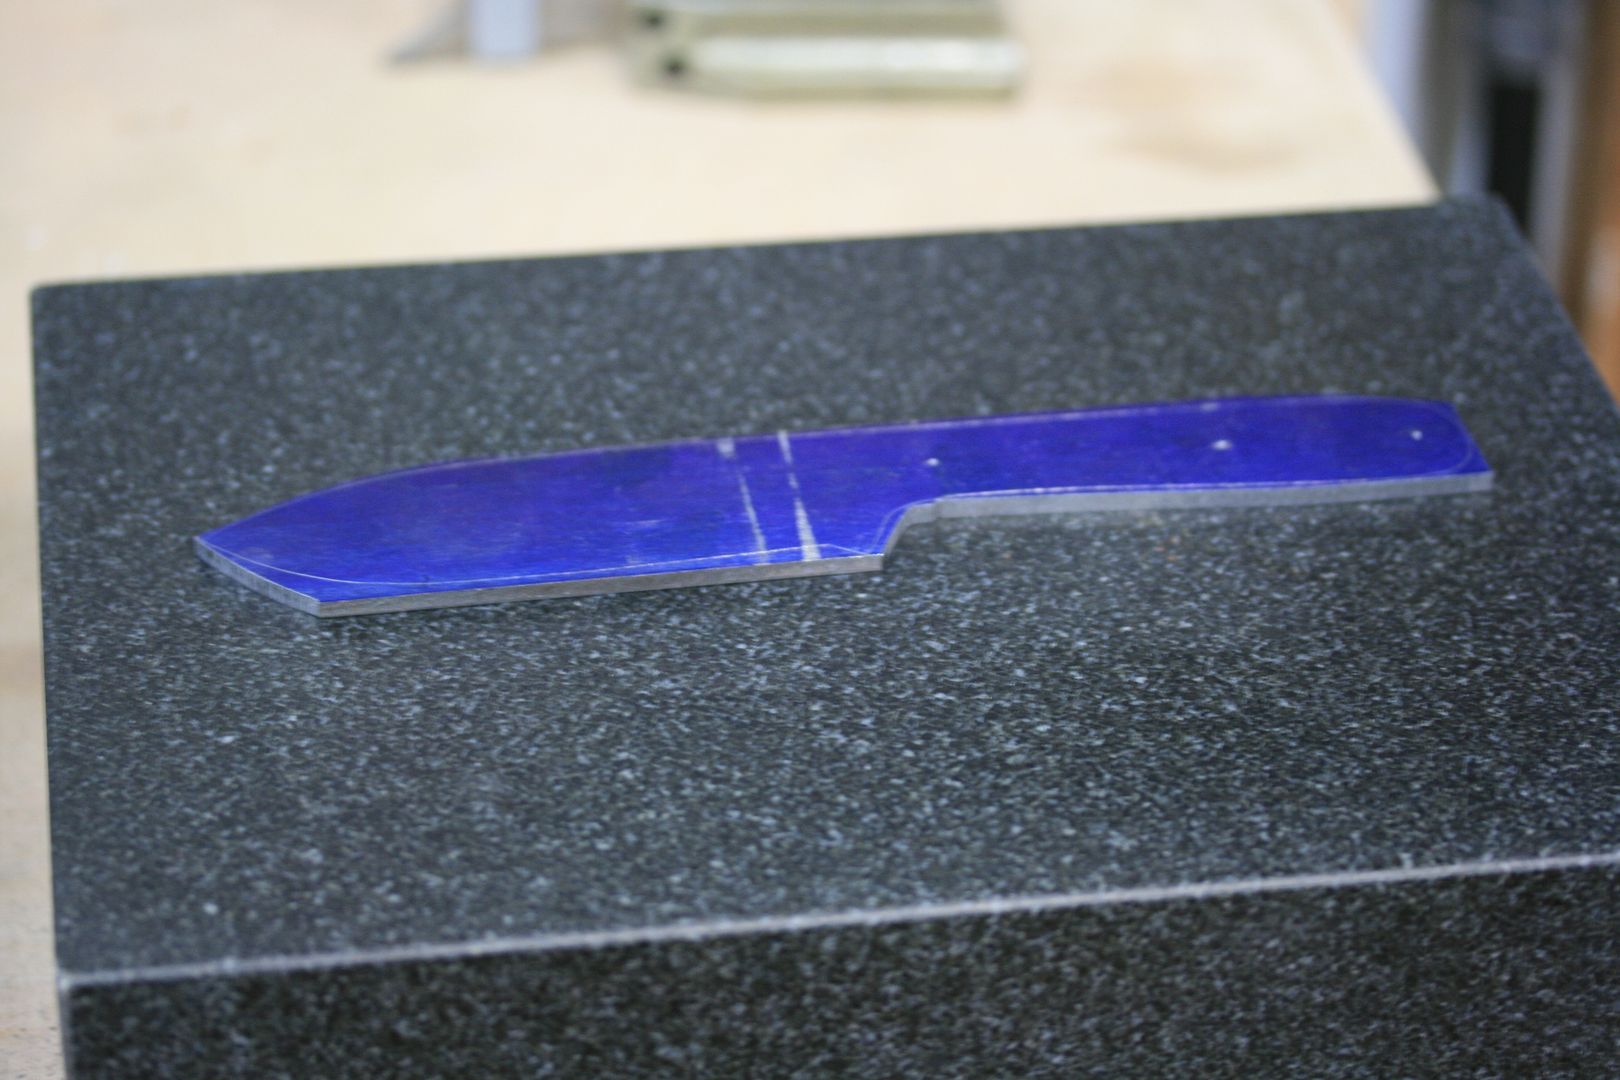
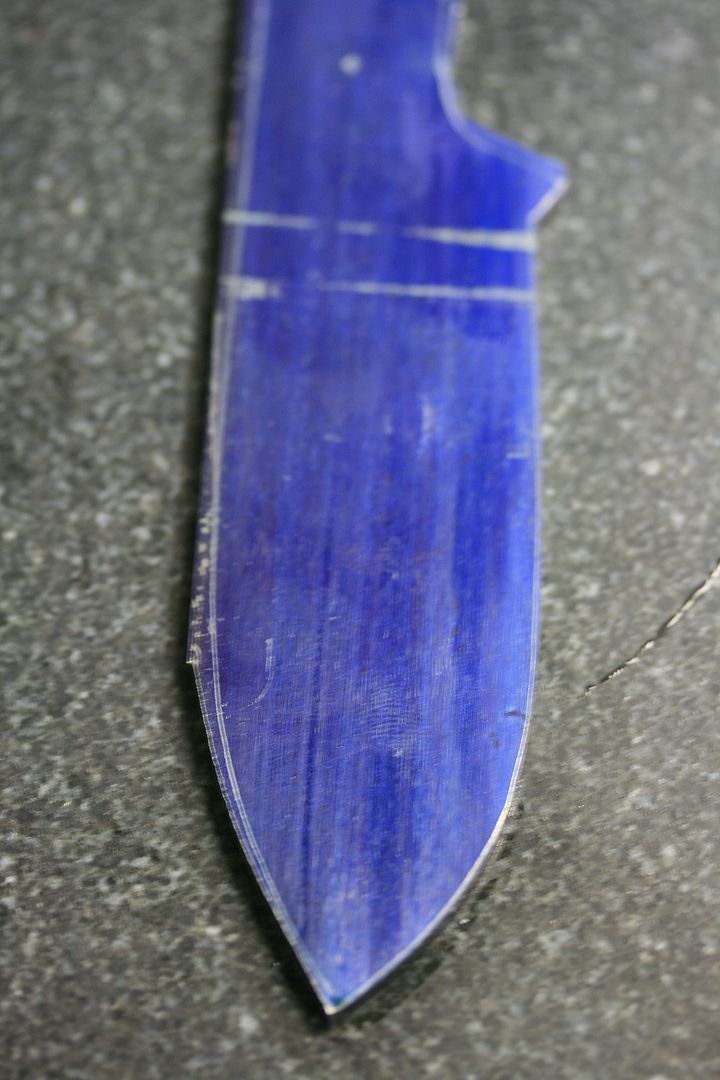
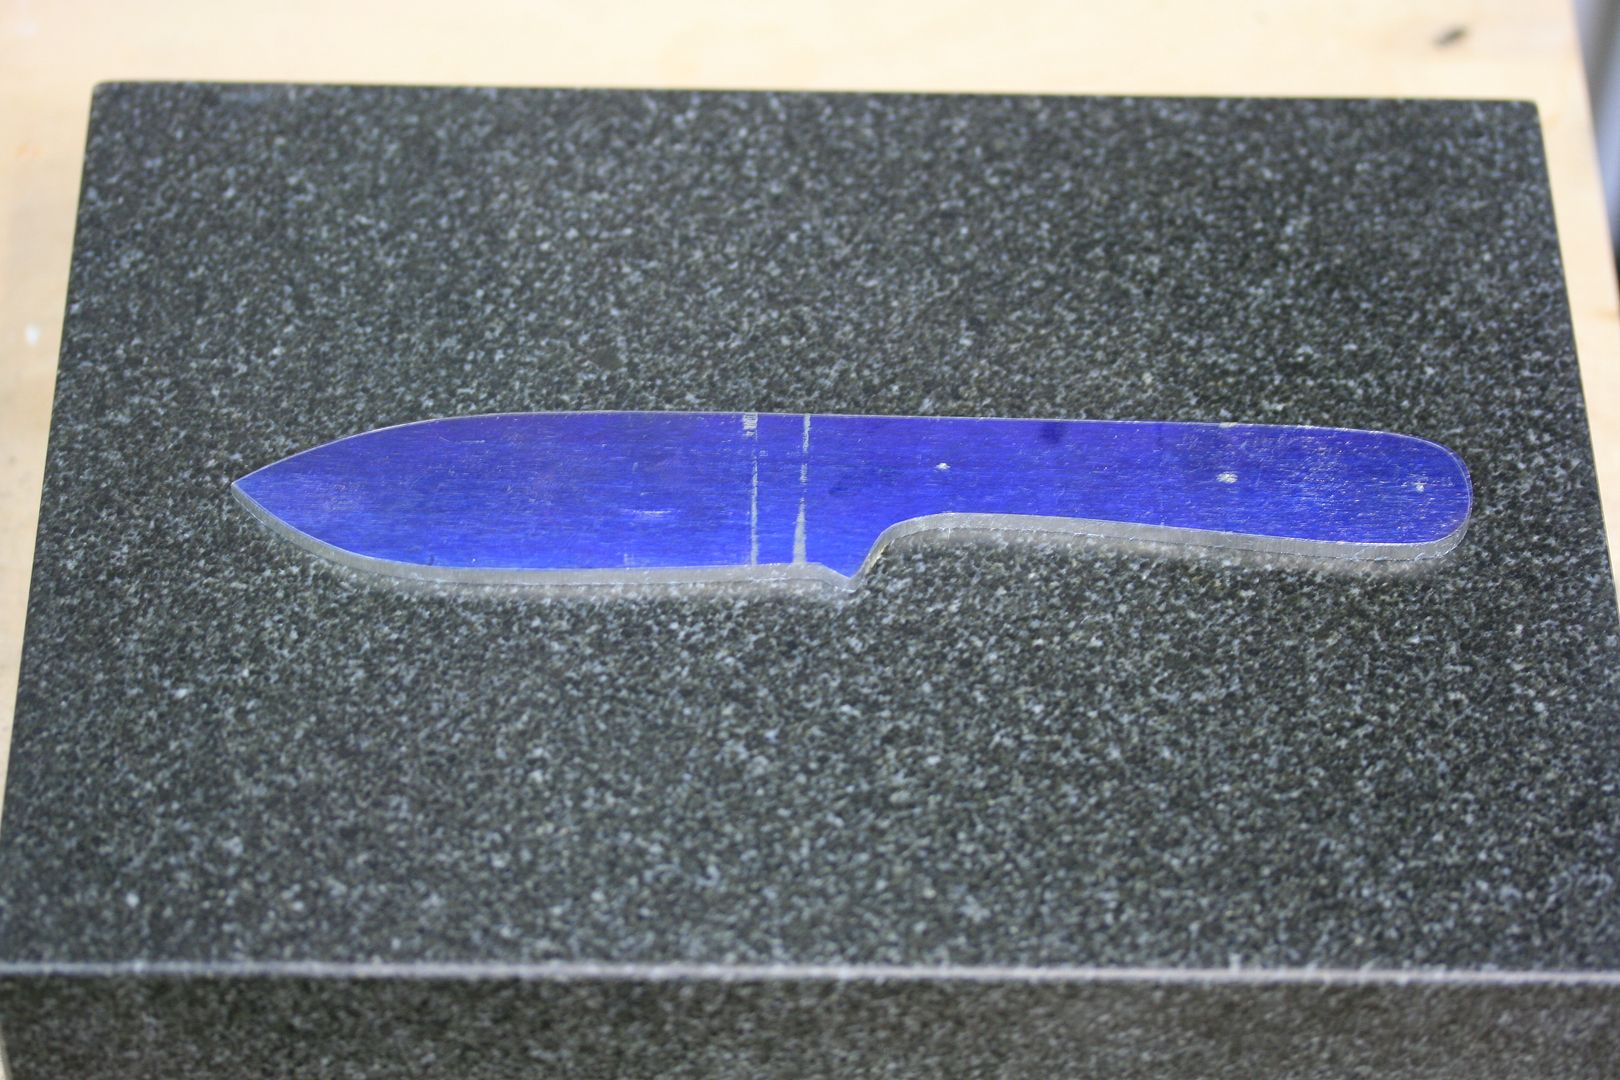
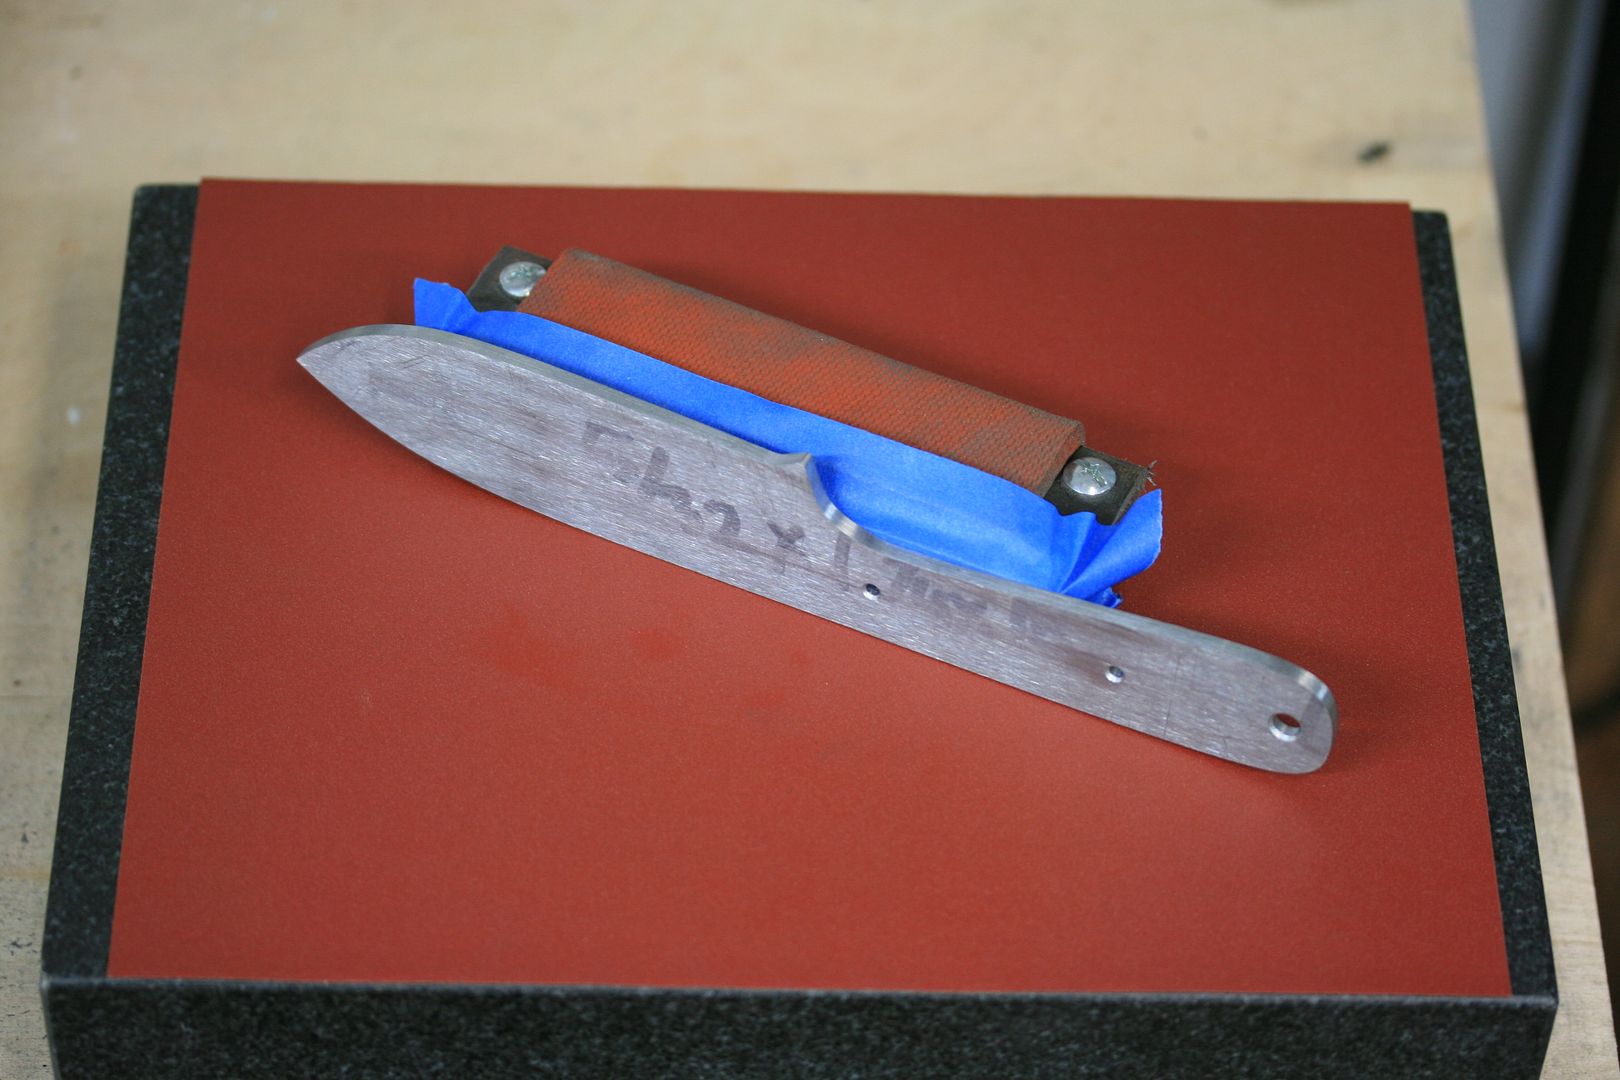
There is still blue dye in a few spots which tells me to keep sanding. I have to say, I will never buy steel that is not precision ground ever again (hopefully). It makes life a lot easier spending the few extra bucks for ground steel...
After making sure that the blade is as flat as I could possibly get it, I clean up my surface plate, marvel at my work so far and get ready for the next step...
That is what I got done this morning. I needed a break and thought it would be a good time to start posting everything. It took way longer than I expected!
I started feeling sick yesterday afternoon but kept working in the shop until about midnight. This morning I woke up feeling pretty sick but after messing up the knife last night, I felt that I needed to get started on another one soon. So after some time in the shop this morning, I am worse. It's nap time now! Plan on getting more done to it in a bit...
Thanks for looking and hope you have enjoyed it so far.
I tape up the magnet to help keep the grit from getting up in it and also protects the work piece a bit...
You can see that it is not flat at all...
Starting to look better...
Now for the other side...
There is still blue dye in a few spots which tells me to keep sanding. I have to say, I will never buy steel that is not precision ground ever again (hopefully). It makes life a lot easier spending the few extra bucks for ground steel...
After making sure that the blade is as flat as I could possibly get it, I clean up my surface plate, marvel at my work so far and get ready for the next step...
That is what I got done this morning. I needed a break and thought it would be a good time to start posting everything. It took way longer than I expected!
I started feeling sick yesterday afternoon but kept working in the shop until about midnight. This morning I woke up feeling pretty sick but after messing up the knife last night, I felt that I needed to get started on another one soon. So after some time in the shop this morning, I am worse. It's nap time now! Plan on getting more done to it in a bit...
Thanks for looking and hope you have enjoyed it so far.
Last edited:
Steven Long
Well-Known Member
Kephart WIP Part 3
I didn't get as much done as I would have liked. My nose is running like a stuck pig, so I am saving the grinding work for tomorrow. It was pretty difficult doing the little grinding I did, wearing a mask. I kept having to pull it off and blow my nose :sad:.
Anyway, enough wining!
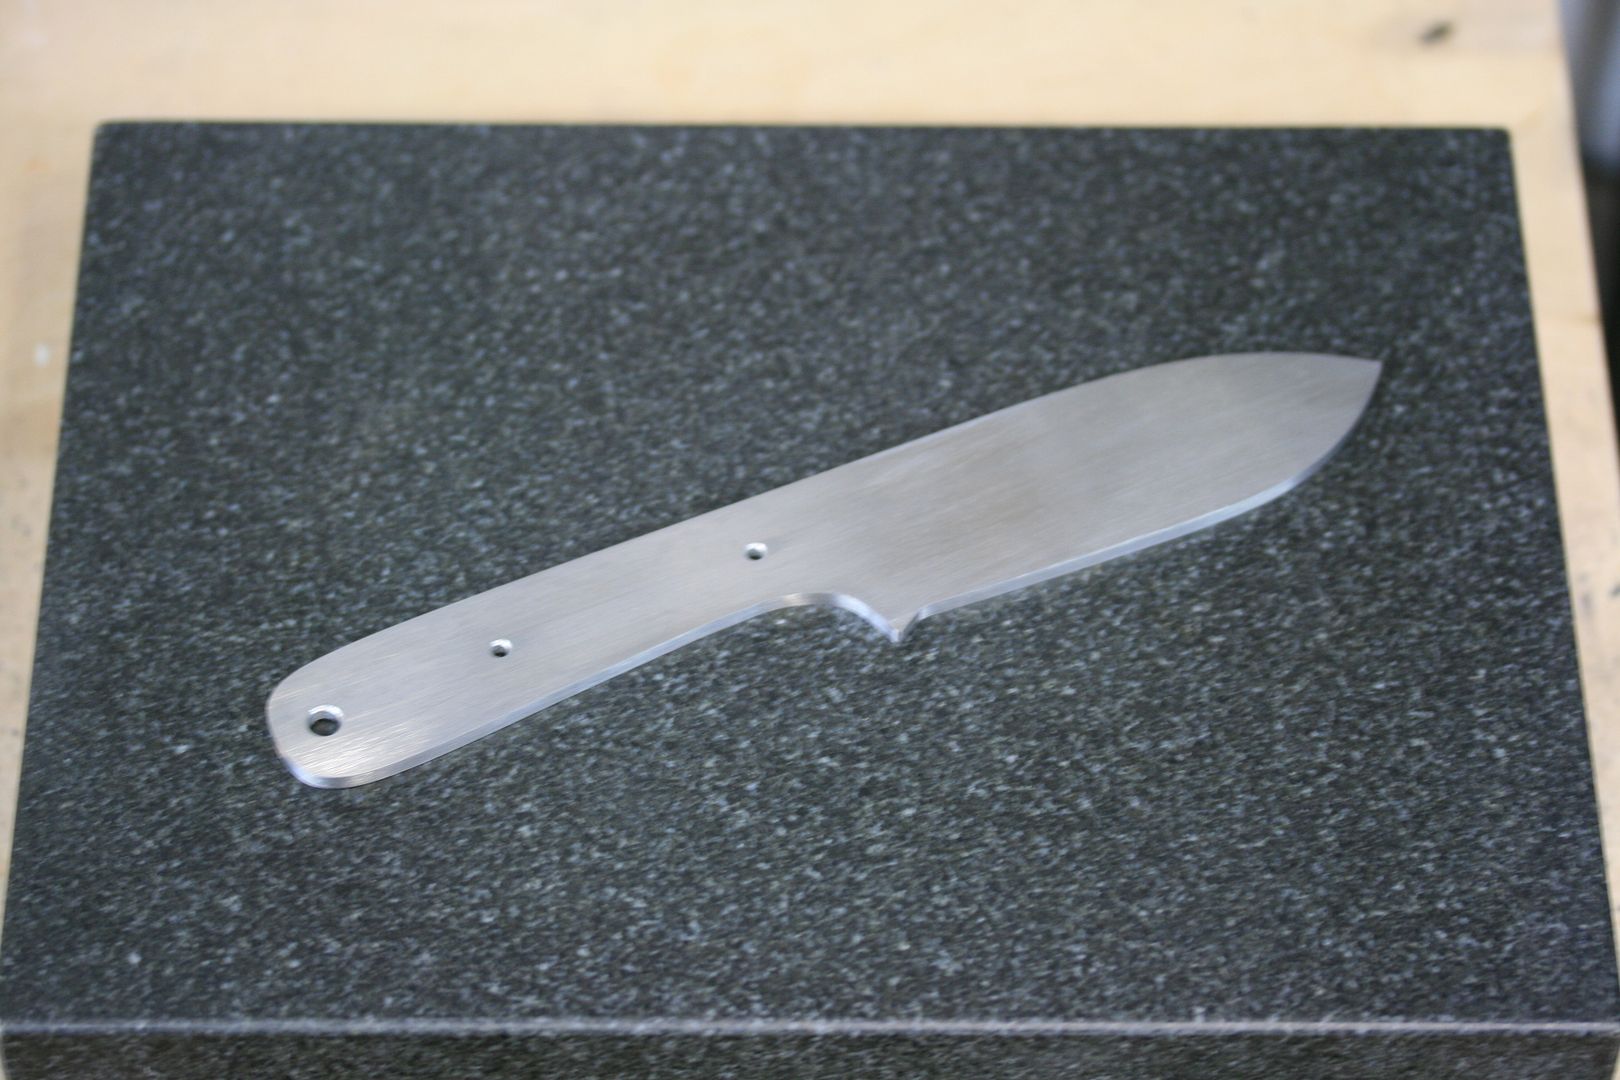
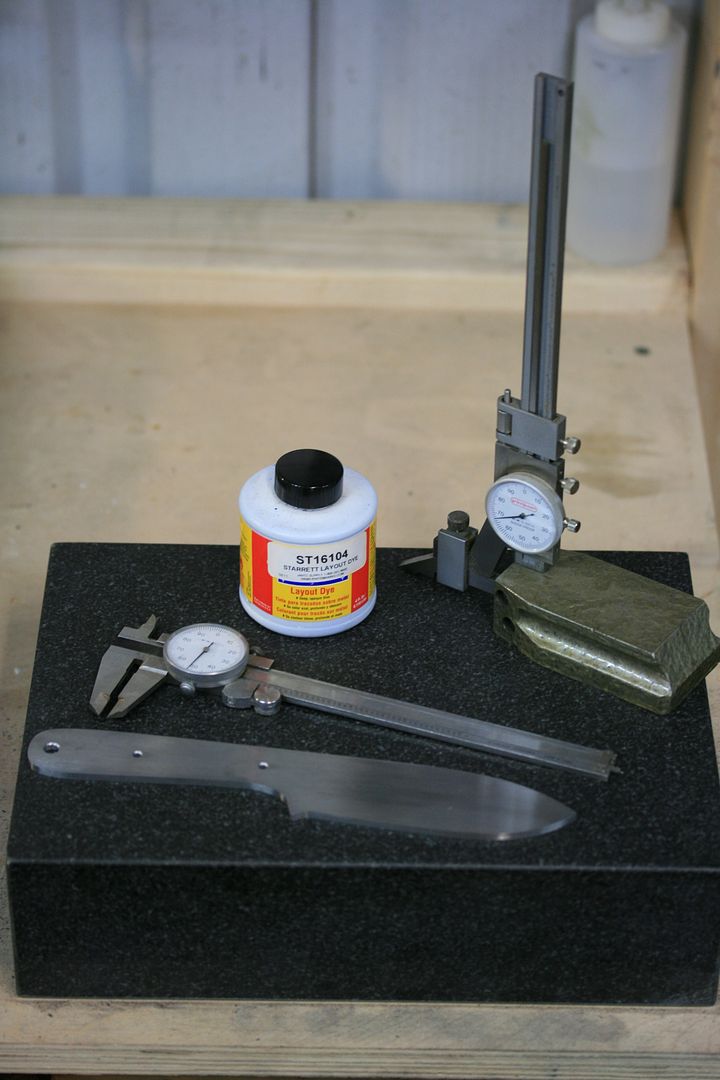
Next in my crazy process, I get everything ready to lay out my knife...
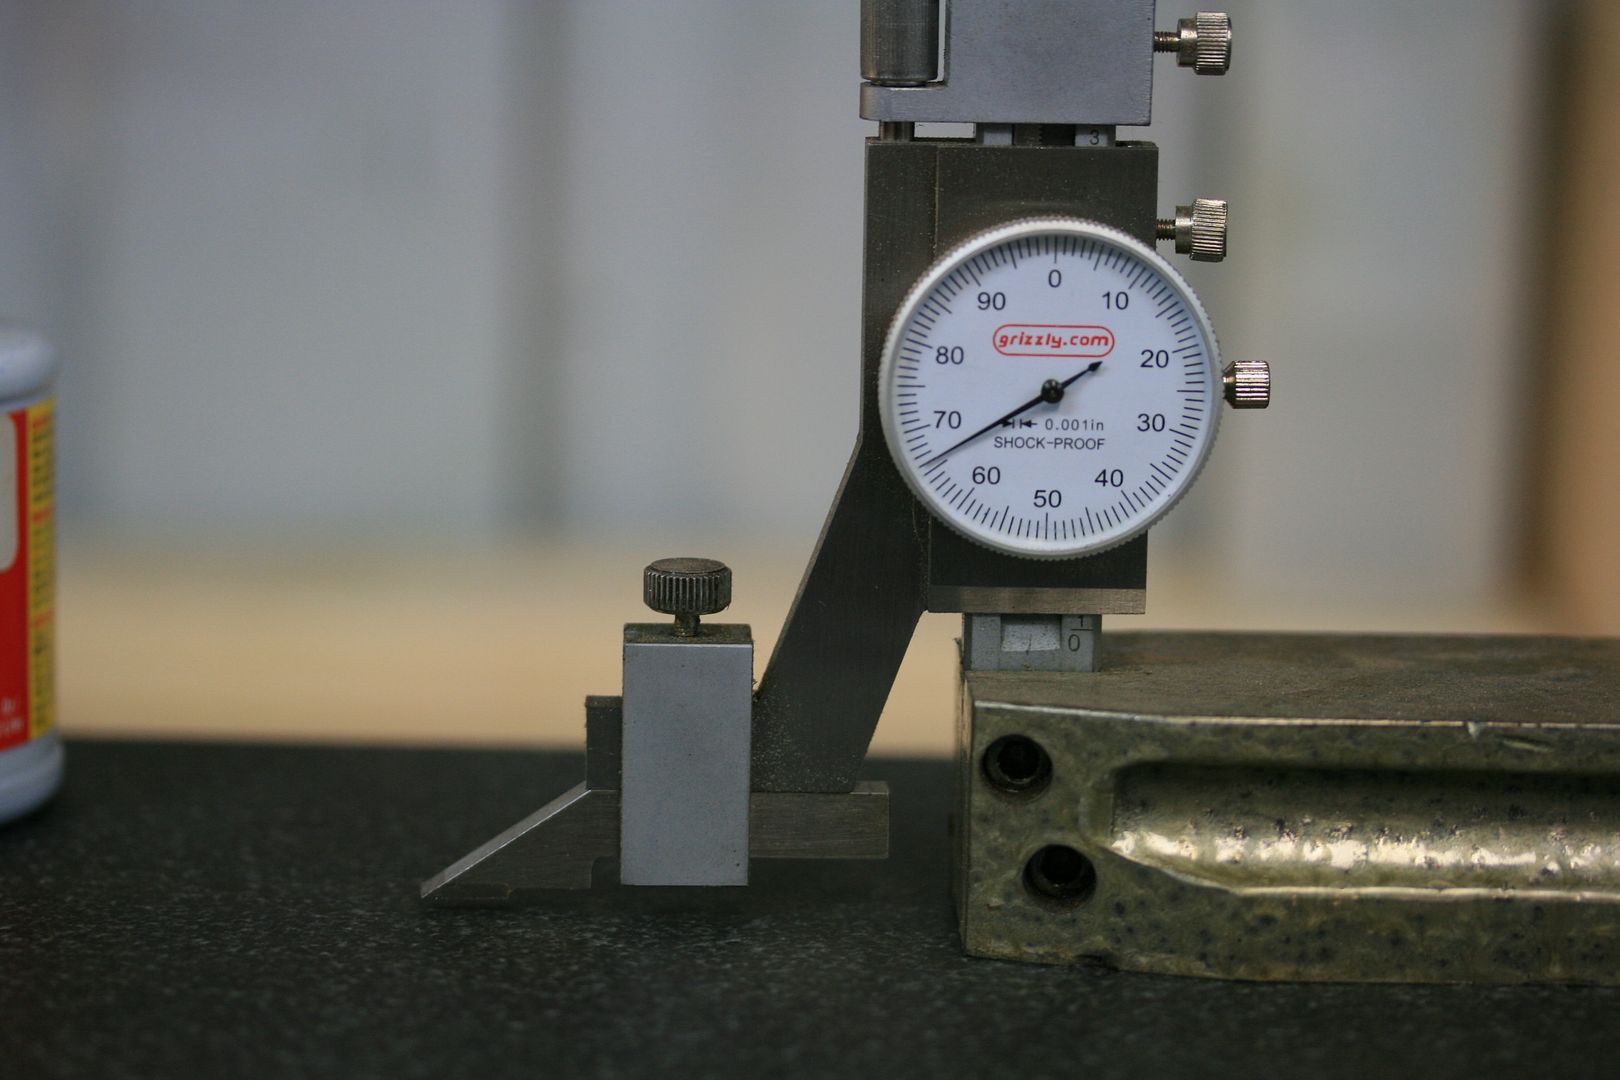
Because of how terrible I am at math, this next step stumped me for a while until I saw Bob Loveless' video where he goes through the process. I had to rewind a hundred times before I figured it out. Now that I know it, I feel very dumb for not figuring it out before.
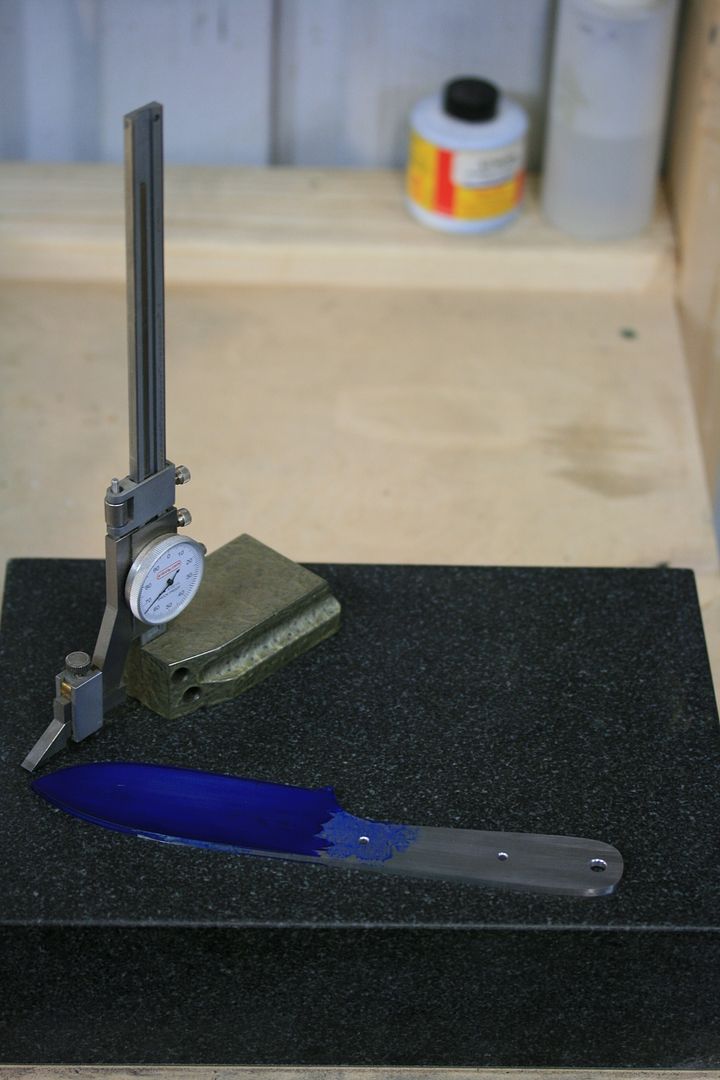
I measure the thickness of the blade at the future cutting edge, in multiple spots, and take the average. It read .153". I want .02" at the cutting edge for heat treat so I subtract .02" from .153", which equals .133". Now I divide that by 2, which equals .0665". This equals the height that I need to set the gauge at. Man I hate math!...
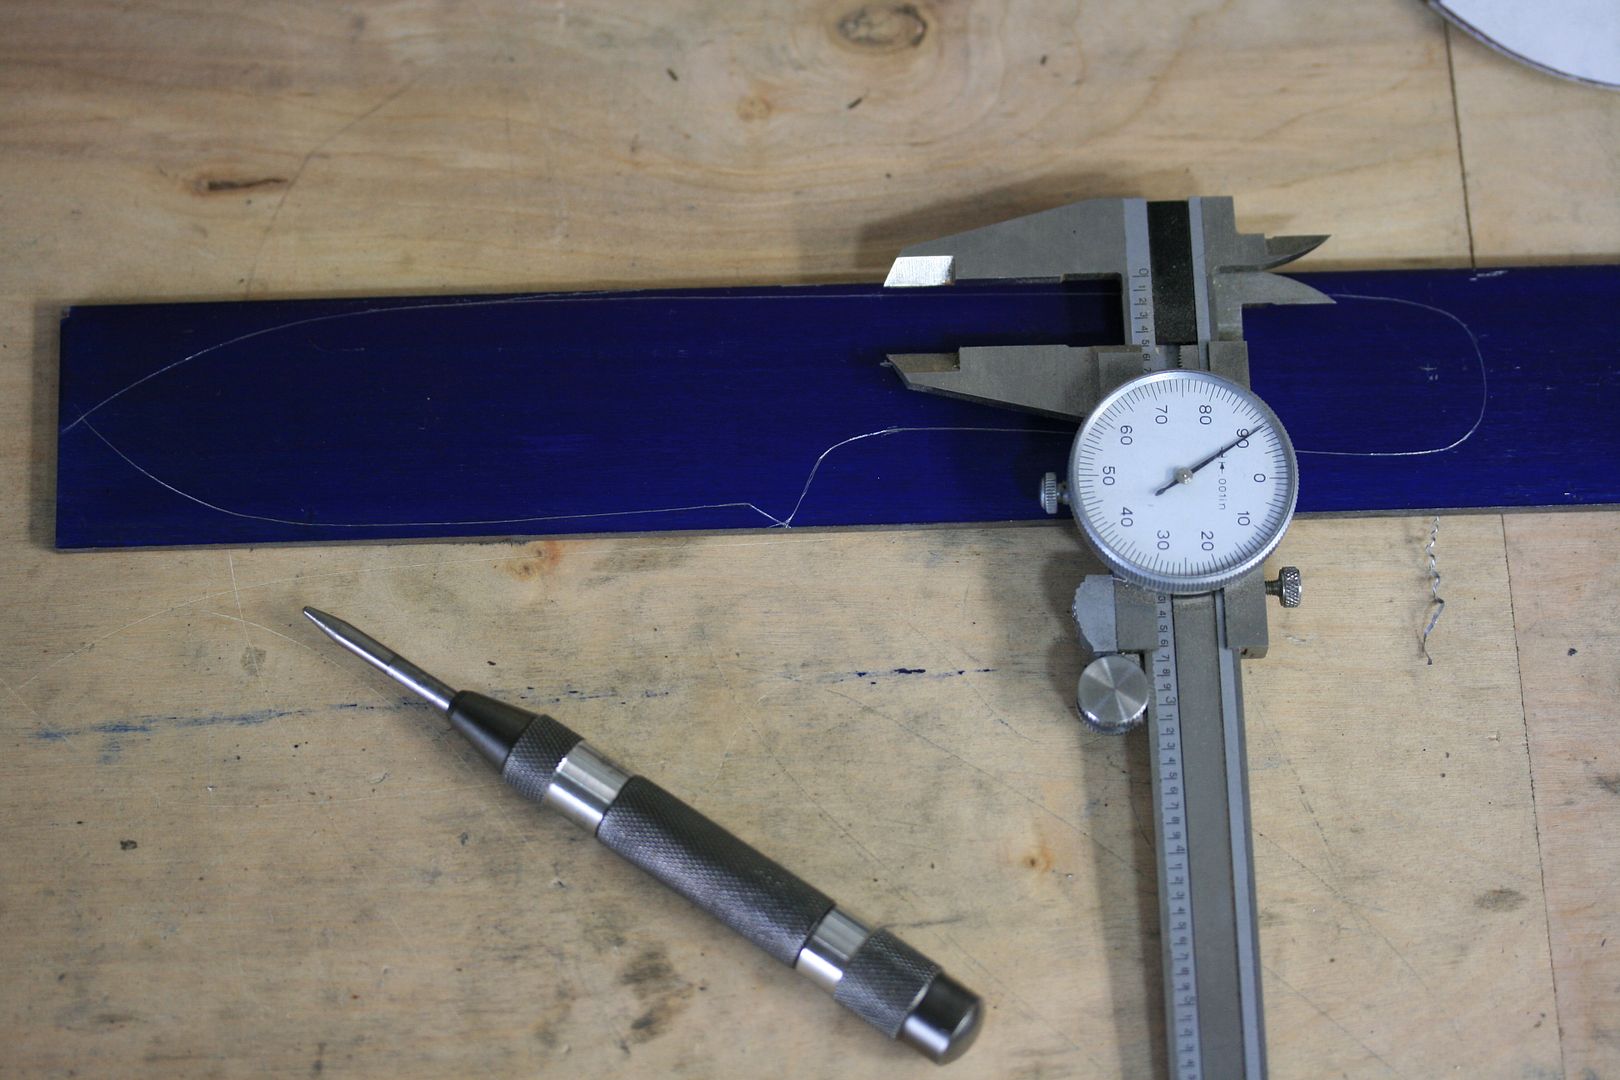
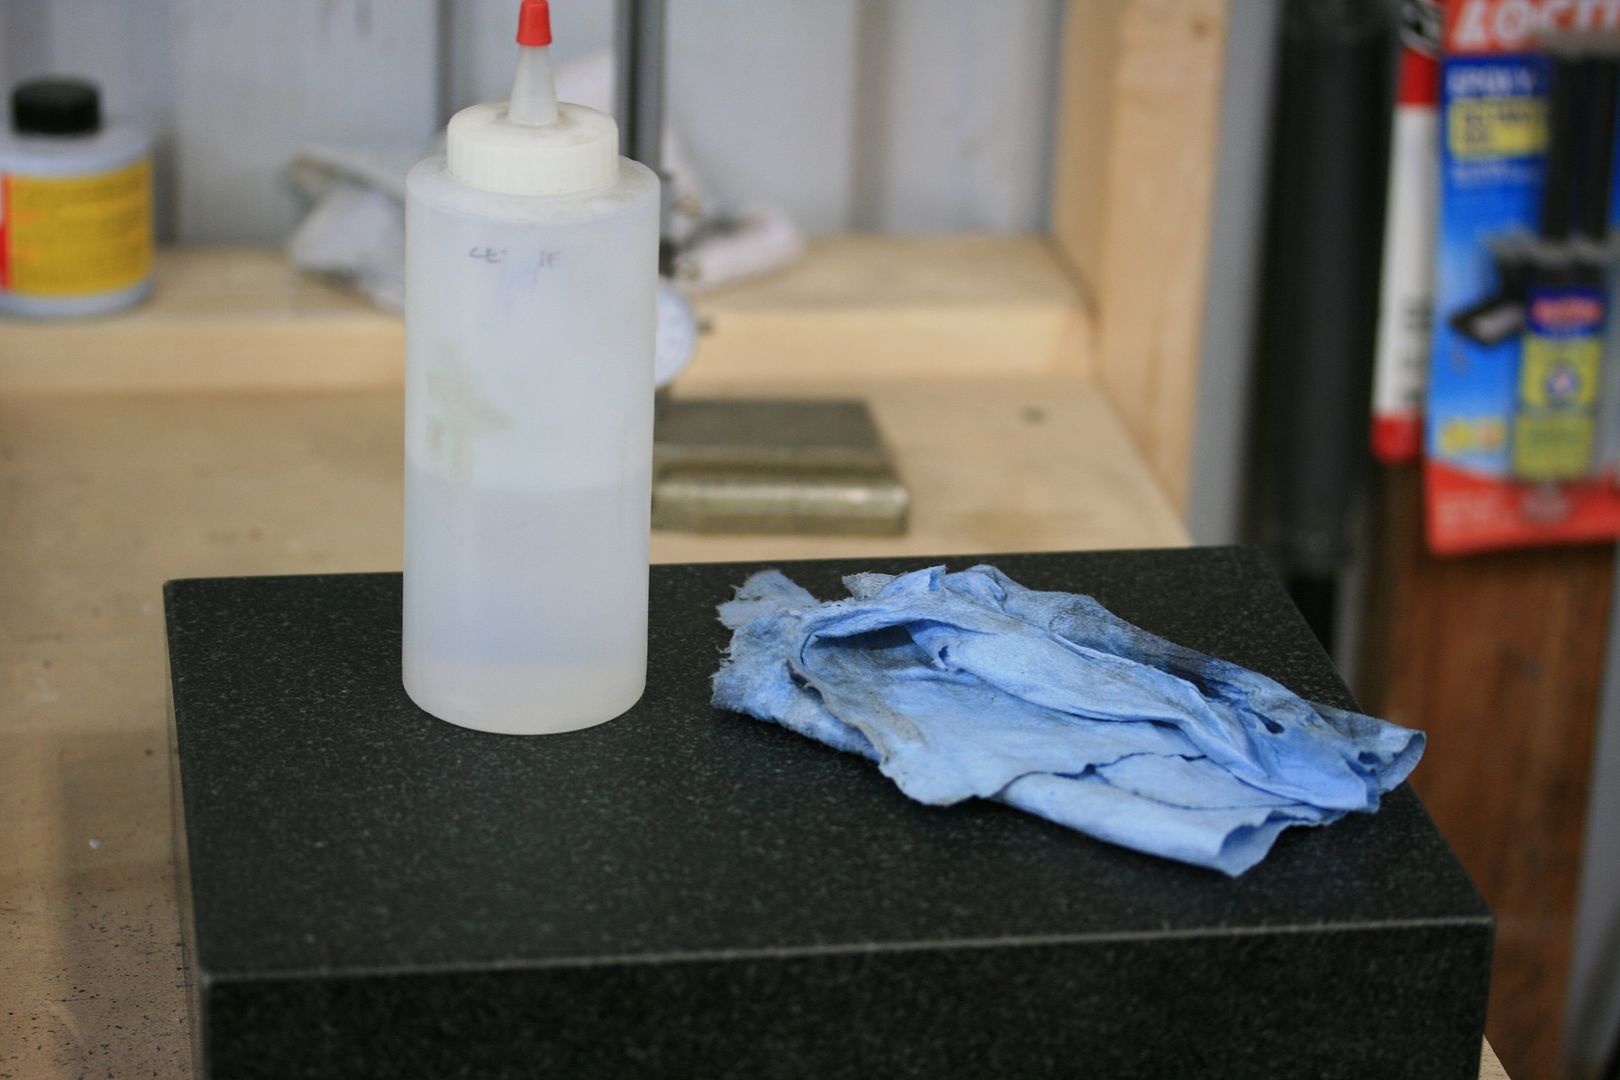
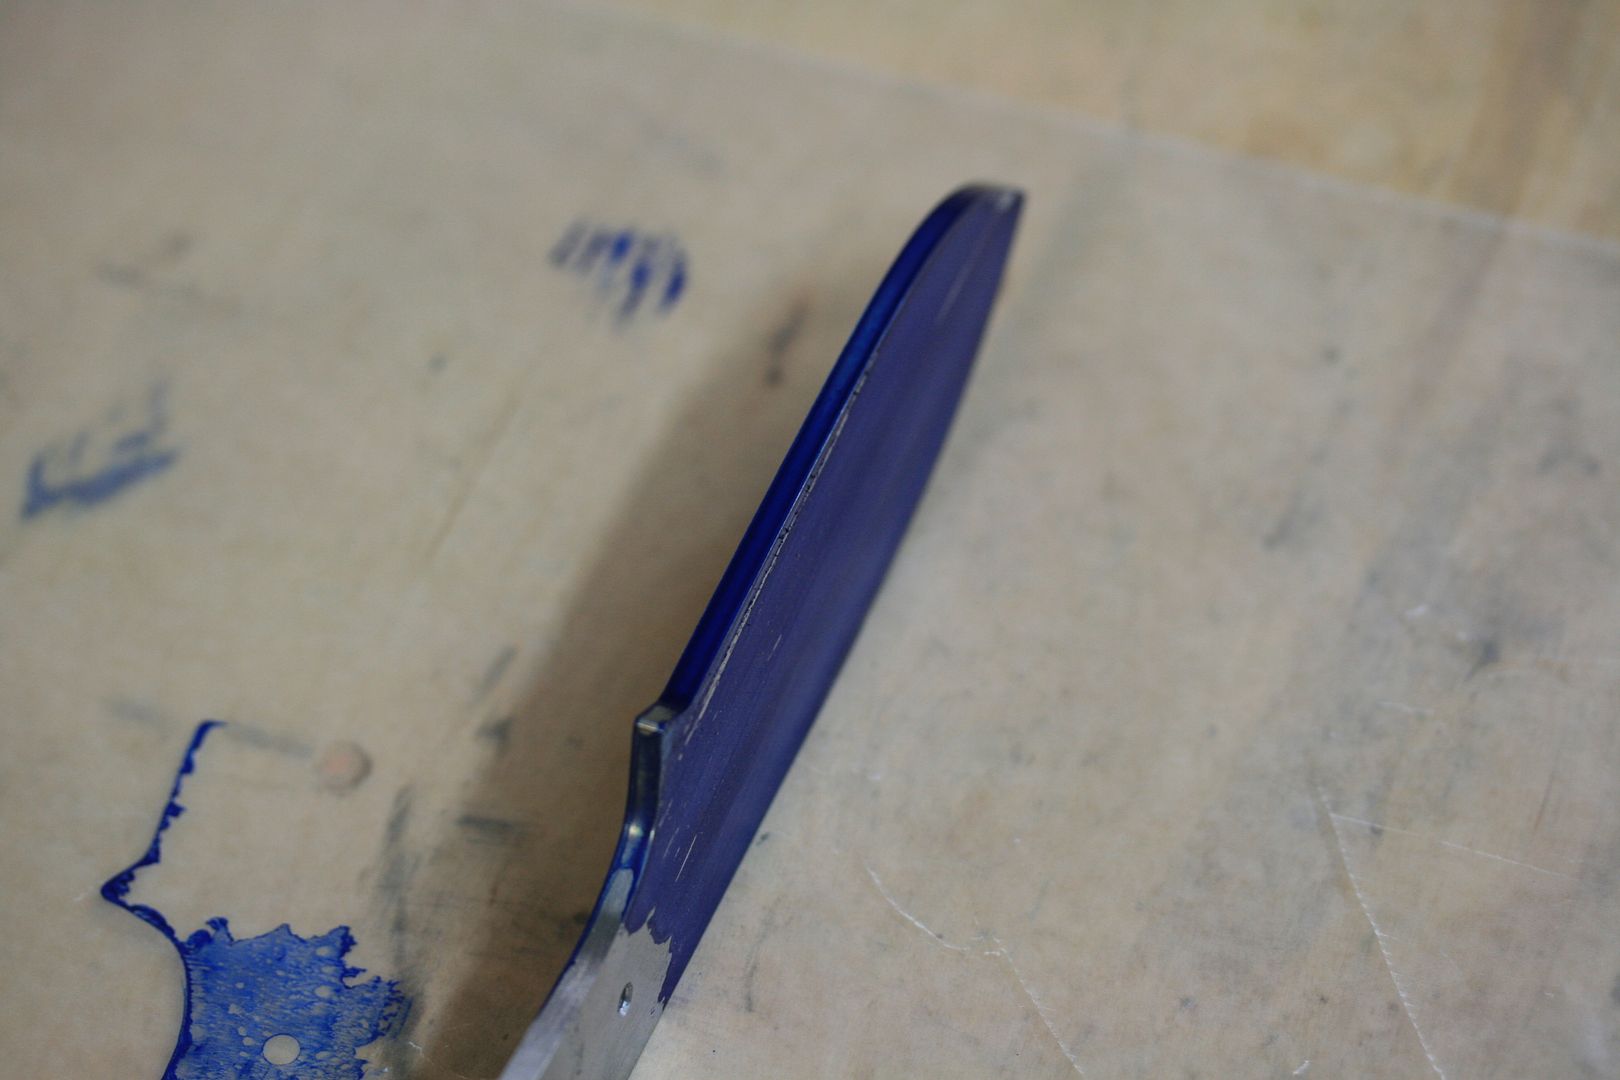
Time to get blue everywhere and cover the blade area in layout dye. I seem to have blue dye show up in the weirdest places after I do this...
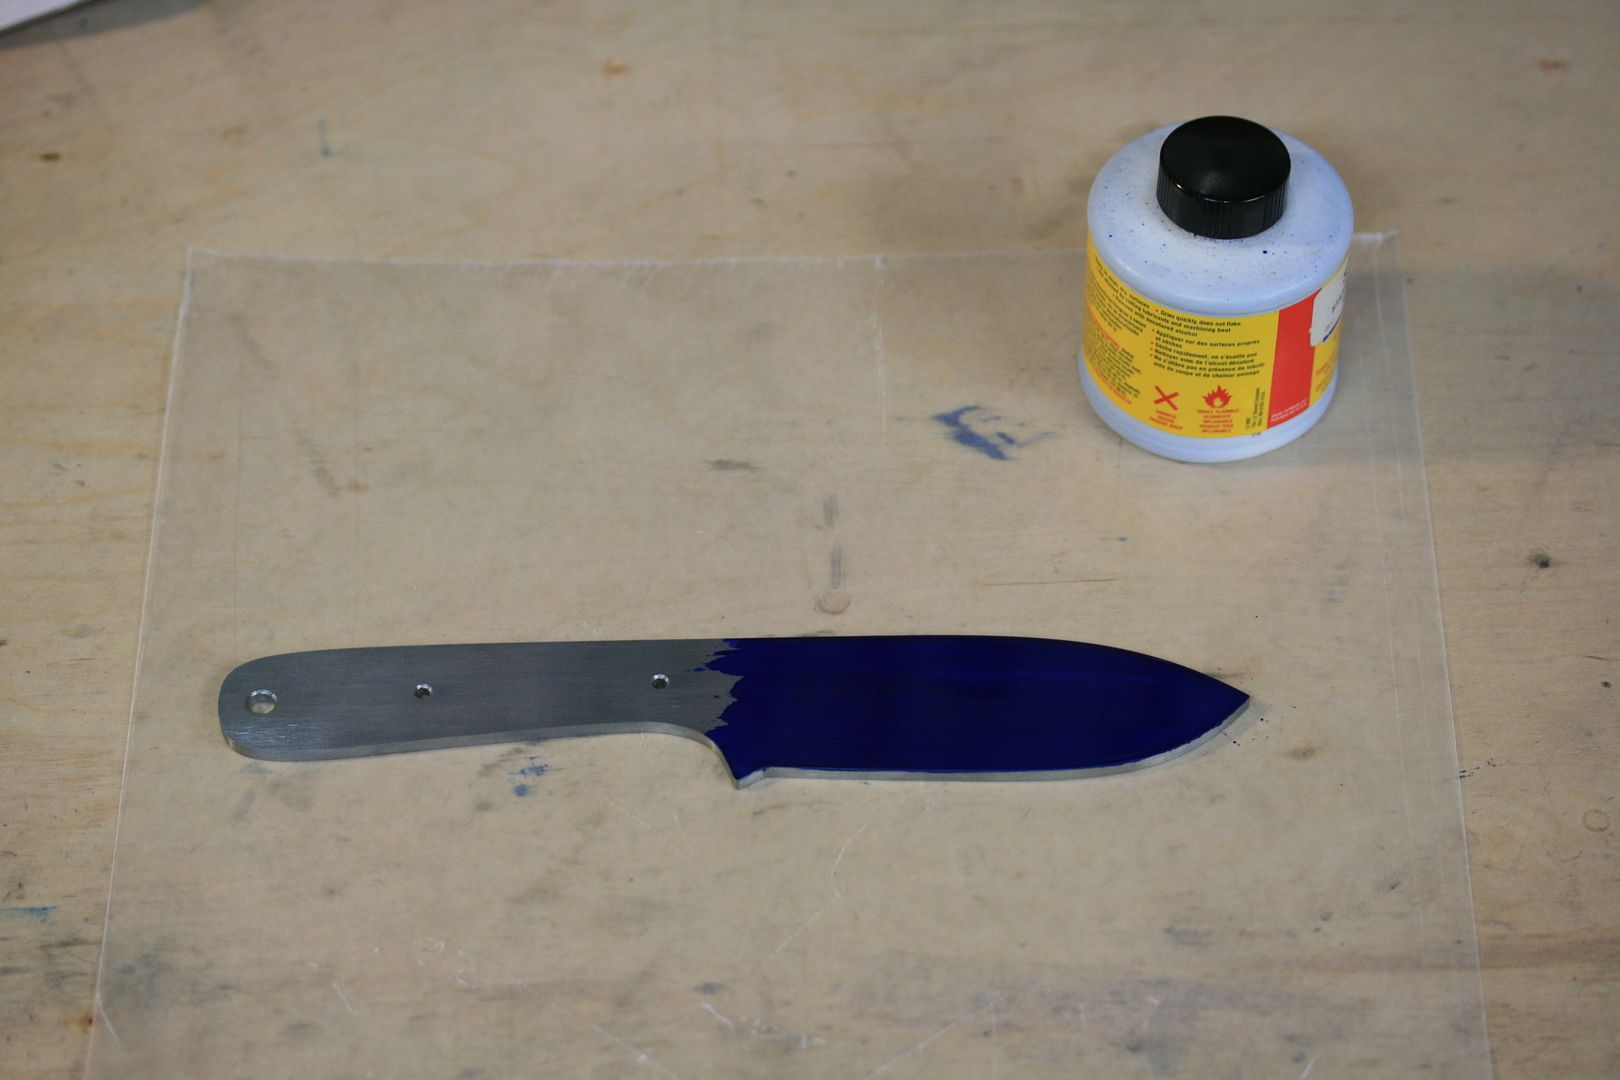
Get the edge and spine...
I move the gauge instead of the knife when scribing the lines. It feels a little more stable...
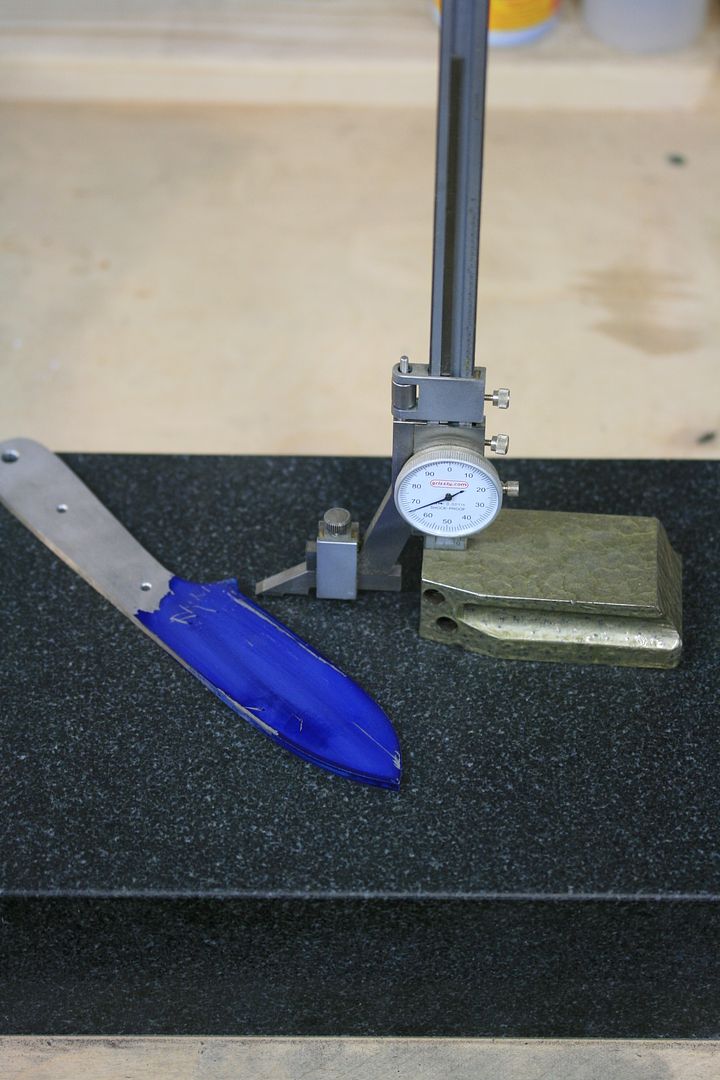
Do both sides...
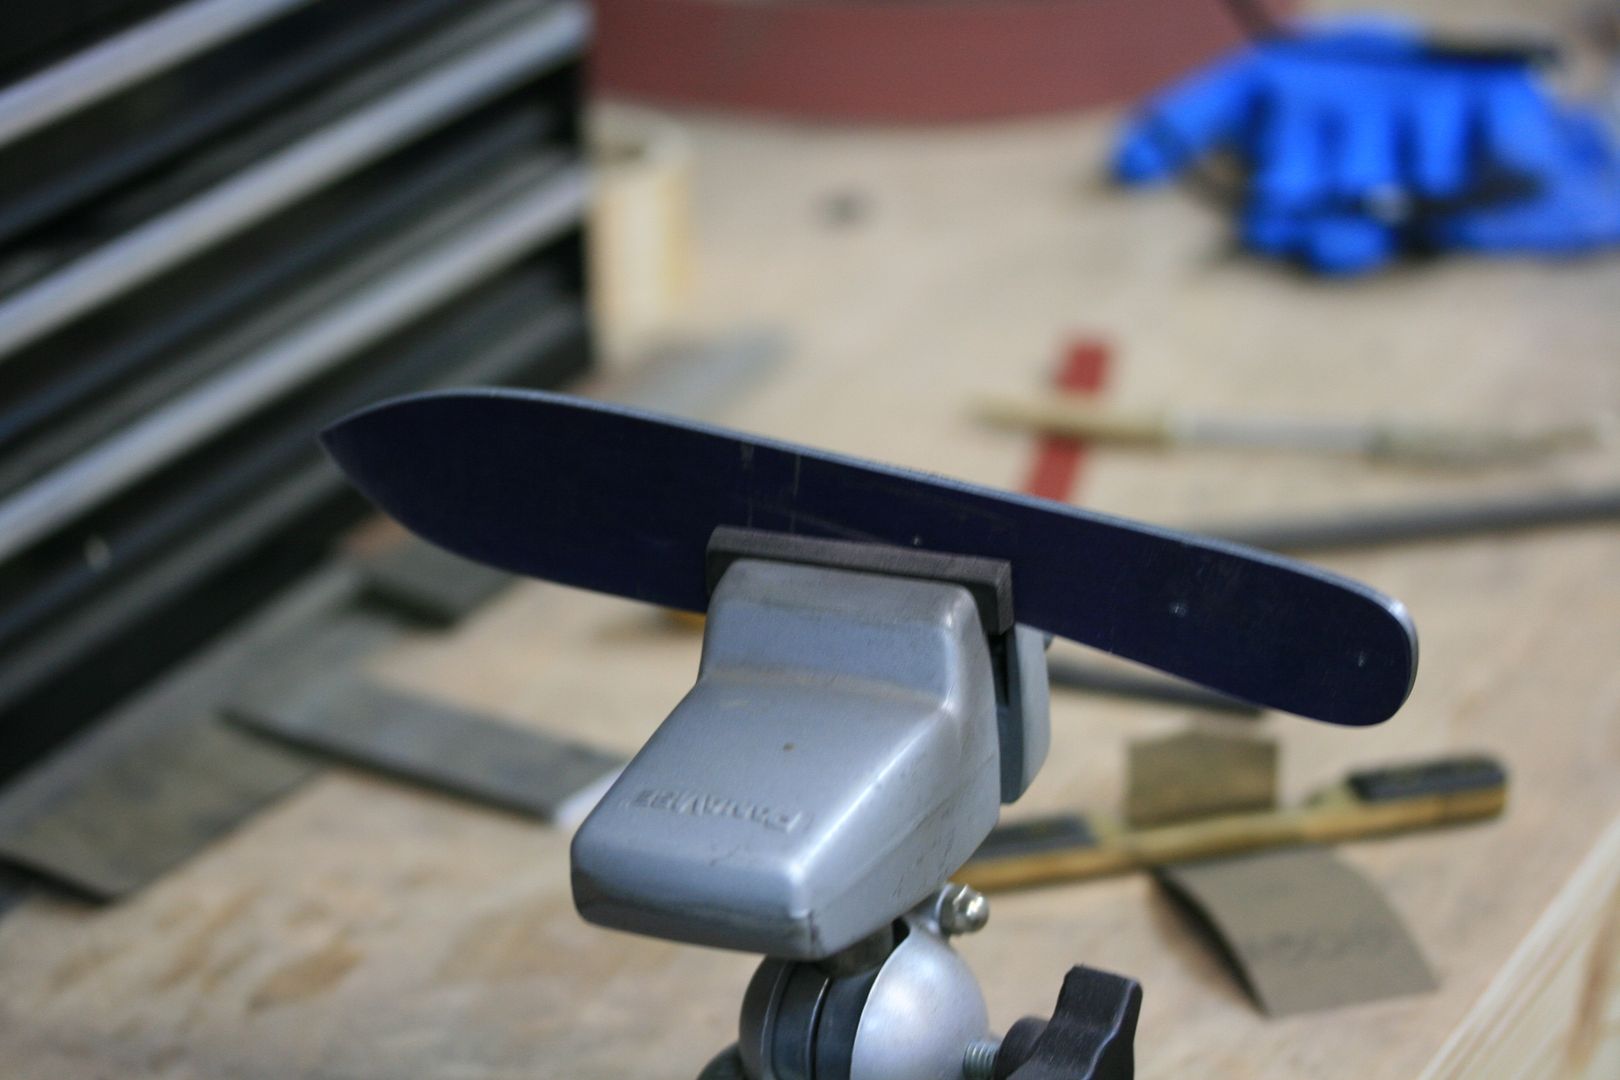
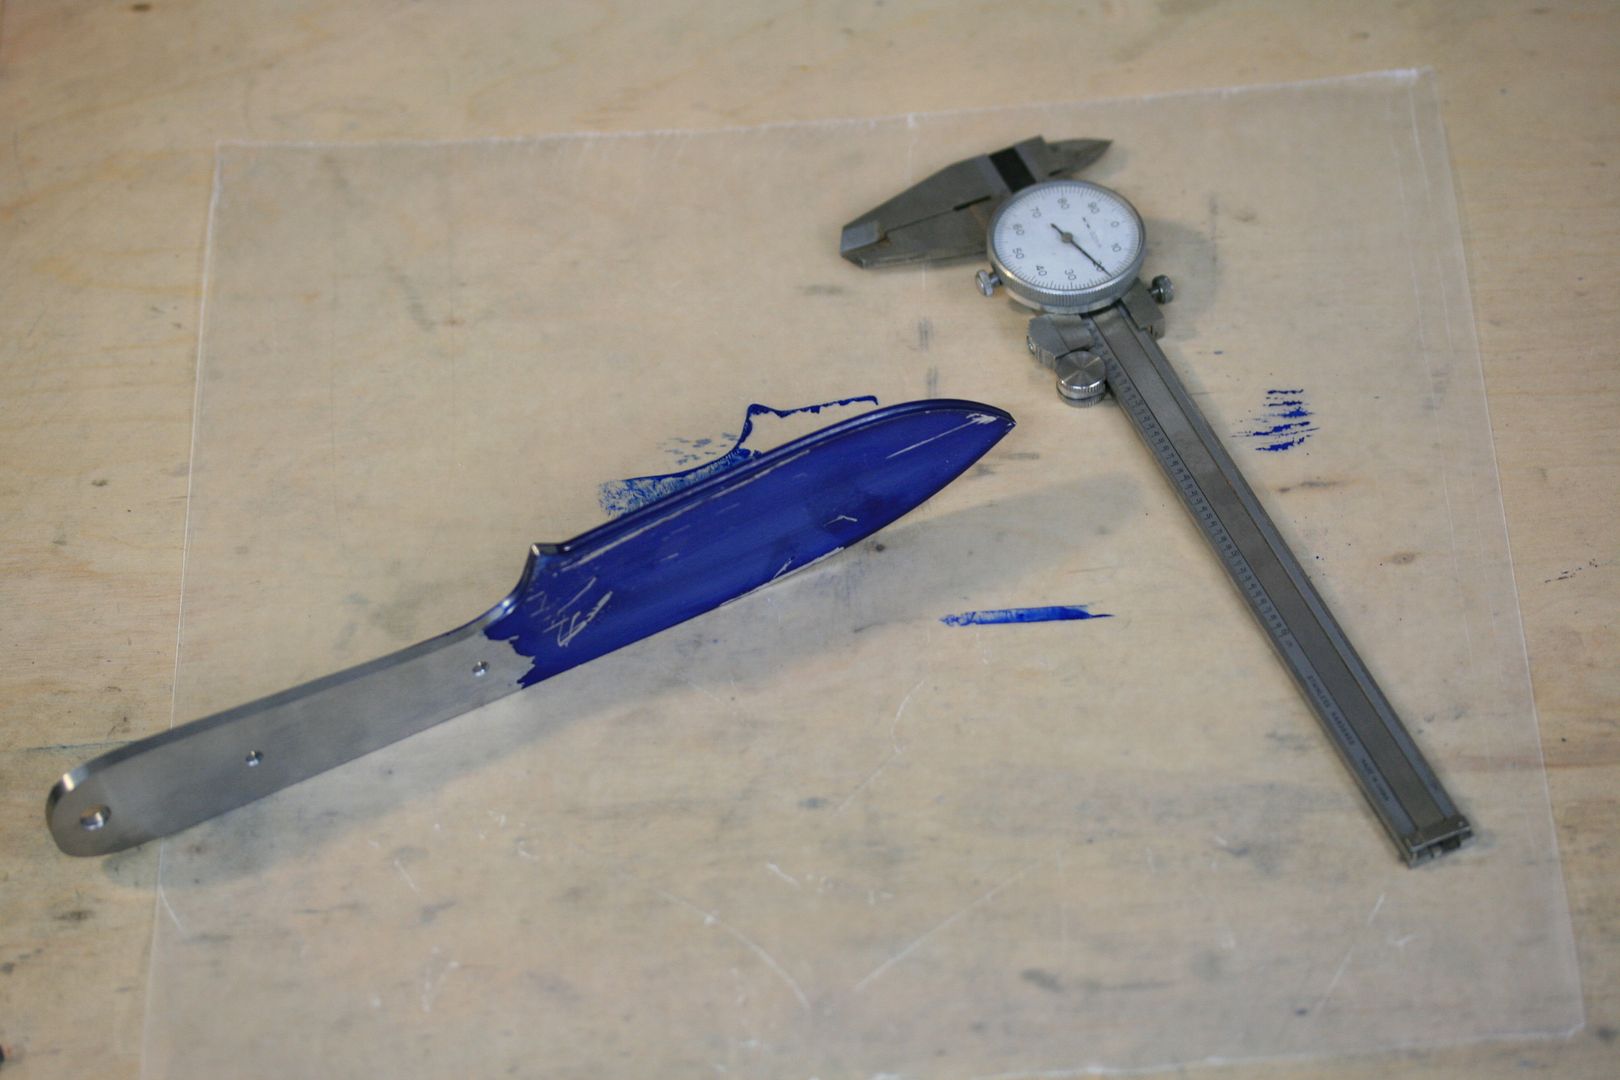
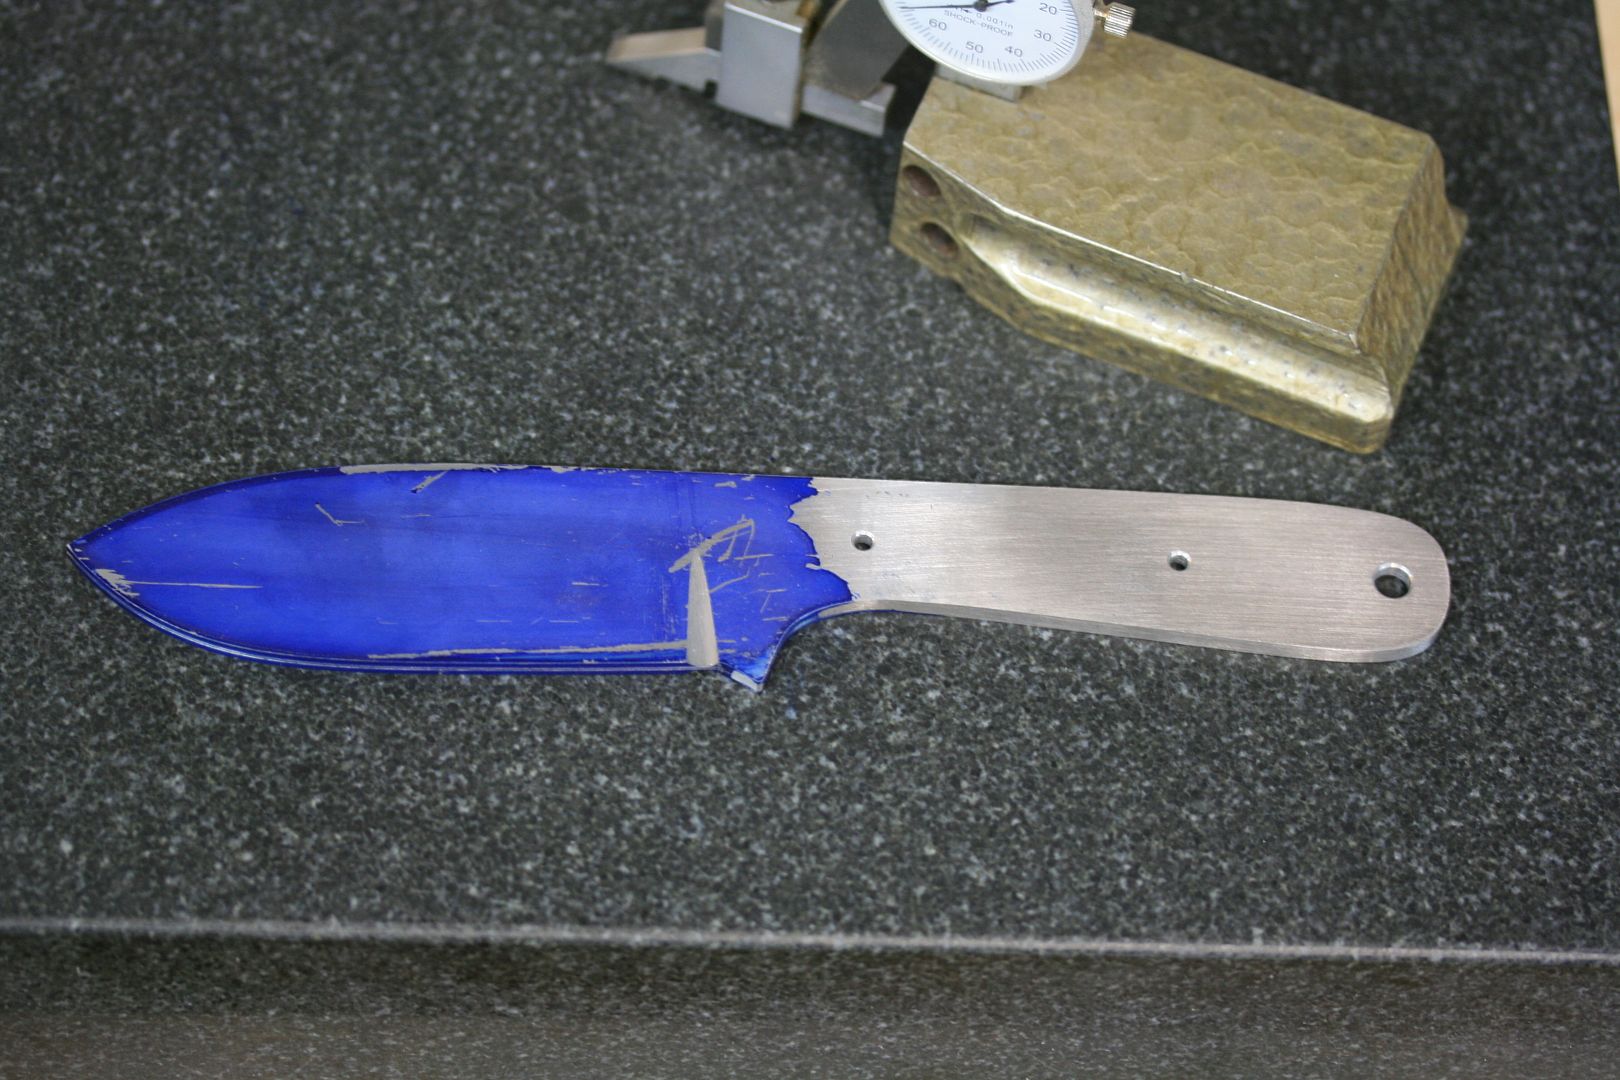
I always check to see if it came out good using the calipers...
Since I have problems at the grinder getting the plunge even, I use a file guide and round file to cut them in by hand. One thing to note is that the plunge does not come out parallel to the guide. It puts it at a angle pointing forward. I always compensate for this when placing the knife in the guide...
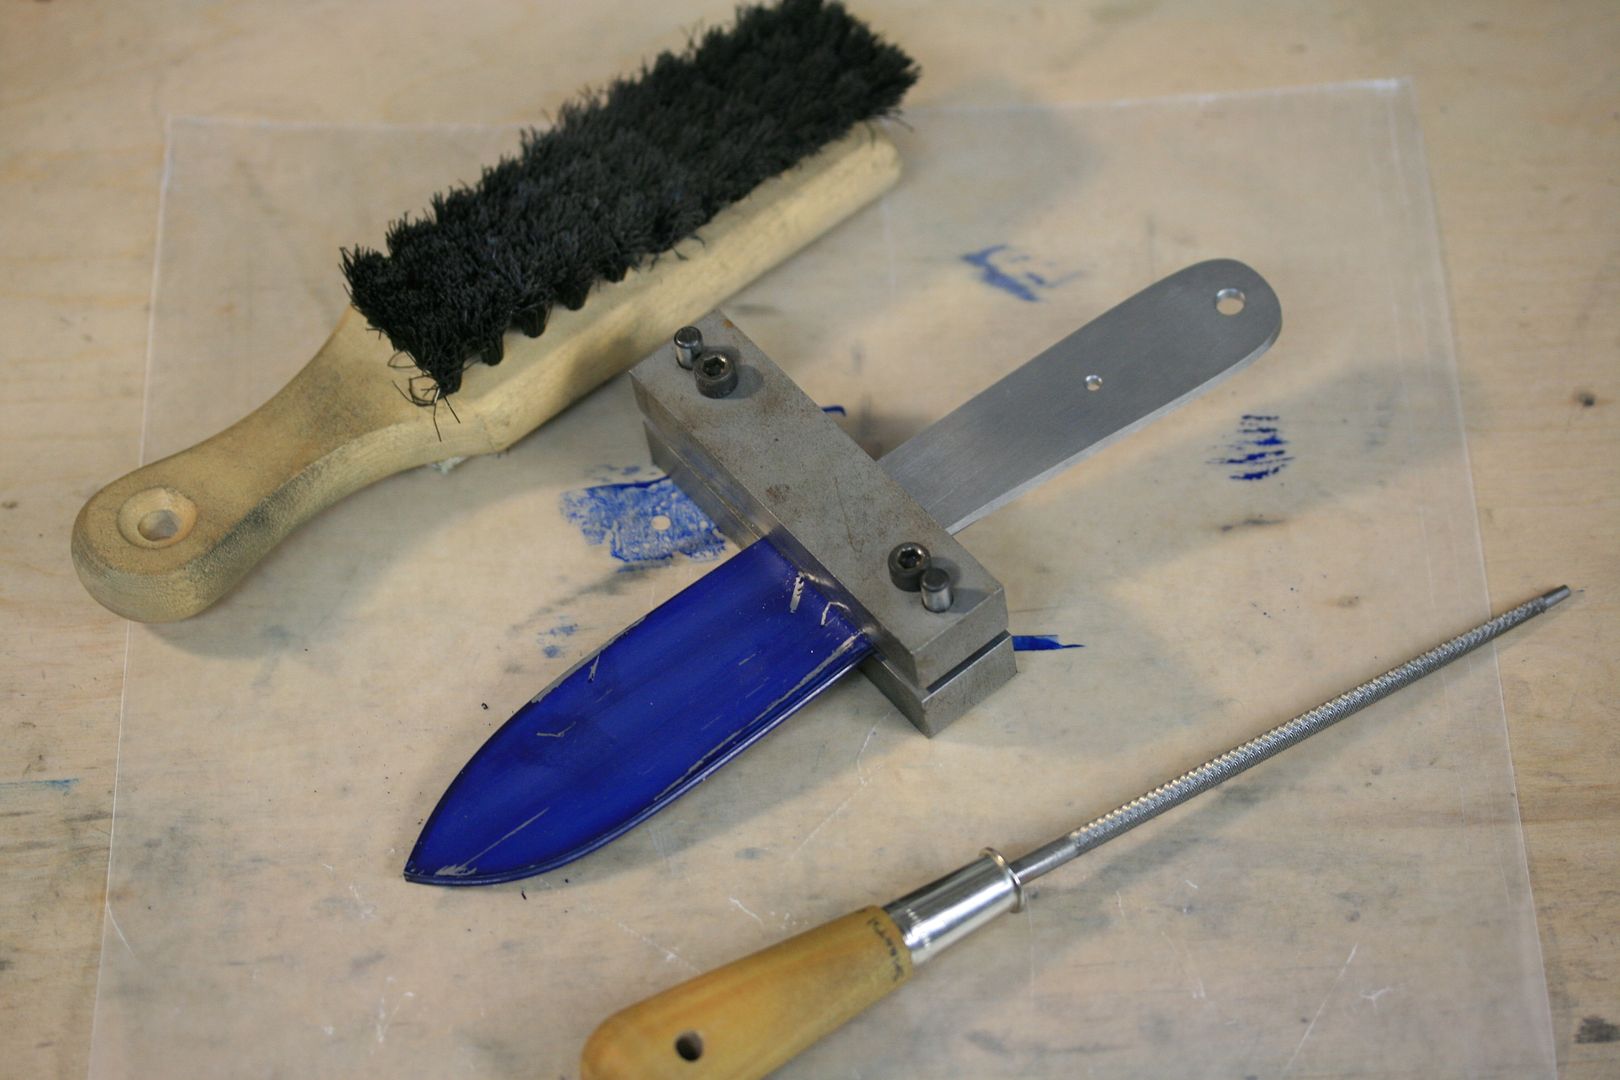
Clamp it in my knifemakers vise and point the light where I can see very well...
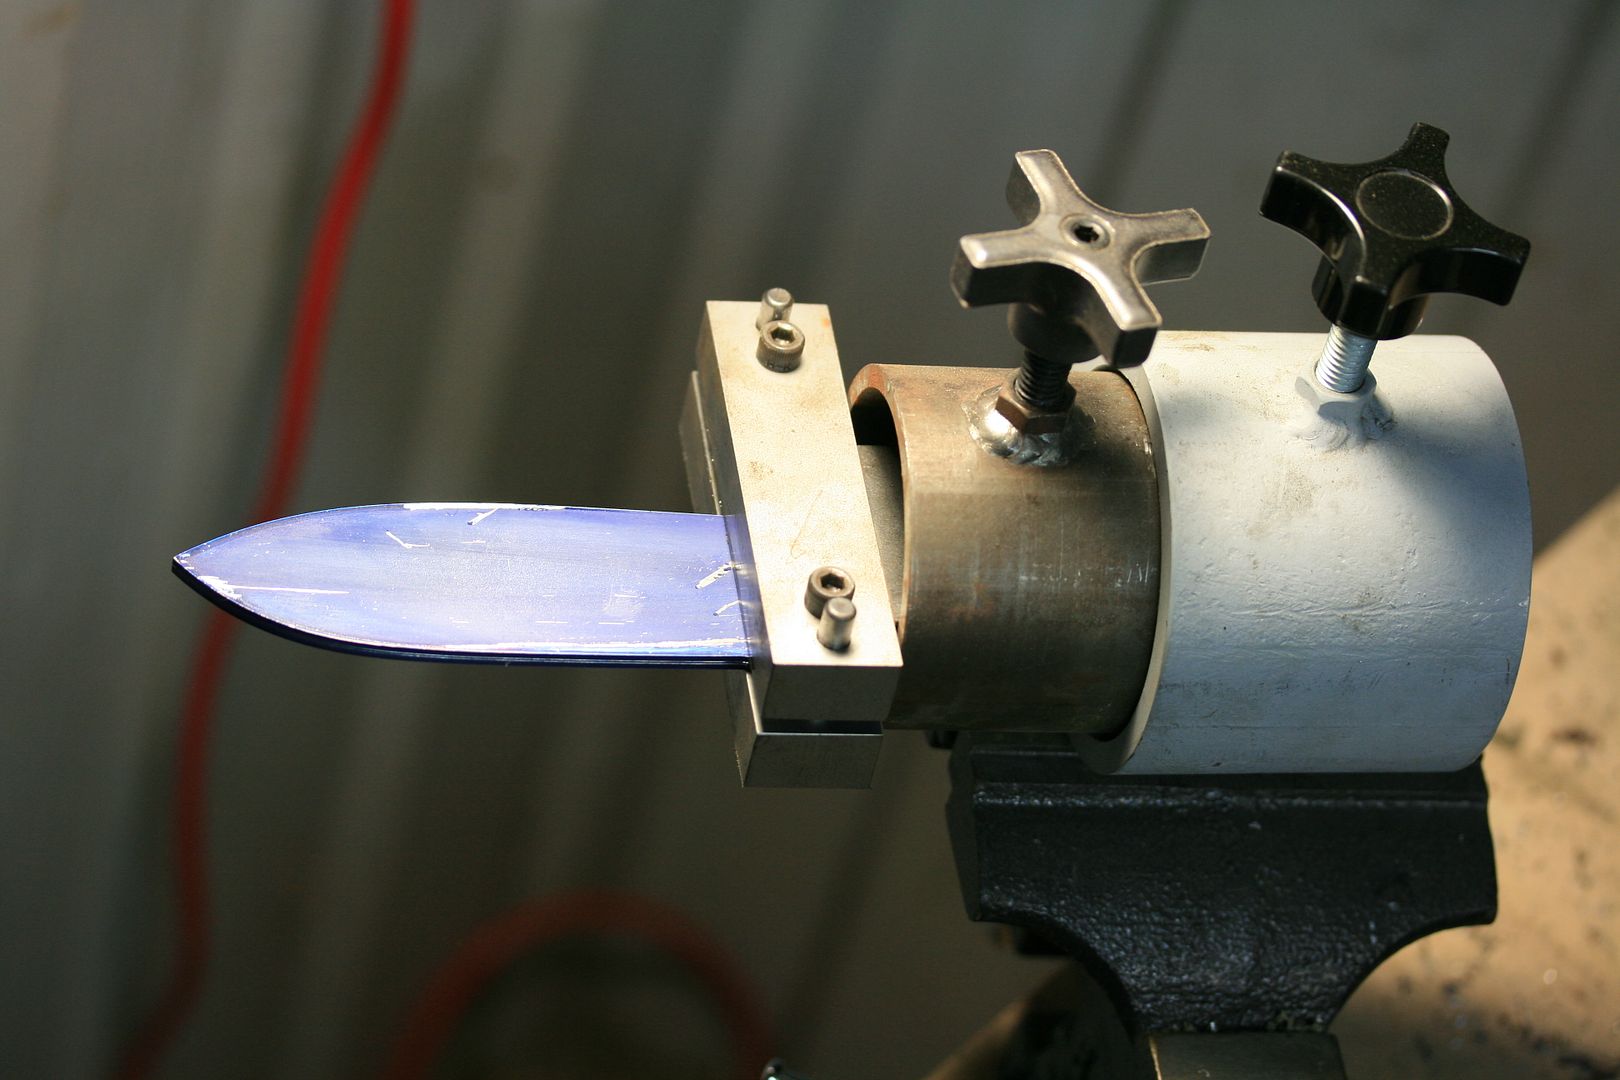
Starting to file... I use both hands when doing this. One holding the handle of the file and the other guiding the file, keeping it flush against the guide...

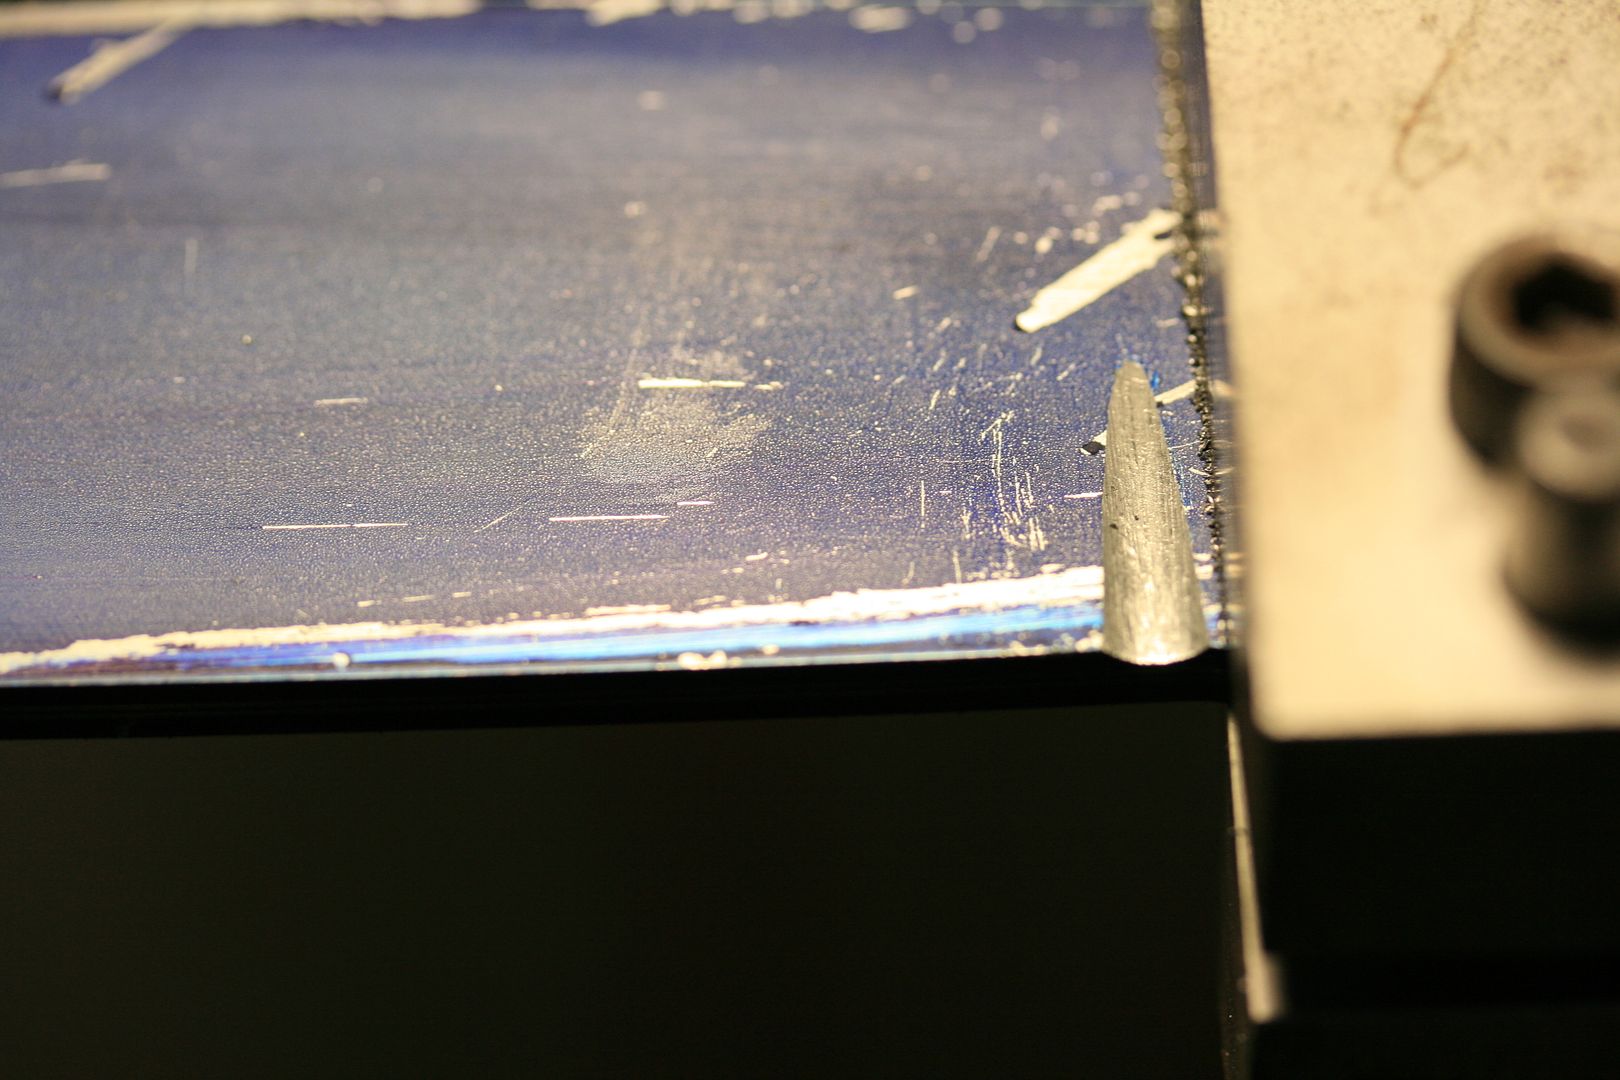
File down to where it just touches the scribe line...
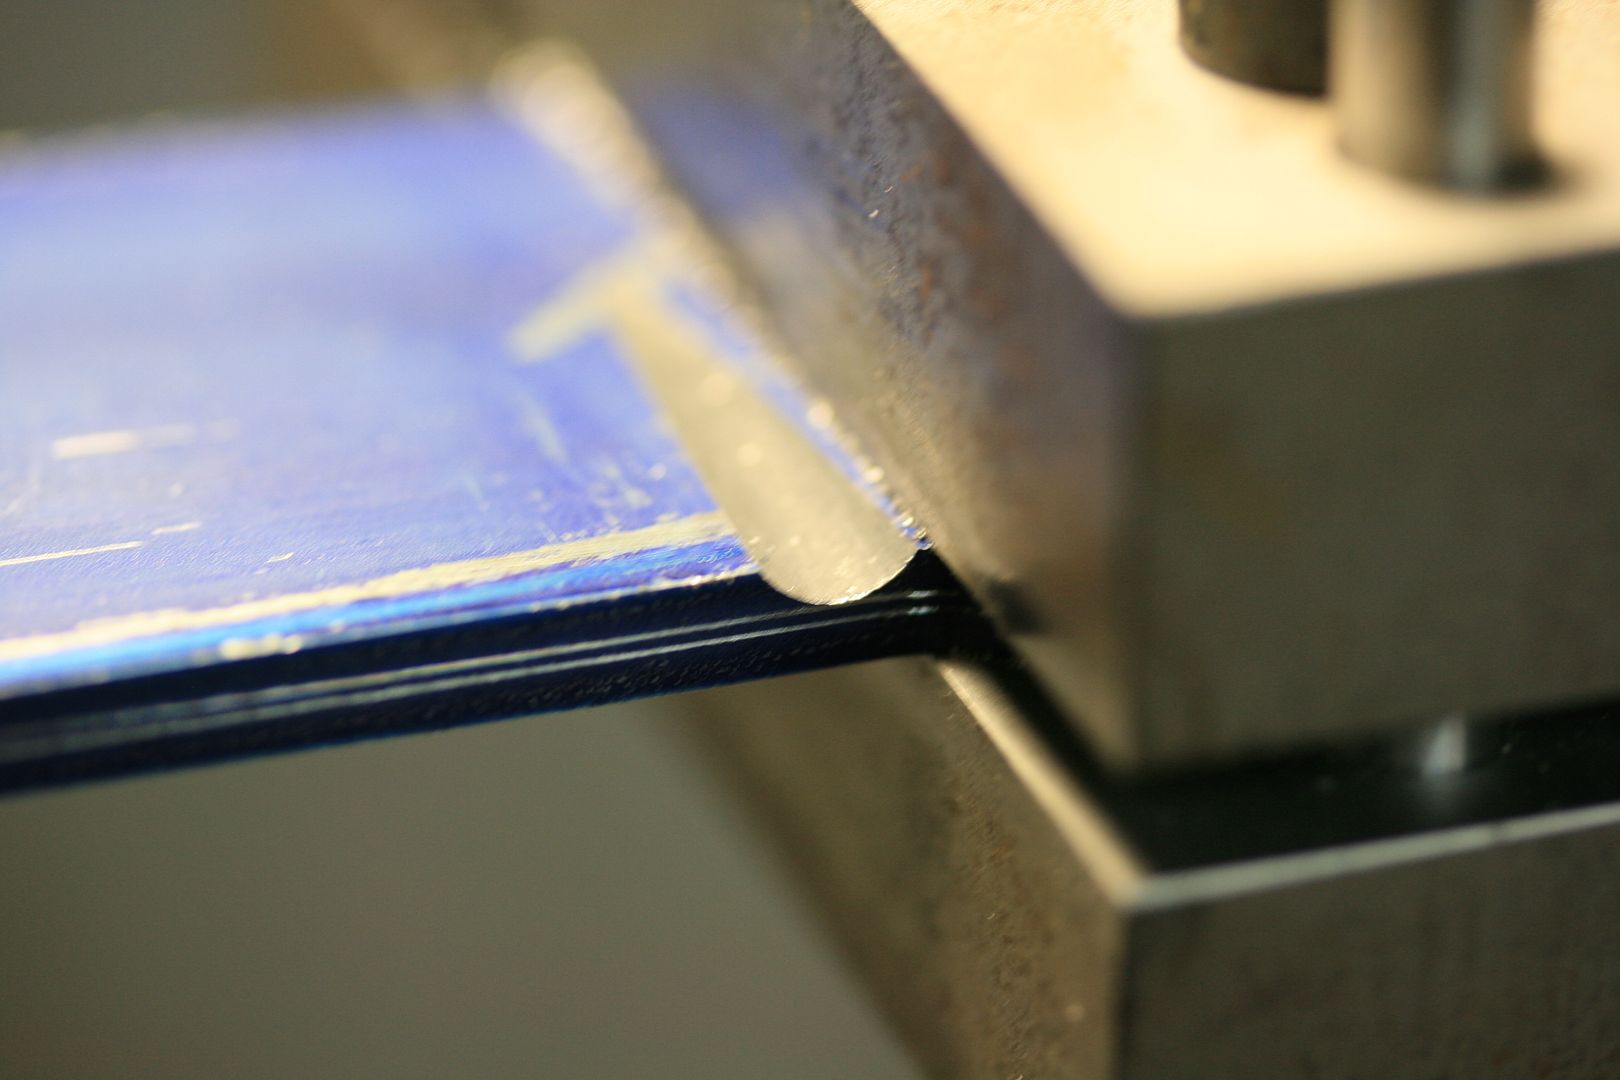
I went a little higher than halfway...
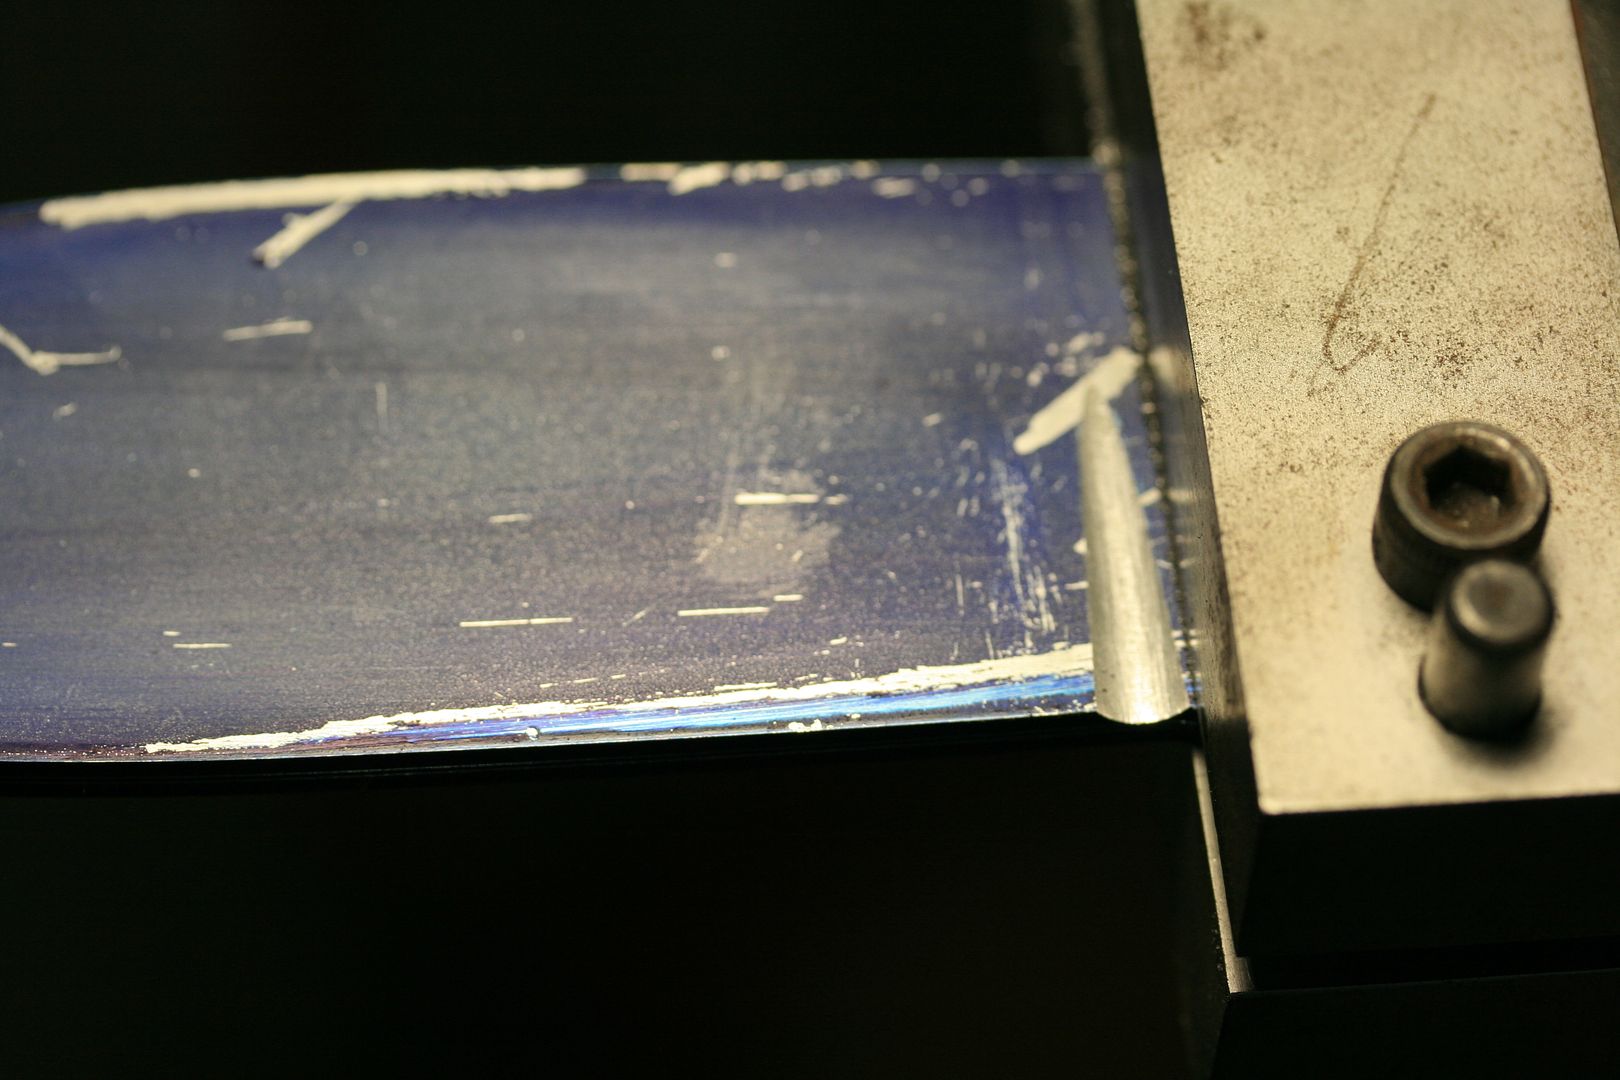
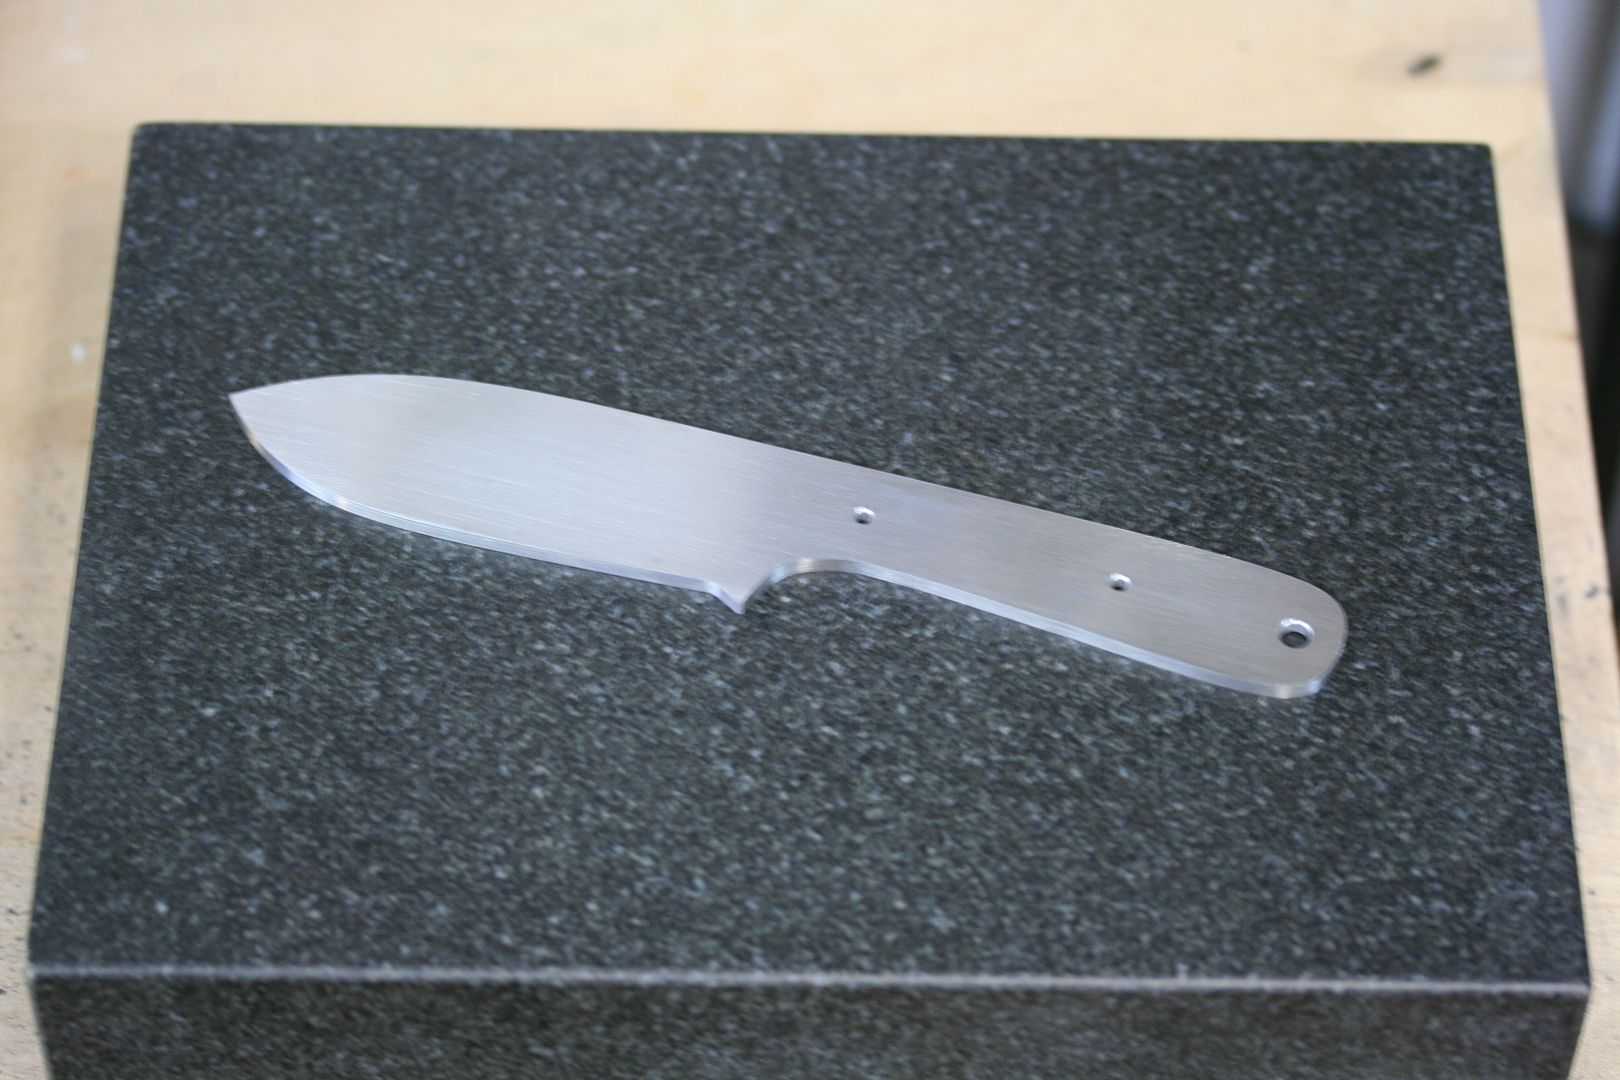
Flip it and match the other side...
Looking good...
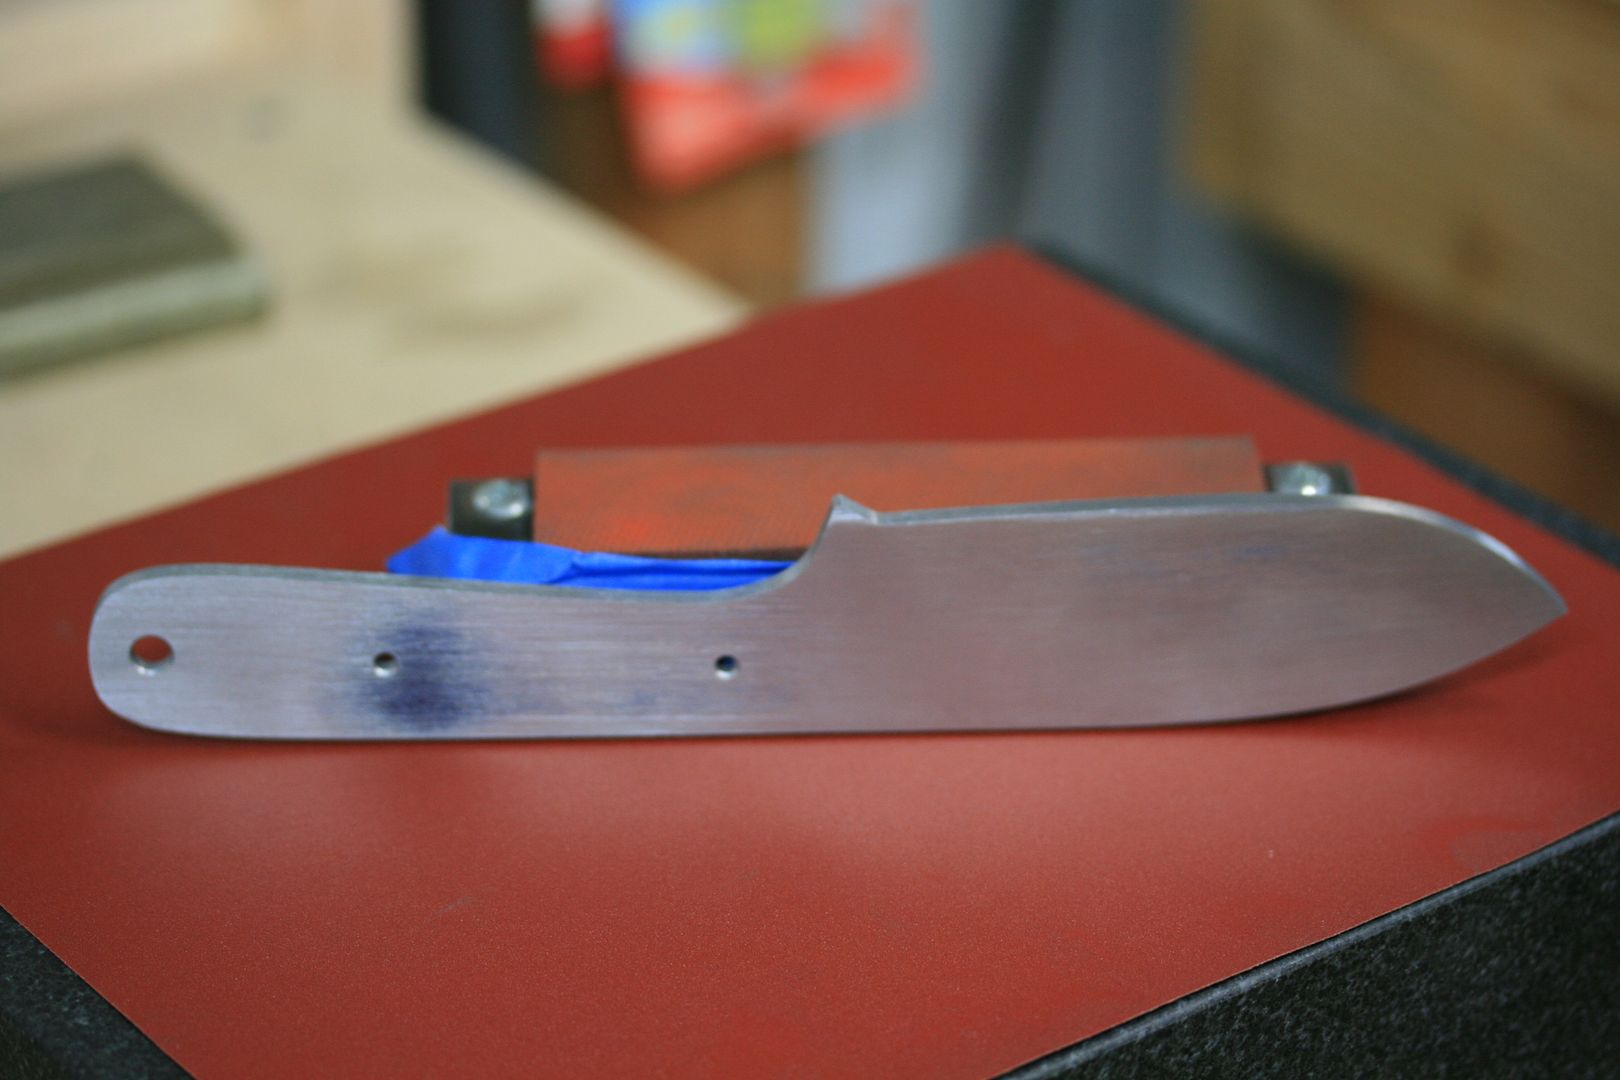
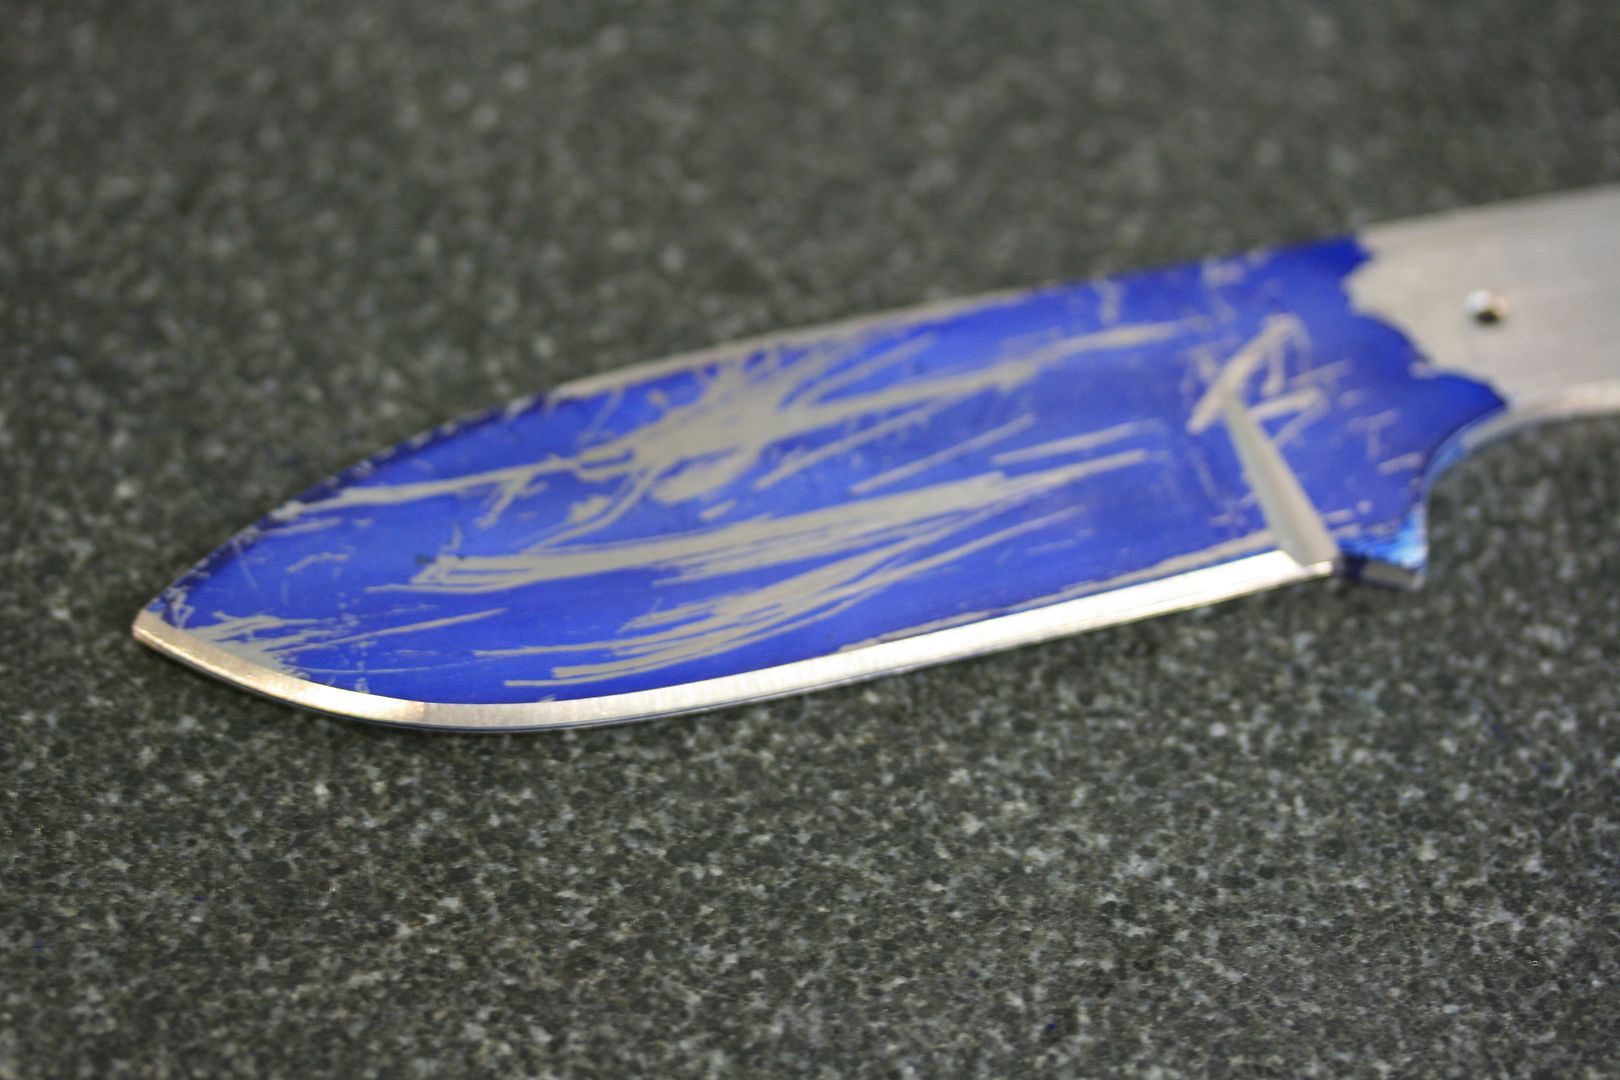
Both sides completed and now it is time to grind in the initial bevel...
Unfortunately, my work rest does not go down far enough so my initial bevels are also pretty small...
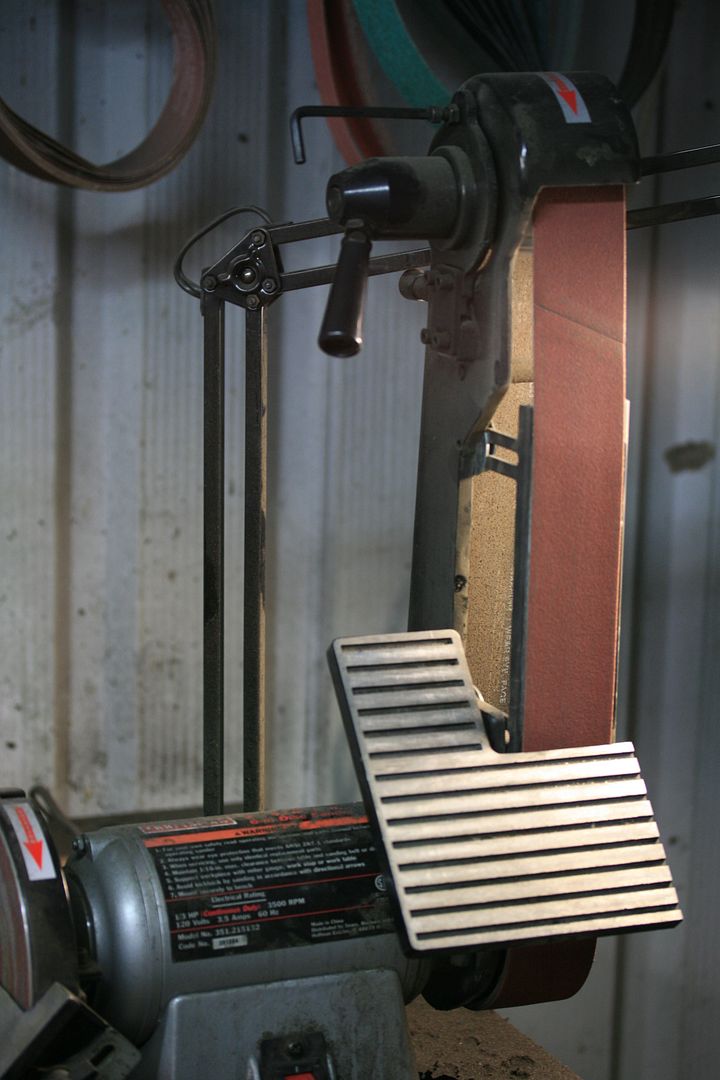
The grinder set up with a worn 120 grit belt and work rest at an angle...
Next, I carefully grind to the scribe lines. I usually don't touch them so I can see them better while grinding in the bevels...
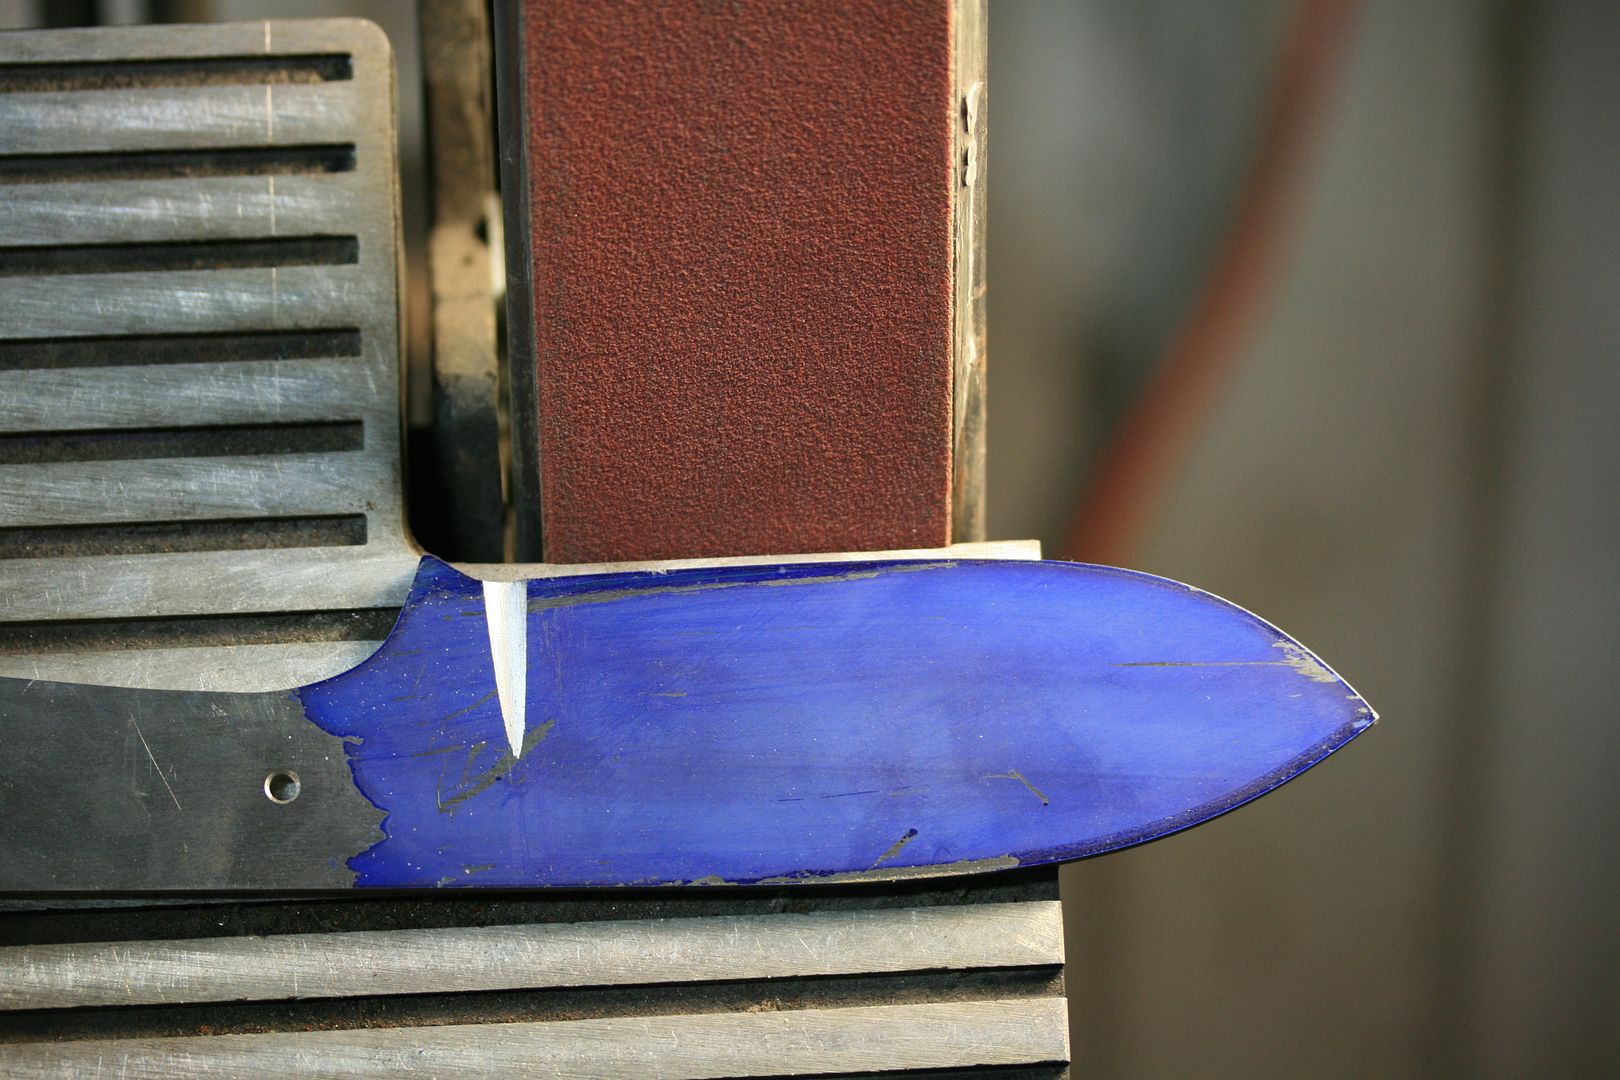
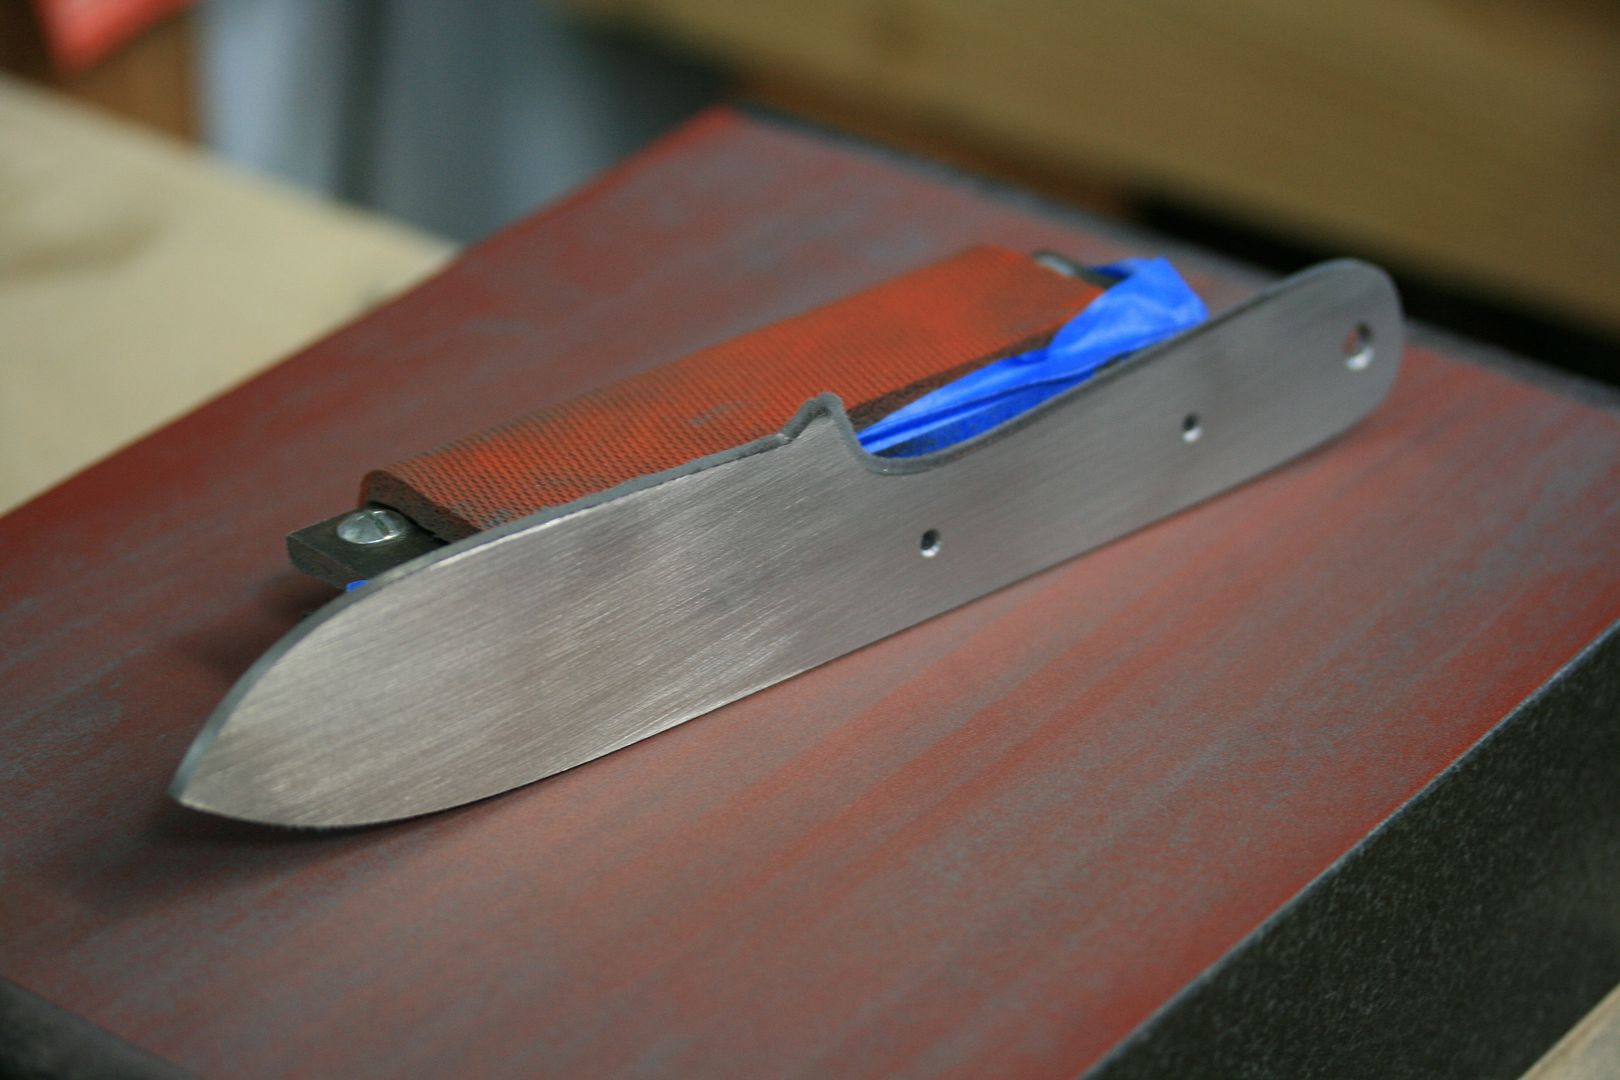
Ground in and ready for the fun...
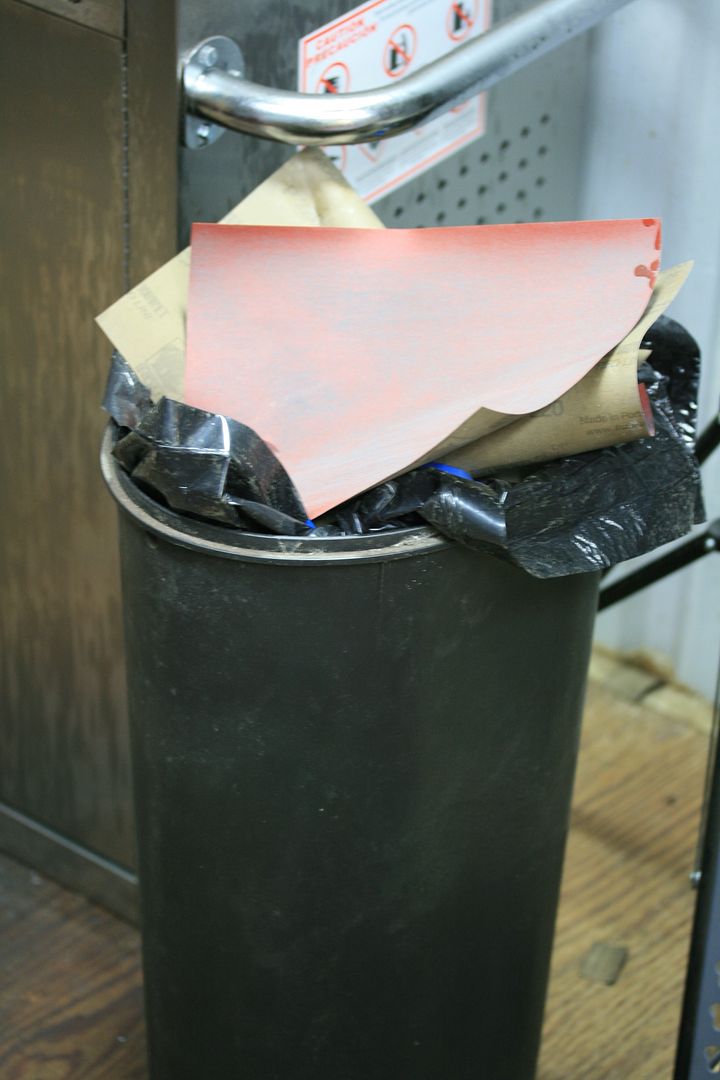
Time to also take out the trash...
I am going to save the grinding for tomorrow. I actually have a job at 7am to go to in the morning. It has been a week and a half since I have gone to work. Weather played a big part but the construction industry is still hurting. Work has been slow, but I have loved all of the time in the shop lately.
I didn't get as much done as I would have liked. My nose is running like a stuck pig, so I am saving the grinding work for tomorrow. It was pretty difficult doing the little grinding I did, wearing a mask. I kept having to pull it off and blow my nose :sad:.
Anyway, enough wining!
Next in my crazy process, I get everything ready to lay out my knife...
Because of how terrible I am at math, this next step stumped me for a while until I saw Bob Loveless' video where he goes through the process. I had to rewind a hundred times before I figured it out. Now that I know it, I feel very dumb for not figuring it out before.
I measure the thickness of the blade at the future cutting edge, in multiple spots, and take the average. It read .153". I want .02" at the cutting edge for heat treat so I subtract .02" from .153", which equals .133". Now I divide that by 2, which equals .0665". This equals the height that I need to set the gauge at. Man I hate math!...
Time to get blue everywhere and cover the blade area in layout dye. I seem to have blue dye show up in the weirdest places after I do this...
Get the edge and spine...
I move the gauge instead of the knife when scribing the lines. It feels a little more stable...
Do both sides...
I always check to see if it came out good using the calipers...
Since I have problems at the grinder getting the plunge even, I use a file guide and round file to cut them in by hand. One thing to note is that the plunge does not come out parallel to the guide. It puts it at a angle pointing forward. I always compensate for this when placing the knife in the guide...
Clamp it in my knifemakers vise and point the light where I can see very well...
Starting to file... I use both hands when doing this. One holding the handle of the file and the other guiding the file, keeping it flush against the guide...
File down to where it just touches the scribe line...
I went a little higher than halfway...
Flip it and match the other side...
Looking good...
Both sides completed and now it is time to grind in the initial bevel...
Unfortunately, my work rest does not go down far enough so my initial bevels are also pretty small...
The grinder set up with a worn 120 grit belt and work rest at an angle...
Next, I carefully grind to the scribe lines. I usually don't touch them so I can see them better while grinding in the bevels...
Ground in and ready for the fun...
Time to also take out the trash...
I am going to save the grinding for tomorrow. I actually have a job at 7am to go to in the morning. It has been a week and a half since I have gone to work. Weather played a big part but the construction industry is still hurting. Work has been slow, but I have loved all of the time in the shop lately.
Last edited: