You are using an out of date browser. It may not display this or other websites correctly.
You should upgrade or use an alternative browser.
You should upgrade or use an alternative browser.
DanF's KITH WIP
- Thread starter DanF
- Start date
Daniel Macina
Well-Known Member
Hahahaha! Looks good!
DanF
Well-Known Member
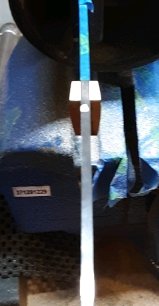
I freehand the bolster shape, sight down the end of the tang for symmetry. When it is close to the eye I use the mics on it.
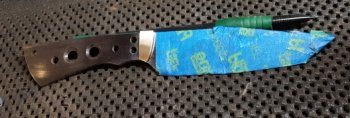
Bolster is close enough to start on the spacer fitting.
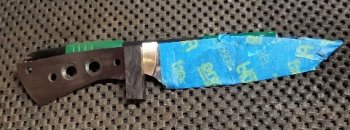
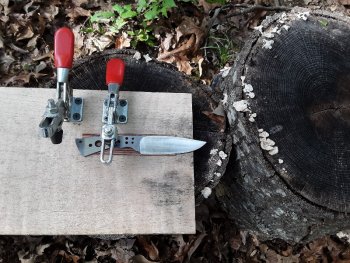
This is representative of the spacer, but, due to the close quarters of everything around the area I need to drill holes for the spacer I will use a piece of material the thickness I want but big enough to cover the rest of the tang, giving me enough room to clamp it in place tight against the bolster and drill the two holes for the pins. Once it is drilled I can then cut to finished size as pictured.
DanF
Well-Known Member
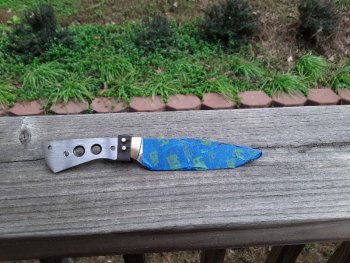
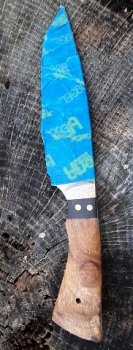
Spacers ready for epoxy. I vascilated between brass pins and black CF pins. I like the contrast between the black and brass and to me the brass pins on the black accents/compliments the brass bolster.
There was a little tear out when the drill went through the wood but the spacer is more than twice as thick as it needs to be so the tear it will be gone before the spacer gets down to it's intended size.
I'm hoping the wild cherry burl/bunyon pieces I sent out for stabalizing get back in time to see if it will be a good match for this knife.
DanF
Well-Known Member
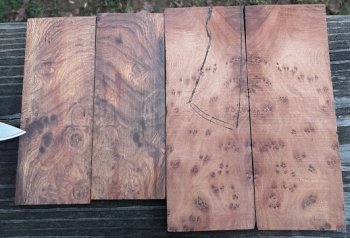
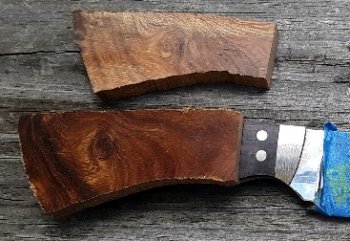
Okay, need some input please. On the left is a piece of "presentation grade" desert ironwood, and the piece on the right is Thuya burl. The area the folder is pointing to shows a crack in that area, so, the scale would come from the upper portion.
I marked the Thuya in an area where you have prominant knot figuring and swirls and a few burl eyes. If I start at the opposite end there would be more burl eyes and some swirlling.
Either would be somewhat bookmatched.
Whichever gets the nod will then be placed up against the figured wild cherry currently at K&G, IF that gets here within the next 7 days.
Having seen the cherry in the rough, it might be a toss-up, and if you like the pink/reddish tint of wild cherry you might lean in that direction (some of the in the rough pieces can be seen in the cherry burl thread I posted a few weeks ago. I don't know how to link that to this, if someone knows how, feel free to link it for a better informed decision/selection). Of course that will be a moot point if it does not make it back in time.
Thanks,
Daniel Macina
Well-Known Member
I personally love the ironwood!
DanF
Well-Known Member
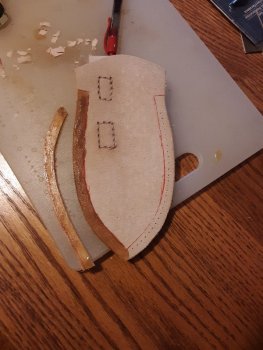
While I am waiting to see what happens with the scales.
I will make two sheaths for this knife, one pancake style and this more traditional style.
The welt has been cut and glued and waiting for it to dry.
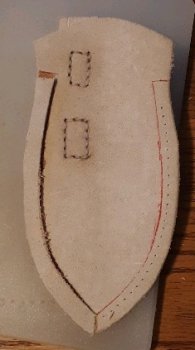 Welt in place, beveled at the point for a better, neater fold there.
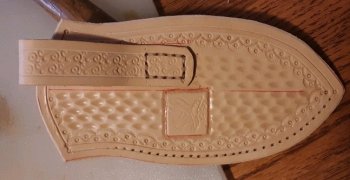
Finishing the stamping on the back side, a little more and in can wet it, fold it, and then stitch/sew it.
Kevin Zito
KNIFE MAKER
WOW!!! Both sheath and knife are really stunning! Very nice craftsmanship!View attachment 65657
While I am waiting to see what happens with the scales.
I will make two sheaths for this knife, one pancake style and this more traditional style.
The welt has been cut and glued and waiting for it to dry.
View attachment 65658Welt in place, beveled at the point for a better, neater fold there.
View attachment 65659
Finishing the stamping on the back side, a little more and in can wet it, fold it, and then stitch/sew it.
Von Gruff
KNIFE MAKER
The DIW gets my vote.
One thing I notice with your sheath Dan (or rather two things) I will ask about/comment on
You have the welt going right to where the leather will fold so when together there will be no drain hole in the bottom of the sheath. I always leave the welt back a good 1/4 in from the fold line so that when together there is somewhere for any water to drain from if you happen to be out in the rain and if the leather is waxed (in and outside) then the sheath becomes weather resistant and longer lasting
The other thing is the welt itself. I see you have cut it to match the shape of the sheath edge but in reality it need not be done like that and can save a lot of leather and time in the process. I cut a number of long strips 5/16 wide from the end of the hide when I get it and these are cut to length for each welt. The leather willl easily bend round the curves of the sheath edge hold that shape when the contact glue is applied and dried and save from having to cut the individual shapes.
DanF
Well-Known Member
Edited, @ Kevin,
Honestly, I struggle with everything I do and all I see are flaws.
The inexpensive knives I make are the product of a mindset that everyone deserves a better knife than can be had at a big box store. The problem with that is that you get used to working that level of fit and finish and the finer skills become rusty. That is why I have stopped making knives like I had been making.
DanF
Well-Known Member
The DIW gets my vote.
One thing I notice with your sheath Dan (or rather two things) I will ask about/comment on
You have the welt going right to where the leather will fold so when together there will be no drain hole in the bottom of the sheath. I always leave the welt back a good 1/4 in from the fold line so that when together there is somewhere for any water to drain from if you happen to be out in the rain and if the leather is waxed (in and outside) then the sheath becomes weather resistant and longer lasting
The other thing is the welt itself. I see you have cut it to match the shape of the sheath edge but in reality it need not be done like that and can save a lot of leather and time in the process. I cut a number of long strips 5/16 wide from the end of the hide when I get it and these are cut to length for each welt. The leather willl easily bend round the curves of the sheath edge hold that shape when the contact glue is applied and dried and save from having to cut the individual shapes.
Thanks for the input, it is greatly appreciated! You actually came to mind when I picked the DIW, I had read in another post that you thought highly of it (and for good reason)!
The welt strips is a novel idea for me and certainly sounds like a time and material saver. I'll have to give that a try.
The hole in the bottom for drainage, and to keep gunk from accumulating will be formed with a sharpened stainless steel pin when I get ready to make the fold. I have found that I can make the hole smaller, and more uniformly shaped that way. I will also sand the point of the tip of the sheath to a more gentle curvature, which helps keep the pointy tip from folding over with use.
Again, thanks for the tips!
Edited to add; Gruff I just tried both your suggestions, two very nice time savers, with good results!
Last edited:
DanF
Well-Known Member

Cleaned up the recently epoxied bolster and spacer, the rest of the still-exposed tang will get a 60 grit sanding before the scales go on. This will give a bit more of a keyhole grip than the current 320 grit in that area.
The brass pins in the spacer are deliberately left just a fraction out of square placement to each other. To me, if you have more than two perfectly parallel lines (as in where the brass and spacer and spacer and handle meet), it starts to look artificial and takes away from the artistic flow of the lines. Too far out of line looks wonky however, so a little goes a long way.

