You are using an out of date browser. It may not display this or other websites correctly.
You should upgrade or use an alternative browser.
You should upgrade or use an alternative browser.
Help a brother out ???? Tools to build ????
- Thread starter Josh Dabney
- Start date
Josh Dabney
Moderator
Just thought I'd give y'all an update on a couple things.
My Bruce Bump file guide came in yesterday !!! I just had to spend some time playing with some of the new stuff without an agenda. Kinda cool to spend a little time just fooling around with the new toys, oh... I mean tools")
Grabbed a blade from the drawer of shame to try the file guide for grinding plunges. After this first try with it I'd advise anyone to sell their soul to get one ! Or at least sell their mother-in-law or something... anything. Putting the carbide guide from Bruce to use was a HUGE eye-opener and a real Ah-ha moment. I've been putting off the purchase of one of these for a long time and feel quite foolish for doing so now, LOL.
Now that I've officially used my guide for it's inteded purpose I'm prepared to give my 100% endorsment of Bruce's product. Why buy from Bruce ? You may ask-
-His product is solidly engineered to perform it's task and made with PRECISION !!!
-The pins are a perfect fit. No wobble or play at all in the direction that would mis-allign the faces of the carbides. Absolutely essential IMHO and anything less isn't good enough. The carbides are perfectly matched and they STAY that way once clamped on the ricaso.
-There is ZERO discernable flex when the guide is tightend down.
-The allignment pins and bolts are on the long side in comparison to some other guides so I envision this being perfect for pre-shaping guards prior to knife assembly. (I haven't tried it for this yet)
The guide functions as it should and I can't imagine being able to improve it. Exactly what you'ld expect from a BB product.
PRICE ! $95 to your door is a huge savings over anything I've seen thats comparable.
And the final reason- You'll get a warm fuzzy feeling inside knowing your supporting a fellow Dog in his endeavors at the same time getting a 1st rate American Made product. Can't think of a better reason than that
I was so impressed at the plunges I finally did something I've been putting off for awhile. Sometimes it's difficult to come to terms with things such as this- My Platen SUCKS ! Sure the ceramic glass is flat but so what when the edges are a terrible mis-match and your plunges look like a dog chewed them in. Maybe I could've dressed the edges of the glass better but I decided to just remove it and dress the steel the way I want it.
Removing the glass was pretty easy even though it was JB welded in place. Flashed the glas with a MAPP gas torch for a couple minutes and it popped right off. In fact it softened the JB up enough that it scraped right off the steel platen in a big sheet.
Stripped the platen down and surface ground .005 off the face then coated the edges with dykem and used to the height guage to scribe lines .020 in from the edge. Filed to the scribed lines and hand sanded with 220 and cork backing to a radius then finished up shoeshinning with 600x paper.
I'm thinking I should be able to grind near perfectly matching plunges with the combination of the guide and my fixed up platen. The carbides will force the belt to roll tightly against the side of the platen and HOPEFULLY eliminate the frustration of plunges with a mis-matched radius. Time will tell
I also threw the rotary platen on and convexed an edge. All I can say is WOW. Quickest, easiest, and cleanest convex I've done and right off the grinder. Simply amazing. I've already got some interesting ideas on some real trick grinds to make with this attachment in addition to just convexing edges. Too many ideas an too little time to work I'll get there eventually though .
Just wanted to share some thoughts with my brethren Dogs !
Take care All ! -Josh
My Bruce Bump file guide came in yesterday !!! I just had to spend some time playing with some of the new stuff without an agenda. Kinda cool to spend a little time just fooling around with the new toys, oh... I mean tools
Grabbed a blade from the drawer of shame to try the file guide for grinding plunges. After this first try with it I'd advise anyone to sell their soul to get one ! Or at least sell their mother-in-law or something... anything. Putting the carbide guide from Bruce to use was a HUGE eye-opener and a real Ah-ha moment. I've been putting off the purchase of one of these for a long time and feel quite foolish for doing so now, LOL.
Now that I've officially used my guide for it's inteded purpose I'm prepared to give my 100% endorsment of Bruce's product. Why buy from Bruce ? You may ask-
-His product is solidly engineered to perform it's task and made with PRECISION !!!
-The pins are a perfect fit. No wobble or play at all in the direction that would mis-allign the faces of the carbides. Absolutely essential IMHO and anything less isn't good enough. The carbides are perfectly matched and they STAY that way once clamped on the ricaso.
-There is ZERO discernable flex when the guide is tightend down.
-The allignment pins and bolts are on the long side in comparison to some other guides so I envision this being perfect for pre-shaping guards prior to knife assembly. (I haven't tried it for this yet)
The guide functions as it should and I can't imagine being able to improve it. Exactly what you'ld expect from a BB product.
PRICE ! $95 to your door is a huge savings over anything I've seen thats comparable.
And the final reason- You'll get a warm fuzzy feeling inside knowing your supporting a fellow Dog in his endeavors at the same time getting a 1st rate American Made product. Can't think of a better reason than that
I was so impressed at the plunges I finally did something I've been putting off for awhile. Sometimes it's difficult to come to terms with things such as this- My Platen SUCKS ! Sure the ceramic glass is flat but so what when the edges are a terrible mis-match and your plunges look like a dog chewed them in. Maybe I could've dressed the edges of the glass better but I decided to just remove it and dress the steel the way I want it.
Removing the glass was pretty easy even though it was JB welded in place. Flashed the glas with a MAPP gas torch for a couple minutes and it popped right off. In fact it softened the JB up enough that it scraped right off the steel platen in a big sheet.
Stripped the platen down and surface ground .005 off the face then coated the edges with dykem and used to the height guage to scribe lines .020 in from the edge. Filed to the scribed lines and hand sanded with 220 and cork backing to a radius then finished up shoeshinning with 600x paper.
I'm thinking I should be able to grind near perfectly matching plunges with the combination of the guide and my fixed up platen. The carbides will force the belt to roll tightly against the side of the platen and HOPEFULLY eliminate the frustration of plunges with a mis-matched radius. Time will tell
I also threw the rotary platen on and convexed an edge. All I can say is WOW. Quickest, easiest, and cleanest convex I've done and right off the grinder. Simply amazing. I've already got some interesting ideas on some real trick grinds to make with this attachment in addition to just convexing edges. Too many ideas an too little time to work
I'll get there eventually though .Just wanted to share some thoughts with my brethren Dogs !
Take care All ! -Josh
Josh Dabney
Moderator
Stew,
Some of the most miserable folks I've ever met were extremely wealthy in $$$$$
Of course having "enough" really does help
I'm certainly not rich but happily above the poverty level and pretty content with life right now.
It's a funny thing about having kids.... they like to eat too LOL
-Josh
Some of the most miserable folks I've ever met were extremely wealthy in $$$$$
Of course having "enough" really does help
I'm certainly not rich but happily above the poverty level and pretty content with life right now.
It's a funny thing about having kids.... they like to eat too LOL
-Josh
rhinoknives
Well-Known Member
Hi Josh,
Bruce's File jig runs circles around another jig that came out recently. "I purchased Both, The other one first"
Having two points to tighten it down is so important, Especially when you angle the plunge cut's like I do.
There is no twisting or mismatched plunges with the Bump file jig.
And the carbide inserts work get!
:s11798::s11798::s11798:
Laurence
www.rhinoknives.com/
Josh Dabney
Moderator
Well Dogs I continue to tredge on with my projects. I keep telling myself ... It's worth it in the long run, It's worth it in the long run. LOL
Since a pic is worth a 1000 words figured I might as well throw one up of my platen
On to building the buffing attachment. I'm guessing this is going to become a popular home made attachment because it just makes so much sense and is a fairly easy project that can be done without Fancy tools. With this in mind I'll try to explain fully what I'm doing with it and why.
Materials-
2- 3/4" pillow block bearings from Beaumont $21
1- 3/4" driveshaft from Beaumont $25
1- 3/4" bore 4" drive wheel from Beaumont- $ 53
1 1/2" square tube & 5" Channel approx- $20
Tapered spindle http://www.knifeandgun.com/ProductDetails.asp?ProductCode=TSR $25
$144 + a little for shipping so basically a $150 3HP VSR Buffer. Compare to this variable speed 3HP Baldor Buffer at $1338.59
http://www.mile-x.com/baldor-1252-buffer.aspx
For the record I don't think I NEED 3hp on a buffer but I WANT variable speed. Variable speed will give me the option of running any size buffs I want. Specifically large diameter buffs at the proper surface speed.
The part of this build that will determine the attachments quality is the threading of the shaft. Of course a lathe is the tool for this job but I don't have one and expect most others don't either. I won't be suprised at all if this part of my build is an EPIC failure but I had to try it for general posterity and prove or dis-prove the method for threading the shaft. I do have a back up plan that involves a friend with a lathe threading the shaft properly so in the event of failure all will not be lost
I picked up a 3/4 x 16 die at the local Ace hardware $12 and change. Of course I don't have a die holder for this thing and I gave a shot at using it with some channel locks- unsuccessfully of course. I couldn't get enough pressure to get it started threading and pretty much just chewed up the end of the shaft.
Using this old drill press vice as a die holder actually worked pretty well and once I switched to it I got the shaft threaded with no real problem
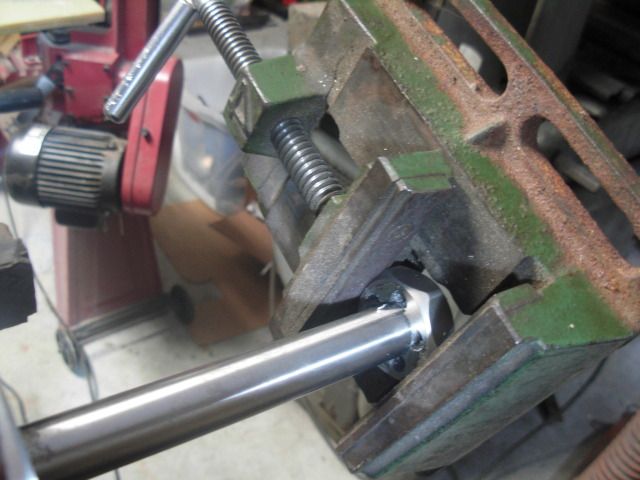
At first I put a key in the keyway and clamped the shaft in the vise with leather but that didn't get me enough force to keep the shaft from spinning. Mounting the wheel to the shaft and clamping that up solved the problem
I'm using a 5" wide channel to mount the pillow blocks. A 6" channel would be better and have room for a nut on the underside. As it is with my 5" piece it's going to work but I had to tap the pillow block mounting holes instead of through bolting them on. No big deal but thought I should mention it.
I notched out the ears on the channel so the flat is on top of the tubing. This gives me plenty of meat for threading and lots of area for welding the channel to the tool arm. Ran out of Mig gas so I couldn't weld it up last night but I'll be running to the welders supply shortly to get a refill Still need to weld everything up and punch the mounting holes through the tubing then tap those two holes and she'll be pretty much done and look something like this. Still need to order the tapered spindle too.

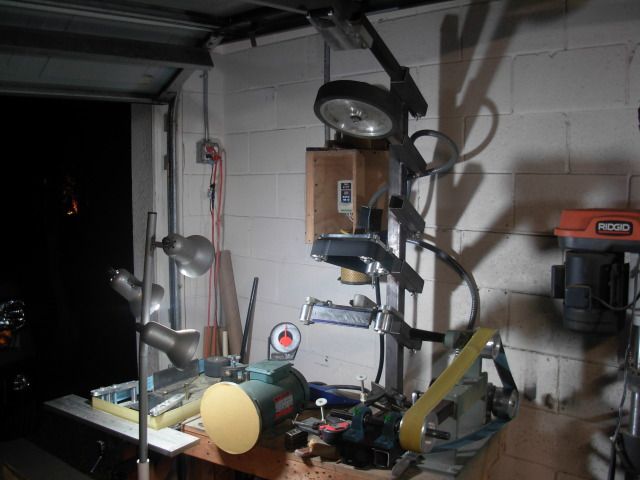
The Ole grinder bench is advancing by leaps and bounds sporting the tree, horizontal grinder, rotary platen, buffing attachment, trued and tuned up flat platen, and still have room in the tree for a dedicate slackbelt tool arm. Also got some nice 3/4" thick aluminum cut-offs for the slack belt attachment the days of removing my flat platen every other minute are going to soon come to an end... hallaluya
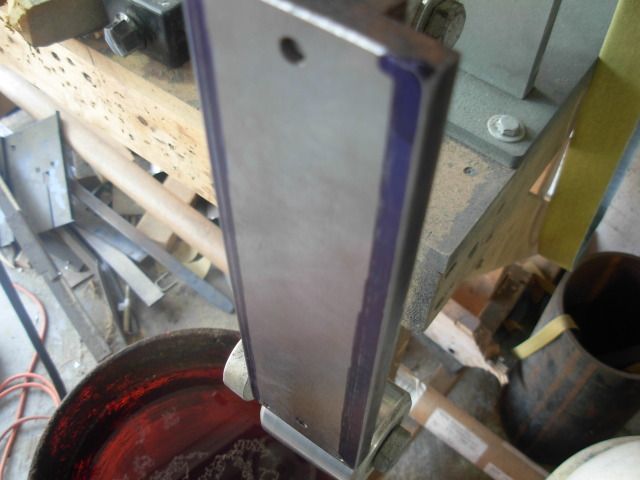
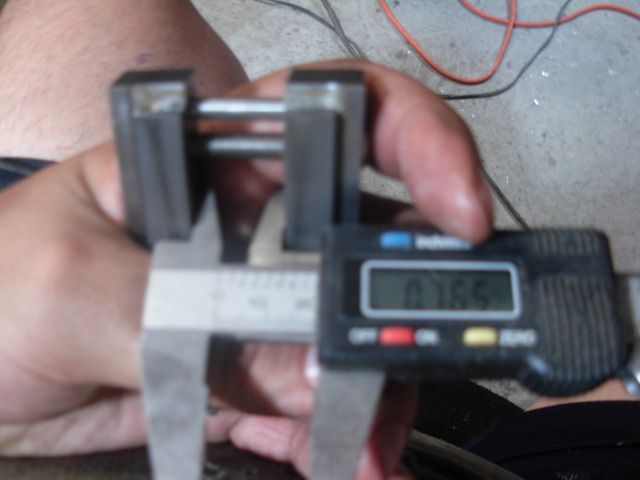
This is about the max opening for the BB file guide. Should clamp on to 3/4" thick guard stock no problem
Since a pic is worth a 1000 words figured I might as well throw one up of my platen
On to building the buffing attachment. I'm guessing this is going to become a popular home made attachment because it just makes so much sense and is a fairly easy project that can be done without Fancy tools. With this in mind I'll try to explain fully what I'm doing with it and why.
Materials-
2- 3/4" pillow block bearings from Beaumont $21
1- 3/4" driveshaft from Beaumont $25
1- 3/4" bore 4" drive wheel from Beaumont- $ 53
1 1/2" square tube & 5" Channel approx- $20
Tapered spindle http://www.knifeandgun.com/ProductDetails.asp?ProductCode=TSR $25
$144 + a little for shipping so basically a $150 3HP VSR Buffer. Compare to this variable speed 3HP Baldor Buffer at $1338.59
http://www.mile-x.com/baldor-1252-buffer.aspx
For the record I don't think I NEED 3hp on a buffer but I WANT variable speed. Variable speed will give me the option of running any size buffs I want. Specifically large diameter buffs at the proper surface speed.
The part of this build that will determine the attachments quality is the threading of the shaft. Of course a lathe is the tool for this job but I don't have one and expect most others don't either. I won't be suprised at all if this part of my build is an EPIC failure but I had to try it for general posterity and prove or dis-prove the method for threading the shaft. I do have a back up plan that involves a friend with a lathe threading the shaft properly so in the event of failure all will not be lost
I picked up a 3/4 x 16 die at the local Ace hardware $12 and change. Of course I don't have a die holder for this thing and I gave a shot at using it with some channel locks- unsuccessfully of course. I couldn't get enough pressure to get it started threading and pretty much just chewed up the end of the shaft.
Using this old drill press vice as a die holder actually worked pretty well and once I switched to it I got the shaft threaded with no real problem
At first I put a key in the keyway and clamped the shaft in the vise with leather but that didn't get me enough force to keep the shaft from spinning. Mounting the wheel to the shaft and clamping that up solved the problem
I'm using a 5" wide channel to mount the pillow blocks. A 6" channel would be better and have room for a nut on the underside. As it is with my 5" piece it's going to work but I had to tap the pillow block mounting holes instead of through bolting them on. No big deal but thought I should mention it.
I notched out the ears on the channel so the flat is on top of the tubing. This gives me plenty of meat for threading and lots of area for welding the channel to the tool arm. Ran out of Mig gas so I couldn't weld it up last night but I'll be running to the welders supply shortly to get a refill
Still need to weld everything up and punch the mounting holes through the tubing then tap those two holes and she'll be pretty much done and look something like this. Still need to order the tapered spindle too.
The Ole grinder bench is advancing by leaps and bounds sporting the tree, horizontal grinder, rotary platen, buffing attachment, trued and tuned up flat platen, and still have room in the tree for a dedicate slackbelt tool arm. Also got some nice 3/4" thick aluminum cut-offs for the slack belt attachment
the days of removing my flat platen every other minute are going to soon come to an end... hallaluya
This is about the max opening for the BB file guide. Should clamp on to 3/4" thick guard stock no problem
Josh Dabney
Moderator
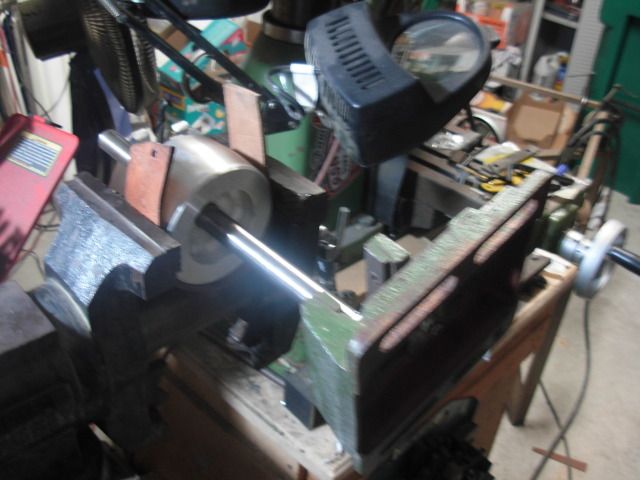
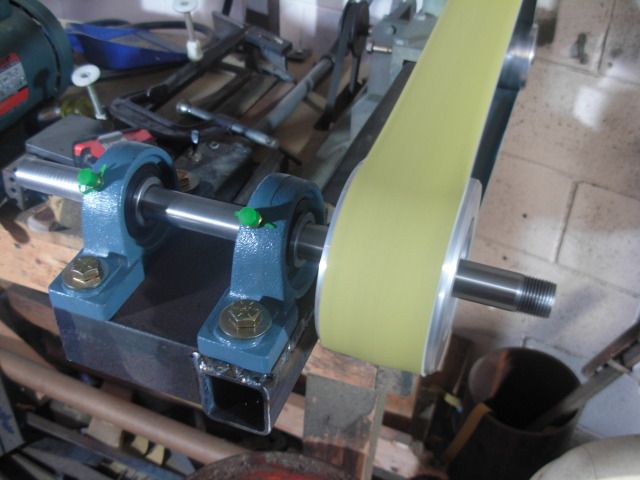
Being the thoughtful and loving gal she is my wife shared with me her raging head cold , LOL. Got the MIG gas yesterday and managed to get out to the shop long enough to get the buffing tool arm welded up and drilled and tapped.
Bolt on the bearings, shaft, and drive wheel and wha-la... Buffing attachment.
Here's a pic of her running-
Also ordered the tapered spindle, a couple 8" buffs, and a buff rake. Ended up getting this stuff from TruGrit as the tapered spindle was $17.50 instead of $24.95.
I've been working on this stuff so long I'm gonna have to re-read my own thread to remember what else I was going to build ,LOL.
I let you know if the tapered spindle runs true with my threading job or not once it comes in.
Take care dogs ! Josh
Josh Dabney
Moderator
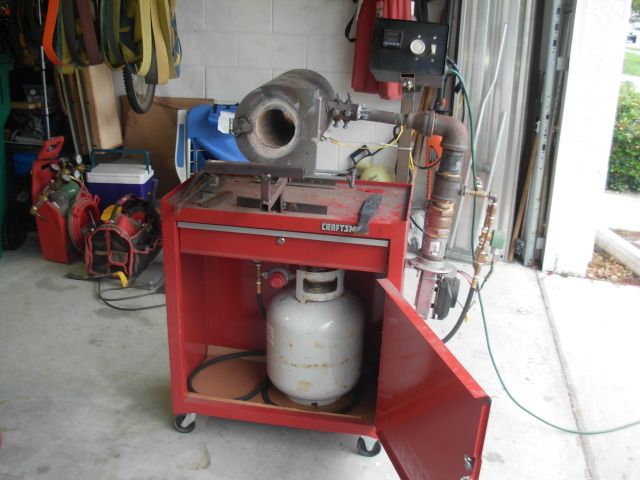
I've been dying to fire up the forge but before I do that I figured while I was working on tools I'd finish my forge project that was started 2 years ago, LOL. I originally picked up the tool box cabinet for my forge with the intent of having a nice tidy package I could roll around and store out of the way when not in use. For all this time I've had the cabinet plus the propane tank plus the PID control box floating around and just being in the way most of the time so before firing it up for some forging I figured I'd follow through with my original plan.
Punched a hole in the side of the cabinet for the propane line to run through and lined the cut-out with some grey electrical flex tube to protect the hose. Also removed the shelf to make room for the tank in the cabinet and welded up a mounting bracket for the PID control box. Now she's what I had envisioned. Compact, neat, and tidy and easily moved around as a complete unit.
Projects Project Projects....
Take care Dogs ! -Josh
Josh Dabney
Moderator
Tapered spindle and 8" 60 ply pin hole buffs arrived yesterday-
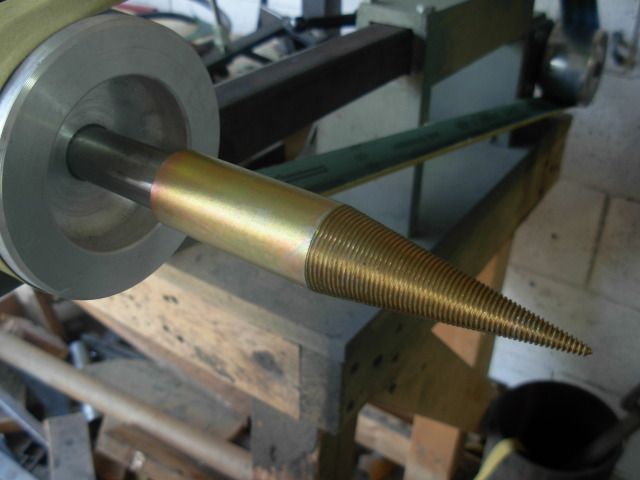
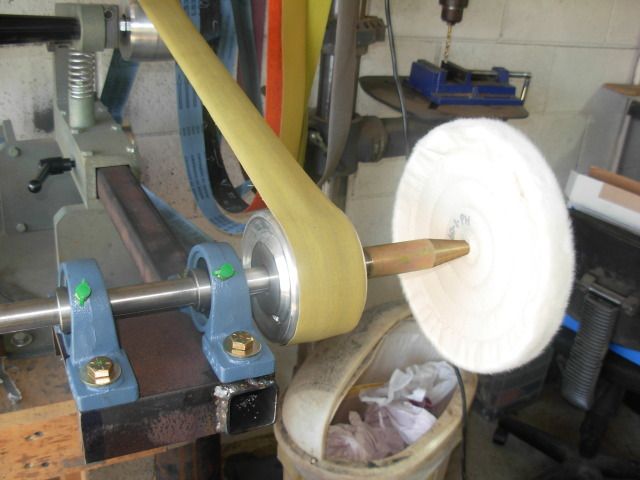
The buffing attachment is complete. As I expected though there is just a little "tip wobble" or run-out at the tip of the spindle due to my cutting the threads with a die instead of on a lathe. It's not an extreme amount but approximately 1/16" and I think It's usable like this for the time being but eventually I'll get with a friend who has a lathe and re-thread the shaft to get it running perfectly true.
Take care fellas- Josh
C Craft
Well-Known Member
You have been a very busy young man Josh, my head is spinning!
I like the buffing attachment though and can see where it will come in very handy!
I still want to see some video shots of the horizontal grinder in use. I can see it's advantages but have been doing it standing on my head so long it probably wouldn't feel right your way, but I am waiting to see what you can show me!:les::biggrin:
:35:
Josh Dabney
Moderator
Well fellas......
Deep subject huh ? Since doing all this tool building I decided to go for an entry in the Neo Tribal KITH which of course isn't gonna nessistate the useage of any of the new stuff Bwaaaaa ha ha ha. Real Genius huh :happy:
Rest assured we'll get there eventually
Y'all are welcomed to check out my KITH build here if you like-
http://knifedogs.com/showthread.php?24030-Did-someone-say-Neo-Tribal-KITH
Not my typical knifemaking endeavor but I'm having alot of fun with it so far in a knifemaking with the rules removed sorta way.
Take care Fellas ! Josh
C Craft
Well-Known Member
I'd like to see some video too. I'd also like to see video of C. Craft grinding on his head.
You a funny guy Eric. You ever heard, "everybody like a little @$$ but nobody likes a smart @$$", (and the crowd hisseeeeesssss) :what!:that's called poetic licence, or in other-words an over statement of the facts. !
I actually have hit my face shield and knocked my hat off leaning over a platen trying to see the edge while grinding a little better, so I guess that is about as close as I can get to standing on my head while grinding!:les:
:biggrin::biggrin::biggrin::biggrin:Josh Dabney
Moderator
Here's a tip for y'all....
I don't personally do this but do know someone who's an amazing maker that does this to solve the aging eyes and grinding problem. His solution... Opti-visor WHILE grinding. Works for him and he can SEE what he's doing !
I like to work close to the grinder with my head over top the edge. This is why I could never do a two wheel grinder for flat grinding... I just know I'd give myself a 2" racing stripe right down the forehead and wind up looking like a blood skunk !
I think a periscope with built in light mounted right to the grinder may be the ticket !!! Or maybe a "Platen Cam" hooked to a bigscreen TV mounted behind the grinder ! That would be pretty trick !!! Yeahhhhh we'll hook it up to Cliff's grinder and stream it live on the web !!!!
Sounds like a worthy project to me... what do yu guys think ?
Have a great day fellas... Josh
C Craft
Well-Known Member
Sounds great Josh but you know my eyes hung in there a lot longer than some but, when the ole eyes starting giving up to the age..................... I started buying brighter light bulbs and denial was a good state to live in back then too!:what!::biggrin: :what!:
Taking Luten does help at least, I hope its not just a "placebo effect"! :9:
Well Eric I always to say God does have a sense of humor. The way I look at it God gives you things at young age that you don't know how to appreciate or even in some cases how to use them skillfully, but.............
He only gives us the wisdom to use them after we get too old to use them, :what!: Some-days you got to laugh as crying is too painful, and I figure God laughs with you!
:biggrin:
Josh all this still ain't gettin you out of a video of this thing up and runnin. I want to see what you can do with this so I can decide if I just have to have one!:les::1::biggrin:
Josh Dabney
Moderator
Cliff,
I got two brand spankin new blades forged out yesterday so hopefully it won't be toooo long
A bunch of my fancy ideas are predicated on having a platen that lines up with the small wheel so I need to get that done also. I guess I'm gonna have to get a platen done soon
Josh
I got two brand spankin new blades forged out yesterday so hopefully it won't be toooo long
A bunch of my fancy ideas are predicated on having a platen that lines up with the small wheel so I need to get that done also. I guess I'm gonna have to get a platen done soon
Josh
Josh Dabney
Moderator
Video posting test.