Help a brother out ???? Tools to build ????

Thanks Laurence !

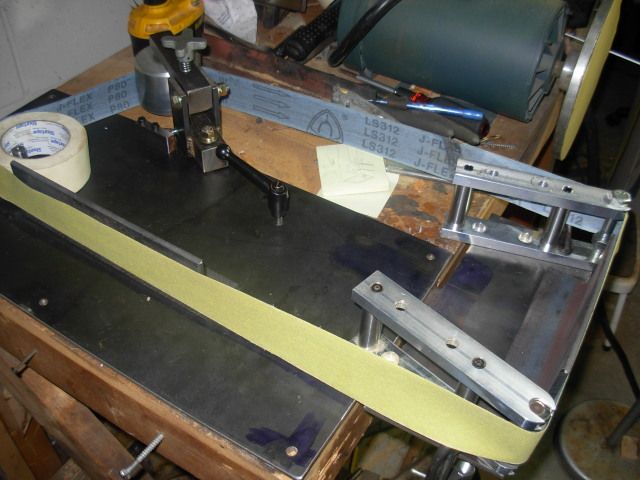
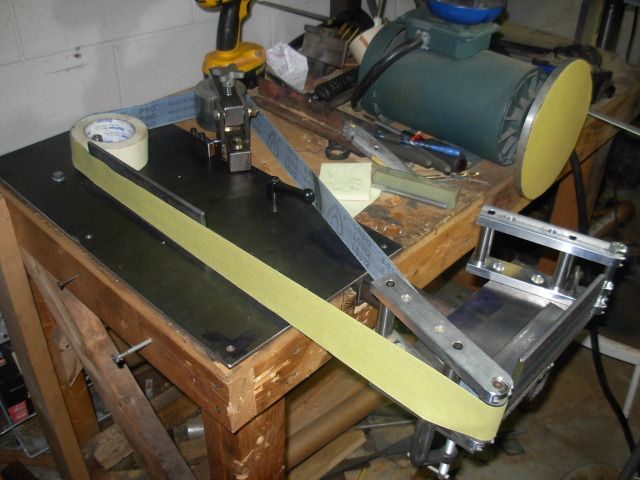
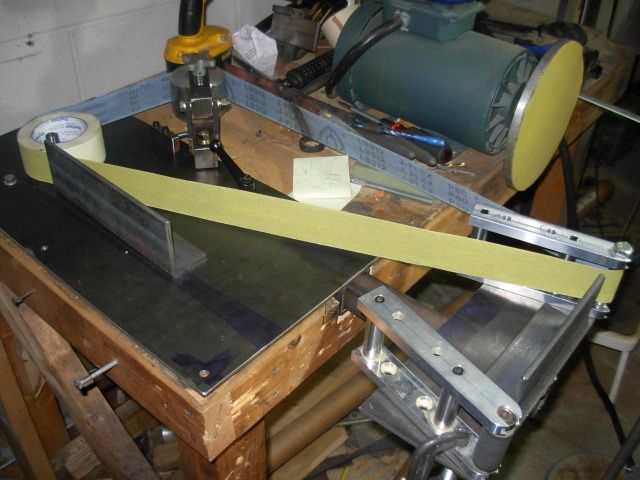
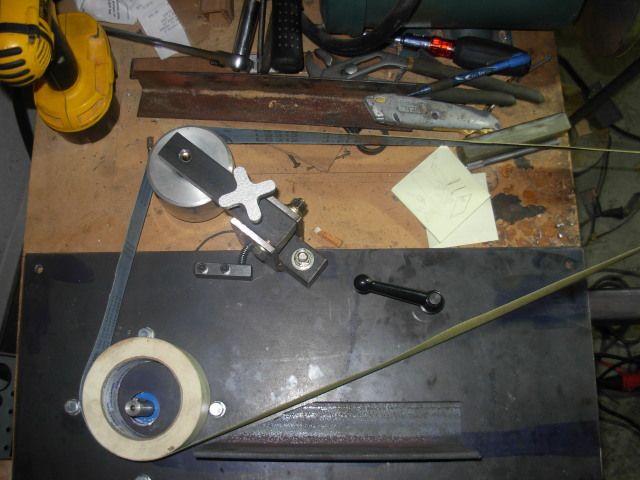
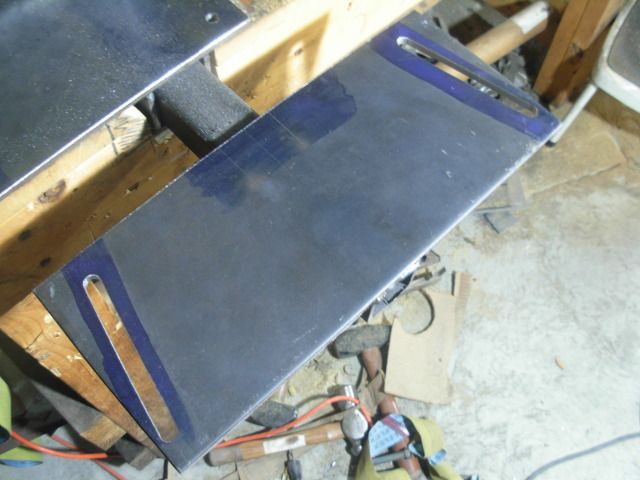
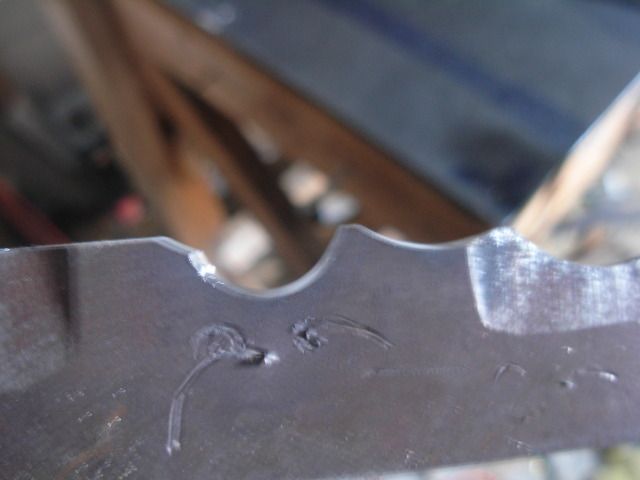
Still have a LONG way to go until completion though. Getting the wheels on and spinning a belt is just the first milestone and will allow me the oppertunity to check out the tracking and tension which is the heart of any grinder. Poor tracking = POS grinder IMHO. I'm not anticipating any issues but if this thing doesn't function beautifully It'll be a scene from the movie "Liar Liar" cuz I'll be kicking my own a#* for not just getting an ER48 and extension from Beaumont, LOL

I started with a sound foundation for a design but admit to a bit of Design on the fly here.

Still need to-

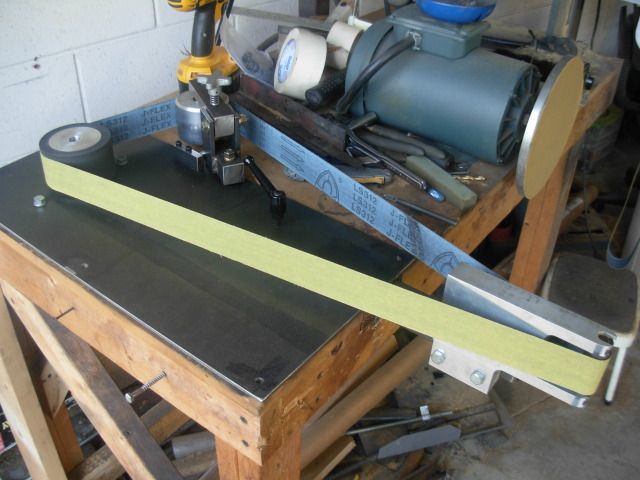
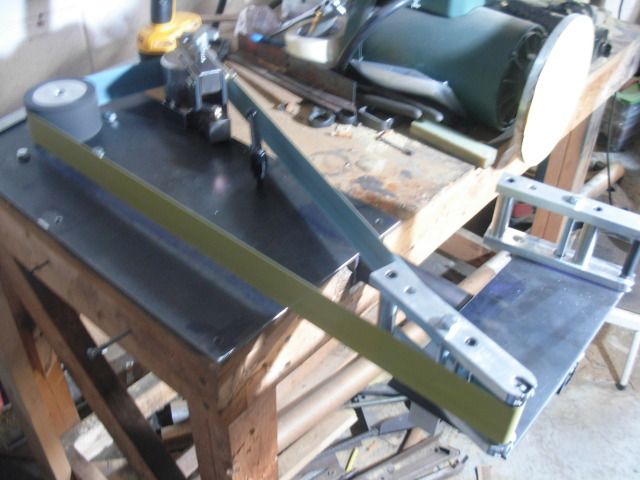
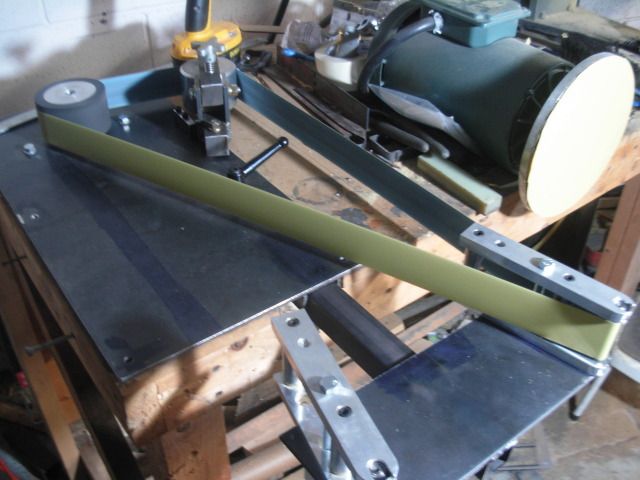
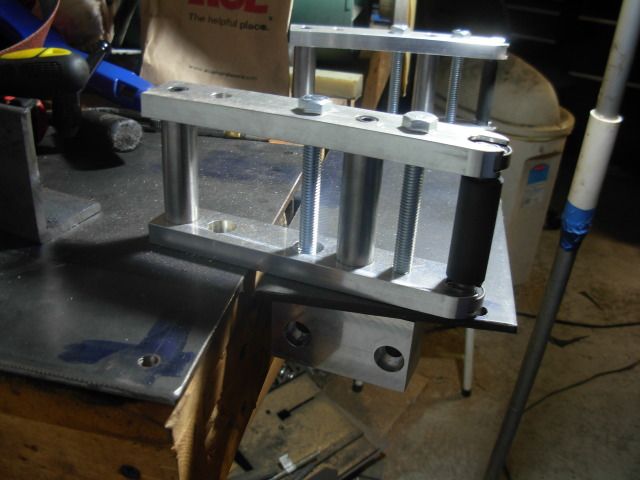
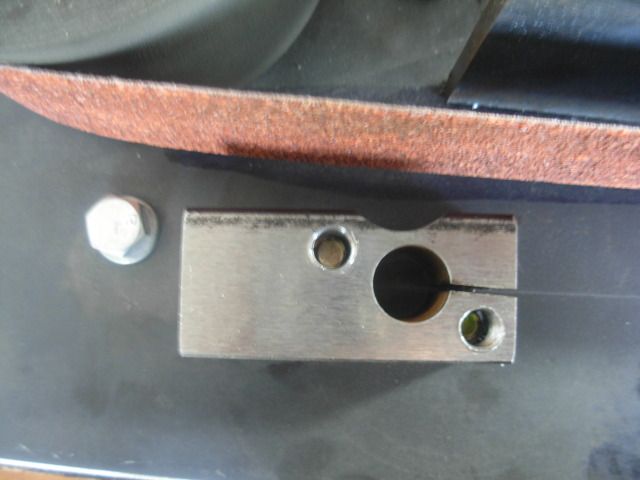
Build adjustment system for the SMA's and get them on the tool arm. They'll slide back and forth to compensate for different diameter wheels

Build tool rest for the horizontal attachment. Adjustable in and out, up and down, with tilting table that goes from 90* to the platen to 0* and has a stop to return to 90

Build tool rest for the contact/drive wheel and rear flat platen and the platen itself. This one will just be an elevator work rest that goes up and down only

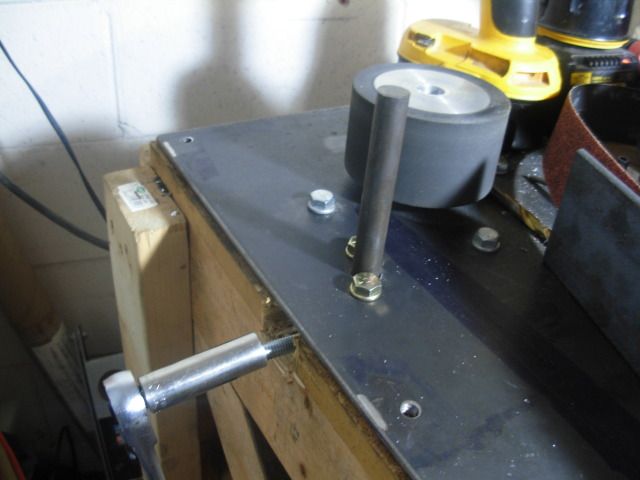
I'll probably also cut a piece of 2" tubing and weld it to the rear of the frame for tool arm storage. I will need to pull the tool arm to use my disc grinder. limited space sucks!

Build adjustable platen for between the small wheels, with quick change platen face of course

That may be everything, LOL

Almost forgot- buy 7 more locking levers and material for the tool rests

It'll be awhile yet before she's done but I'm hoping she'll be the total BOMB horizontal with unique capabilities and quickly and easily adjusted to take advantage of the design.

-Josh
 
Josh, really nice work on the grinder build. I see a lot of these kinds of builds going on so, I got to ask what is the big advantage to the horizontal grinder Vs a vertical? Even if I don't see all the advantage I can appreciate great fabricating work!:35:

Oh as for the Parks50 I think it was just time to step up a couple of notches, and the parks 50 was one of those. Now if I can just find the time to spend in the shop dedicated to knife work, and not get hung up on everything else!:biggrin:

Keep on keeping on, I am anxious to see this beast in action and then you can show me the advantages of horizontal!:3:
 
While everything can be done on a verticle grinder there are benefits to a horizontal also.

The main benefit is comfort and accuracy for profiling. I could've built a fancy tool rest like a MAPP arm for my small wheel attachment and got nearly the same benefit on the kmg. The main issue with this though is your grinding 90* to the rest of the world. This is why we're staring to see tilting grinders pop up like the Wilmont and Brian Fellhoelter's ubergrinder. Although the idea of a tilting grinder goes back a ways with the Radius Master grinder.

Profiling on a horizontal makes the scratch pattern on the spine run in line with the blade instead of across it. This allows you to pretty much finish the profile right on the grinder and save time avoiding hand sanding at least to some extent.

For me it's all about accuracy, consistancy, and repeatability. I'm game for whatever helps me make knives EXACTLY like my drawn out design. If I can save time and be more productive as a result that's BONUS. If it takes more time but gives better results thats worth it too.

I've gotten by thus far with just my flat platen attchment. I'm CONSTANTLY putting on tool rest, taking off tool rest, putting on platen, taking off platen, tilting it, squaring it up, etc etc etc. I spend as much time screwing around with my tool arm as I do grinding sometimes. Doing all this stuff really eats up time and reduces productivity which is why pro makers have multiple verticles with different set-ups, multiple small drill presses etc. The beauty of the tool arm configuration is that you can swap out attachments in a minute or less. Once I have this grinder in use and see how the rotary platen is going to fit in with my methods I may or may not build a dedicated slack belt grinder. At a minimum I need to build a seperate slack belt attachment so I can leave my flat platen attachment set-up the way it is.

All that said my horizontal is going to have some unique features that will hopefully allow me to-
grind perfectly matching plunges in complete comfort (getting this to work will be HUGE !!!) If I could only use this grinder for this it would be worth the effort and expense
grind integrals with whatever radius I want -never made any inegrals but I hope to in the future ;)
grind clips with perfectly matching radii- No more free handing it on the flat platen and spending 2 hours hand finishing clips for a less than perfect result.
have quick access to 1/2" 3/4" 1" 2" 3" 4" and 10" radii with the wheels I currently have on hand. I'm definately gonna pick up a 1/4" wheel also.

A little complicated to explain how all this is going to work out but it'll be easily understood once the grinder is done and running.

Hope that didn't just confuse things further. LOL

Someday your gonna have to make the great trek over here for a visit !

Take care buddy, Josh
 
Located, drilled, and tapped the tool arm locking lever and got to working on components. I can't really mount anything else pemanently until I get the wheels in tomorrow.

Cut some 2x3 angle for both flat platens.
001-4.jpg


3 wheel mode 1
002-5.jpg


3 wheel mode 2
003-3.jpg


Platen trimmed for belt clearance
004-4.jpg


Started working on this gooseneck that's going to be the heart of the adjustable work rest. The 5/8" round will be the rest's hinge pin. loosening the lever will allow the table to tilt up. There will also be a 5/8" stem sticking down from the gooseneck for the elevation adjustment.

I'm gonna scrap this one and pick up some 1" square tomorrow to make this and the work rest tool arm from. The 1 1/4" stuff is just too stout for this stuff.
005-2.jpg
 
I'm watching closely Josh in anticipation of making my own horizontal. I built my KMG clone a while back, but I understand exactly what you mean about being able to profile along the blade. I like the idea of getting into areas with a small wheel and being able to see the progress of your work. In my mind, the SWA is a good idea on the vertical grider, but a great idea on the horizontal grinder. Keep up the good work and thanks for the pic's etc.
 
What really has my eye now is that new fangled drive wheel you have made that looks just like a roll of masking tape!
The invisible center sprocket is a great touch!:biggrin:
Great touch!

Laurence

www.rhinoknives.com/
 
Awwwww Shucks , Y'all gonna make me blush:eek:

You weren't supposed to see the super double secret drive wheel :shush:

It's durmometer changes with rpm's and never makes mistakes or gouges the workpiece due to the Jedi Mind Controlled Centerless hub. The sproket is merely negatively charged super ionized atmospheric particles working in relationship with the positively charged driveshaft.

The technology was brought back from the future by Doc Brown and Marty Mc Fly :lol:

Have a great day fellas
 
Swung by my new favorite steel supplier this morning and picked up some 1" square bar and a couple pieces of flat bar.

Also check Fed-Ex tracking and my order from Beaumont is on the truck for delivery today :1971_dancing_dog:

Operation HORIZONTAL shall continue :biggrin:

-Josh
 
Guess it works fine. just mouse over the image and click to view

Here's another. Just a random belt grabbed off the used pile. Too early for a full blown celebration but I'm havin a Beer ! I think this is about as close to zero belt wobble you can get :)

 
Josh, Great looking build. The video worked well! and it looks like your new grinder will work well!! :)

Thanks for sharing the build with us Dogs!
 
Took some still shots also.

Milling out these slots for the small wheel attachment mounting and adjustment was an exercise in patience but it came out fine considering my total lack of machinist ability

015-3.jpg


Since I have the wheels you know I had to throw something on it for a test run. Went with the KMG's SMA

006-2.jpg


The rest of the pics were taken with the grinder running full tilt at 3600 rpm's. Likely it'll rarely see this speed in actual use but figured why not test it out running full bore

4 wheel mode with a 3/4" and 1/2" wheel. The SWA's are bolted on with only one bolt. I still need to drill the SWA's for a second bolt between the stand-off and wheel. No biggie just didn't get to it yet

007-2.jpg


Swapped over to just the 3/4" wheel. Still running smooth and tracking in the same place as 4-wheel mode :biggrin:

011-3.jpg


Swapped again to the 1/2" wheel. Same result

012-3.jpg


Got it running so I had to grind on something :p
013-4.jpg

014-4.jpg


Still got alot of fab work building the toolrest and platens but I'm breathing a real sigh of relief now that I got the grinder running. Everything seems smooth and tight. Tracking works great and I'm leaning towards thinking the spring tension will be fine as is.

:punk: -Josh
 
Josh I have been following this build with interest, thanks for explaining and hey one day I am gonna get to meet you and then I am going on to meet Wick in person. I feel like I already know you now I just got to put the face to the person! It was kinds hard to see your face when you had your nose in the Canola!:s12137:

I think if I ever build another KMG clone it will be made where it will tilt side to side. I know someone already has something similar but the design has been in my head for a while! It looks like you got a running dynamo there and will save a lot of time!:35:
 
Not alot to report on the grinder today.

I did remount and allign my mill vise and drilled the SWA's for the second mounting bolt (had to remove the vise to mill the slots). Those are done and mounted now so I can move forward with working on the tool rest systems and finally the platens.

I did get started re-purposing and re-tooling the gooseneck I made from the 1 1/4" square. Instead of scrapping it I decided to use it for the rear tool rest elevator block. I considered just welding it to the frame but decided to drill and tap it and bolt it on just in case I ever strip out the "pinch bolt" hole I can easily replace it. Just need to tap the second hole and it'll be good to go.

Actually used the grinder to grind a relief cut into the elevator block too :happy:

Hope to get more time in the shop tonight and get some pic worthy work done on her

Appreciate the comments fellas

Take Care ! Josh
 
I've been watching too. Its looking real good so far. Well designed, sturdy and made to last a lifetime.
 
Appreciate the comments Fellas !

I guess I've been thinking about building a horizontal for 3 years or thereabouts so I've had lots of time to think about it. The KMG was one of my first tools but I built my grinder bench and placed my disk grinder with a horizontal in mind.

Bruce- I really struggled with deciding to get an EF-48 or build myself. Two things made up my mind. 1. I REALLY wanted a Rotary Platen but couldn't afford both. 2. I wanted more options than the EF-48 offers. I knew I wanted a horizontal for all the normal benefits of a horizontal but had other uses in mind that couldn't be accomplished with an EF-48. That's why I went with a tool arm set-up. Once I decided to build I kinda promised myself that I'd go all out to end up with a useful and smooth running machine. It's going well so far ;) We'll have to wait and see if the tool arm set-up was worth it or not. I envision figuring out which wheels I'll use alot and keeping it in a 4-wheel set-up with my preferred wheels and barely fooling with it. I'm just not sure what sizes I'll want etc. I figure it's always good to have options.

Kelly, What a great compliment ! I thank you for it. I do try to put my best foot forward.

Not as much progress as I had hoped tonight. Did make some though-

Here's a close-up to show how I mounted the small wheel attachment to the tool arm. It is adjustable so I can change wheel diameters and keep them in line with the platen.

005-4.jpg


This is the rear tool rest elevator block. It's bolted on top of the frame to locate the hole for the 5/8" rod to pass through but it's permanent place will be on the underside of the frame.
003-4.jpg


Here it is in place and gripping the 5/8" rod. The elevator work rest allows use of the full width of the belt reguardless of wheel size (wheels smaller than the SWA's limit the amount of tracking possible.
004-5.jpg


Went to the hardware store today to grab some nuts, bolt, washers, etc. Also went to my metal supplier and got some aluminum for the tool rests. There was some material in the 1/2 x 5 rack so I oredered it up. Turns out it was 3/4" in the bin so the cut guy just cut me off 2 pirces for my tool rests. I was debating between 3/16th's and 1/2" fpr the tool rests but I'm going with 3/4" x 5 becasu that's what they had o hand

Thing will be slowing way down in the next week. Got my brother in law and his kids comming for a week starting sunday. Fun Fun Fun but NOT good for the grinder build most likely :)

Take care everyone ! Josh
 
Hey if your spending all your tax bucks I would buy a bunch of them new norton norax u936 structured abrasive belts Ide get 2 of each. I have the olderstyle u264 and they kick ass for finishing . Now the word on the street says these belts are good for everything except profiling. I think I would still cut my initial plunce with a fresh orange 60 grit . Josh I use the structured belts up to 3000 grit and makes finishing on the buffer a breeze compared to the old way. I actualy even use one of the 3k grits in conjunction with cr ox and wow does it polish. Kellyw
 
Back
Top