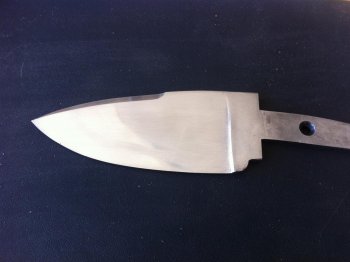
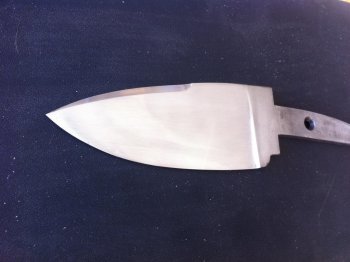
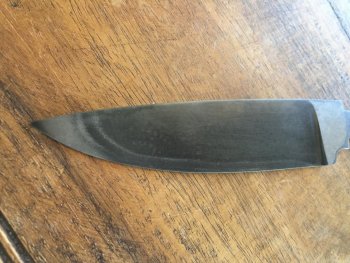
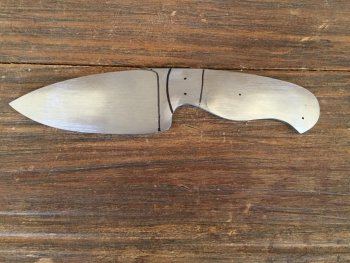
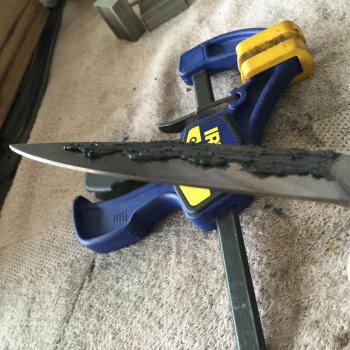
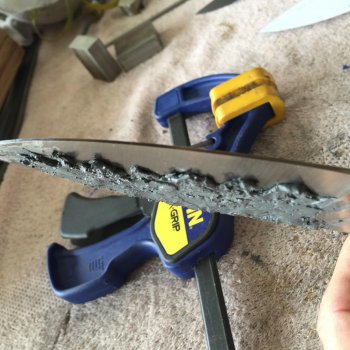
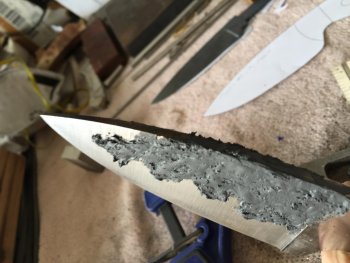
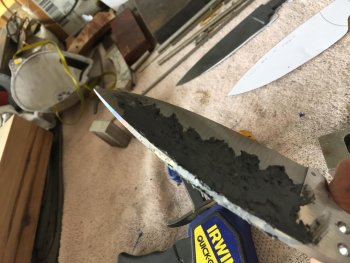
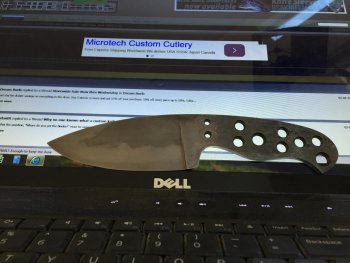
I wanta make a Hamon because my name is Hammond

Ahhh.....salts. That's right I forget about salts. I dream about them....but then reality sets in. I take back what I said about hamon activity and clay being the only way I know to get great activity. It can be done with the right geometry/temp/time/quench. "Look, ma. No clay!"
Nick Wheeler seems to be one of the masters at pulling out the crazy cool "accidental hamon" with no clay used. As for putting clay coated blade in a high temp salt pot, Howard Clark is the only guy that I have run across crazy enough to do that.
 
Here's what I do. Its what works for me, and you will find what works for you may be different, as it is for each smith.

I rough grind the knife. I get the edge to about 0.040", and have the blade evenly sanded to 120g. The clay doesn't pop off too early for me when I stay at 120g. It was hit or miss when sanded at 400g. Clean all oil, wax, fingerprints before applying clay. Make sure there are no rough edges or gouges, especially around the plunges/ricasso. Make sure there are no leftover scratches from the 60 or 36g belts. They may rear their head during the etch. Some people coat the entire blade with a wash of clay. That doesn't work with me for the brand I use. Try it with and without to see for yourself which you prefer. You don't need a lot of clay, max 1/8" at the thickest.

I let the clay set while I bring the oven up to temp. I use 1460f for W2 and 1095, 1465 for 15N20, and 1440for Hitachi White. I have only done two blades in 1075, and am still experimenting. I found 1450 too cool, and 1475 a bit on the warm side. My next one will be 1460. As a note, the 1075 blades are 1/4" thick, compared to the much thinner kitchen knives. This will affect soak and quench times. I use Maxim DT-48, which is similar to parks 50. In the kitchen blades, I use very thin clay, and I quench 2 seconds, out for three, in for three, out for 5 then finish the quench. I find this really enhances the drama in the ashi. Its safer to use a slightly thicker clay and just quench, but the drama is more subdued. The top kitchen knife in my previous post was done this way. It gives a mix of clay and time/temp activity, with extra cloudy action. You can do the same thing without a commercial oil, by using brine for the first quench to beat the pearlite nose, then subsequent dips in heated canola oil. You will risk a cracked blade every so often, but its mostly safe, maybe...

As the steel gets thicker, it gets a bit easier as a wedge cross section will try to naturally form a hamon. You will need to adjust the heat, amount of clay, and time in and out of quench to get the desired effect.

After tempering. I go back to 120g on the grinder, and clean everything up, then go to structured abrasives in u200, u100, u65, then u45. (approx 150, 220, 320, 400g) I can see the hamon clearly as soon as I get through the decarb in steels that do a hamon well. The 15N20 shows between 220 and 400g, depending on something I haven't quite figured out. The finer you hand sand, the more detail that will come out. The kitchen knives were only sanded to 1000g, as they are users. The finer you go in the kitchen, the more you have problems with food stiction.

I do the first etch in heated white vinegar, about a 15 min soak, then neutralize with windex. Polish with the powdered abrasives mixed with water to a toothpaste consistency. Clean then etch with a makeup pad and heated lemon juice. Focus on the fully hard parts of the blade. Oh, I forgot, put a few drops of dishsoap in the vinegar and lemon juice, it acts as a surfactant. Repeat until you are happy, or are worried you are losing your mind. If you don't have powdered abrasives, you can use rubbing compound from the auto store.

Don't get too obsessed. Its definitely a process that either wows you, or makes you want to quit.

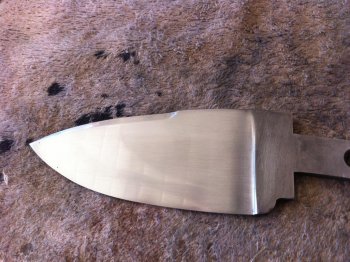
Warren, thanks for the detail. I am at the point of having etched with heated vinegar and now etching wilt lemon juice and buffing with powdered abrasives. When I etch the Hamon shows up very well. When I buff it kinda disappears. I am using various very fine grit (8,000 - 10,000) buffing creams and I am buffing it using a muslin disk on my Dremil. Do you think I'm doing something wrong? Thanks again for your help.

Wallace
 
Here are pictures of the Hamon I got. I suspect that this didn't come out too well because some of the heat resistant cement didn't adhere to the blade during the entire process. I would love some analysis and comments, particularly about how to get the Hamon to show up better. Thanks,

Wallace

IMG_1232.jpgIMG_1233.jpgIMG_1234.jpg
 
Power buffing washes out the Hamon in my experience. You want to buff lightly by hand. You want to remove the oxides on the surface, but you don't want to a race away the fine structures that cause the visual effect. The other thing that is really important is making sure you are completely past the decarb, and working with the good steel.

To to prevent the clay from blowing off, clean the blade with dawn dish soap and water. I sand the blade with 120g sandpaper. The clay sticks better in my experience. There is no right way to do this, just experiment and find what works for you.
 
Switch to Rutland brand black furnace cement and you'll never EVER complain that your clay fell off half way through. You might complain about the opposite, you had to grind the cement off. :)

Unfortunately, the pics don't give much to analyze. Hard to see what's really there.
 
What John said!!! and remember to degrease the blade before the application of the cement.
John, i have a question, since we use the same stuff; do you pre-go with an overall thin wash or just with the pattern above the bare blade when you "paint" the Ruthland?
Thanks

Stefano
 
What John said!!! and remember to degrease the blade before the application of the cement.
John, i have a question, since we use the same stuff; do you pre-go with an overall thin wash or just with the pattern above the bare blade when you "paint" the Ruthland?
Thanks

Stefano

I just use the cement in the pattern I want for the hamon. I've never done a thin wash over the blade first.
 
Thank you John, next time i will try without wash...i was using it both for disrupting the wapor blanket and for protecting a bit the edge area from decarburation, but i was definitely not getting a lot of hamon activity.

Stefano
 
Another question: On Aldo's site he says that W-2 is a water quench steel. Other places I have seen it described as the same as 01, oil quenched. Above, Warren says that the first quench is in water and then the follow on quenches are in oil. Is any one of these better than the other to get a Hamon. Also, is the in-out, in-out method of quenching necessary. Thanks again,

Wallace
 
W2 and W1 are indeed water quenching steels. Hence the "W". However, in knife sized cross sections (thin) water can cause too much stress in the steel once martensite starts to form (crack). And in all reality, water should no be used straight. It should be a brine solution. But since this can cause too much stress, we try oil. But the oil MUST be a very fast oil to achieve full/max hardness throughout the blade. Canola oil and the like will work in a pinch, but may not achieve full/max hardness, especially in thicker cross sections.

W1 and W2 require extremely fast oils to properly quench....ala Parks 50 7 second oil. O1 is NOT to be quenched in water at all, and is best served with a slightly slower oil, ala canola or AAA. So they are not the same in any respect, other than they are both carbon steels with slight alloying.

I'm not super educated on hamons, but a water (brine) quench will allow for more hamon "activity" than the oil quench.

What Warren mentioned is a good practice if you want to do brine quench, but realize the risks. Into brine for a quick hold, and then into oil.

My recommendation during quenching is to place the blade in the oil, agitate up and down, or forward and back (never side to side), and then leave it in the oil to cool to ambient. If you want to try the dual quench (I forget the proper term) mentioned by Warren, I would leave the blade in the oil once it goes in. However, you will need to check for straightness so you'll need to pull it out of the oil, give it a look see, straighten if needed, and back into the oil for cooling to ambient.
 
Interrupting the quench can give you extra activity not related to the clay line. I do a few hamons simply by controlling the heat in the steel, and cooling the thinner areas, but interrupting so the thicker areas cool slower, and therefore not forming martensite. The transition looks more like billowy clouds than a line. Nick Wheeler is quite good at this.

As Stuart notes, you need a fast oil to do this right. The reason to use brine then oil is that brine cools the steel very fast, and this causes huge stress in the steel. Broken blades tend to happen in the latter stages of the phase transformation, so using oil after the first part of the quench results in slower cooling during this critical time, and therefore less stress toward the end of the quench. It's just a stopgap to try to prevent a broken blade. The fast commercial oils control this for you. I still interrupt to get the clouds in the hamon, even though I have a commercial oil.
 
Why don't you do a trial of three simple blade like objects ground as a wedge shape. Try brine only, brine then oil, then oil only. You will get a sense of what each does and does not do for you.
 
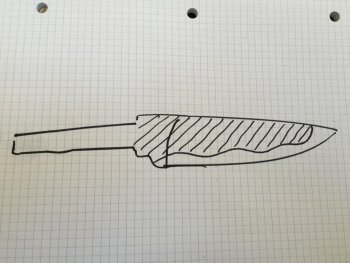
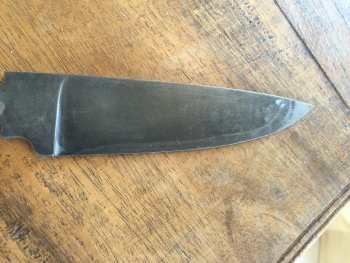
I'm beginning to become a little frustrated with this whole deal. here is my second attempt at this Hamon "thing". The steel is W-2. I ground it to 120 grit and the blade was coated with heat resistant cement in the pattern as marked on my diagram. I heated it to non-magnetic (I don't have an oven) and tried to "soak" it there for about 10 minutes. Than quenched it in Canola - 2 seconds in - 3 seconds out and back in to finish. Cleaned it up 120 grit, 220 grit and 600 grit. Hand sanded with 220 and 500 grit to a really nice finish (no sign of a Hamon at that point). Then etched in heated vinegar for 15 minutes and then polished with 0000 steel wool. What I got you can see in the picture - no sign of the wavy line I put in the cement and the double line of the Hamon I did get. I'm beginning to think that I should put this process on hold until I can afford a heat treat oven so I can better control my temp and soak time. What do you think? Thanks,

Wallace


IMG_1319.jpgIMG_1318.jpgIMG_1317.jpg
 
Three things that come to mind instantly:

1: Too much time at temp

2: Too much clay, too thick, too low on the blade

3: Possibly the canola is too slow or, the combination of 1 and 2 above.

All of these can definitely affect the activity in your hamon and where it is on the blade.

If your clay application was like in your drawing, I'm not at all surprised that it ended up relatively straight (meaning paralleling the cutting edge) more like what an edge quench would look like. In fact, it's just what I would expect from that clay application.

You have to remember that you are not likely to get your hamon to look like your clay. Rather, you have to change your mindset to think about using your clay to influence what you want the hamon to end up like. That very well might not make sense right now. But keep at it and it will eventually. I'm not trying to be secretive or vague. I just don't know a better way to explain it.

You don't have enough variation in your clay application to get much in the way of activity unless it was coupled with drastic changes in blade geometry and thicknesses, which in that sized blade, you simply can't have. So you have to rely entirely on your clay placement. And there just isn't enough variation.
 
Last edited:
There are a couple things to keep in mind.

If hamon is the goal, it is critical to use a good steel, which you are. W2 and 1075 are my favorites by far with 1095 being a very distant third. I can never get the activity out of 1095, especially Aldo's, that I can with the other two steels. Also the quenching medium here is critical. I'd use the very fastest thing I felt comfortable with. For me, it's Parks 50. But I may play around with brine quenching in the near future.

When I use clay, I try to think about where I want the hamon on the blade. Then I think of it terms of, "What do I need to do with this clay so that the steel underneath has a hard time hardening. You may have to play around with the clay and see if there are areas it needs to be thinner or thicker.

Cross sectional geometry of the whole blade plays a big part. When going for good hamon, I like thicker spines and thin edges with radical distal taper from ricasso to point. Thicker areas need less clay because they have a hard time coming to temp as quick as the point and edge and have a hard time cooling fast enough to harden as it is. A layer that is 1/16" thick is plenty on the ricasso and thicker parts of the upper spine. I use a little more near the tip where the steel is thinner and it tries to harden underneath the clay.

I try to use less soak time if I'm using temps in the upper end of the austenitizng range, never exceeding 1475. A little more of a soak could be acceptable in ranges around 1450 or so. I personally try to shoot for 1460 with w2 and 1075.

By far, the most active hamon I've gotten is using time/temp control and no clay. This shows how critical blade geometry is. I do have the advantage of high temp salts for this and that makes things easier to watch and gives predictable and repeatable results. But it could be done in an oven or forge too.

Clay might be the best method to achieve consistent success though when your first playing around with it. Don't misunderstand me, I'm no pro and I am continually learning things every time I quench a blade. I have just enough experience with it to know that I don't have anything about it figured out yet. :D

Here is an example of a blade I quenched last week with no clay. It has just a very rough 120 grit finish with no etching and the hamon can be easily seen in any lighting. Even in these pics it's quite active both above and below the main transition line, but in person rolling it in the light, there are things I can't capture in pics. There is a LOT of activity to bring out with etching and polishing cycles.


John:

I can't tell you how much I appreciate your help. I takes time to write comments as thoughtful as yours and I thank you for the time you have spent helping me. By way of update: This morning I took the knife that I photographed above and annealed it. My intention is to just re-harden it and use it without a hamon. Then I cut out a new knife from 3/16" W-2 that doesn't have any corners and that I think will handle the brine quench better. I'll grind this knife with a more distinct distal taper and will try to get it down to about .04 on the cutting edge. Once I get it ground down I'll put the heat resistant cement on it and post a picture before I quench it. My plan is to hit it 2 seconds in the 20% brine and then go directly to canola and leave it there until it is finished. I'll keep you posted. Thanks again,

Wallace


IMG_1320.jpg
 
As anyone who works with hamons knows, its a love/hate thing. If you can accept that it won't always work the way you want it to, the it gets less frustrating. 3/16" , distal taper, and careful clay application are great, and the brine/oil combo will get you closer. The next thing is to look into temp control, such as a pyrometer in the forge, to keep track of temps. Its really important. If you go over 1475, you might as well let it cool and start over, in my humble experience. I just did a set of 6 steak knives, and the hamons were horrible, amongst the worst I've ever done. Its how it goes. Geometry worked against me in this set. The customer knew he didn't pay for the hamons so the fact that he got a little bit of activity in the knives was a bonus anyway.
 
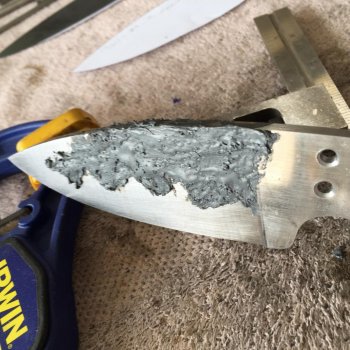
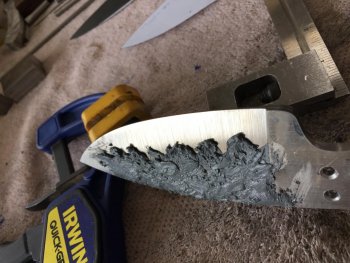
Here are the pics of my cement application. This knife is 3/16" at the spine and has been ground to .050" on the cutting edge. I ground it with 80 grit and did not take it lower than that. The cement is thicker towards the cutting edge and gets thinner as it gets up towards the spine. My plan is to first quench 2 seconds in a 20% brine solution and then go right to canola oil. I'm sure I need some help on this and won't quench until I get some comments on my prep process. Thanks you guys, I really appreciate the help.

Wallace


IMG_1323.jpgIMG_1322.jpgIMG_1324.jpgIMG_1325.jpgIMG_1330.jpgIMG_1331.jpg
 
I don't make the clay thicker toward the edge. I'm not sure if anyone else does, but I've never heard anyone comment on doing that. With a hamon, less is more. Less clay and less heat. You want just enough to get the job done. Too much clay will result in a heat sink that can wash out the activity. Aldo's W2 is so responsive that my clay is so thin its transparent in a lot of areas. I say thin the clay a bit and go for it. :cool:
 
I think I did it - sort of. . . . . . I took the knife back to the belt grinder and ground down the cement to about 1/32" in thickness - man, was it hard. Then heated to non-magnetic and quenched 2 seconds in 20% brine solution and then immediately into 140* Canola Oil. Went immediately to temper (2 cycles of 300* for one hour and air cool). Cleaned it up on the grinder and took it to 600 grit. Then hand sanded to 1200. Then 15 minutes in heated white vinegar and a brush with 0000 steel wool. Here is what I got:


IMG_1332.jpg I mitta made a Hamon!
 
Back
Top