You are using an out of date browser. It may not display this or other websites correctly.
You should upgrade or use an alternative browser.
You should upgrade or use an alternative browser.
KDM designed by HHH Knives WIP
- Thread starter SHOKR
- Start date
SHOKR
Well-Known Member
ok gentlemen (and ladies), we're back in business!!
sorry i was late, just was going through some stuff, then sick, then busy...
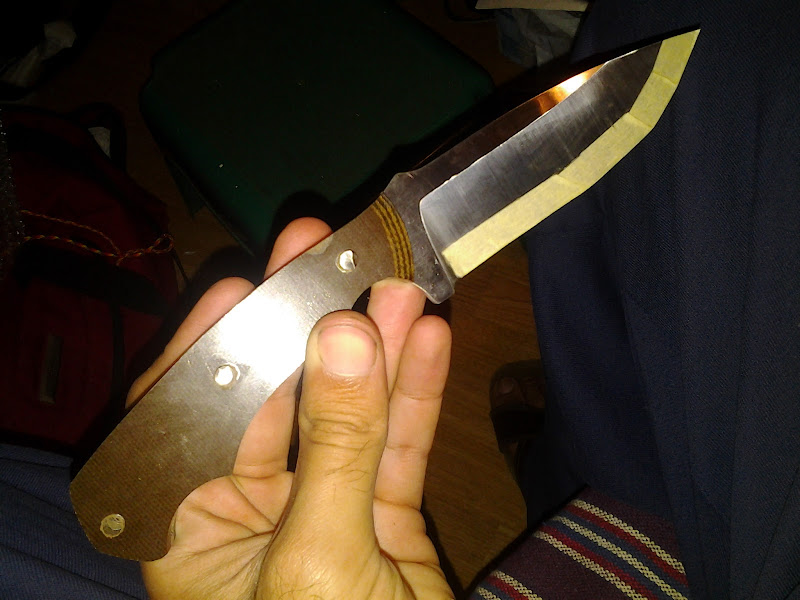
a week ago i started working on the knife again
thats knife after HT (along with another one im working on)
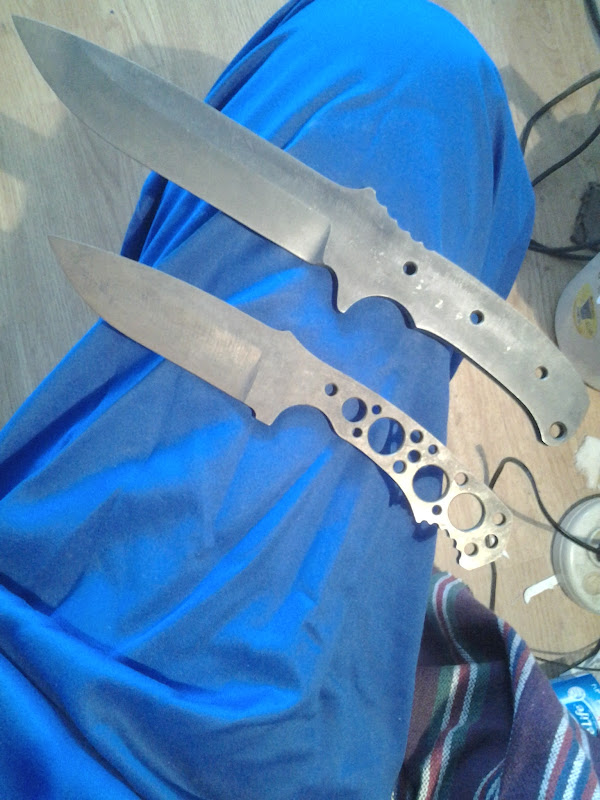
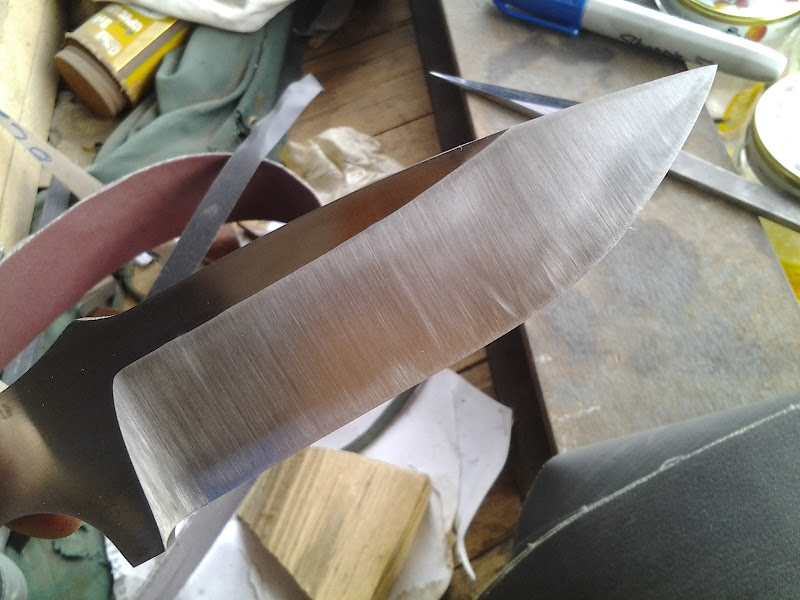
after grinding the bevel with 40g belt. and clean up of course")
sorry i was late, just was going through some stuff, then sick, then busy...
a week ago i started working on the knife again
thats knife after HT (along with another one im working on)
after grinding the bevel with 40g belt. and clean up of course
Last edited:
SHOKR
Well-Known Member
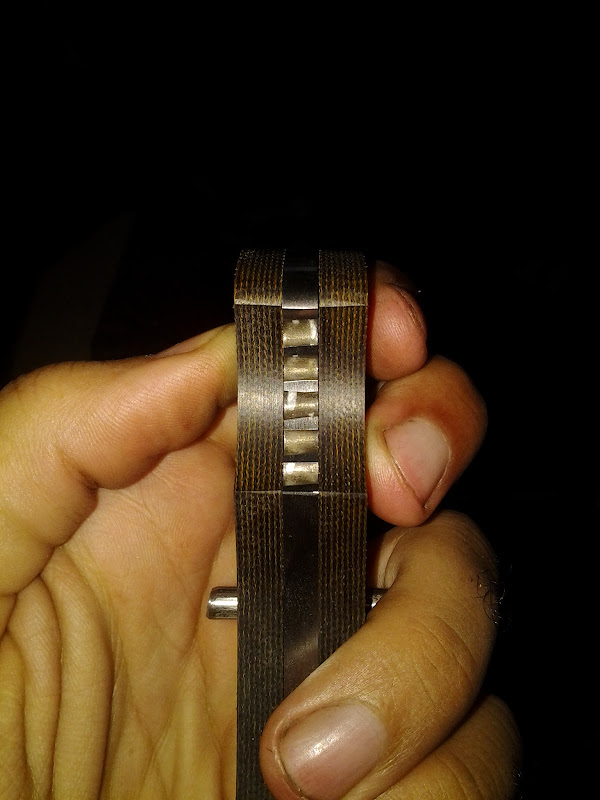
discovered this 2 flaws
at the choil, its not level
now that was not easy to do, but surprisingly i didnt mess it up
took it to grinder, used the 1/4" wheel with 320g (if i remember correctly) and just slight touch up.
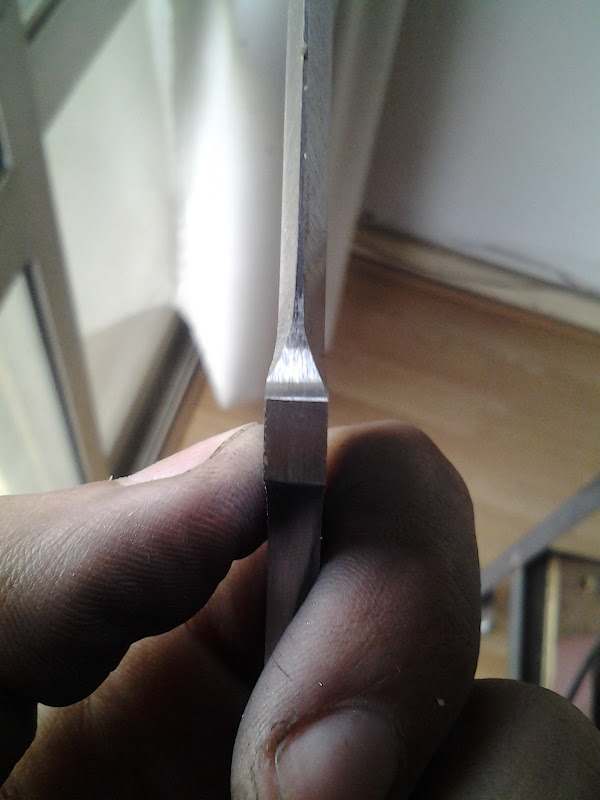
fixed, it looks crooked in the photo a bit i thonk, but its actually its level. but knowing my skills at the choil/plunge cut i probably will be 'visiting' this part of the knife again lol
the second one:
a chip or dent on the edge itself
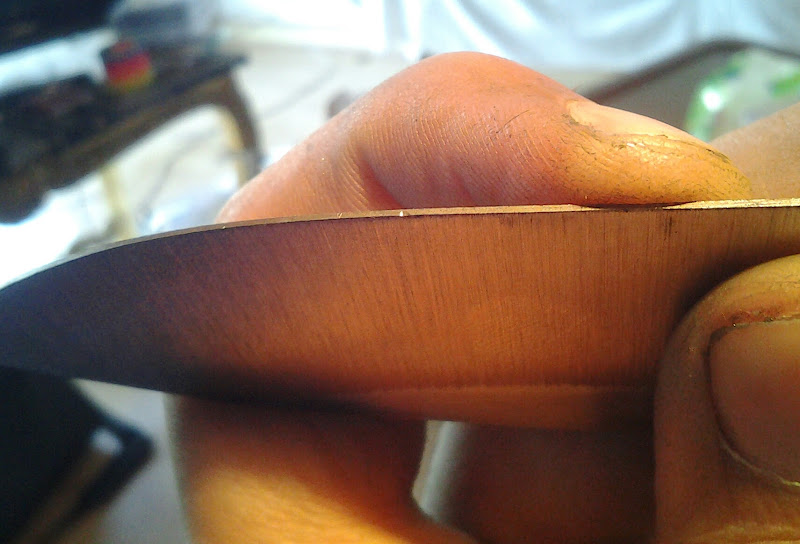
slight touch up on the belt and all is good to go.
while cleaning and grinding the part above the bevel, i had a trouble i used to have before. the part of the knife at the top of the platen gets a gouge, i was never SURE about the reason, but the most likely one is the welded part of the belt is too rigid so it creates kind of a bumb everytime it passes.
so after a bit of this i decided i would do it by hand
started with 120 then 220

have you seen my workbench?! fancy huh?! well, its an upgrade from a wood bar stool so im happy
i get by ok when doing the part above the bevel this way, any tips to improve it? laying it one the sand paper on a flat surface is better but doesnt always do it for me.
as for the spine, due to the thumb rest i couldnt do it on the platen, when i tried the wheel attachement it created the wavey thing when the belt weld passed, so after removing the HT scale i went ahead and did it by hand as well, used 120g belt
at the choil, its not level
now that was not easy to do, but surprisingly i didnt mess it up
took it to grinder, used the 1/4" wheel with 320g (if i remember correctly) and just slight touch up.
fixed, it looks crooked in the photo a bit i thonk, but its actually its level. but knowing my skills at the choil/plunge cut i probably will be 'visiting' this part of the knife again lol
the second one:
a chip or dent on the edge itself
slight touch up on the belt and all is good to go.
while cleaning and grinding the part above the bevel, i had a trouble i used to have before. the part of the knife at the top of the platen gets a gouge, i was never SURE about the reason, but the most likely one is the welded part of the belt is too rigid so it creates kind of a bumb everytime it passes.
so after a bit of this i decided i would do it by hand
started with 120 then 220
have you seen my workbench?! fancy huh?! well, its an upgrade from a wood bar stool so im happy
i get by ok when doing the part above the bevel this way, any tips to improve it? laying it one the sand paper on a flat surface is better but doesnt always do it for me.
as for the spine, due to the thumb rest i couldnt do it on the platen, when i tried the wheel attachement it created the wavey thing when the belt weld passed, so after removing the HT scale i went ahead and did it by hand as well, used 120g belt
Last edited:
SHOKR
Well-Known Member
todays work:
all was going good so far, then... dum dum daaaa

started grinding using 220 belt and you can probably see were i went wrong. work on the near side, then discovered the mistake i made in the curve near the tip. and of course mistakes seldom come in ones
started working on the other side until i think of a way to fix the near, made other bobos as well!!!
seriously, why does the first mistake bring behind it the avalanche?!
here are close ups to the blade

i think my options are, go higher with bevel (which i dont want to do, i want the bevel at wider angle to maintain its strength), do a swedge, or grind at a different angle
any advice?
and here is the other side, which i messed up even more

deep gouges, and the bevel near the tip for some reason, i kept laying the bevel flat on the plated but on the middle got ground no matter what i did, i am suspecting it was the belt curved outwards a bit (this happens when i work on the plunge cut on the edge the shift the belt to the other side, the purt that was at the edge of the platen is permenantly curved outwards, which often creates the 2" gouges/scratch)
also the tip got really thin due to what happened
that was the sign i needed to stop, relax, think and start another time
stay tuned. comments, suggestions, guidance and candy are welcome!
edit: i am suddenly VERY aware of the strange amount of mistakes i made or problems that met me with this knife and i cant help but wonder, is it too advanced for me? am i getting worse at this? or i just go through this often but having to document it makes it more significant?
all was going good so far, then... dum dum daaaa
started grinding using 220 belt and you can probably see were i went wrong. work on the near side, then discovered the mistake i made in the curve near the tip. and of course mistakes seldom come in ones
started working on the other side until i think of a way to fix the near, made other bobos as well!!!
seriously, why does the first mistake bring behind it the avalanche?!
here are close ups to the blade
i think my options are, go higher with bevel (which i dont want to do, i want the bevel at wider angle to maintain its strength), do a swedge, or grind at a different angle
any advice?
and here is the other side, which i messed up even more
deep gouges, and the bevel near the tip for some reason, i kept laying the bevel flat on the plated but on the middle got ground no matter what i did, i am suspecting it was the belt curved outwards a bit (this happens when i work on the plunge cut on the edge the shift the belt to the other side, the purt that was at the edge of the platen is permenantly curved outwards, which often creates the 2" gouges/scratch)
also the tip got really thin due to what happened
that was the sign i needed to stop, relax, think and start another time
stay tuned. comments, suggestions, guidance and candy are welcome!
edit: i am suddenly VERY aware of the strange amount of mistakes i made or problems that met me with this knife and i cant help but wonder, is it too advanced for me? am i getting worse at this? or i just go through this often but having to document it makes it more significant?
Last edited:
Steven Long
Well-Known Member
This has been my problem. I get it close to where it needs to be then I guess I get comfortable and quit thinking properly. All of a sudden, it has to go in the scrap bucket.
I think you could save it by just grinding the bevel a little higher. It doesn't look like it goes too far up.
Looks great so far! That's a beautiful pattern Randy let you use.
I think you could save it by just grinding the bevel a little higher. It doesn't look like it goes too far up.
Looks great so far! That's a beautiful pattern Randy let you use.
Josh Dabney
Moderator
Your NOT getting "worse" ! Just growing pains I assure you. This kind of stuff happens to veteran makers as well... they just don't fret about fixing it.
That would be a pretty deep swedge. I'd go for running the bevel higher personally but either would work.
Run the bevel higher just don't "roll out" so much to maintain thickness and strength in the tip.
If you get the tip thinner than you want profile a little off to thicken it back up.
FWIW- It's not a mistake unless you leave it and call the knife completed. Right now it's just part of the grindig process
It's absolutely important to use a sharp belt to fix this !!!!!!!!!!!! A couple more explaination points for effect.... !!!!!!!!
WIP's comming along great
-Josh
Drew Riley
Well-Known Member
Great WIP. Lookin' forward to seeing this one finished up.
SHOKR
Well-Known Member

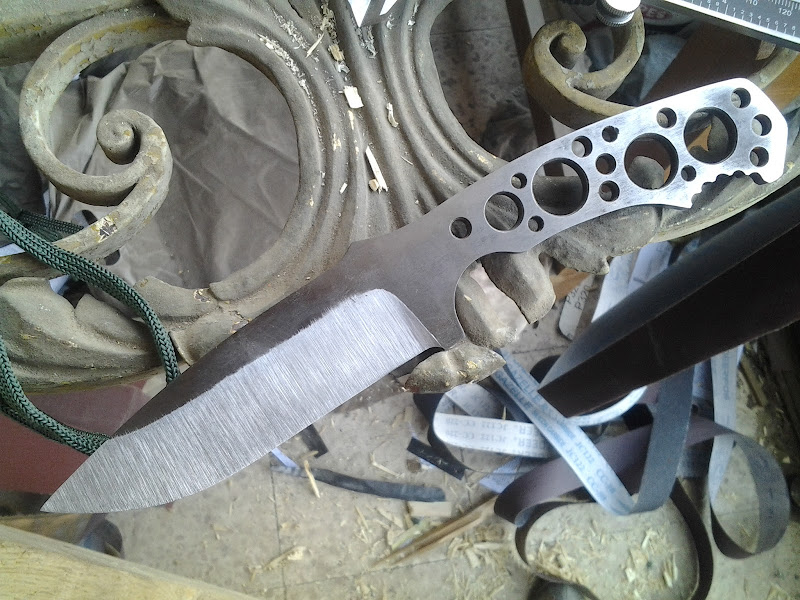
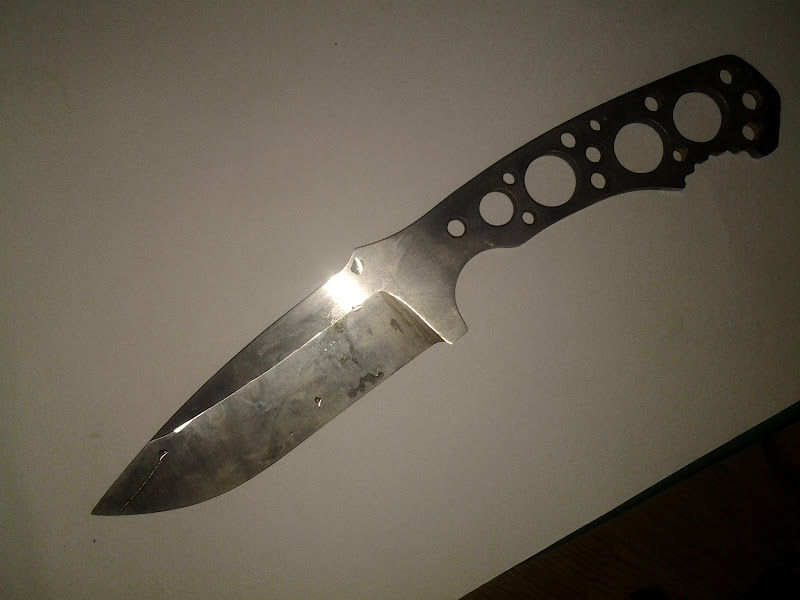
both sides fixed and taken to 400 grit
will still need bit of work but anything else will be by hand. while fixing the bevel i made the same mistake again at the curve, so needed to take it even higher!
since my platen is not attached right (problem with its machining) i have hell of a time evening out the plunge, its still not so even, but i am afraid if i work on it more will blow the whole area apart
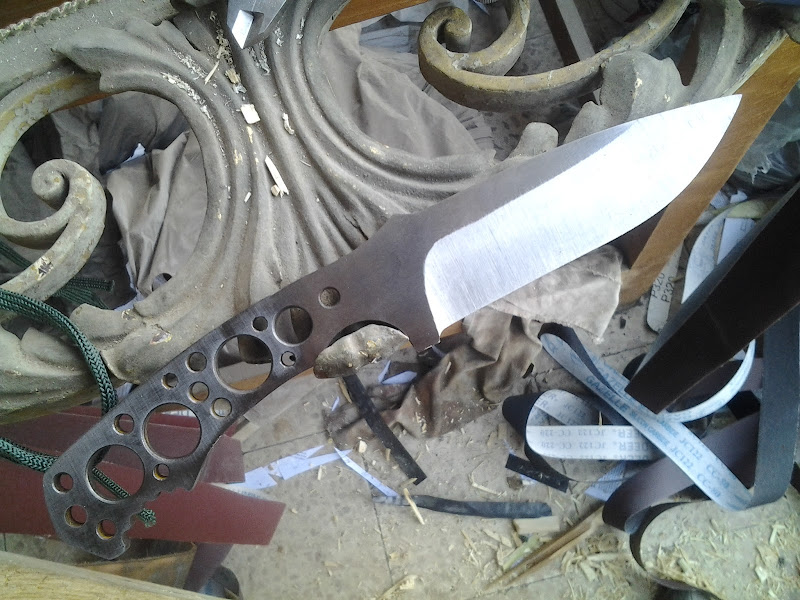
now time for some testing!! i put a quick edge on it, 200g, then 400g (reverse) then strop, also reverse
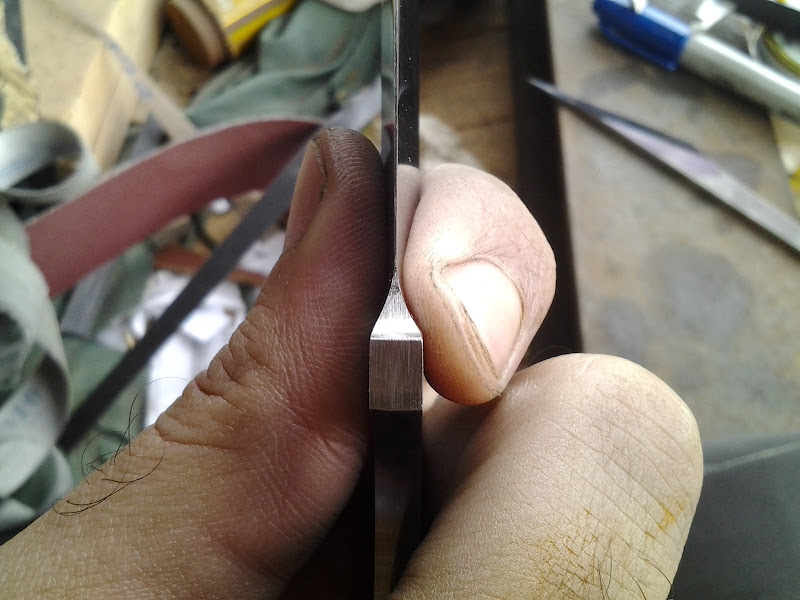
btw i forgot to mention, the edge thickness was between 0.013 and 0.014 along the entire edge

paper, i cut more but only took pic of that
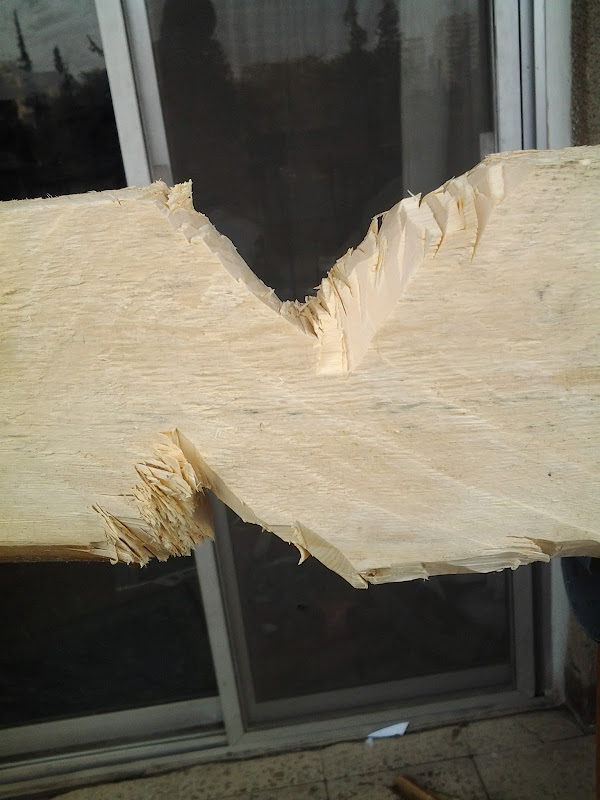
2x4, the reason i stopped there was apparently i tried chopping wrong for a while, my hand hurt and i almost lost control on the blade (almost flew from my hand into the street). its great with wood, just its light so needs more chopping than larger knives
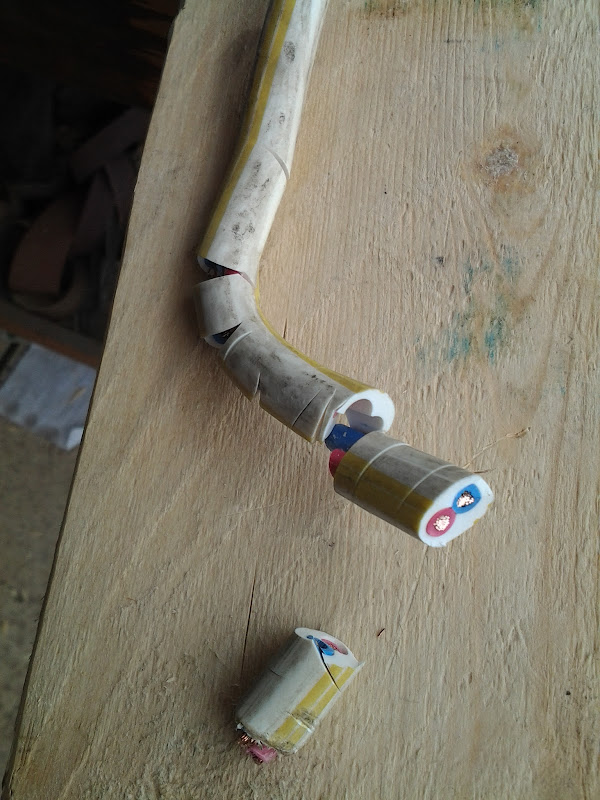
chopping 1cm 'AC wire'
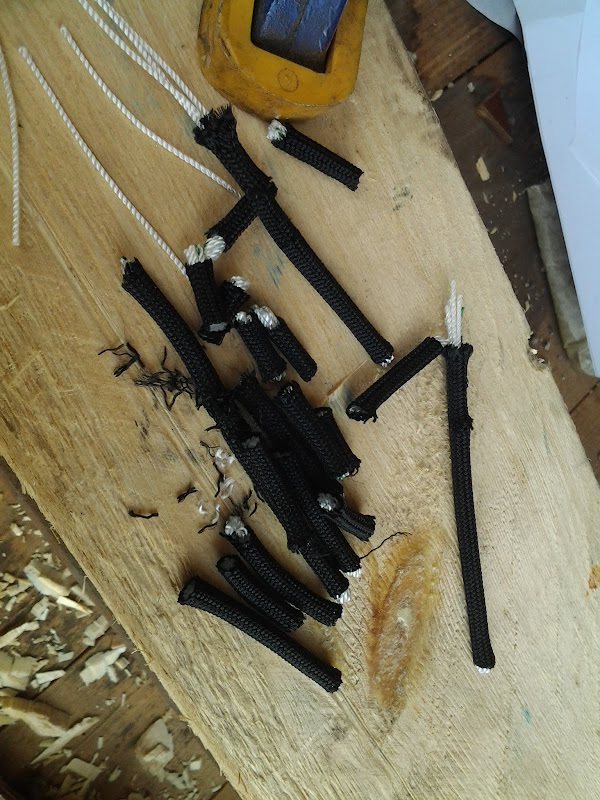
folded paracord into 16 layers and just cut them with downwards pressure

bit of batoning and chiseling. that was little over 4/5" deep
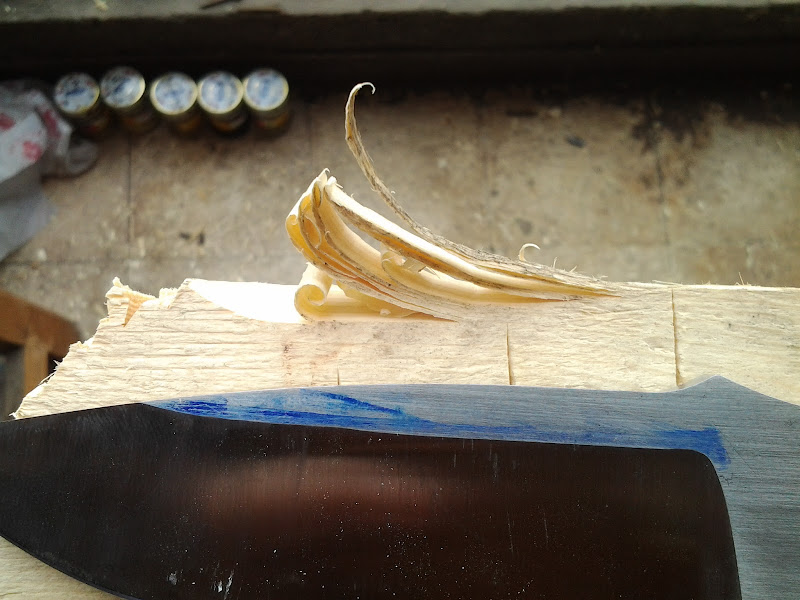
peeling wood, i put the knife there for size reference. no trouble starting a fire when you have this one
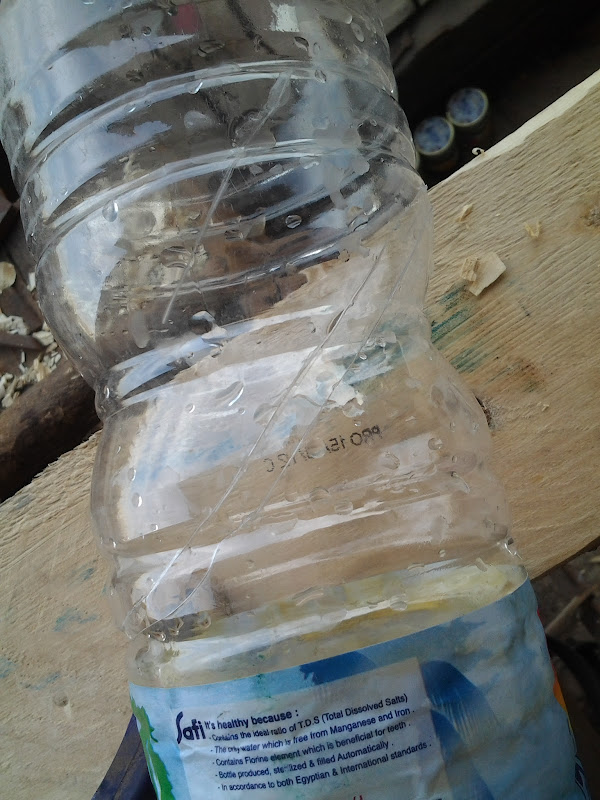
slashed a water bottle, i wanted to cut it clean, but the diameter is almost as long as edge, was hard to accomplish. first slash was actually so thin it only let in air until i did the other one
now, the boboes of the process, i did say this might end up what not to do, and i deliver
1
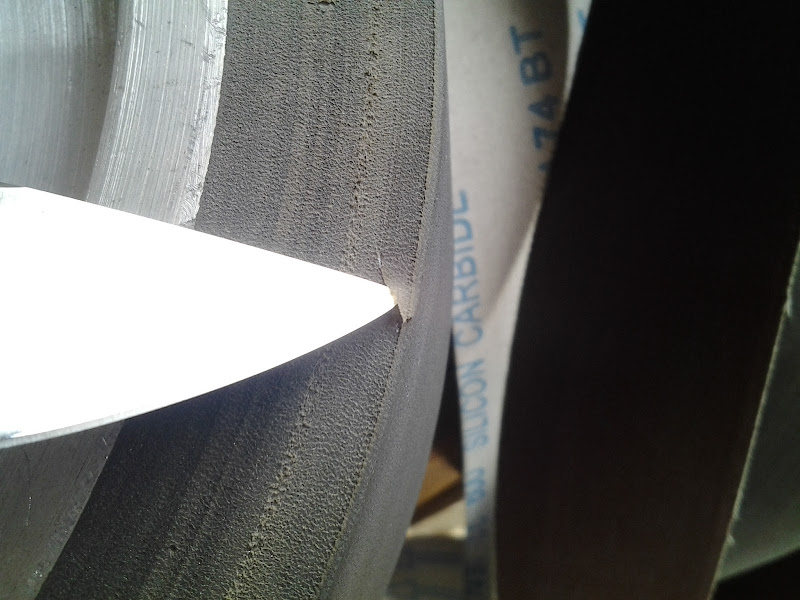
when cutting, slashing, or slicing be very careful whats in the extended path of the knife. thats my 10"wheel, that happend when i was cutting paper
2
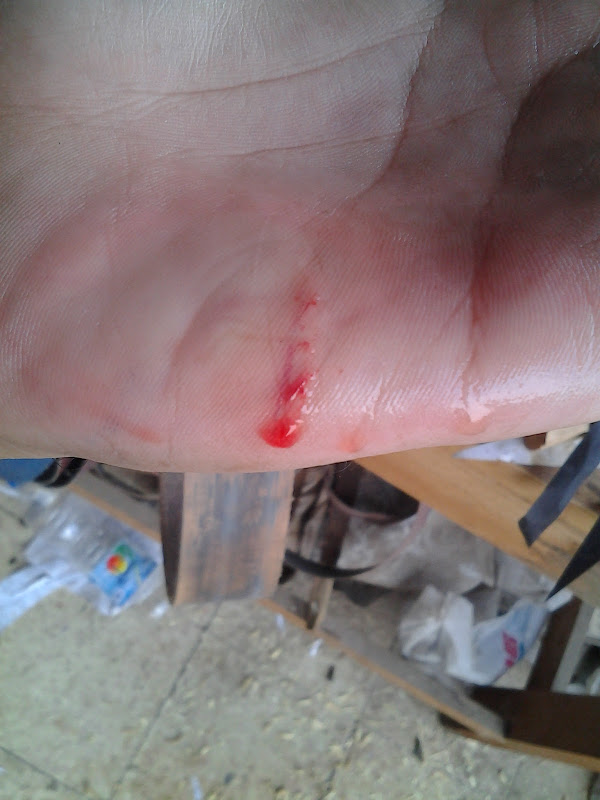
we make things that cut, not just cut, cut really well!! NEVER lose focus. i am used to cleaning the knives when wet (and because i dont usually sharpen them before i am completely done with finish work) i absent mindedly wiped this on my hand. the plus side is it was so sharp it sorta peeled the skin instead of digging into the hand!
3
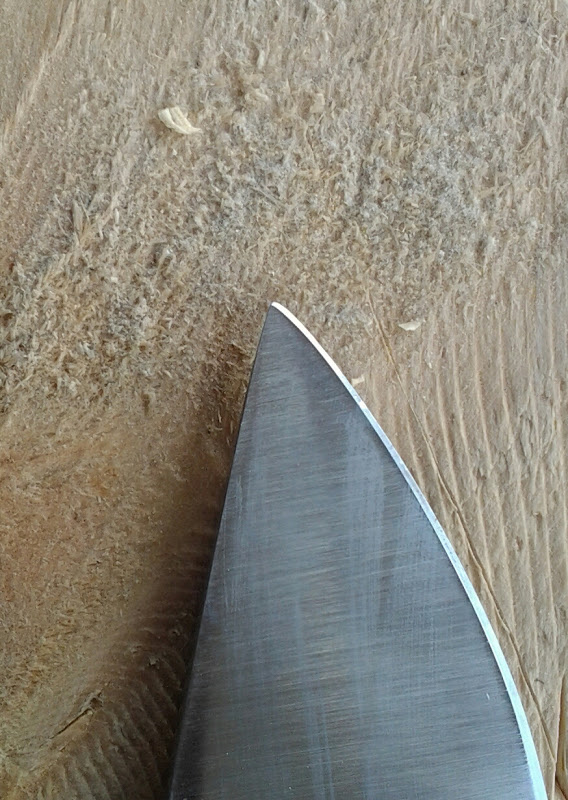
this happens to me a lot, if anybody knows what im doing wrong please let me know. when sharpening i remove that pointy tip of the knife, it curves, i know that due to getting it too thin, but how to avoid it?
i did fix it by lightly grinding part of the spine (but seems i forgot to take a photo)
next comes handle shaping and etching the blade
i never etched a blade (well, once but i wanted to ruin it on purpose) and never shaped before gluing, so both should prove interesting experiences
comments, tips, advice and info are welcome if not mandatory
Steven Long
Well-Known Member
Looks like you did a great job fixing the issue you ran into.
I'm really looking forward to seeing how this one comes out. Great job so far!
I'm really looking forward to seeing how this one comes out. Great job so far!
SHOKR
Well-Known Member
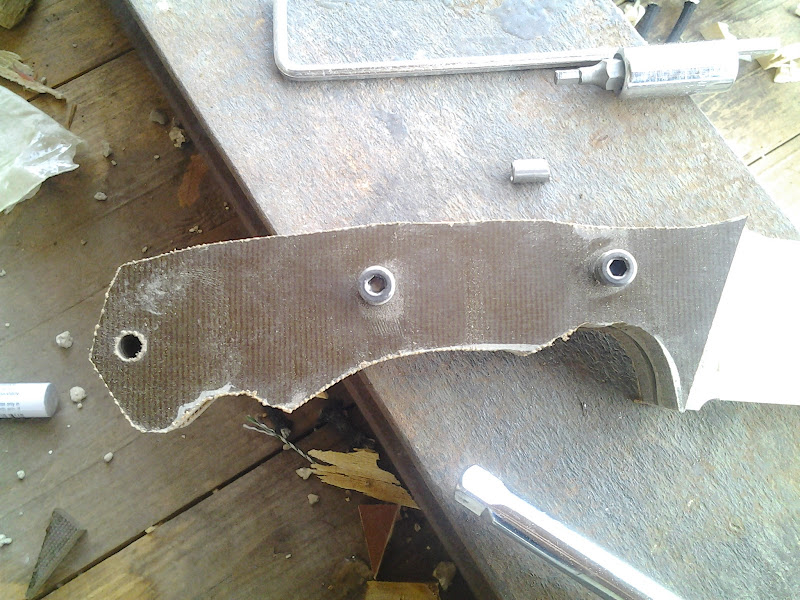
roughly marked the scales and cut them
because this is a military model, i went with the best tactical handle material i know, canvas micarta, double green and double black.
i used to drill holes around the entire profile and then seperate with chisel (be careful, if the distance between holes is too large and strong you could crack the wrong places of the scales) or saw but now i cut straight lines with my angle grinder using the same disc i use for steel, i dont know if thats 'right' or 'wrong' but helps get the job done way easier and faster, and i still drill few holes for curves. till the day i get a band saw or something better!!!

to make sure the scales are flat i hand sand them on a flat grinite piece, used to go with 150g, but found out 60 does the job better. since this has one side laminated nad the other isnt, i did marks on it with a marker and kept sanding till the marks disappeared
holes drilled, that was a simple process so i didnt photograph it (actually i forgot), i often struggle with the clamps i use to fasten scales to knife, most recently Tony Metsala directed me to twist klamps, they require some getting used to but they are pretty good, for me at least better than c clamps and locking pliers (pliers might be faster to use but they leave deep marks) i also liked the locking clamps, but the ones i found locallu for reasonable price were really big
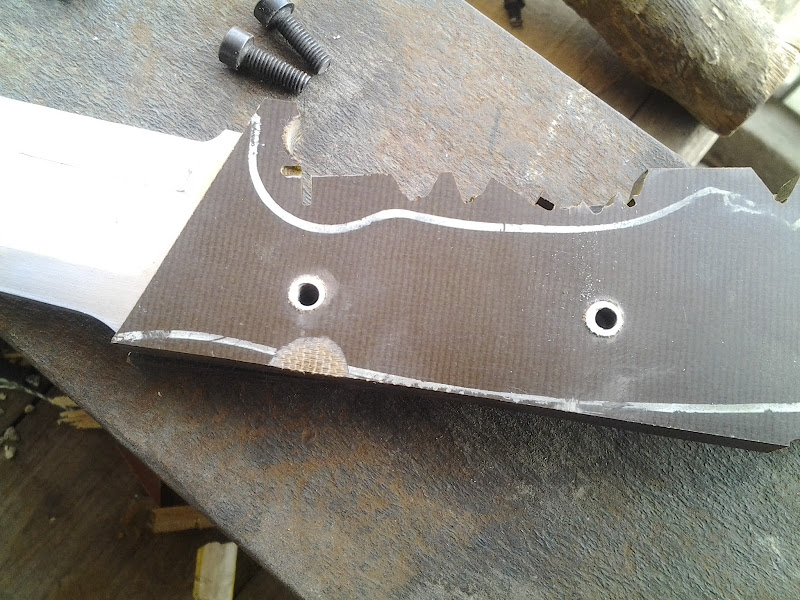
i also inserted the threaded tubes, i wanted to attach the handle with screws so it can be taken apart if needed, i changed my mind, you will find out why in a bit
marked where i will cut the tubes to fit exactly the thickness of the handle, this is done just till i profile the scales, was going to counter bore the scales later.

question tho, what do you guys believw best be the minimum safe thickness left in a scale after counterbore? (the part between the screw head and the tang)
here is a photo taken of the inside of the scale
you will notice i countersank the holes, this cleans any material that 'stuck out' after drilling which can push against the tang, also that space will house epoxy, which creates a strong bond around the pins. however i absent mindedly did all the holes, including the lanyard one. but again than will be filled with epoxy and i can clean it with a drill bit and a reamer

because this is a military model, i went with the best tactical handle material i know, canvas micarta, double green and double black.
i used to drill holes around the entire profile and then seperate with chisel (be careful, if the distance between holes is too large and strong you could crack the wrong places of the scales) or saw but now i cut straight lines with my angle grinder using the same disc i use for steel, i dont know if thats 'right' or 'wrong' but helps get the job done way easier and faster, and i still drill few holes for curves. till the day i get a band saw or something better!!!
to make sure the scales are flat i hand sand them on a flat grinite piece, used to go with 150g, but found out 60 does the job better. since this has one side laminated nad the other isnt, i did marks on it with a marker and kept sanding till the marks disappeared
holes drilled, that was a simple process so i didnt photograph it (actually i forgot
), i often struggle with the clamps i use to fasten scales to knife, most recently Tony Metsala directed me to twist klamps, they require some getting used to but they are pretty good, for me at least better than c clamps and locking pliers (pliers might be faster to use but they leave deep marks) i also liked the locking clamps, but the ones i found locallu for reasonable price were really bigi also inserted the threaded tubes, i wanted to attach the handle with screws so it can be taken apart if needed, i changed my mind, you will find out why in a bit
marked where i will cut the tubes to fit exactly the thickness of the handle, this is done just till i profile the scales, was going to counter bore the scales later.
question tho, what do you guys believw best be the minimum safe thickness left in a scale after counterbore? (the part between the screw head and the tang)
here is a photo taken of the inside of the scale
you will notice i countersank the holes, this cleans any material that 'stuck out' after drilling which can push against the tang, also that space will house epoxy, which creates a strong bond around the pins. however i absent mindedly did all the holes, including the lanyard one. but again than will be filled with epoxy and i can clean it with a drill bit and a reamer
Last edited:
SHOKR
Well-Known Member
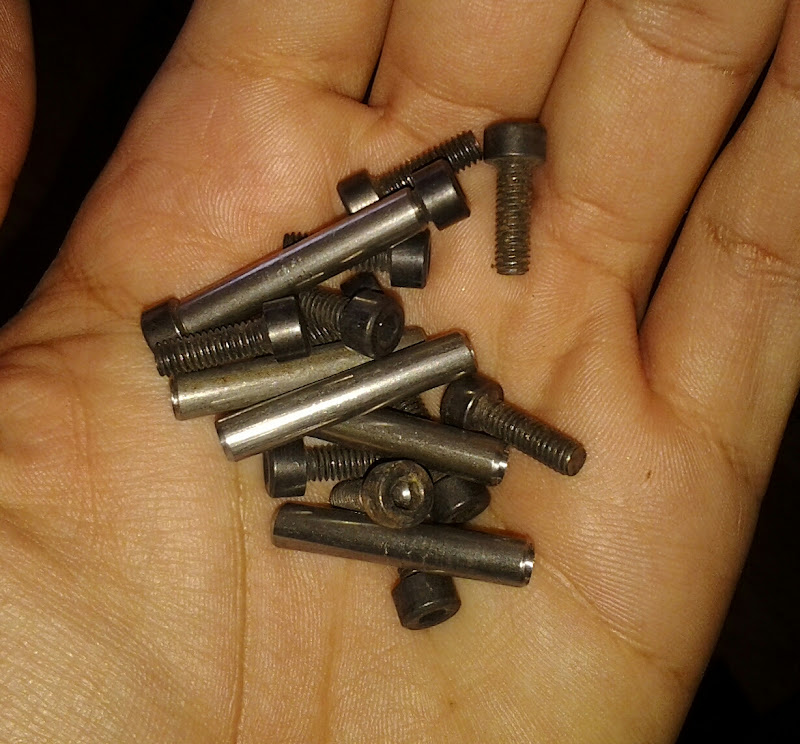
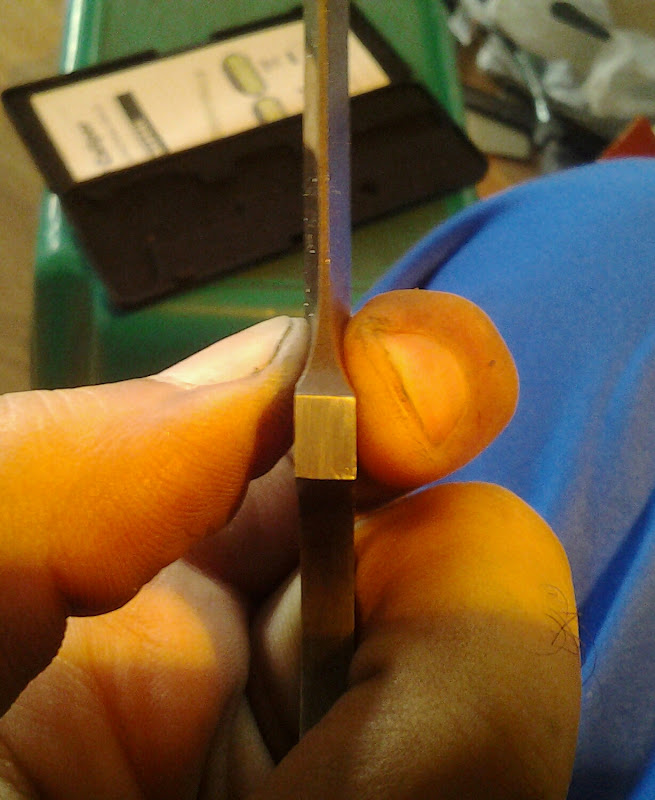
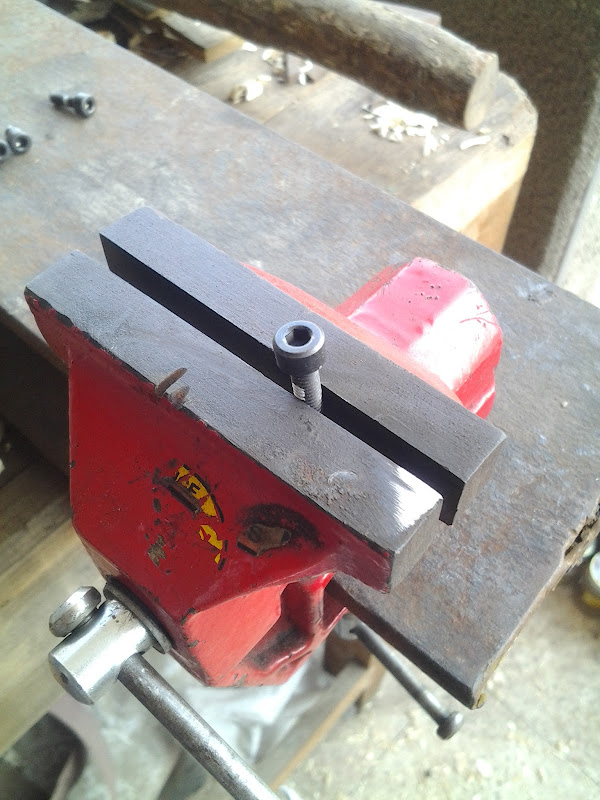
thats a close up to the screws and tubes. according yo the seller they are made of 'iron' and the screws are coated, i thought tubes will be inside so no problem and coating should prove suffiecient, im statting to have doubts about that

also same tube, different screws, but i liked the others better
SHOKR
Well-Known Member
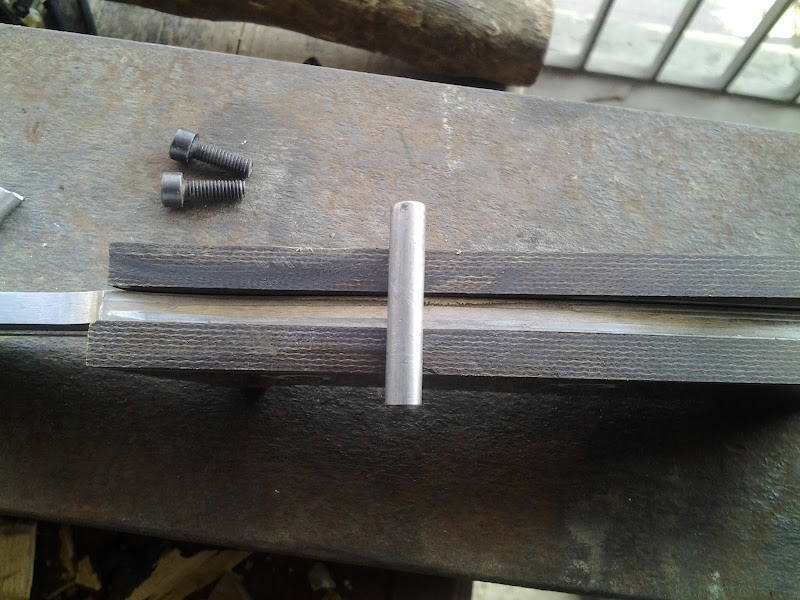
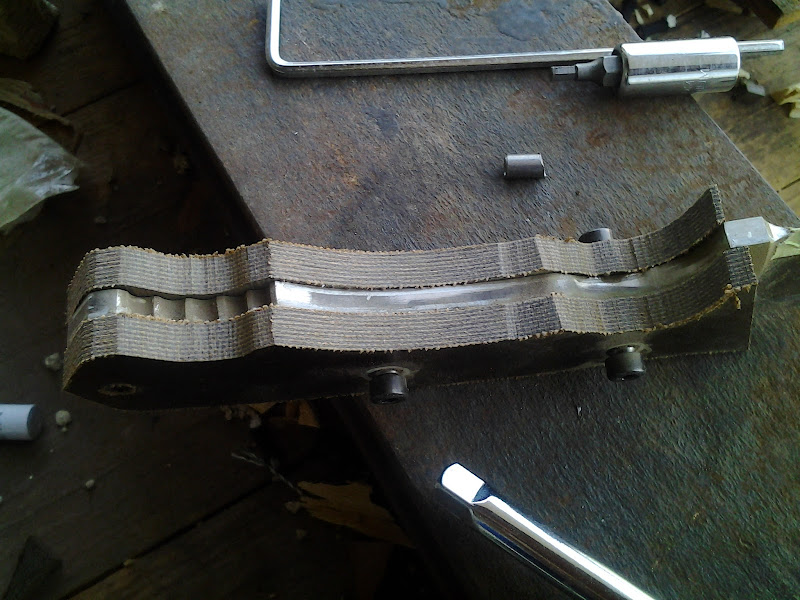
i cut and ground the tubes flush with the scale surface (generally i would have counterbored them, but since this os my first time i wanted to test them and didnt want to do something i cant take back, i was right)
original length of tube
now screws will be too long for tube, so i lay them like that and mark ( this will ahorten them more than needed now, but not too short when o counterbore)
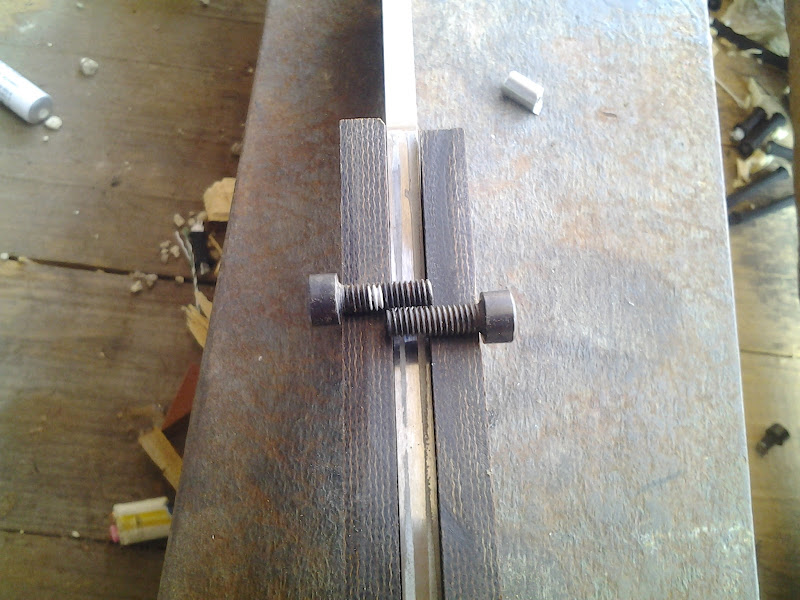
thats how i do it, in vise and cut with angle grinder
they need 'clean up' on grinder afterwards. holding something so small against a grinder with no proper tool is dangerous and not easy!!! you guessed it! i held it with my hand, was hell considering my right hand thumb was cut near the tip!! i have nothing to hold a screw firmly in place without having it swing when i rotate it around on the belt

original length of tube
now screws will be too long for tube, so i lay them like that and mark ( this will ahorten them more than needed now, but not too short when o counterbore)
thats how i do it, in vise and cut with angle grinder
they need 'clean up' on grinder afterwards. holding something so small against a grinder with no proper tool is dangerous and not easy!!! you guessed it! i held it with my hand, was hell considering my right hand thumb was cut near the tip!! i have nothing to hold a screw firmly in place without having it swing when i rotate it around on the belt
SHOKR
Well-Known Member
started profiling free hand with 40g belt and thats where i will stip
note: Josh Dabney advised me to keep a belt just for handle material, and that was a very sound advice, keeps belt freah, and cuts without overheating and burning handle material
profiled with 120g
at this point i have alrwady realized that the screws and tubes were of such low quality i didnt want to use them on this knife anymore. i will still test them once more, but seperately
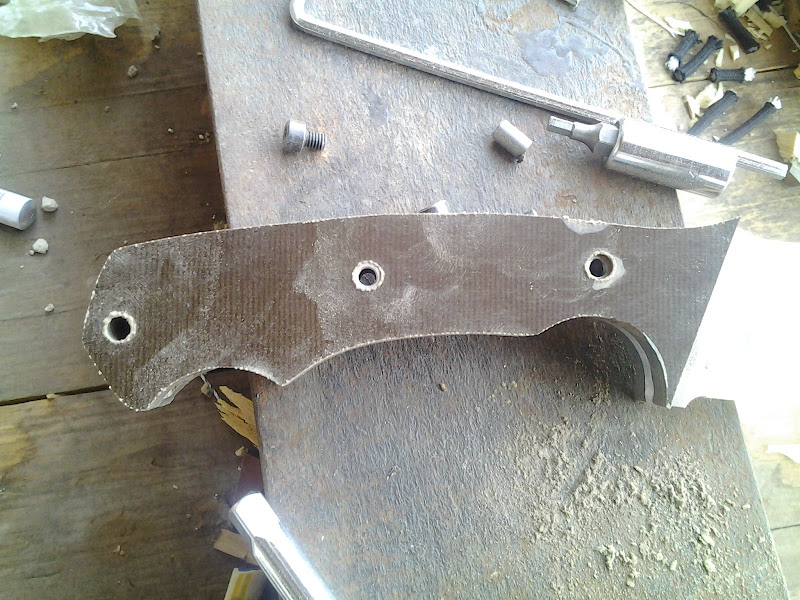
as you saw, the hole of tube is not centered exactly and on one side none of the screws wanted to go all the way in. so i just used the tubes as pins for now
after profiling to 120g, i did the front of the scales to 220g (which is where i'll be stopping in grit on handle) i believe the 220g gives enough good look for the canvas micarta while still retaining its 'gripping' property
i reached that conclusion on my own, so if anybody has notes on that please let me know
after shaping the front i finished profiling on 220g belt to the profile
and now that scales are profiled i turn my attention back to blade
i have two concerns
1 is the bevel might need bit of handsanding (it was taken to 400g on grinder), but i am thinking i can leave as is, and that could give an interesting look with the etch
2 this:
that was done poorly with dremel before HT, and now i honestly dont know how to clean it up!, since its hardened filing would not be a feasible idea, dont want to use dremel again, sanding remains but im skeptical!
note: Josh Dabney advised me to keep a belt just for handle material, and that was a very sound advice, keeps belt freah, and cuts without overheating and burning handle material
profiled with 120g
at this point i have alrwady realized that the screws and tubes were of such low quality i didnt want to use them on this knife anymore. i will still test them once more, but seperately
as you saw, the hole of tube is not centered exactly and on one side none of the screws wanted to go all the way in. so i just used the tubes as pins for now
after profiling to 120g, i did the front of the scales to 220g (which is where i'll be stopping in grit on handle) i believe the 220g gives enough good look for the canvas micarta while still retaining its 'gripping' property
i reached that conclusion on my own, so if anybody has notes on that please let me know
after shaping the front i finished profiling on 220g belt to the profile
and now that scales are profiled i turn my attention back to blade
i have two concerns
1 is the bevel might need bit of handsanding (it was taken to 400g on grinder), but i am thinking i can leave as is, and that could give an interesting look with the etch
2 this:
that was done poorly with dremel before HT, and now i honestly dont know how to clean it up!, since its hardened filing would not be a feasible idea, dont want to use dremel again, sanding remains but im skeptical!
SHOKR
Well-Known Member
today i hand sanded the entire profile to 400g, fixed all the peaks and stuff.
also had a bit of rippling or waving which happens specially when using smaller wheels and the welded part of the belt passes
how do you reduce that? i decrease a bit with light touch in the end but is there a way to avoid? sanding the welded part helps quite a bit but still happens!
now etching comes next, just contemplating hand sanding the bevel or not and how to fix jimped part
Drew Riley
Well-Known Member
To answer why your tips round off when sharpening....
Are you running the tip off the edge of the belt? Or do you stop and pull the blade off before that happens?
Are you running the tip off the edge of the belt? Or do you stop and pull the blade off before that happens?
shokr,
knife looks great.
im ready to start grinding my first knife but not for sure on the beval or grinding angle how much on the inatial grind do you remove and how much do you leave for the cutting edge. i like this wip you made. do you know of any other wip that have been written?
knife looks great.
im ready to start grinding my first knife but not for sure on the beval or grinding angle how much on the inatial grind do you remove and how much do you leave for the cutting edge. i like this wip you made. do you know of any other wip that have been written?
SHOKR
Well-Known Member
Andrew
i think i run it, today i thought about it and i THINK it could be due to the fact that i drop the tang on a rotating action when i get near the tip. will pay attention next time! thanks!
Larry, there are loads of WIPs in this section, by makers WAY more experienced than me!
however i will try to answer you to the best of my knowledge
what i do is mark two lines in the center of the edge (some do one line, but 2 lines are better for me and i believe its more accurate). you measure the thickness of the steel (lets call it S), and decide the thickness you want to leave before heat treatment (will get to that)(lets call it E), S-E will give you the remaining of the thickness, subtract by two, that will be the thickness you leave from the sides when you mark
in numbers will be easier
for example S=1, E=0.4
so 1-0.4=0.6
0.6/2=0.3 and that is what you leave from both sides when you mark the edge. if you will use a single line just divide S by 2. you can eyeball it but that will make things more complicated
as for E before heat treatment, it depends on the type of knife you are making (mainly size), i would say go with 0.050" to be on safe side IF you are making a small knife with an edge length of 5"-6" or less
after you mark the edge, use an old belt if you have one and break the hard corners of the edge, i go with 45 degrees aproxamitely(here, the lines you marked will help A LOT)
once you broke those hard corners/edges switch to a fresh belt and go as high as you want. i mostly stop with the bevel before HT slightly below the level i want in the end
the reason youcstart with old belt is those hard corners would remove the grit off the belt in matter of seconds, ruining that.
if by initial grind you mean the breaking of edge i believe i answered that
if you mean grinding before HT, i go as i told you, some say they go about 60%, i dont really measure it, to be on safe side until you try for yourself grinding about 50-60% or so
after HT i grind again to reach the hight and edge thickness i need before sharpening (depends on the use of the knife but it goes between 0.010 and 0.020")
if you tellme what knofe you are making and size i may be able to help bit better
i hope i answered your question, if you need anything else let me know and again this place is a gold mine of experience, someone much experienced than me will probably help you even better
also, welcome to KD!