You are using an out of date browser. It may not display this or other websites correctly.
You should upgrade or use an alternative browser.
You should upgrade or use an alternative browser.
KDM designed by HHH Knives WIP
- Thread starter SHOKR
- Start date

SHOKR
Well-Known Member
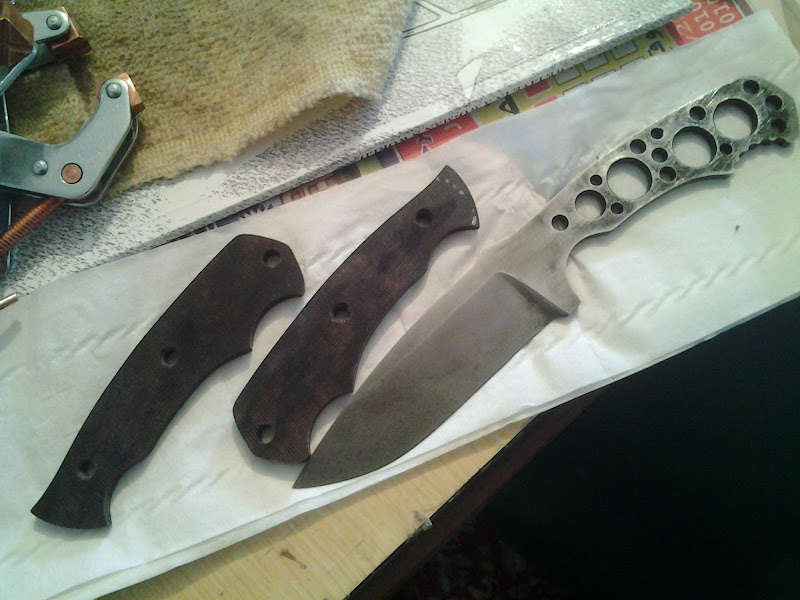
yesterday i put the blade blade inside that bottle for etching
i put it on its side to cover the blade entirely
left it outside in the sun today
just got it out, cleaned with baking soda (although it didnt have any effervescent effect at all) then with dis soap
there are coarse spots
the sctratches you see happened because i used dishes sponge, used the sponge side but apparently while rubbing the scotchbrite side was rubbing against the steel, AND i found very small peices from a wire brush stuck deep in the sponge, may need to re-etch. i have no idea how that would go though.
the etching showed scratches at the ricasso area that i didnt even see before etching.
at this point i will give the blade more inspection and see how it can be saved if that is even possible (the blade now is ready for handle and is of really good quality, the saving part refers to a good finish)

SHOKR
Well-Known Member
gluing the handle (i apologise if this is bit disorganized, i lost half of what i wrote when the browser crashed and i wasnt going with all info in order)
first create scratches with 60grit sand paper on the tang and the scales, this is not a necessity but will increase the odds of a better adhesion
diagonal scratch lines or circular motion could work
it is very good to wrap the blade for protection (from epoxy and during handle shaping), what i did often was wrap the blade with masking tape, but sometimes i used to get oxidazed lined where the tape ended of the blade
i remdied that by laying the blades flat on the tape on one side, then flip and the other side and sticking the prutruding parts of tape to each other, then cut them around the profile of the blade (leaving just enough to protect spine and edge. basicly what i do is blade sandwich with and then cut the extra 'bread'
this tome i will be trying something different, wrap the blade with paper towel (i used toilet paper) and then wrap it with tape, this negates any oxidization, however you have to make sure no water gets beneath it AND that the wrap is tight, firat time i did that the wrapping wasnt tight enough the knife slipped from it when i held the blade part against the grinder. something you better keep in mind
then i clean the tang and scales with acetone (wear gloves)
now i have found that to be VERY important for me, in your mind walk through the whole process of gluing the scales, and start collecting thing accordingly and setting things up. after a while you probably would need that but for starters i think its very important
also i dont know if thats just me or what but i often feel a rush when gluing so i often forget something, so walking through it first helps
for example this time i forgot that since i wont be cleaning the tang profile after i had to clean it from epoxy entirely NOW (only realized that while cleaning the jimping)
you will need the following
latex gloves (was wearing them already)
now if you are as messy as i am you might consider keeping a second pair on stand by just in case") i only needed them once so far but better have them and not use them than need them and not have them
i only needed them once so far but better have them and not use them than need them and not have them
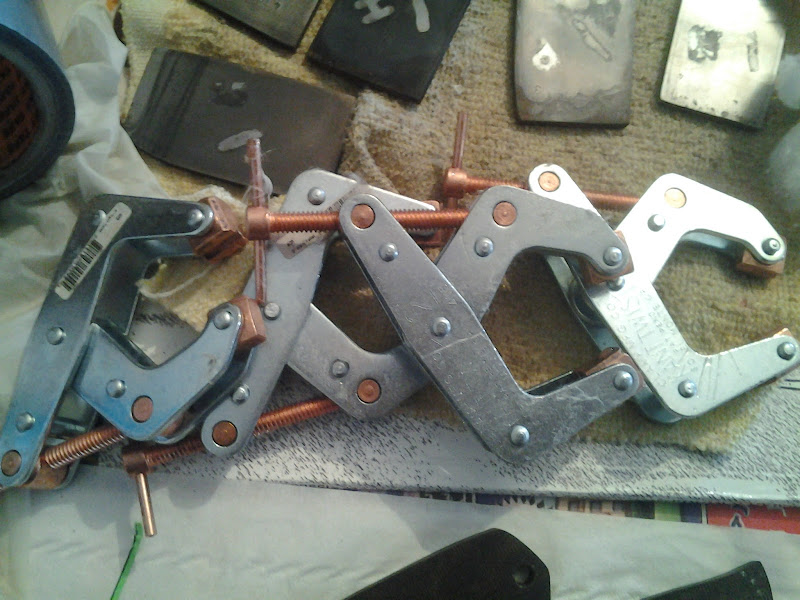
clamps, and it will help a lot to pre-size them, just wide enough to put on knife with ease and quickly tighten
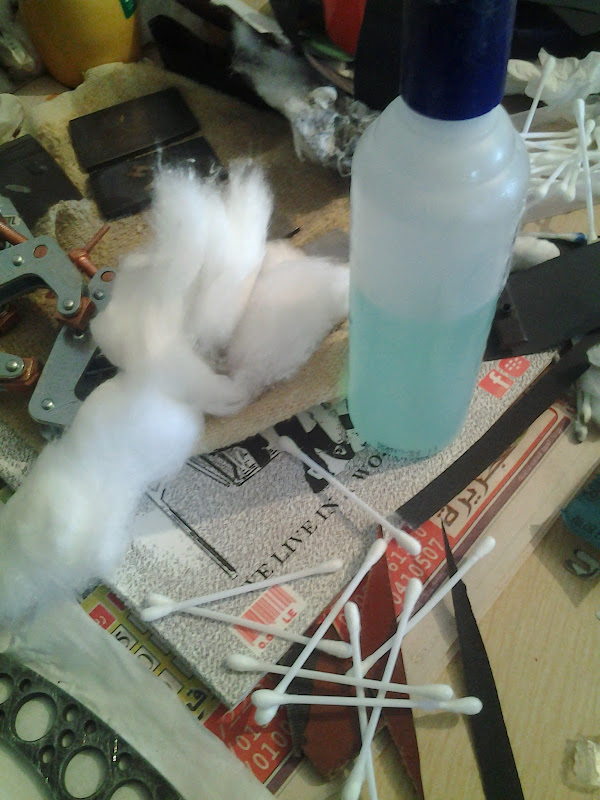
acetone and cotton, the more of those the merrier, i use the large pieces for cleaning larger areas and removing the bulk of excess epoxy, and cotton buds for tight and small parts like jimping and where the scales meet the ricasso. after cleaning the epoxy with acetone there will remain bit of liquid, which is mox of epoxy and acetone, if that dries it will be epoxy again yet with weaker bond, so what i do is rub off with dry cotton or bud, this removes most of it. and as i said sometimes i need to lightly clean some parts after drying, but by then its a very 'weak' it is removed quite easily
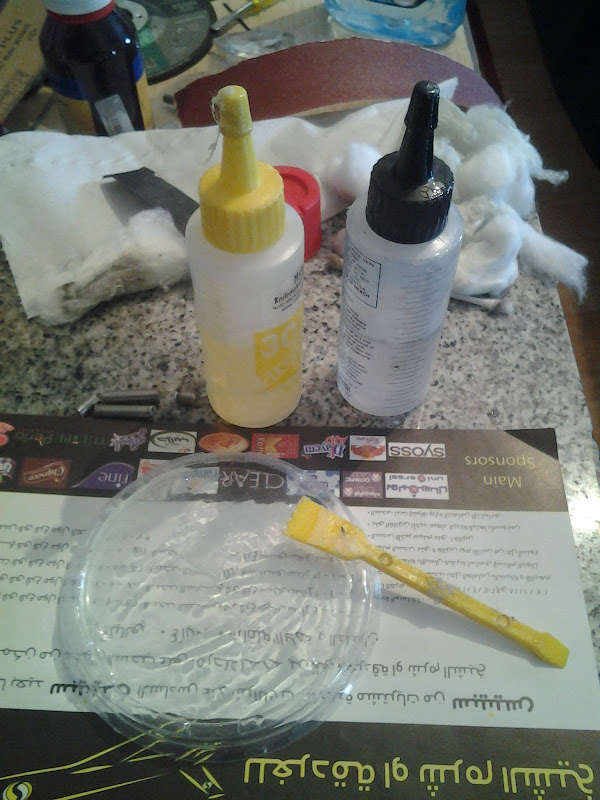
epoxy, you can technically use any strong adhesive, however more experienced advised me with epoxy on base of its stronger bond and higher heat resistance. i bought this from usaknifemaker and its really good. i STRONGLY advise using long setting epoxy like this one, this sets in 30mins, there are those that set in 15 & 5, some take longer than 30mins too. i was told longer ones have better qualities than the faster setting ones, also they have a great feature, TIME! theu give you time to take things slow, correct any mostakes, mix more epoxy if you didnt mix enough etc.
when you use these you better leave them 24 hours, some heat them a bit by strong bulb, leaving in warm oven or under the sun to speed drying, i prefer to leave it naturally
you will also something to steer it 'in' and steerer/paster
you can pretty mich mix it in any clean thing that can stand it, piece of cardboard would do, here im using the cap of yogurt
next to the epoxy you will find the 2 pins i'll be using, pre-sizing them helps A LOT, since i dont have a band so i either keep grinding and cooling the excess or use handsaw( which never really worked for me) so i i cut the just little extra than the thockness of handle and grind/taper the edges so it would go in with ease during gluing. after that i am just left with a millimeter or two to grind (use relatively fresh belt), these heat real fast so be careful not to over heat the epoxy, just a second or two and dip in water to cool (example of the water that can get beneath the paper towel wrap)
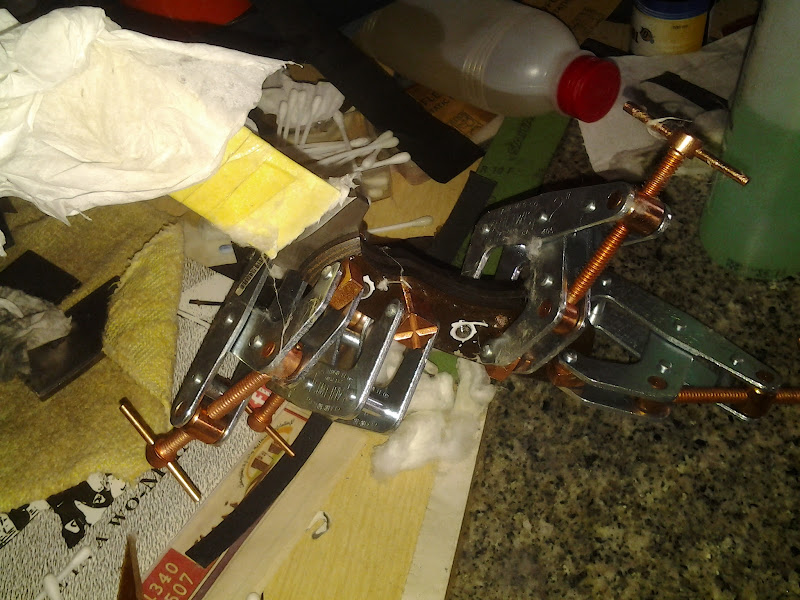
all glued up and clamped!
as i mentioned it is very important to plan everything ahead
you probably can never cean ALL the epoxy during gluing, however if you remove the mass of it you can still clean ot with acetone after.
if you can close off the lanyard tube during the gluing process
you can never use too much epoxy, and you can always remove the excess. a good test of good distribution of epoxy is when you clamp and tighten you will see epoxy squeezed out around the entire profile of the tang (and ricasso)
just make sure not to tighten clamps too hard or you might squeeze out all(most) epoxy
one thing i found to be useful, but havent used yet, is a vise that holds blade horizontal, this will free a hand to help with the whole process
tomorrow i shall take clamps off and start handle shaping
first create scratches with 60grit sand paper on the tang and the scales, this is not a necessity but will increase the odds of a better adhesion
diagonal scratch lines or circular motion could work
it is very good to wrap the blade for protection (from epoxy and during handle shaping), what i did often was wrap the blade with masking tape, but sometimes i used to get oxidazed lined where the tape ended of the blade
i remdied that by laying the blades flat on the tape on one side, then flip and the other side and sticking the prutruding parts of tape to each other, then cut them around the profile of the blade (leaving just enough to protect spine and edge. basicly what i do is blade sandwich with and then cut the extra 'bread'
this tome i will be trying something different, wrap the blade with paper towel (i used toilet paper) and then wrap it with tape, this negates any oxidization, however you have to make sure no water gets beneath it AND that the wrap is tight, firat time i did that the wrapping wasnt tight enough the knife slipped from it when i held the blade part against the grinder. something you better keep in mind
then i clean the tang and scales with acetone (wear gloves)
now i have found that to be VERY important for me, in your mind walk through the whole process of gluing the scales, and start collecting thing accordingly and setting things up. after a while you probably would need that but for starters i think its very important
also i dont know if thats just me or what but i often feel a rush when gluing so i often forget something, so walking through it first helps
for example this time i forgot that since i wont be cleaning the tang profile after i had to clean it from epoxy entirely NOW (only realized that while cleaning the jimping)
you will need the following
latex gloves (was wearing them already)
now if you are as messy as i am you might consider keeping a second pair on stand by just in case
i only needed them once so far but better have them and not use them than need them and not have them
clamps, and it will help a lot to pre-size them, just wide enough to put on knife with ease and quickly tighten
acetone and cotton, the more of those the merrier, i use the large pieces for cleaning larger areas and removing the bulk of excess epoxy, and cotton buds for tight and small parts like jimping and where the scales meet the ricasso. after cleaning the epoxy with acetone there will remain bit of liquid, which is mox of epoxy and acetone, if that dries it will be epoxy again yet with weaker bond, so what i do is rub off with dry cotton or bud, this removes most of it. and as i said sometimes i need to lightly clean some parts after drying, but by then its a very 'weak' it is removed quite easily
epoxy, you can technically use any strong adhesive, however more experienced advised me with epoxy on base of its stronger bond and higher heat resistance. i bought this from usaknifemaker and its really good. i STRONGLY advise using long setting epoxy like this one, this sets in 30mins, there are those that set in 15 & 5, some take longer than 30mins too. i was told longer ones have better qualities than the faster setting ones, also they have a great feature, TIME! theu give you time to take things slow, correct any mostakes, mix more epoxy if you didnt mix enough etc.
when you use these you better leave them 24 hours, some heat them a bit by strong bulb, leaving in warm oven or under the sun to speed drying, i prefer to leave it naturally
you will also something to steer it 'in' and steerer/paster
you can pretty mich mix it in any clean thing that can stand it, piece of cardboard would do, here im using the cap of yogurt
next to the epoxy you will find the 2 pins i'll be using, pre-sizing them helps A LOT, since i dont have a band so i either keep grinding and cooling the excess or use handsaw( which never really worked for me) so i i cut the just little extra than the thockness of handle and grind/taper the edges so it would go in with ease during gluing. after that i am just left with a millimeter or two to grind (use relatively fresh belt), these heat real fast so be careful not to over heat the epoxy, just a second or two and dip in water to cool (example of the water that can get beneath the paper towel wrap)
all glued up and clamped!
as i mentioned it is very important to plan everything ahead
you probably can never cean ALL the epoxy during gluing, however if you remove the mass of it you can still clean ot with acetone after.
if you can close off the lanyard tube during the gluing process
you can never use too much epoxy, and you can always remove the excess. a good test of good distribution of epoxy is when you clamp and tighten you will see epoxy squeezed out around the entire profile of the tang (and ricasso)
just make sure not to tighten clamps too hard or you might squeeze out all(most) epoxy
one thing i found to be useful, but havent used yet, is a vise that holds blade horizontal, this will free a hand to help with the whole process
tomorrow i shall take clamps off and start handle shaping
Last edited:
SHOKR
Well-Known Member
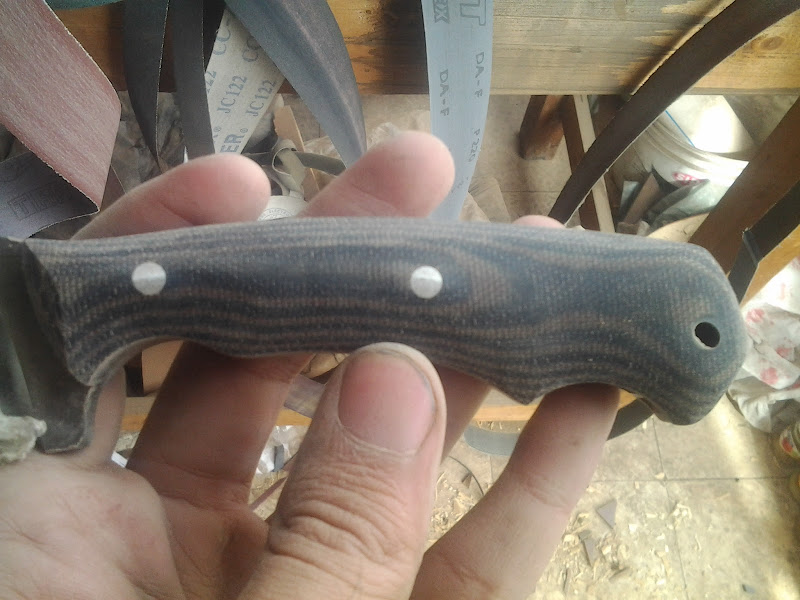
after about 24 hours i took off the clamps and started planning how to shape the handle
because i dont have a very good handle on shaping i sometimes need to improvise, but i guess everybody does from time to the other

i liked the way Josh Dabney did the handle so i thought i will follow it to good extent (didnt go in the same order though)
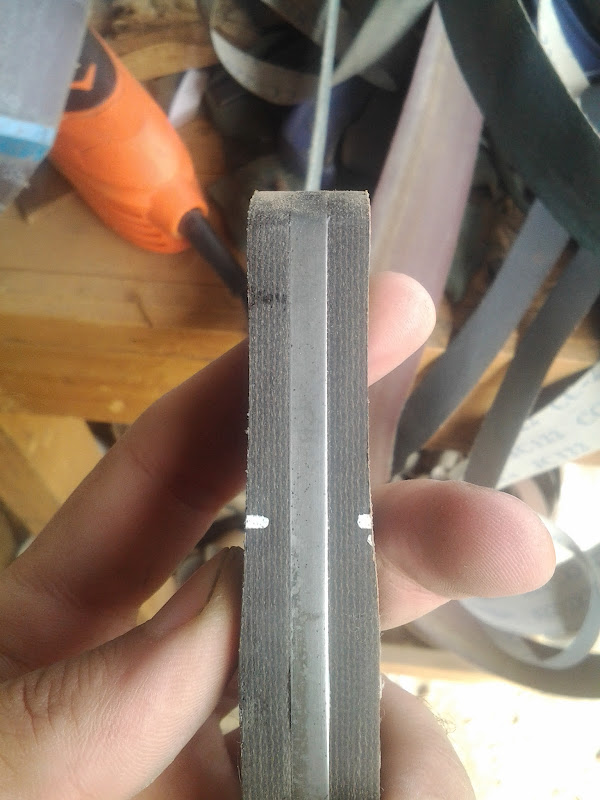
so here i marked where i will do the part on the large 10"wheel
and here i transferred it to the top and then the other side

this is how i determined where i will have that marker


i held it in my non dominant hand then 'released' the index and middle finger leaving exact the border of the two fingers that will land on that area
the reason i used the non dominant hand is i found out i can much easily detect errors or any uncomfortable spots on a knife handle with it than the dominant one
i think because its 'untrained' to adapt to the uncomfortable part. if you hold with dominant hand you will find even without realizing it that the hand moves and tries to adapt to the best hold that can fit, while the other doesnt.
here is after bit of work on the 10" wheel, now the wheel's diameter isnt large enought that i can just lazily push the handle against it and get the shape i want, so i had to carefully move it back and forth until i got the shape i desired
having handle material with layers has its pros and cons, pros is the lines help greatly with determining symmetry, cons is you probably cant get away with asymmetry! lol
because i dont have a very good handle on shaping i sometimes need to improvise, but i guess everybody does from time to the other
i liked the way Josh Dabney did the handle so i thought i will follow it to good extent (didnt go in the same order though)
so here i marked where i will do the part on the large 10"wheel
and here i transferred it to the top and then the other side
this is how i determined where i will have that marker
i held it in my non dominant hand then 'released' the index and middle finger leaving exact the border of the two fingers that will land on that area
the reason i used the non dominant hand is i found out i can much easily detect errors or any uncomfortable spots on a knife handle with it than the dominant one
i think because its 'untrained' to adapt to the uncomfortable part. if you hold with dominant hand you will find even without realizing it that the hand moves and tries to adapt to the best hold that can fit, while the other doesnt.
here is after bit of work on the 10" wheel, now the wheel's diameter isnt large enought that i can just lazily push the handle against it and get the shape i want, so i had to carefully move it back and forth until i got the shape i desired
having handle material with layers has its pros and cons, pros is the lines help greatly with determining symmetry, cons is you probably cant get away with asymmetry! lol
SHOKR
Well-Known Member
i then installed teh small wheel attachment, and using the 1" wheel and went all the way around the perimeter of the scales


now i wasnt so happy with angle so i did more work with teh wheel
this is the first time i follow that technique and i am loving it, before, i use to do this on platen and slack, this gives way better control and precision, and i can always use different wheel sizes when needed
i noticed there are few blurry photos, i appologize, i took the pics outside and with all the light the screen isnt so visible


after this i switch to the slack, using 120g i give a very quick pass to blend in all the hard lines and grind off the remaining surface of the slack
at this point i don't have much 'meat' left, so i have to be very careful. i also break the hard edge at the lanyard hole area (the tang 'butt')
after the slack i switch to 1" 220g belt and start working the scale all over and getting that belt in the finger grooves

at this point i am all done with the grinder but i am still not happy with slightly hard edges at the top and bottom of the scales near the spine
so i put the knife like this
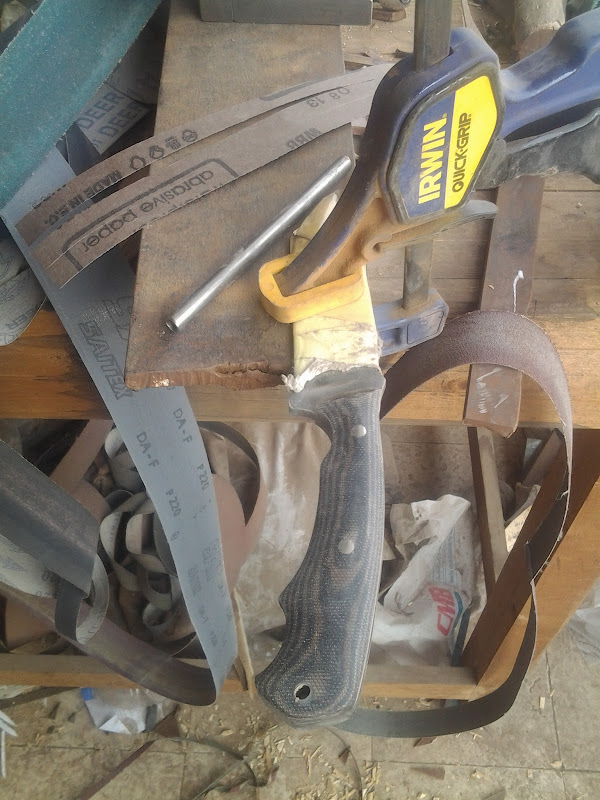
and sand using a round tube or rod (to have a very precise contact area with the scale, i wouldnt want to scratch the etched spine would i) i also use shoeshine method when needed
and i'm done with handle shaping
now i wasnt so happy with angle so i did more work with teh wheel
this is the first time i follow that technique and i am loving it, before, i use to do this on platen and slack, this gives way better control and precision, and i can always use different wheel sizes when needed
i noticed there are few blurry photos, i appologize, i took the pics outside and with all the light the screen isnt so visible
after this i switch to the slack, using 120g i give a very quick pass to blend in all the hard lines and grind off the remaining surface of the slack
at this point i don't have much 'meat' left, so i have to be very careful. i also break the hard edge at the lanyard hole area (the tang 'butt')
after the slack i switch to 1" 220g belt and start working the scale all over and getting that belt in the finger grooves
at this point i am all done with the grinder but i am still not happy with slightly hard edges at the top and bottom of the scales near the spine
so i put the knife like this
and sand using a round tube or rod (to have a very precise contact area with the scale, i wouldnt want to scratch the etched spine would i
) i also use shoeshine method when neededand i'm done with handle shaping
SHOKR
Well-Known Member
before sharpening i check the knife for epoxy remains from the glue up
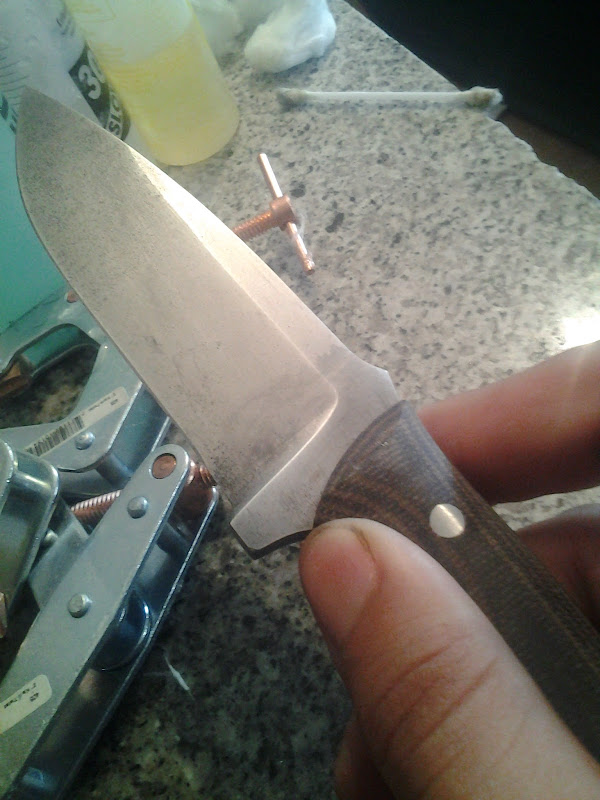
n this picture so close to the plunge you will see a vertical 'dirt' line, that was left over from the cleaning process after gluing (this was hard to get access to due to the cover on the blade)
as i mentioned before as long as i remove the bulk of epoxy remains are easily removed with acetone, and thats exactly what happened
there was also a very small part on the front bevel of the scale, but it was too large to be removed with acetone so i just very lightly 'scratched' it with a razor knife (we call it cutter), was easily removed with no scratches on the handle itself
then went to sharpening, since i already had the bevel from the testing i used the 400g belt then went to strop
i have trouble regrinding the edge bevel so i had bit of trouble with it but came out good in the end
next and final part i show the flaws and how they happened
SHOKR
Well-Known Member
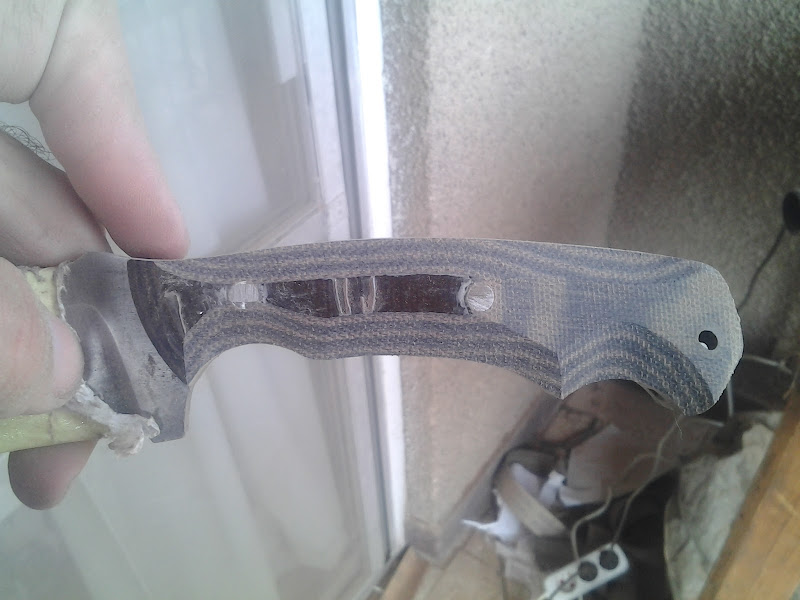
View attachment 381381
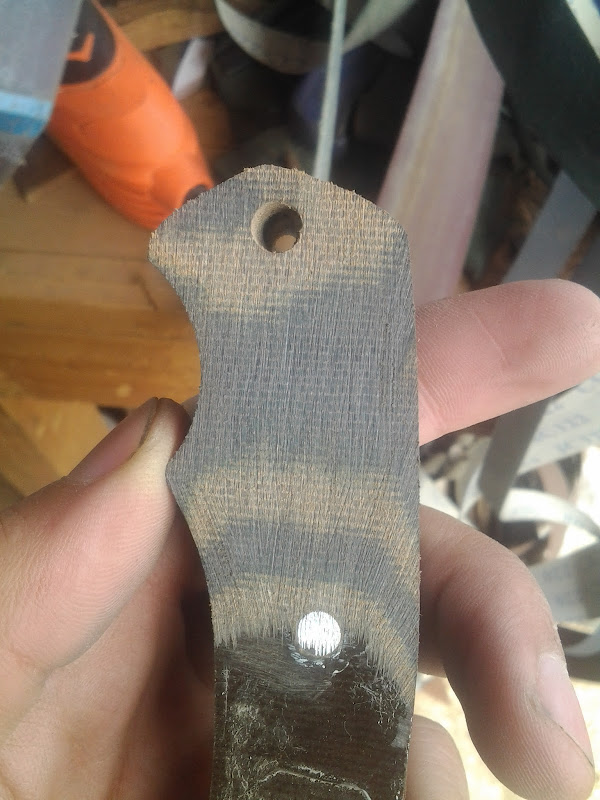
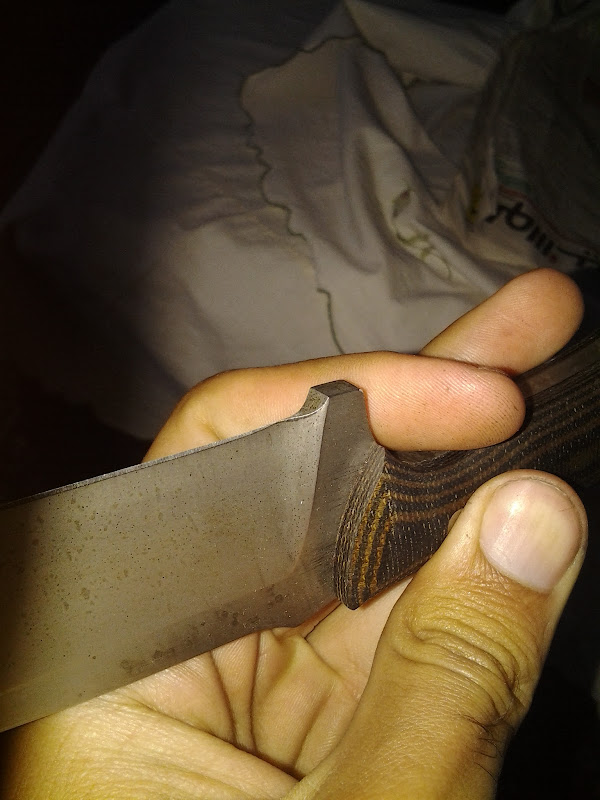
in this picture you will see the knife 'tilted'
this actually happened because the second pin hole was too wide, so the pin wiggled which caused the scales to drift a bit, i noticed that before gluing and decided i will make sure they align, but with all the complexity of this scale for me it seems i forgot
about a week ago i discovered that i drill holes wrong, so far i was under the impression that i drill with the size i want, use reamer of the same size and i'm set. until Josh Dabney by coincidence informed me that it is better to use a bit one size smaller then use the desired size reamer. that combined with the fact that my drill press sometimes vibrates i guess the hole was too wide (doesnt always do that though). so from here on will do what Josh Advised. for those of you who don't know him, he is a great teacher! i strongly advise you to check his WIPs, and after you read this one and learn what NOT to do, go check his on the same knife to learn what TO DO!
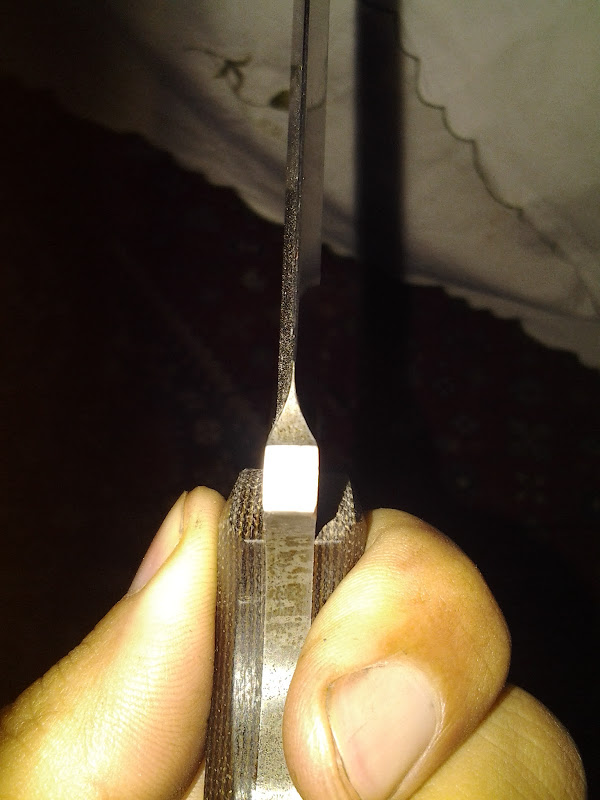
2
the new 400g belt i used as it turns out wasnt straight on one side, so when i aligned the knife to where i wanted the edge to start and made contact the belt scratched it at the plunge, i didnt even realize it until i pulled the knife away to look at the edge, soof course i did the same to the other side to keep things 'even'
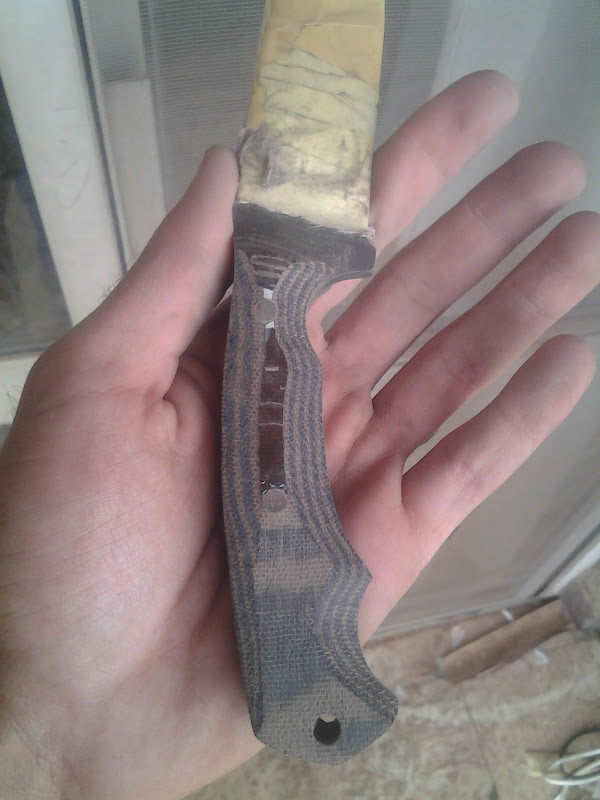
3

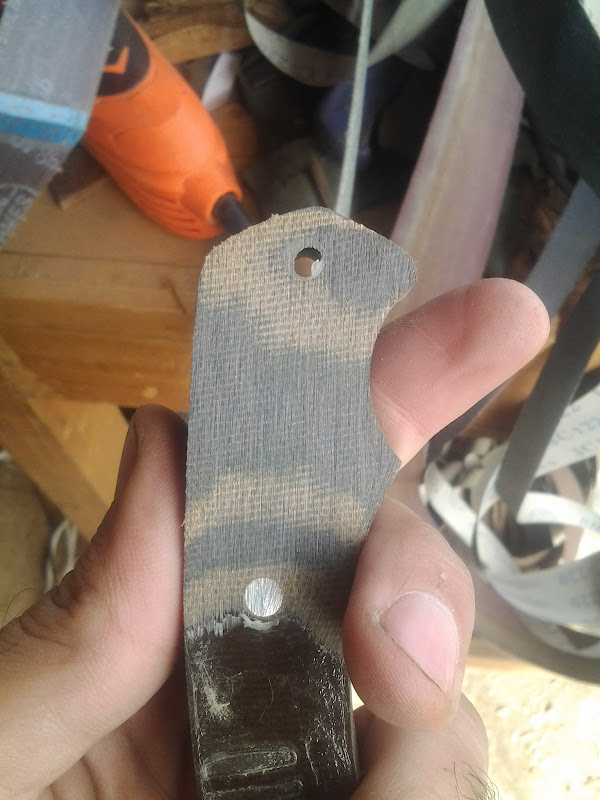
even tho i was very cautious not to touch the bottom of the ricasso to the belt while shaping the handle i made a very small scratch at it corner. apparently one can never be too careful!
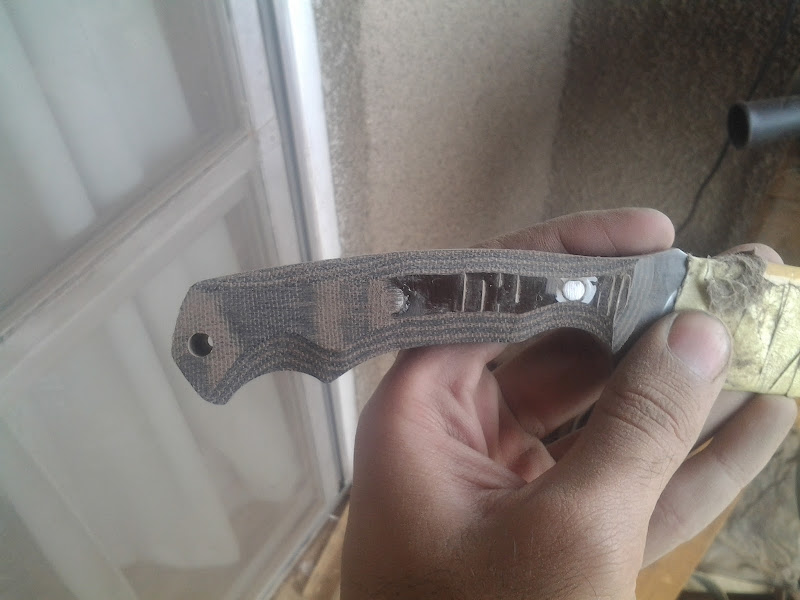
4
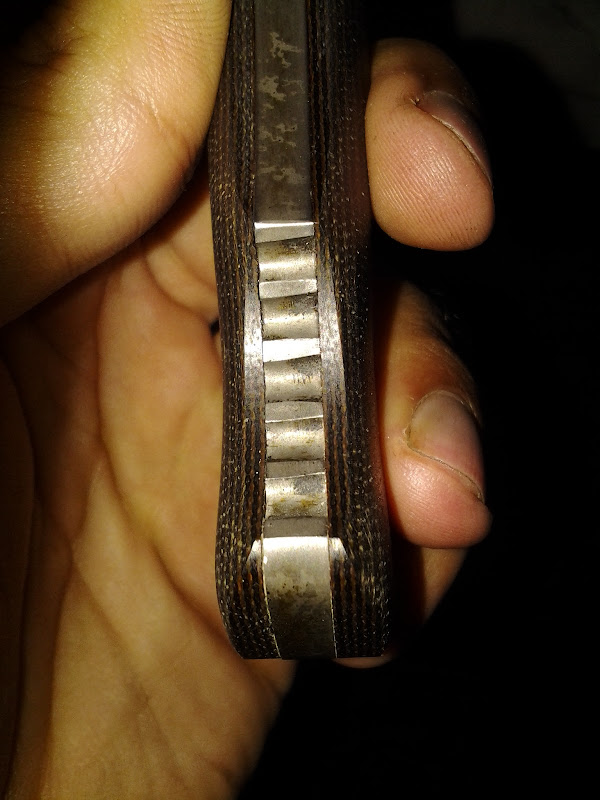
this of course was the massacre of the this knife. i originally wanted to make jimping in the scales itself but since this was ruined and i couldnt fix with the tools i have i thought its best keep like this
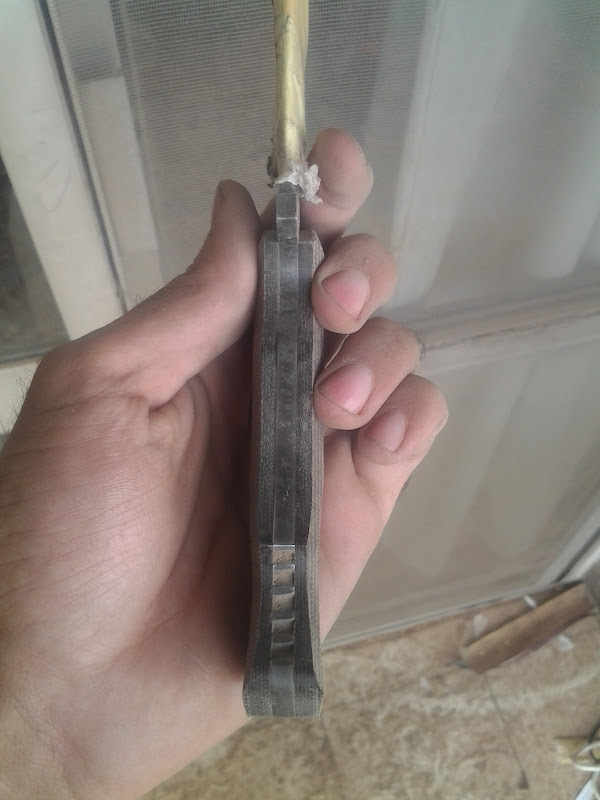
5
the slightly uneven plunge
the platen i have is not set right (the guy who machined it did it wrong) i would like to believe thats the reason not my skill
the upside is the knife is very well balanced, but there is again the thought that some like the tactical blades' balance point more near the middle of the handle rather than tat he index finger
now i made my peace that the knife is done, but my perfectionist/committed side is nagging me to resand the profile of the handle and fix the other scratches then etch once more. BUT again, something tells me i should make my peace, learned a LOT form this knife (was couple of skill levels above mine), the flaws arent major and the next knife can always be a better one
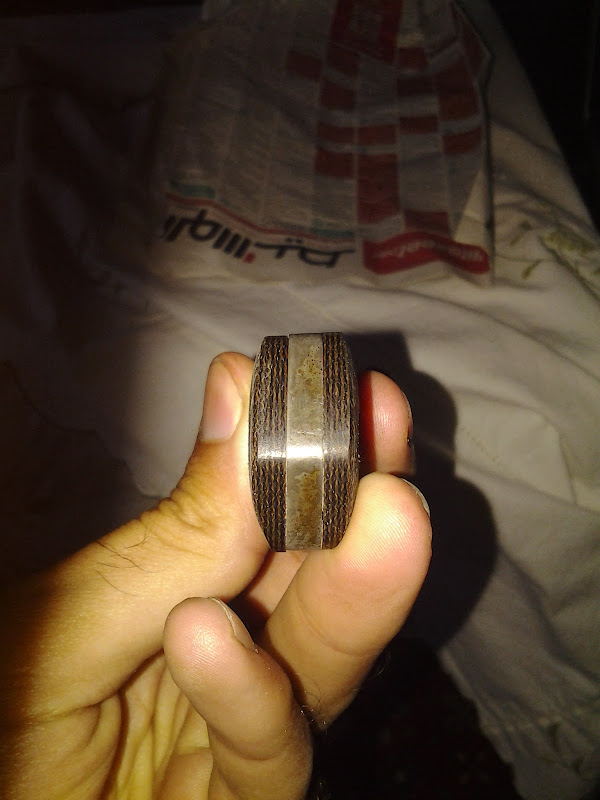
the weight of the knife

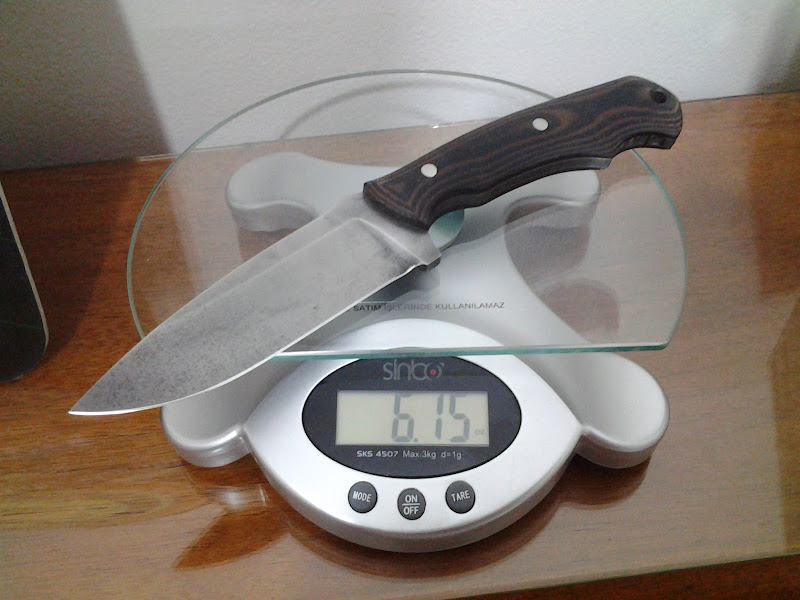
grams and ounces
in this picture you will see the knife 'tilted'
this actually happened because the second pin hole was too wide, so the pin wiggled which caused the scales to drift a bit, i noticed that before gluing and decided i will make sure they align, but with all the complexity of this scale for me it seems i forgot
about a week ago i discovered that i drill holes wrong, so far i was under the impression that i drill with the size i want, use reamer of the same size and i'm set. until Josh Dabney by coincidence informed me that it is better to use a bit one size smaller then use the desired size reamer. that combined with the fact that my drill press sometimes vibrates i guess the hole was too wide (doesnt always do that though). so from here on will do what Josh Advised. for those of you who don't know him, he is a great teacher! i strongly advise you to check his WIPs, and after you read this one and learn what NOT to do, go check his on the same knife to learn what TO DO!
2
the new 400g belt i used as it turns out wasnt straight on one side, so when i aligned the knife to where i wanted the edge to start and made contact the belt scratched it at the plunge, i didnt even realize it until i pulled the knife away to look at the edge, soof course i did the same to the other side to keep things 'even'
3
even tho i was very cautious not to touch the bottom of the ricasso to the belt while shaping the handle i made a very small scratch at it corner. apparently one can never be too careful!
4
this of course was the massacre of the this knife. i originally wanted to make jimping in the scales itself but since this was ruined and i couldnt fix with the tools i have i thought its best keep like this
5
the slightly uneven plunge
the platen i have is not set right (the guy who machined it did it wrong) i would like to believe thats the reason not my skill
the upside is the knife is very well balanced, but there is again the thought that some like the tactical blades' balance point more near the middle of the handle rather than tat he index finger
now i made my peace that the knife is done, but my perfectionist/committed side is nagging me to resand the profile of the handle and fix the other scratches then etch once more. BUT again, something tells me i should make my peace, learned a LOT form this knife (was couple of skill levels above mine), the flaws arent major and the next knife can always be a better one
the weight of the knife
grams and ounces
Last edited:

Josh Dabney
Moderator
GREAT job all around !!!!
Enjoyed catching up on your WIP !
The misakes you've got going on are extremely minor stuff !!! With this experience under your belt any minor issues will just fade away. (once I glued a set of scales on a blade but forgot to drill any of my pinholes in the handle material... Shhhhh don't tell)
Don't know about you but I'm glad you had to grind your bevels higher it looks fantastic
One small tip for shortening screws- Drill and tap a hole through something thin like 1/8" scrap aluminum or steel. To shorten just thread the screw all the way in and grind it down to the length you want. When you unscrew it from the "jig" it'll straighten the threads back out and be good to go. This way you have something to hold onto and you can get pressure without burning your fingers.
Take care,
-Josh
SHOKR
Well-Known Member
Thanks franklin
Lol Josh
I wanted it bit lower for strength, being tactical blade and all. I guess i still have a lot to learn about that! Making a tanto withchollow grind and D2 steel and that opened up a lot of questions about strength of hollow grinds for tactical or hard used knives and D2 durability for both...
I think i read that in one of your posts, but i dont have dies or taps yet actually screw sizes seriously confuse me so far!! So still a bit to reach this stage, but thats a really good idea!
Thanks a lot man!!
Lol Josh
I wanted it bit lower for strength, being tactical blade and all. I guess i still have a lot to learn about that! Making a tanto withchollow grind and D2 steel and that opened up a lot of questions about strength of hollow grinds for tactical or hard used knives and D2 durability for both...
I think i read that in one of your posts, but i dont have dies or taps yet
actually screw sizes seriously confuse me so far!! So still a bit to reach this stage, but thats a really good idea!Thanks a lot man!!
Last edited:
HHH Knives
Super Moderator
Ahmad, Great WIP and the knife looks like its gona be a cutting machine! Congrats, and thanks for sharing. Its fun watching you learn and grow as you try new things..
Stay sharp my friend!
Randy
Stay sharp my friend!
Randy
SHOKR
Well-Known Member
thanks Shane
very interesting, and in theory can work i believe, however for ME, i have relatively large drill, so would be hard for me to control it well, also there is the fear of accidentally pushing the screw hard enough and tearing the sandpaper, but for a smaller drill maybe it would be ok
just make sure that the inside of the chuck arent so 'sharp', they might scratch the screw's head
again, i havent tried it, this is all theory and my own take
if you do try it please share results. and remember, safety first
welcome to Knife Dogs!!