Justin Presson
Well-Known Member
Nice job!
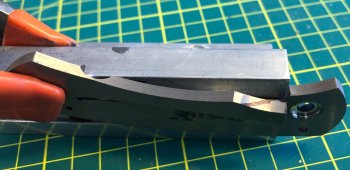
Bending the lock bar using a piece of wood with slot cut into it. I used this method to try and get a more gradual bend along the lock bar rather than applying heat to the back end and bending in one spot. I am really not sure which is the best way to do this so if anyone has some advice I would love to hear it.
View attachment 67571
Thanks TraceyHow thick was this liner? I assume it was Ti but it's hard to tell.
I have used a bending jig, bending crick (small arc radius to bend around), pliars and just hand bending it. I went back to heating it up and bending in a gentle radius. You have to clean things up from the heat but it doesn't take long to sand off the heat anno.
Great WIP. Thanks for posting it.
t
You have an incredible post here thanksMy blades are back from heat treatment and I found some time yesterday to work on my folder. I have three to complete but am working on just one now through to the end and hope the mistakes I make on this one will result in the others being better!
Liners were marked out and cut on the bandsaw. Green G10 is my chosen colour for this one and I quite like it.

I bought these clamps recently and I think they are going to be very handy for drilling operations.

I drilled the handle screw holes first and mounted the scales to liners with screws before drilling the pivot holes. The holes were countersunk for screw heads and once attached the back side where screws protrude are ground flat.

I used the grinder to bring the scale thickness down using a 120 grit belt first and then 240 to get close to final dimensions. Slack belt with 240grit worked well.

So this is where I ended up.

So next steps to finish handles are:
Shorten stop pin (slightly long at moment)
Reduce thickness of back spacer to final thickness
Going finger groove in face liner to access lock bar
Detent ball needs seating slightly lower
Finish scales all around liners
Re-countersink screw and pivot holes
Refinish screw length on inside of liners
Grind pivot to length
Flame lock bar face to try and get a smoother contact face
Sand blast liner
Then I can move onto grinding the blade.....
Hello thanks for your work I also have a strong interest and have read and watched a lot of vids. I have some questions and most of the time when you ask others you get no reply. I just ques they are too busy or just can not be bothered. I hope to follow your journey.I’ve just change the title of this thread - I had it as a framelock but it is a liner lock - sorry if I caused any confusion.
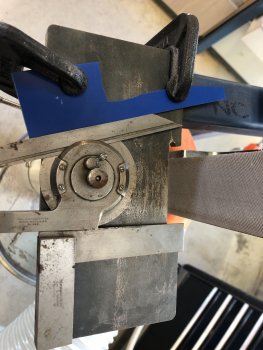
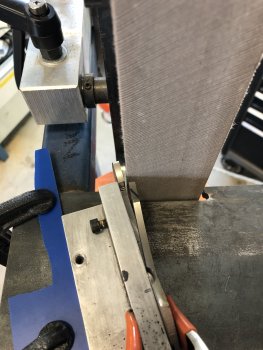
How did you set the angle on the lock bar and have you set the angle on the blade????Now it’s time to cut the lock bar. Set my drill press to highest speed it can go and using a metal cutting disc I was able to cut a decent slot with the liner held in drill press vice. These are much better than the dremel version I used previously - I could cut a couple of locks with one disc I think.
I have also drilled hole for the 2mm ceramic detent ball to sit in by the time I took the photo.
View attachment 67570
Bending the lock bar using a piece of wood with slot cut into it. I used this method to try and get a more gradual bend along the lock bar rather than applying heat to the back end and bending in one spot. I am really not sure which is the best way to do this so if anyone has some advice I would love to hear it.
View attachment 67571
And the result
View attachment 67572


