Morland's KITH WIP

Being a smaller knife makes for more selection from the wood stash. I have a few smaller blocks that will not work for bigger knives. For extra credit name the wood type from top to bottom. Don’t forget to answer in the form of a question. “Jeapordy” music is playing. Go!
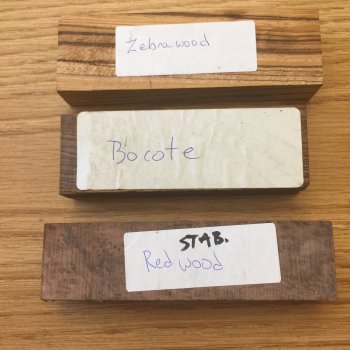
Both blocks no 2 or 3 are nice to my opinion.
 
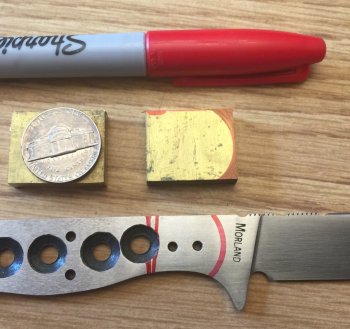
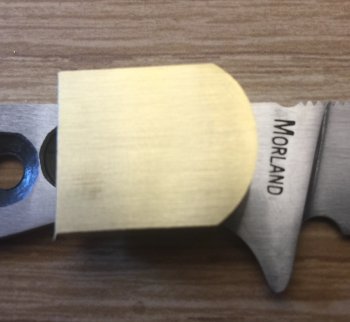
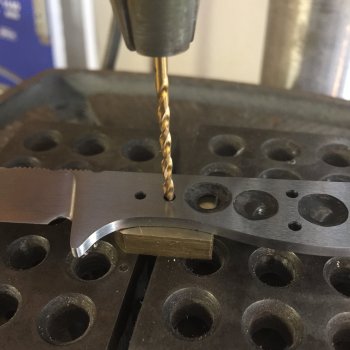
I forgot to mention that I rounded the spine in front of the thumb jimping.

My first rounded off edges were on the pocket knives for the KITH. Never done it before but I think I will incorporate more often. I think it’s a nice touch on your knife. Looks great.
 
If I go with zebrawood it will have black g10 bolsters with copper pins. If bocote or redwood it will be brass bolsters/pins. I am leaning towards the redwood.
 
Got some color out on the first few attempts. Left is raw leather and just plain ugly. Two is antique gel saddle tan. Three is antique finish light brown. Four is dark brown dye background and antique finish light brown.
 

Attachments

  • 584E9649-CE92-4066-8499-5288197AB1F5.jpeg
    584E9649-CE92-4066-8499-5288197AB1F5.jpeg
    947.1 KB · Views: 11
Up until now my KITH build has been more of a build along as opposed to a how to build. I will attempt to show how I build my bolsters. It might help some of the members that haven’t tried-bolsters. Ask questions if you have any.

First I lay out what I want them to look like and where I want them to be placed. I have chosen brass so that good pictures can be taken. I use a coin to get that sweeping curve at the front of the bolster. In this case a nickel. Bigger knives I use a quarter or a Chuck E. Cheese token.
 

Attachments

  • 744F3C40-FBE6-4570-81C2-F80E2A117662.jpeg
    744F3C40-FBE6-4570-81C2-F80E2A117662.jpeg
    690.3 KB · Views: 6
Next step is grind and shape front of bolster. I stamp my maker mark in the right side Ricasso. Always. So I make the right side bolster first so I can line it up with the stamp.
 

Attachments

  • 26E5D7FF-10EC-4119-8413-F21BE36142E6.jpeg
    26E5D7FF-10EC-4119-8413-F21BE36142E6.jpeg
    563 KB · Views: 2
When I get the shape of the front of the bolster correct, I use one drop of super glue and attach the bolster to the knife blank. Then to the drill press. Drill the two bolster holes using the knife blank as a guide. Perfectly placed holes, every time.
 
About half way through drilling the first hole the super glue let go. No problem. Just finish drilling the hole.
 

Attachments

  • B6A70D27-631D-40B2-9118-27506E70D38C.jpeg
    B6A70D27-631D-40B2-9118-27506E70D38C.jpeg
    836.2 KB · Views: 1
Place a dummy pin in the hole and drill the second hole. Be careful of spinning blades. I used a stop and did not put it in the picture.
 

Attachments

  • 6C8699F9-B8F5-4924-BB48-22BA20D907C1.jpeg
    6C8699F9-B8F5-4924-BB48-22BA20D907C1.jpeg
    655.8 KB · Views: 2
Drill the second hole and then check hole alignment with a second dummy pin. Should fit perfectly.
 

Attachments

  • 5B5DD577-BC46-4F08-B855-E3C5FDA55B20.jpeg
    5B5DD577-BC46-4F08-B855-E3C5FDA55B20.jpeg
    666.1 KB · Views: 1
In the inside of the bolster I touch mark it R for right side. I also cleaned up the left side.
 

Attachments

  • 62EFEB03-36D0-434F-9D23-77BF27E99CE0.jpeg
    62EFEB03-36D0-434F-9D23-77BF27E99CE0.jpeg
    734.1 KB · Views: 2
Super glue the two bolsters together. The R goes to the inside. Line up the top and back of the bolsters the best you are able. It will save you headaches later trysting to get the flushed and shaped.
 

Attachments

  • 2CDBBEC3-11C4-49D9-9591-1BE6C0486913.jpeg
    2CDBBEC3-11C4-49D9-9591-1BE6C0486913.jpeg
    690.6 KB · Views: 1
Well, I guessed the first two correctly, did not have a clue about the third (I have a bow made from bocote and use zebra often for my smaller knives.
Will be watching the bolster fit up closely, good stuff!
 
Drill the holes in the second bolster. Put in the dummy pins. Square the back , top, and bottom using your grinder.
 

Attachments

  • 3EA8F465-2DC8-4E90-9657-2C9CBBBA7CBF.jpeg
    3EA8F465-2DC8-4E90-9657-2C9CBBBA7CBF.jpeg
    719.3 KB · Views: 2
Back
Top