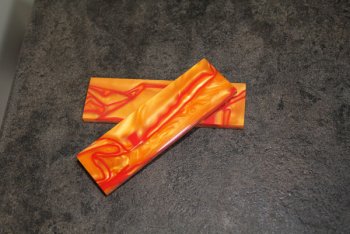
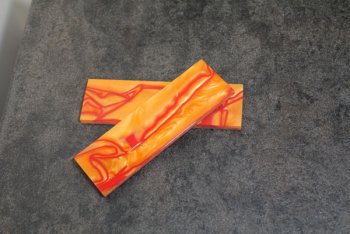
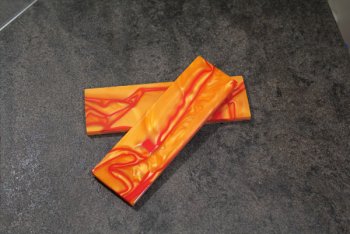
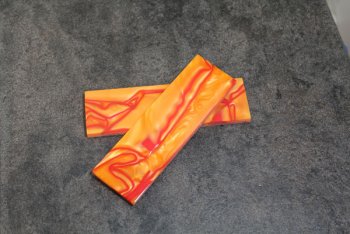
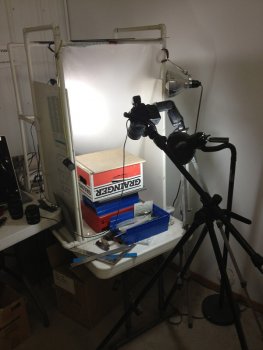
Here are some pictures of the light tent we have cobbled together over time at Midwest Knifemakers Supply.
We take dozens, sometimes hundreds of product images a week. Product photography is a bit different than knife photography. The lighting is more on the front of the item. On knife photography most of the light wants to come from the back. Once you get a knife set up, you can get most knives done with the same setup. When you do products you have to have a flexible setup for anything from the size of a bead to the size of an oven.
I took some quick pic's with my Iphone (which I hate 50% of the pictures from)
I made a large frame out of PVC pipe. I can clamp lights around it front and back.
I used to shut off the lights when I worked out of the house but in the warehouse there are other people working and I had to reset the light balance for all the fluorescent lights. I use a Canon Speed flash to the side with a connection to the hot shoe.
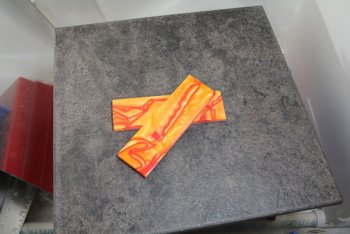
I usually use a 12"x12" ceramic floor tile for a platform. I have a dozen of them to chose from.
I use a Benbo Trekker tripod. It will extend well into the tent for a top down shot. It gets shaky extended that way so I have to use a remote control on the Canon Eos Rebel T2i camera. Otherwise we trip the shutter manually.
We have several lenses but generally our workhorse for 95% of what we shoot is a Tameron Aspherical XR DI 28-75mm. It got rave reviews on www.DPReview.com and they were right. It is fantastic glass. If you are looking for any kind of new camera equipment, I'd suggest browsing DPreview.com first.
Our light tent is backed up by drafting paper often called vellum. Specifically is Xerox Erasable Vellum 20#. I have two large rolls of it I bought several years ago on ebay meaning to sell by the foot and never got that setup. I will get it set to sell by the foot.
This material is fairly tough and translucent. I tried several different diffusers and this works quite well. One sheet lets a lot of light through and gives a broad halo. Two sheets steps the light down and gives a smaller background hot spot of light. I just tape it onto the frame.
On the left side of the frame, hanging by a yellow paracord is the camera remote control. We also shoot everything tethered which also allows remote control firing.
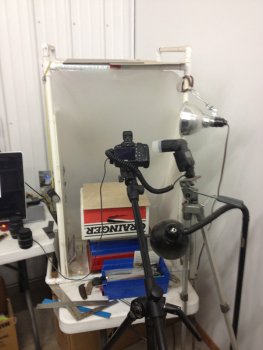
I turned on one lamp in the back so you could see how it illuminates the tent and how the vellum diffuses the light. The light to the lower right is also on. The grainger box and red and blue boxes under that allow us to lift up or drop what ever item we are shooting to get the angle we want with out messing with the trip pod and light set up. For small items like beads, we bring the item almost chest high. It's just easier that way.
Note on the sides of the tent, we are using white art core board. The kind of stuff kids use at the science fair to show off their project. On top of the tent, you will see at least a couple different color boards. I use a black piece of kydex or gray foam board or plastic mirror to direct a little light or eliminate a reflection I don't want.
This took me the longest time to learn. Don't worry about any hand held reflectors, lights, cables, clamps, junk, troll dolls -- what ever getting into your shot around the edges. That can just be edited out. When ever I have to hand hold a reflector panel, it is always in frame but it gets edited out in post production.
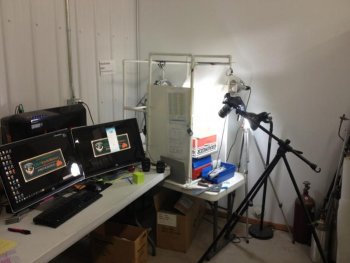
This is our graphics station. Samantha manages all of our image work now. She uses dual monitors and Adobe Photoshop in a tethered set up. She can shoot an image and it will show up instantly on the large monitor to the right in 20" size. She can see instantly the focus and any adjustments needs to composition or lights that need to be adjusted. The image is saved instantly to the hard drive for editing. The tether software also allows you to change the shutter speeds, aperature, flash and trip the shutter. It's complicated to get set up but once you do, it's amazing how much time you save by be able to view the image on a large monitor screen and make adjustments from there. I can also make a "live" view where it acts like a video recorder. This helps set up composition when you have several items. It's easier to view and rearrange using the monitor than it is using the little screen on the back of the camera. You can get a better idea of how the Benbo tripod articulates here. The Canon SpeedLight Flash has it's own tripod just because it was handy. It could be clamped onto the tent frame I suppose.
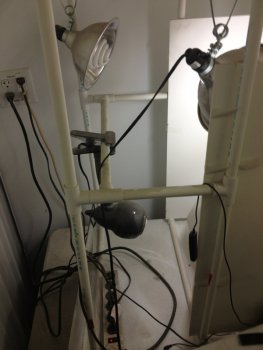
Just a quick look at the back of the frame. I use typical clamp lamps. The CFL bulbs are daylight balanced. You can drive yourself nuts trying to find the exact daylight Kelvin temperature bulbs. Don't spend a fortune on them. Just get the bulb that says Daylight somewhere on it. I rarely turn on all of the lights at once, in fact never. I have them positioned all around so I can vary how the light comes to the object I am shooting. This is a big deal shooting knives. For products the front flash and ambient light in the warehouse covers us fairly well.
We take dozens, sometimes hundreds of product images a week. Product photography is a bit different than knife photography. The lighting is more on the front of the item. On knife photography most of the light wants to come from the back. Once you get a knife set up, you can get most knives done with the same setup. When you do products you have to have a flexible setup for anything from the size of a bead to the size of an oven.
I took some quick pic's with my Iphone (which I hate 50% of the pictures from)
I made a large frame out of PVC pipe. I can clamp lights around it front and back.
I used to shut off the lights when I worked out of the house but in the warehouse there are other people working and I had to reset the light balance for all the fluorescent lights. I use a Canon Speed flash to the side with a connection to the hot shoe.
I usually use a 12"x12" ceramic floor tile for a platform. I have a dozen of them to chose from.
I use a Benbo Trekker tripod. It will extend well into the tent for a top down shot. It gets shaky extended that way so I have to use a remote control on the Canon Eos Rebel T2i camera. Otherwise we trip the shutter manually.
We have several lenses but generally our workhorse for 95% of what we shoot is a Tameron Aspherical XR DI 28-75mm. It got rave reviews on www.DPReview.com and they were right. It is fantastic glass. If you are looking for any kind of new camera equipment, I'd suggest browsing DPreview.com first.
Our light tent is backed up by drafting paper often called vellum. Specifically is Xerox Erasable Vellum 20#. I have two large rolls of it I bought several years ago on ebay meaning to sell by the foot and never got that setup. I will get it set to sell by the foot.
This material is fairly tough and translucent. I tried several different diffusers and this works quite well. One sheet lets a lot of light through and gives a broad halo. Two sheets steps the light down and gives a smaller background hot spot of light. I just tape it onto the frame.
On the left side of the frame, hanging by a yellow paracord is the camera remote control. We also shoot everything tethered which also allows remote control firing.

I turned on one lamp in the back so you could see how it illuminates the tent and how the vellum diffuses the light. The light to the lower right is also on. The grainger box and red and blue boxes under that allow us to lift up or drop what ever item we are shooting to get the angle we want with out messing with the trip pod and light set up. For small items like beads, we bring the item almost chest high. It's just easier that way.
Note on the sides of the tent, we are using white art core board. The kind of stuff kids use at the science fair to show off their project. On top of the tent, you will see at least a couple different color boards. I use a black piece of kydex or gray foam board or plastic mirror to direct a little light or eliminate a reflection I don't want.
This took me the longest time to learn. Don't worry about any hand held reflectors, lights, cables, clamps, junk, troll dolls -- what ever getting into your shot around the edges. That can just be edited out. When ever I have to hand hold a reflector panel, it is always in frame but it gets edited out in post production.

This is our graphics station. Samantha manages all of our image work now. She uses dual monitors and Adobe Photoshop in a tethered set up. She can shoot an image and it will show up instantly on the large monitor to the right in 20" size. She can see instantly the focus and any adjustments needs to composition or lights that need to be adjusted. The image is saved instantly to the hard drive for editing. The tether software also allows you to change the shutter speeds, aperature, flash and trip the shutter. It's complicated to get set up but once you do, it's amazing how much time you save by be able to view the image on a large monitor screen and make adjustments from there. I can also make a "live" view where it acts like a video recorder. This helps set up composition when you have several items. It's easier to view and rearrange using the monitor than it is using the little screen on the back of the camera. You can get a better idea of how the Benbo tripod articulates here. The Canon SpeedLight Flash has it's own tripod just because it was handy. It could be clamped onto the tent frame I suppose.

Just a quick look at the back of the frame. I use typical clamp lamps. The CFL bulbs are daylight balanced. You can drive yourself nuts trying to find the exact daylight Kelvin temperature bulbs. Don't spend a fortune on them. Just get the bulb that says Daylight somewhere on it. I rarely turn on all of the lights at once, in fact never. I have them positioned all around so I can vary how the light comes to the object I am shooting. This is a big deal shooting knives. For products the front flash and ambient light in the warehouse covers us fairly well.


