Ribbon Burner build for new forge.

Vombrown

Banned
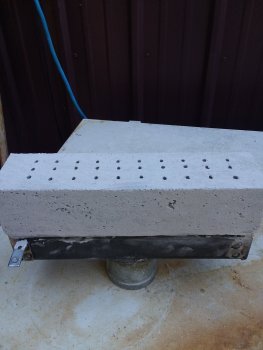
So I have been planning this for a while and thought I might offer up some pictures and thoughts on what I did and why. This ribbon burner is based on all the others that are online. It's 12 X 3" with 3" of castable. So the first things first. I built one exactly as I have seen others built, no modifications. I used 1/4" straws for the gas chases in the castable. Nothing fancy, just simple.

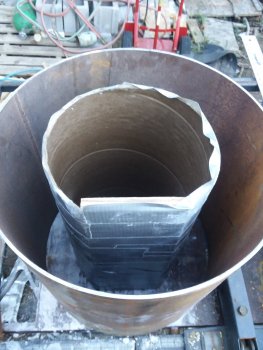
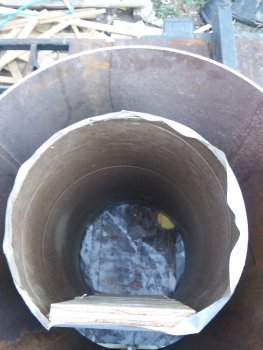
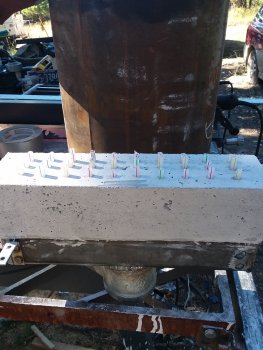
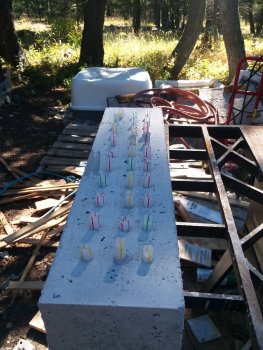
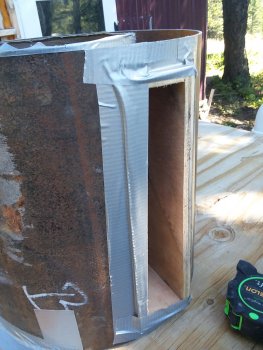
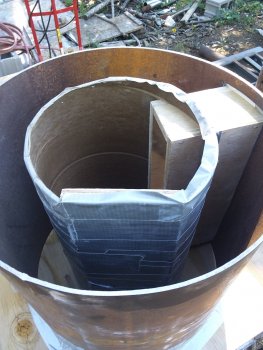
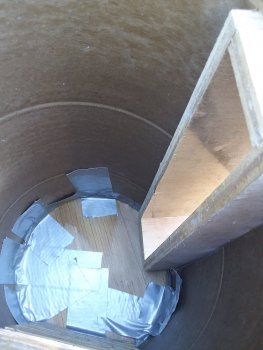
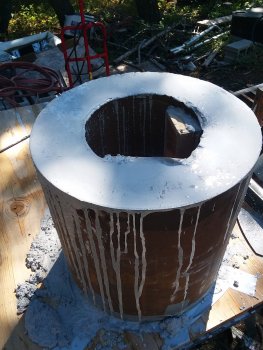
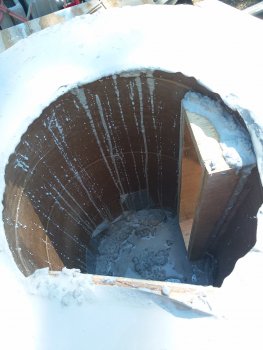
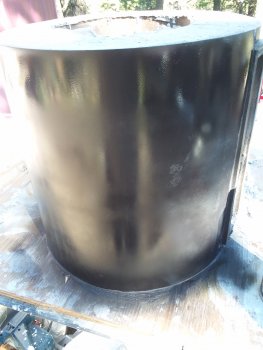
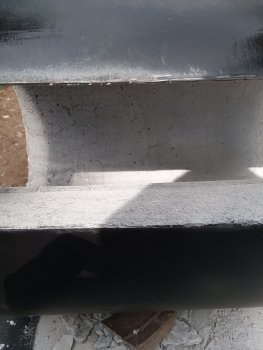
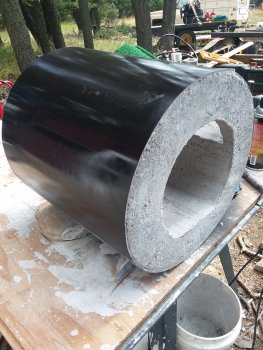
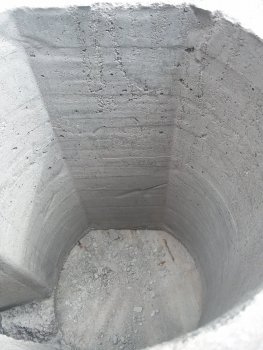
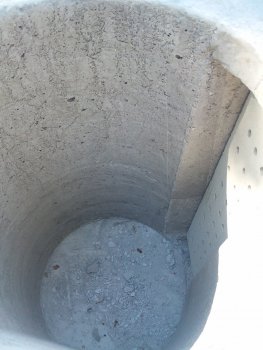
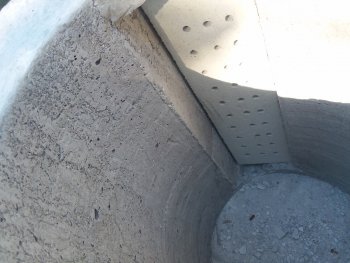
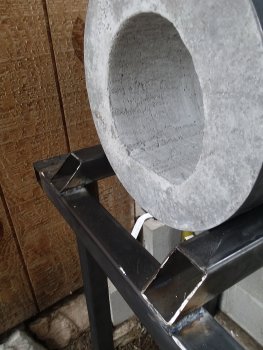
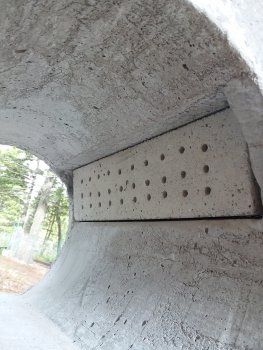
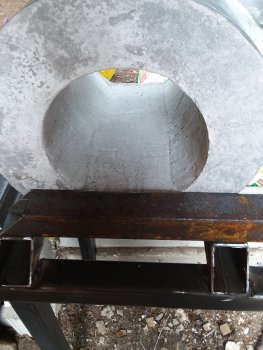
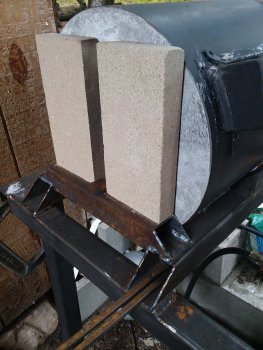
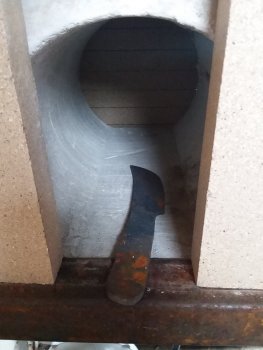
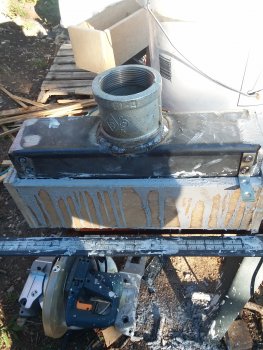
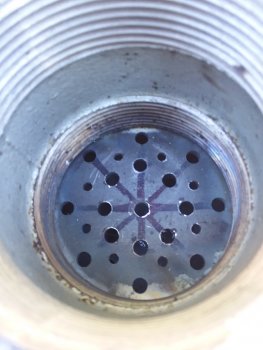
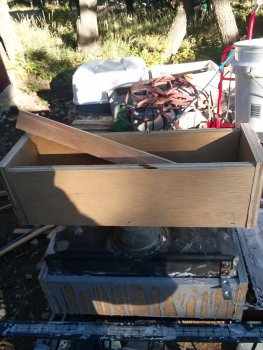
Now the pictures below are the one that I modified slightly. First and formost it isn't square. The castable is actually wedge shaped. In the same opening for the 12x3 this one will not need to be suspended on the outside it should sit tight in the hole by 1/4". Making a better seal. OK next small change that I made is illustrated in the second pic. Instead of cutting out the 2" hole in the top of the square tubing, I layed out the diameter, drilled the hole in the top of the hole and dimpled it using my press with a 2" dimpling die. It's sort of hard to see but I think you get the drift. This lowers the "Plenum" area, gives it curvature and should more evenly mix the gas coming into the manifold portion of the burner. I will be curing these according to the manufacturer specs and test them independently to see if there is any difference. I doubt there will be, if very small. I can tell you my way took about 30 minutes less time and no hole saw to make. My new forge is also underway. Cutting Down the 14" diameter pipe that I will be using as the casing for the castable. Pics on that later.
 

Attachments

  • image.jpeg
    image.jpeg
    832.2 KB · Views: 36
  • image.jpeg
    image.jpeg
    555.4 KB · Views: 34
  • image.jpeg
    image.jpeg
    717.4 KB · Views: 33
While those ribbon burners cure, I'm moving on to the forge. I decided the interior is going to be a "D" so essentially round with a flat bottom. I trimmed a cardboard sono tube for a 4.5" flat surface on the bottom. This is the average size of hard fire brick that I can lay on the bottom to reduce damage from flux or whatever should come in contact with it. This will be surrounded by 3" of castable refractory. The bottom where the flat is will be closer to 4" when completed. I will be cutting into the tube with a 12.25"X 3.25" hole which will be formed into the castable. This burner hole will angle the burner towards the ceiling of the inside. Firing the burner essentially into the curvature of the interior.
 

Attachments

  • image.jpeg
    image.jpeg
    635.6 KB · Views: 15
  • image.jpeg
    image.jpeg
    644.7 KB · Views: 12
Ok, updates. The ribbon burner was allowed to set for 24 hours and removed from the mold. Looks great. Straws were easily removed for perfectly round ports. Very easy to do and I feel like the crayons may be twice as hard. I will be allowing it to cure for a day or two on the counter top and then cure it in the oven. Total castable usage. .25 of one bag.

On to the forge. So the burner port was located as high in the diameter of the interior as I could get it without doing something funky. Forms were taped down and burner port was formed into the casing and interior mold. All seams and joints were taped with cheap duct tape. Hopefully this will make it an easy smooth removal. Castable was mixed to the consistency of wet oatmeal. I measured and used 3 liters of water per 55 bag of castable to achieve this consistency. It still flows but has a high solid feel to it. This forge project used 1.75 bags of castable with about a cup of waste. So essentially I used 2 full 55 pound bags for the burner and forge. Total waste was around two or three cups. I will continue to work the castable with a steel rod until it starts to set in the mold. Ensuring that all of the edges have been worked and castable has been worked evenly and compacted. The forward facing side will get a trowel smooth finish.
 

Attachments

  • image.jpeg
    image.jpeg
    740 KB · Views: 23
  • image.jpeg
    image.jpeg
    786.4 KB · Views: 20
  • image.jpeg
    image.jpeg
    509.2 KB · Views: 19
  • image.jpeg
    image.jpeg
    689.4 KB · Views: 23
  • image.jpeg
    image.jpeg
    642.9 KB · Views: 23
  • image.jpeg
    image.jpeg
    595.4 KB · Views: 24
  • image.jpeg
    image.jpeg
    741.3 KB · Views: 23
  • image.jpeg
    image.jpeg
    527.1 KB · Views: 23
Here are some other things. On the second ribbon burner I used bendy straws. I angled the straws slightly towards one side of the burner. Just an experiment.

As I finished this today I wondered why this couldn't be poured as a monolithic piece. Forge and burner in one unit. The burner head and manifold could be placed on top, straws inserted through the center form at the right angle and poured. I may actually try this as I have a smaller section of the casing left over and two more bags of castable. Might be a fun little side project.
 
Last but not least. It will need to sit and cure for a few days before I can move it, so I added a little high temp black paint to clean it up some.
 

Attachments

  • image.jpeg
    image.jpeg
    507.2 KB · Views: 7
Here are a few more pictures from today. The castable was allowed to set for 24 hours. I removed the forms on it today to allow it to air cure fully for a couple more days. It turned out perfectly! I do need to go in and dress the interior a little there are some small imperfections that I want to smooth out but overall I am very happy with it. Next step is to start on the stand while the forge continues to air cure for a few more days. The ribbon burner is curing in the kitchen oven then after a few days I'll put the forge in there. My oven is just large enough to get it in there. Don't tell my girlfriend!

Once it's mounted on the stand I will be welding up fire brick slides to enclose both ends of the forge. Pipe it all together and get it hot!
 

Attachments

  • image.jpeg
    image.jpeg
    844.3 KB · Views: 16
  • image.jpeg
    image.jpeg
    590.8 KB · Views: 16
  • image.jpeg
    image.jpeg
    948.5 KB · Views: 17
  • image.jpeg
    image.jpeg
    841.5 KB · Views: 17
These pictures show the ribbon burner sitting in it's location in the forge tube. It isn't all the way seated, I cast the opening 1/8" tight so it could be fitted tightly. This shows the angle of the burner in respect to the tube. It should fire directly into the curvature of the tube for a more even heat inside the forge without the fire directly on the steel. The "roof" of the hole for the ribbon burner is going to overhang by about 1/2" when it is fully seated. This will be beveled and flared towards the interior so as to not interfere with the flow of heat.
 

Attachments

  • image.jpeg
    image.jpeg
    672 KB · Views: 17
  • image.jpeg
    image.jpeg
    1.4 MB · Views: 16
Forge is almost ready to burn. I built a new table to mount it on. Working on the firebrick door setup now. Then I'll get the blower setup together, I need to make a run to town for some more fittings. New blower came in from blacksmith depot and looks great! I have one off angle pipe or it would have all just spun together. Ribbon burner is sitting in it's new home. Slight roof on the top but the bottom is flush with the tube. I dig it, can't wait to get it running.
 

Attachments

  • 20180915_144006.jpg
    20180915_144006.jpg
    667.7 KB · Views: 18
  • 20180915_145730.jpg
    20180915_145730.jpg
    845.2 KB · Views: 20
  • 20180915_145805.jpg
    20180915_145805.jpg
    702.9 KB · Views: 18
I took a lot of ideas from people and the net and then sort of did my own thing. All 2" pipe, the blower I am using has a 2" outlet so It's just a matter of a rubber boot to connect the two. The needle valve I ended up getting isn't the right one. Had it not been for that I could have fired it today. I still have a good amount to do. The fire brick doors are almost done, front and back. I will also fab up stem holders too at some point.
 
I have 1/4" NPT needle valves, which I think is the way to go. They are $15.00 each plus $8.00 S&H.
Let me know if I can help you.
 
Probably not. The only reason that I stock these is because I found that the 1/4" NPT Needle Valves are hard to find. Most hardware and big box stores just stock compression fitting valves.
 
So I picked up the new 1/4" NPT needle valve locally today and the last couple things I needed. Got the new forge all plumbed and sealed. THEN......I just HAD to fire it for a minute. Burned it at half blower capacity and about 2 psi for ten minutes. Man alive that baby COOKS! I still have to modify the angle of the ribbon burner slightly, it's firing a little low in the curve and I want it about 15 degrees higher. Just a small shave job to the inlet for the ribbon burner and it will be perfect. I'll weld up a shelf for the blower tomorrow and brace some of the pipe as well. Then I can close the table up around it and finish all the little details.
 

Attachments

  • 20180917_192508.jpg
    20180917_192508.jpg
    844.3 KB · Views: 25
  • 20180917_194128.jpg
    20180917_194128.jpg
    592.1 KB · Views: 25
OK guys, this is winding up. Tonight I burned the forge for the second to last curing temperature. It zoomed up to 2,000 degrees and held it there for an hour before allowing it to cool down overnight. Tomorrow is the 2500 degree burn for two hours. After that it should be ready to use and fully cured. Tonight was the first time I had any serious steam or gassing from the castable. It has always had a little steam but tonight it really STEAMED. I was able to reach 2k degrees in 14 minutes. I reduced the gas and airflow to maintain a constant 2k degree temp for one hour. Settings ended up with the blower closed off and 1/2 PSI of propane. Burning very clean and strong. With the firebricks in place it's essentially silent. All you can hear is the blower below it. The thing I love is that I can stand right in front of it with the firebrick doors half way closed. All it needs now is some tool rests, a couple pieces of flat stock welded on to hold the doors, a final coat of high temp paint and the two final curing burns. I tossed a knife blade in there just to have something to do while it was burning.
 

Attachments

  • 20180920_162857.jpg
    20180920_162857.jpg
    811.3 KB · Views: 16
  • 20180920_162918.jpg
    20180920_162918.jpg
    583.2 KB · Views: 15
Here it is, Final burn. This forge ZOOMED up to 2500 degrees. It maintained 2500 for an hour at 1 psi of propane and the blower fully closed.
here are some things that I learned:
1. The burner I used is oversized for the size of this forge, that allows it to rocket up to forging temps. I went from cold forge to 2500 in 18 minutes. A flat bar stock of 52100 0.250 thick and 10" long reached forging temperature in 8 minutes. The larger burner allows it to use a MUCH lower fuel pressure and air pressure to keep it hot. I really think there is something here. I've seen the recommendations as far as size in relation to the forge. I didn't listen and built my own the way I wanted. I think it proofed out.

2. The angle of the burner into the forge is EVERYTHING. At first I had the angle set at about 15 degrees down from the roof of the forge. It burned relatively good, it was OK. So at the advice of a friend I changed the angle up to about 5 or 6 degrees off the roof of the forge. Not only did this make it burn cleaner, it equalized the heat inside the forge and provided a more complete "swirl" of heat inside.

I'm tickled with this new forge. I followed the manufacturers specs for curing the castable and the ribbon burner. Now if you remember, I made two ribbon burners for this forge. I'm happy with it the way it is but next I am going to try my ribbon burner design now that I have a baseline of temperatures and time to reach those temps.
 

Attachments

  • Resized_20180921_190416.jpeg
    Resized_20180921_190416.jpeg
    69.2 KB · Views: 11
Here it is, Final burn. This forge ZOOMED up to 2500 degrees. It maintained 2500 for an hour at 1 psi of propane and the blower fully closed.
here are some things that I learned:
1. The burner I used is oversized for the size of this forge, that allows it to rocket up to forging temps. I went from cold forge to 2500 in 18 minutes. A flat bar stock of 52100 0.250 thick and 10" long reached forging temperature in 8 minutes. The larger burner allows it to use a MUCH lower fuel pressure and air pressure to keep it hot. I really think there is something here. I've seen the recommendations as far as size in relation to the forge. I didn't listen and built my own the way I wanted. I think it proofed out.

Sounds efficient - with gas and electricity.
 
Back
Top