DonL

Well-Known Member
Okay, I didn't start taking pics at first because I had no intention of making this a WIP! But since Boss asked for 'em, here it is. (plus it doesn't hurt that he's willing to put us in a drawing for some goodies)

I want to start off by saying that this started off as a hair-brained idea of mine. Follow it at your own risk because I have no idea if it'll work or not. I'm in need of a decent heat treating set up. My 1 gallon paint can forge is a year old and it's really hard to get consistent results from it, even with a digital temp gauge and Tempilstiks! Ever hold a knife blade so it can "soak" all the time moving it back and forth so it doesn't get too hot in one spot? I nearly pulled the trigger on the last Sugar Creek Kiln on ebay, but decided at the last minute to save my money and put it on my LB-1000. So this is what I came up with as an alternative.

I looked and looked around locally for some type of metal cyclinder object to make my heat treat furnace. I looked at examples of other furnaces/kilns on the web and liked the idea of how salt pots worked. Eventually I bit the bullet and bought a 15 gallon metal drum off of ebay. $45 shipped. It's military surplus and I sure wish I knew what they packed in these things! Inside was mostly green foam with a small opening in the middle. The drum is a little over 15" in diameter and about 22" tall. Since I don't plan on making anything larger than a 6 or 7 inch camp knife, this should be tall enough.

My plan called for putting a 4 to 5 inch pipe in the center of the barrel as the Mother of All Heat Treat Mufflers. This way I should get even heat, or so I'm thinking! I happen to ask my neighbor if there was a good junk yard around. He wanted to know what I needed and I told him a 4 or 5 inch length of pipe. He told me to come down to his house and take a look at some pipe in his backyard. WooHoo! He had a short section of 4 1/2" pipe that was cut to nearly the perfect length! Schedule 80 it appears! Plus, he GAVE it to me! FREE STUFF! I love it!

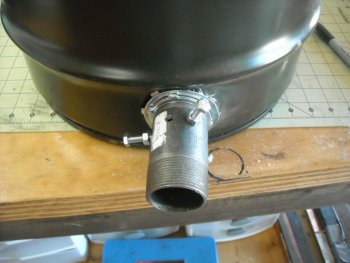
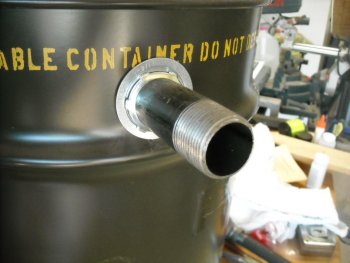
Here's my thought process. I'd use a 1 1/2" black iron coupling for the burner holder at the bottom of the drum. Near the top, I'd put an exhaust consisting of a 1 1/2" coupling.

I went to Lowe's and bought a Lennox 1 1/2" hole saw for my drill to drill out the holes for the black iron couplings. Okay, I knew better but my brain wasn't engaged when I did this. A 1 1/2" hole saw drills a 1 1/2" hole. A 1 1/2" black iron nipple has an INSIDE DIAMETER of 1 1/2" (or just a tad bigger). Needless to say, I had to break out the Dremel with the little metal cut off saw wheel and cut away to make the bottom hole larger. For the top exhaust, I went with a 1 1/4" coupling that fit the hole the hole saw blade made with little filling.
DSCN0038.jpg DSCN0039.jpg

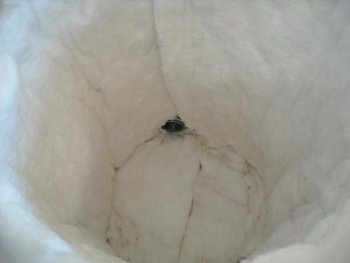
My plan was to line the inside of the drum and the lid with 1" inswool and then coat it with Satanite and ITC 100. Don't ask me why two refractory cements, just seemed like a good thing to do. Maybe I read it someplace once, I dunno. I'm kinda like that sometimes, over kill to the Nth degree!
DSCN0049.jpg

For the burner holder, I drilled 3 - 1/4" holes around the outside with the intention of tapping them 1/4-20. Again, brain not engaged because a 1/4-20 bolt will not get anywhere tight if the hole is drilled with a 1/4" bit! Gotta use the right bit and tap. Of course I knew that in advance, I just got into a hurry and let it slip my mind. So after that debacle, I drilled 3 CORRECT sized holes and tapped them. These bolts will hold the burner into place.
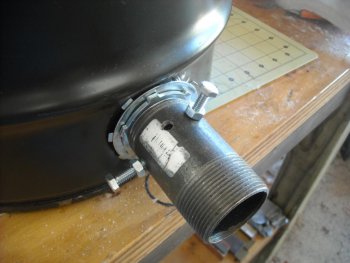
DSCN0041.jpg

I then cut my inswool to fit the inside of the drum and the bottom of the lid. I wanted my first coat to go on real thin and then the next coat will be a little thicker. I got that done this morning. All the pieces are sitting out and drying. It's suppose to get near 90 here today, so I'm hoping by tomorrow they'll be dry enough for the 2nd coat.
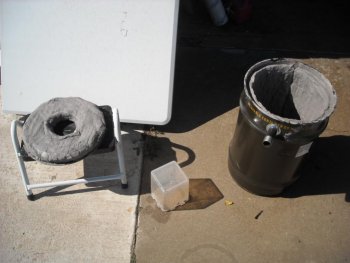
DSCN0051.jpg

Feel free to ask questions or make suggestions. This is all new to me (and my first WIP!) and I'd appreciate hearing your comments and recommendations.
 
Last edited:
Good WIP topic. We could use more forge or forging related WIPs

you are entered in the October drawing..
 
Day 2

Not much to show today. I added another layer of Satanite. The first layer was about the consistency of a thick soup. The 2nd layer that I added today was about as thick as pudding. I applied it in a thin coat also, but thicker than the first.

DSCN0077.jpg

Here's a few tips I've learned working with Satanite.

DSCN0050.jpg

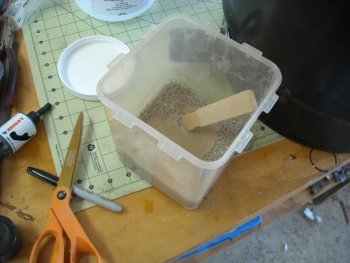
1. It doesn't take much water for a big batch! When I made my first forge, I would use way too much water. Use very little at a time.
2. I use a spray bottle to mist down the Inswool. This makes the Satanite stick better. Then, when adding additional coats, I also mist down the previous layer which should be well cured. Typically, I let each layer cure for 24 hours or more. It all depends on the weather. Hot windy days will obviously cure the Satanite faster than cool wet days. Make sure each layer is cured well before applying the next layer.
3. I use rubber gloves when applying Satanite, but it's still messy and expect it to get everywhere!
4. ALWAYS wear a respirator or dust mask when working with Inswool and the powder Satanite! The fiber blanket materials like Inswool and Kaewool can really do major long term damage to your lungs!
5. USE a Round Mixing container! And resist the urge to use your wife's Kitchen Aid mixer for mixing this stuff. Although I'm sure it would be the best thing to do it with!

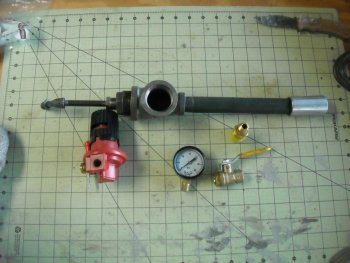
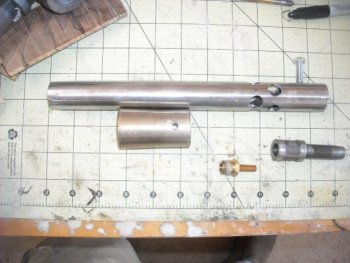
Since there wasn't much more to do today, I'll show you the burner that I'll be using. I could have made it myself from plans I found on the Internet, but I figured the cost of buying a kit versus the time for me to run around town and find all the parts was money saved. It's the 3/4" venturi burner kit from HighTempTools.com. I also bought the Inswool, ITC-100 and Satanite from there.

Anyway, here's a pic of the kit I ordered. Haven't put it together yet, but I'll get it soon.

DSCN0079.jpg

I also have a bad habit of under estimating how much material I need for a project. I'm going to order another 10 pounds of Satanite. Plus to be on the safe side, I'm going to order more ITC-100 for the final coat. I'll be waiting for a few days for this order to come in.
 
Last edited:
3rd Day

Okay, the folks at High Temp Tools got my order out and it arrived Saturday afternoon. I try and not work on anything Sundays, so first thing this morning I added another layer of Satanite. I'll add one more tomorrow and then do the final layer in ITC-100. Then the fun will begin!

Didn't take no pics today, it looks just like the pic above except with one more layer..:5:
 
4th & 5th Days

Today is just another layer of Satanite. I'm thinking it will be the last one. I'd like my Satantie to be about 1/4" when it's all said and done. Tomorrow I'll start applying the ITC-100. After that I'll have to add the muffler and then the burner and I should be ready for some dry (hot) runs.
 
Hi Don
Is this for heat treat only or is for forging or both.
Will you be using digital control?

That's probably a dumb question after looking a post #3
 
Last edited:
Mark, this will be for heat treat only. That's why I'm installing a schedule 80 pipe into the center. This could easily be made into a forge or a vertical small salt pot if I was to use some stainless steel pipe instead of a mild steel pipe. (IMHO).

As for the controls, I do have a pyrometer that I'll be using to monitor the temp inside the muffler (pipe), but other than that, it will be manual right now. I've seen plans on the other forums for a solenoid activated burner that is paired up with a pyrometer. When the temp falls below a set point, the solenoid opens and allows gas in and it ignites. When the internal temp reaches the upper limit, the solenoid shuts off the gas flow.

That's a little more involved than what I want to do currently. For right now, I'll be happy to babysit this contraption and turn the gas on/off manually to maintain a constant temperature (or at least as good as I can get it). At least that's my plan. I've never built anything like this so I'm hoping it will work out!

Tomorrow will be the ITC-100 application!
 
Well I'm back! During my absence, I added two coats of ITC-100. The thing about ITC-100 is that it is very thin when mixed. The ratio is 2 parts ITC-100 to 1 part water. I read somewhere that it was best to apply it with an air brush, but since I don't have one of those I used a normal paintbrush. I let each coat set at least a day between coats.

I was off hunting for a few days so it had plenty of time to cure.

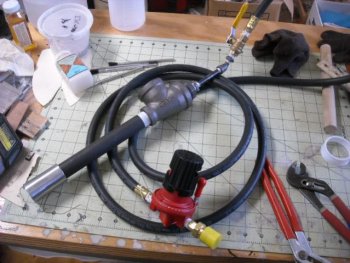
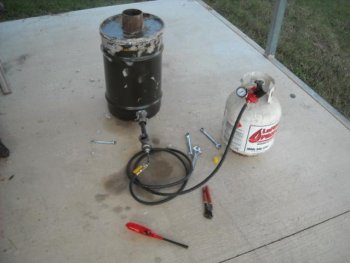
Meanwhile, I assembled the burner and hose assembly. I initially forgot the gauge and had to go back and add it.

DSCN0125.jpg

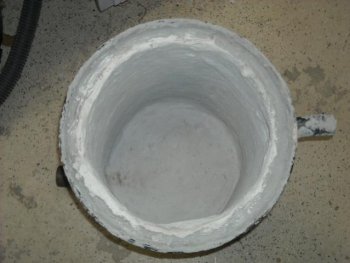
Here's the finished cured product. I can't believe that I got it that smooth inside!

DSCN0127.jpg

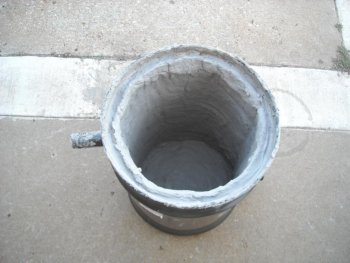
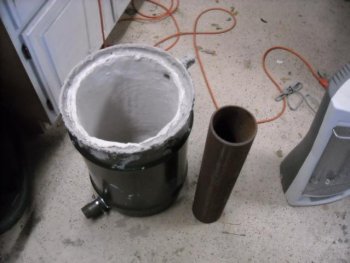
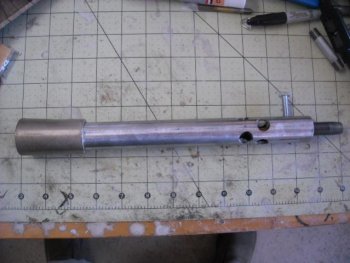
This is the pipe I'll be using as a muffler. I wish it was a bit thinner but when it's free, you don't complain! I then put the top over the pipe and inserted the whole thing into the furnace.

DSCN0128.jpgDSCN0131.jpg

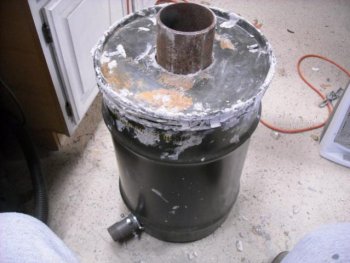
As you can see, the Inswool/Satanite/ITC-100 on the lid prevented it from closing tightly. I was hoping that I would be able to get the lever lock ring on, but I couldn't. The Inswool ended up coming off the lid, but that's alright because it ended being stiff enough to fit anyway. It's a good thing as you'll see later :52:

DSCN0135.jpg

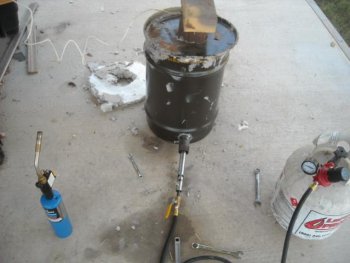
Next I took the whole shooting match out to my carport and assembled it. This is where I learned that I had forgotten the pressure gauge and went back to get it. After installing it, I was ready to go.

DSCN0138.jpg

I when I opened the valve to the propane bottle I forgot and left the shut off valve open. There was only about a few seconds between when I opened the propane bottle and shut the valve off at the burner. I then stuck a BBQ lighter into the T and lit her up. And boy, DID IT EVER LIGHT UP! What little propane made it out of the bottle pooled into the furnace and when I lit it, I had a big POOOF! It nearly blew the lid off of the pipe! Lesson learned! Had the lever lock ring been on, I'm not sure what kind of fun would have happened! :shush:

DSCN0137.jpg

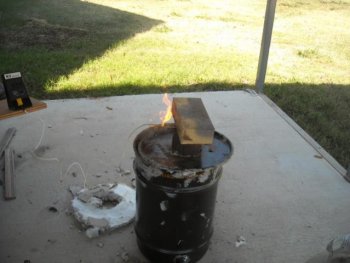
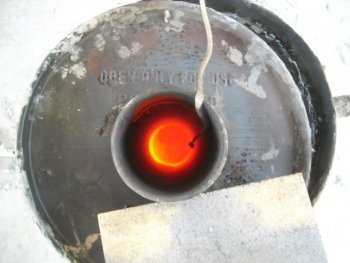
Anyway, once I fixed that, I turned it on and let it go! Everything looked good and the pipe (muffler) started heating up well. I had very little heat escaping around the openings. I let the furnace run for about 10 minutes and shut it off. The burner needs adjusted but other than that, I think this will be just what I was needing.

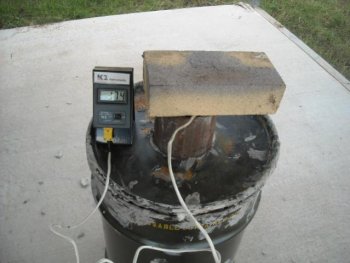
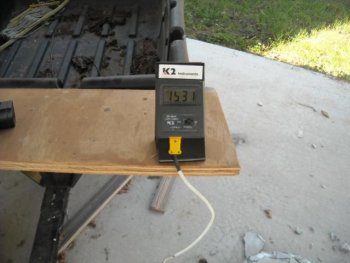
The readout on the Pyrometer says "174" but that's because there's part of the readout that doesn't work (the horizontal part of the "7").

DSCN0146.jpg

After it cools, I'll go and try to tweak the burner and check the inside of the furnace. Now I need to find some heavy SS wire to suspend the knives from when they're HT'ing. Hopefully tonight or tomorrow I'll get to try it out on a real knife!

Thanks for looking, I hope this has been helpful to you. One of these furnaces would make a great forge. If I ever do that, I'll go with 2" of Inswool and probably 2 burners along with putting in a thicker floor (maybe even a firebrick floor). Mount this badboy horizontally on a stand and you'd be ready to roll!

Here's the final cost break down and places where I resourced parts. Well, it was either High Temp Tools or Ebay! LOL

I already had the pyrometer that I bought last year for $75.

15 gallon barrel - $40 @ ebay
Venturi Burner Kit - $45 @ HTT
0-10ft Hose Assembly - $62.95 @HTT
10lbs Satanite (I already had .5 lbs.) - $28 @HTT
Half Pint ITC-100 (I already had about 1/4 pint) - $34.95 @HTT
5ft roll of Inswool - $36.00 @HTT
1 1/2" coupling and 1 1/4" coupling with fittings - $5.00 @ Lowes

Grand Total = $251.90
 
Last edited:
Looks are deceiving Mark! I'm having a hard time getting the burner tuned. I've tried several different things and I just can't seem to get a really hot torch like flame out of this burner. Plus, the burner goes out when I insert it into the furnace.

Just for kicks, I stuck my TS8000 Bernzomatic head with small a small bottle attached into the furnace and it didn't go out but had a hard time heating past 500 without the pipe in.

I'll have to contact the folks at HTT and see what they recommend.

I'm using 1095, 01 and 1084 right now. Hope to try some 52100 in the future. All my stainless is sent out.
 
Don
Do you have any exhaust port, out the inner tube or lid?

Try a space where your tube bottoms in the barrel, or leave the lid off.

Just a thought.

Mark
 
Yeah Mark I have an exhaust. It's a 1 1/4" exhaust near the top. I can keep the flame lit on the burner with the top off, but I believe the problem is the burner itself. It's not putting out a blow torch like flame such as those I've seen in video's. Also when I turn up the gas pressure, it sometimes blows itself out before I even get it to the furnace. Gonna make a smaller burner and see how that works.
 
That awkward moment when you realize.....

...you have the stainless steel flare end on backwards :( :eek: Of course, I didn't realize that until I had already went to the store and bought parts to make another burner and had it built. I was drilling and tapping the flair end for a set screw and realized that I had it on backward before. Ooops.

Anyway, I build another burner. I followed this guy's instructions on youtube. Building a Venturi Burner I used the mig tip from HTT and the Stainless steel flair end. Everything else I bought at a local home & ranch store for about $15. The pipe fitting that came with the HTT burner were 1/8". The one I build this morning is 1/4". I'll probably modify the burner I built this morning later on and try the 1/8" pipe and fittings. This should give me a more robust flame.

DSCN0155.jpgDSCN0157.jpg

It needed a little tweaking, but other than that, it worked great. I then inserted it into the furnace and was ready to go.

DSCN0158.jpg

I think the back pressure is too much for the little 1 1/4" black iron coupling that I'm using as an exhaust. The burner had problems running properly. So I took the lid off just a little and everything seemed fine.

DSCN0159.jpg

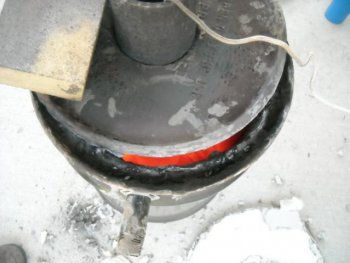
Just over 1000 degrees and the rubber gasket around the lid caught fire...oooopssies....guess I should have removed that at the beginning of the build. I guess the Satanite and ITC-100 protected it up to that point!

DSCN0160.jpg

This is the temp I had inside the schedule 80 pipe after about 20 minutes and about halfway down the inside of the pipe. My 1095 and 01 are gonna love this!

DSCN0162.jpg

I was able to maintain that temp within about 25 degrees simply by lowering the pressure and/or removing the brick from the top of the pipe. It was way easier than I thought it would be.

Here's the business end...or I should say 'the bottom of the business end'.

DSCN0163.jpg

A little peek inside...

DSCN0164.jpg

I can't wait to try it out!

FINAL THOUGHTS - WARNING!!!!

I can't begin to tell you how dangerous it is messing around with propane in an enclosed container!! Yesterday I had my second "POOOF"....actually a small explosion to be honest. I was still trying to get the other burner functioning properly and had turned my back and was getting something when I heard the flame go out. I took the few steps to the hose/valve and turned it off. Maybe 2 seconds tops. I pulled the burner out and waited a few minutes to allow the propane to clear.

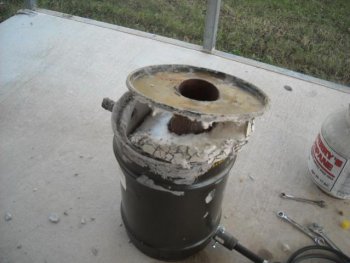
When I relit the burner and had it almost to the opening of the 1 1/2" coupling, I had a small BOOM and a pretty good back blast came out of the coupling and singed hair off my arm. The explosion literally blew the lid off the top off the furnace, destroying the Inswool that was on the bottom of the lid. The satanite and ITC-100 was crumbled. Later on, I discovered some cracks inside the furnace that I'll have to patch.

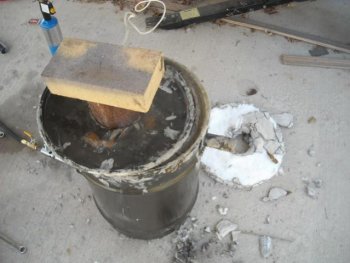
This is how the Inswool looked after my "experience". In the pic, I had already replaced the lid around the pipe.

DSCN0160.jpg

BE VERY CAREFUL IF YOU DECIDE TO BUILD A PROPANE POWERED HEAT TREAT FURNACE!!

God Bless and thanks for following along!
 
Last edited:
Remember Don, propane is heavier than air and lingers at the bottom.

Yeah, I knew that Mike, just figured after several minutes it would clear out on its own (through the burner holder, which is at the bottom). The lid to this thing needs removed and let the air push the unburned propane out before trying to relight the burner. It doesn't take much to make things interesting!
 
Sorry, didn't mean to imply that you didn't know, just that it may have slipped your mind... happens to me quite often. I've had this happen to me on propane grill, sufficed to say, even if your eyebrows grow back, you don't soon forget it. :biggrin:
 
Naw Mike I didn't take it that way. I knew what you were saying. I should have known better than to re-insert the burner even after the flame went out but I have to relearn some lessons the hard way! :)
 
Some more Mods....

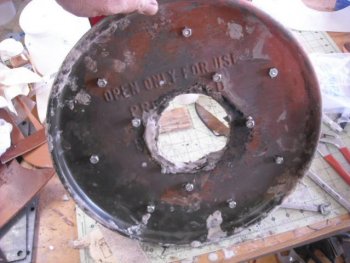
Without the Inswool/Satanite/ITC-100 coating on the lid, it got very hot. Over 300 degrees and counting. So I needed a way to keep the Inswool on the lid. This is the best I could come up with on short notice ;)

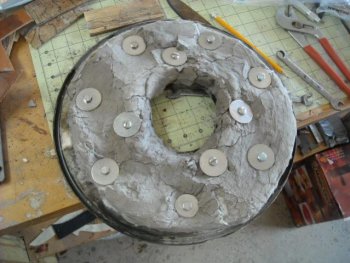
I took 1/4" stainless steel bolts and used 5/16 fender washers to hold everything to the lid. I actually thought about using some fiberglass mesh tape used for drywall joints, but figured this would be just as good. I used 1" and 1 1/2" long bolts. In retrospect, I should have used all 1 1/2" long bolts. I tightened the nuts just so I had a full threads on the nuts and then covered everything on the underside with Satanite. I'm out of the ITC-100. When I get more, I'll add a few layers of that as well, but it'll be in the future.

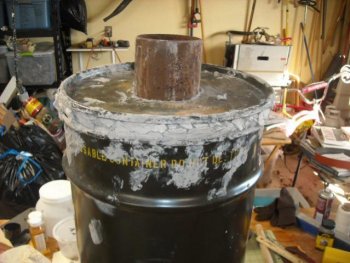
Here's what I ended up with. I wish I'd done this before adding the first layer of Satanite, but it didn't occur to me until after I'd applied it. Looks like a stainless steel fender washer and satanite pizza!

DSCN0184.jpg

The top side. This kinda looks Steam punkish....maybe I just started a new fad? :)

DSCN0185.jpg

Future mods include switching out the 1 1/4" black iron coupling that I'm using as an exhaust for a 2" coupling to reduce the back pressure enough so I can close the lid completely while running.
 
I'll toss out some suggestions:

The exhaust port needs to be about three times the inlet port size. For a forge like this I would use a 3" exhaust.
There has to be enough room to prevent excessive back-pressure, or the burner won't run well.

Use insulboard forn the lid, and forget the metal top and kaowool.

These work better with a blown burner. The air/gas mix can be ajusted to allow almost any temp. They are not as sensitive to backpressure, either.
 
Back
Top