2013 St. Jude Childrens Hospital Sub Hilt WIP

Awesome as always , John!
Dude when are.you going to give up the dream of being a machinist and become the KNIFEMAKER
YOU ARE MEANT TO BE!?!?
This knife.will be.EPIC! Now.to find some.one.to engrave it's...
Rex
 
Rex, I talked with several engravers. This knife has alot going on, and after discussing it with them, I (along with them) think that you can have too much in a knife. I was also going to do filework on the spine, but the damascus pattern pretty much washes it out. I think Mosaic pins will be the stopping point on this one as far as bling. I talked in depth with Ken Hurst and for one thing, he just didn't have enough of a time frame. On top of that, he tried to talk me out of one of my 1911s as payment for the job :lol: Seriously..I think anything done by Ken Hurst would be simply amazing and well worth whatever he charges, but it needs to be done on a knife that doesn't have so much going on. Maybe I can get one done in the future.

Got a small amount done last night. I didn't get out to the shop until late so I didn't do very much. I was wanting to start fitting the mammoth scale pieces, but one touch on the grinder reminded me just how much this stuff stinks when you grind it. Good gracious..you have no idea. I will have to open up the roll up door and get some ventilation going to do that part..and I can't do that at 9:30pm at night..the grinders are too loud. That will be done this weekend.

In this pic I have pinned the guards with dummy pins so I could start to fit the scale pieces. As I stated, I will have to hold off on that untill this weekend.

IMG_20130710_211035_846_zps4727eee2.jpg


Got the handle pin holes reamed out. They had scale built up on the inside that would hinder the pin from passing through. I just twist the reamer by hand

IMG_20130710_211309_783_zps926883c3.jpg


I started doing some of the profiling work on the guards. This has to be done, so I started on it. You can see here where I have drawn sharpie marks on the sides of the sub hilt guard, to start to rough profile it down.

IMG_20130710_212022_125_zps1270373e.jpg


I stuck these in the mill to cut a bunch of this metal off quickly. Beats the heck out of grinding it all.

IMG_20130710_212226_348_zps9a0b8d98.jpg


Here are both of the sides roughed down

IMG_20130710_212533_096_zpsd90ae902.jpg


Also need to do the same to the profile on the front and back. You can see the sharpie marks here of what needs to come off.

IMG_20130710_212638_484_zps87bf5a33.jpg


And then after a little grinding, there is a roughed in profile

IMG_20130710_213601_106_zps6c2e0aab.jpg


More to come.
 
Last edited:
Started the major handle work over the weekend. In this pic, I have started grinding the width of on of the pieces that goes between the main guard and the sub hilt. I have to be really careful when doing this. Only remove a little material at a time, becuase if I remove to much, I'll create an unsightly gap that is not wanted.

IMG_20130714_121021_719_zps76f07ade.jpg


If you look close here, you can see the height difference between the side of the guard and the top of the scale piece. I'll address that later. I am going to add spacer material to the back which will bring it up further, so I'll still need to thin it up even more for that.

IMG_20130714_121149_811_zpsbc830fea.jpg


Now I'm going to start tapering the tang. I've drawn a sharpie mark here on both sides to indicate where I need to stop tapering, which is the start of the area under the subhilt. We'll taper starting here and angle down towards the rear on both sides.

IMG_20130714_123829_011_zps519c40c6.jpg


Here's a line scribed down the center of the tang to use as a reference before I start

IMG_20130714_123845_748_zps3696f249.jpg


It's kind of difficult to depict in a picture, but the taper is done here. To get it the same on both sides, I lay the tapered portion down on a surface plate and measure the distance that the tip rises off of the plate. When it rises the same amount on both sides, I know the taper is equally ground. This was my first one of these, and it really wasn't that hard at all.

IMG_20130714_125955_583_zps5db8f878.jpg


Side view

IMG_20130714_130048_914_zpsffade9da.jpg


Now I start fitting the main scale piece. I try to make the grain line up. It looks better that way. To do this fit, I have to establish that angle on the right side that matches up to the rear bolster. Once I get that angle established, I can take a little off at a time until it gets all the way down to where it needs to be. Again, this is an area where I have to be very careful, because if I take to much I will overshoot.

IMG_20130714_134350_222_zpsa8503b23.jpg


Here it is a little further. You can see the grain line I'm trying to work towards.

IMG_20130714_134558_674_zps90cd73ec.jpg


There it is matched

IMG_20130714_134914_910_zps9a0c72c7.jpg


I had enough white fiber spacer material left to use. I will cut this to match the scales. This stuff makes the lines pop when the knife is finished. I have it in different colors, but the white is all I've ever really used. That's a piece of crimson red underneath.

IMG_20130714_121618_420_zpsf63c6637.jpg


I pretty much repeat those steps for both sides. Aftter I do that, I can put the scale pieces on, flip over, and trace lines around the tang to make lines on the scale pieces so I can see what needs to come off.

IMG_20130714_135449_885_zps7957bf8e.jpg


Here are the pieces laid out. Note the rear bolsters are included as well

IMG_20130714_140020_165_zpsb7dd7fa7.jpg


I saw as much of this off as possible to mimize what I have to grind

IMG_20130714_142018_428_zps61b28e90.jpg


I believe Daisy has lost interest in the process. I'm glad yall are still paying attention :)

IMG_20130714_142316_031_zps3501a652.jpg


Next we need to drill the scale mount holes. This is done by clamping them to the tang in the position they need to be, and then supporting the blade from underneath. Note the 123 block on the left is slid all the way up to the sub hilt. If I were to come further to the left with it, I would start getting into the tapered section of the tang, and that would throw the hole off. Once ever thing is set up, I drill through the tang hole and into the scale. I don't use alot of pressure here, because the clamps are really the only thing holding the scale in place and then too much force near the break through point will cause the surface of the scale material to chip out. -More unsightly stuff we are trying to avoid.

IMG_20130714_142752_804_zps13cc0758.jpg


The finished hole

IMG_20130714_142911_652_zpsec80fd6f.jpg


Here are all of the holes drilled.

IMG_20130714_144449_158_zps4771191d.jpg


Now I need to go ahead and cut some pins. The pins on this knife will be mosaic. I measure my tang thickness near the main guard with both liners and scale pieces attached. I'm getting about .900" or so, so I'll cut them 1" to be safe. I need three of them.

IMG_20130714_154506_070_zps1b346fe8.jpg


IMG_20130714_154901_365_zps06408a4e.jpg


Now I need to do some roughing on these pieces to get them down to the tang. I put some electrical tape on my pin ends to keep them coming out from the vibration of grinding.

IMG_20130714_155459_496_zpsca50c7e8.jpg


Here you can see I've ground it pretty close.

IMG_20130714_161341_168_zps3558307c.jpg


And here is some of the scale work. I also hit the top of the sub hilt guard in this pic.

IMG_20130714_162453_345_zps8e575766.jpg


Some of the main scales

IMG_20130714_163255_994_zpsc6f68051.jpg


IMG_20130714_163307_108_zpsa7327237.jpg


And here is a pic of the mock up. Starting to look like a knife

IMG_20130714_163704_141_zps04bd2de8.jpg


This was about five hours of work yesterday. Had to give it up at that point :) More to come.
 
Have to get these scale pieces down a little thinner than they are. The reason for this is because the surface (known as bark) is what we want the most of left when shaping is done. if I were to have left them as thick as they were, by the time I shape the handles down to match the guards and final contour, the bark would all be gone. That is what gives any natural handle material its character, so I try to leave as much there as possible. In order to do this, I need to remove material from the backside. In these pictures, I'm working on them.

IMG_20130716_193156_130_zpsa9afff0b.jpg


IMG_20130716_193248_549_zps8ecd1160.jpg


Looking back at the pictures in the last update, I see my handle thickness was about .8865". After the grinding I did last night, I'm down to .761" now. That is about 1/8" or .125" over all.

IMG_20130716_195553_826_zpsc6683542.jpg


If you remember, the guards are still in the roughed in state. I spent about two hours on these things last night working towards a final shape. Almost there.

The sharpie marks show what needs to come off

IMG_20130716_195709_381_zpsf738d08c.jpg


I did some mill work roughing to get some of it off, and then finished up on the disc sander to get the curved profile

IMG_20130716_201215_387_zps7365cf19.jpg


Here I have started working on the backside of the guard, as well as the front side. Not the difference of the right side vs the old roughed in left side we started with. There is really no secret to this, other than using some disc sanders, belt sanders, and a small 1/2" dia barrel sander on my dremmel rotary tool. Again, sorry for lack of pics of me in action. I can't get the mosquitoes or the dog to take any pictures for some reason.

IMG_20130716_205448_984_zpsb09feaf0.jpg


Finally, when all is said and done, I got this. These are not 100% final, but they are very close to their final shape.

IMG_20130716_212726_690_zps5261b556.jpg


Getting close folks..Still alot to do though :)
 
Need to glue the fiber spacers to the backs of the scale pieces.

IMG_20130717_080603_26601_zpsa6164d7d.jpg


First I clean everything with a little alcohol, just to be sure there isn;t any residual grease or other stuff that would hinder adhesion. I also blow off the scale pieces before this to ensure no sanding dust is still present.

IMG_20130717_081013_281_zps669c1b2d.jpg


I use regular super glue for this. It works great between the fiber material and handle scales.

IMG_20130717_081320_681_zps105faef7.jpg


Here they are glued. I set something heavy on them for a little while just to be sure I have good press up.

IMG_20130717_082434_352_zpsf91dfb4f.jpg
 
Update. I ran into a problem a few nights ago that required some changes, but it was not really a big deal. One of the issues with doing a project like this is getting everything done in a certain order of steps. There is so much to do, it is easy to skip a step or do something before it should have been done. In this case, I drilled the scale holes before I should have. On the last update, I took the handle scales down thinner by grinding away material from the rear. Somewhere, in all that grinding, the squareness / perpendicularity of the holes in relation to the backs went out the window. I had a slight concern for this but was praying it would not happen. Murphy's law came into play, and well, it did..

IMG_20130717_190924_030_zps0012cca6.jpg


You can see in the pic above that with the pins passed through the scales, the gap in between is not straight. The only way to make those scales lay down flat against the tang is to open up the holes the pins pass through to give them some slack. Only problem with that is that it creates gaps. Can't have that.

So the question is, what do we do to fix it? The only option is to re drill the holes out bigger. That will require a bigger pin..which I have. I had to move the holes up to 5/16" diameter instead of 1/4". That's ok though, it isn't much different..just a little bigger. I would have preferred 1/4", but 5/16" will have to do it on this one.

So, I put the blade back in the vise, and locate that hole using this 1/4" sharpened dowel. That gets me on location to enlarge each hole.

IMG_20130717_192519_224_zps701b2e17.jpg


Then I mill the holes out to 5/16" with a carbide endmill.

IMG_20130717_193103_624_zps1197fd2d.jpg


At this point, I go back and re drill the scales one at a time out to 5/16".

Anyway, good to go again.

So last night I started doing the final shaping and polishing. This is something that will be a process over the next few days. The knife will gradually take shape and become a completetion of parts, rather than a bunch of seperate parts. As I do this I will constantly be shaping the pieces and trying to work out a shape for the handle. This is a mystery to some people, and to be honest it requires alot of patience and sorcery. handle shaping is not rocket science, but it does take patience and concentration. This mammoth ivory is going to be amazing. It is starting to come out and it is beautiful.

Since the masses have spoken and requested polished hardware, that's what we will do. That's gonna take some time. Here I am working on the subhilt trying to get that trigger surface smooth. Just 400 grit to start.

IMG_20130718_123144_812_zps84b42c76.jpg


Here is the main guard

IMG_20130718_155821_494_zpse1ba950c.jpg


Here I have started shaping the bolsters in the rear. I have brought them down level with the tang. You can also see some of the underside of the handle has been brought down as well.

IMG_20130718_203348_870_zpscc211fed.jpg


Here is the top of the handle starting to take shape

IMG_20130718_203402_377_zpse5ed11a4.jpg


Next I round off the guards.

IMG_20130718_203725_401_zps403ed852.jpg


IMG_20130718_203729_925_zpsc2765ef1.jpg


This is how that is done..on the disc sander

IMG_20130718_203921_347_zpsdcf4361e.jpg


Finished for now. Still have to work it all the way up to 2k grit sandpaper and polish. Rough shape is done.

IMG_20130718_204002_730_zps54f49ebc.jpg


More on the handle rough in. What I am pointing at here..the rear of the scale where it meets the bolster, needs to be brought down to where it is roughly the same height of the bolster. This would have been a tad easier with thicker material for the bolster, but I'm not complaining because this stuff was donated to me by Josh. We'll will make it work!

IMG_20130718_205922_723_zps8c42e811.jpg


Here is a final shot for last night. This thing is gonna be something special :)

IMG_20130718_212817_440_zps5adef701.jpg


Just to sum up whats left..

-I have to turn a piece of brass for the lanyard hole

-Polish both guards and bolsters

-Cut new 5/16" pins

-Final grind the blade

-Etch the blade

-Add my name

-Stick everything together and let it dry

-Do a final shaping on everything and get it cleaned up. Pin the subhilt and main guard, and take care of polishing those back out to where the pins are hidden.

Stay tuned. Shooting for Monday as completion.
 
Have about four hours in sanding and polishing these guards. They are pretty much done except for when we install the pins and have to clean them up to hide them.

IMG_20130719_154550_469_zpsd34a5492.jpg


Did the blade grind last night. It is 95% done. All I have to do is go back and hit it with some finer grit belts and clean everything up before etch. First I blue it so we can scribe a center line

IMG_20130719_190708_277_zps066bf3f8.jpg


Then I scribe a line with the calipers. The blade is 1.084" tall, so the midline is .542" like you see on the caliper screen

IMG_20130719_190929_342_zpse4ac51aa.jpg


First bevel in progress

IMG_20130719_193221_376_zpsd6e8ea43.jpg


The wife came out and got an action shot of me grinding :) Yeah I know..I should be wearing safety glasses..I usually do but didn't have them on right then for some reason

IMG_20130719_195527_124_zps928fd727.jpg


Here it is as of now :cheers:

IMG_20130719_210240_786_zpsc3a8ead9.jpg
 
sorry for joining in here so late...great WIP and tutorial all rolled into one.
Nice job!
 
Thanks Tracy. I have enjoyed this one. Here is the last update before it goes to Rowe Leather for a sheath.

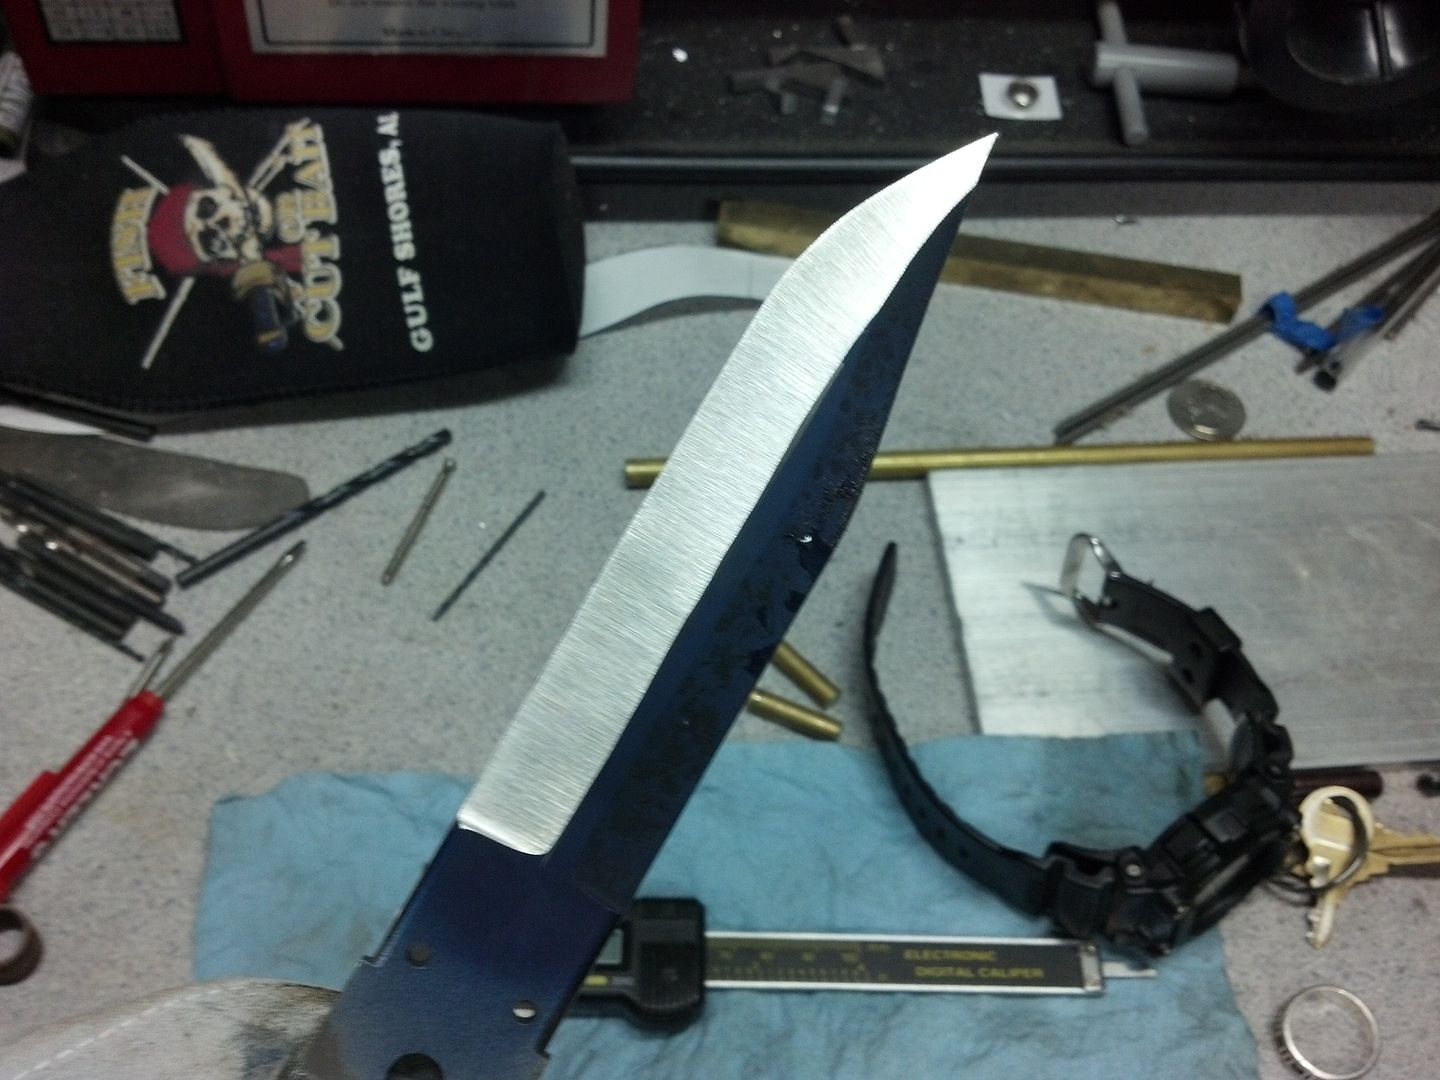
Ok so when we left off we had ground the blade to about 95% completion. I still needed to go back and work my way up through the finer grits to make it shine.

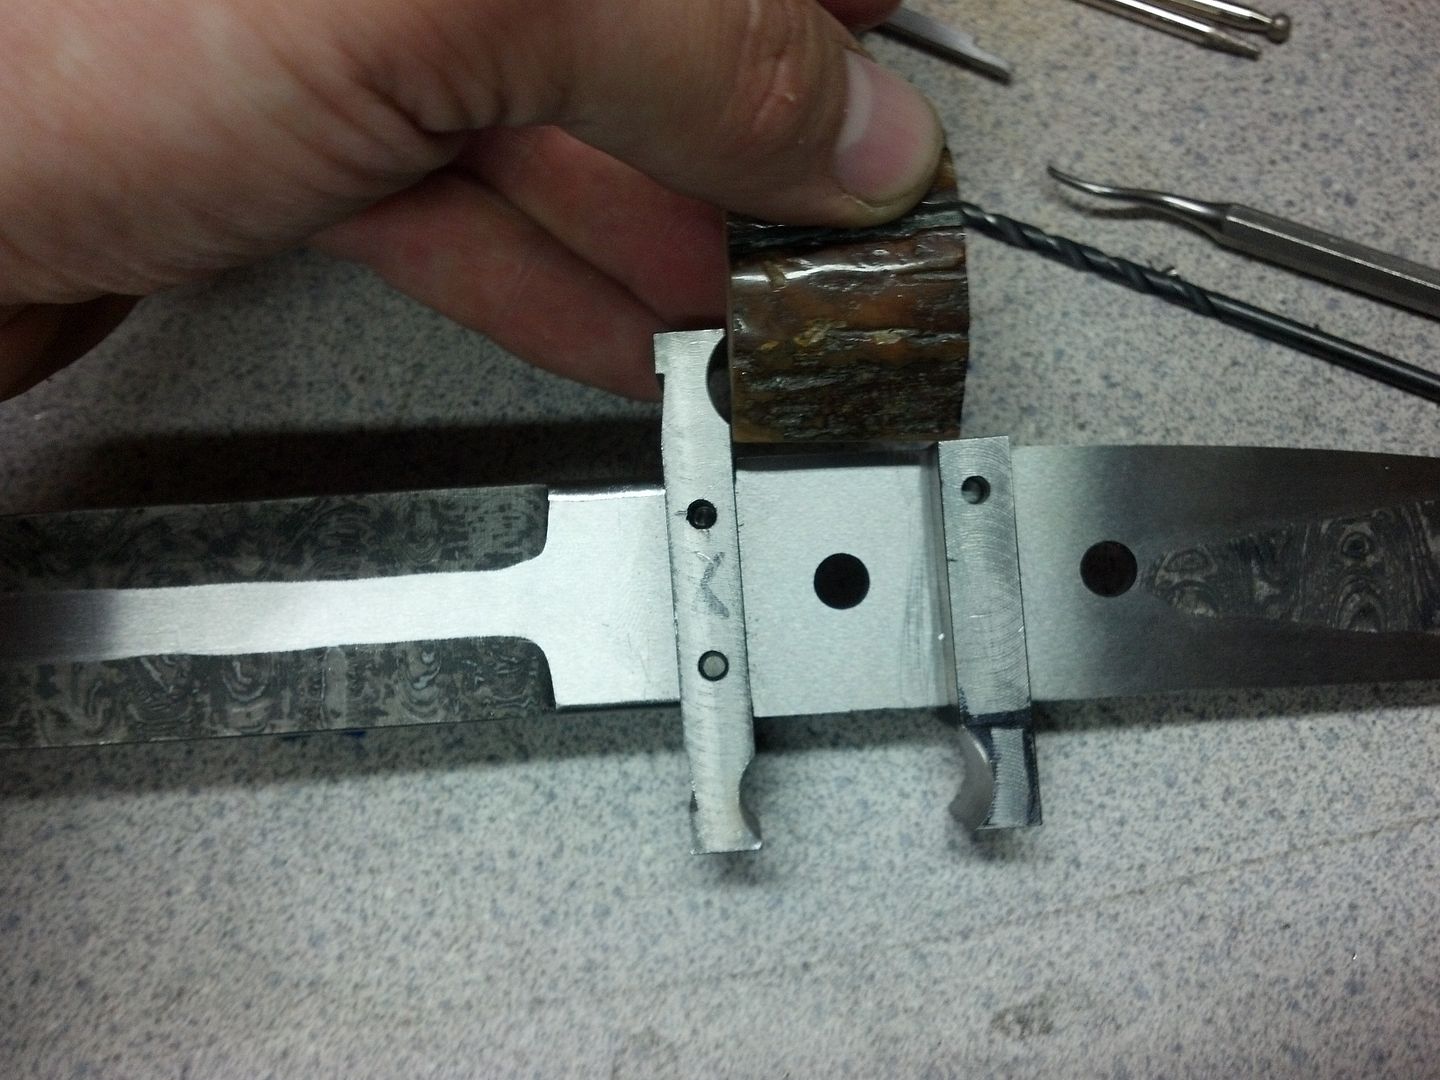
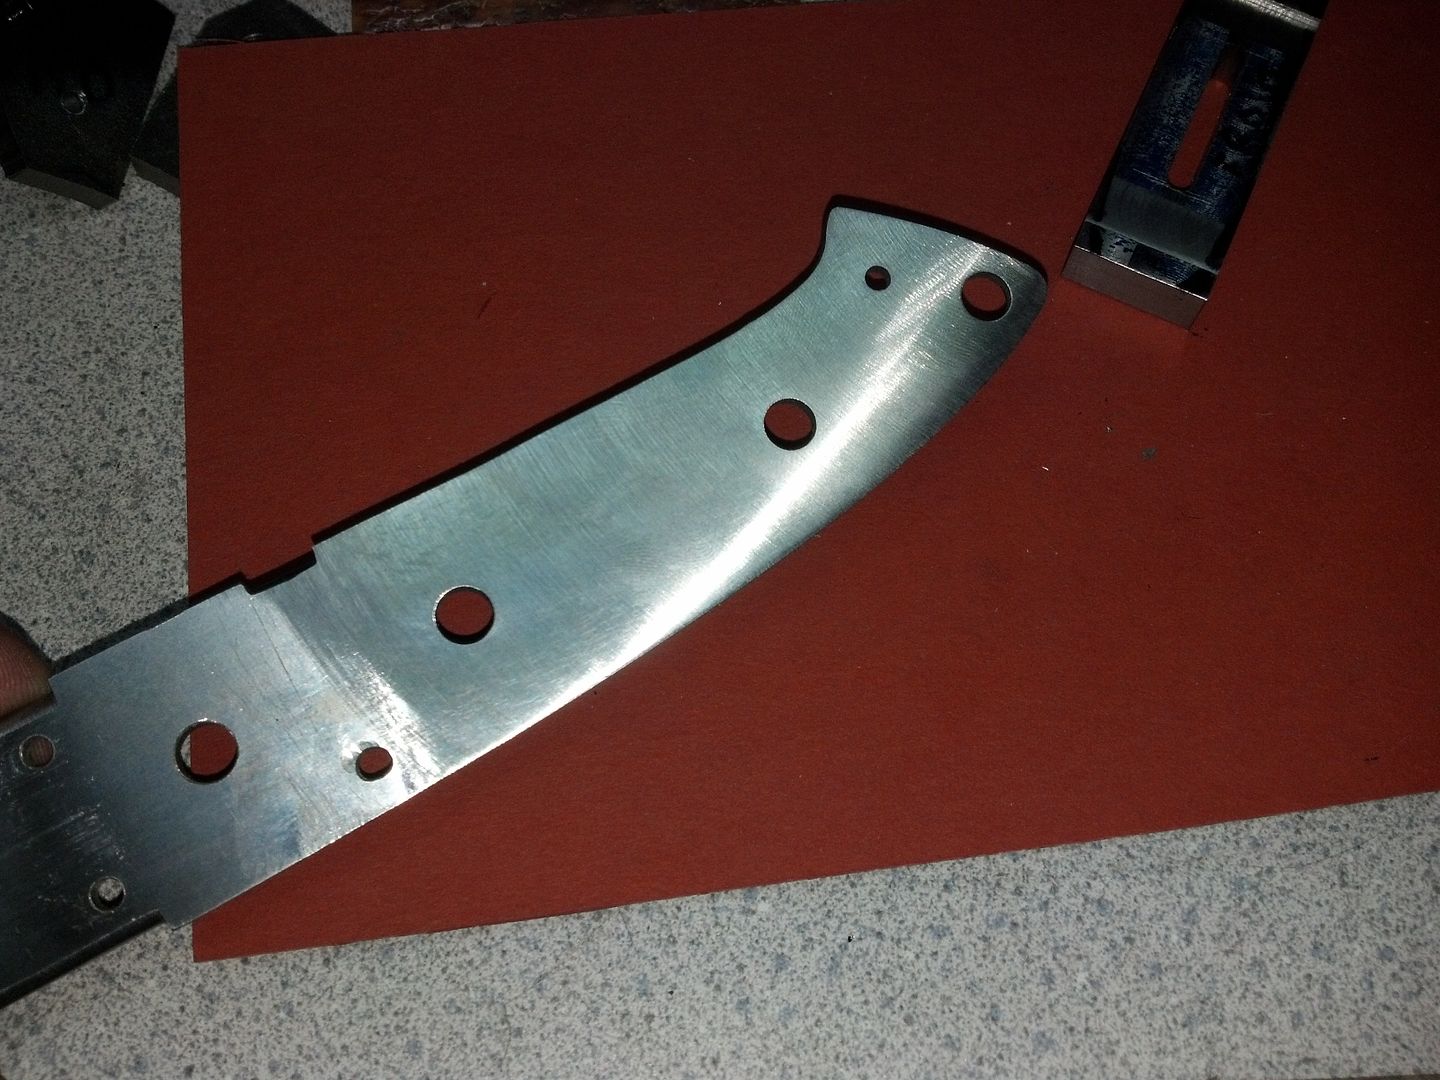
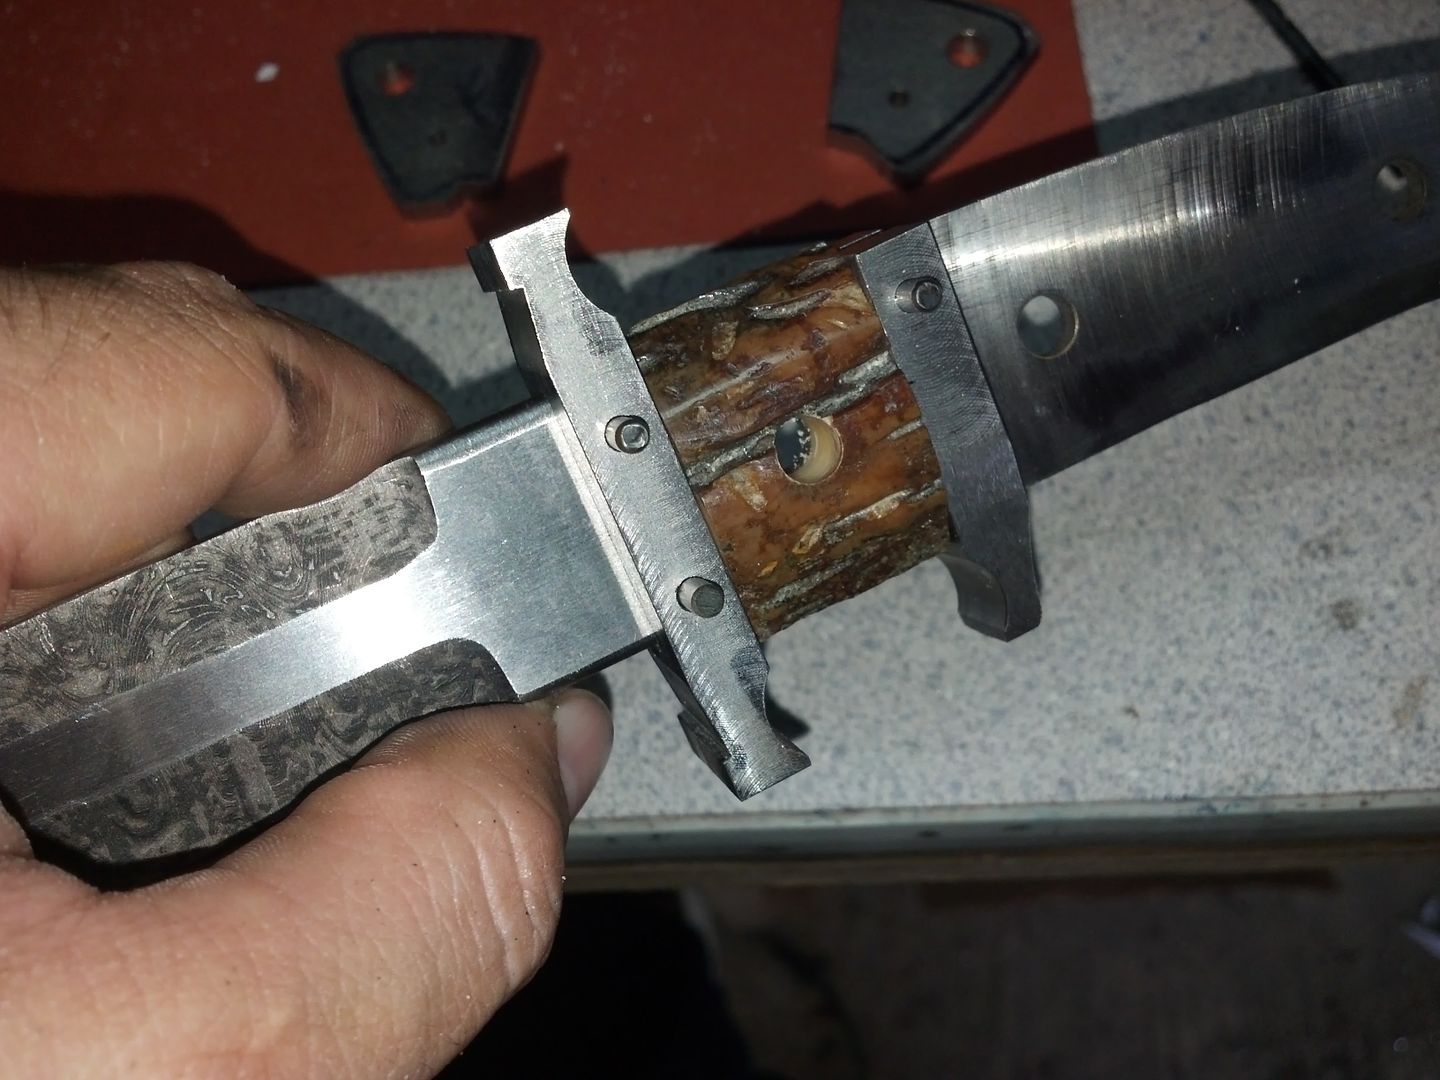
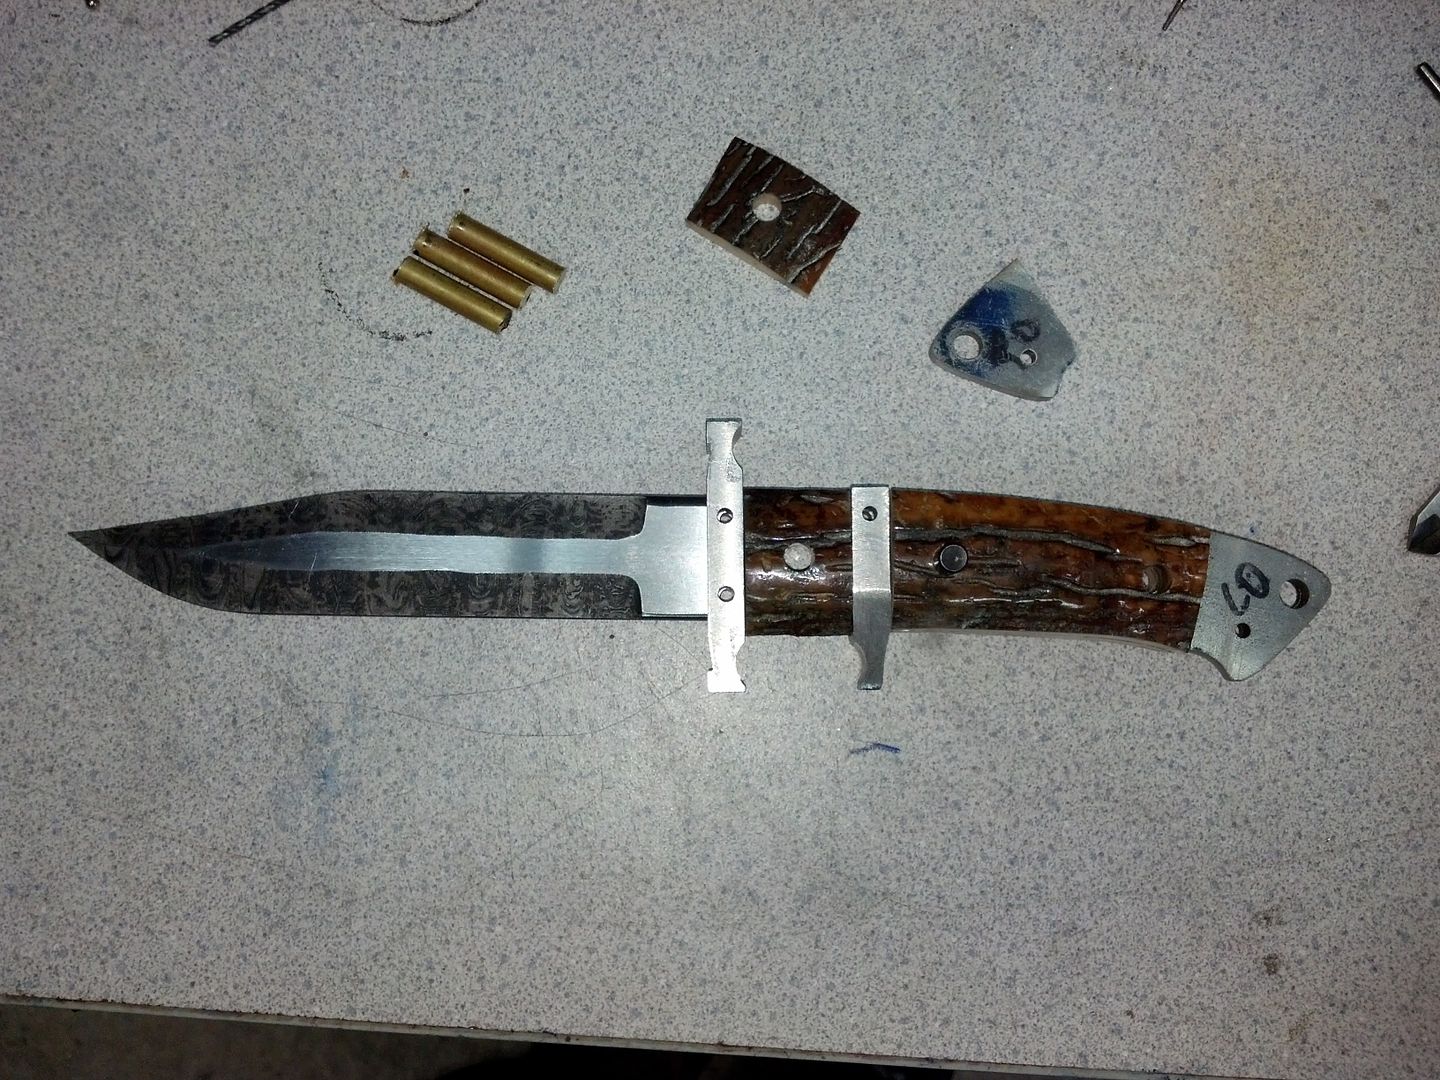
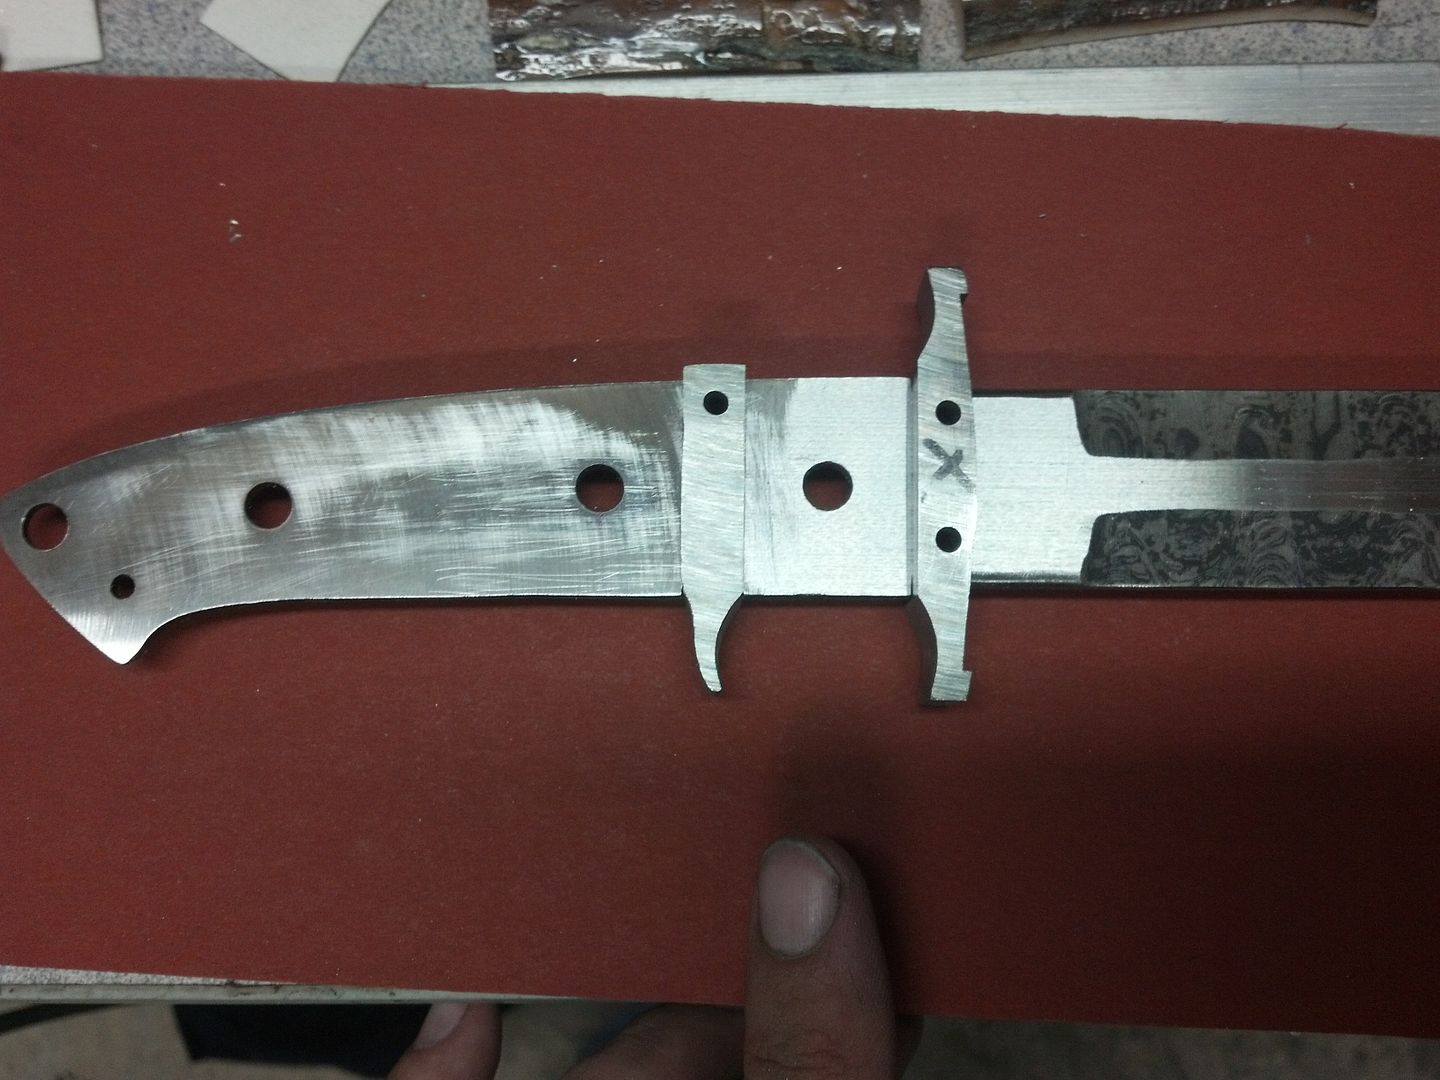
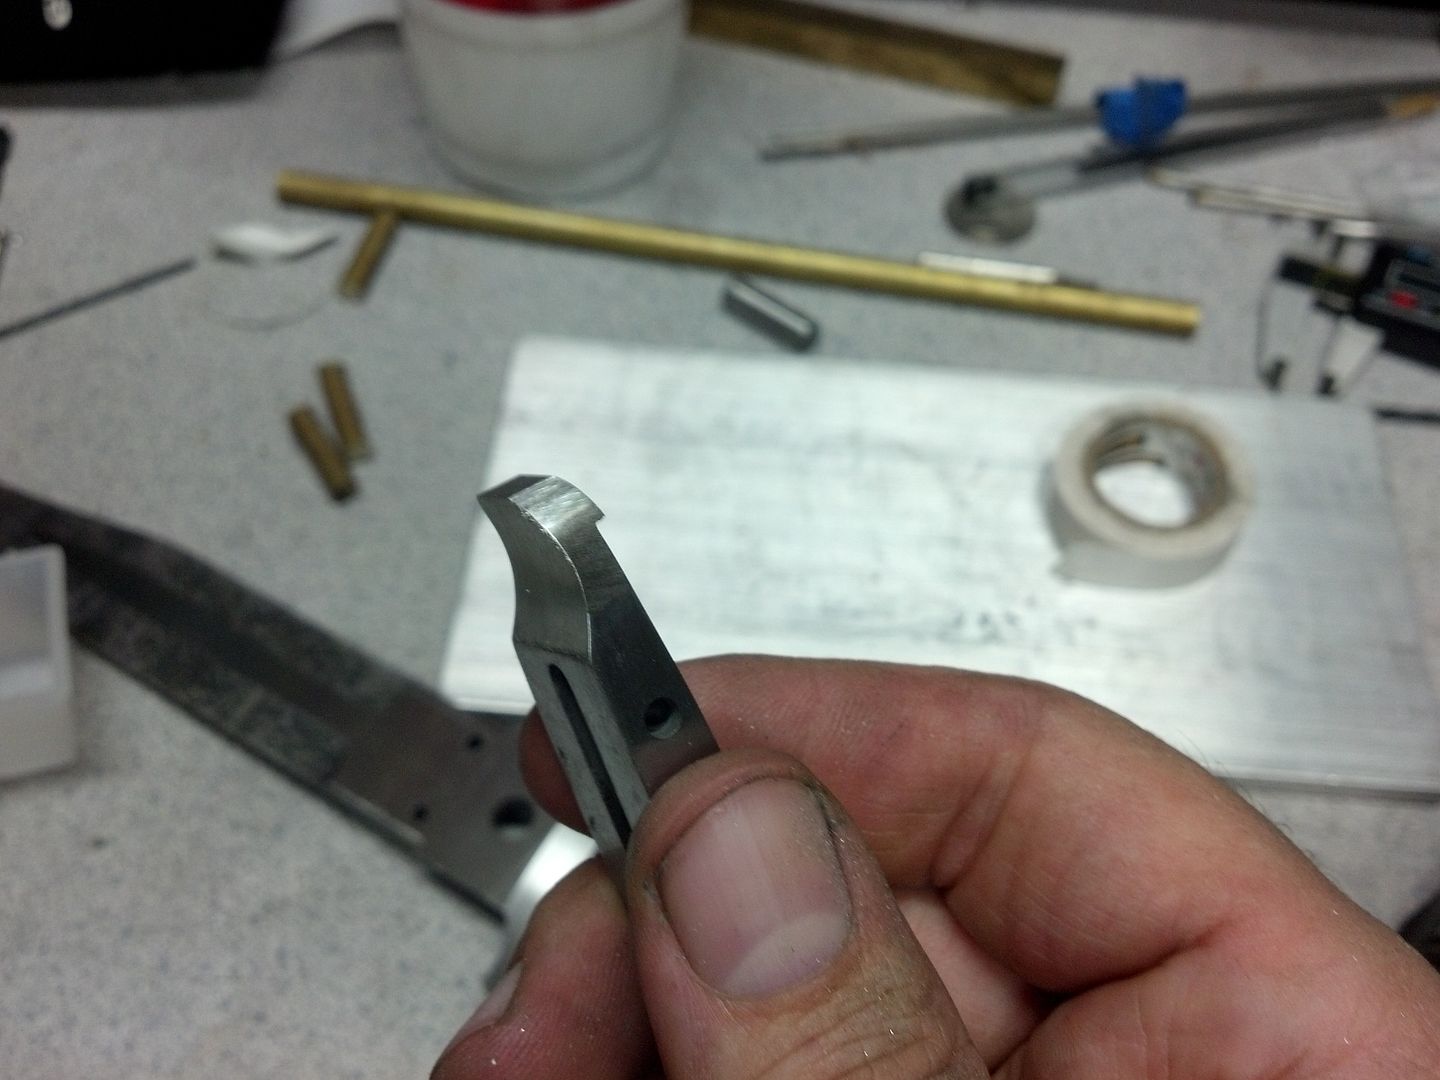
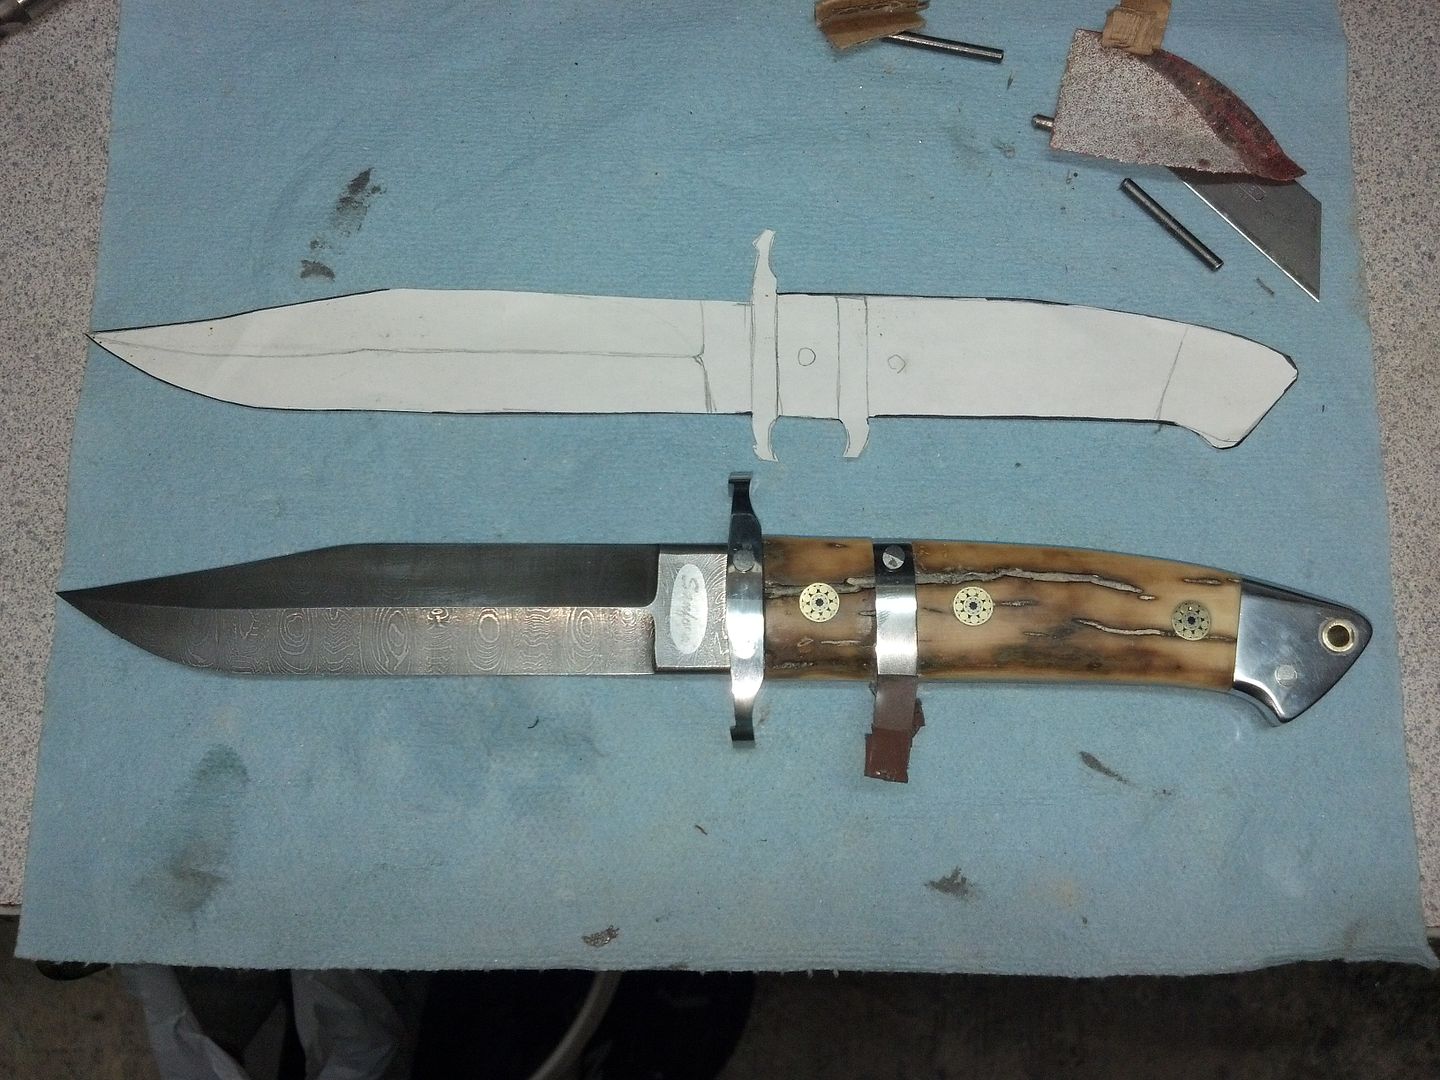
This is a shot after, with the guard sitting there. I have to say I am proud of this grind. I was afraid i would not be able to do this, but I think I pulled it off :)

IMG_20130720_201757_199_zps18d20877.jpg


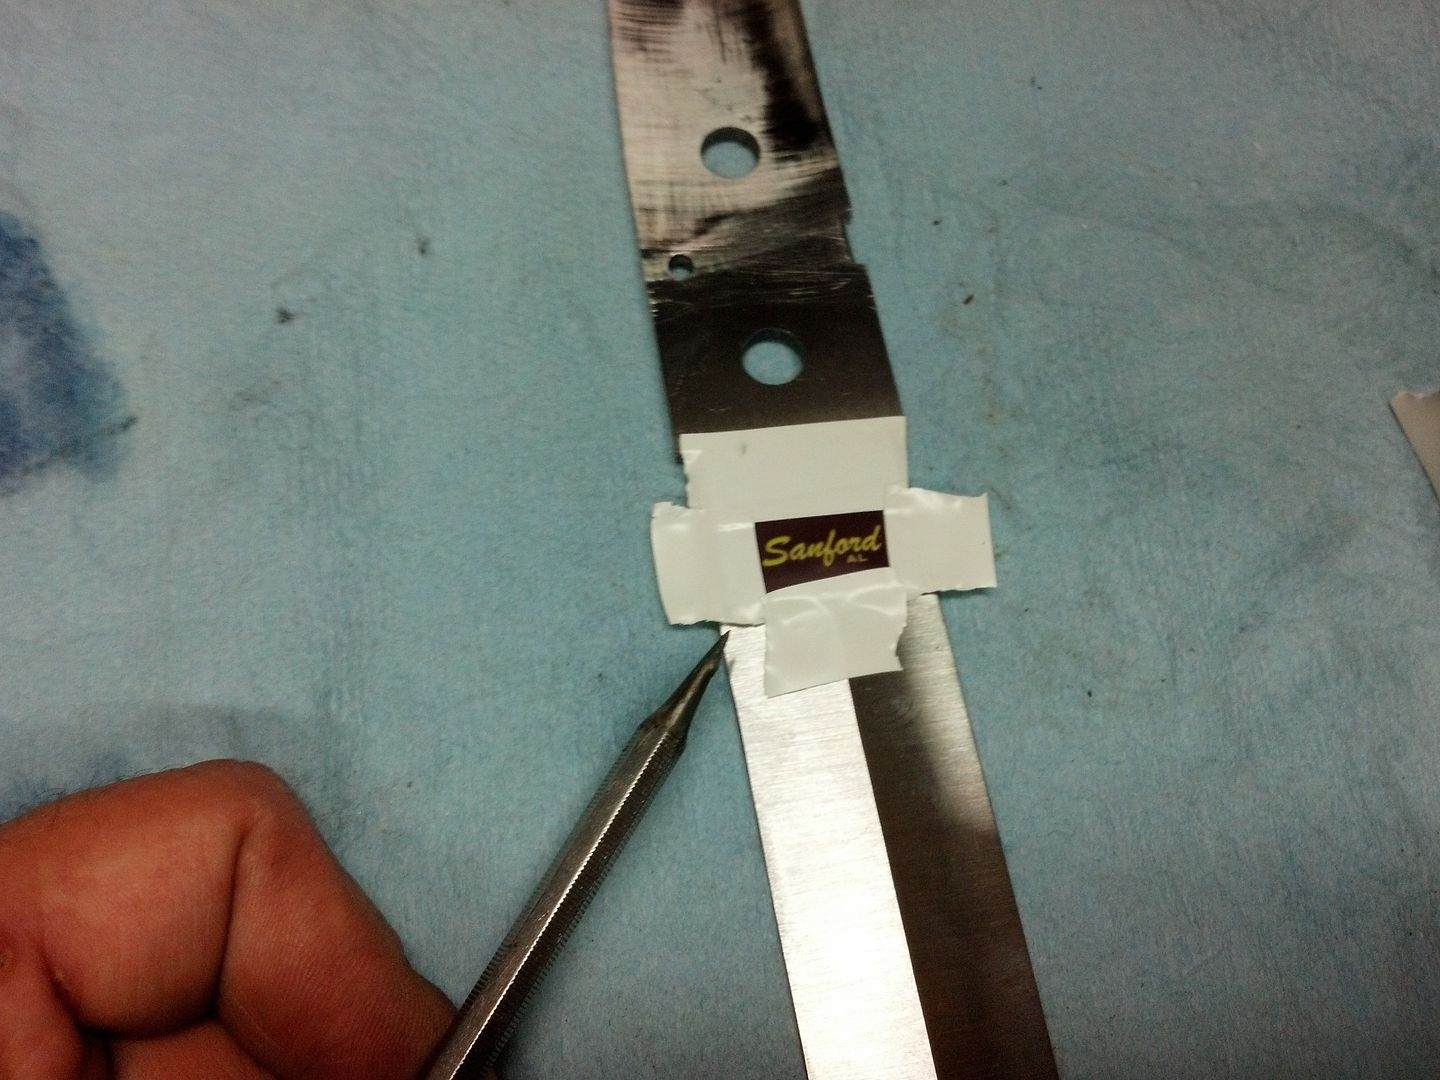
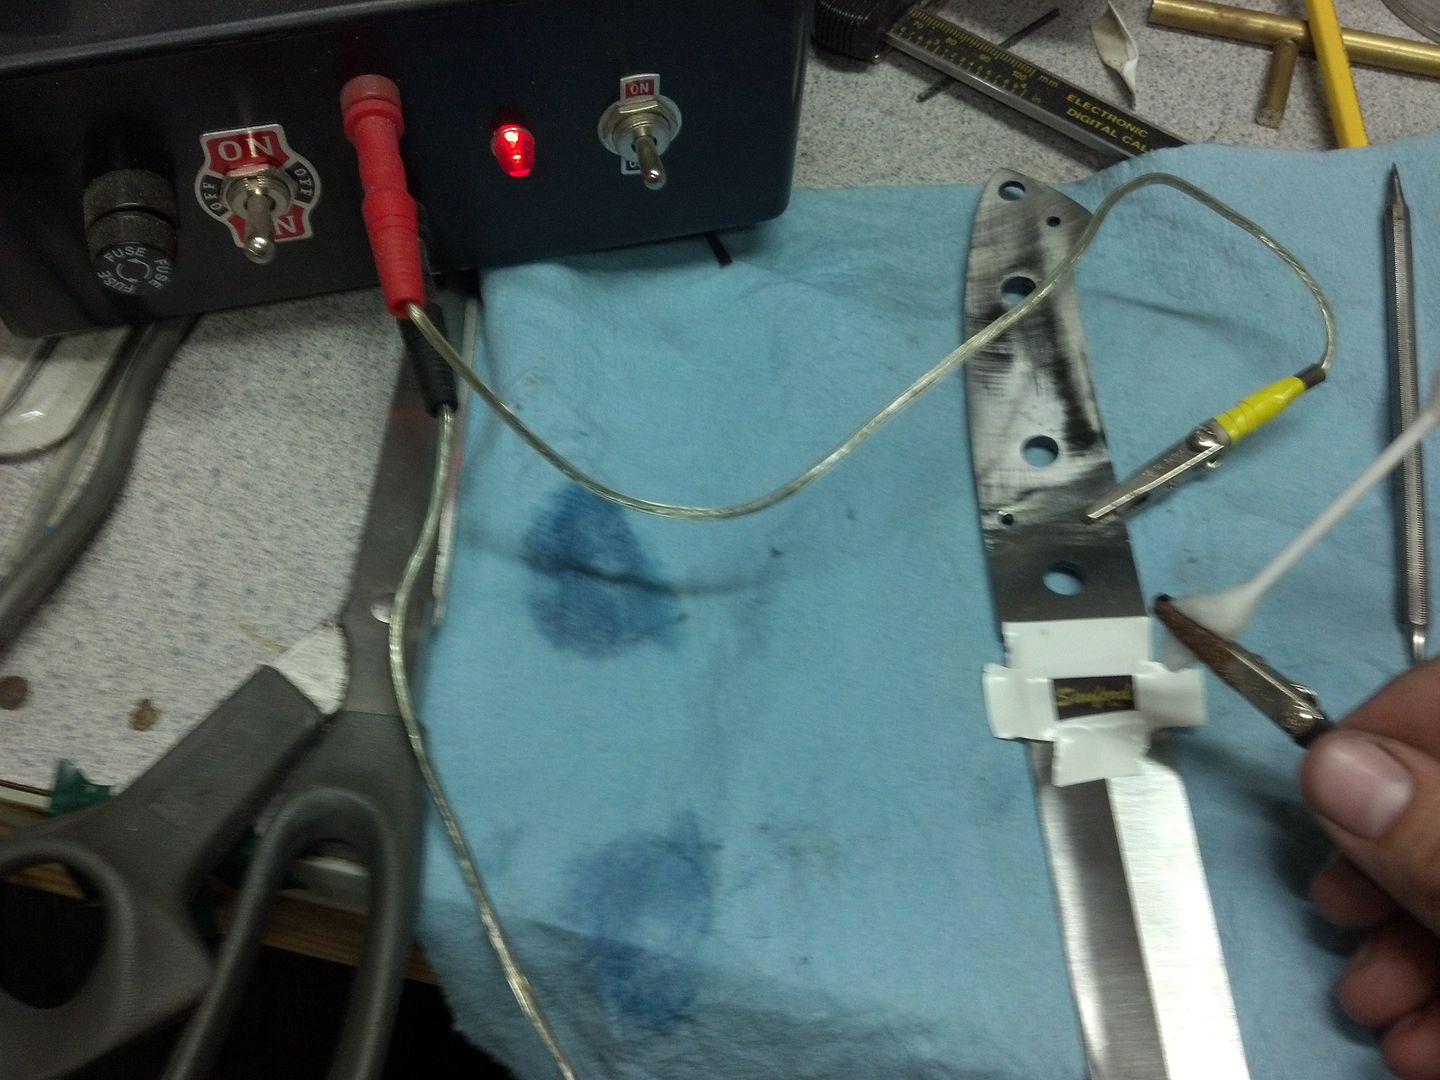
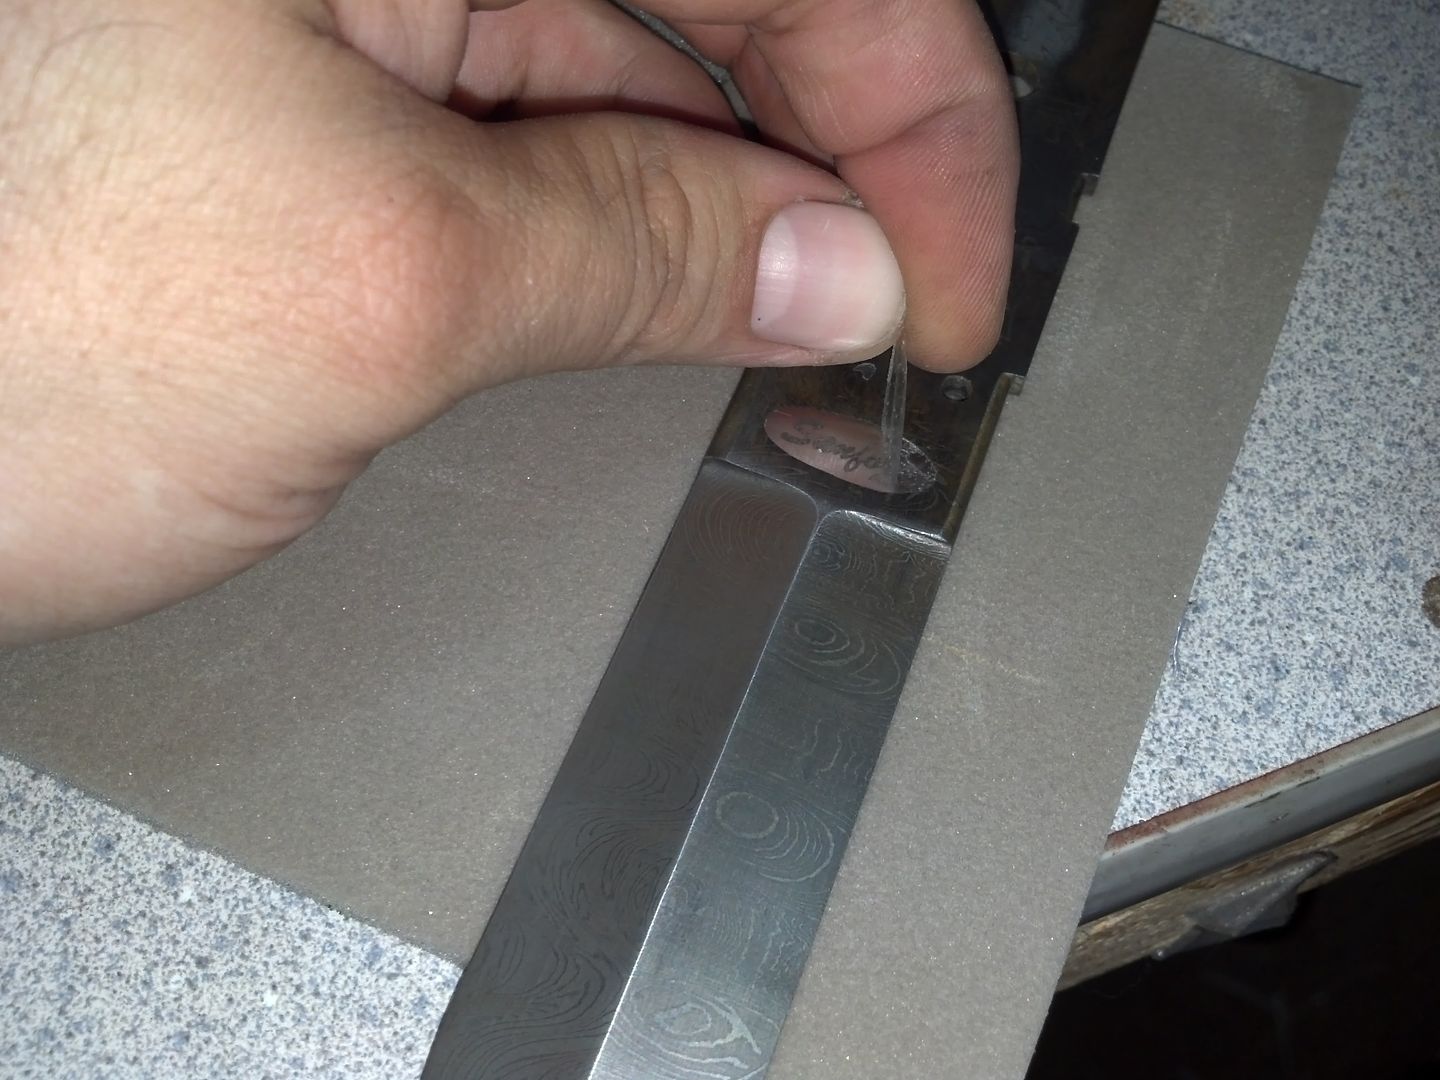
At this point, I etch my name on the blade. I use an Ernie Grospitch stencil.

IMG_20130720_202906_427_zps513e3e19.jpg


The leads are connected to the blade and a qtip is dipped in a saltwater mix, and the moist qtip is pressed over the stencil.

IMG_20130720_203204_565_zps6fd9cc40.jpg


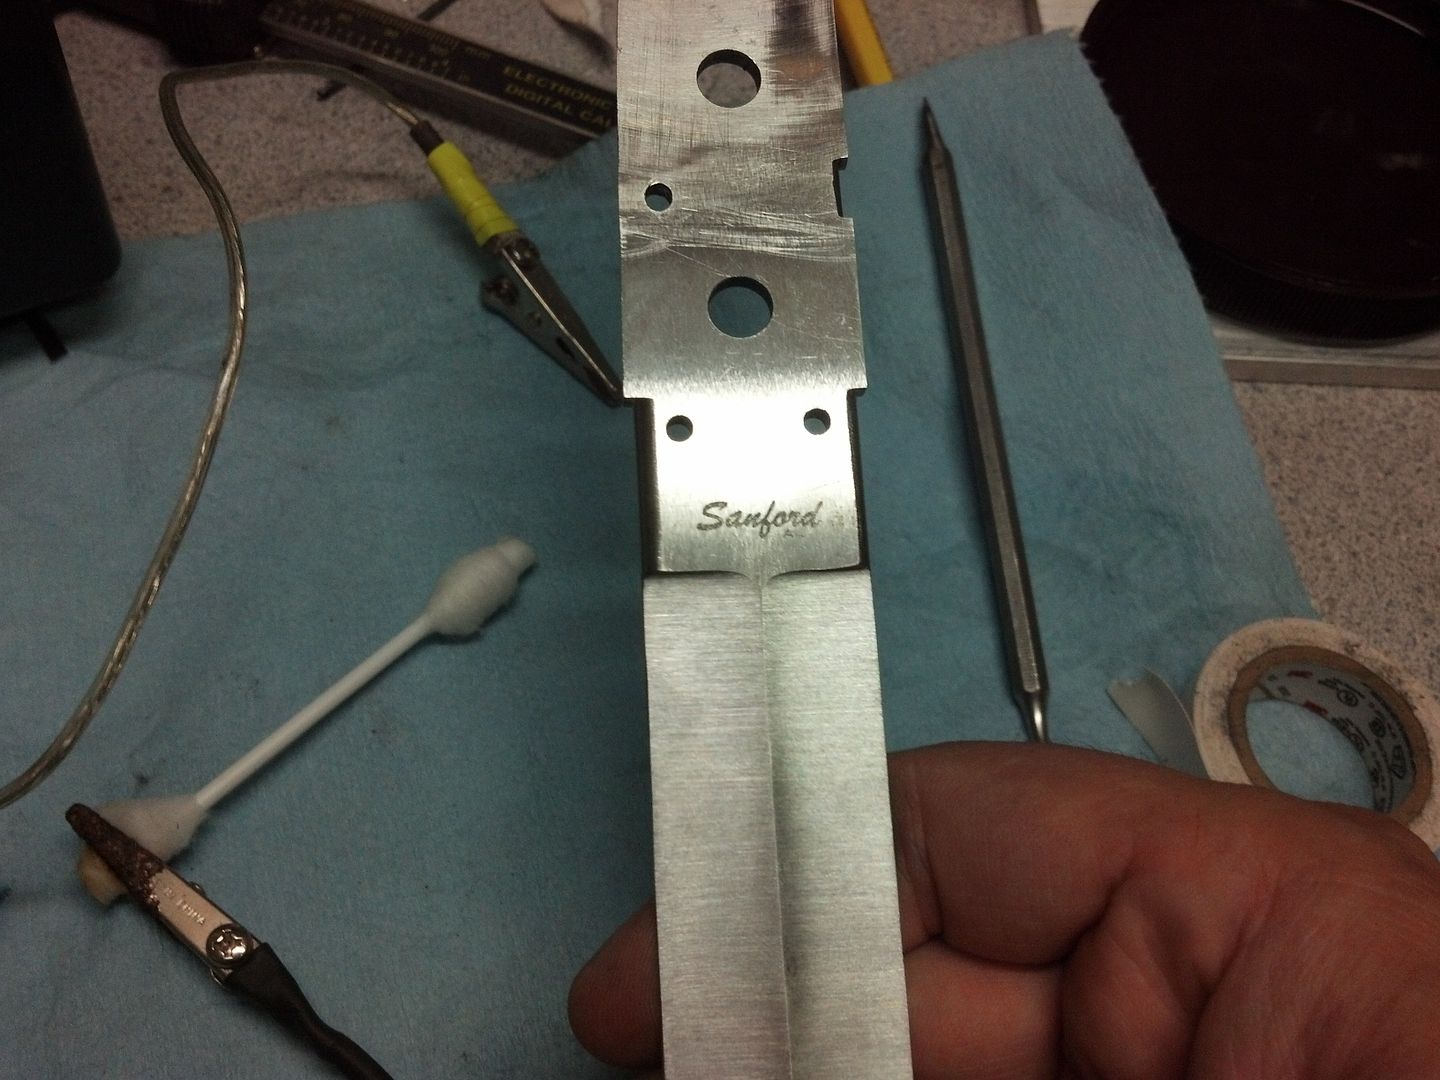
And then when the stencil is removed, we have my name.

IMG_20130720_203649_107_zps78e04b9b.jpg


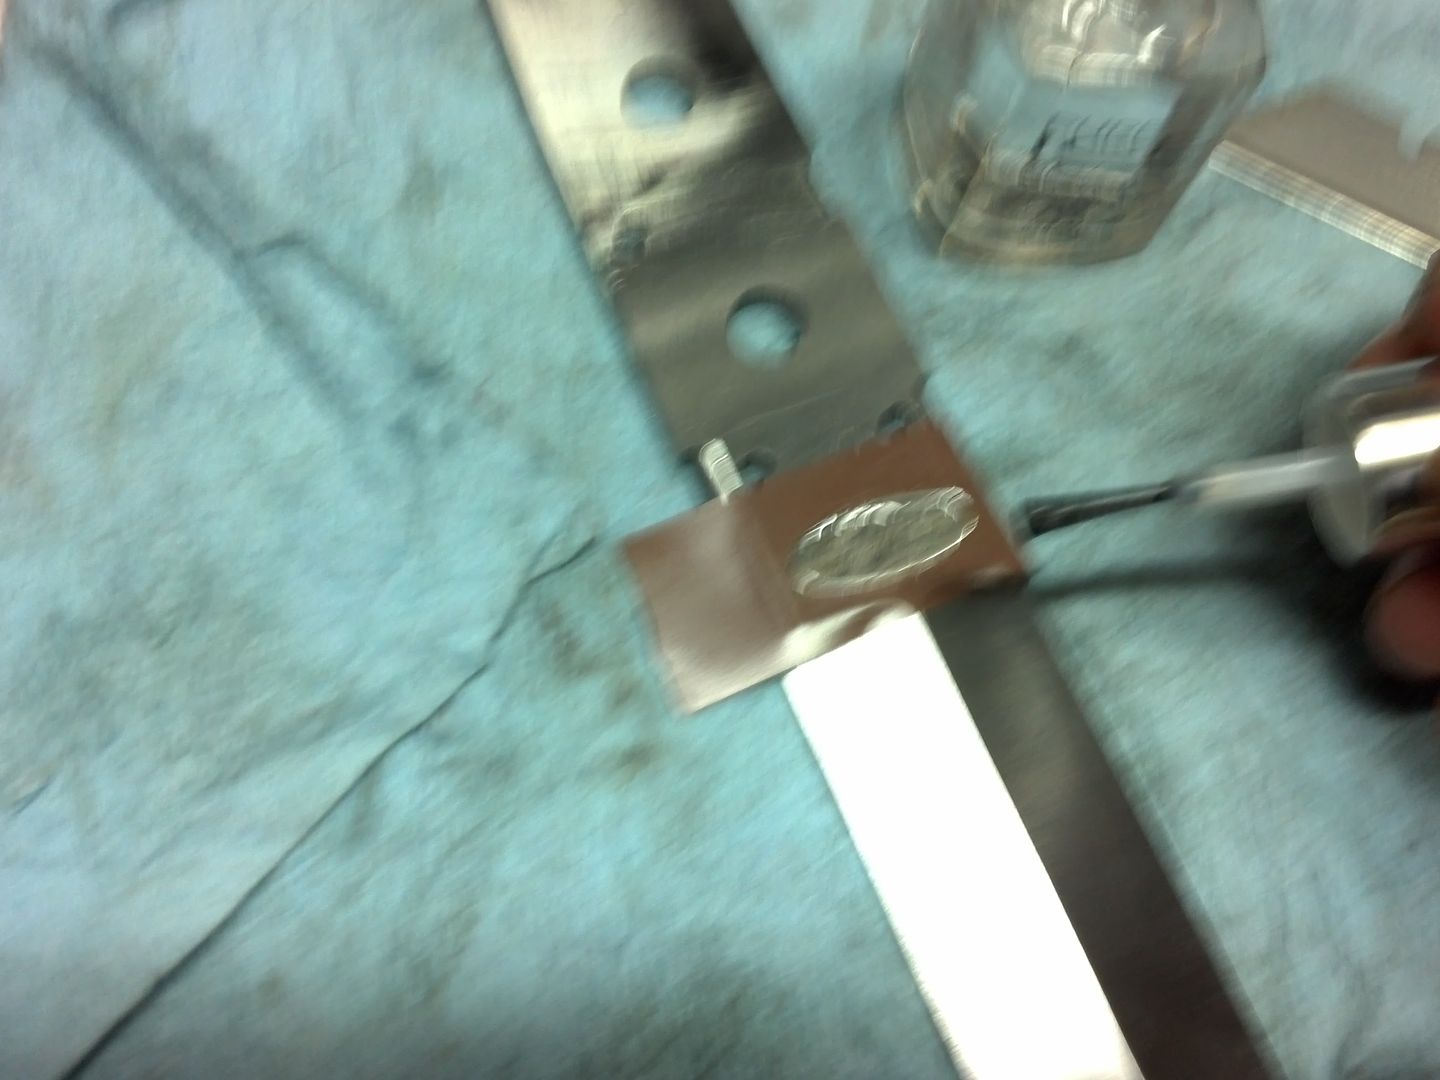
After this, I cut out an oval shape from a piece of electrical tape and place it around my name. I then take clear nail polish and fill in the oval, covering the etched area with my name.

IMG_20130720_230551_985_zps4e025ede.jpg


IMG_20130720_230305_144_zps9e77815e.jpg


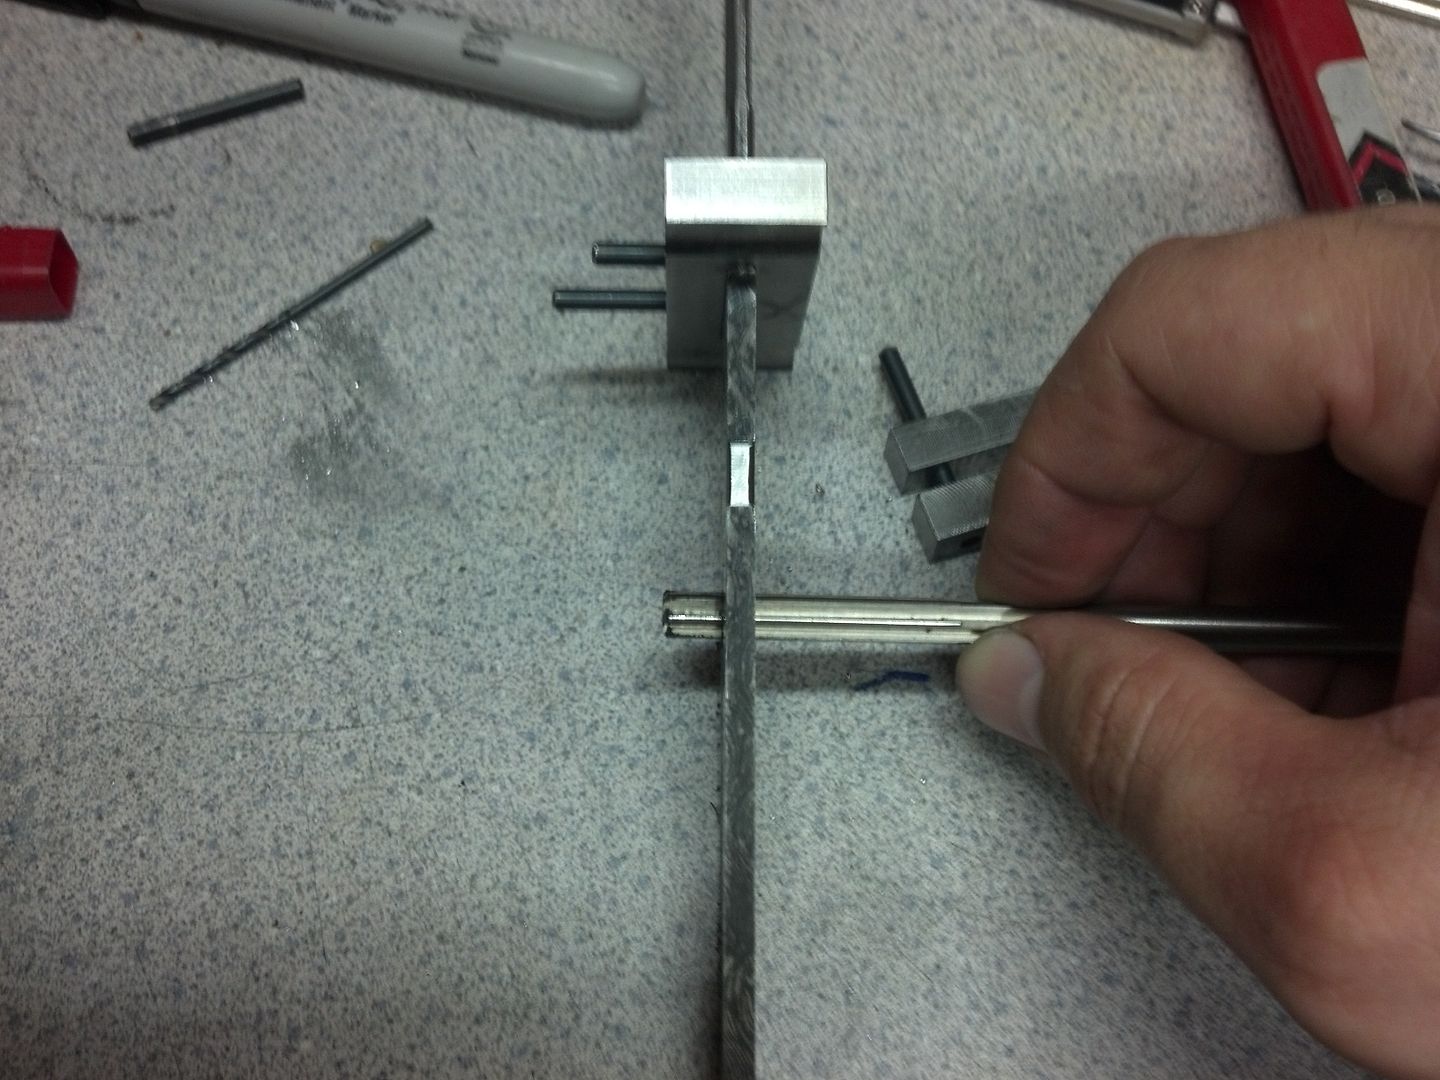
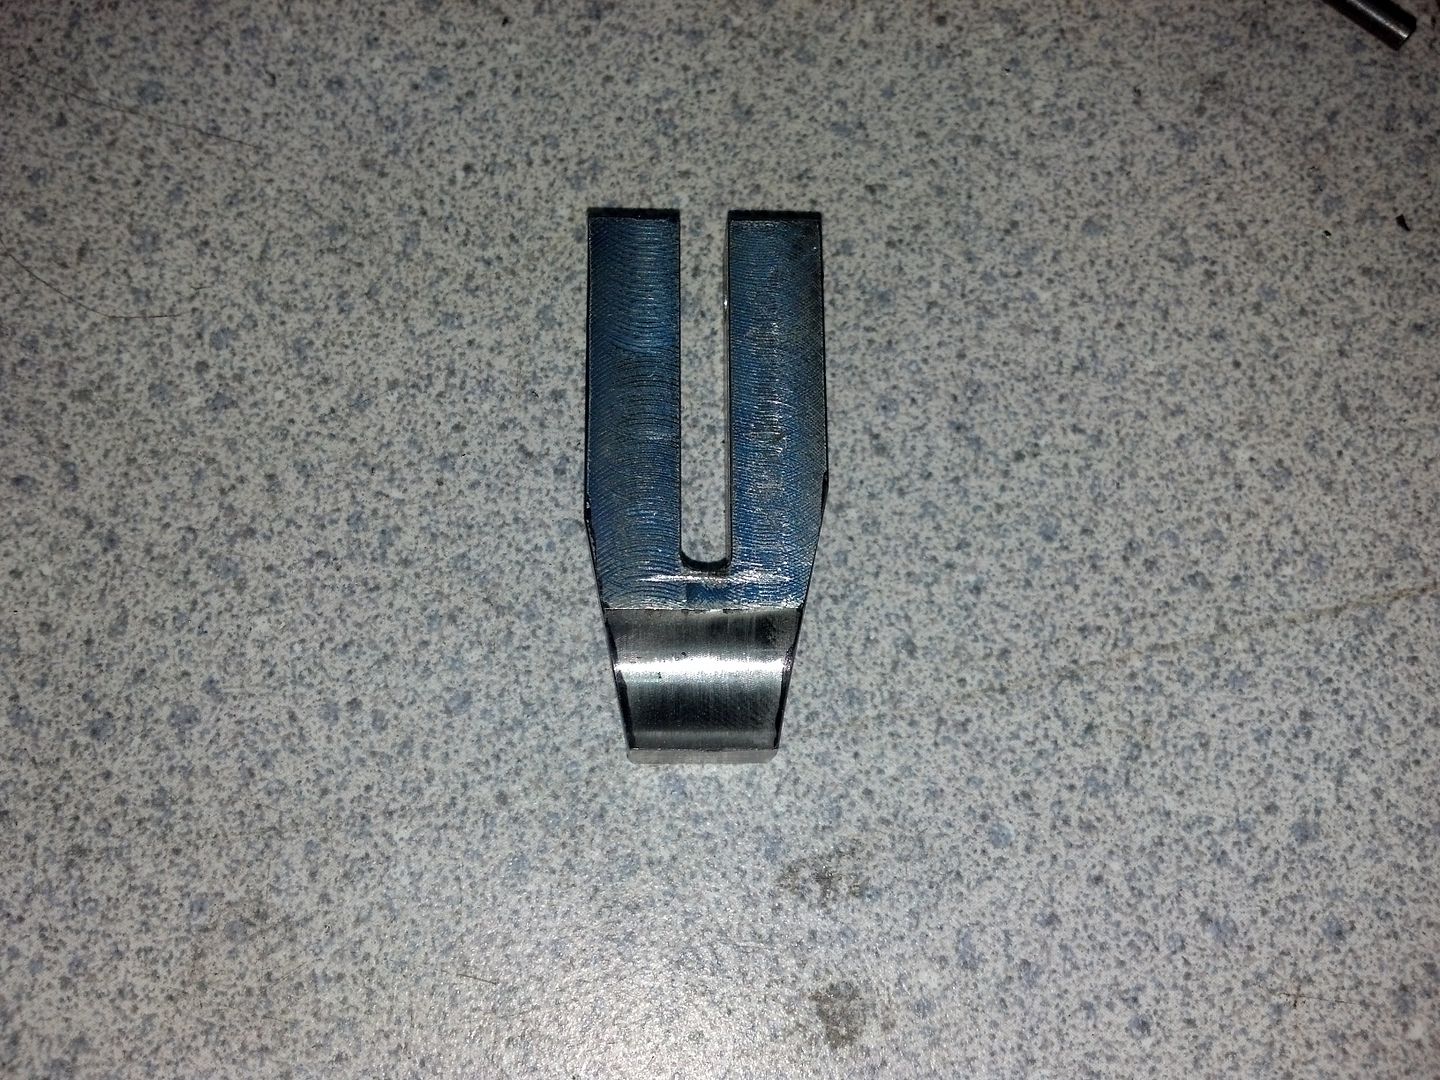
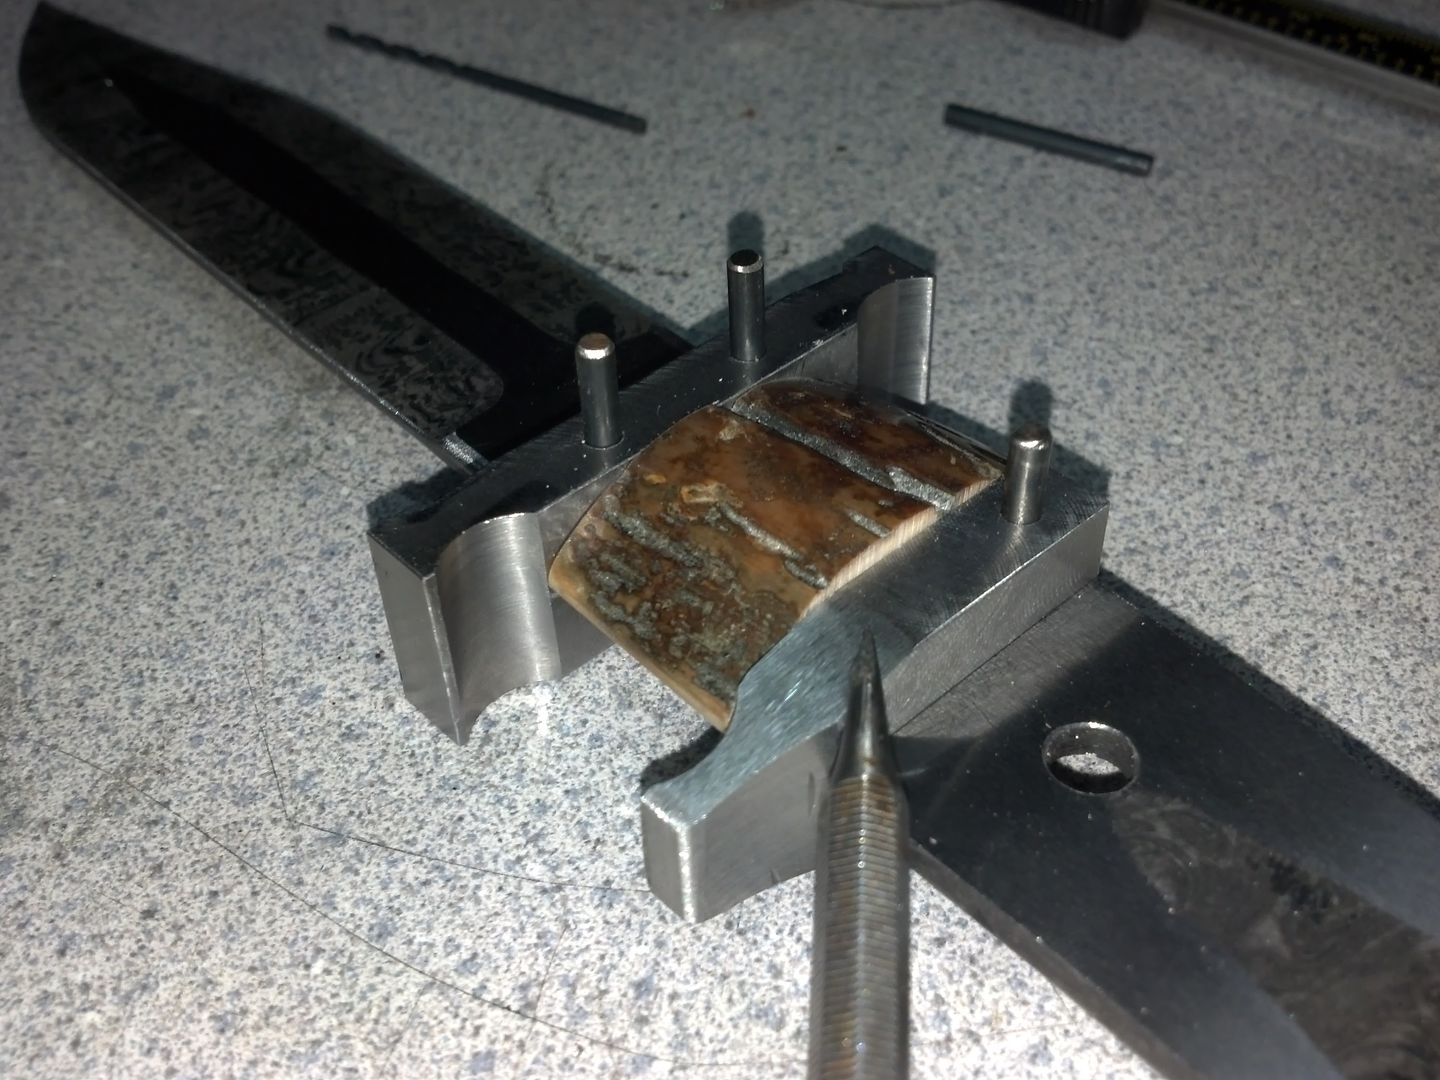
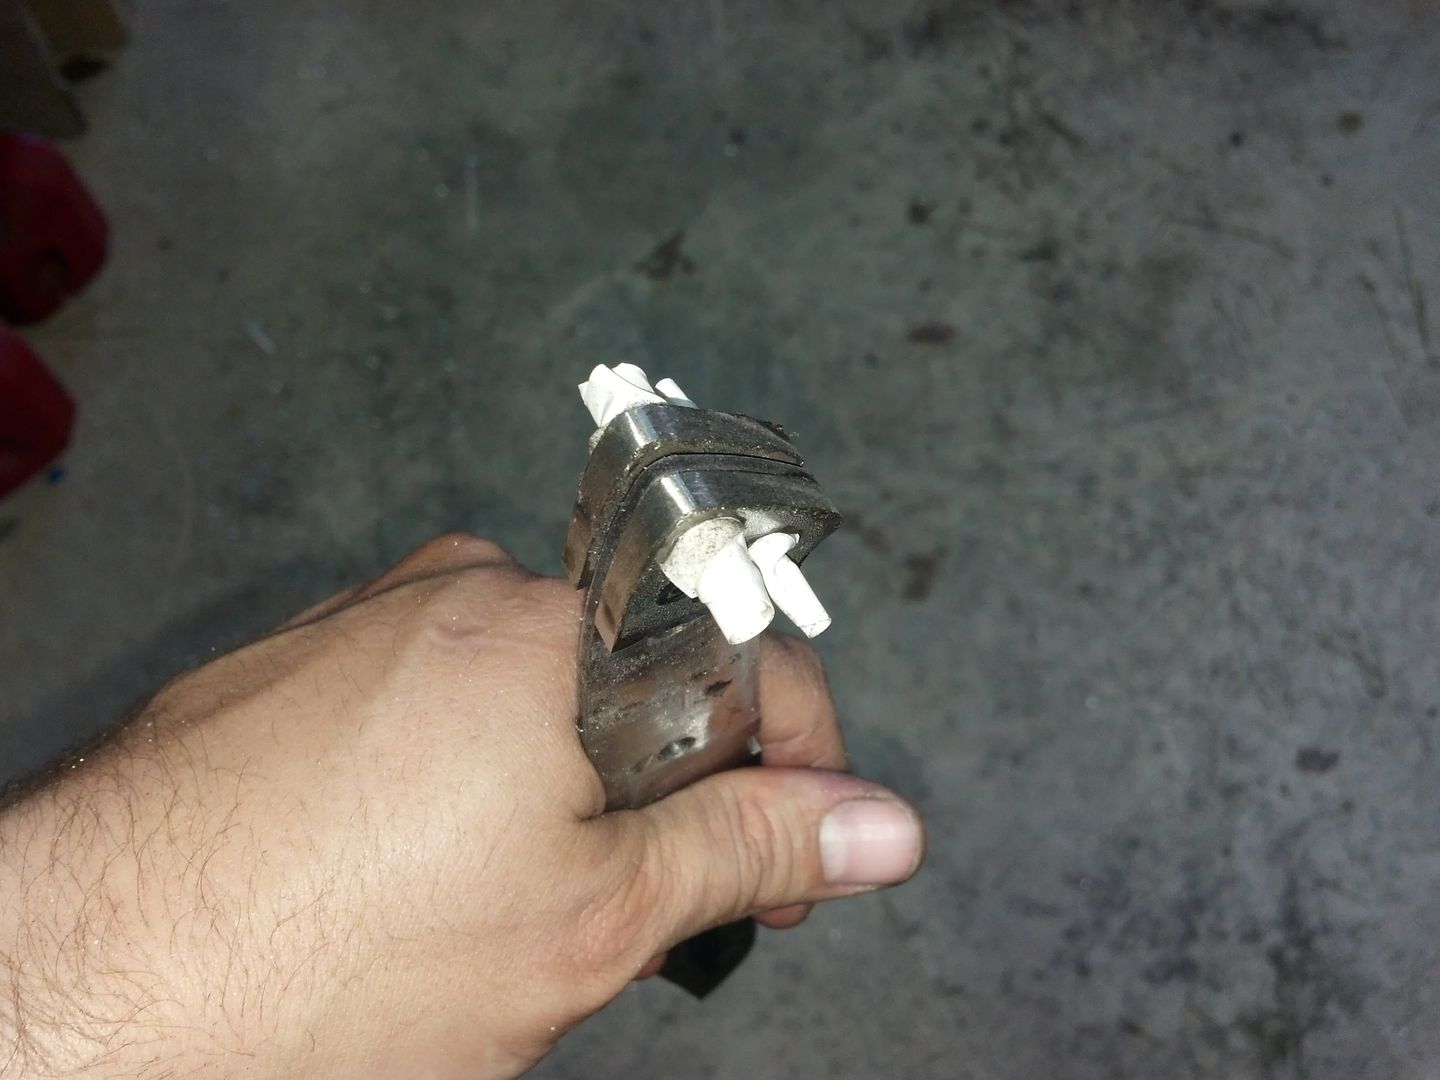
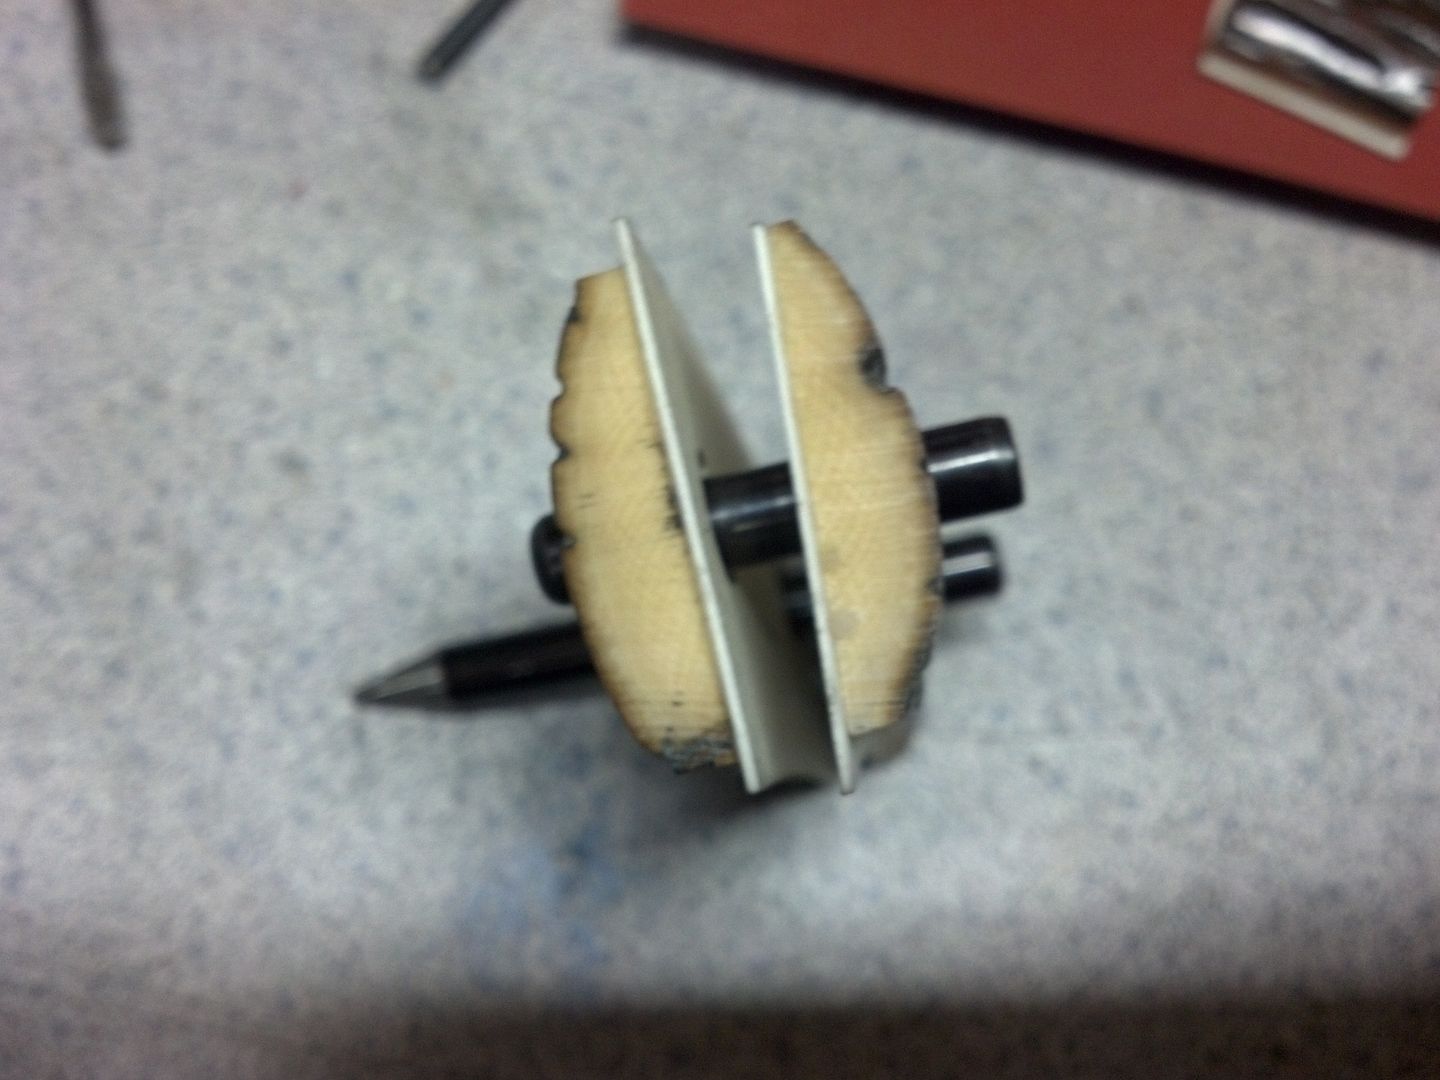
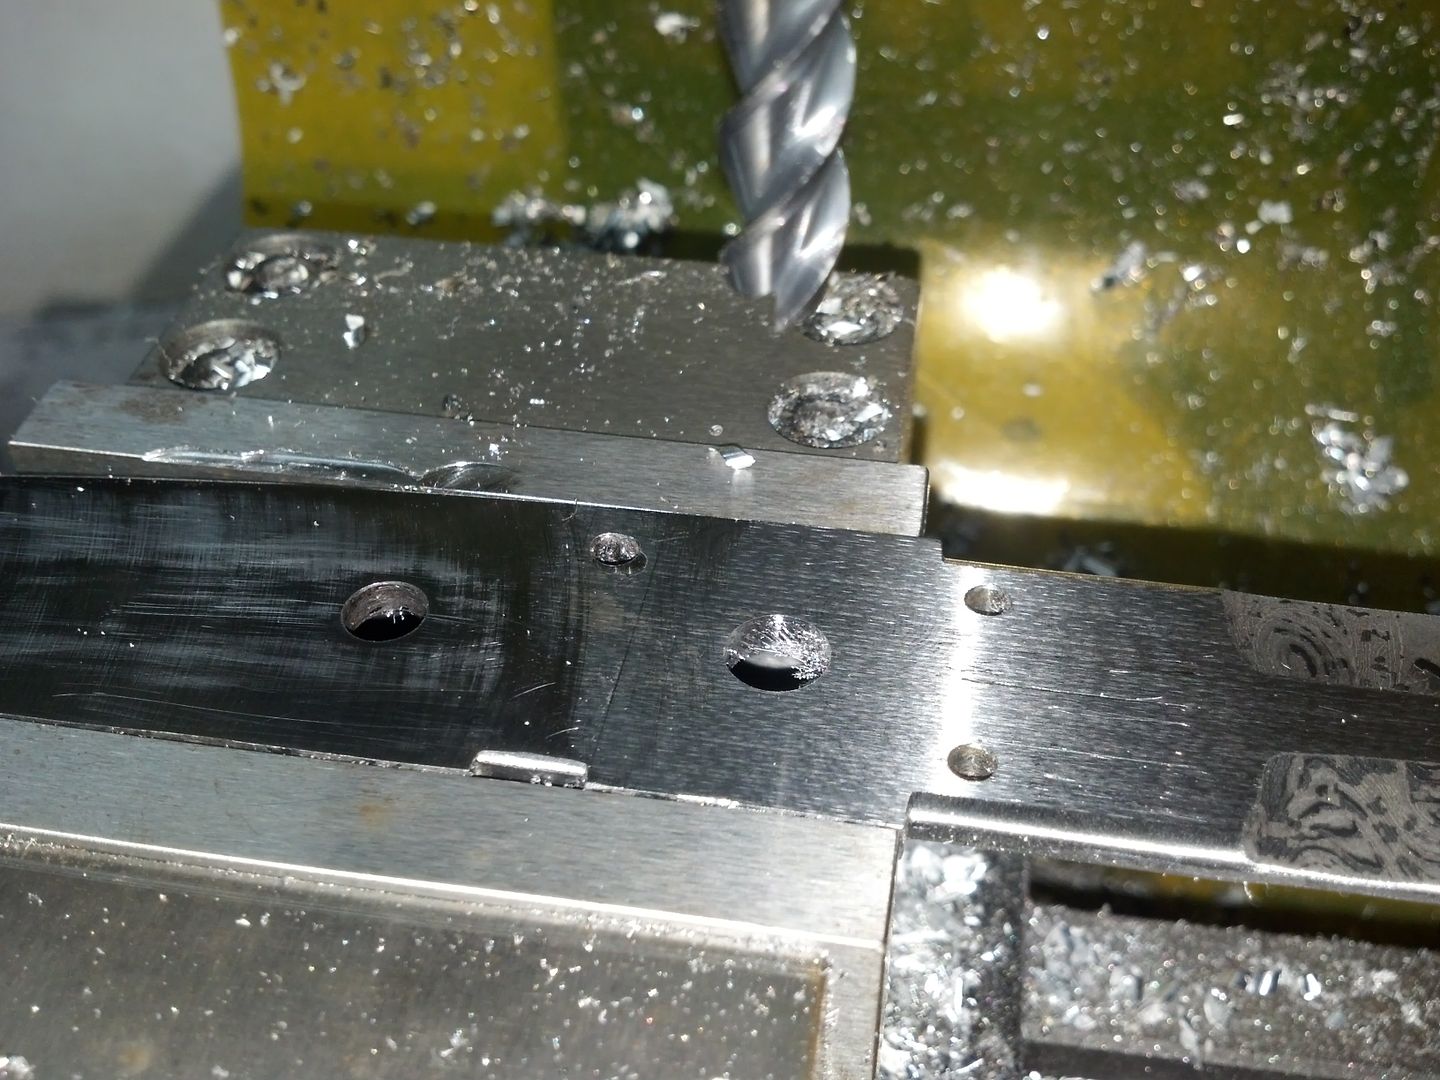
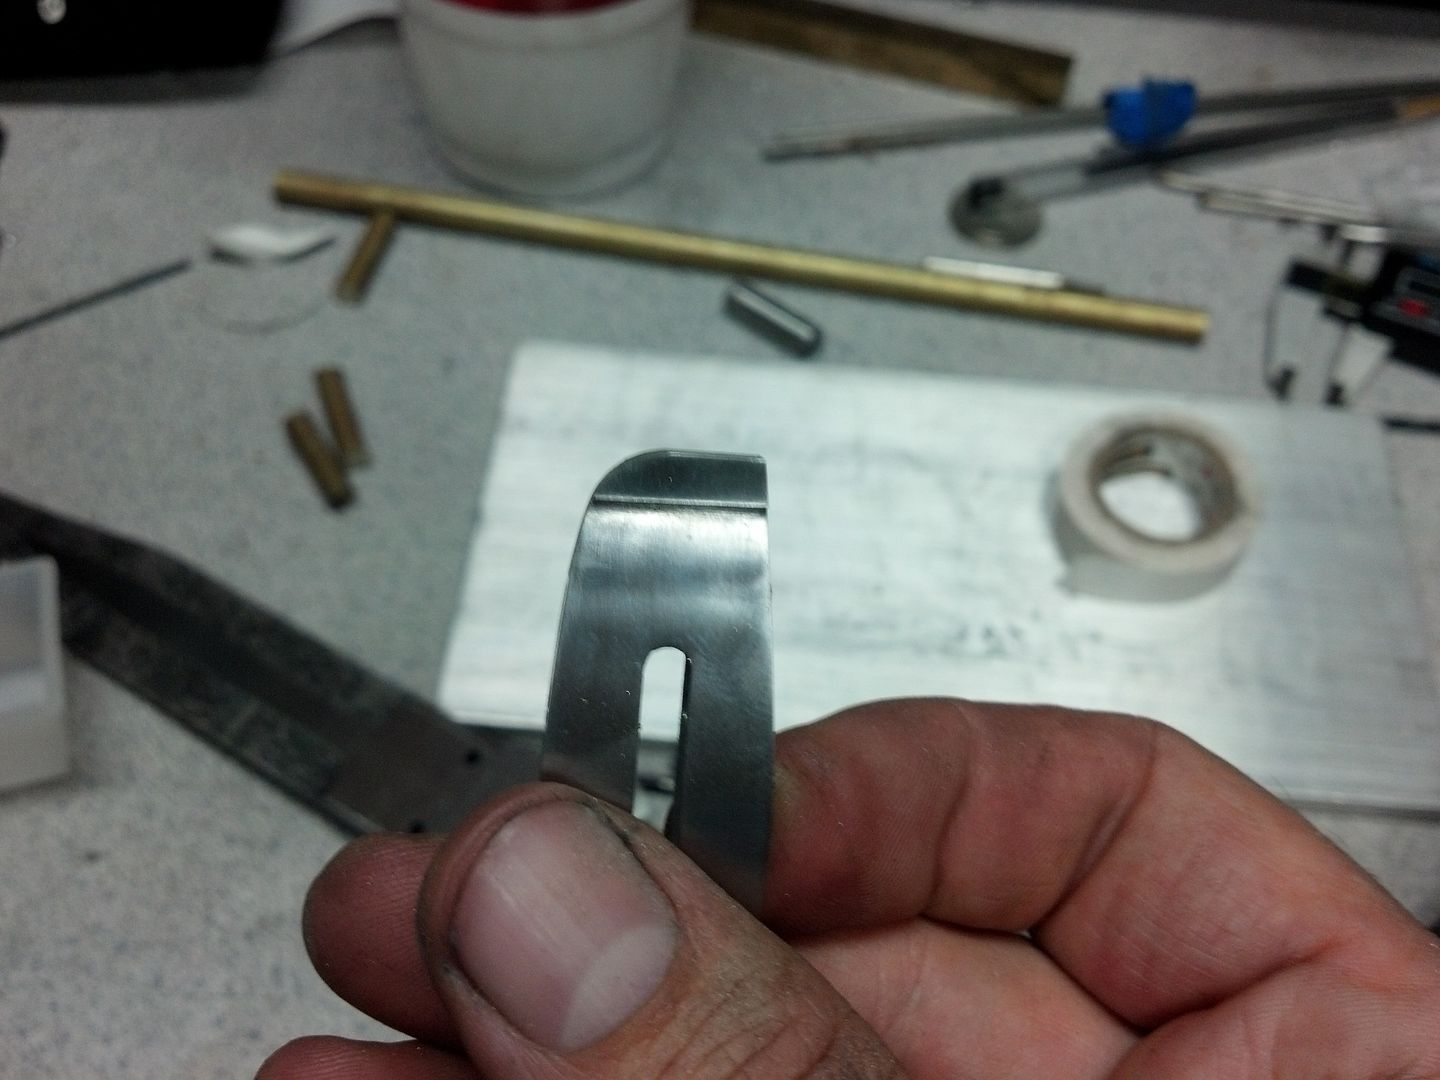
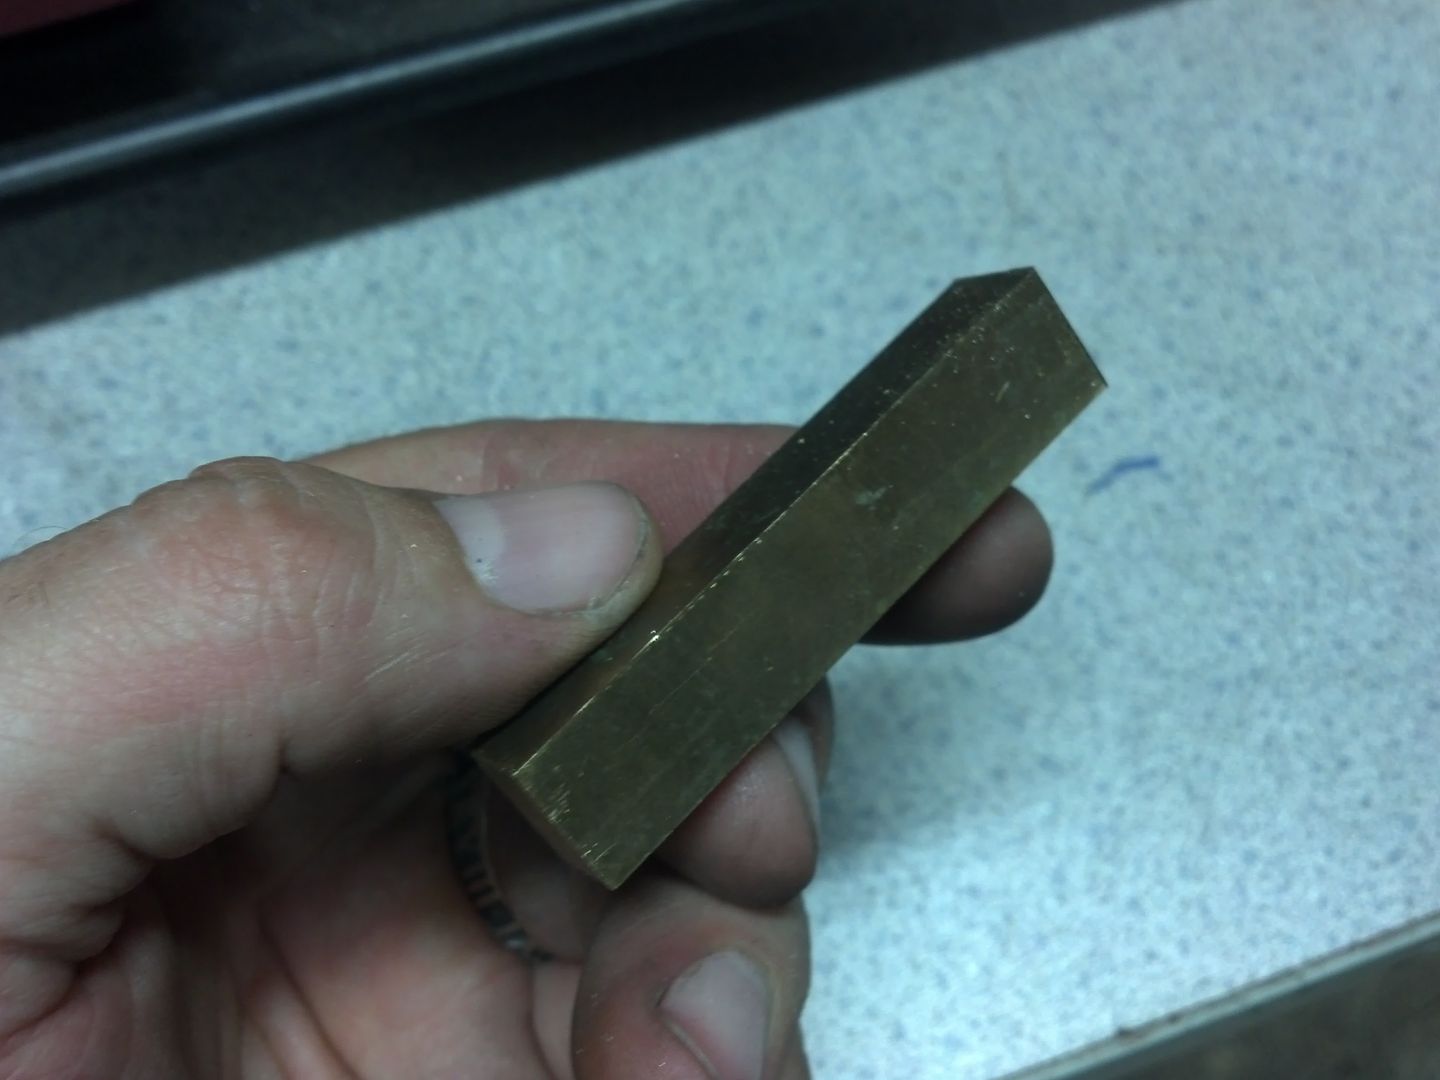
While that is drying I have to turn some square brass stock I have to make the lanyard hole tube piece. I'm doing it out of brass to match the mosaic pins. After all this was done, I think this would have looked more correct and less busy with just solid 416SS pins, but the mosaic pins are cool. There is just kind of a clash that I notice between the brass and SS.

IMG_20130720_232156_553_zps25baf551.jpg


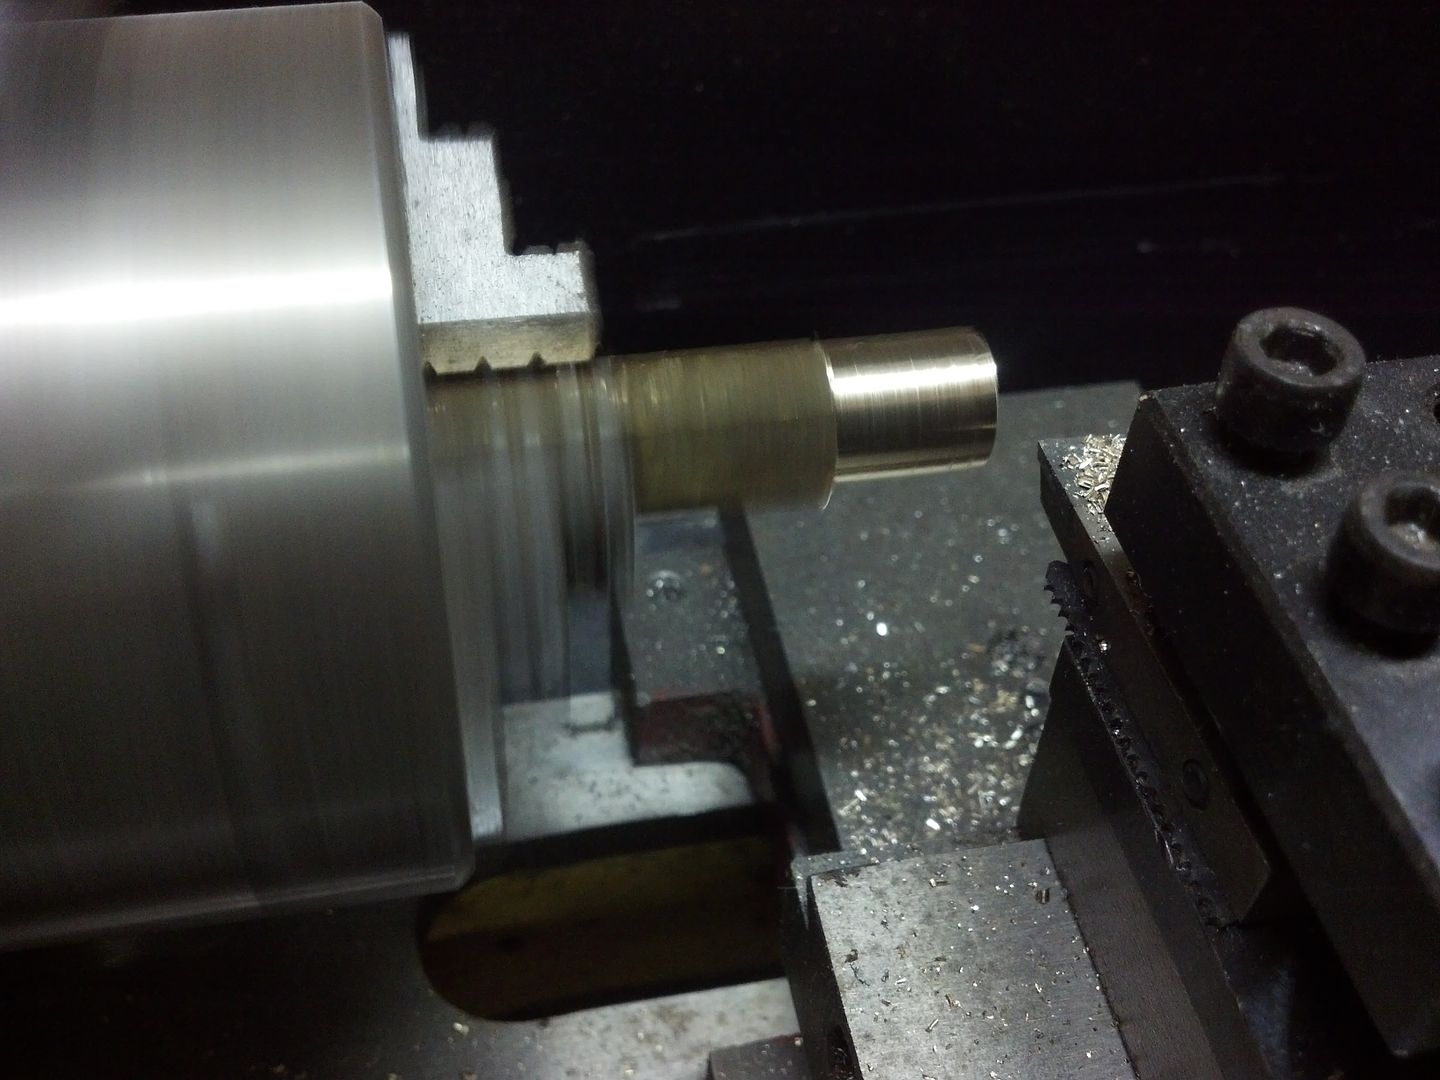
Really I needed a four jaw chuck for this, but my little lathe only has a three jaw. You can do this, but it isn't recommended. I ended up with one jaw on a flat and the other two on corners. You just have to take light cuts..

IMG_20130720_232543_968_zps1c5b05a3.jpg


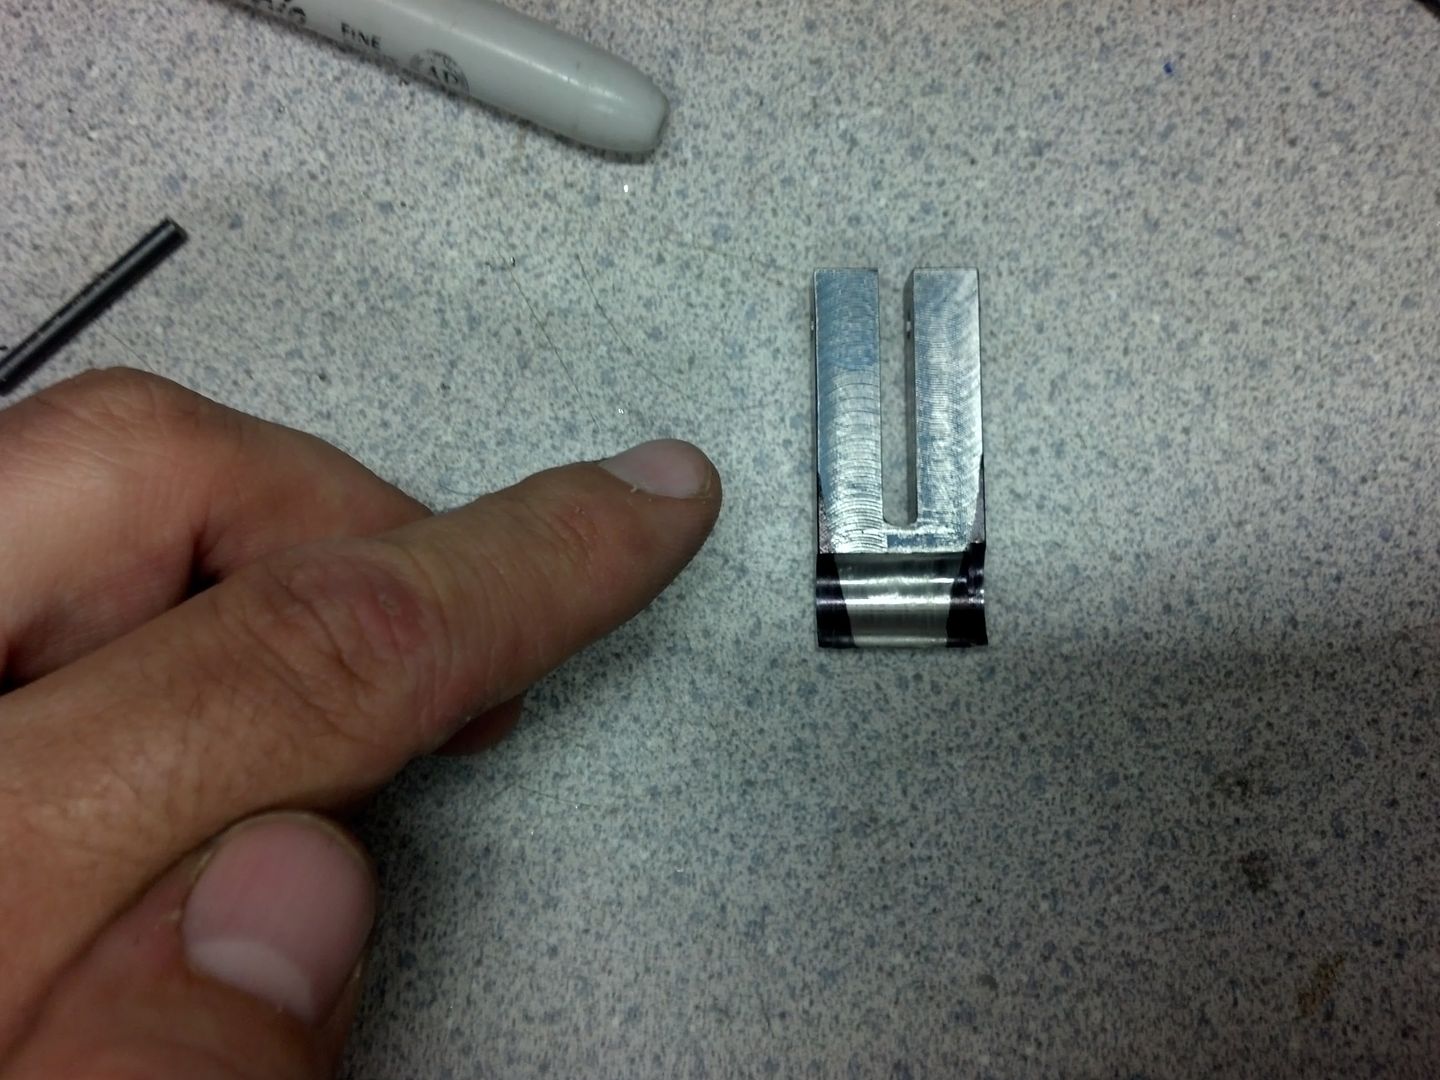
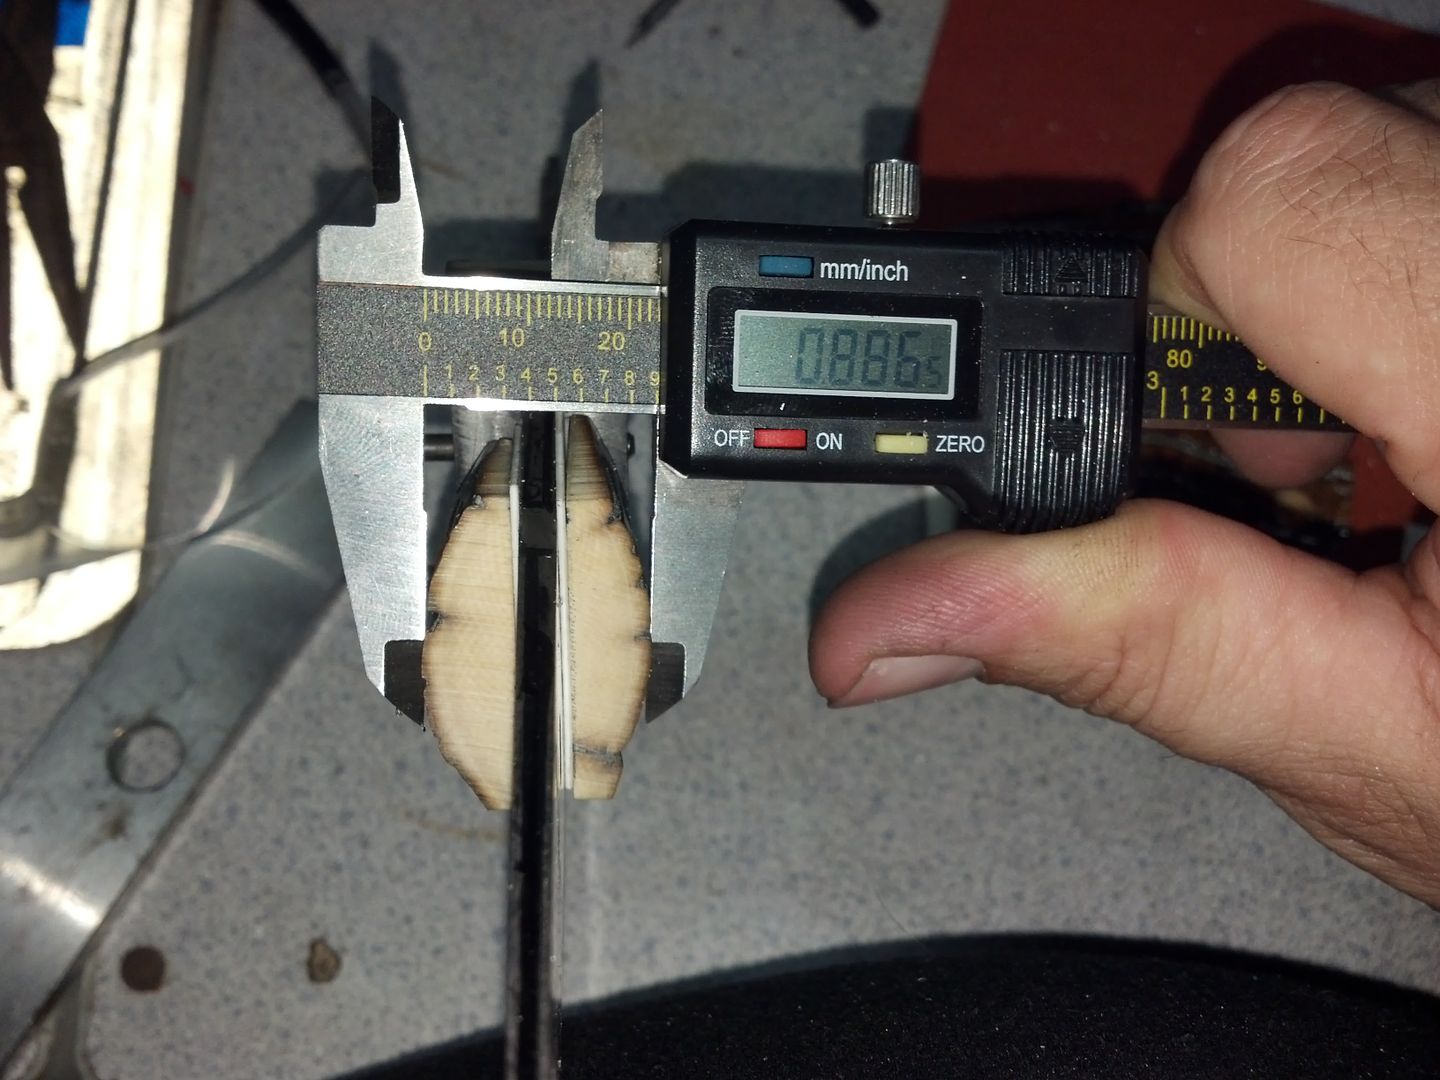
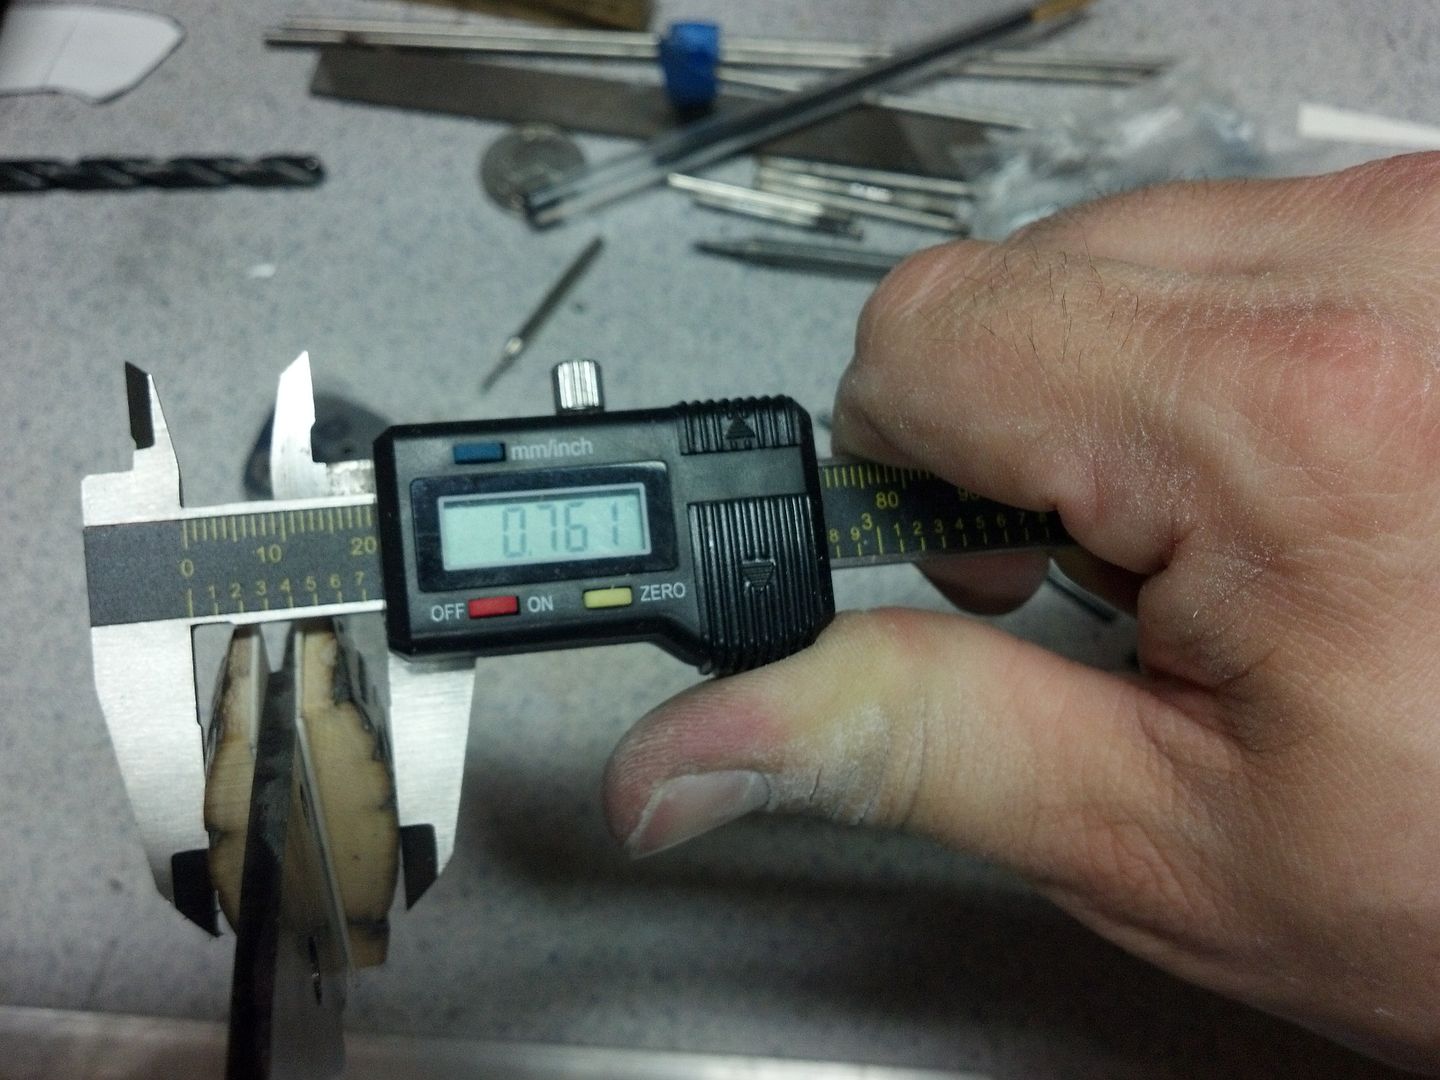
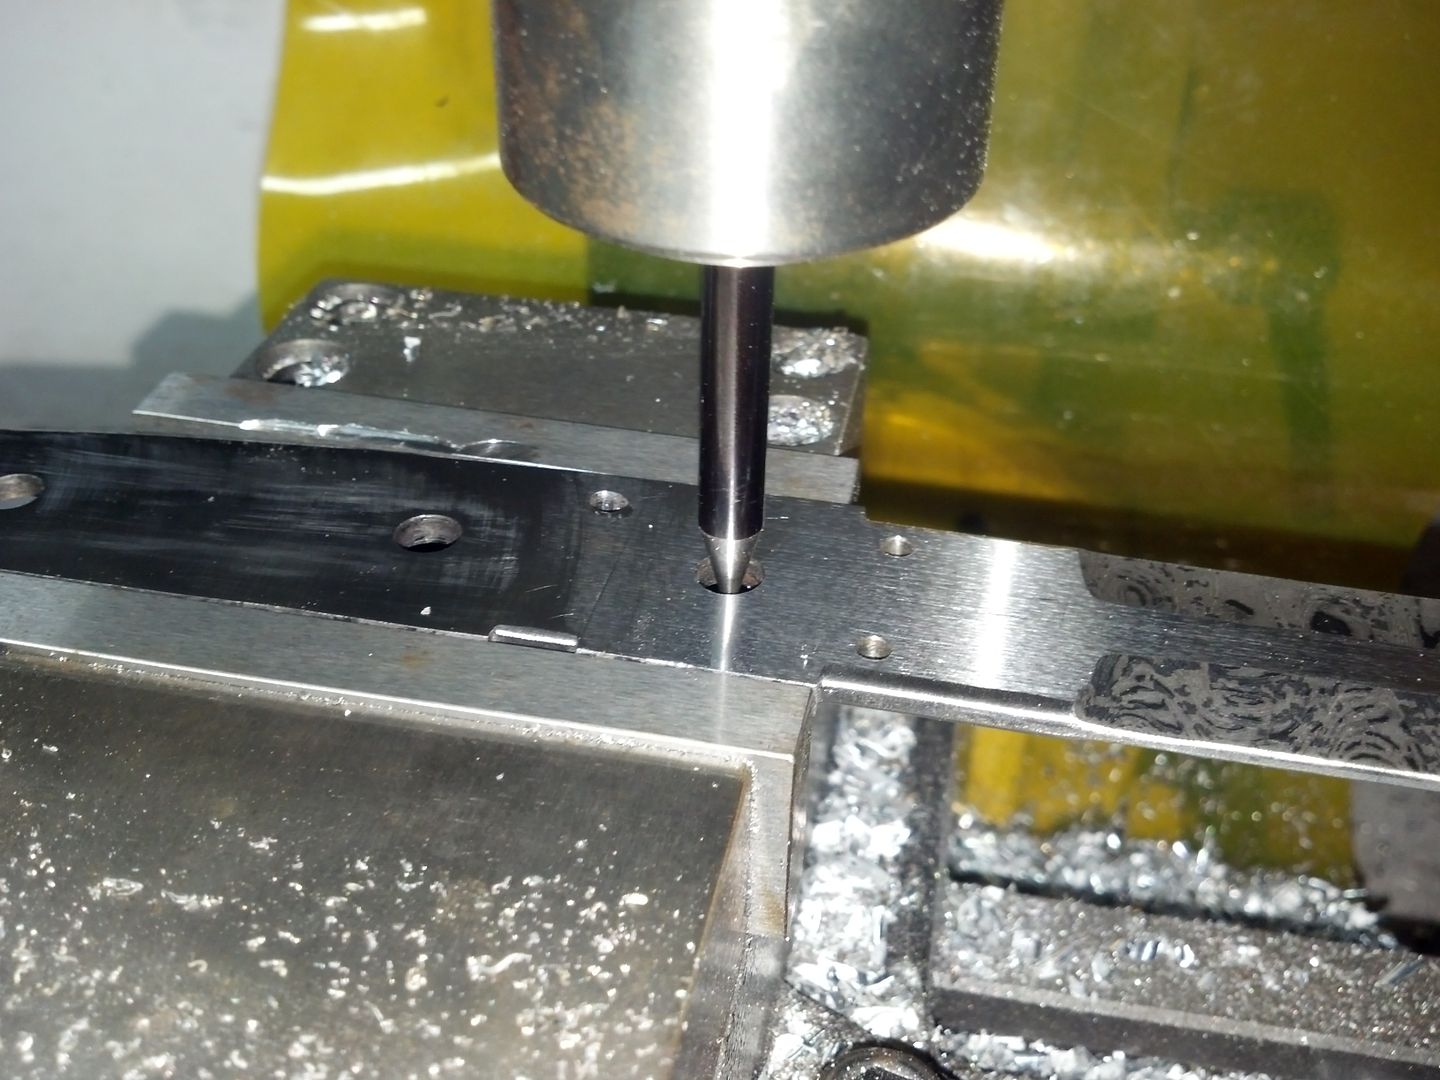
After some turning we arrive at .250", which is what the hole in the rear of the tang and bolsters is.

IMG_20130720_233537_895_zpse27c26ff.jpg


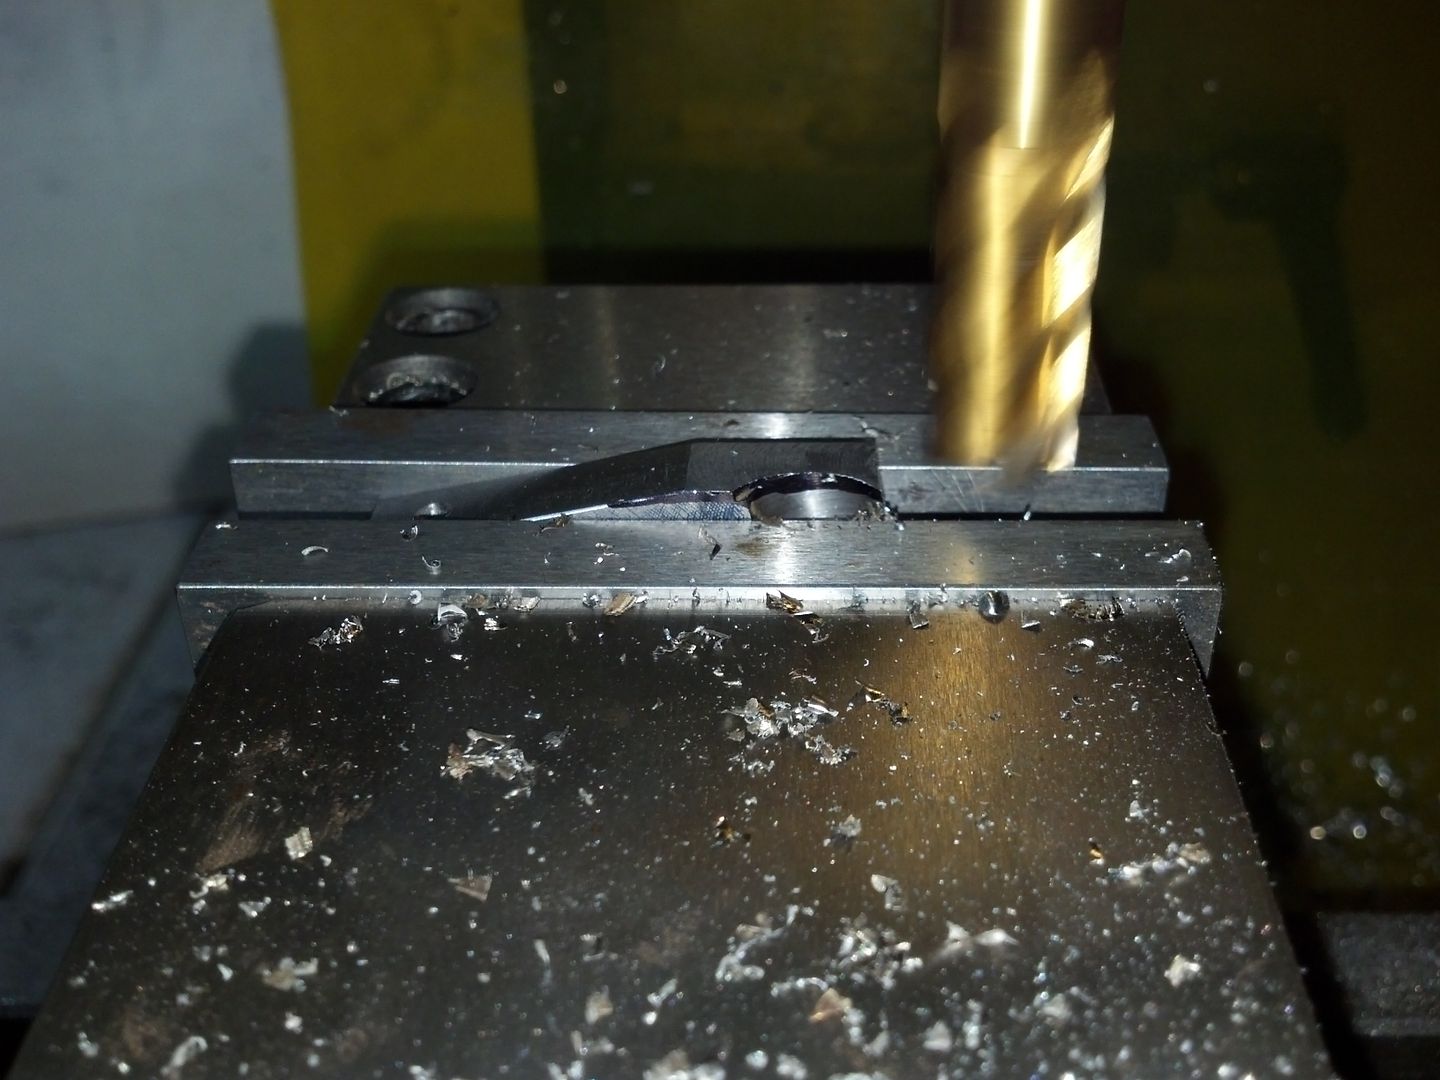
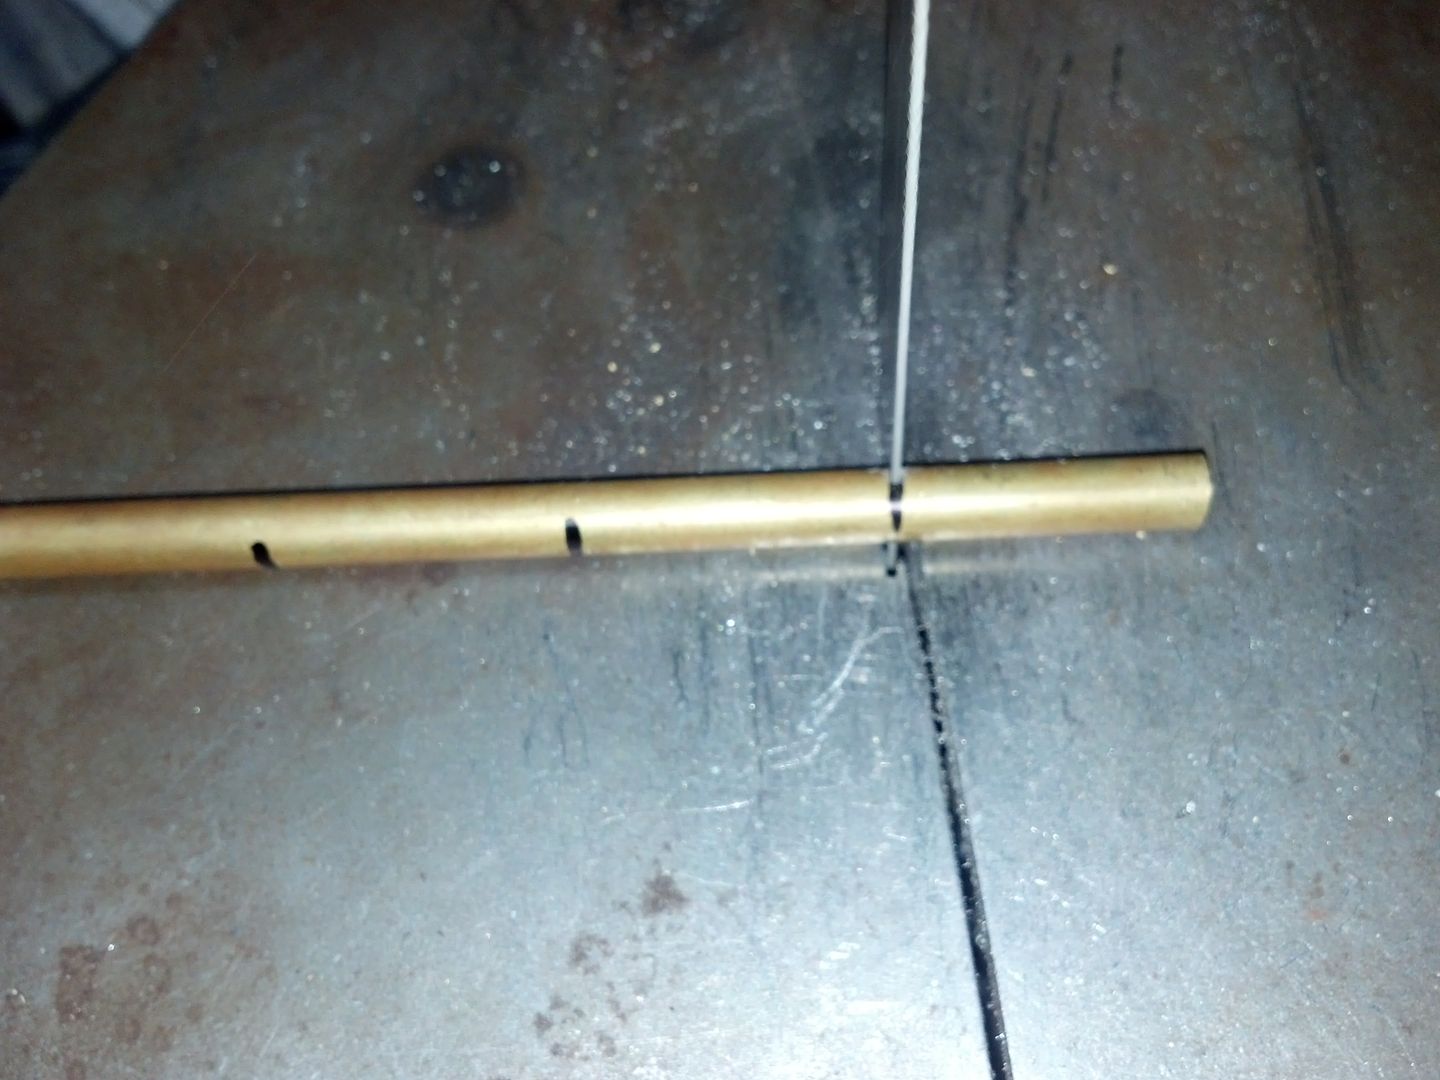
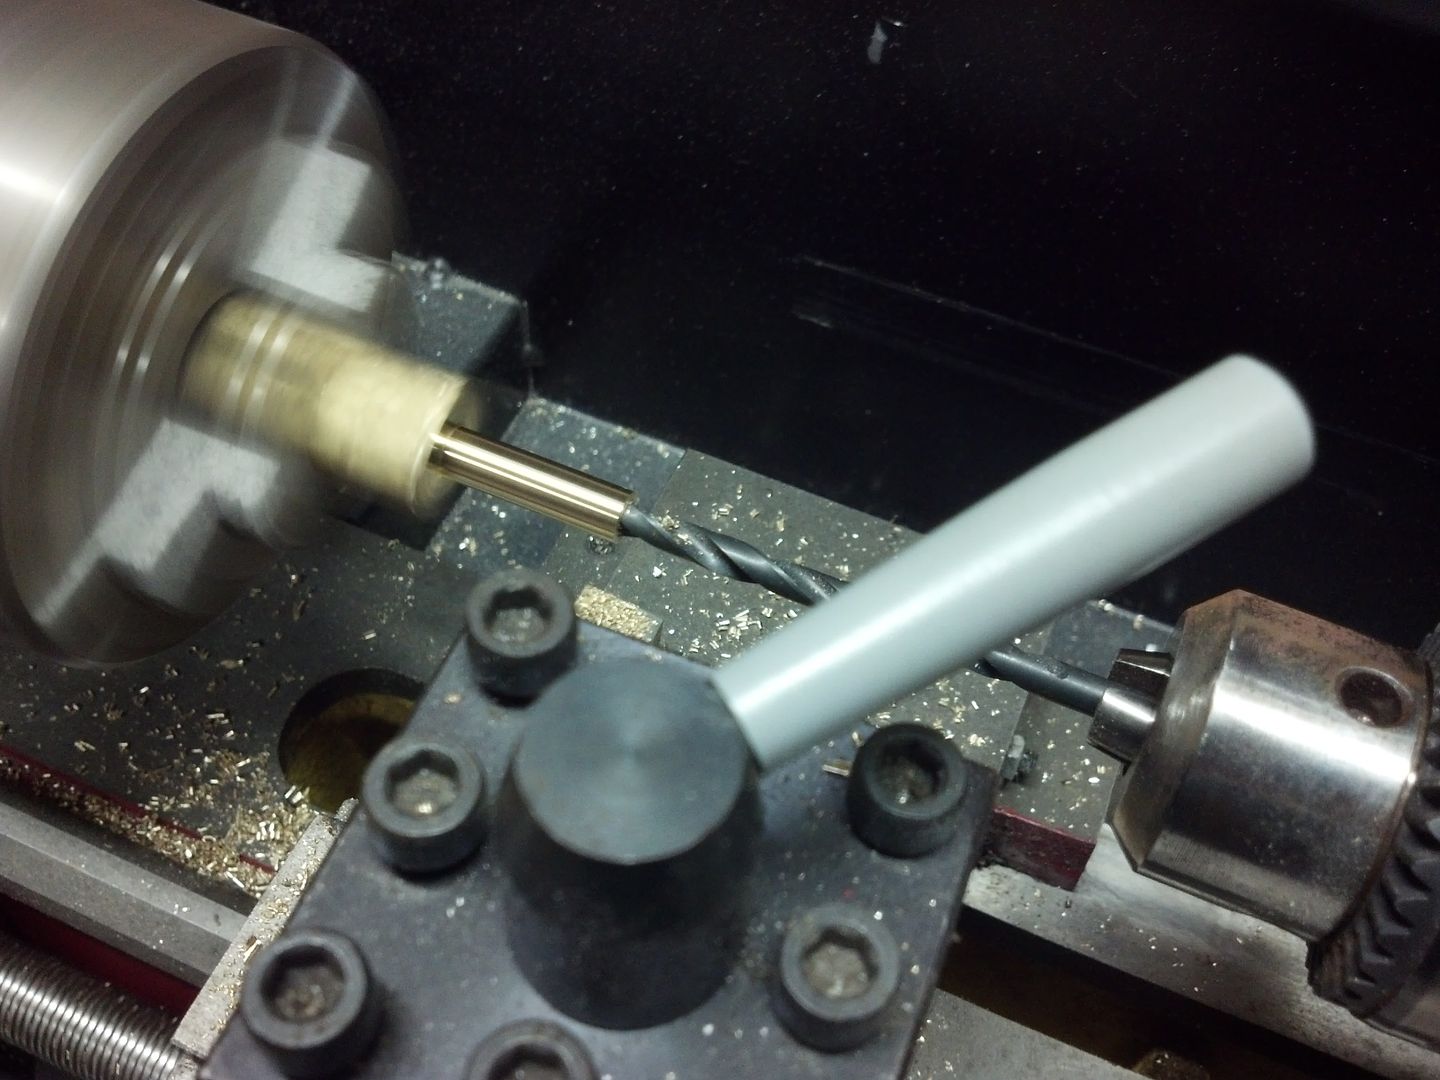
Then we have to drill a hole through to create the tube. I think I used a .177" drill..nothing specific, just need a hole.

IMG_20130720_233955_173_zpsc63254f1.jpg


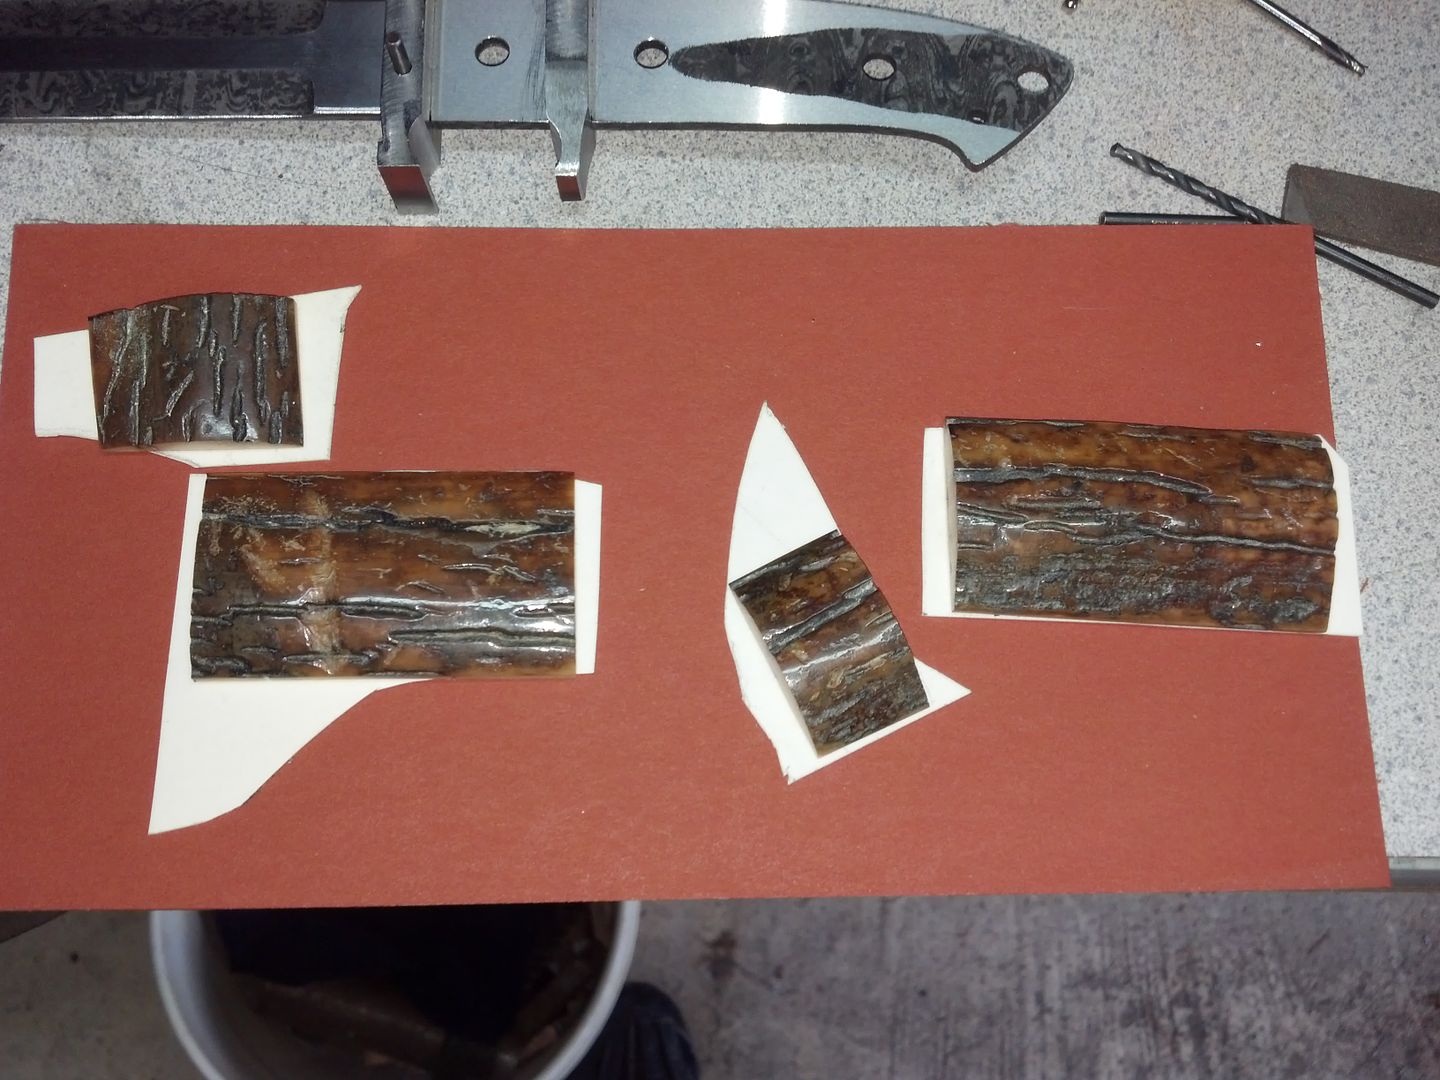
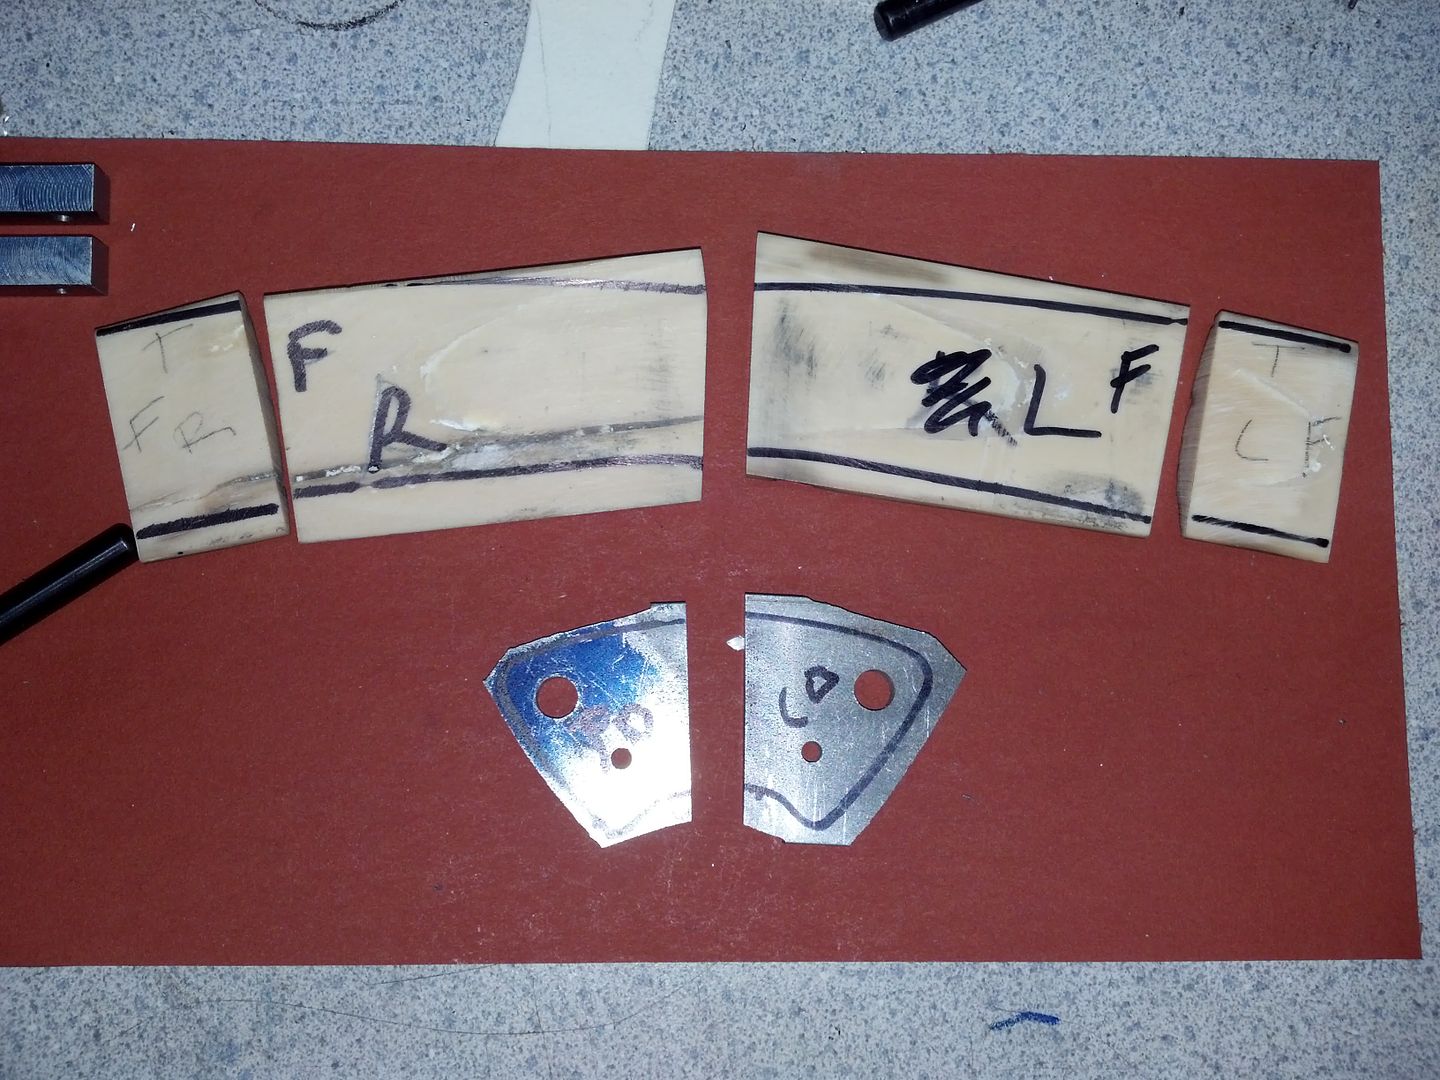
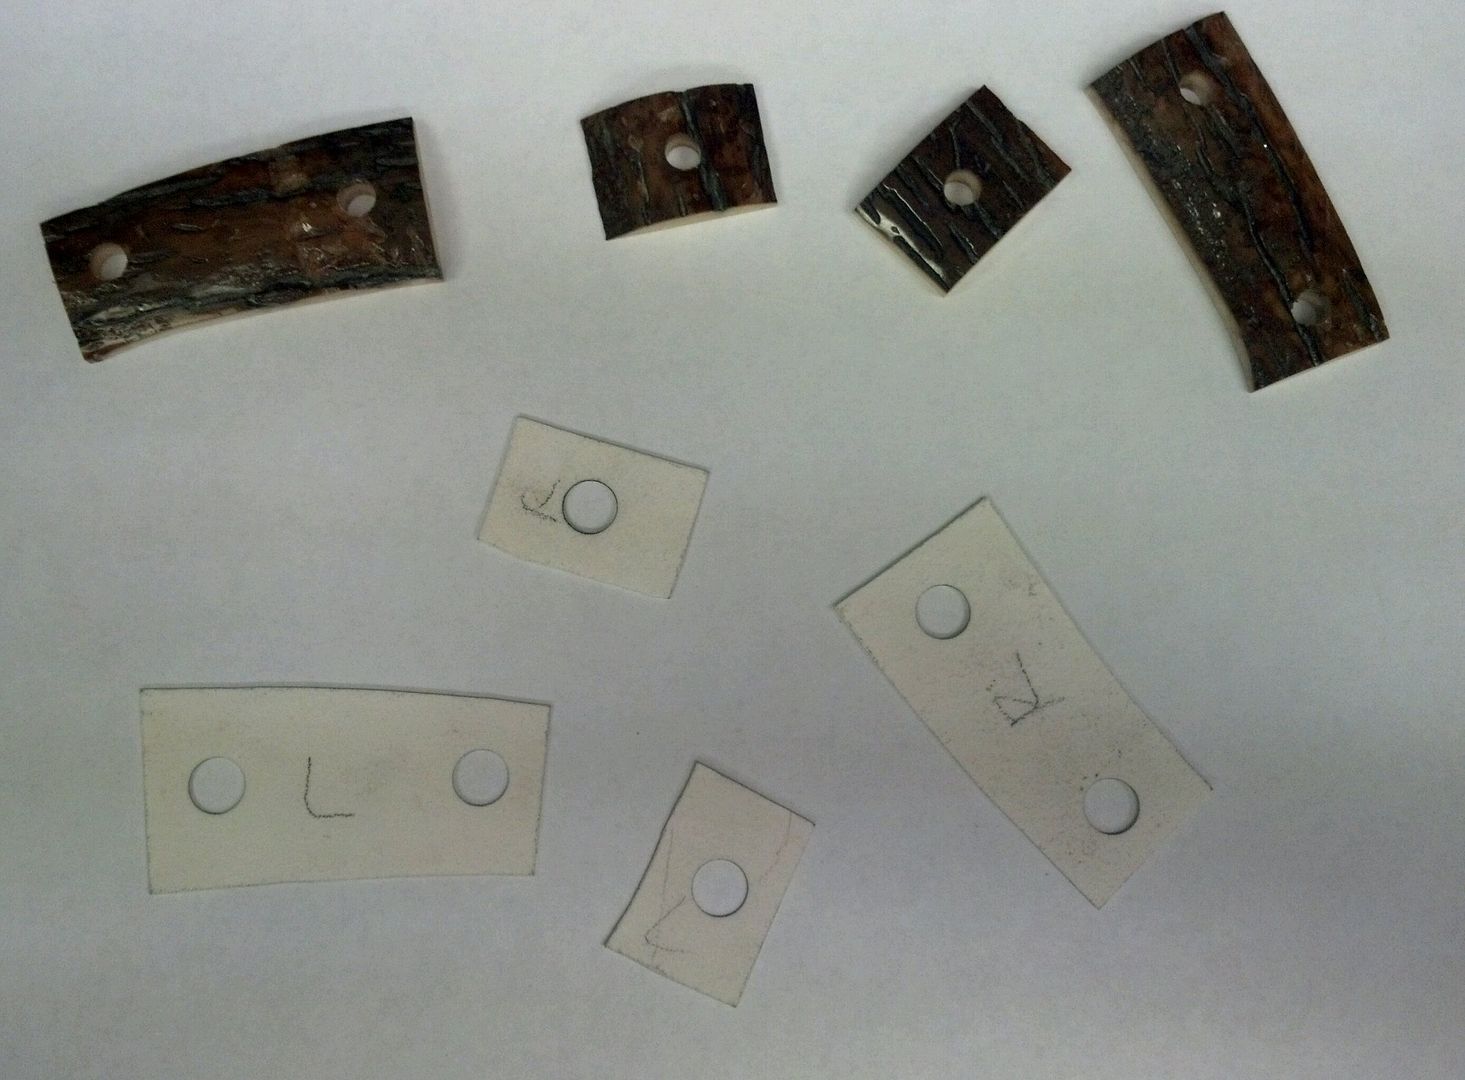
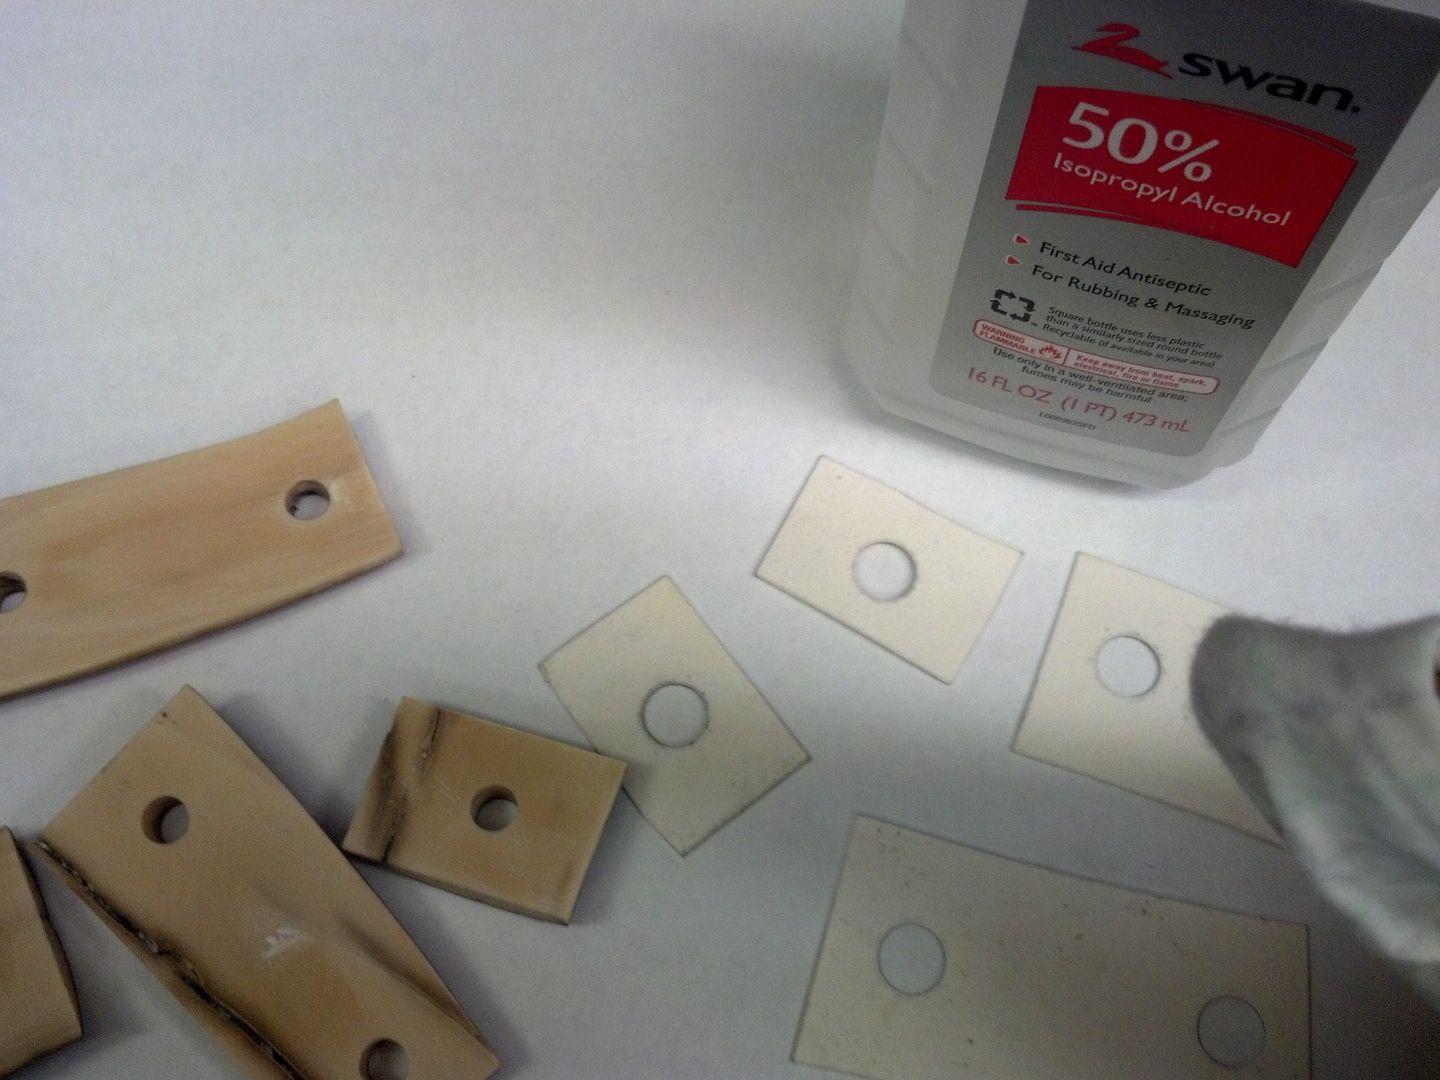
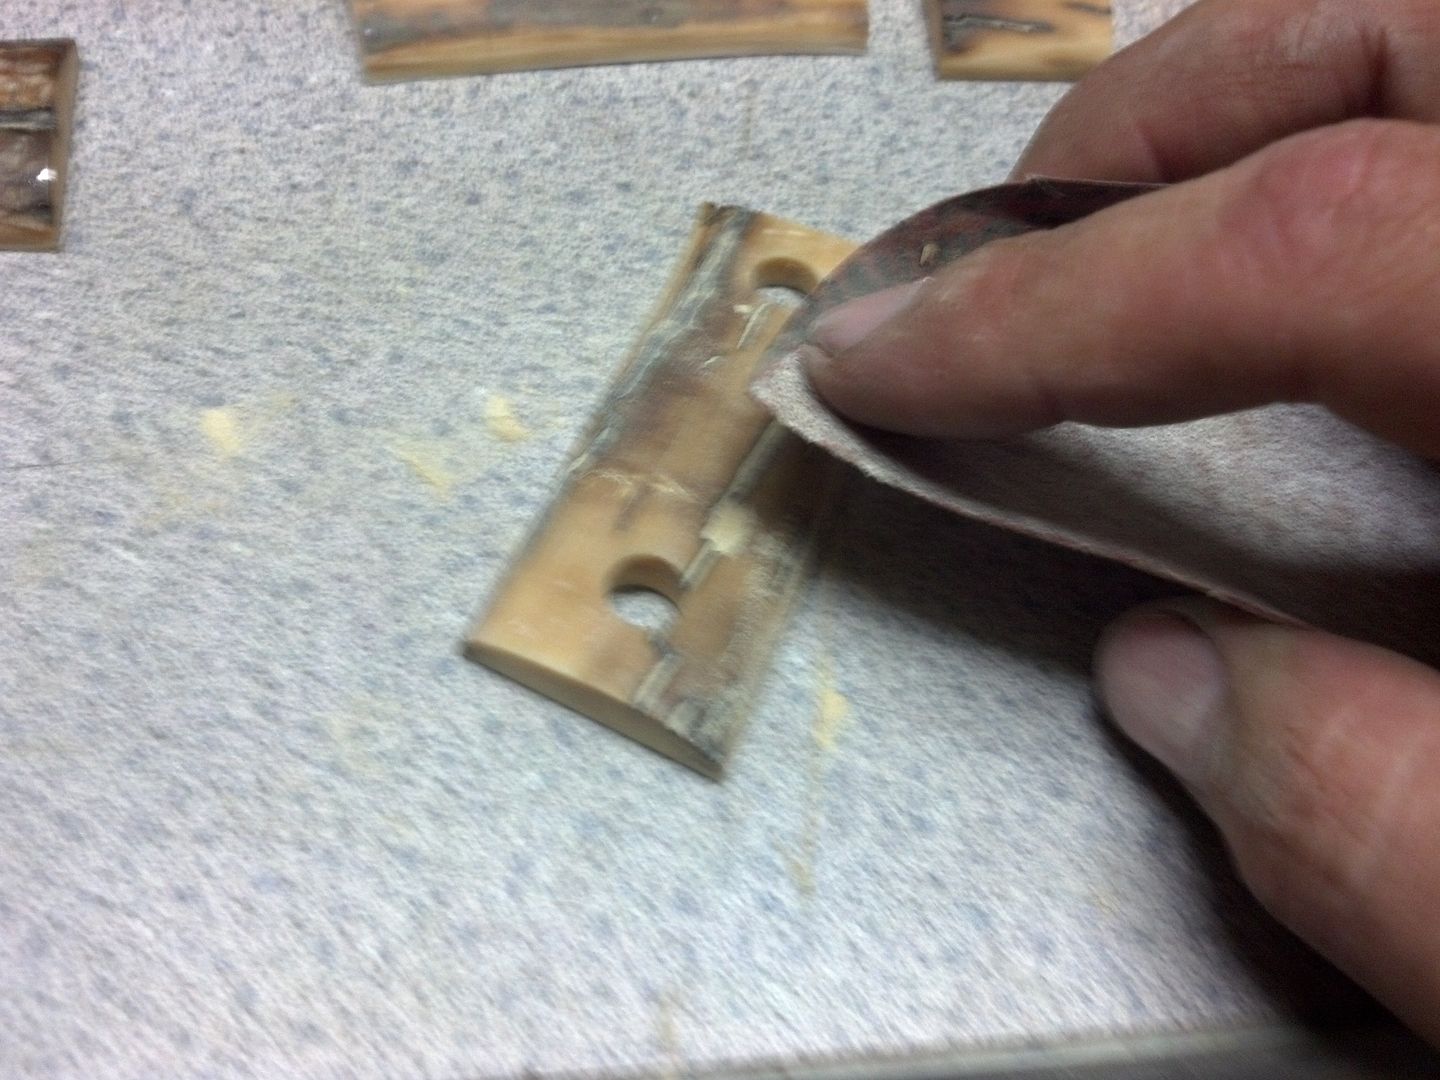
In this pic I have started sanding the tic marks left by my angle grinder in the scale pieces. I use a little right angle air grinder to do the majority of the scale shaping. It always leave some marks, and this gets them out. I then work up through the finer grits to make them smooth.

IMG_20130721_241603_343_zpsc18e9063.jpg


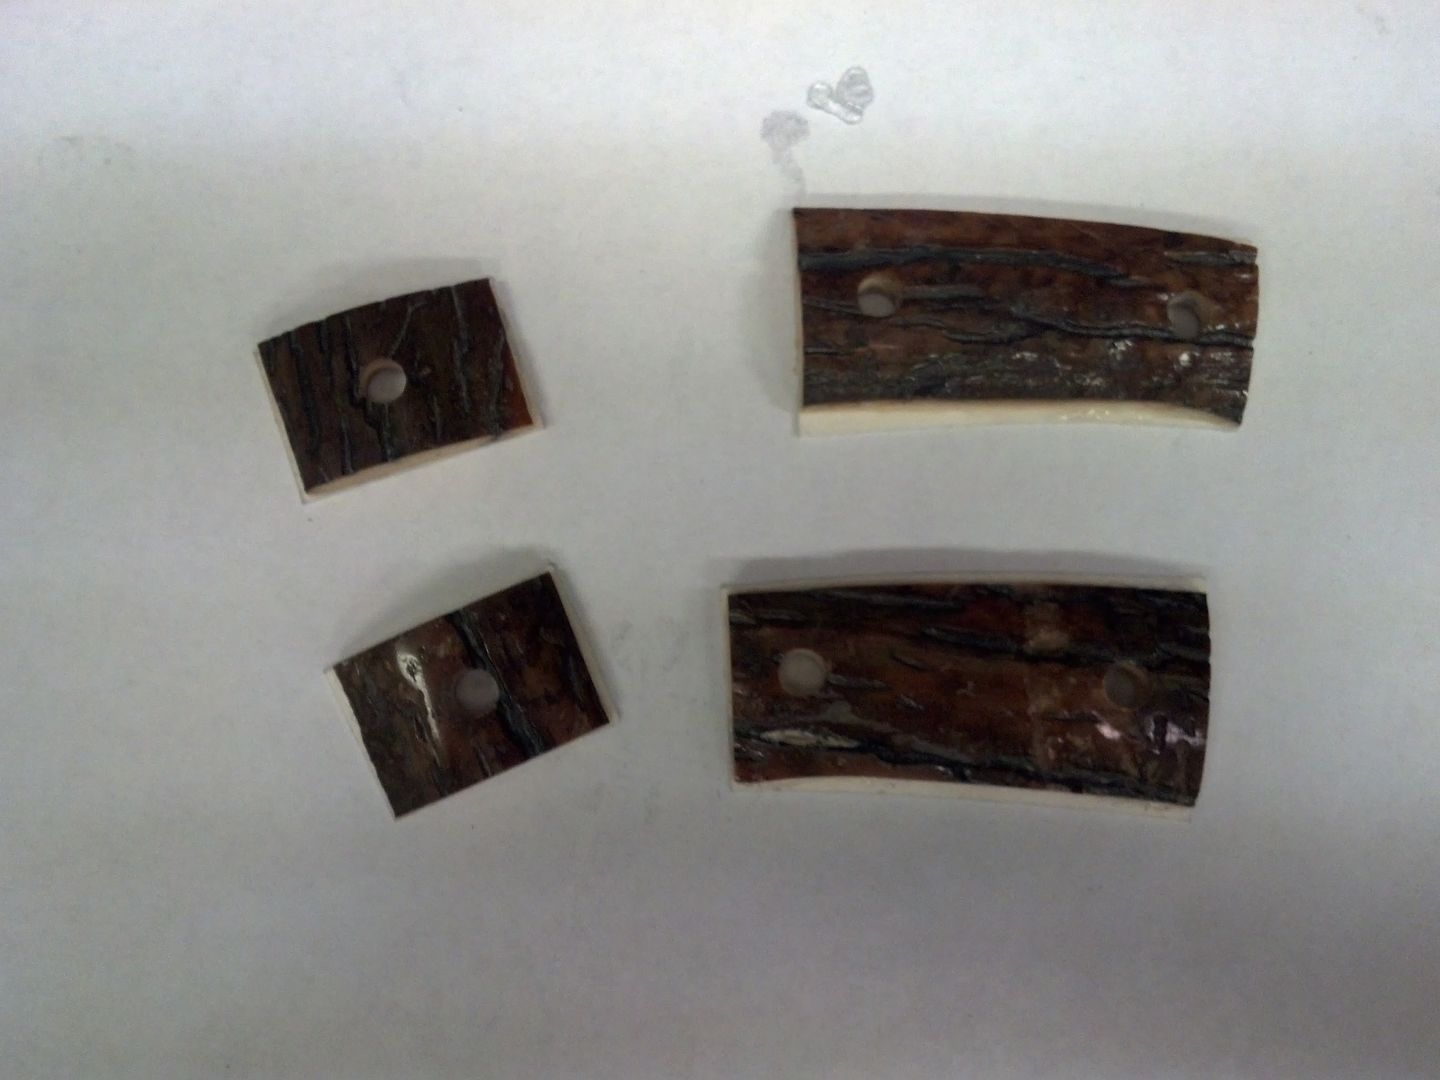
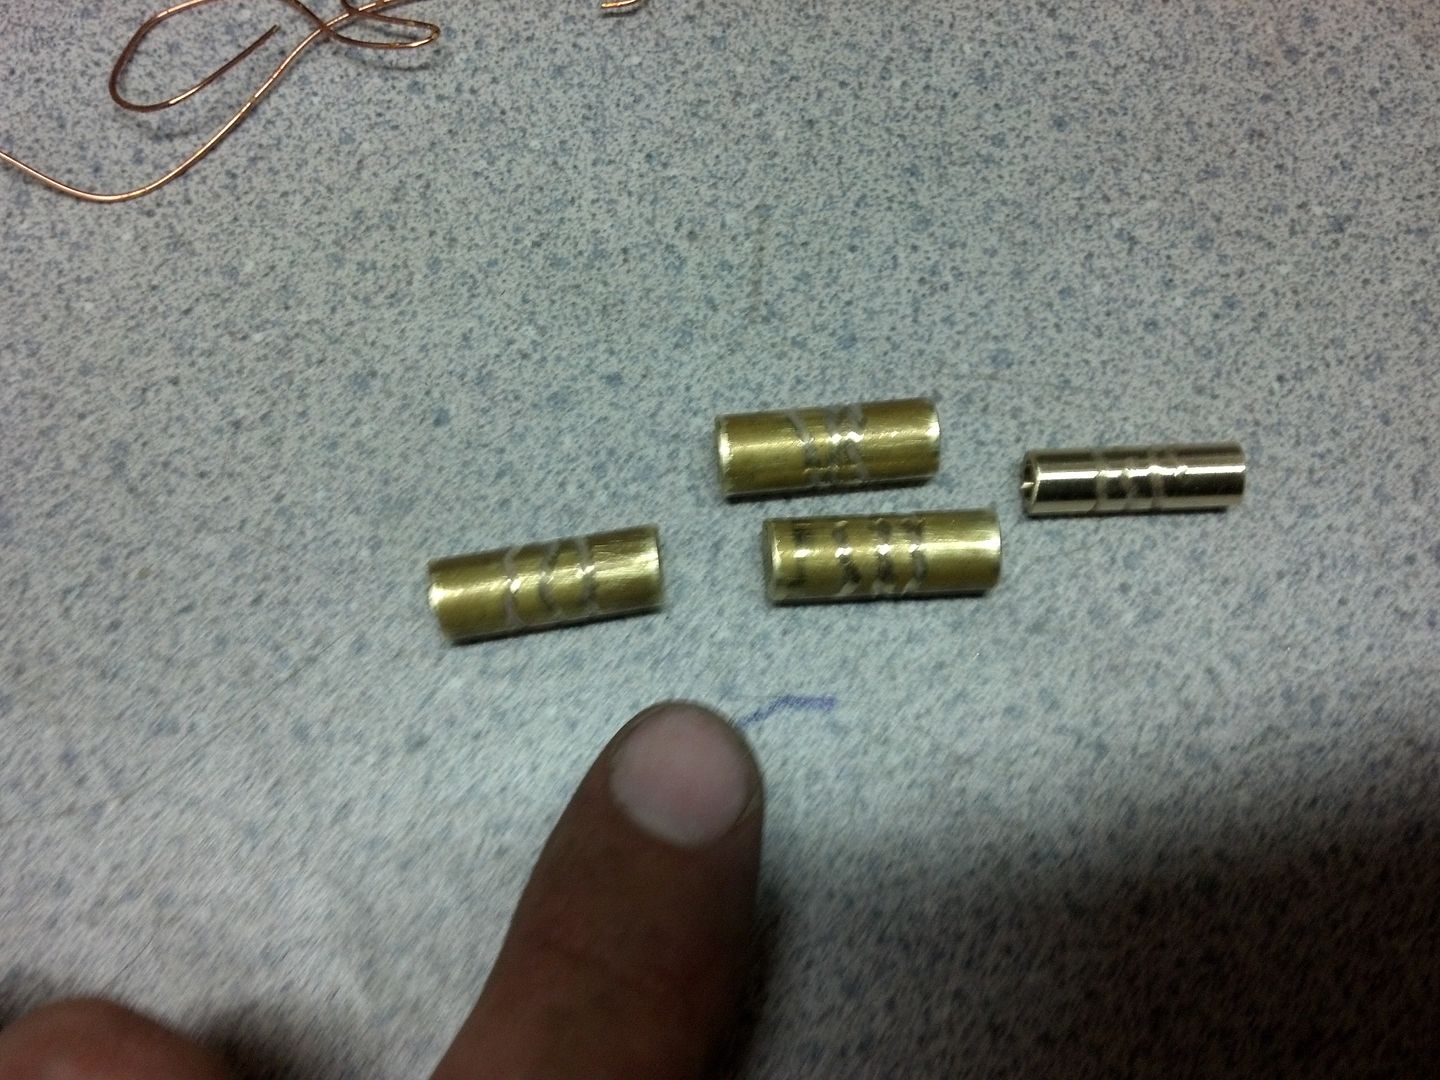
The finished pieces (for the time being)

IMG_20130721_244219_202_zpsffe5782c.jpg


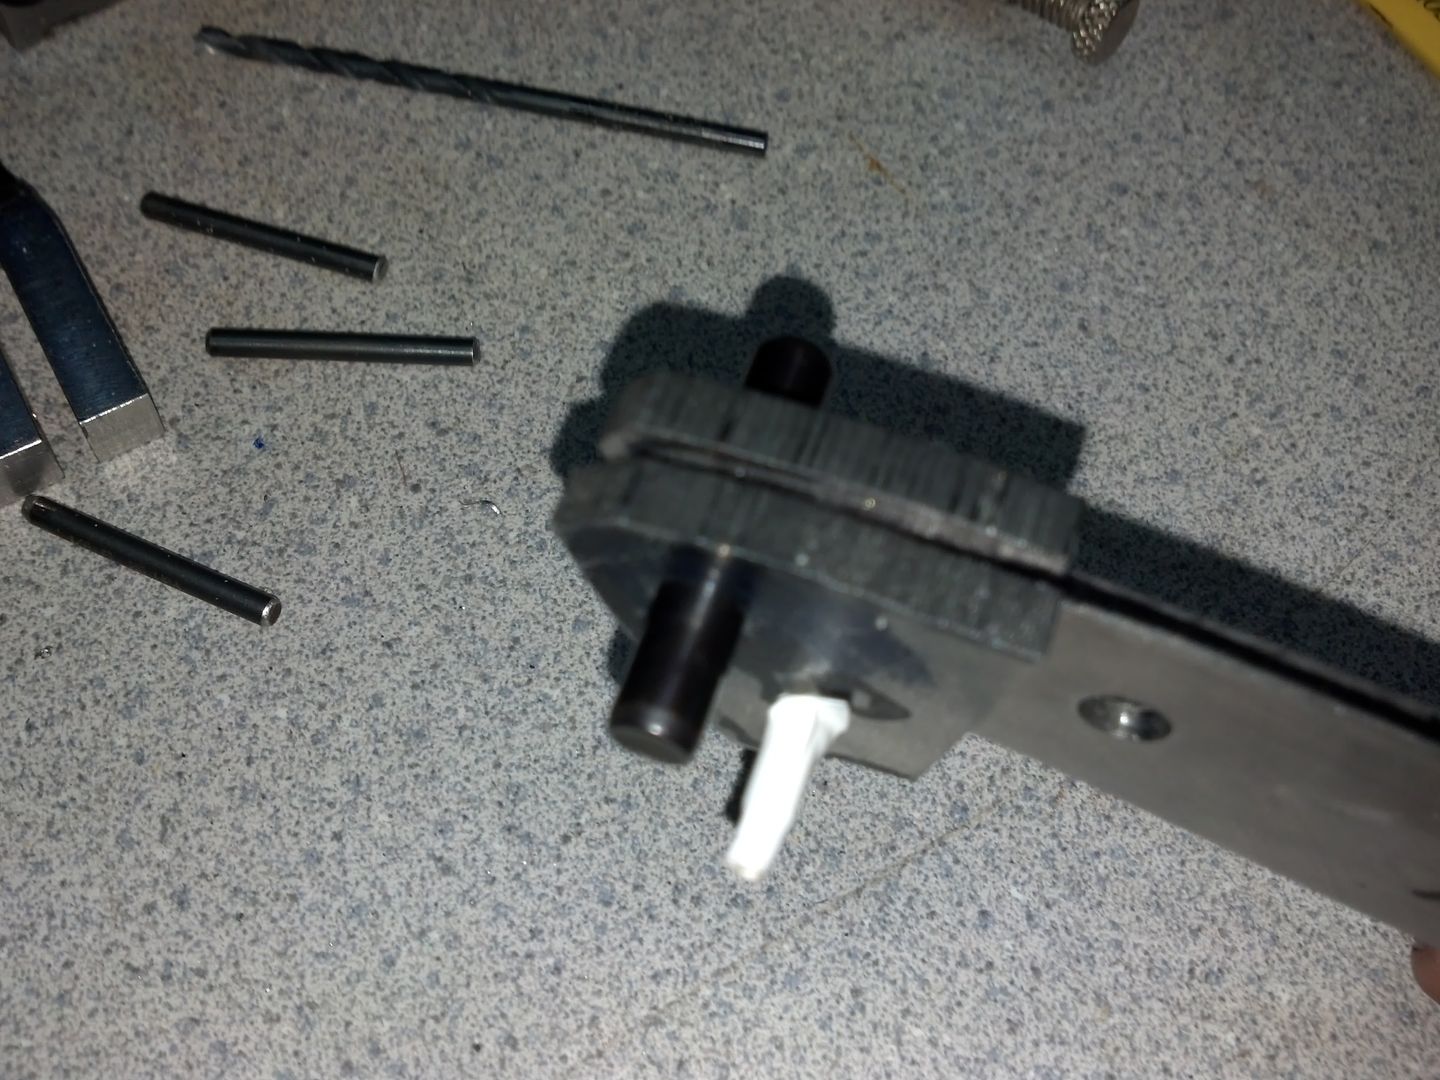
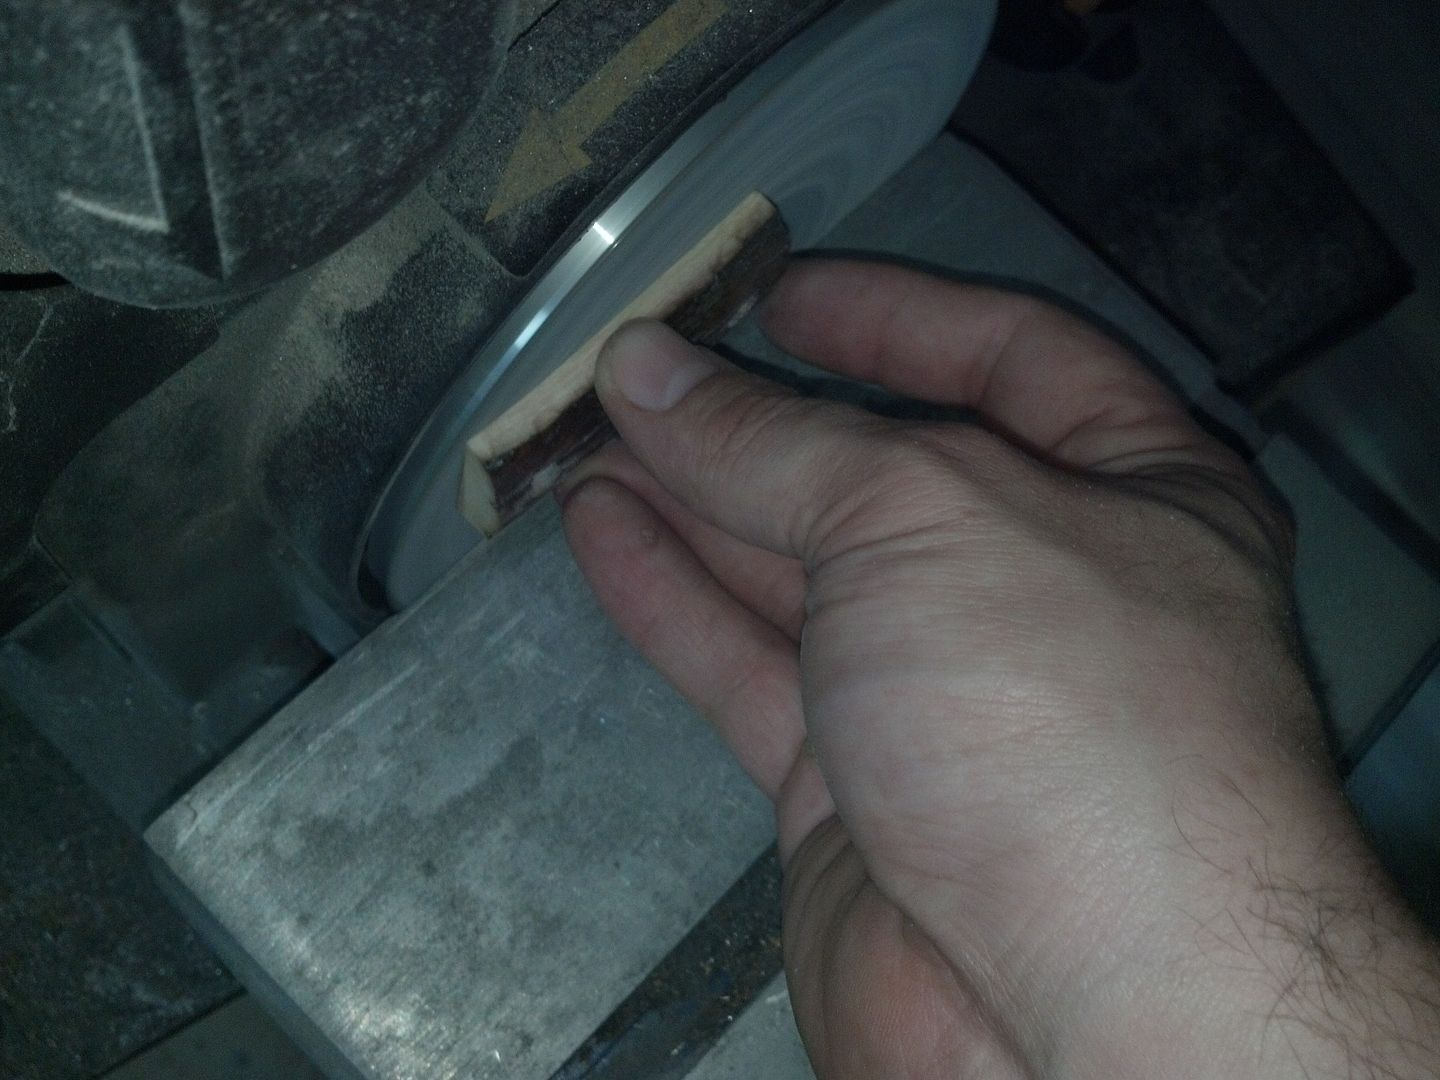
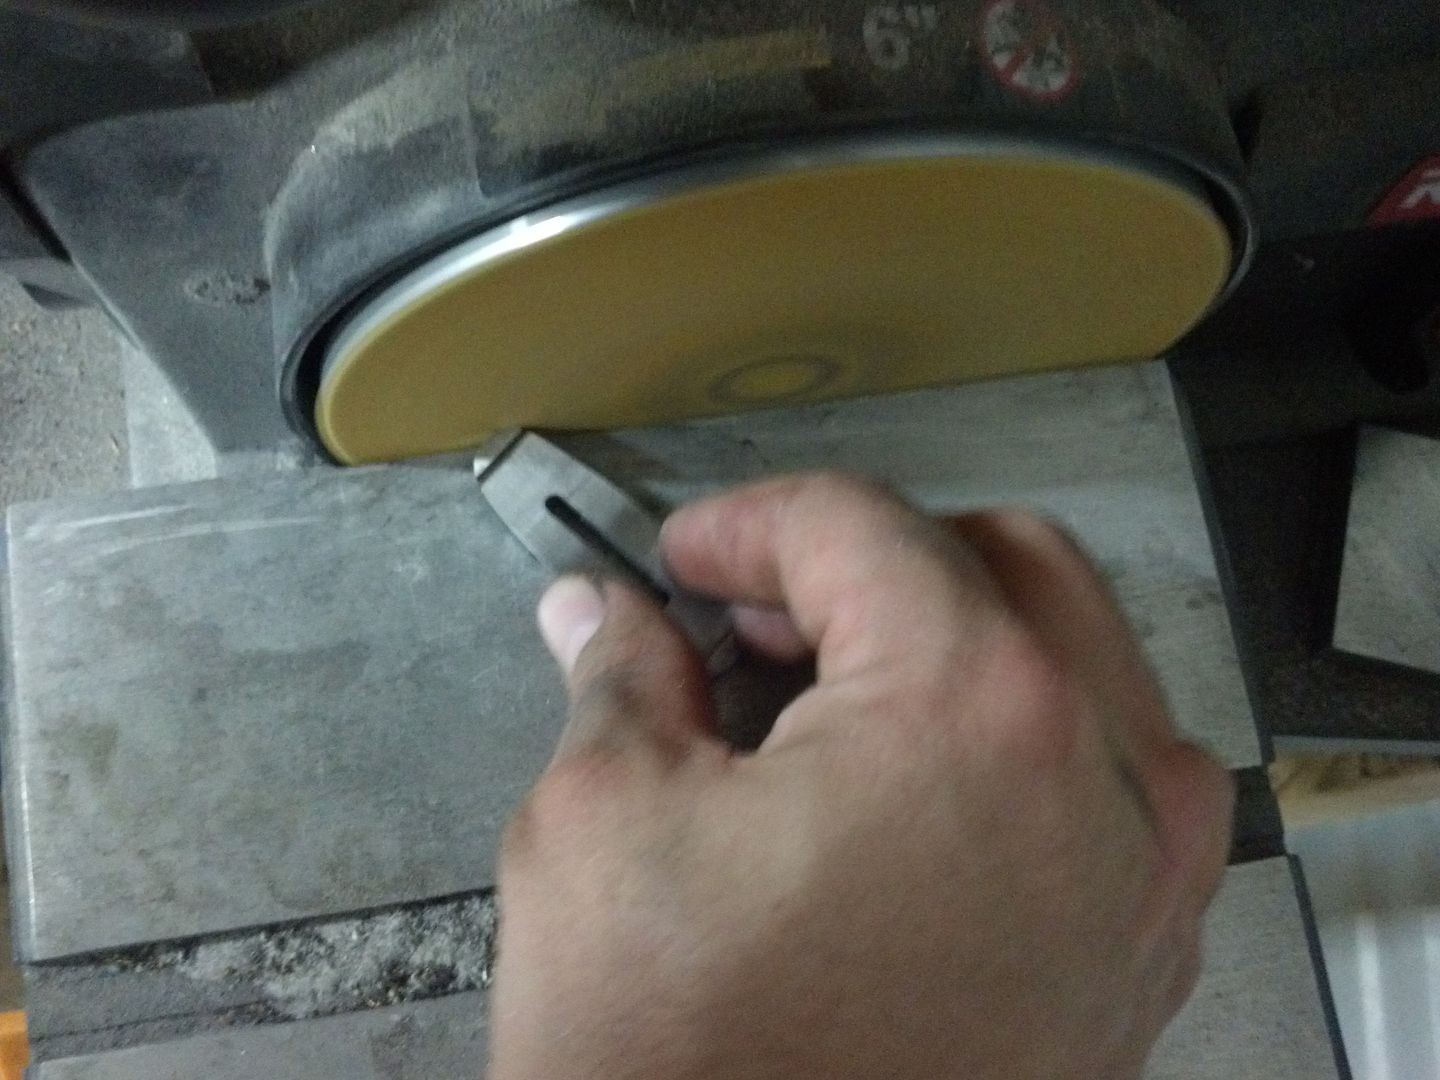
I have cut the new 5/16" mosaic pins and there is the new little lanyard tube I just made on the right. I run the pieces in a kind of spiral motion on a grinder to create a groove for adhesive.

IMG_20130721_010901_904_zps8971607d.jpg


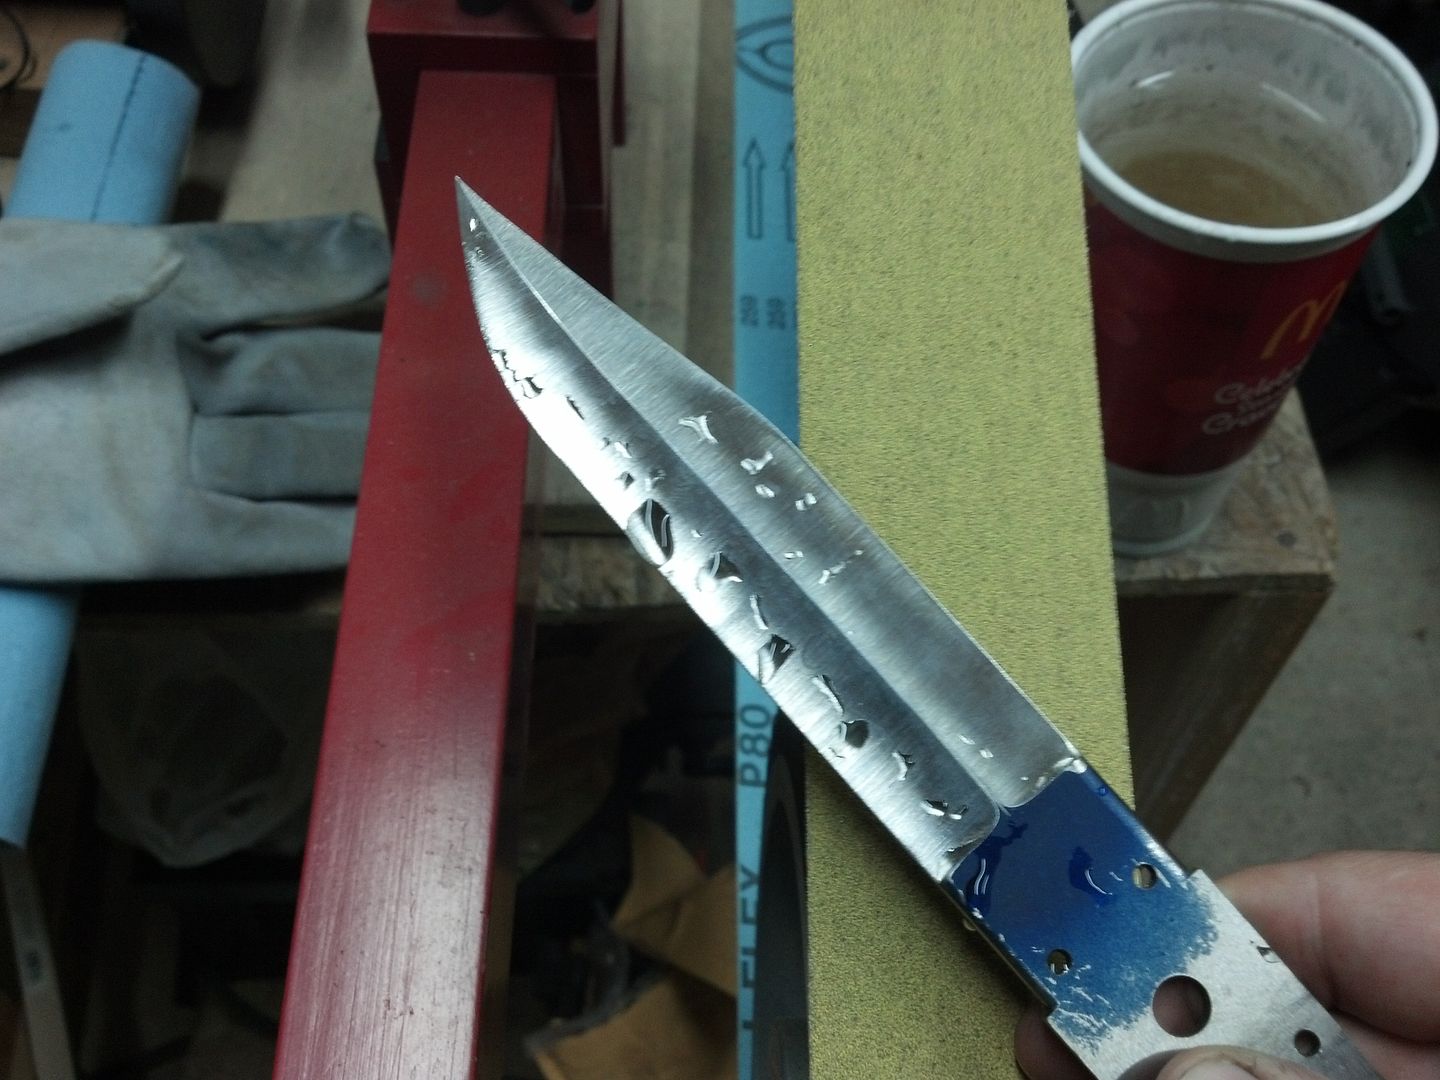
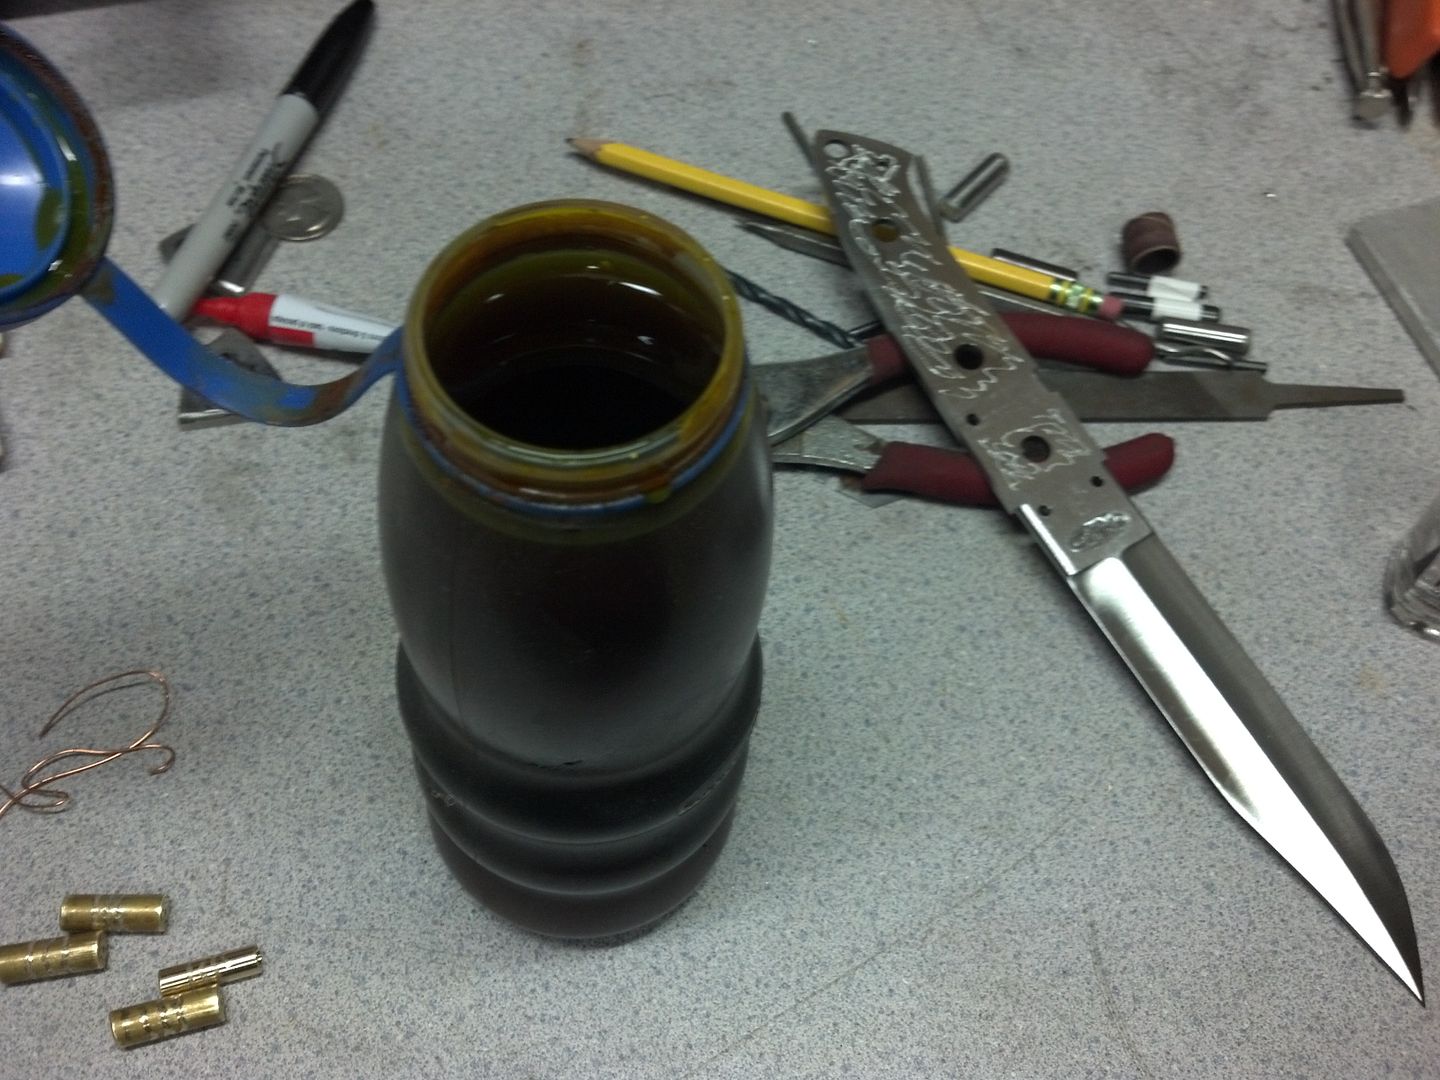
At this point the nail polish over my name on the blade has dried, and I can now proceed with the blade etch.

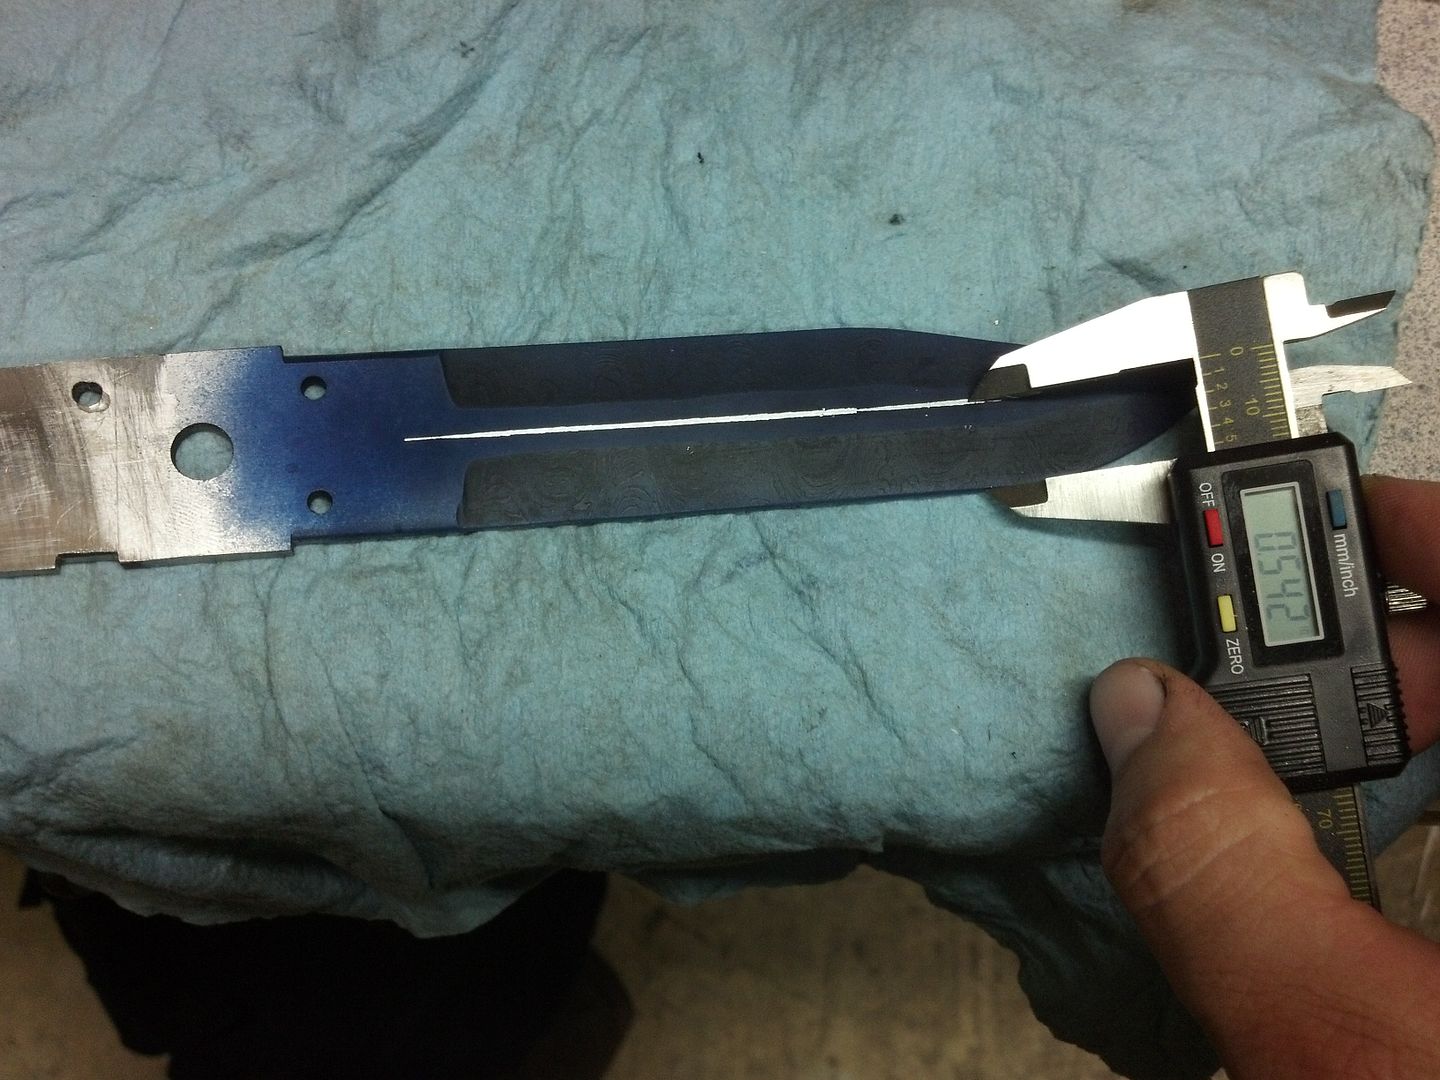
The blade is placed in a ferric chloride solution, somewhat diluted with water.

IMG_20130721_012058_855_zps5696898d.jpg


The whole blade is submersed. I only leave it in the etch solution for about 5 minutes. The longer you leave it, the darker the etch and the deeper the black.

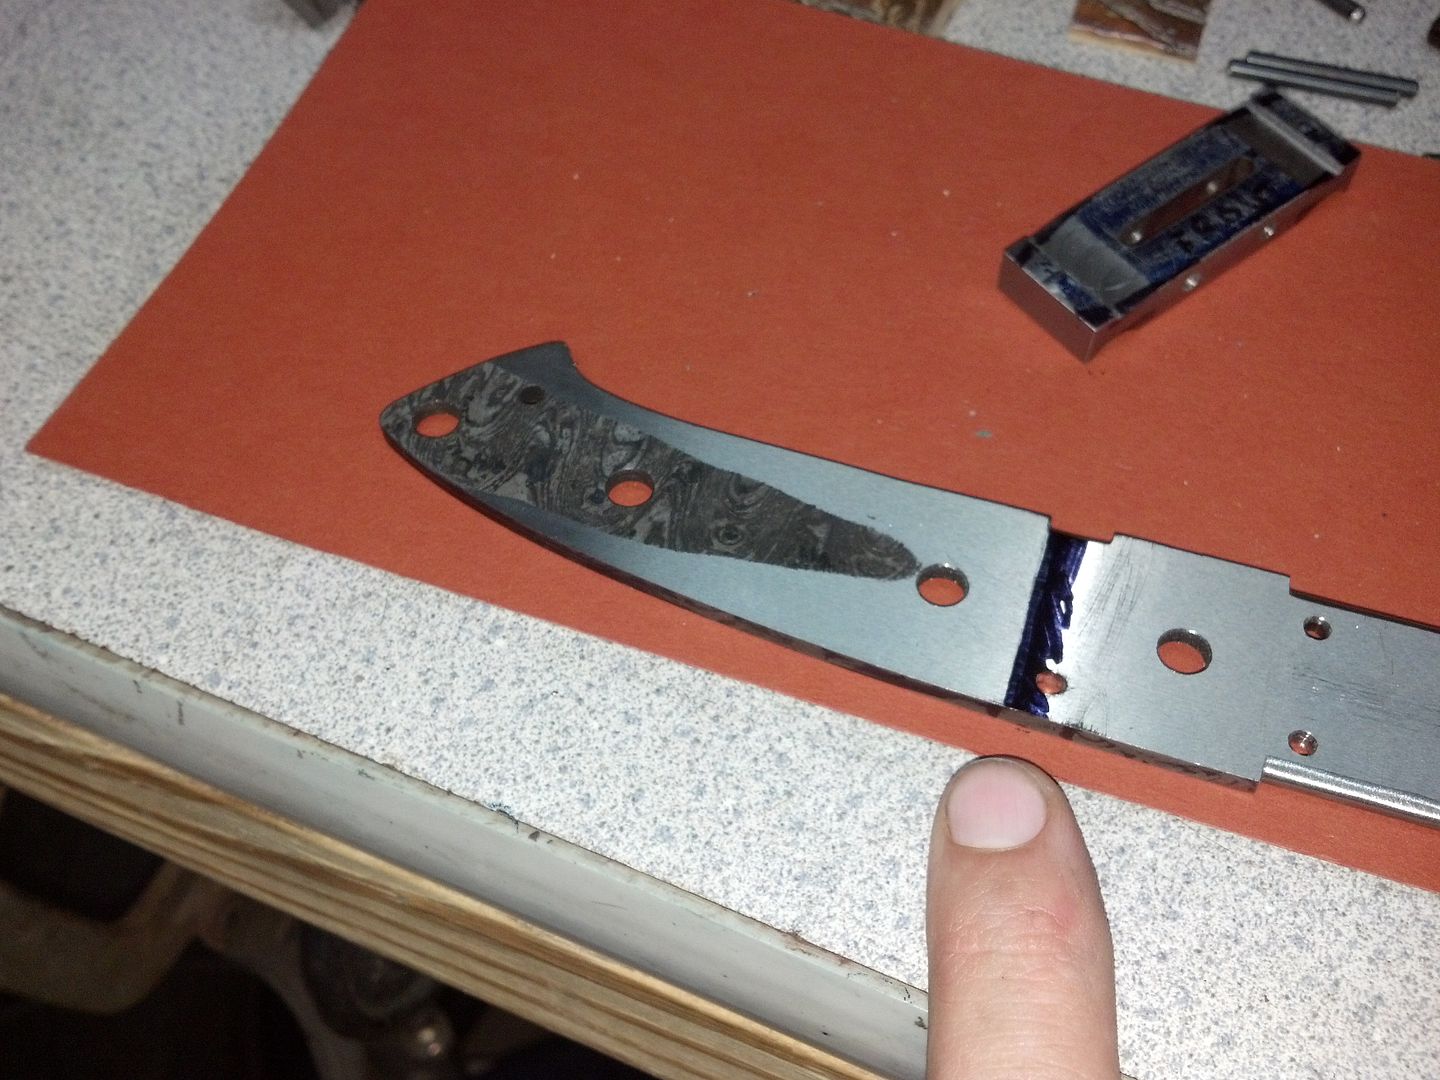
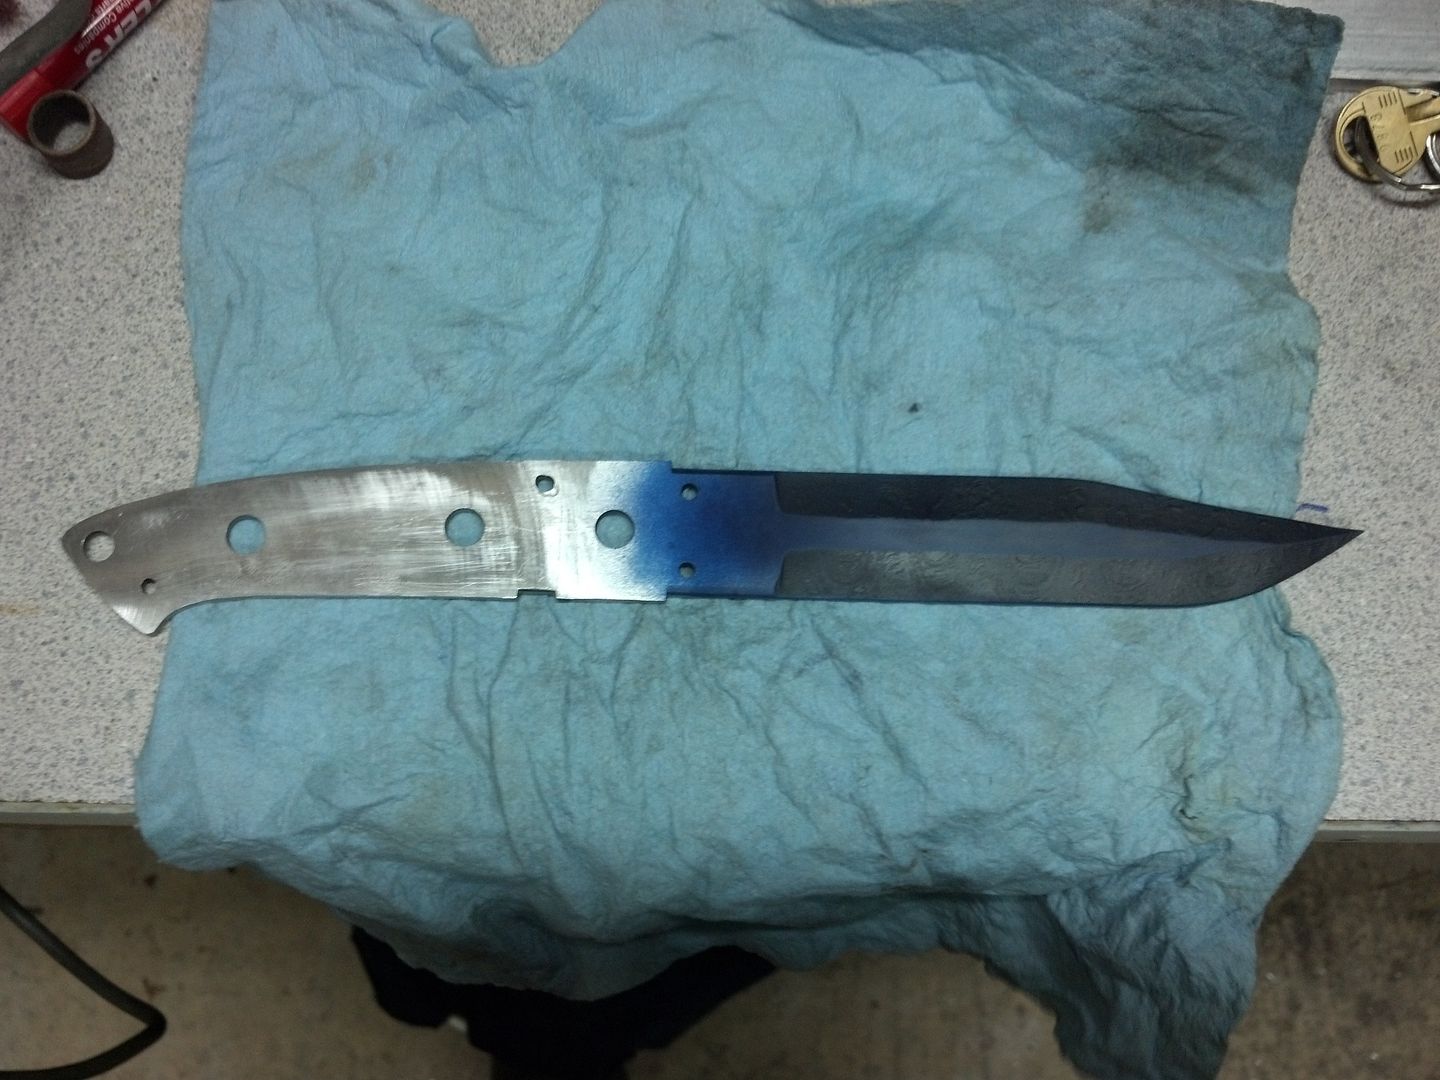
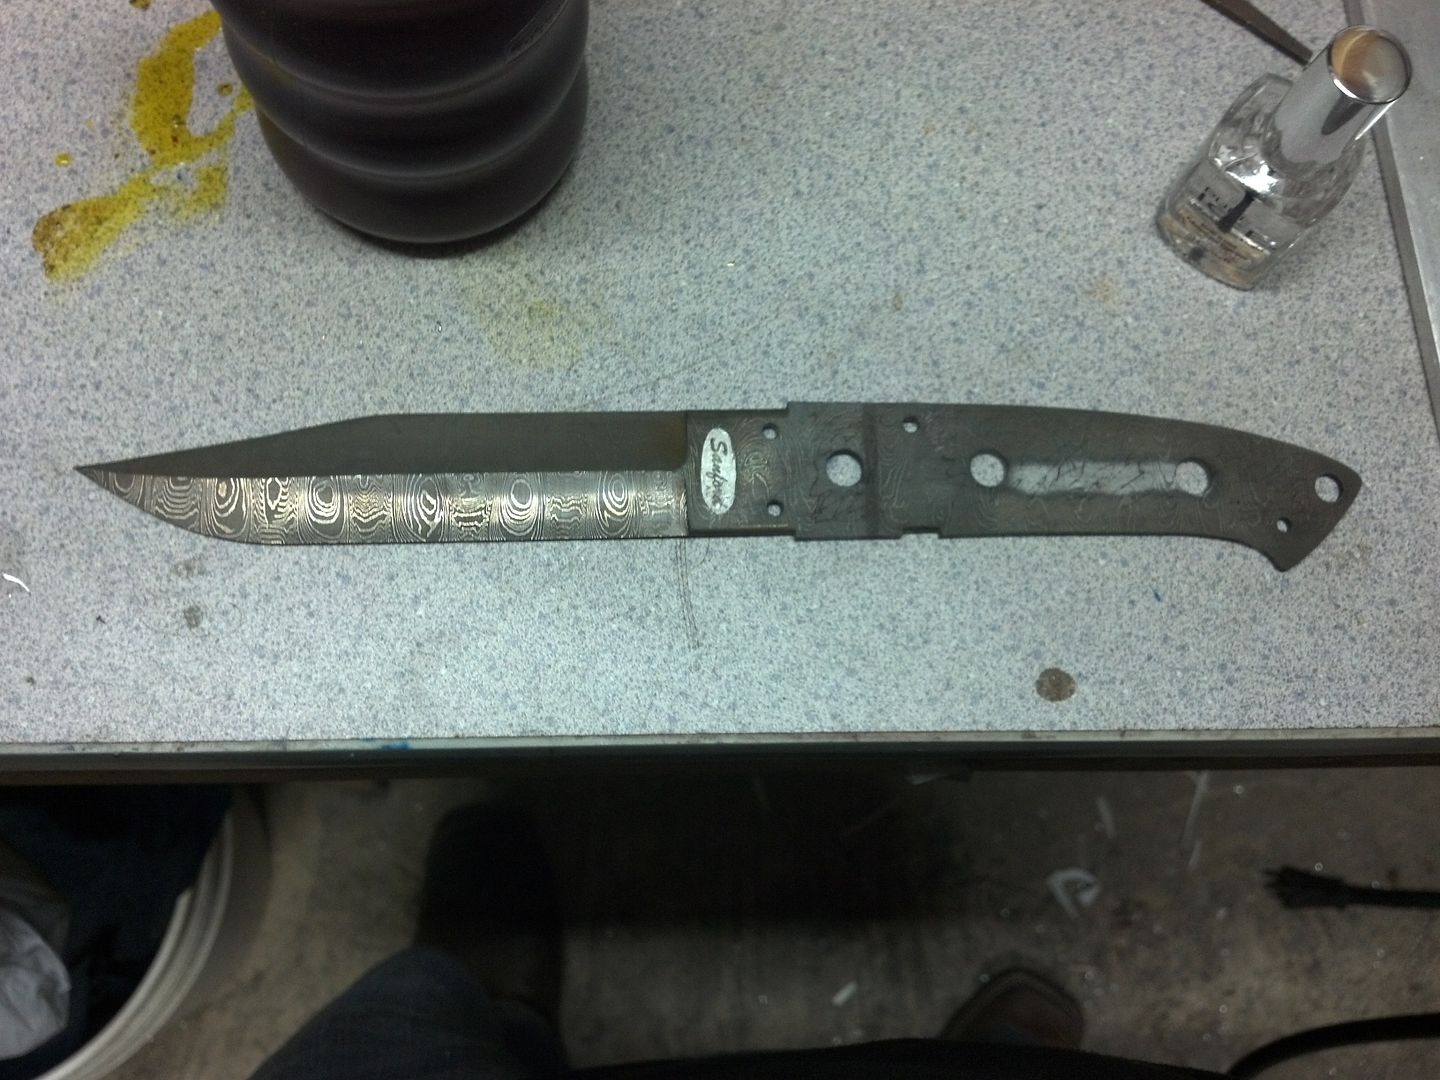
Here it is right out of etch and rinsed off. You have to rinse it off good because if you don't get the solution completely off it will continue to work.

IMG_20130721_013113_419_zps799ba4a4.jpg


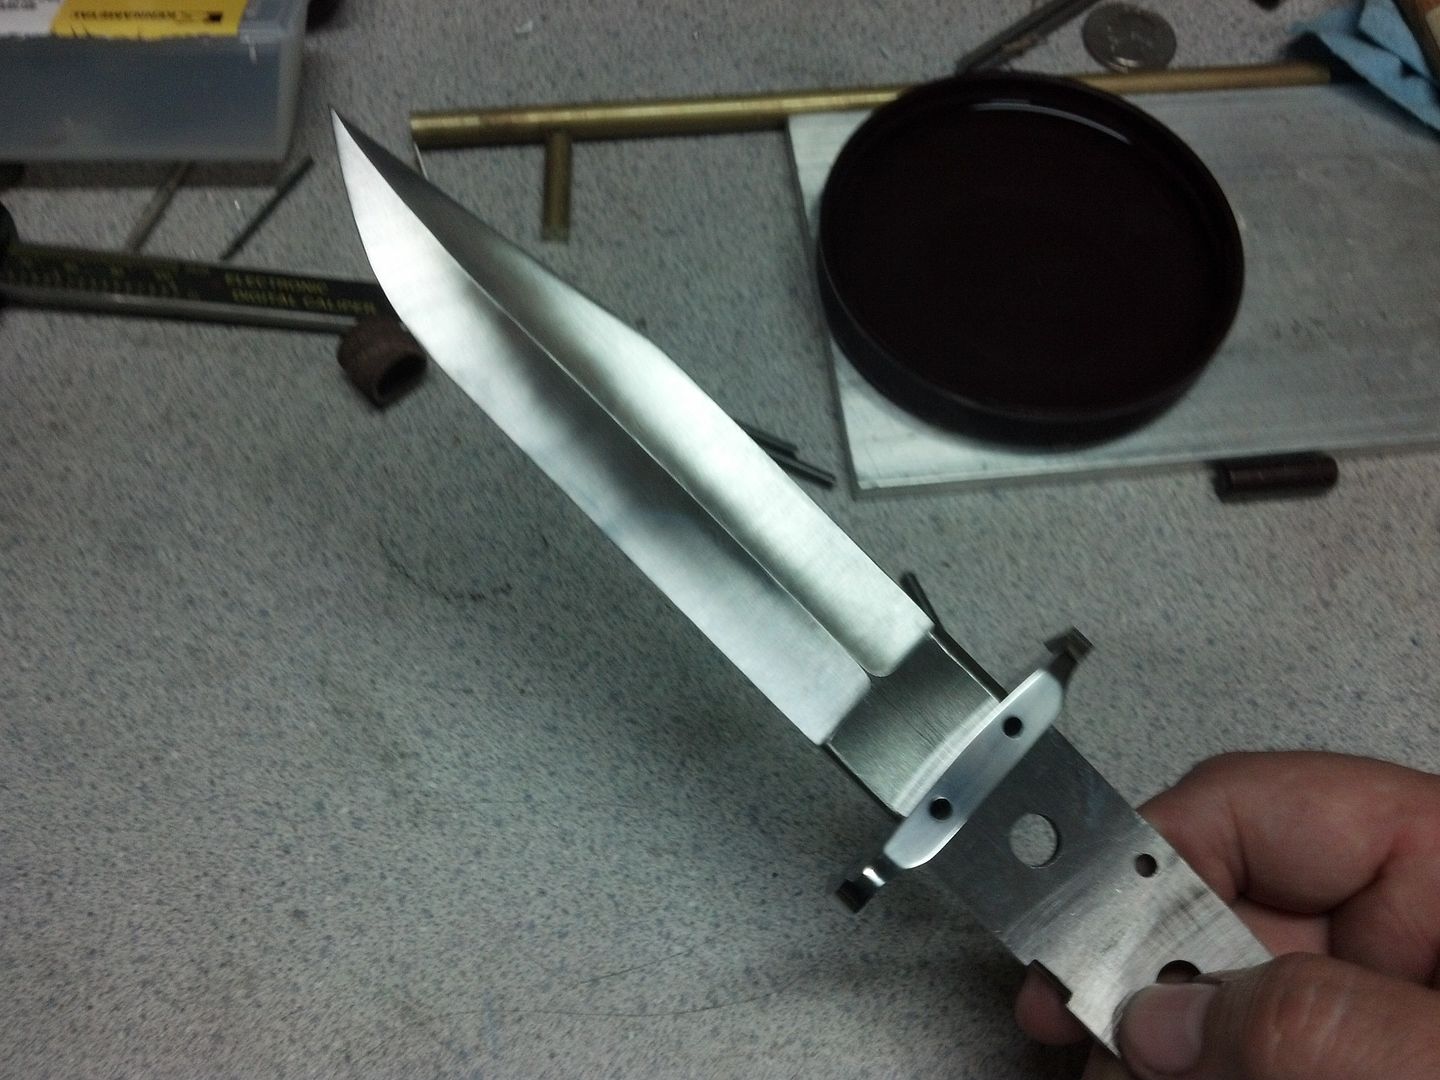
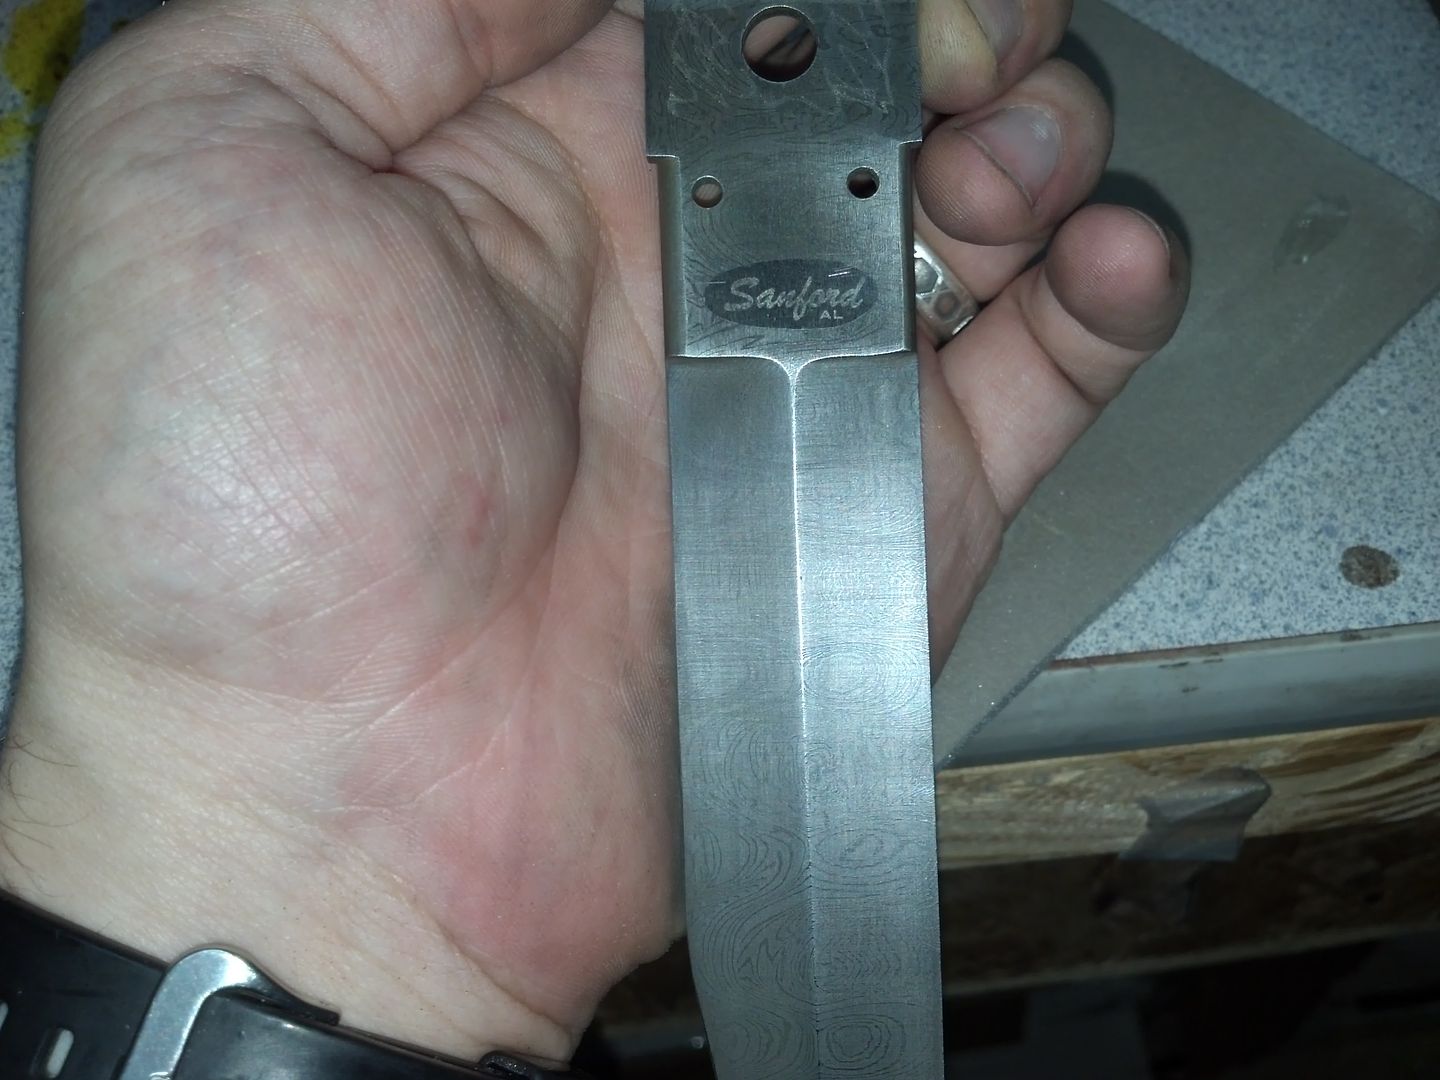
Then I peel off the nail polish, which was protecting a small oval area around my name.

IMG_20130721_014226_876_zps2fbb6951.jpg


Then I take some mocrofine sanding pads and lightly work the entire blade. It slightly polishes the high spots and removes the remaining eaten metal from the lower carbon areas.

IMG_20130721_014732_826_zpse343cd0e.jpg


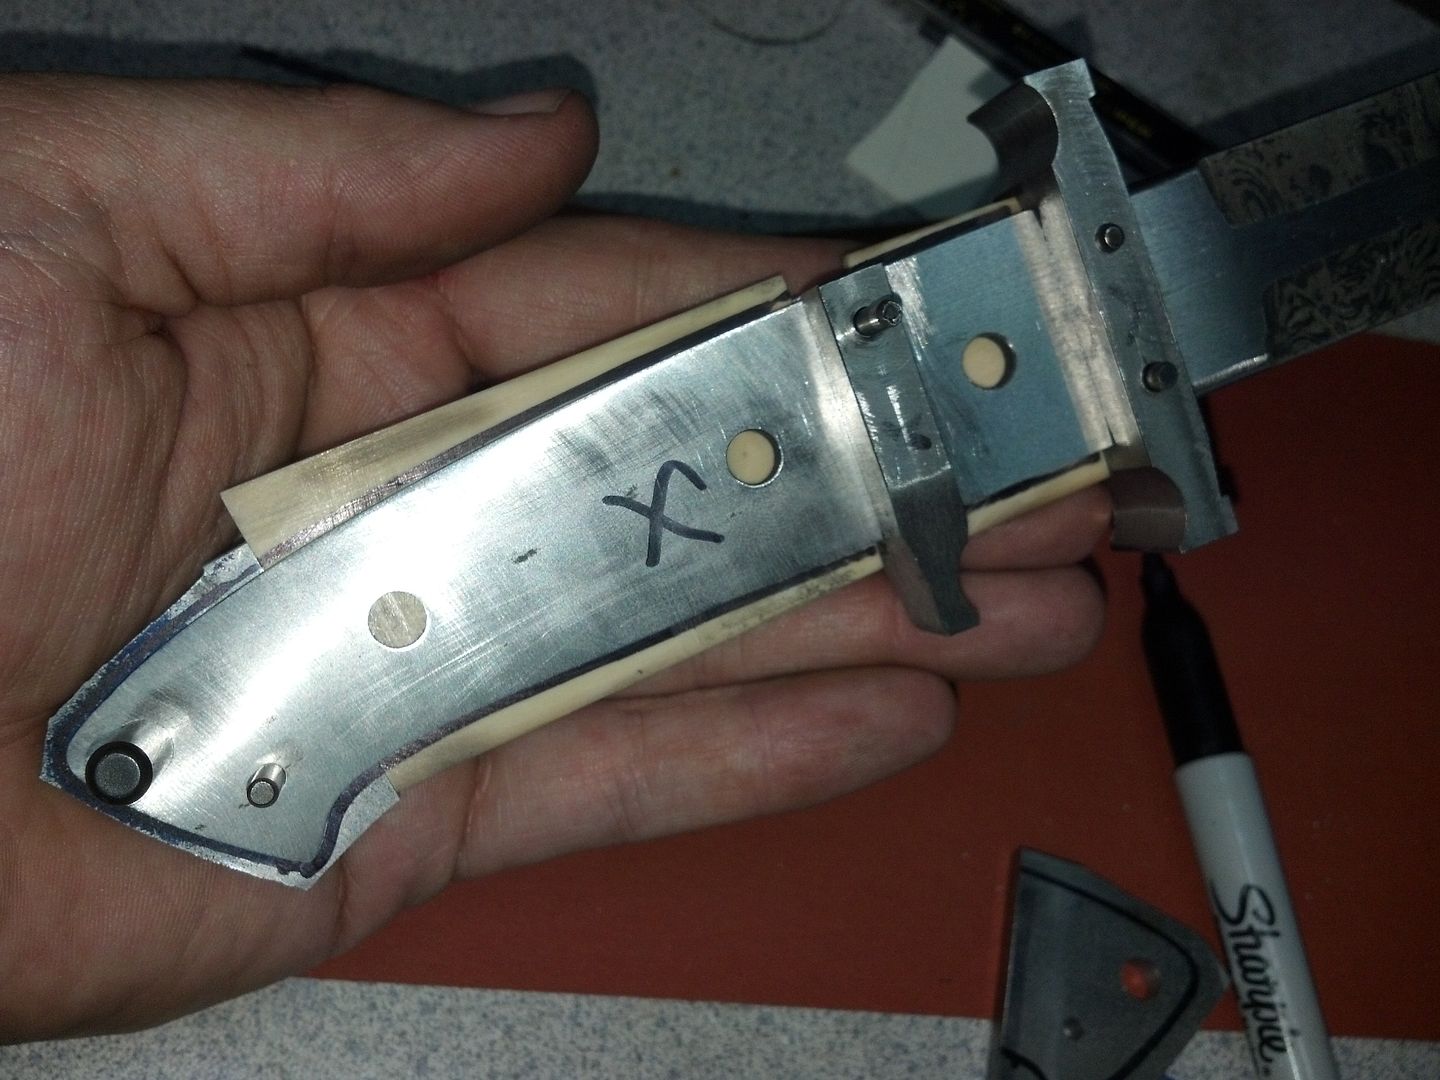
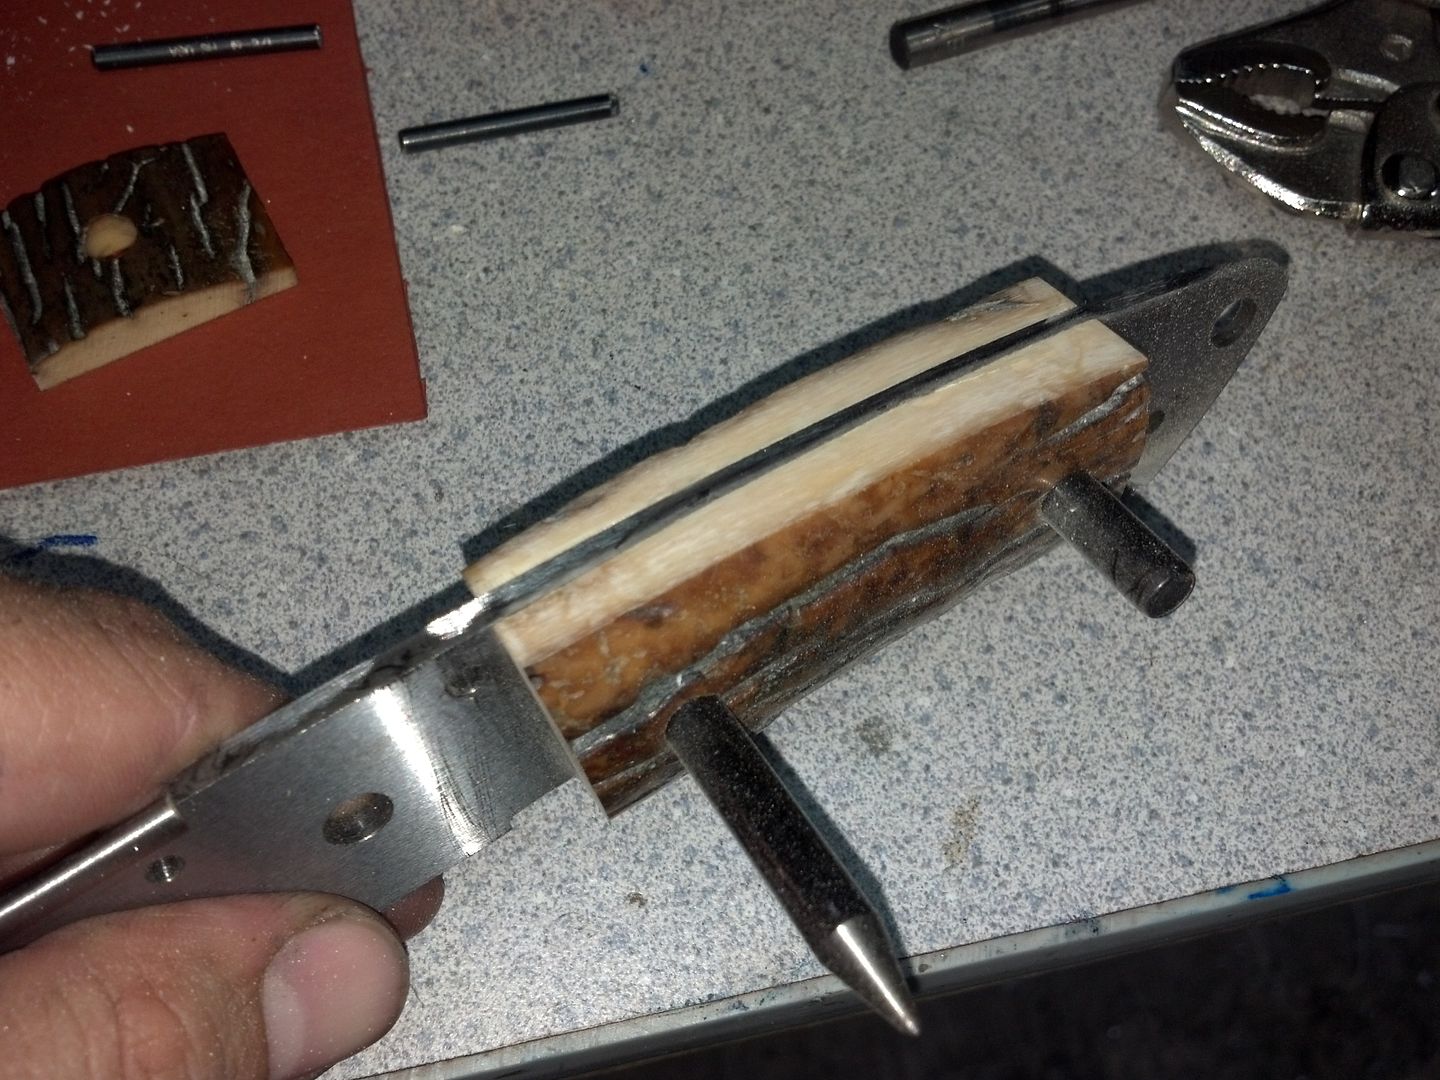
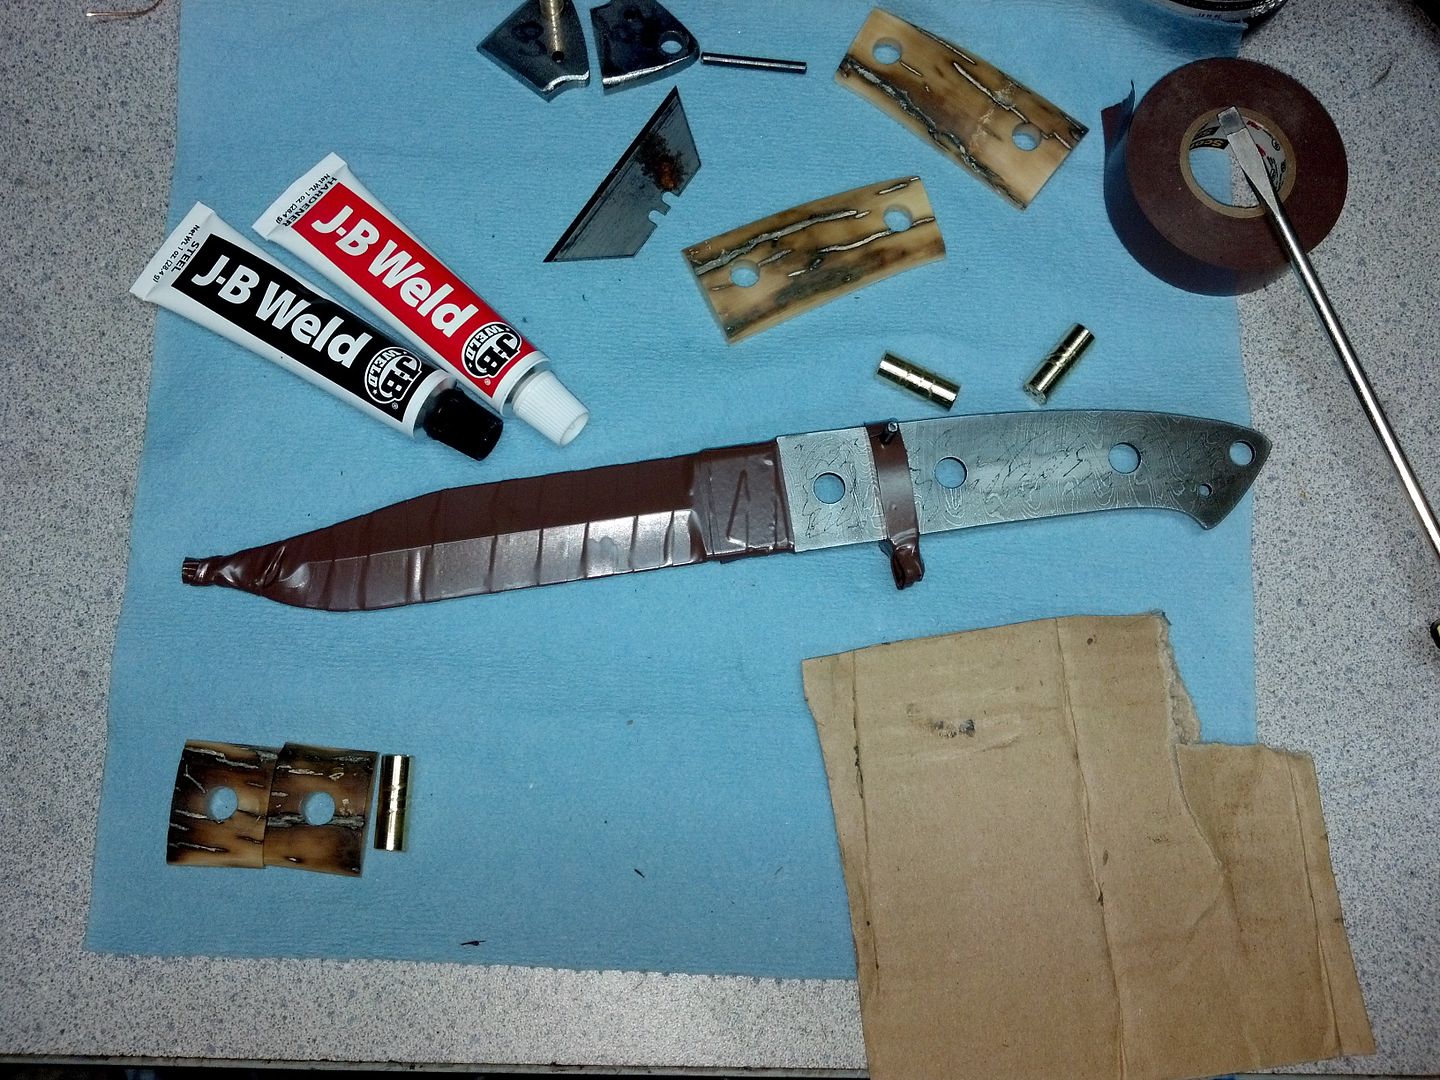
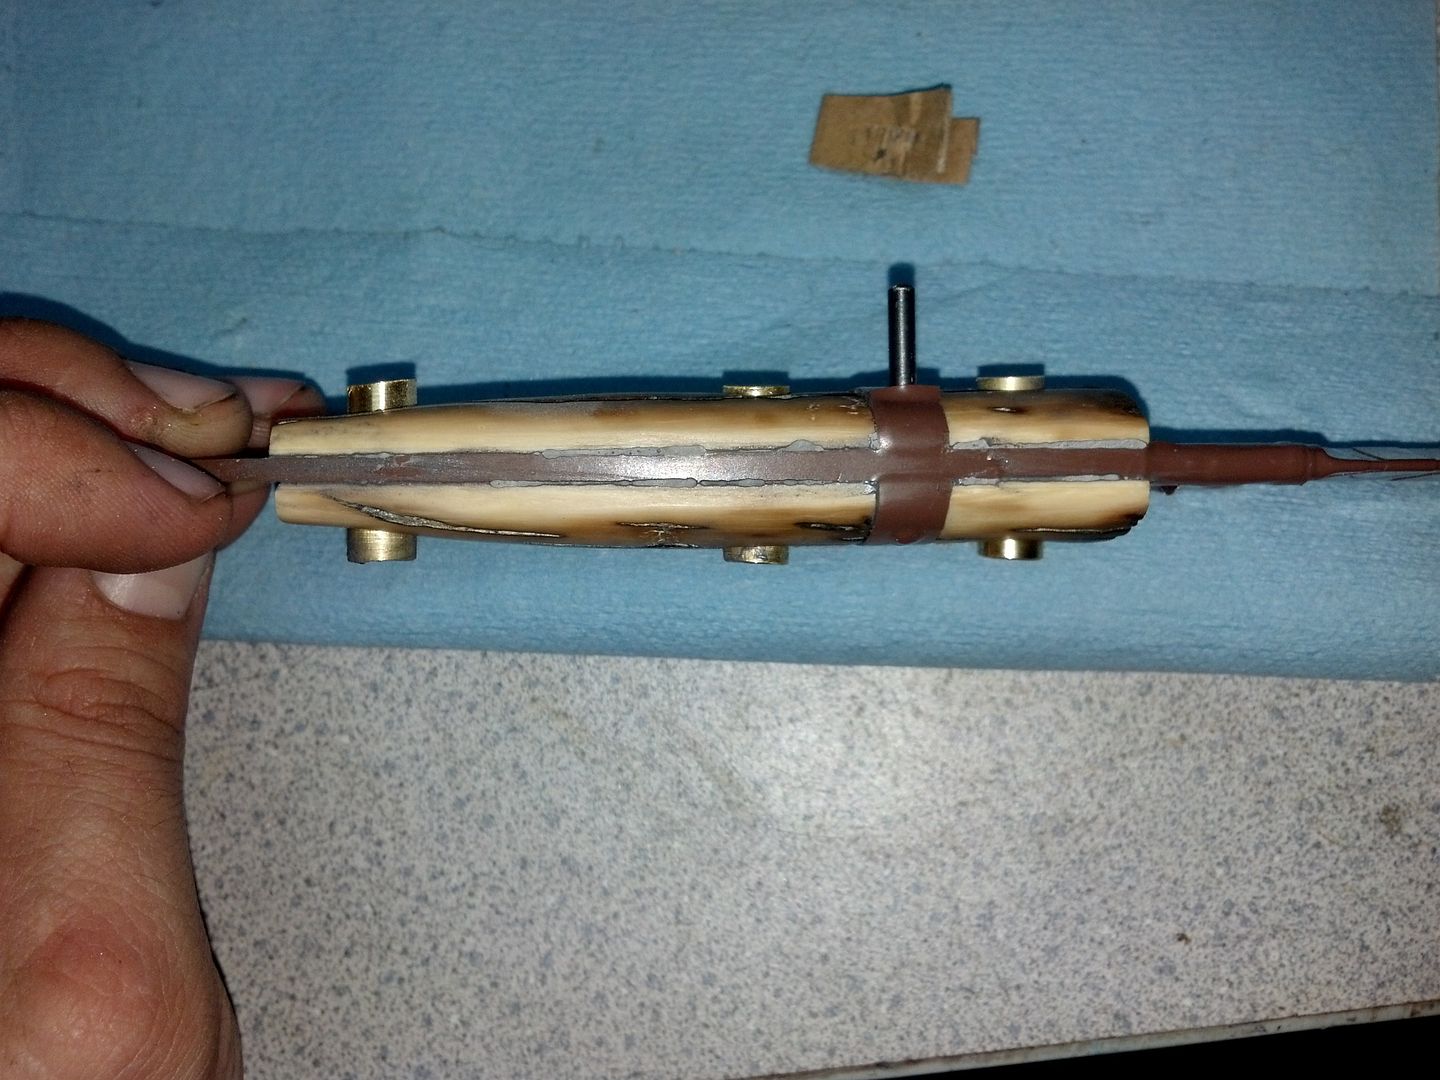
At this point I have wrapped the blade in electrical tape to protect it, and set up everything to glue the scales. I use JB Weld for this mostly. It seems to work great.

IMG_20130721_023620_668_zps88068dbf.jpg


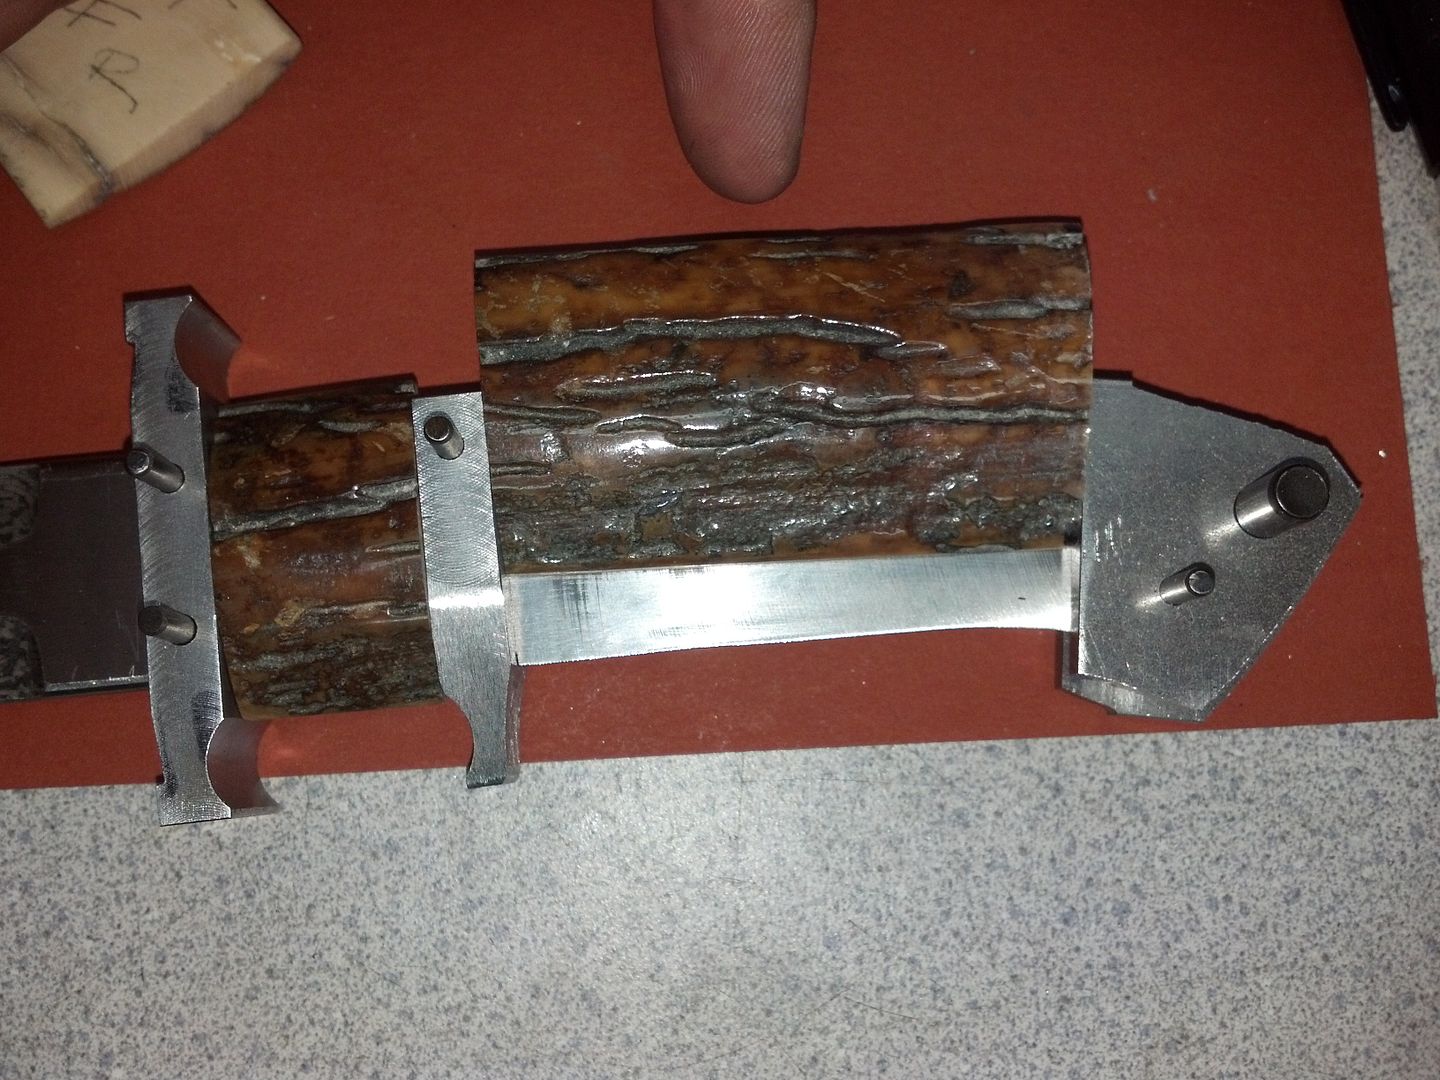
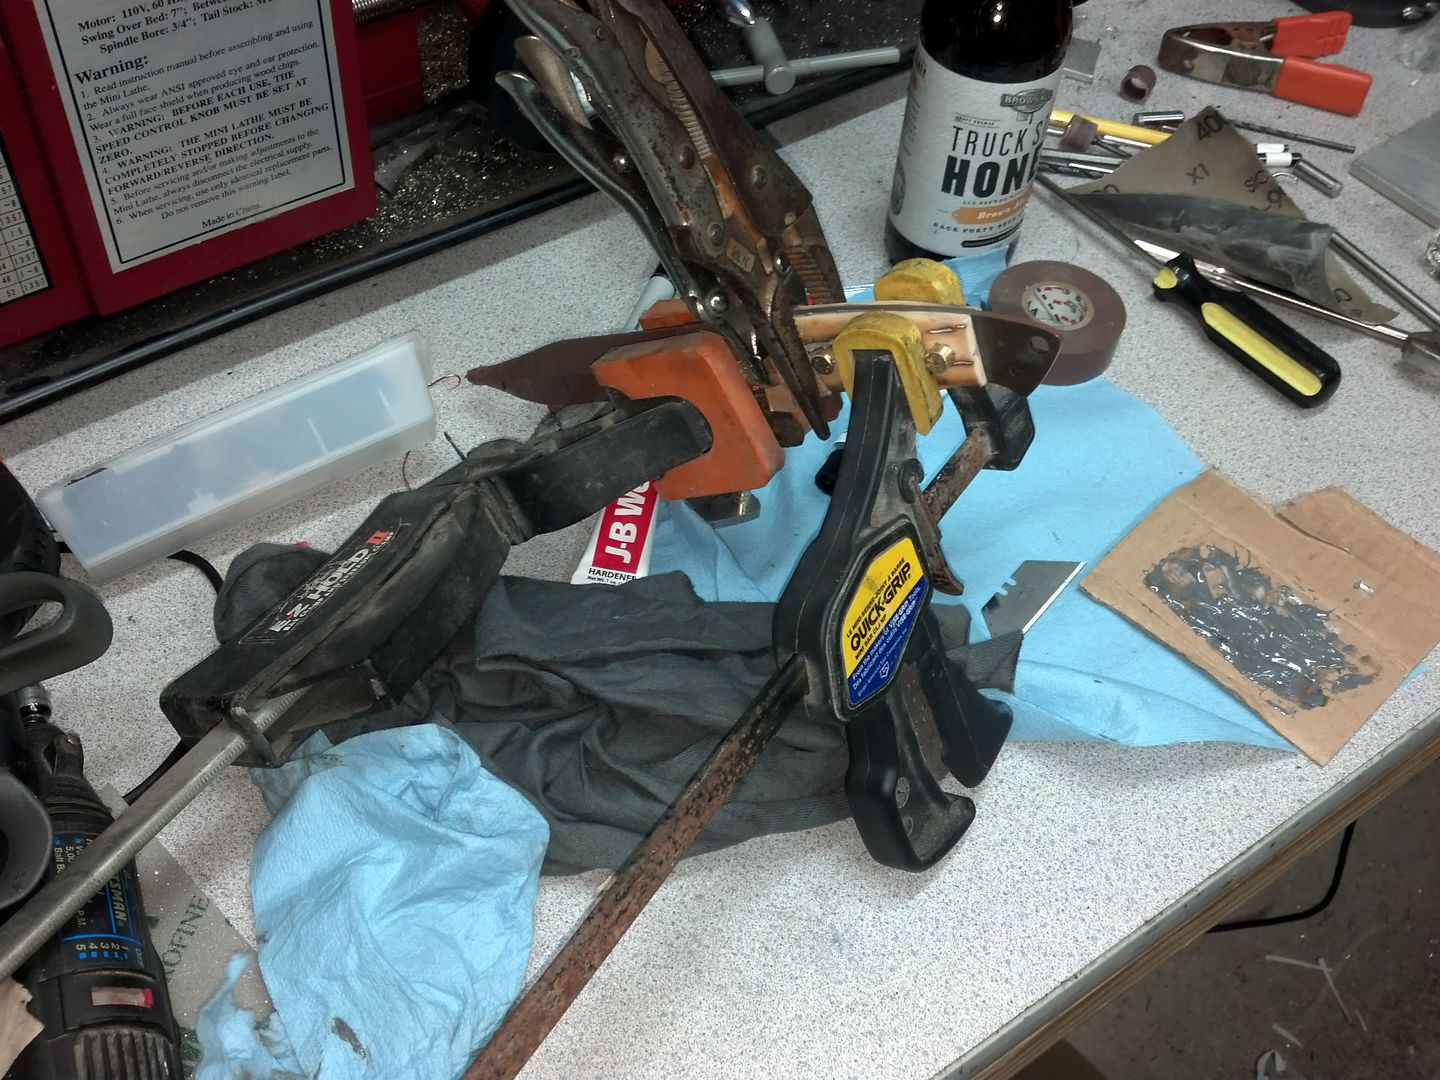
And here is everything stuck together. I have two sets of vise grips and two clamps squeezing everything tight.

IMG_20130721_031254_154_zps8fc1e4d4.jpg


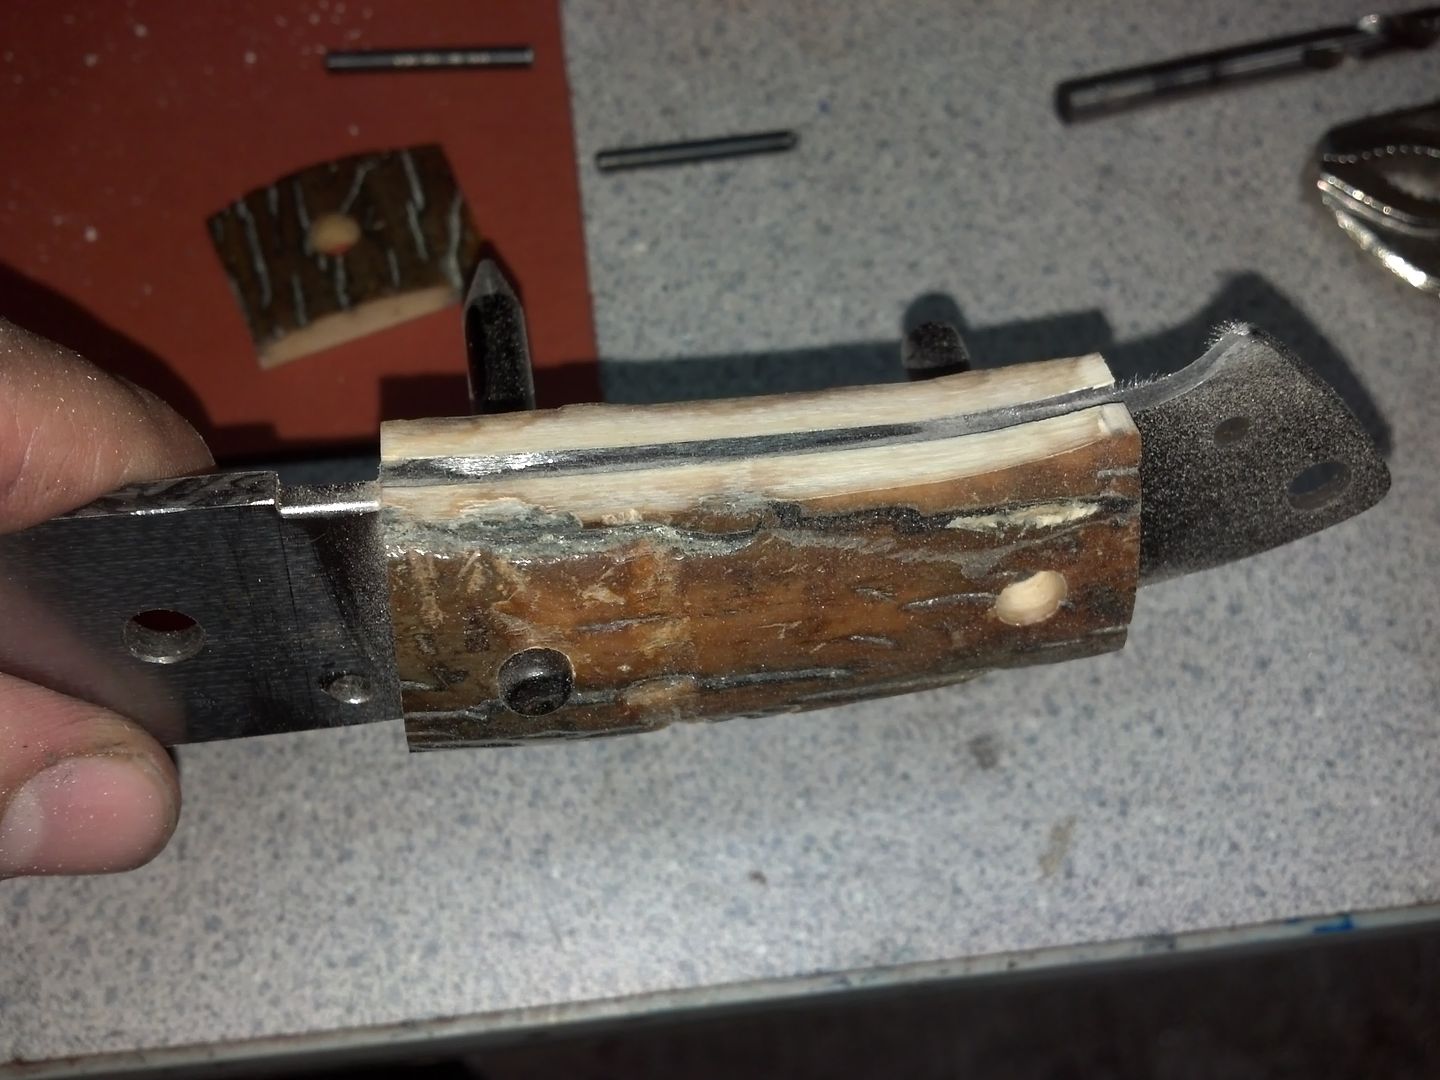
This is what it looked like after removing all the clamps.

IMG_20130721_114618_639_zpsd90f1b7b.jpg


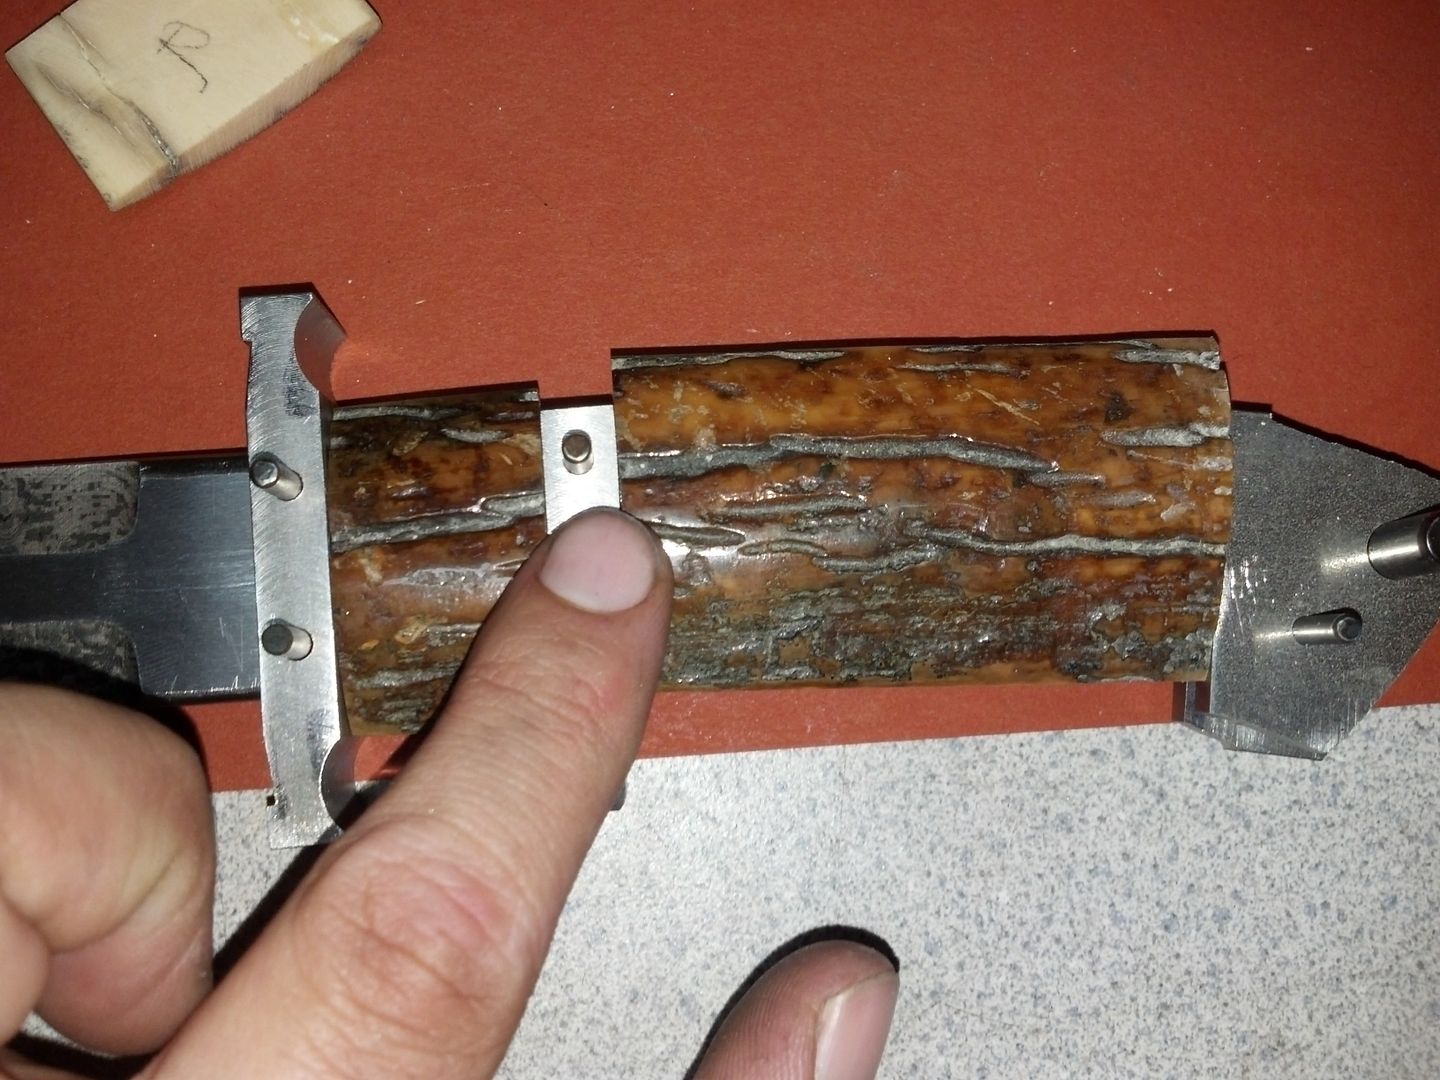
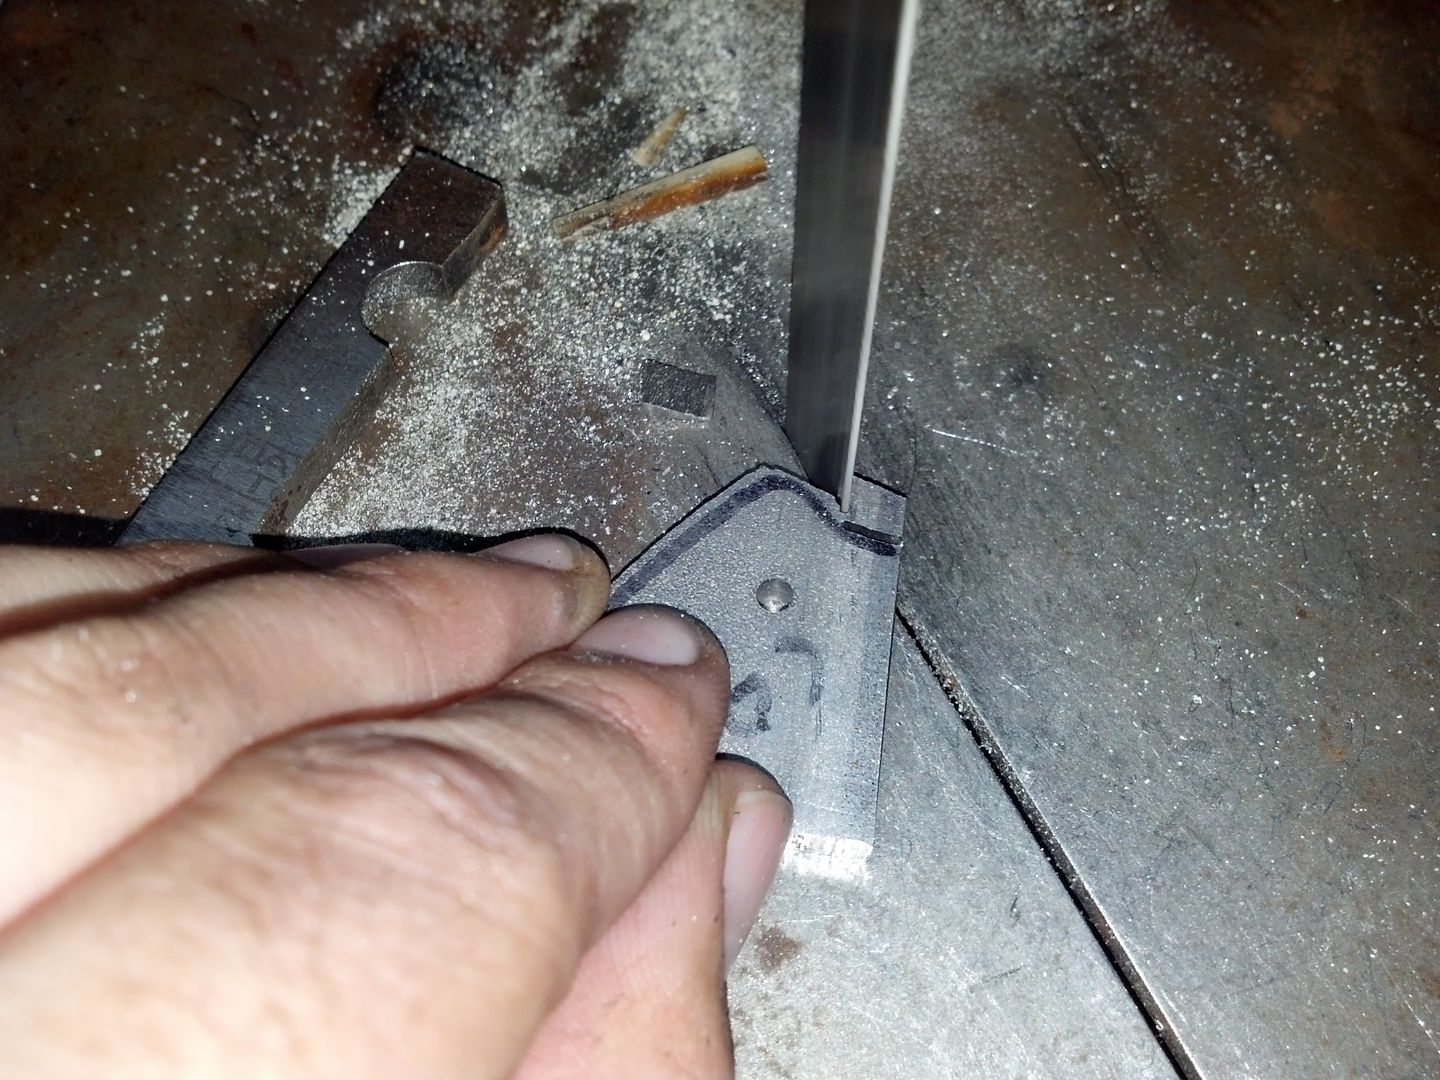
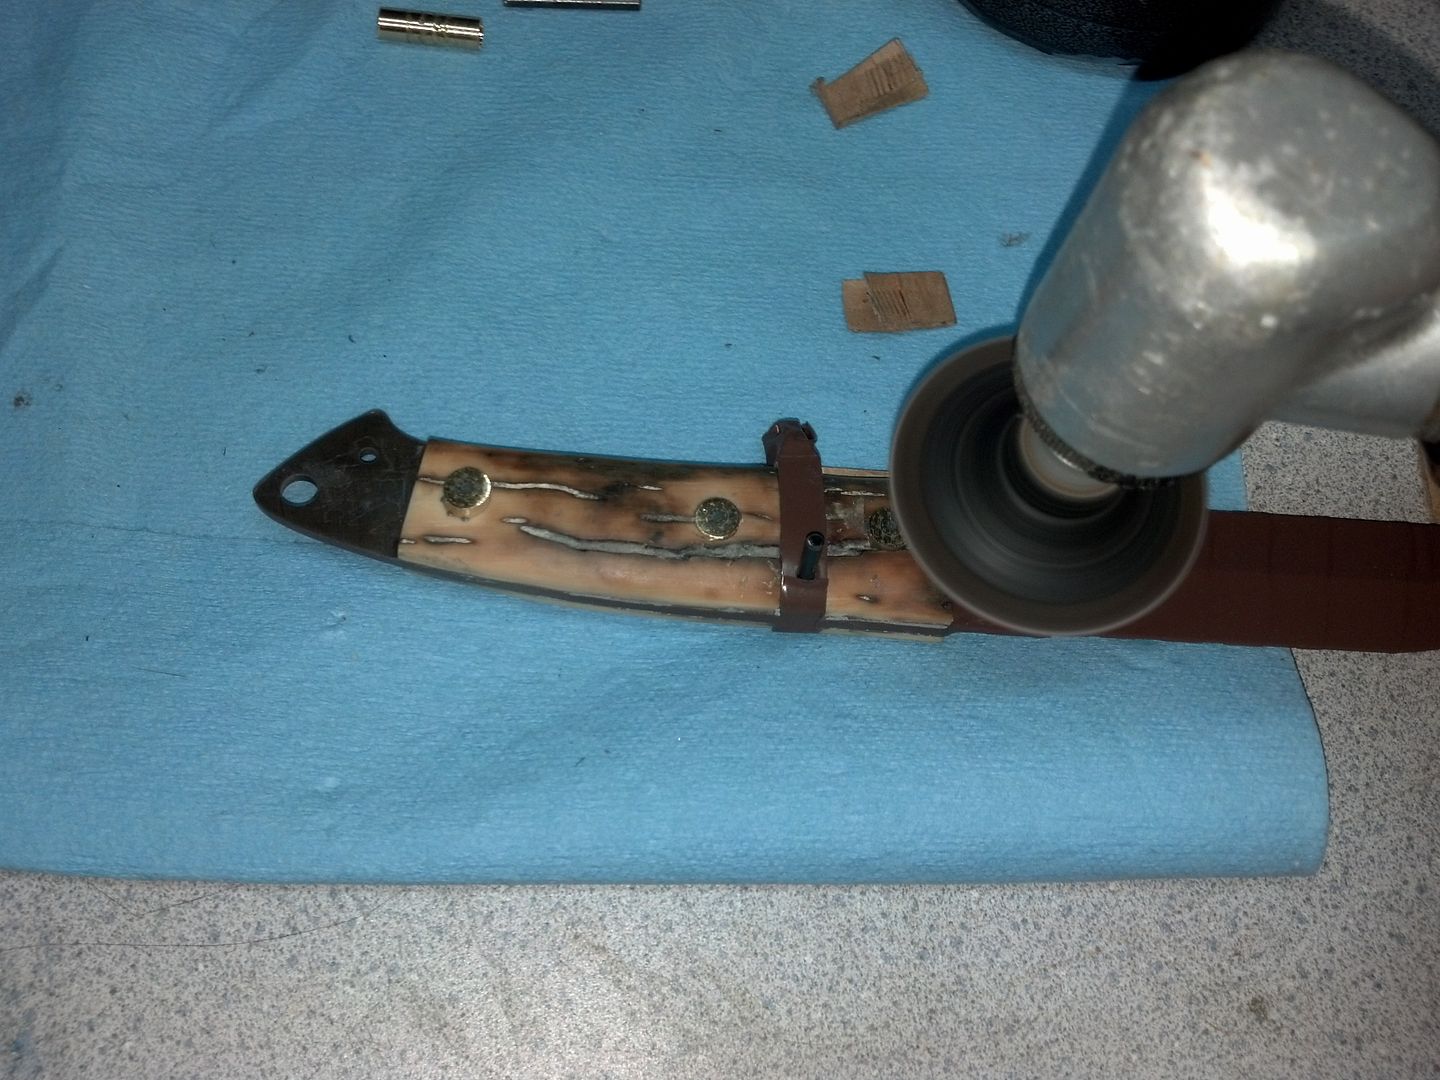
Next step is to start roughing those mosaic handle pins down to get them closer to the scales. Eventually they will be level.

IMG_20130721_114649_722_zps619fb597.jpg


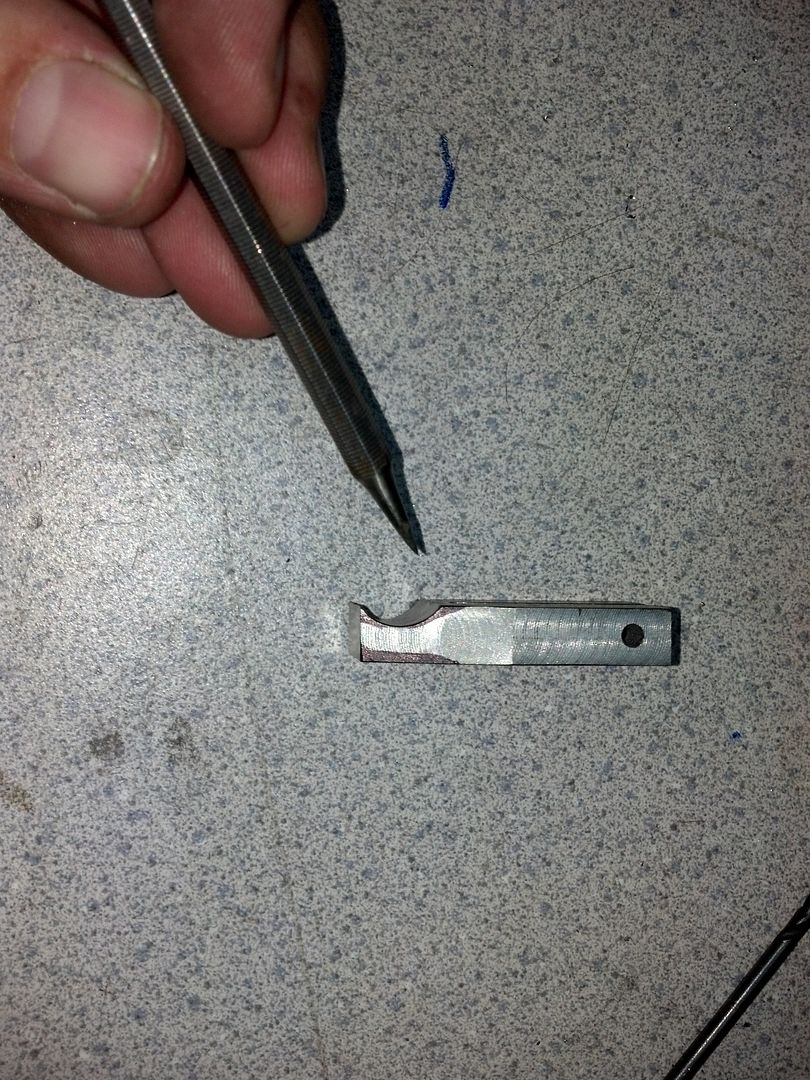
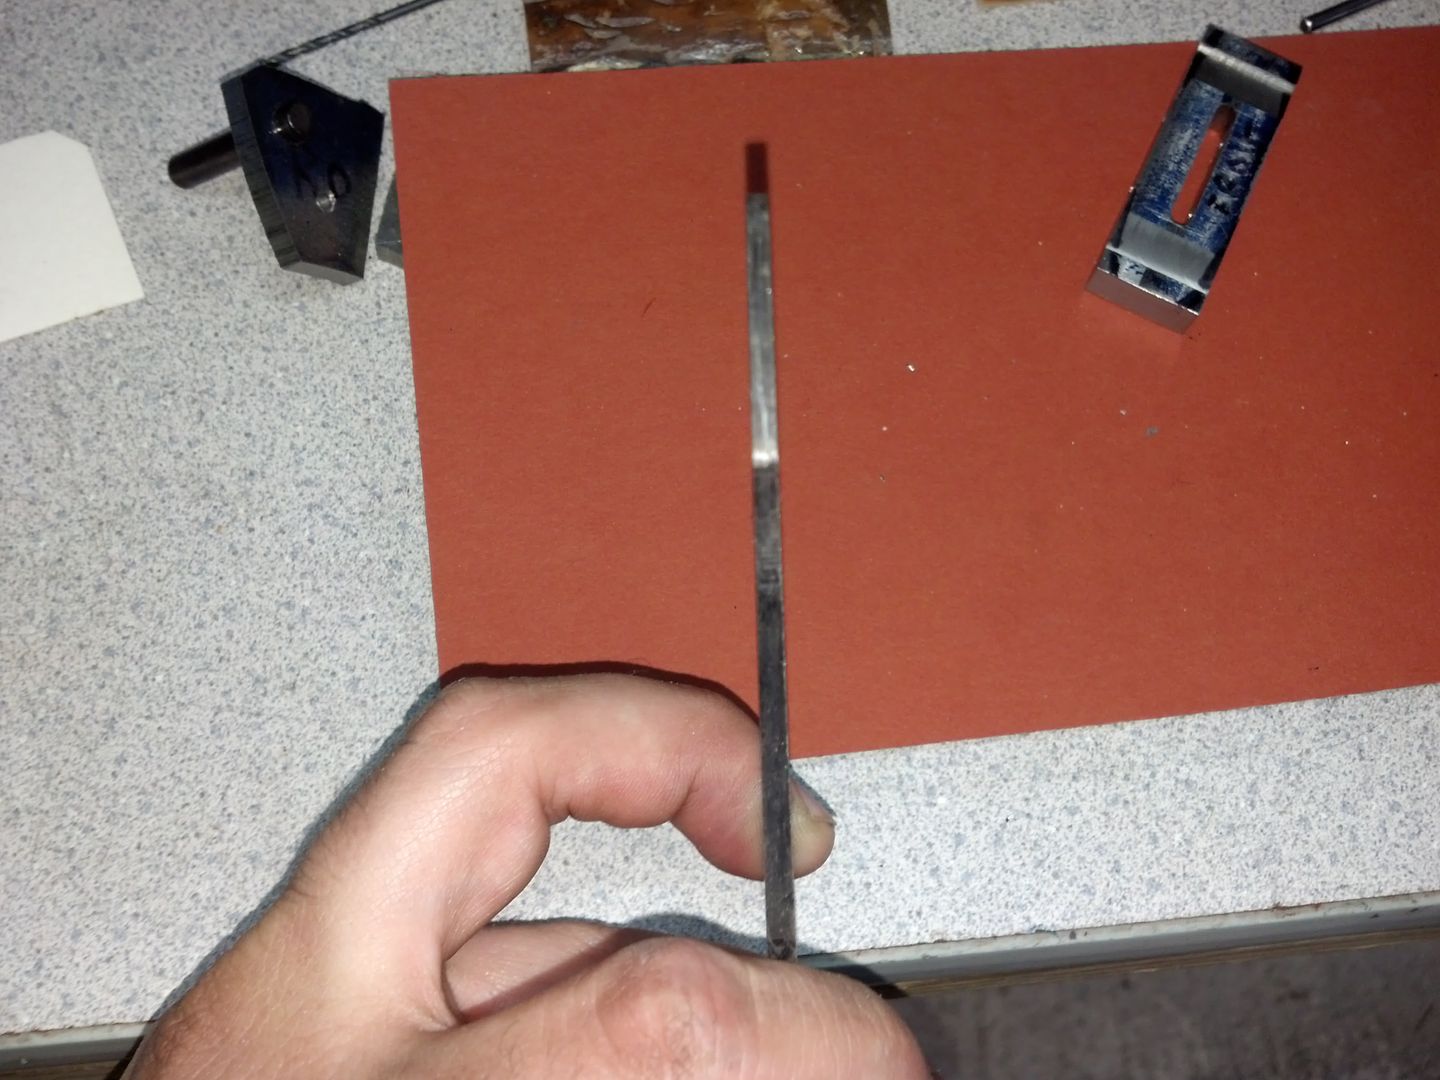
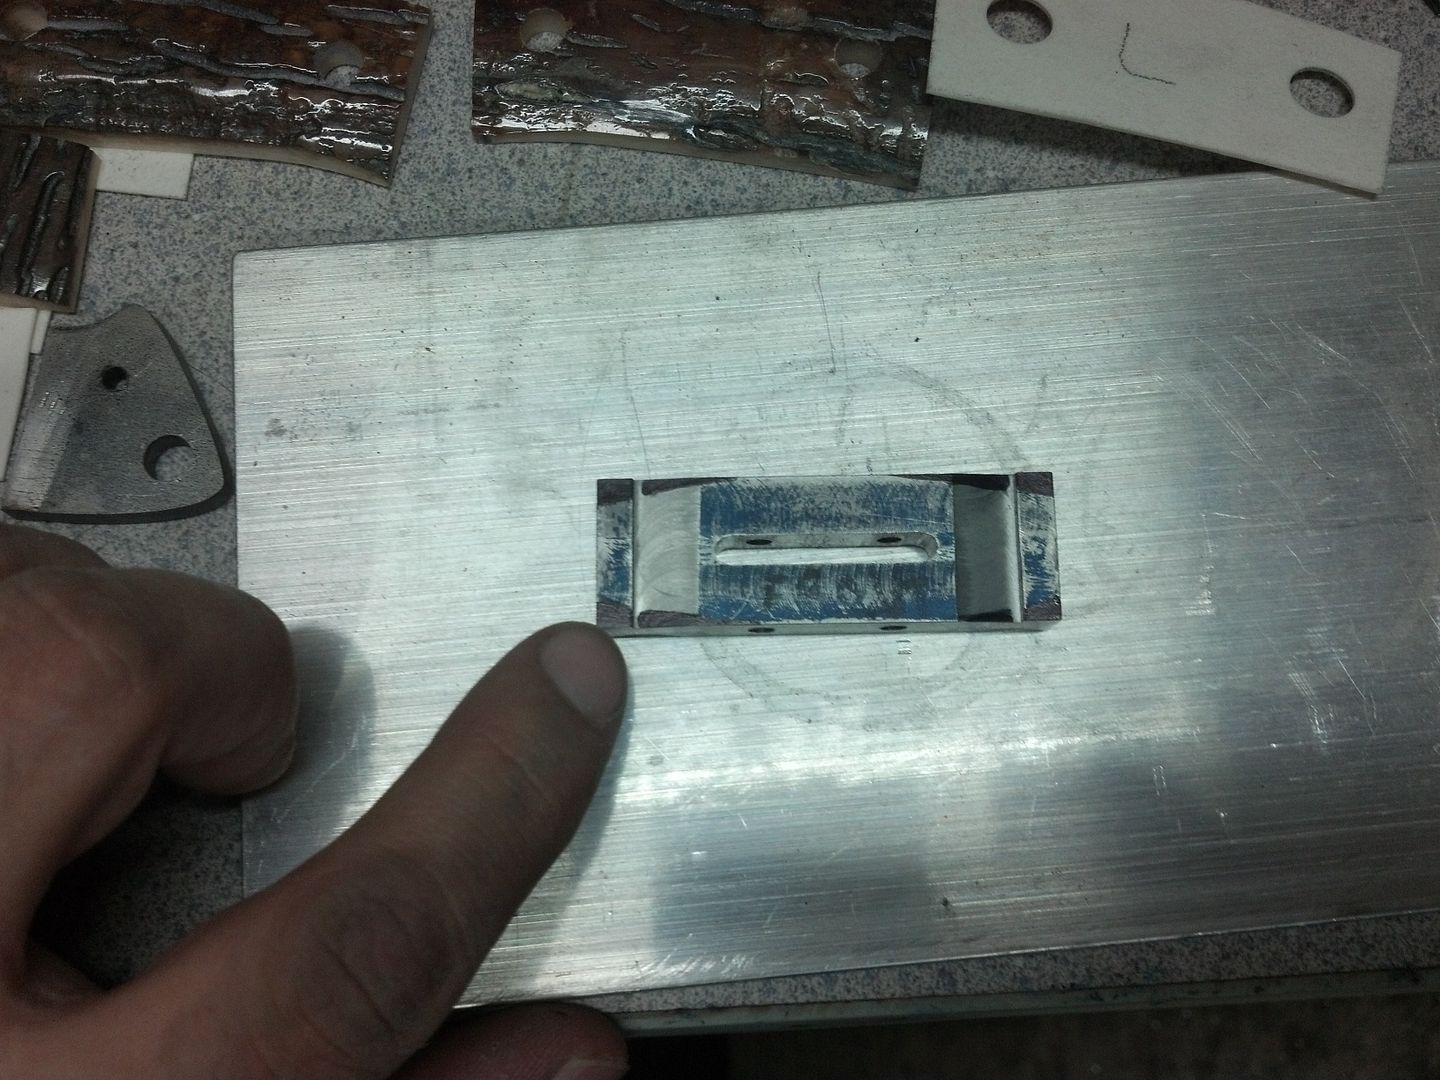
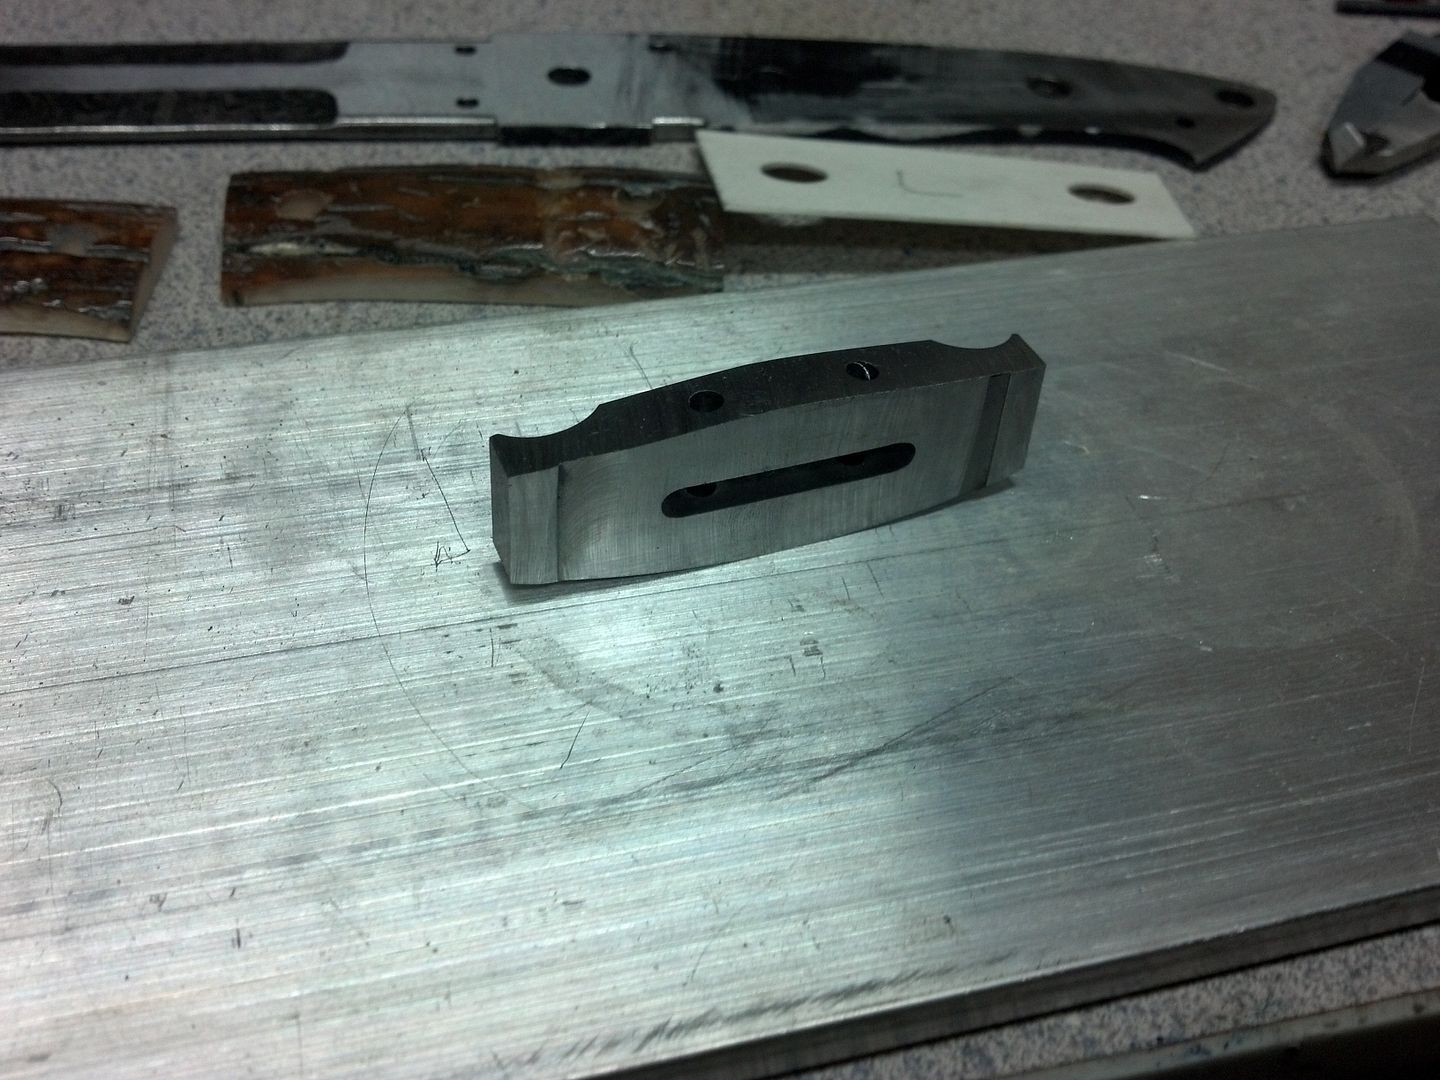
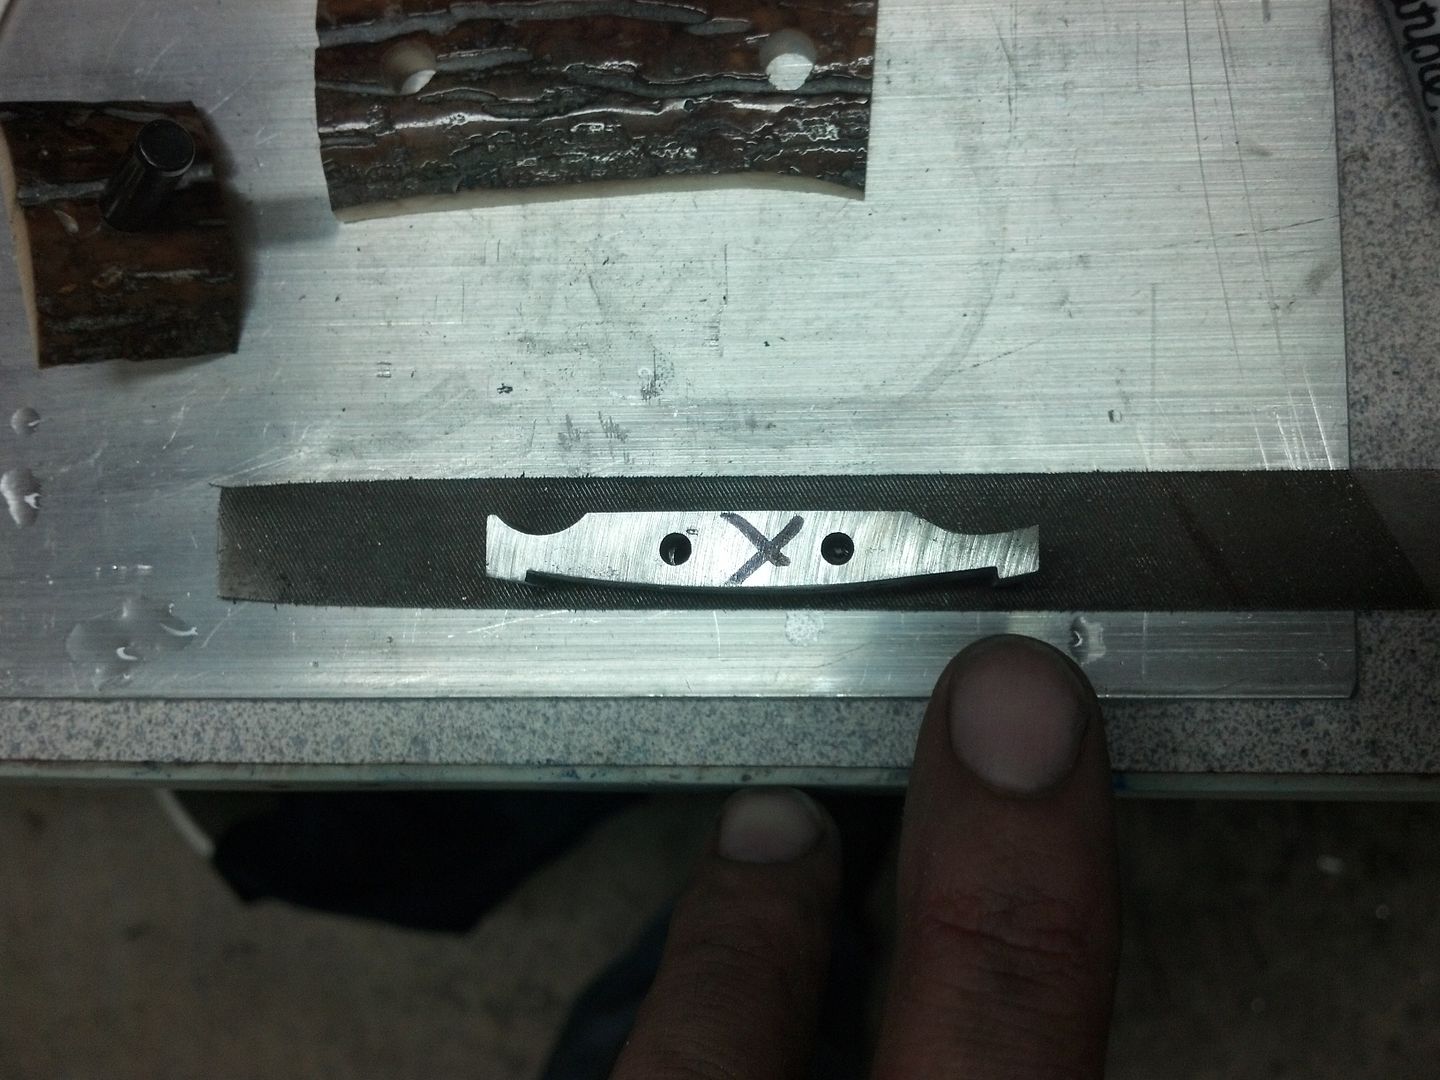
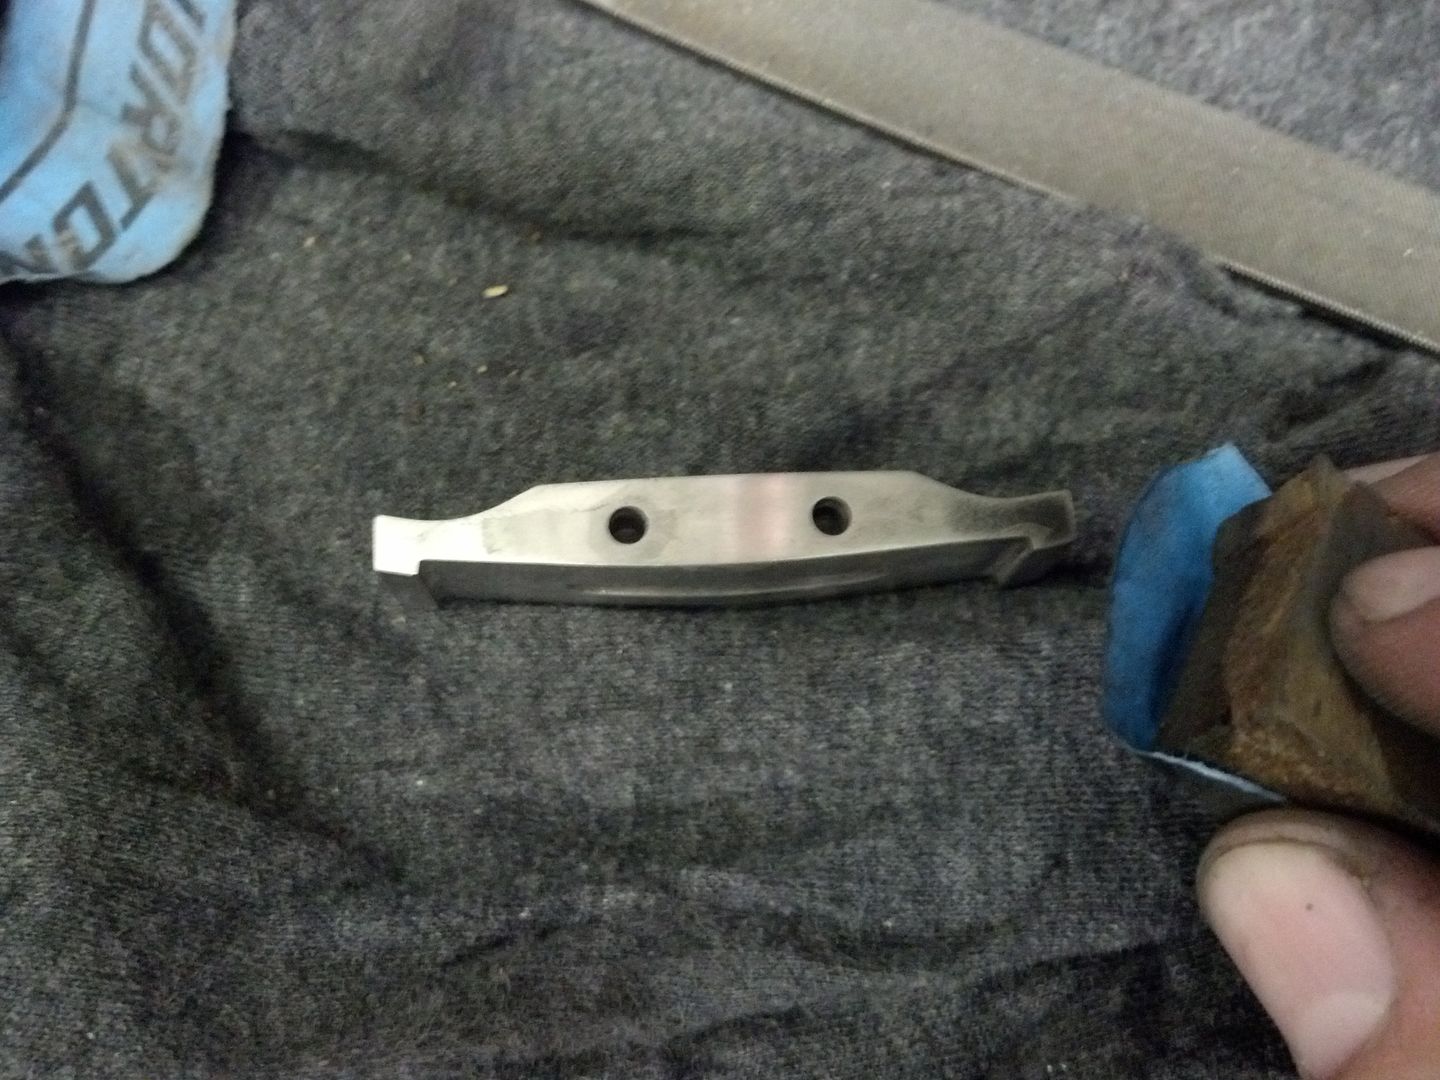
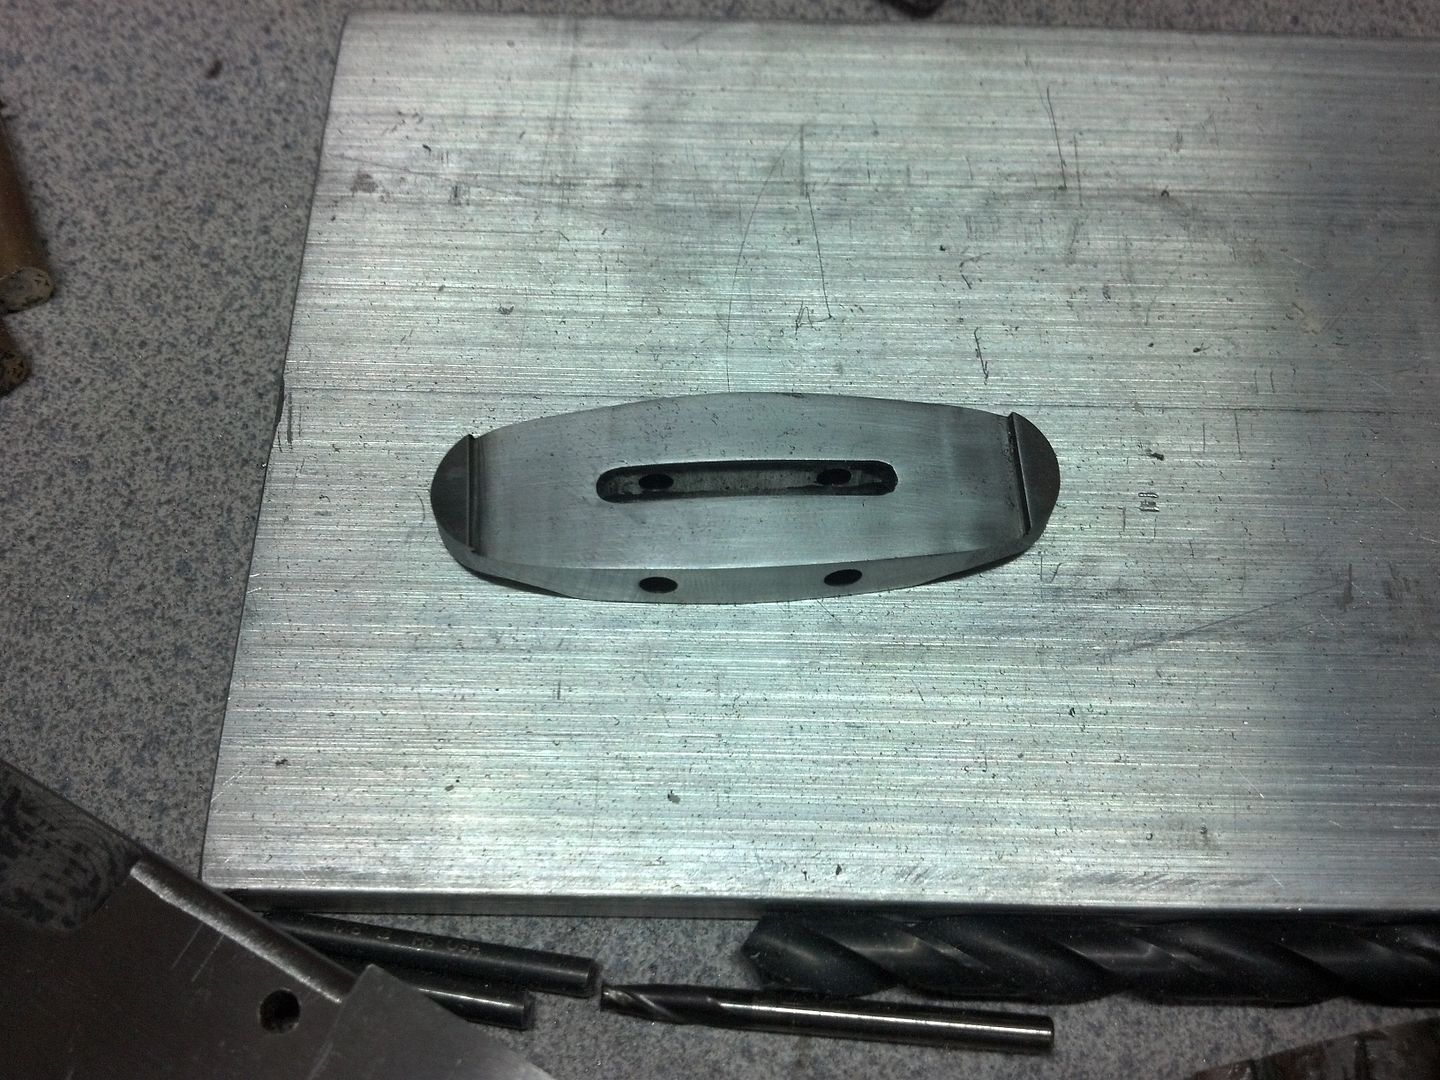
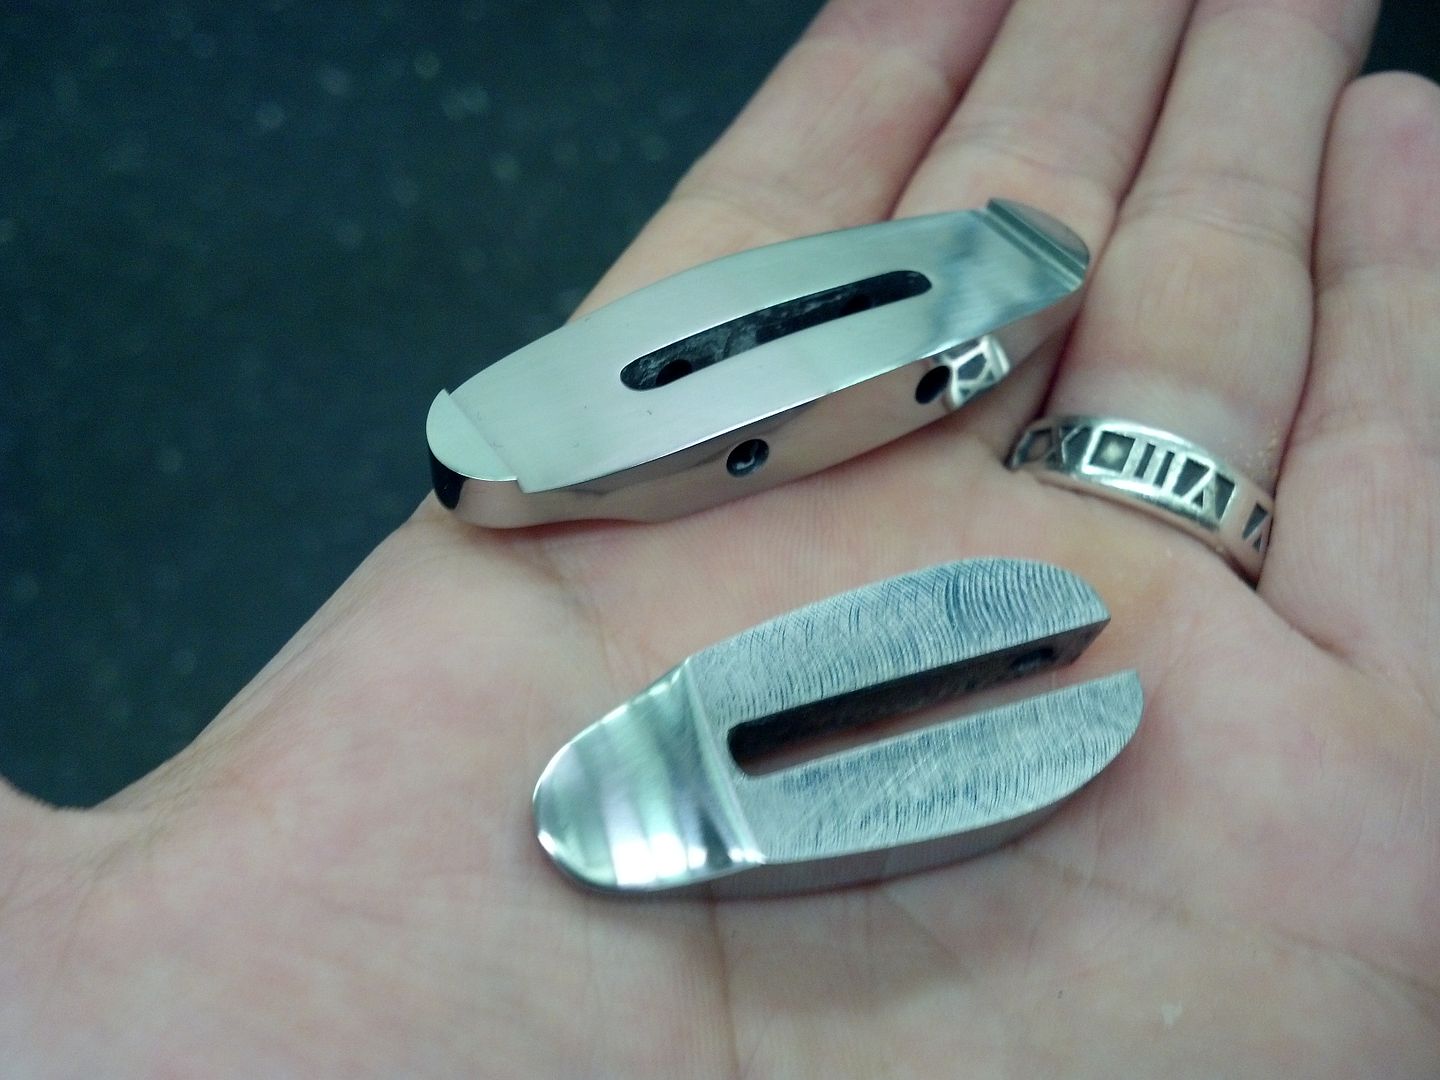
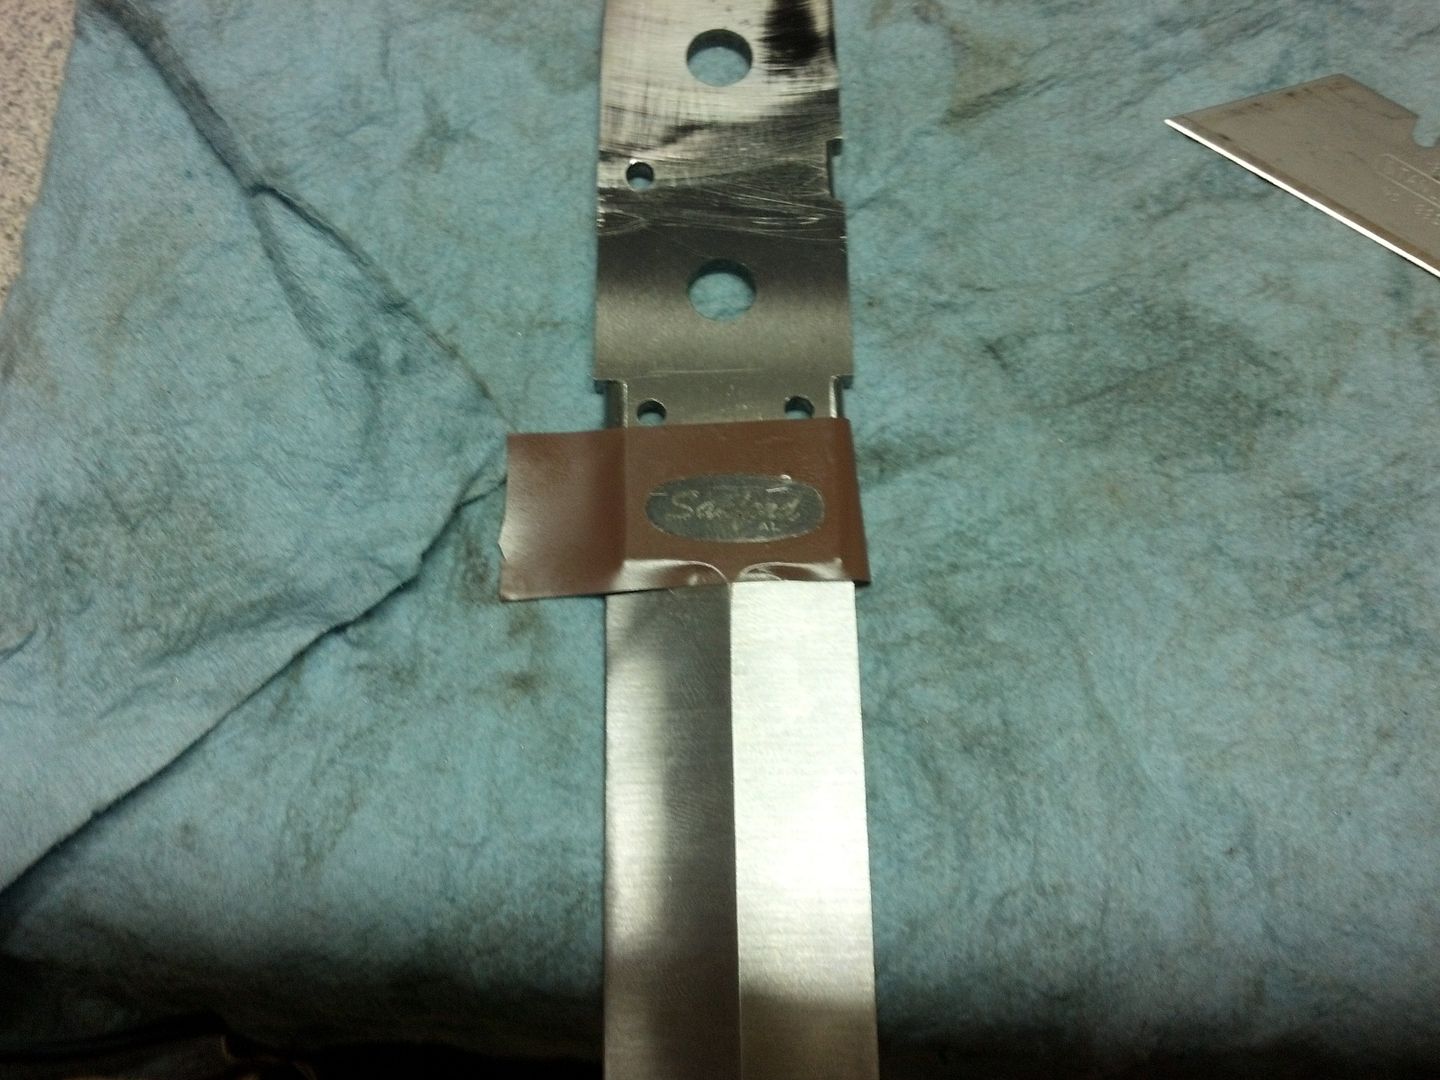
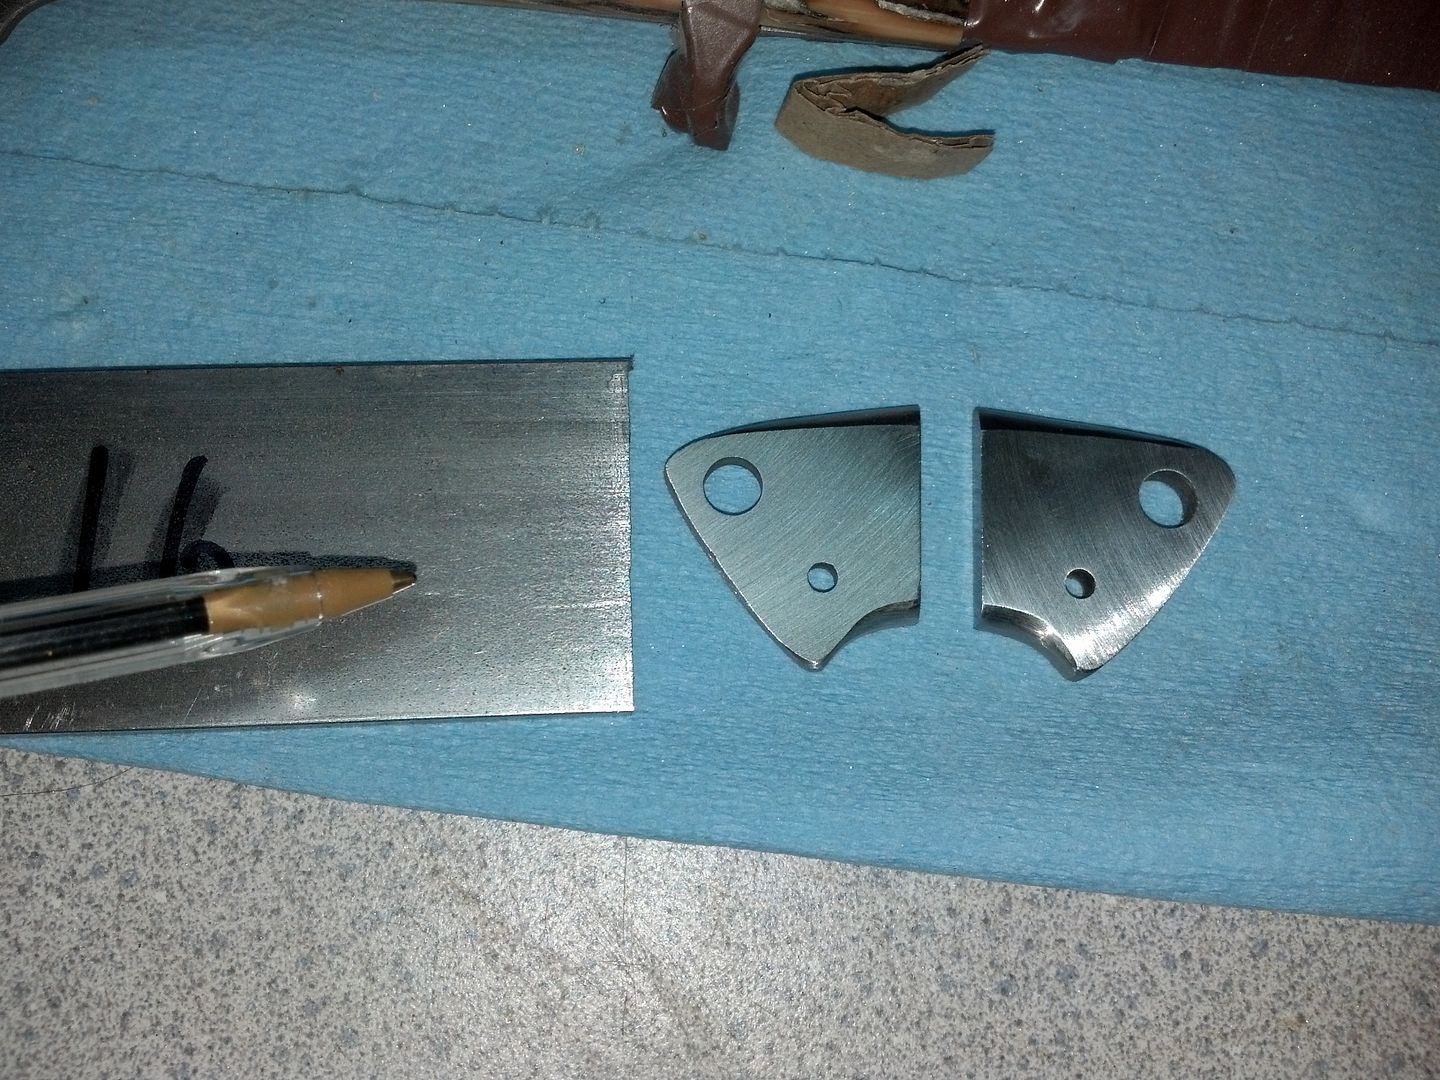
Now I have to address the bolsters. In this pic I have ground the surface of them. They had a mill finish (typical of cold rolled steels from the steel mill..see what I'm pointing to on the bar.)

IMG_20130721_120253_866_zps409ea0a5.jpg


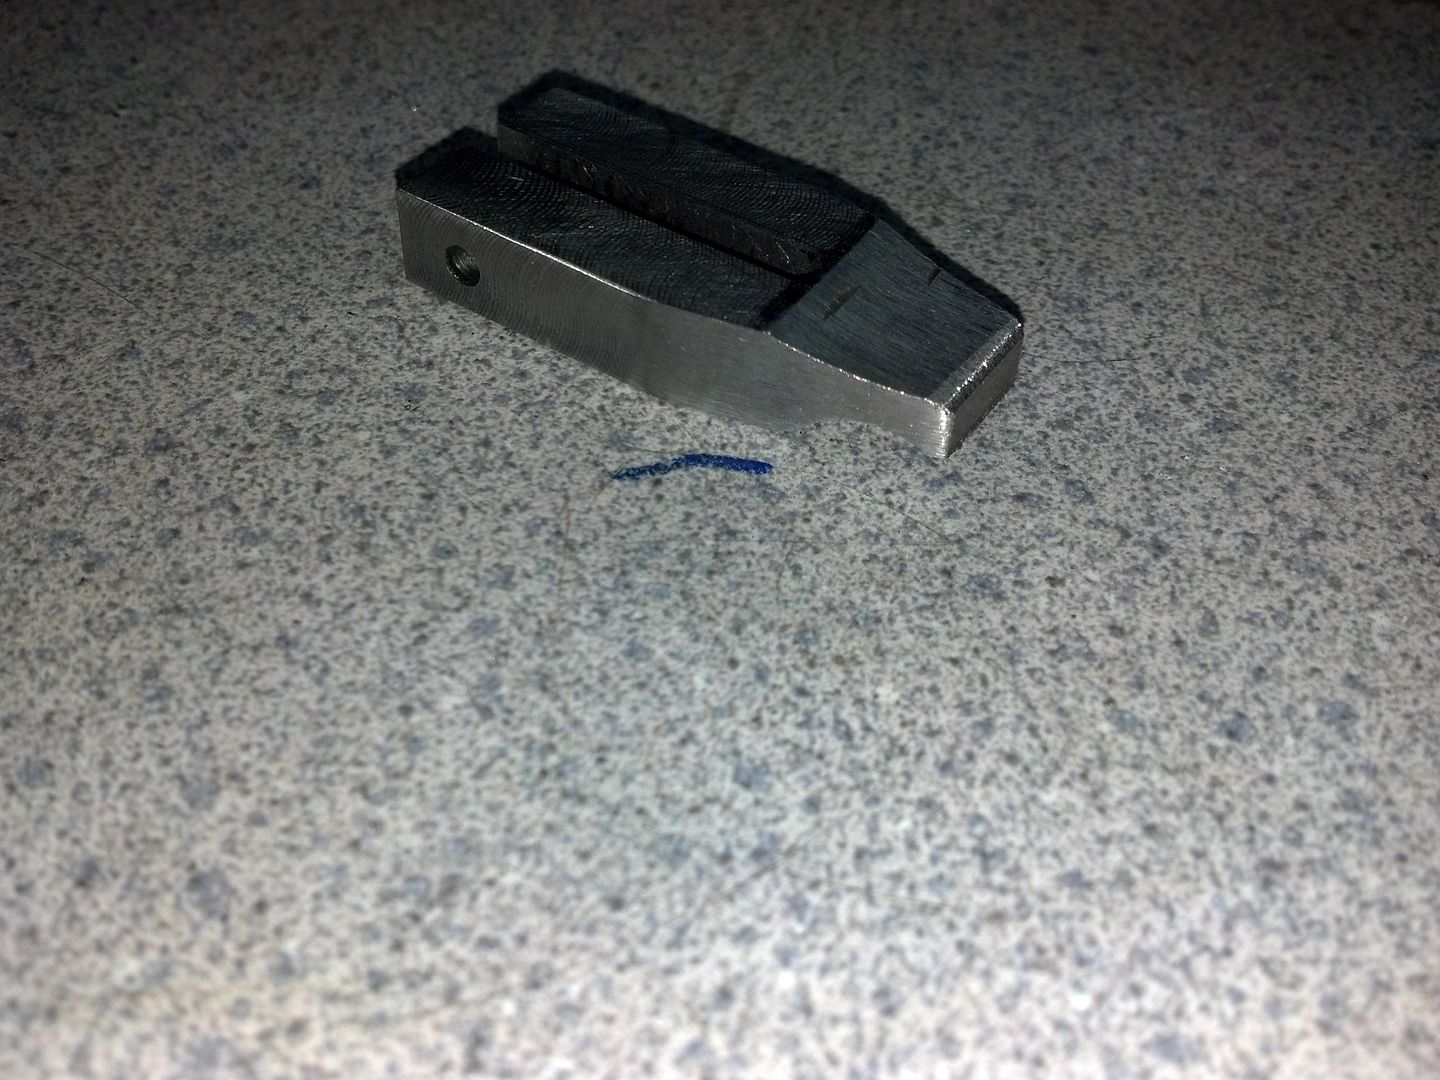
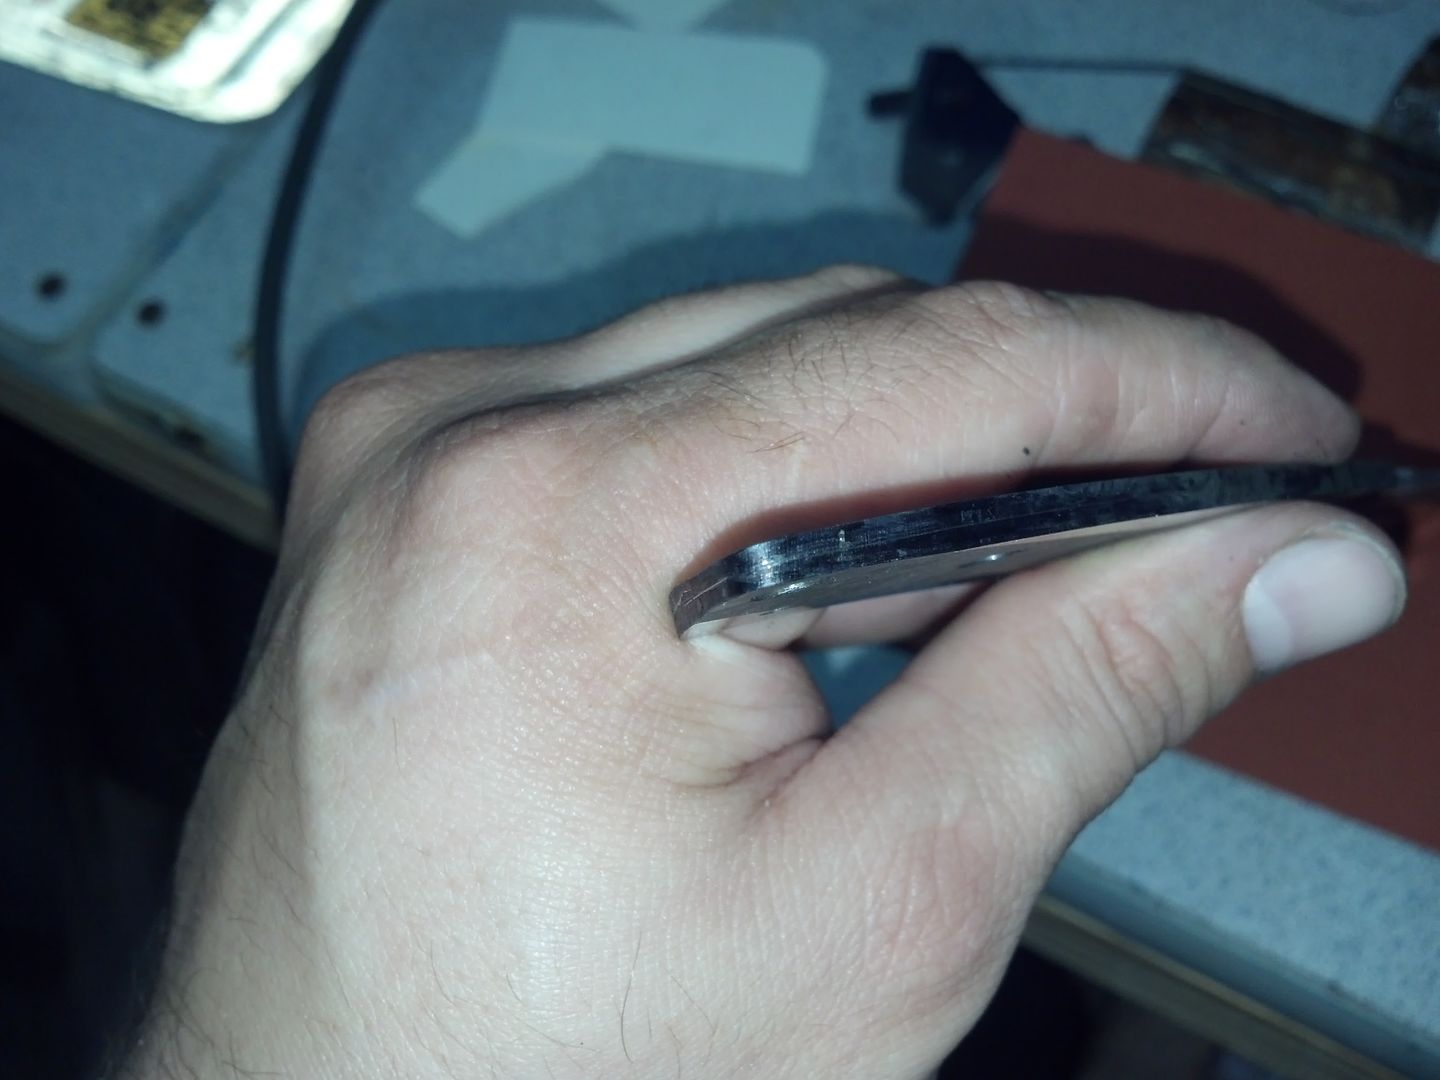
I've also worked the radiuses that match the scales and gotten them ready for final sanding before polish. I wet sanded starting at 400, all the way up to 2000 grit. I then polished and that's what we have here

IMG_20130721_140505_308_zpsb0ac7864.jpg


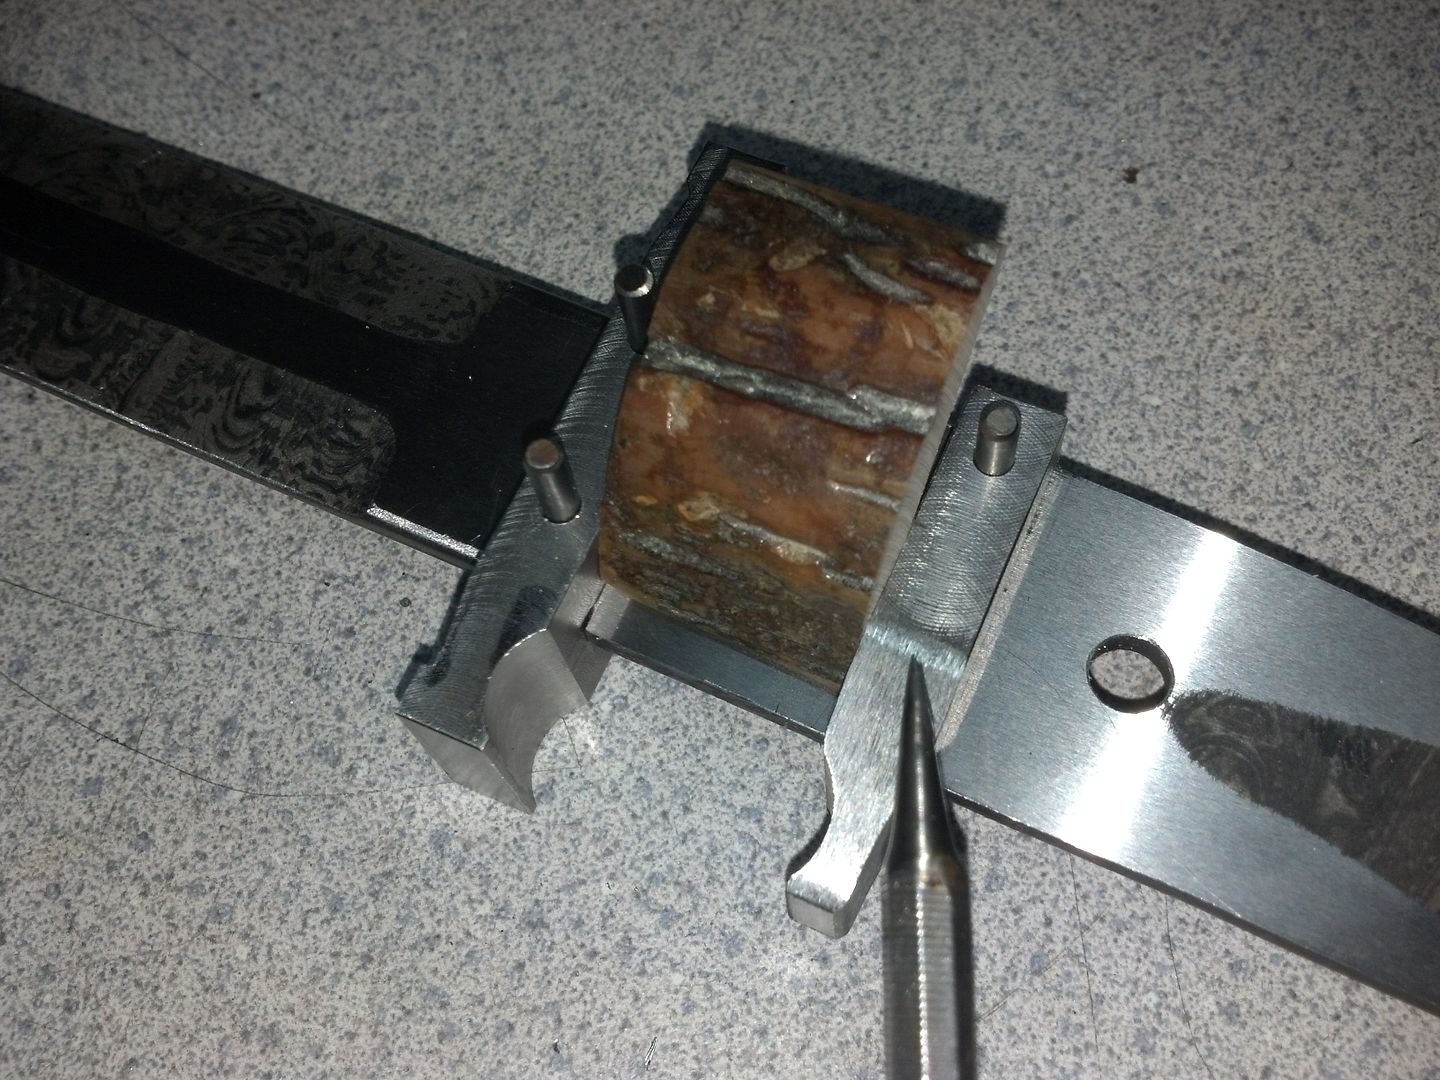
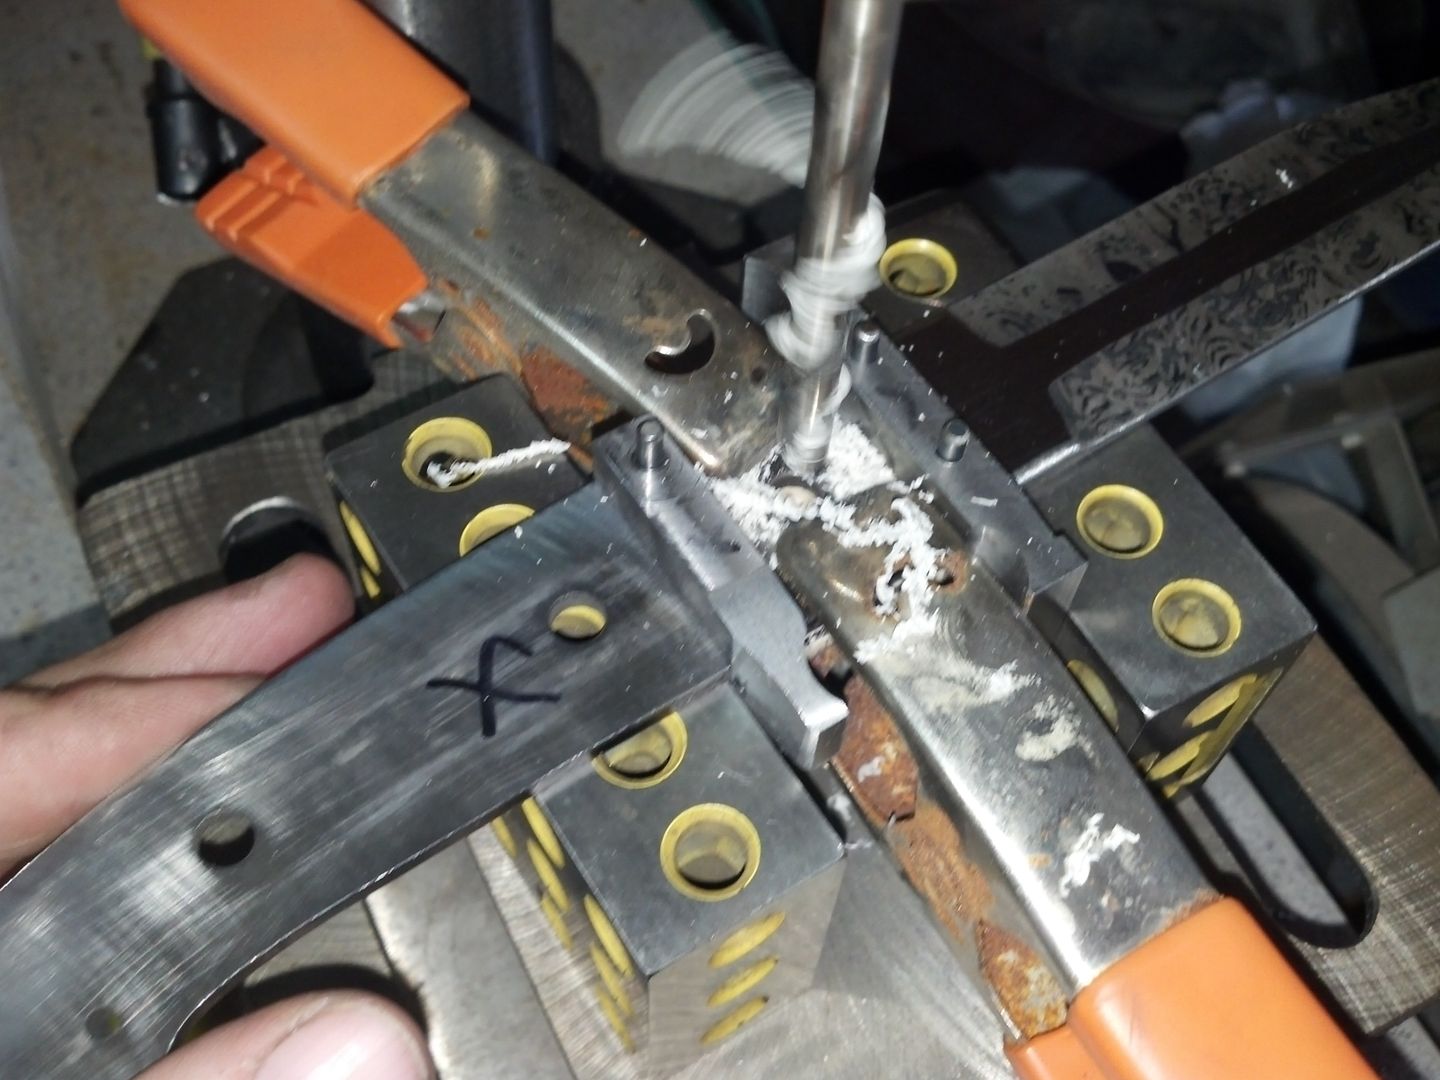
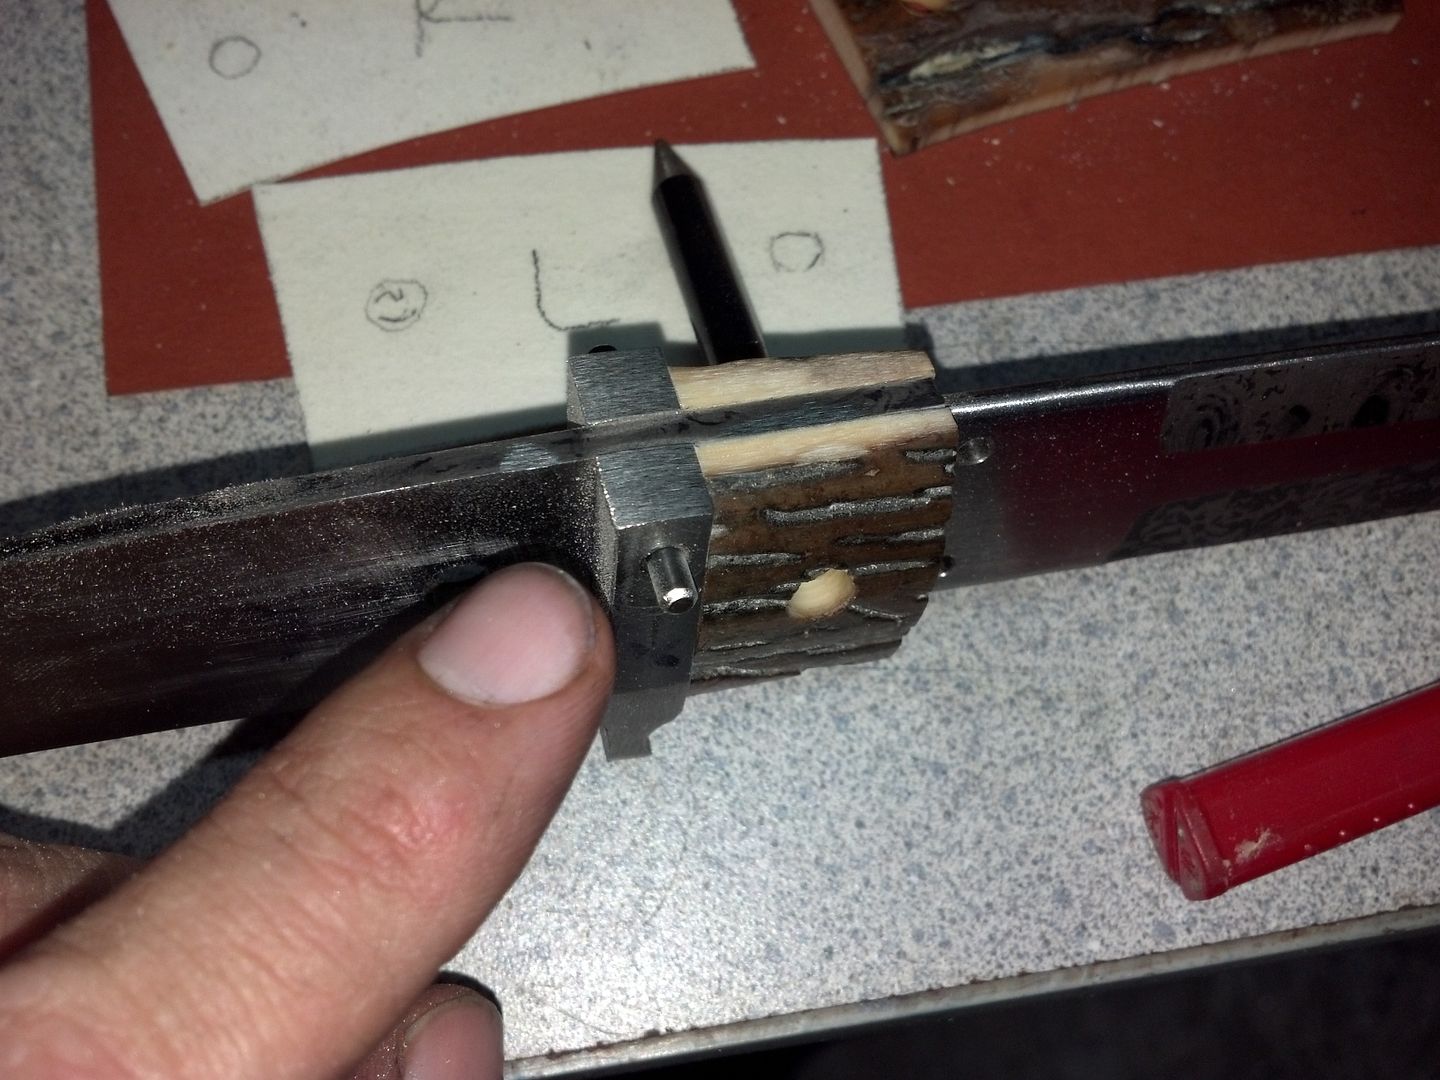
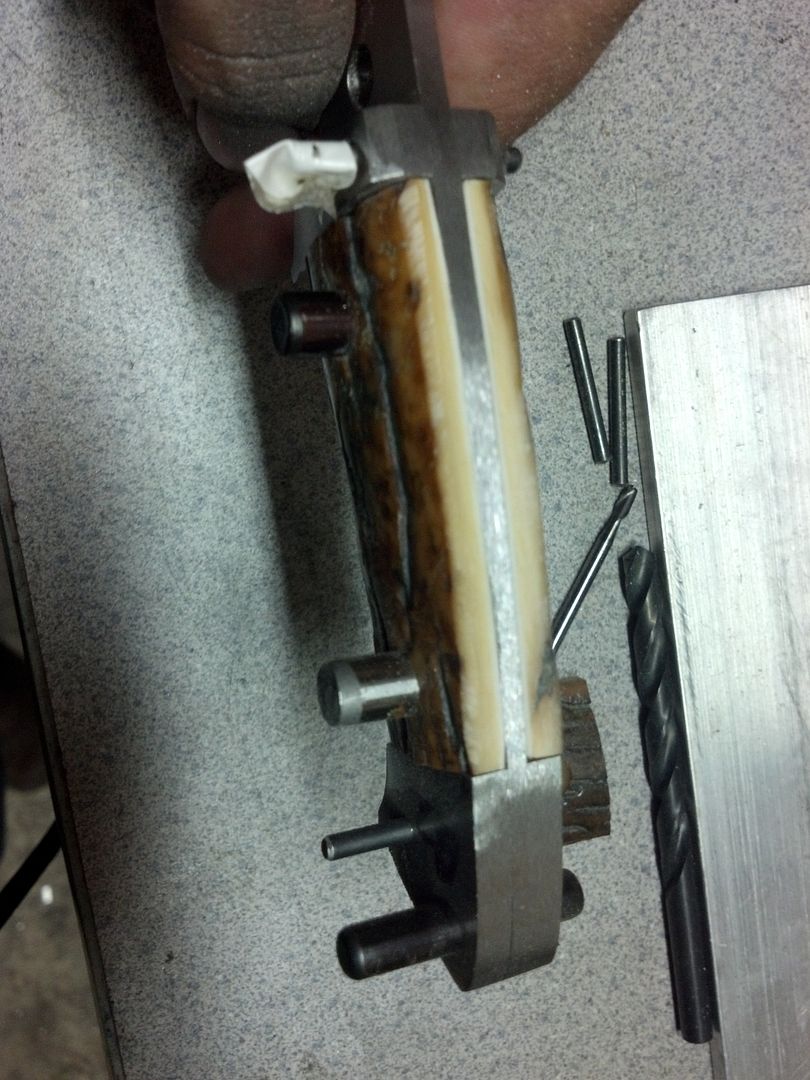
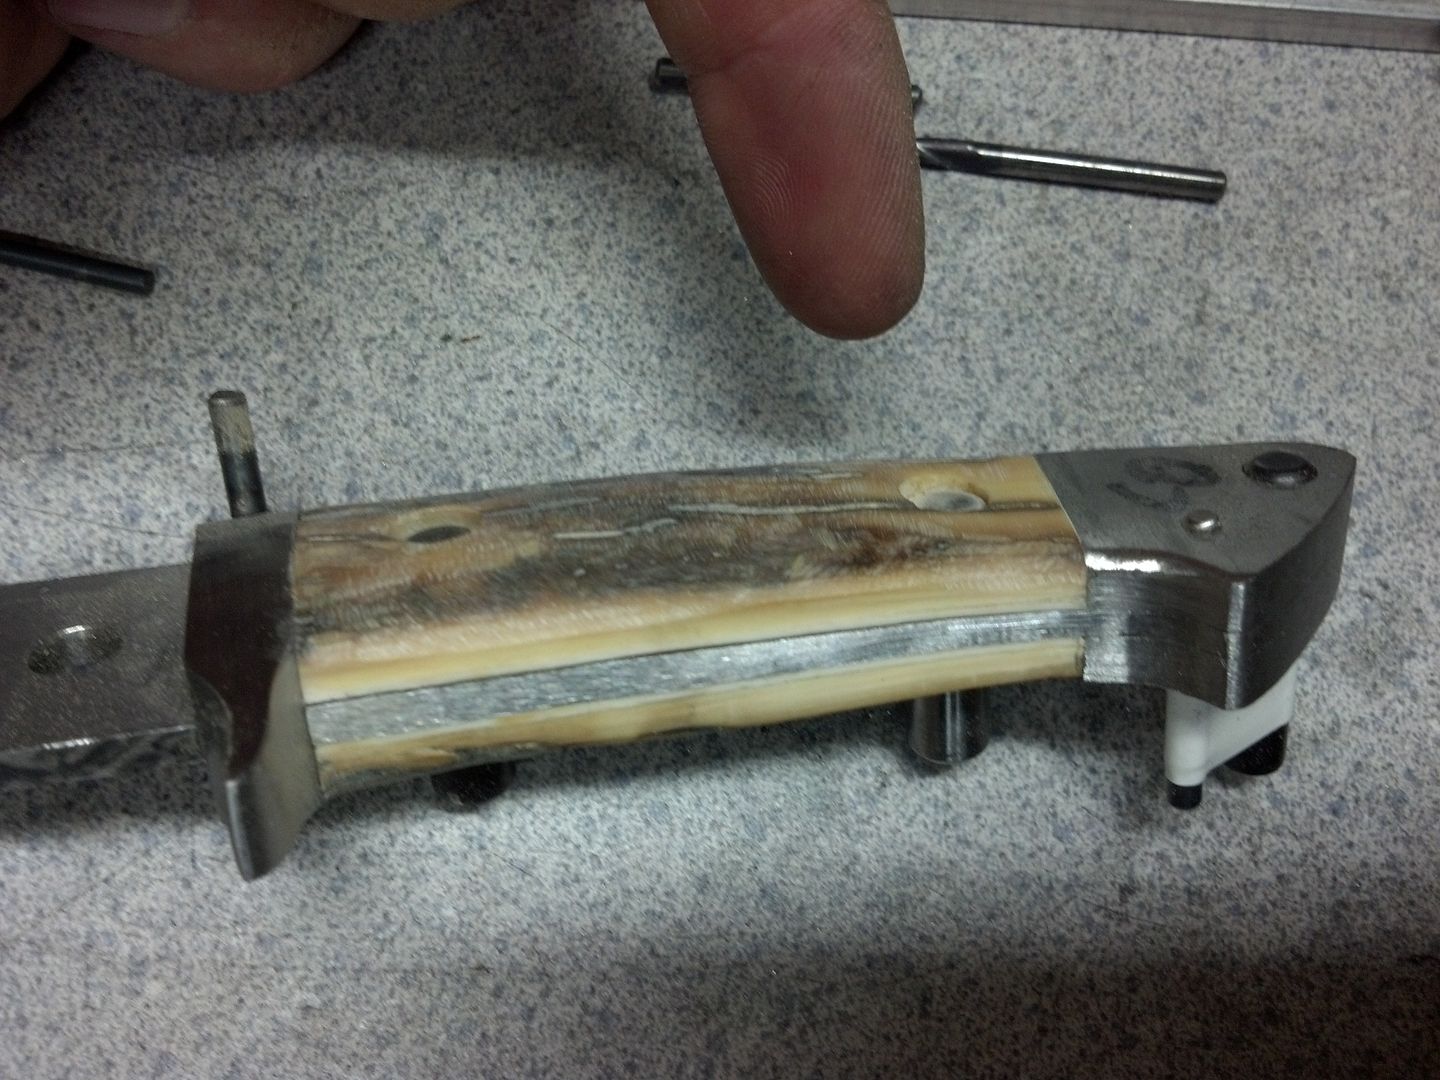
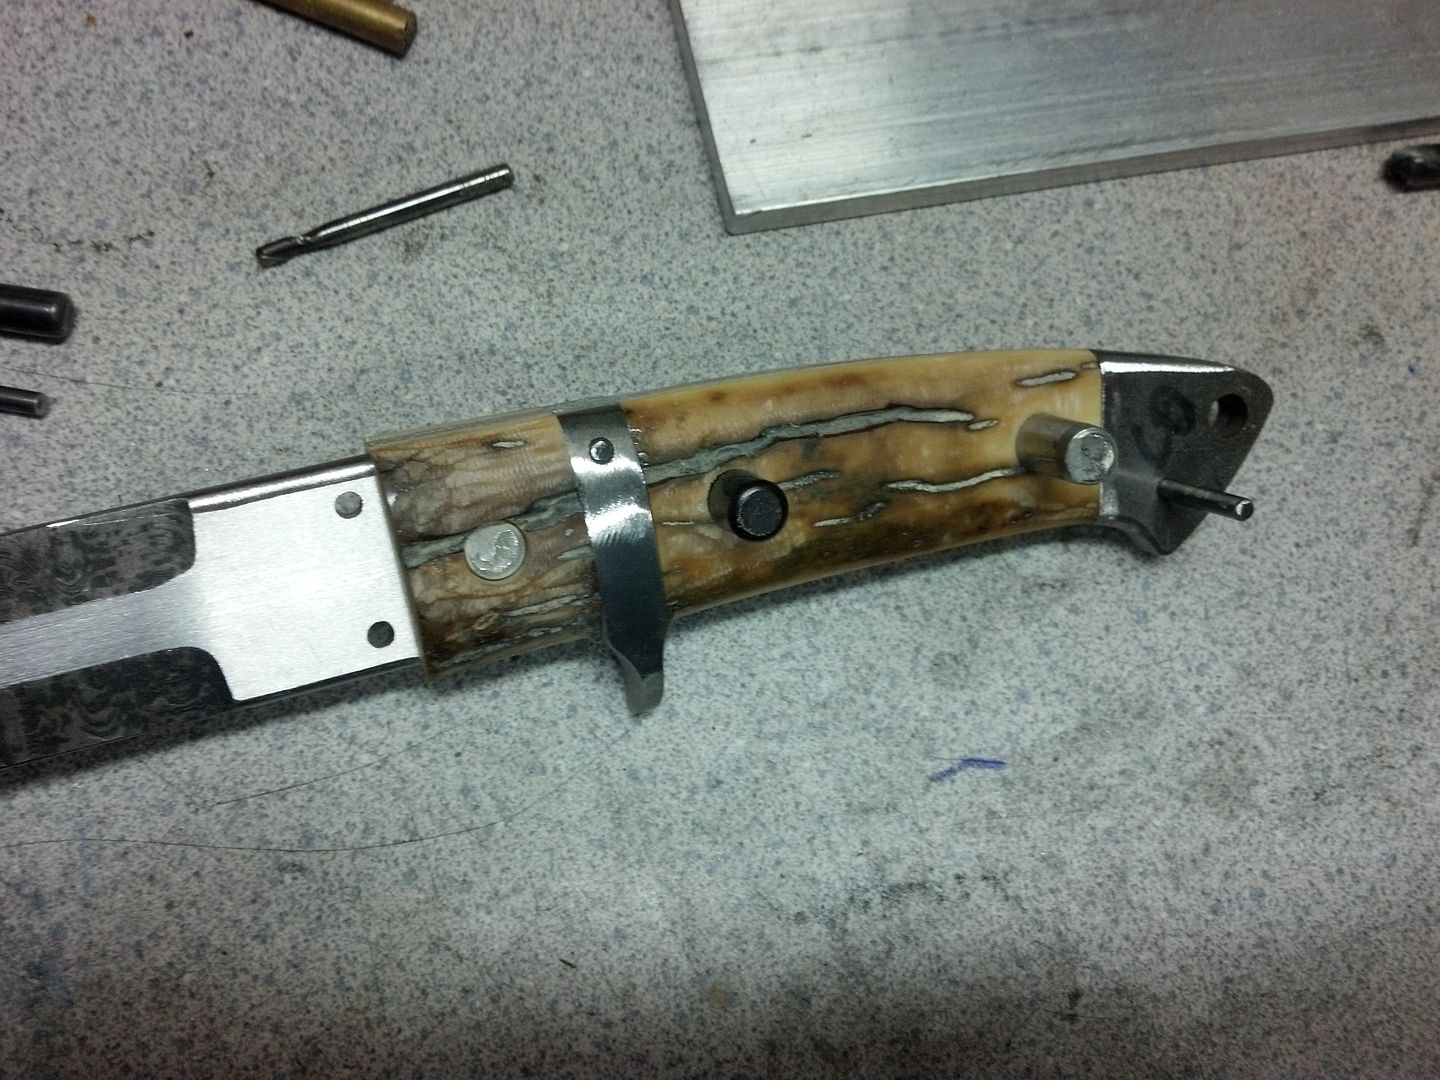
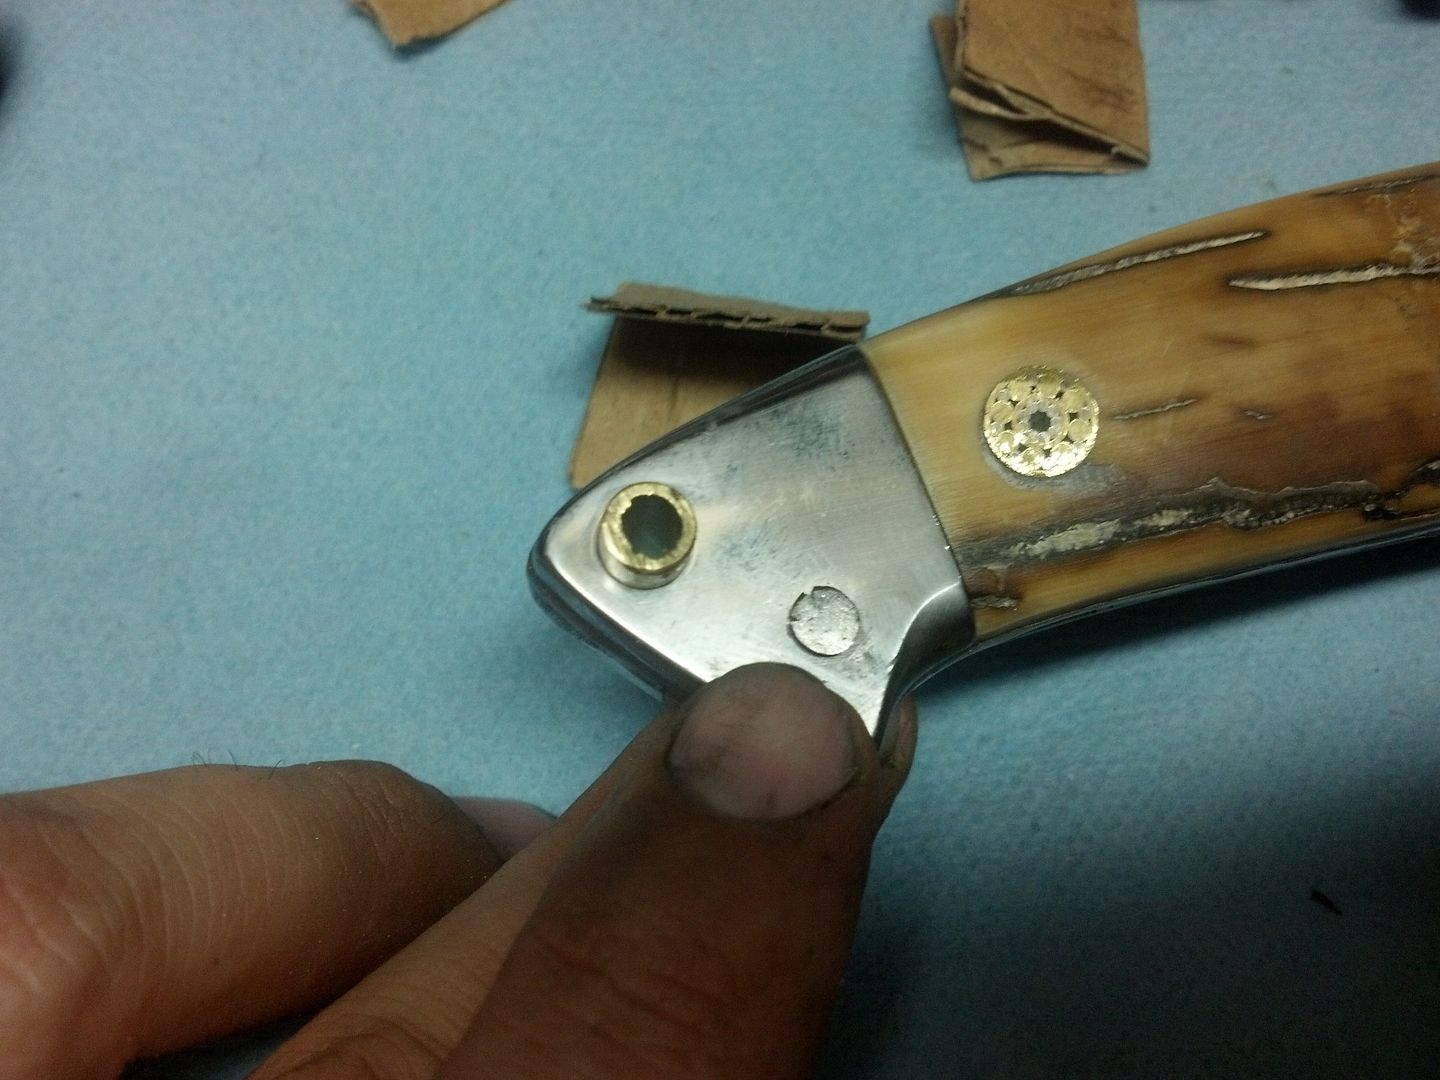
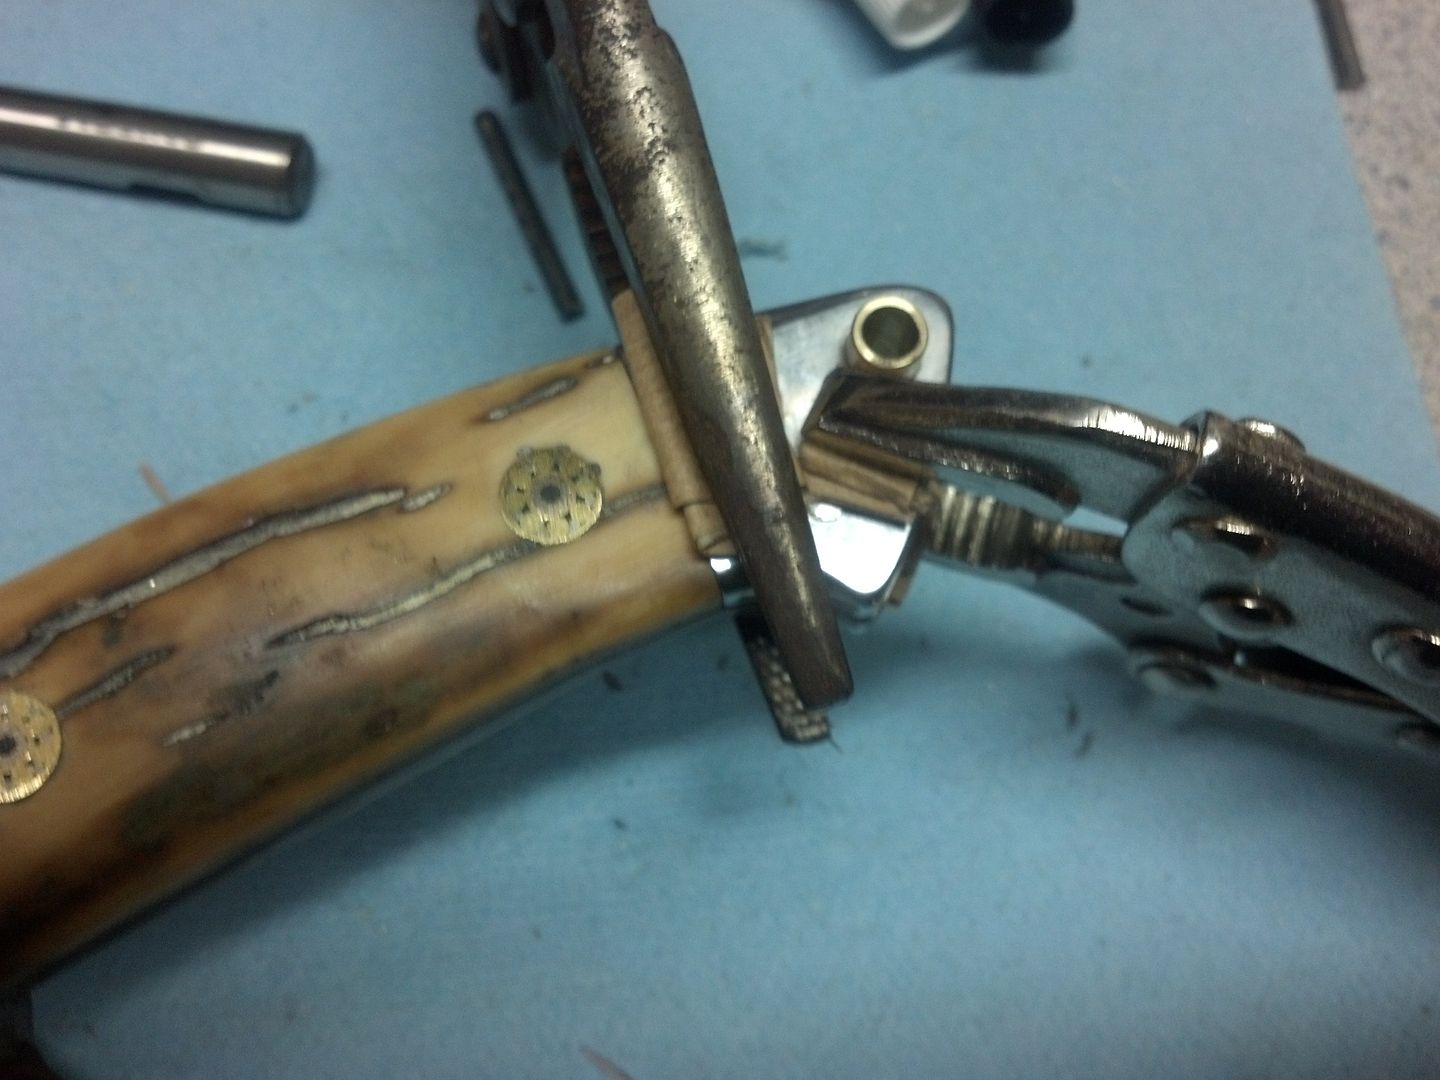
Next step is sticking those bolster pieces on, along with the lanyard tube. Got that glued up and had to install the locating pin. the small holes in the bolsters are flared out at the surface, to give the pin something to spread into when peened. You can see the pin has been peened and it is now stuck. We'll grind those off flush soon. Hopefully they will hide and disappear leaving no trace that they are there.

IMG_20130721_144153_838_zps0942d55b.jpg


Just to be sure everything is squeezed up, I left it vise griped for a bit.

IMG_20130721_144514_218_zps963cc3a5.jpg


More later.
 
The knife is about 95% done. All that is left for me to do is grind off the pins and lanyard tube and blend them in. Other than that it is just some minor touch up work and small things.

It has taken 55 hours to get to this point, and this is what we have.

I will not post more pics until it comes back from Rowe Leather. I plan to have it in the mail tomorrow or wednesday, and they should get it by the end of the week. I do not have a time frame on how long it will take them to make the sheath, but I assume no more than a few weeks.

IMG_20130721_191212_907_zps7d208685.jpg


I hope you all have enjoyed this as much as I have :)
 
Looks real great! I would be pleased if my grind turned out that nice. A hollow ground double edged knife is about as difficult as it can get.
 
Back
Top