You are using an out of date browser. It may not display this or other websites correctly.
You should upgrade or use an alternative browser.
You should upgrade or use an alternative browser.
DoAll G-1 Hydraulic Surface Grinder restoration
- Thread starter Josh Dabney
- Start date
Don't ya love the lazy rust removal of Electrolysis Josh? I'm really glad you went that route, I think you'll be far happier with it also! Only thing with that rebar is you'll have to wire brush it probably once a day or you'll notice that the process 'stalls' since it will be covered in crap like an ocean pier support gets covered with barnacles. I usually clean mine every 2 days, but with the heavy rust and the 270' location of it around your anode, you'll have to do it more often. Don't forget, it works by line of site, so corners or holes for screws will only work if the anode is directly in them or over them or in them.
Josh Dabney
Moderator
Teter09,
I kinda figured the rust on the anode could become problematic with the process. I've got my rebar just under the surface of the electrolite so when I de-foam I can see the rebar and it is looking pretty crusty.
As soon as I get time I'm gonna drain it and scrub it out to see what I've got so I can clean up the anode for another run with it or call it good and shoot some primer in there.
I read about the line of sight but I think I'll come out pretty good here. It's pretty much an open space other than a couple pins that span across the short way. Everything in there is pretty much line of sight except the underside of those cross pins.
I'll get a much better idea of how it's going after the clean out. It sure put out a bunch of rusty foam. I cleaaned the foam off about 5 or 6 times.
-Josh
Josh Dabney
Moderator
Of course Teter09 was right on the money about the anode needing cleaned off.
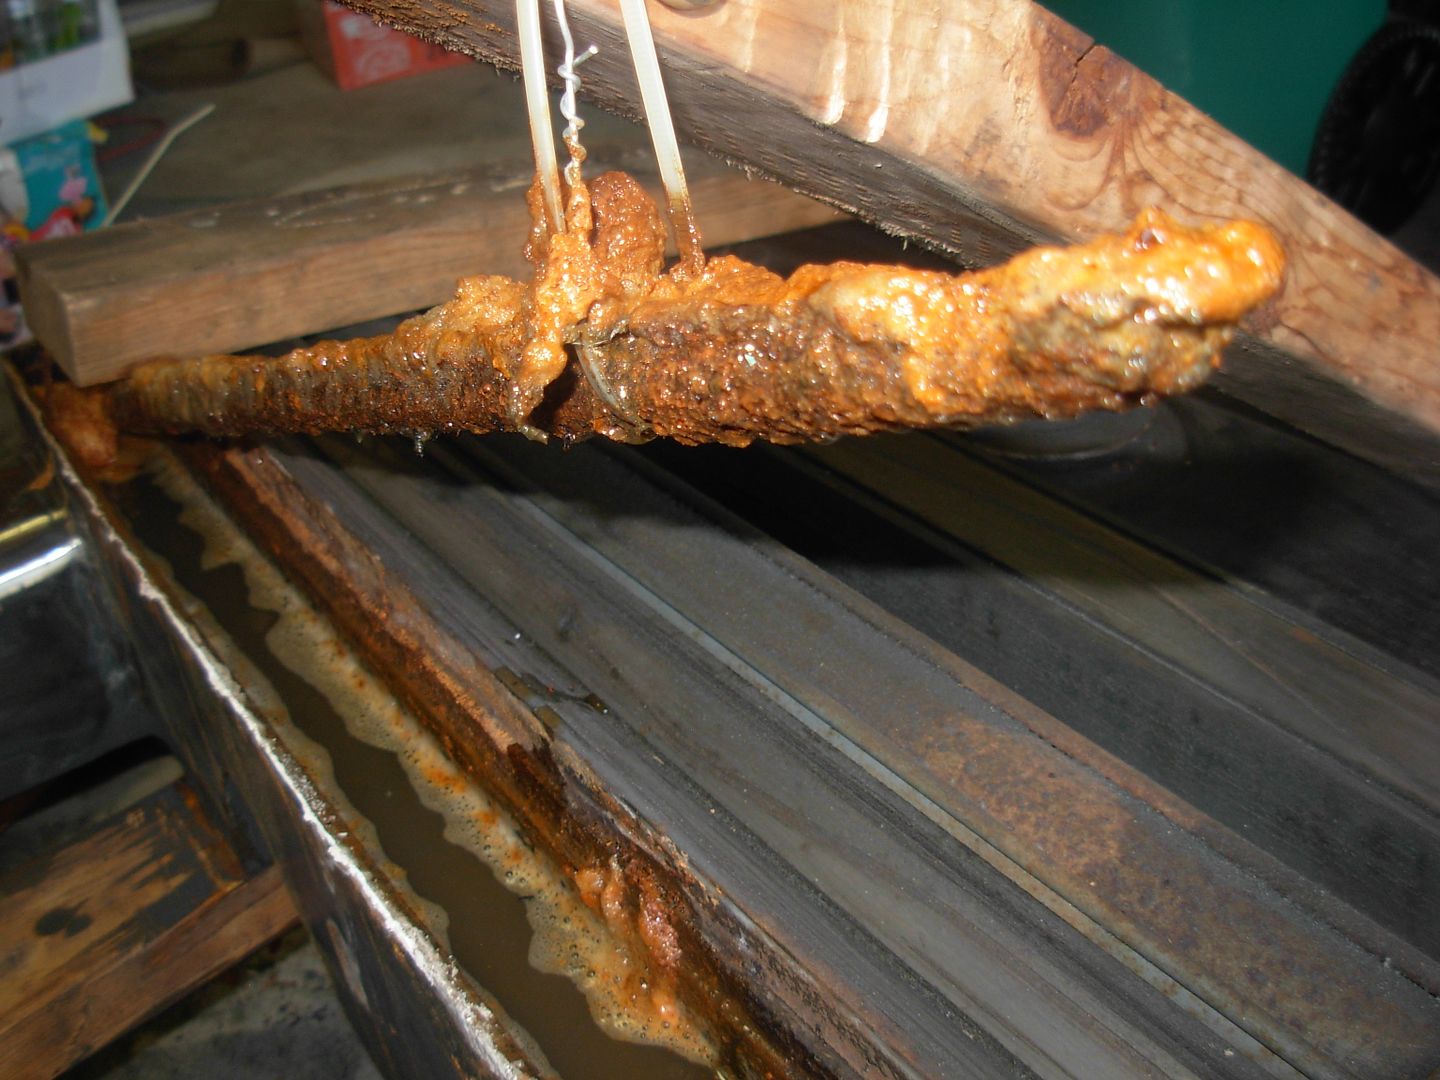
How it looks after draining the electrolite

Scraped the crud out, scrubbed it out with a scotchbright and mean green cleaner, and wire brushed a few areas. The whitish areas are bare clean iron and everything else is pitted up iron but it's preety much rust free
Getting just a touch of flash rust but she's pretty darn clean considering how it looked before the electrolysis.
I was thinking maybe I was working a little too hard with the oven cleaner for stripping. I soaked this down last night and left it sit overnight. The oven cleaner did it's job with very little work required for clean up
Wire brushed and degreased with the mean green

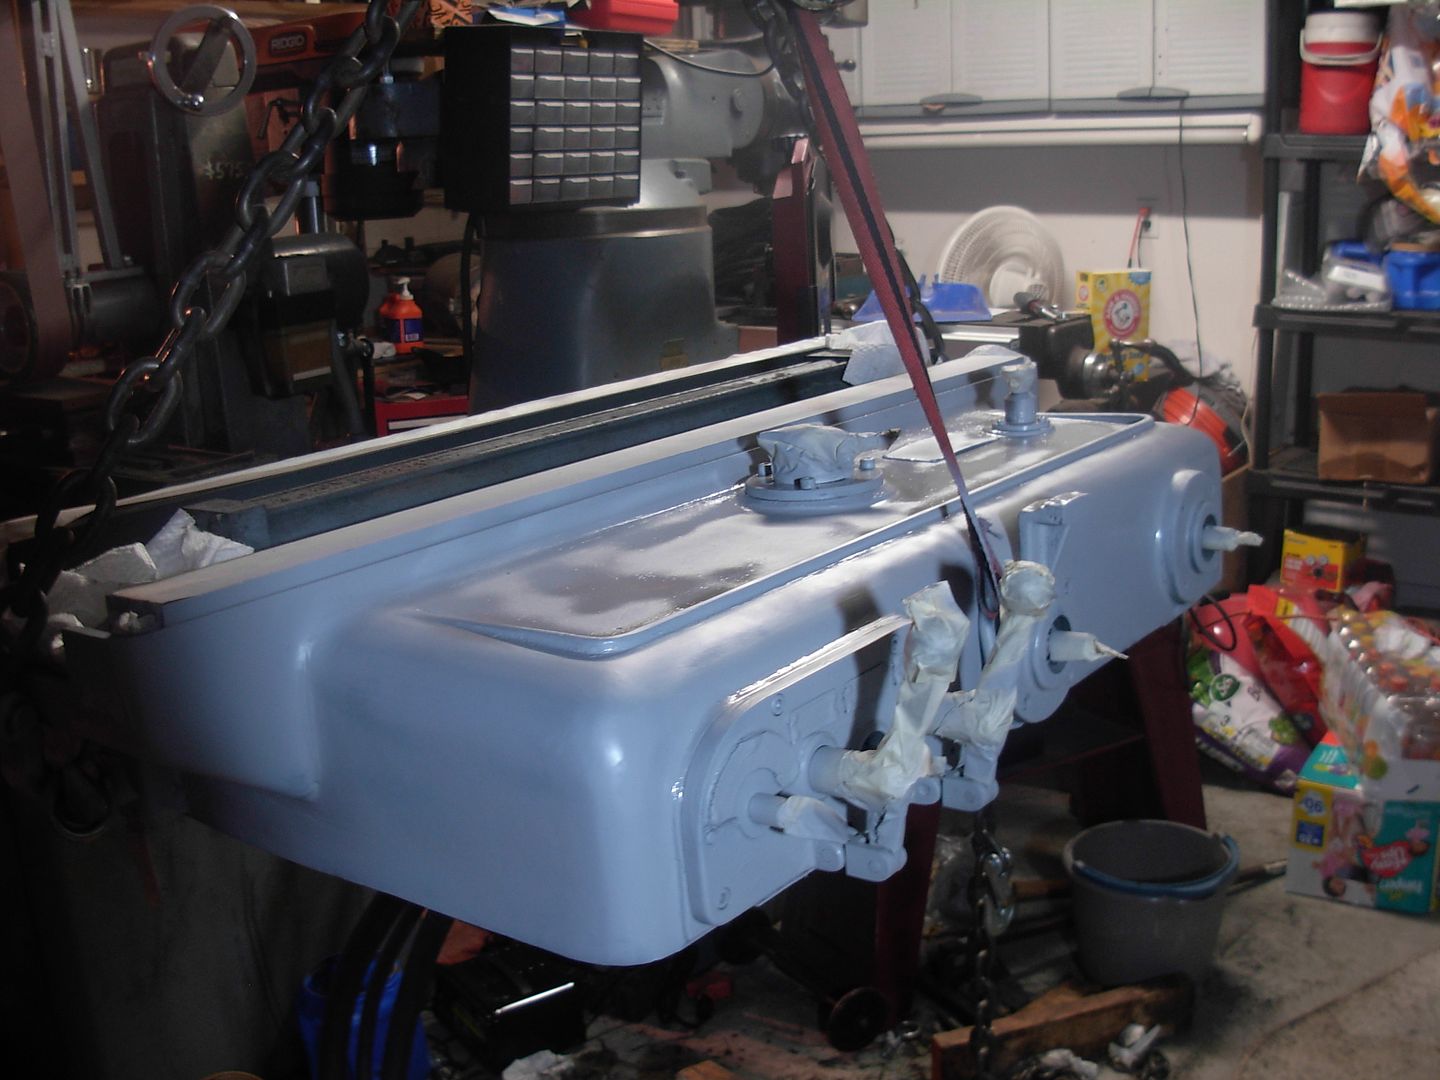
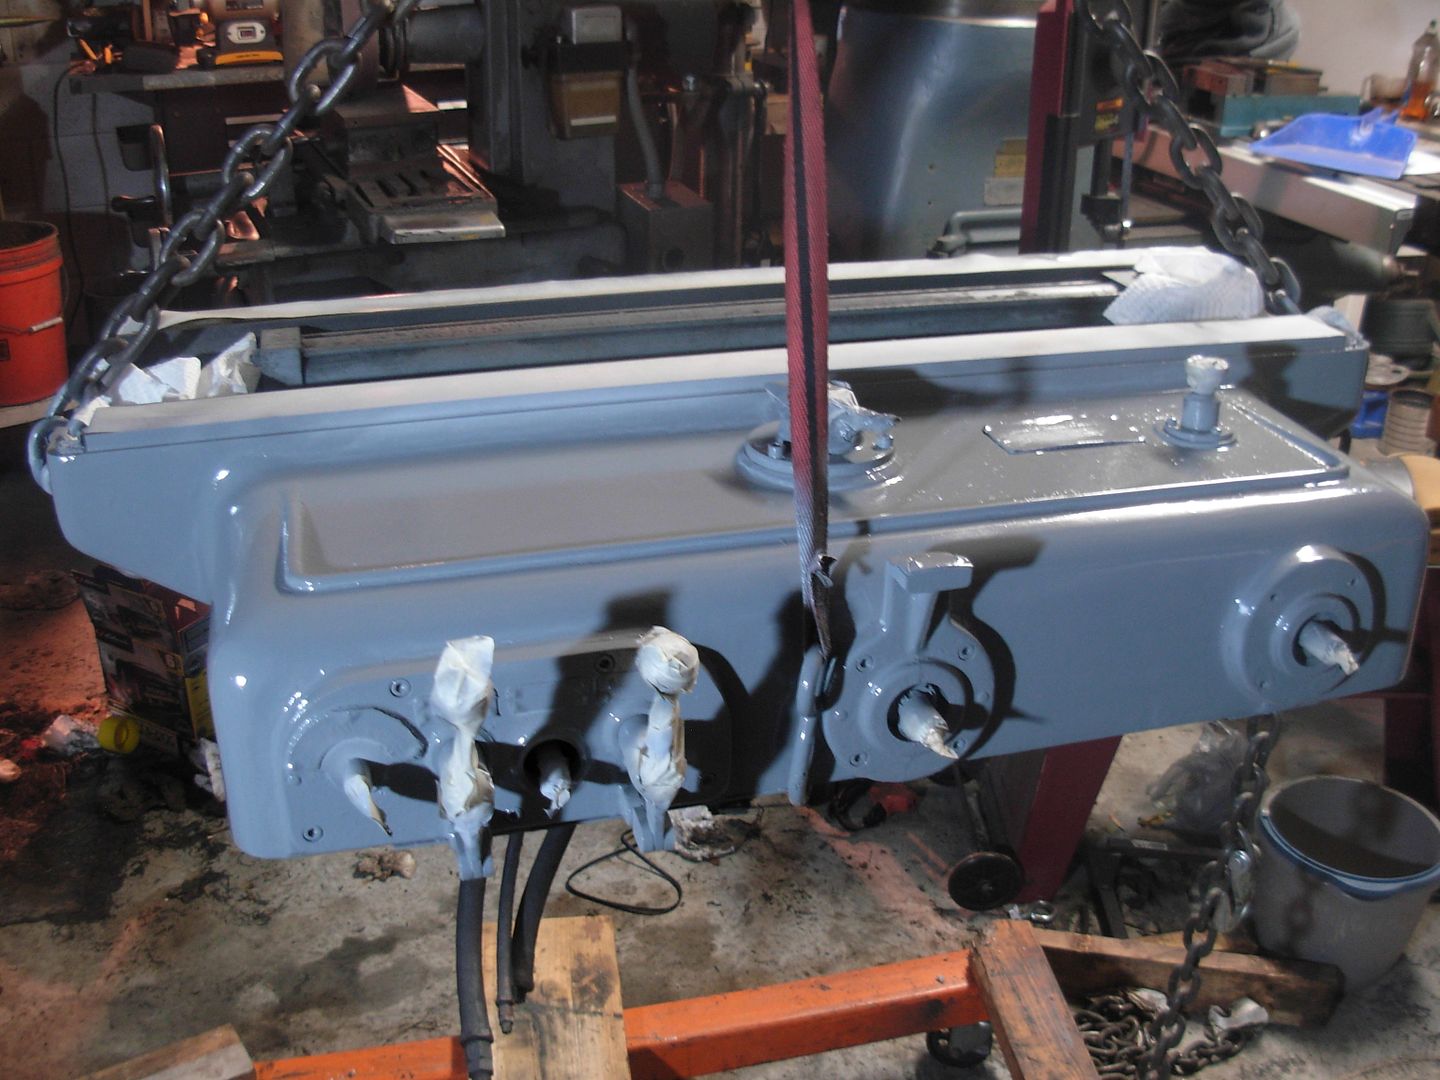
Before painting the saddle I needed to reinstall everything I took out on the under side. Got it all back in and the drip pans on.

Things can get a little tricky. I put the control knob bracket back on the saddle for painting but thankfully realized that the two levers are held to the shafts with taper pins that need to be installed underneath the drip pan. Had I put the saddle back on the cabinet without attatching these levers I would've had to pull it again to remove the drip pan
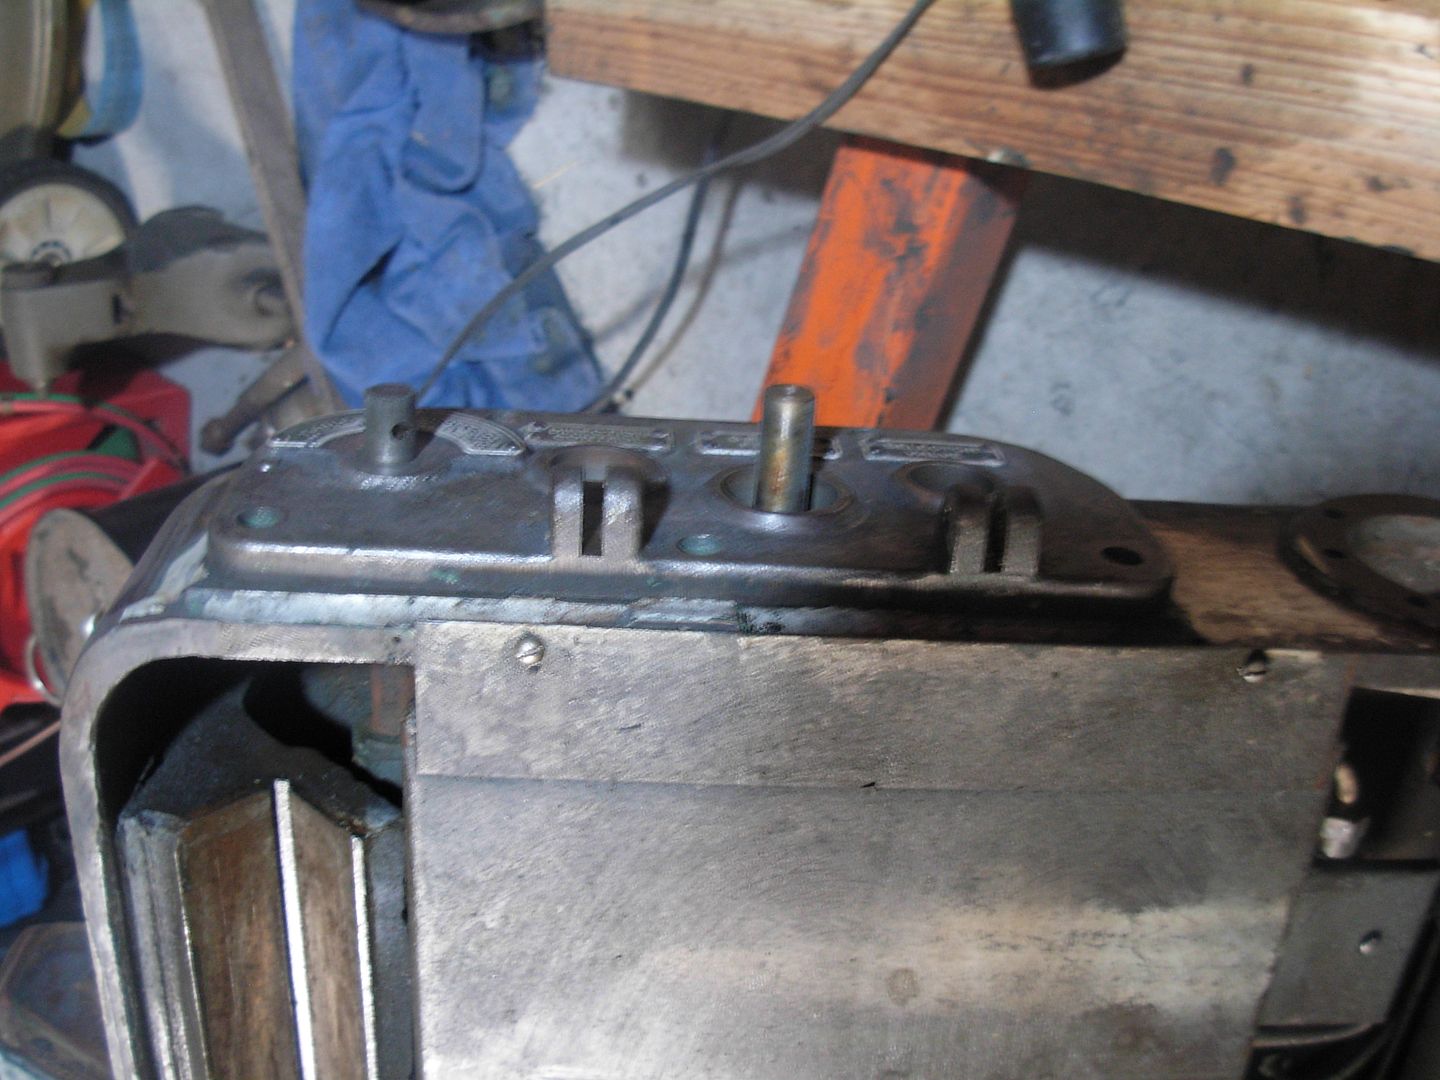
Pulled that drip pan to install the two levers. The other lever and knob attach from the outside so I'll leave those off for painting
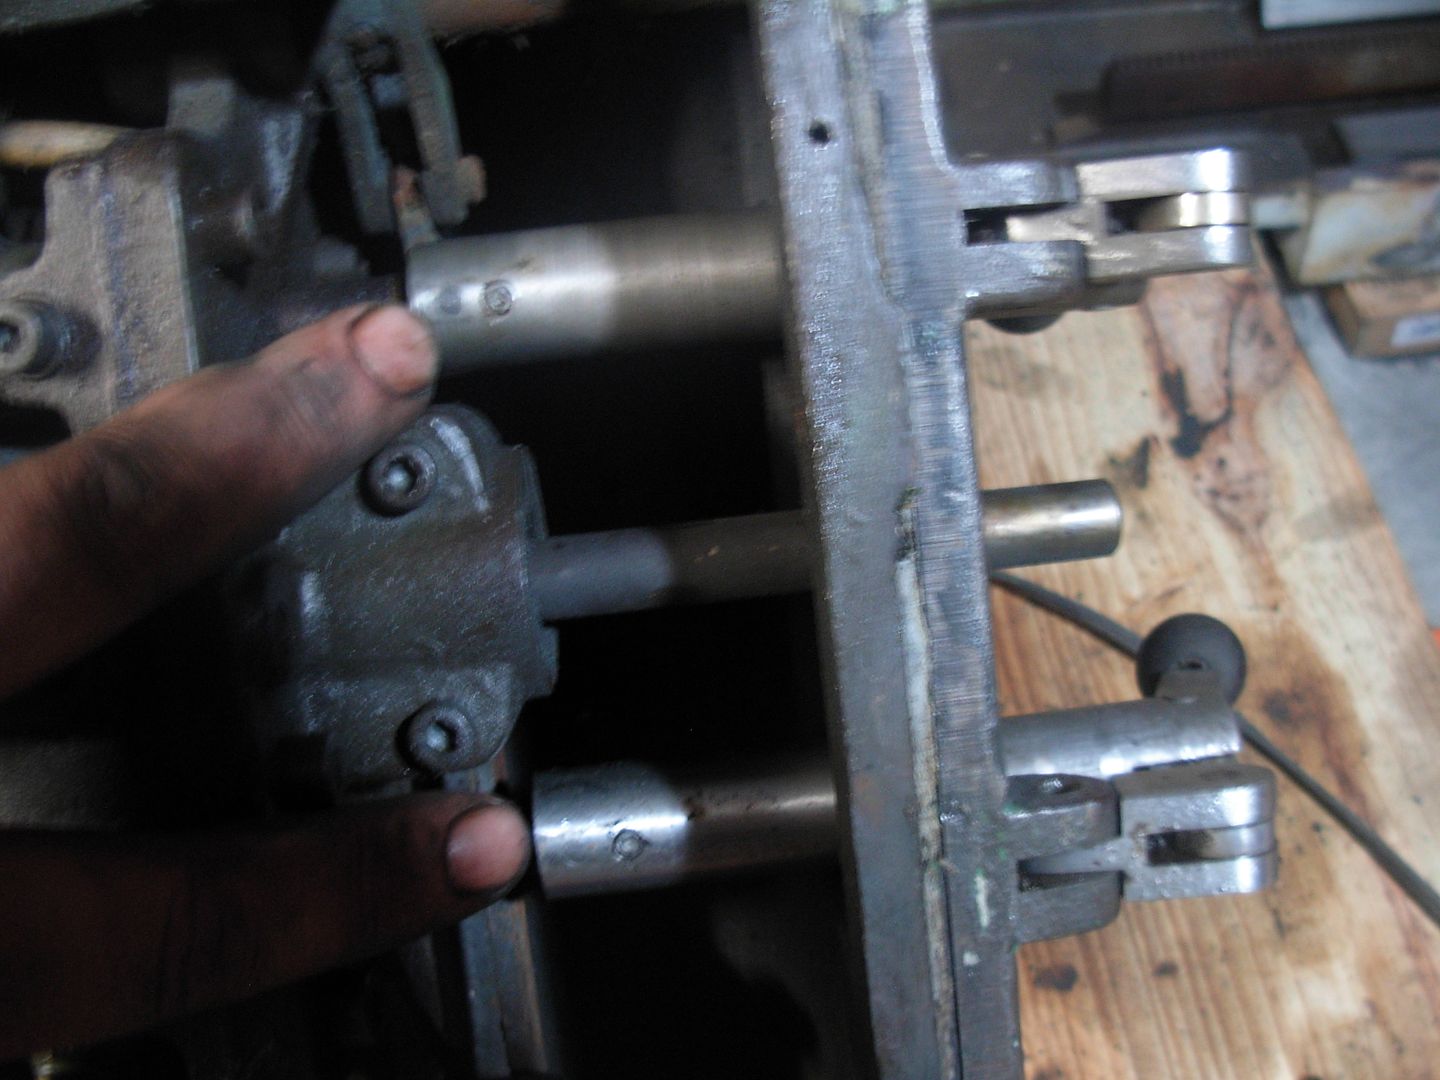
Reinstalled the drip pan and installed the crossfeed screw. I actually didn't need to pull the screw to remove the saddle. The nut is a half nut that is engaged from the bottom side with hydraulic power.
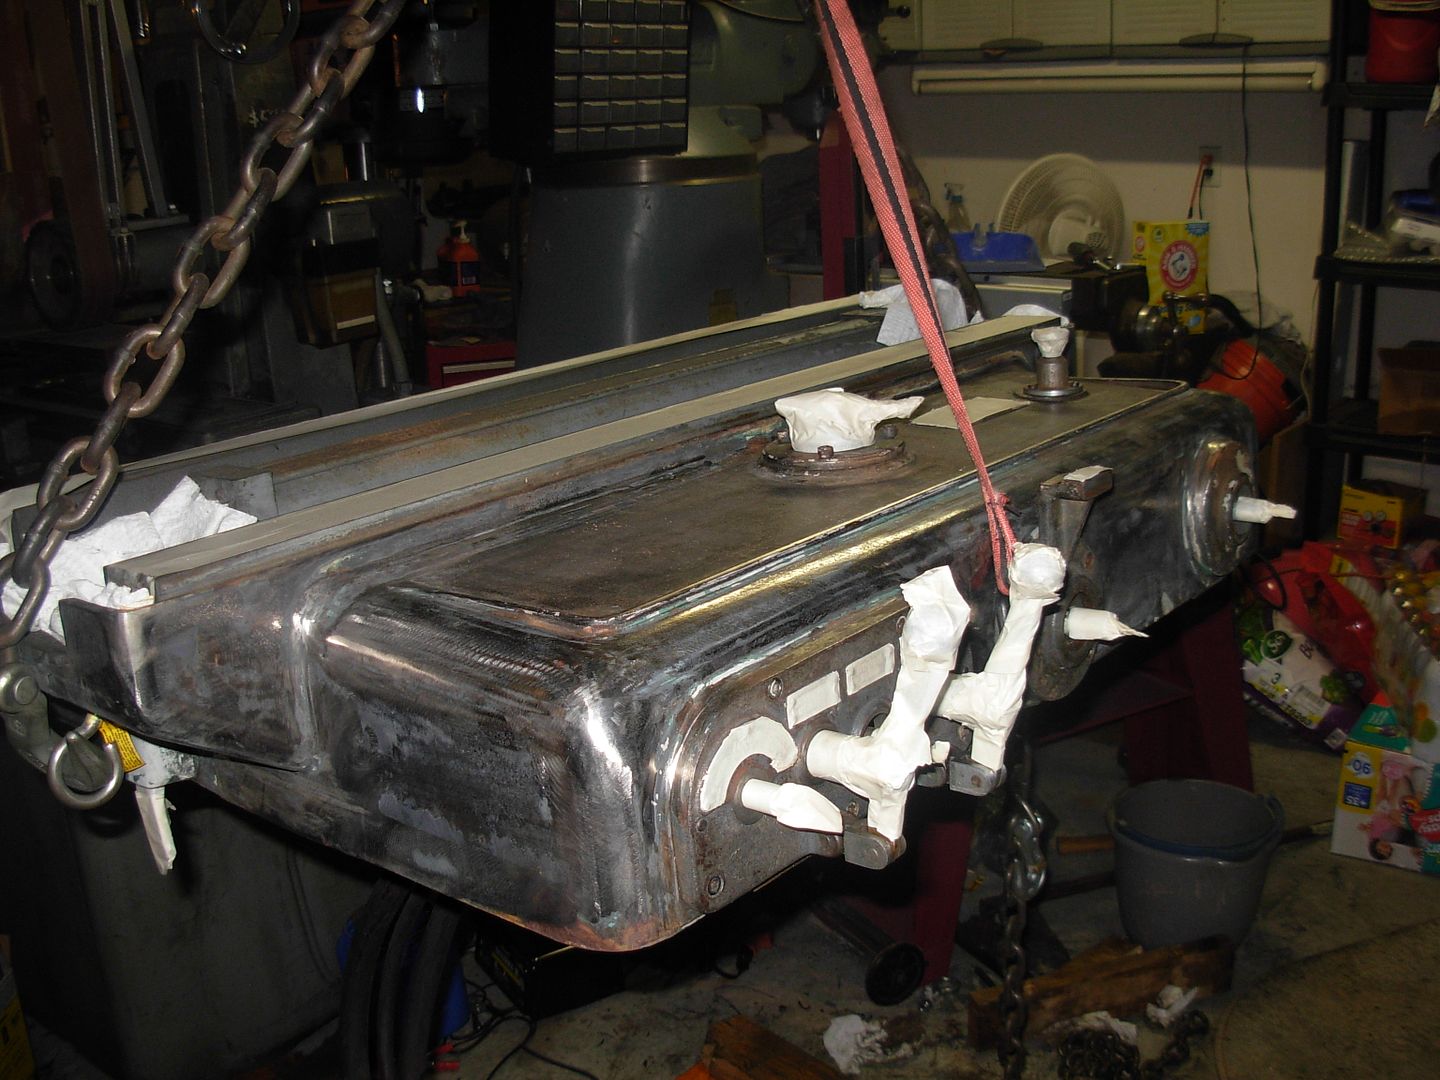
Got it flipped back right side up and re-rigged for the prep&paint.
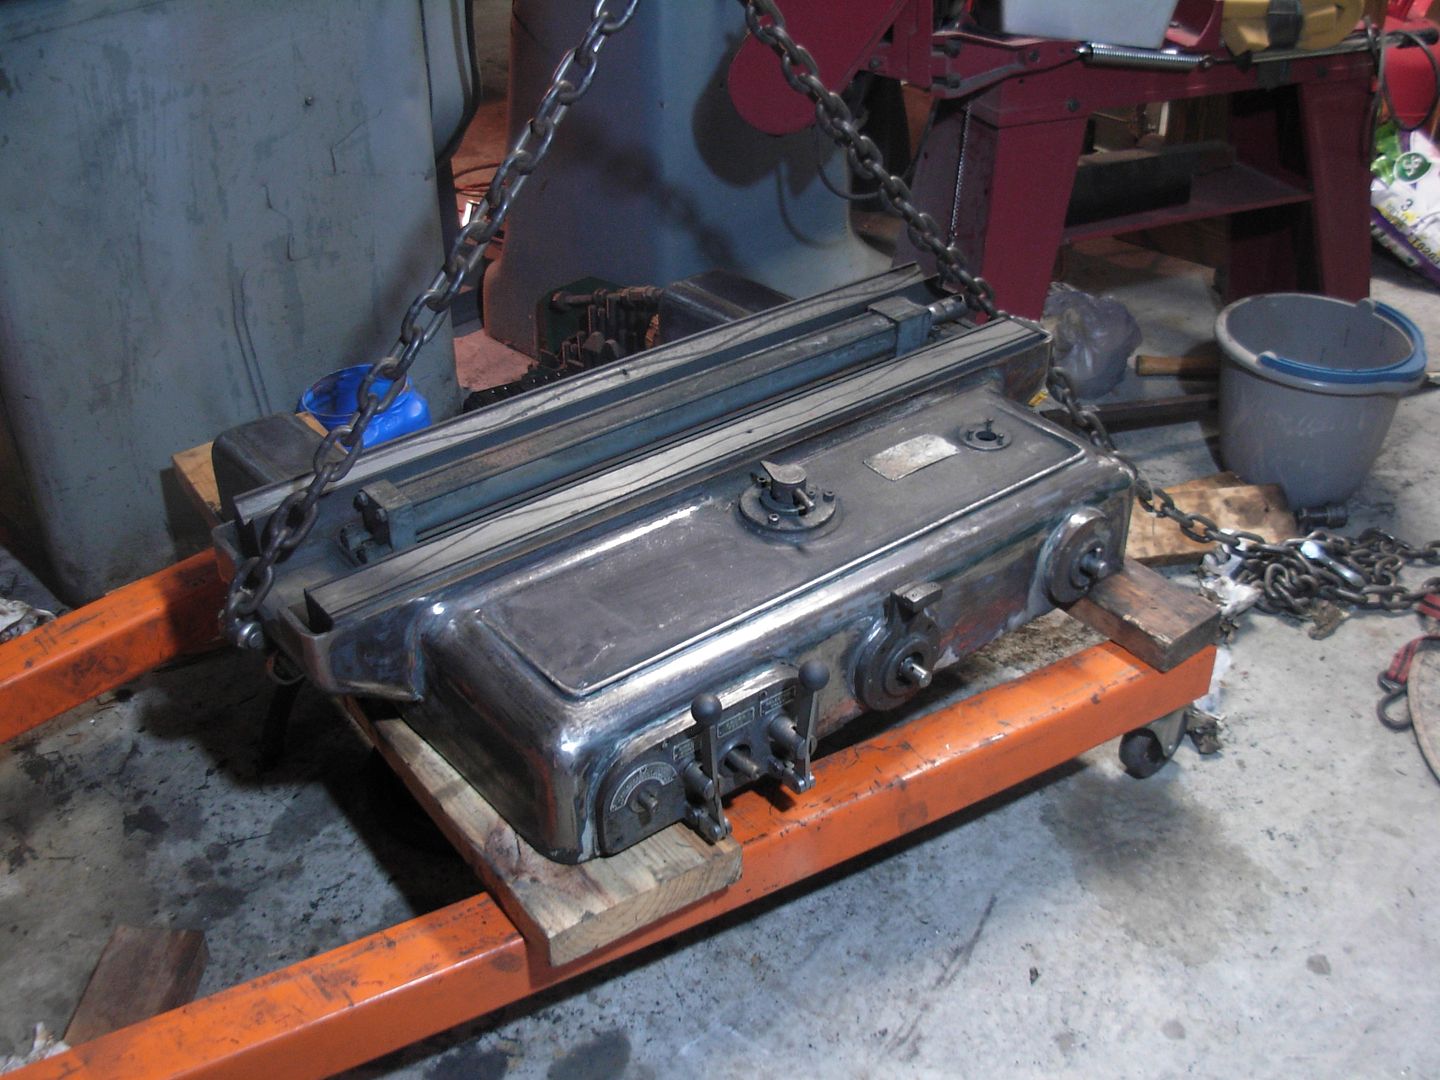
-Josh
How it looks after draining the electrolite
Scraped the crud out, scrubbed it out with a scotchbright and mean green cleaner, and wire brushed a few areas. The whitish areas are bare clean iron and everything else is pitted up iron but it's preety much rust free
Getting just a touch of flash rust but she's pretty darn clean considering how it looked before the electrolysis.
I was thinking maybe I was working a little too hard with the oven cleaner for stripping. I soaked this down last night and left it sit overnight. The oven cleaner did it's job with very little work required for clean up
Wire brushed and degreased with the mean green
Before painting the saddle I needed to reinstall everything I took out on the under side. Got it all back in and the drip pans on.
Things can get a little tricky. I put the control knob bracket back on the saddle for painting but thankfully realized that the two levers are held to the shafts with taper pins that need to be installed underneath the drip pan. Had I put the saddle back on the cabinet without attatching these levers I would've had to pull it again to remove the drip pan
Pulled that drip pan to install the two levers. The other lever and knob attach from the outside so I'll leave those off for painting
Reinstalled the drip pan and installed the crossfeed screw. I actually didn't need to pull the screw to remove the saddle. The nut is a half nut that is engaged from the bottom side with hydraulic power.
Got it flipped back right side up and re-rigged for the prep&paint.
-Josh
Last edited:
Drew Riley
Well-Known Member
I'm really enjoying this WIP. I'm hopefully going to take a look at an older millport mill and leblond lathe this week, and chances are I'm gonna have to do something simlar to this if I end up getting them.
I may have missed it, but what are you using to strip the paint and how are you applying the new paint and primer? Sprayer? Spray can? brush?
I may have missed it, but what are you using to strip the paint and how are you applying the new paint and primer? Sprayer? Spray can? brush?
Josh Dabney
Moderator
Andrew,
I did alot of the paint stripping using Easy Off oven cleaner. The longer it sits on the paint the better it seems to work. I sprayed a piece and left it overnight and the paint just wire brushed right off the next day. I used the oven cleaner for the top end and the back side.
For the cabinet and saddle I used a 4 1/2" angle grinder with a 36 grit flap wheel to do the stripping. This works really well especially for big flat areas. However... I'm not getting a beautifully smooth result especially in inside and outside corners. I wasn't worried at all with this for my purpose as my main goal is to eliminate rust and stop it from comming back. Not to mention this thing is a surface grinder not a Corvette fender")
I deliberated on what paint to use. There are far more durable paints available than what I'm using but I went this route knowing I can grab a can of Rustoleum anytime for touch up for just a couple bucks.
I'm priming with Rustoleum Rusty Metal Primer. I got it form Walmart but it's in the automotive section near the bondo and bedliner stuff NOT with the rest of the paints in the Paint section.
Painting with regular Rustoleum Enamel in the white can. The color is Smoke Grey.
It sure looks good now but time will tell if the paintjob holds up to contact with hydraulic oil etc.
-Josh
I did alot of the paint stripping using Easy Off oven cleaner. The longer it sits on the paint the better it seems to work. I sprayed a piece and left it overnight and the paint just wire brushed right off the next day. I used the oven cleaner for the top end and the back side.
For the cabinet and saddle I used a 4 1/2" angle grinder with a 36 grit flap wheel to do the stripping. This works really well especially for big flat areas. However... I'm not getting a beautifully smooth result especially in inside and outside corners. I wasn't worried at all with this for my purpose as my main goal is to eliminate rust and stop it from comming back. Not to mention this thing is a surface grinder not a Corvette fender
I deliberated on what paint to use. There are far more durable paints available than what I'm using but I went this route knowing I can grab a can of Rustoleum anytime for touch up for just a couple bucks.
I'm priming with Rustoleum Rusty Metal Primer. I got it form Walmart but it's in the automotive section near the bondo and bedliner stuff NOT with the rest of the paints in the Paint section.
Painting with regular Rustoleum Enamel in the white can. The color is Smoke Grey.
It sure looks good now but time will tell if the paintjob holds up to contact with hydraulic oil etc.
-Josh
Josh Dabney
Moderator
I should also mention that I'm final cleaning with Mineral Spirits which is what the primer's directions call for.
Very busy weekend without much shop time but I did manage to squeeze in a couple hours tonight to get the saddle primed and painted
Prepped-
Primed-
Painted-
Tomorrow she'll be ready to go back on the cabinet :biggrin:
-Josh
Very busy weekend without much shop time but I did manage to squeeze in a couple hours tonight to get the saddle primed and painted
Prepped-
Primed-
Painted-
Tomorrow she'll be ready to go back on the cabinet :biggrin:
-Josh
Brad Lilly
Moderator and Awards Boss
Your doing a great job Josh.
Josh Dabney
Moderator
Thanks Brad. Still got a ways to go on it but I think the bulk of the heavy lifting is behind me now... no pun intended
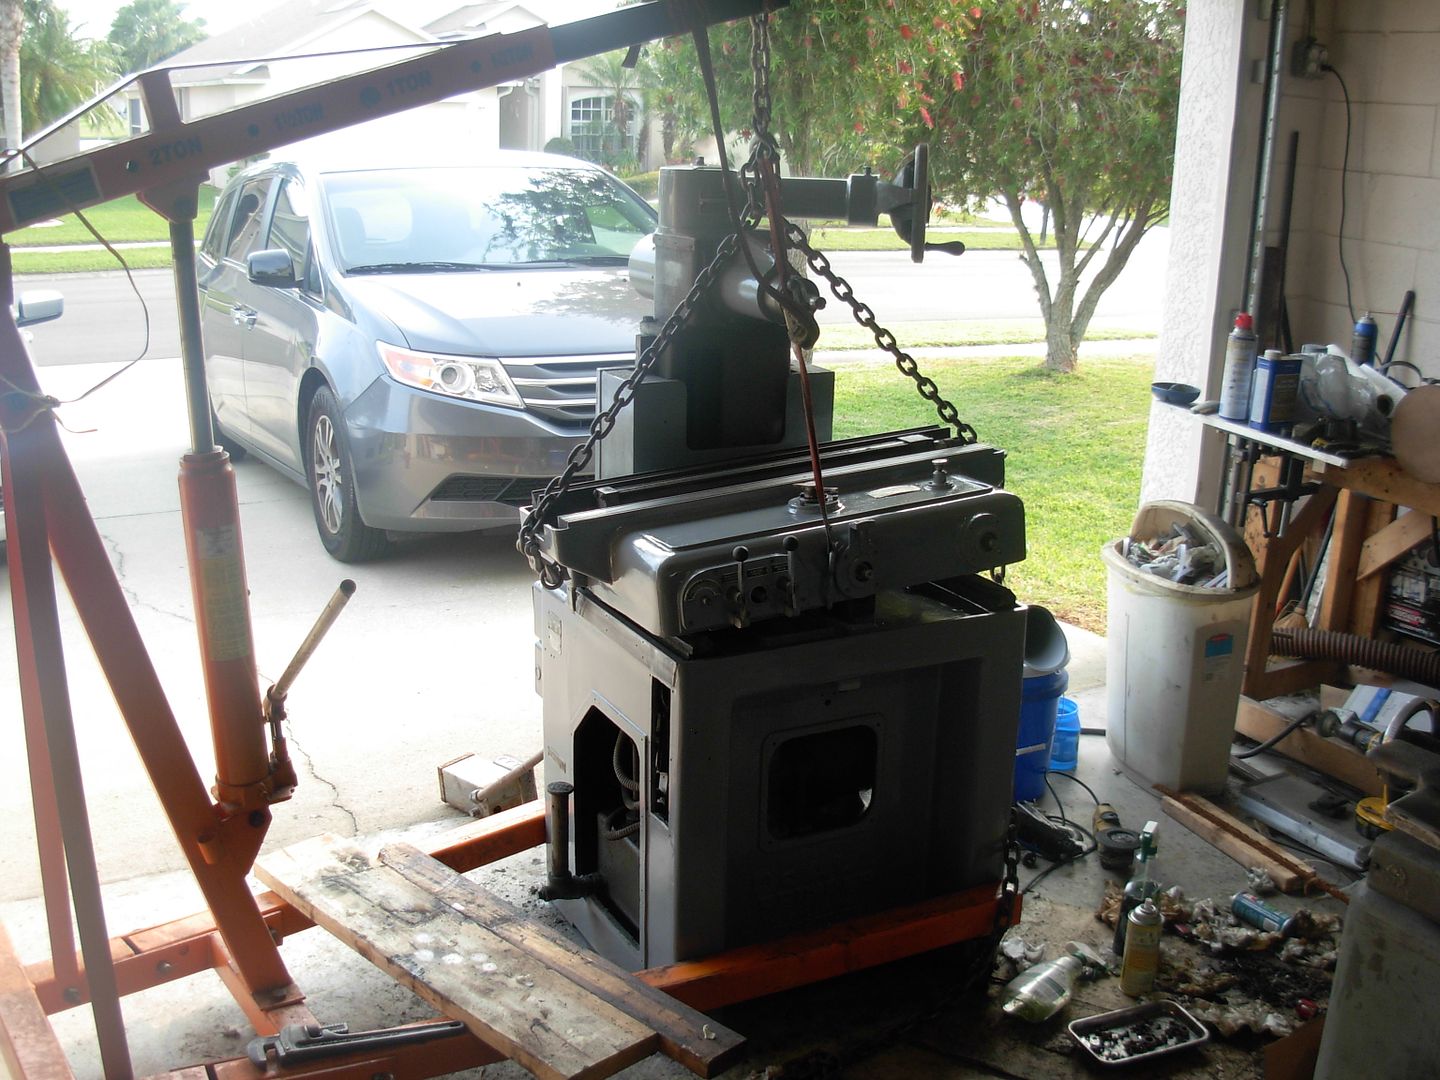
I picked up 5 gallons of hydraulic oil today so I could pre-lube the ways with it before reinstalling the saddle. This way I'm not sliding on dry ways before my fresh oil makes it through the system.
Getting it lined back up. It took a little fiddling with to get it in the right spot but I didn't skin my fresh paint too bad.
Back home with the levers, knobs, and handwheels back on

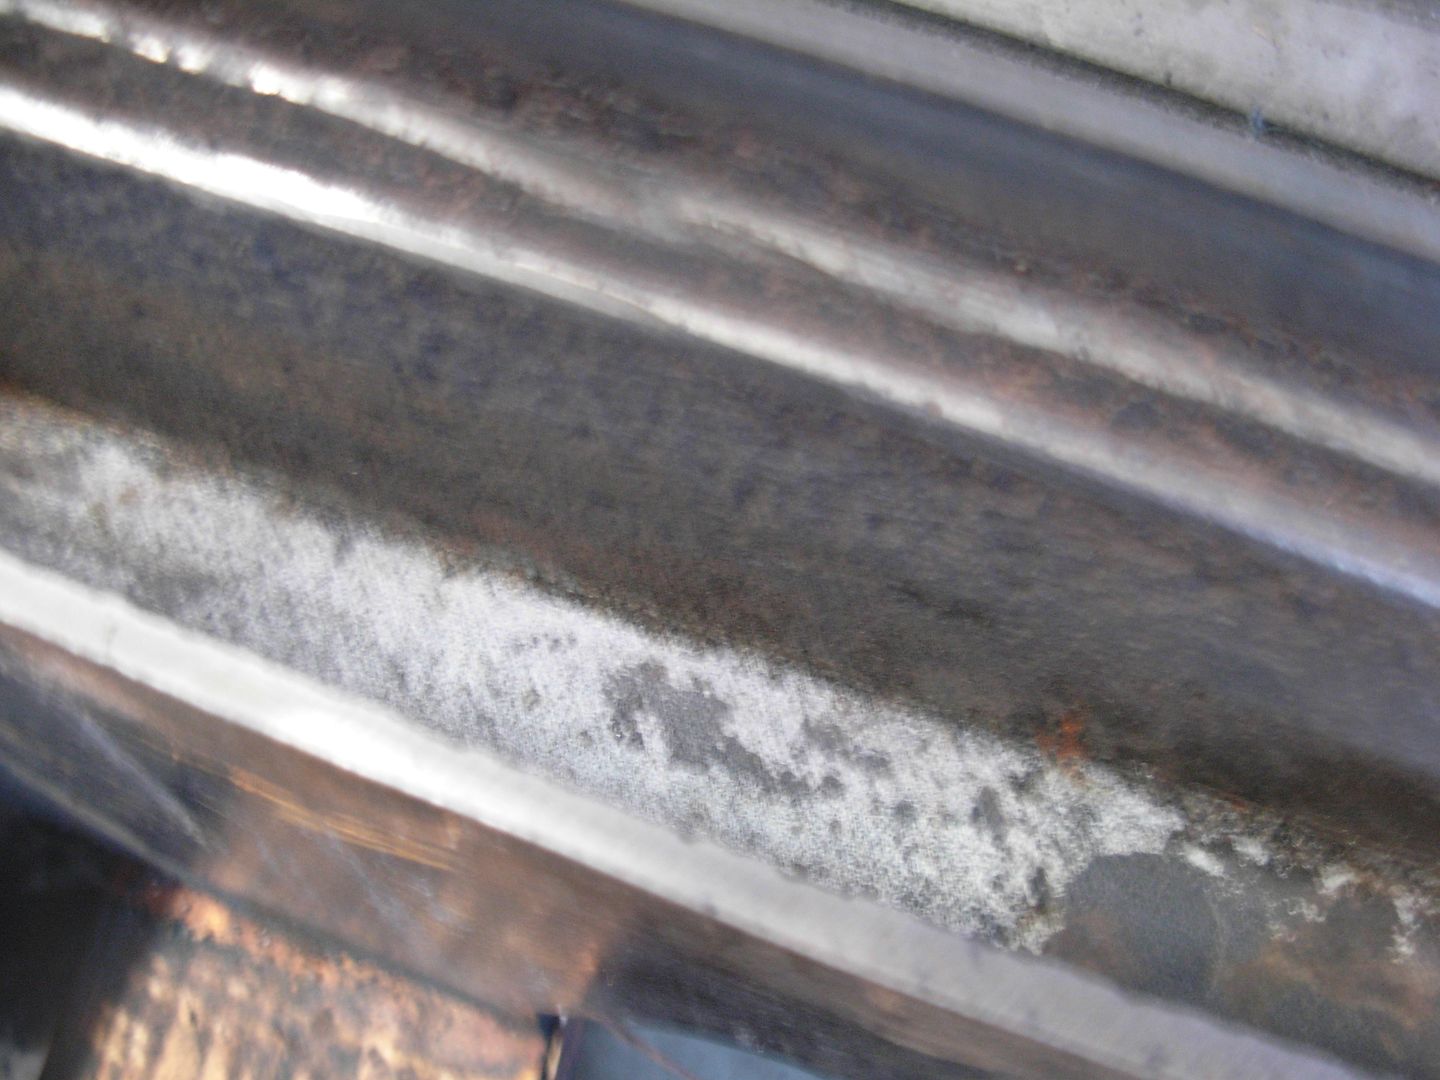
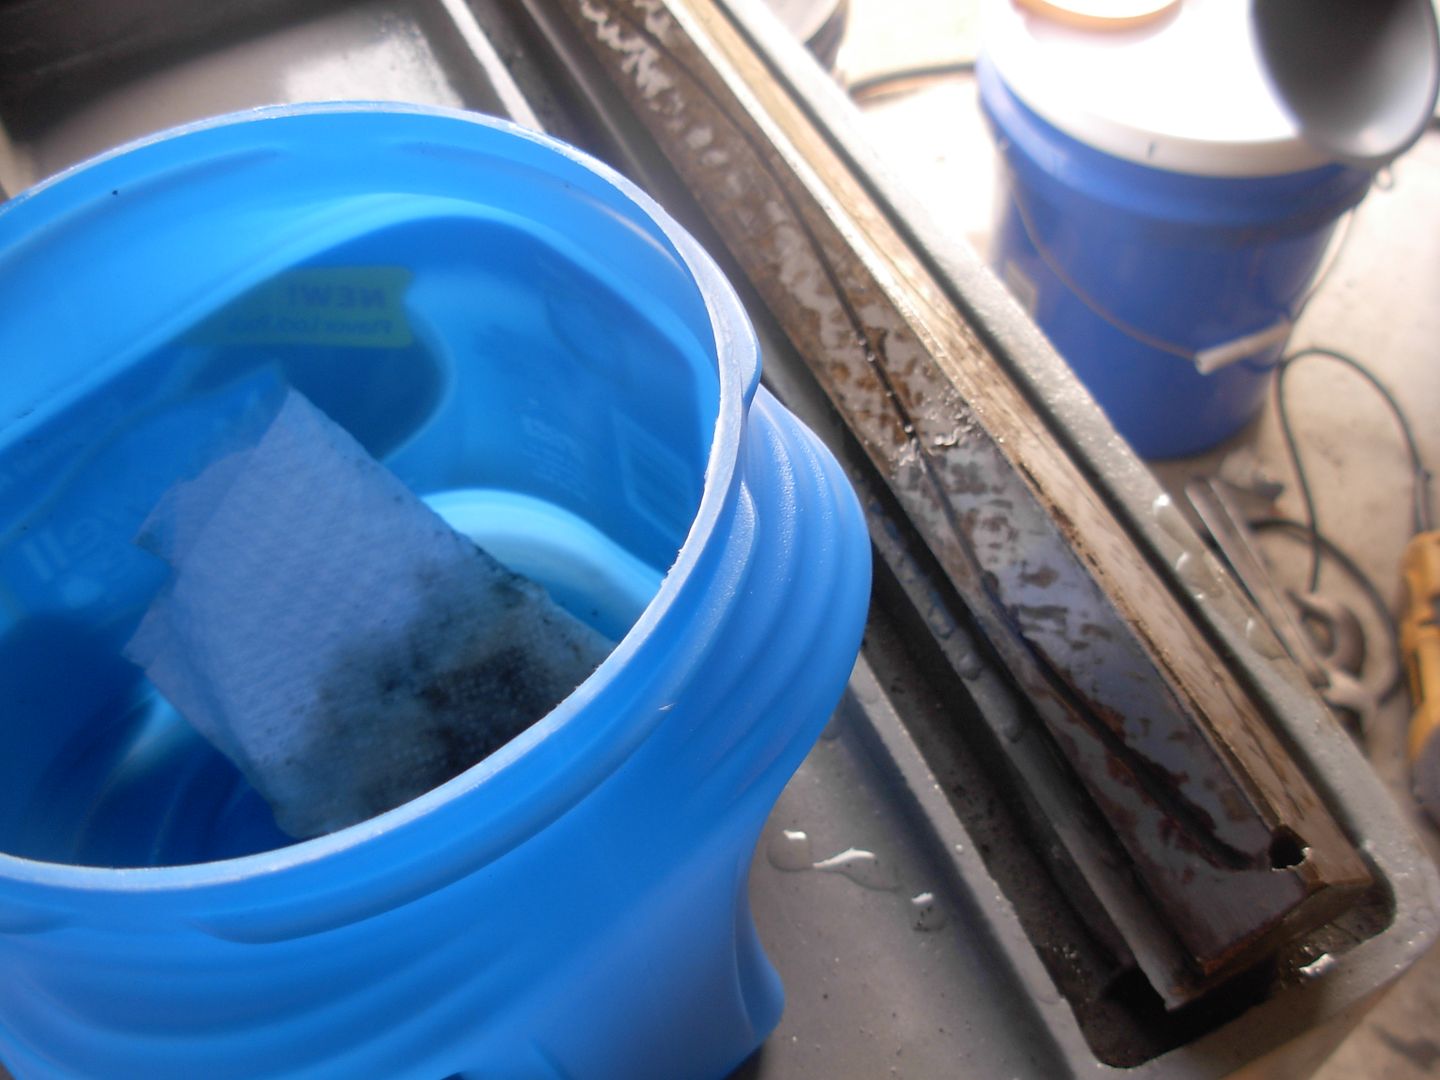
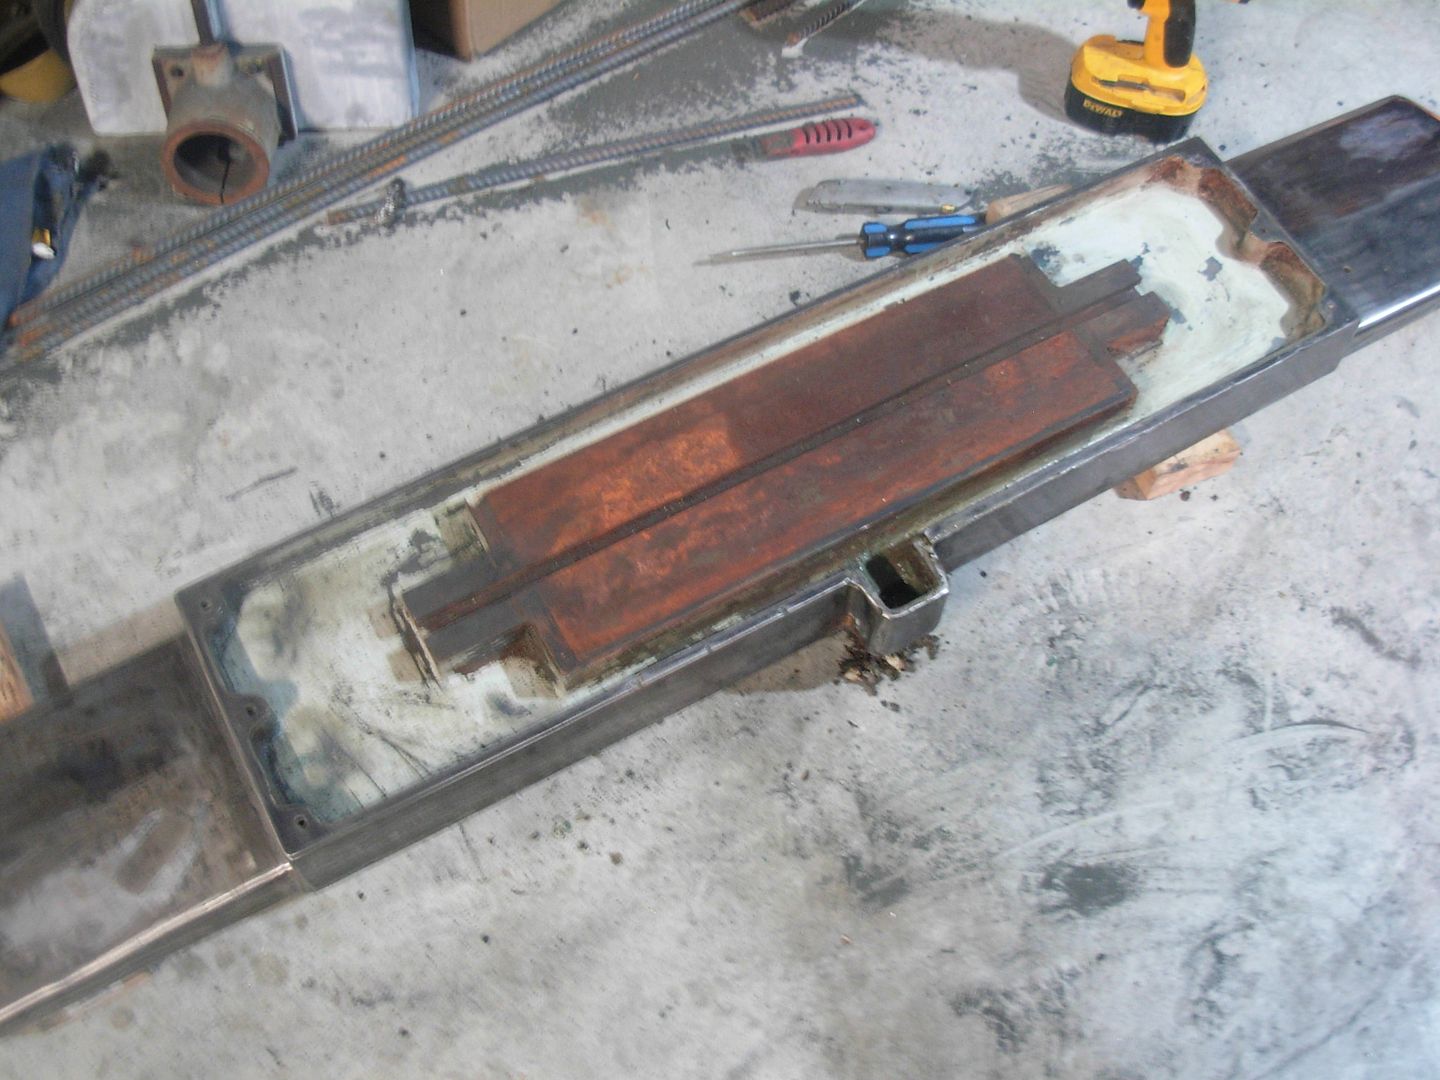
This is how the troff that got the electrolysis looks now
Ready to drain the tank. I've got a plastic under the bed storage container handy just in case I have trouble getting the plug back in. I didn't need it though and had no problem draining it one paint tray at a time
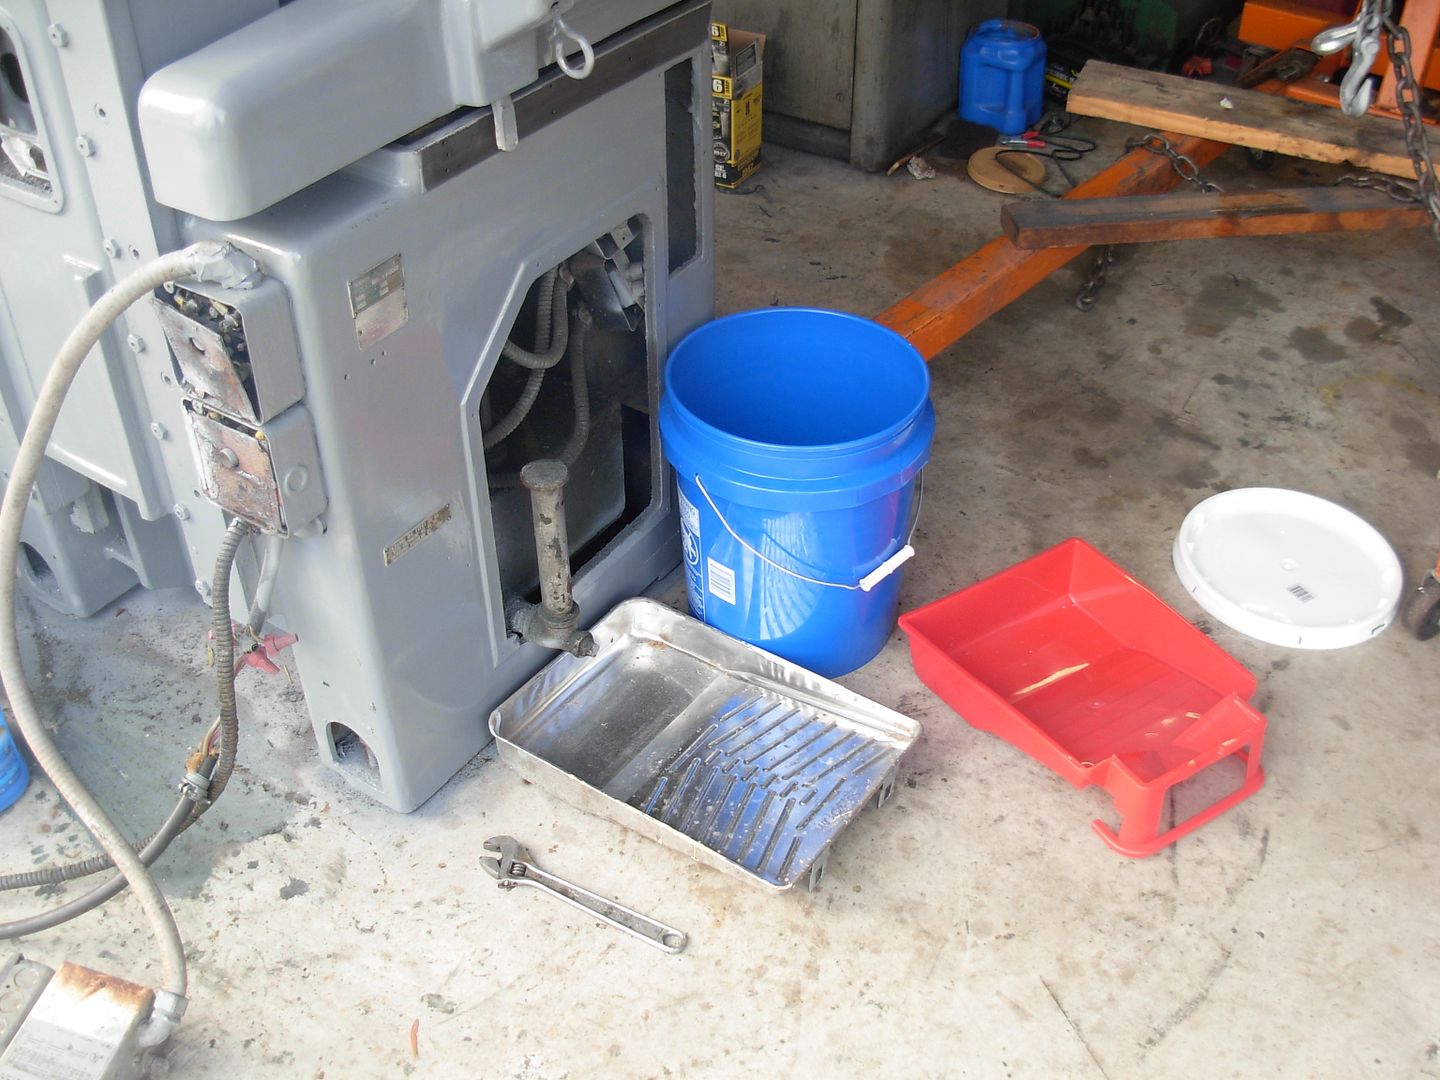
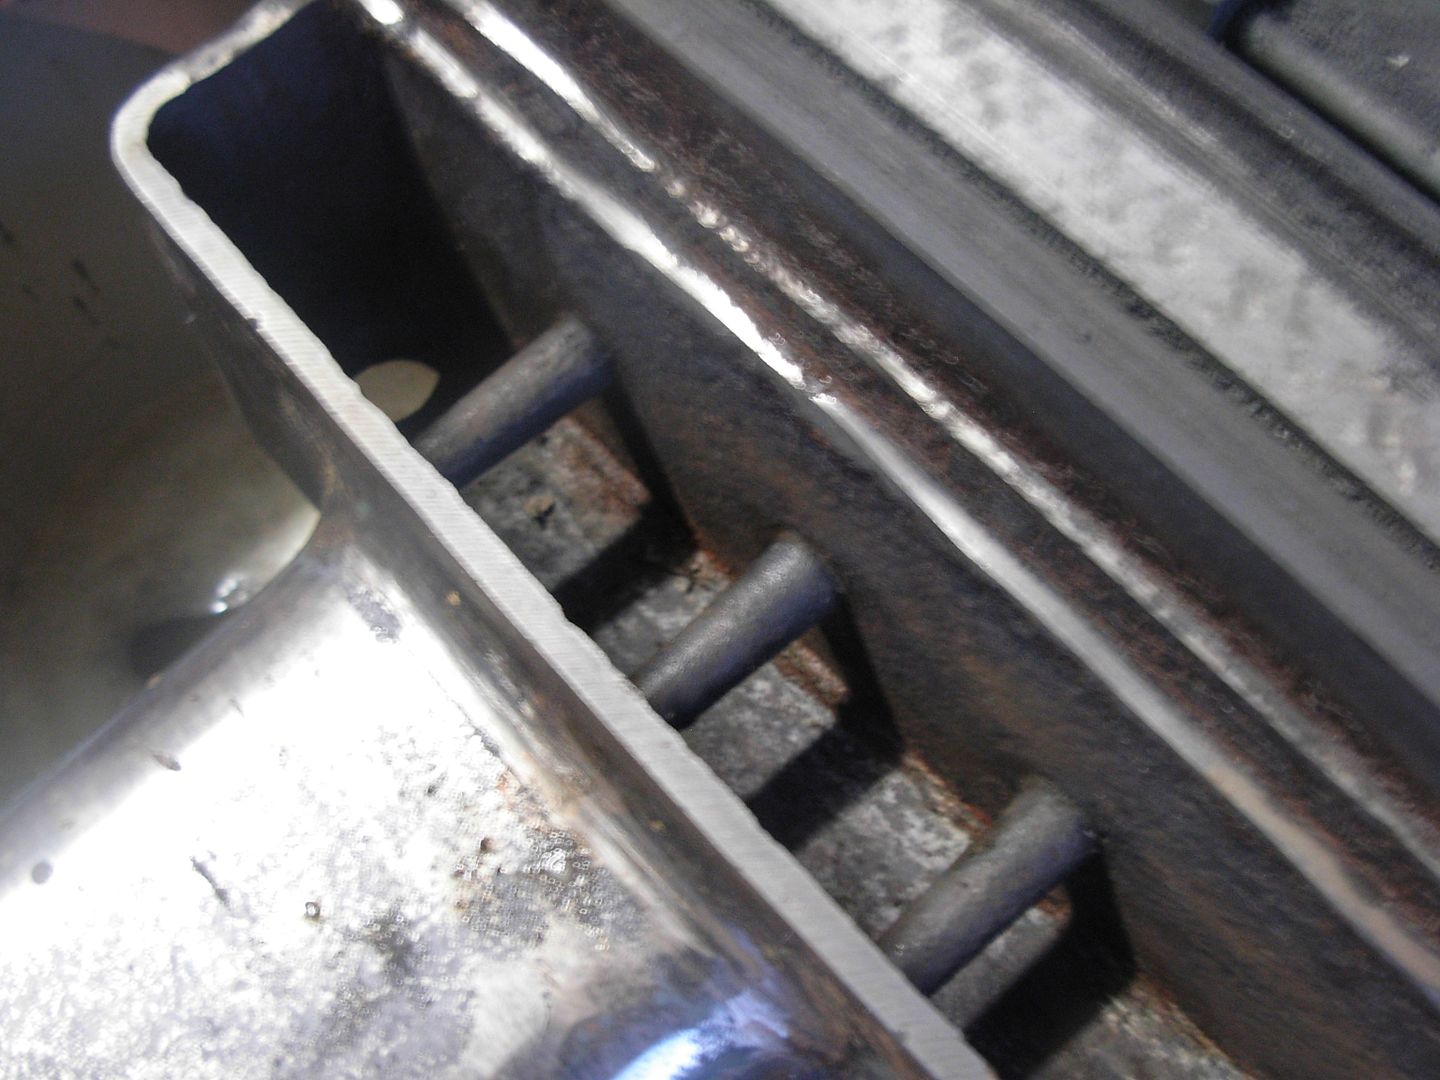
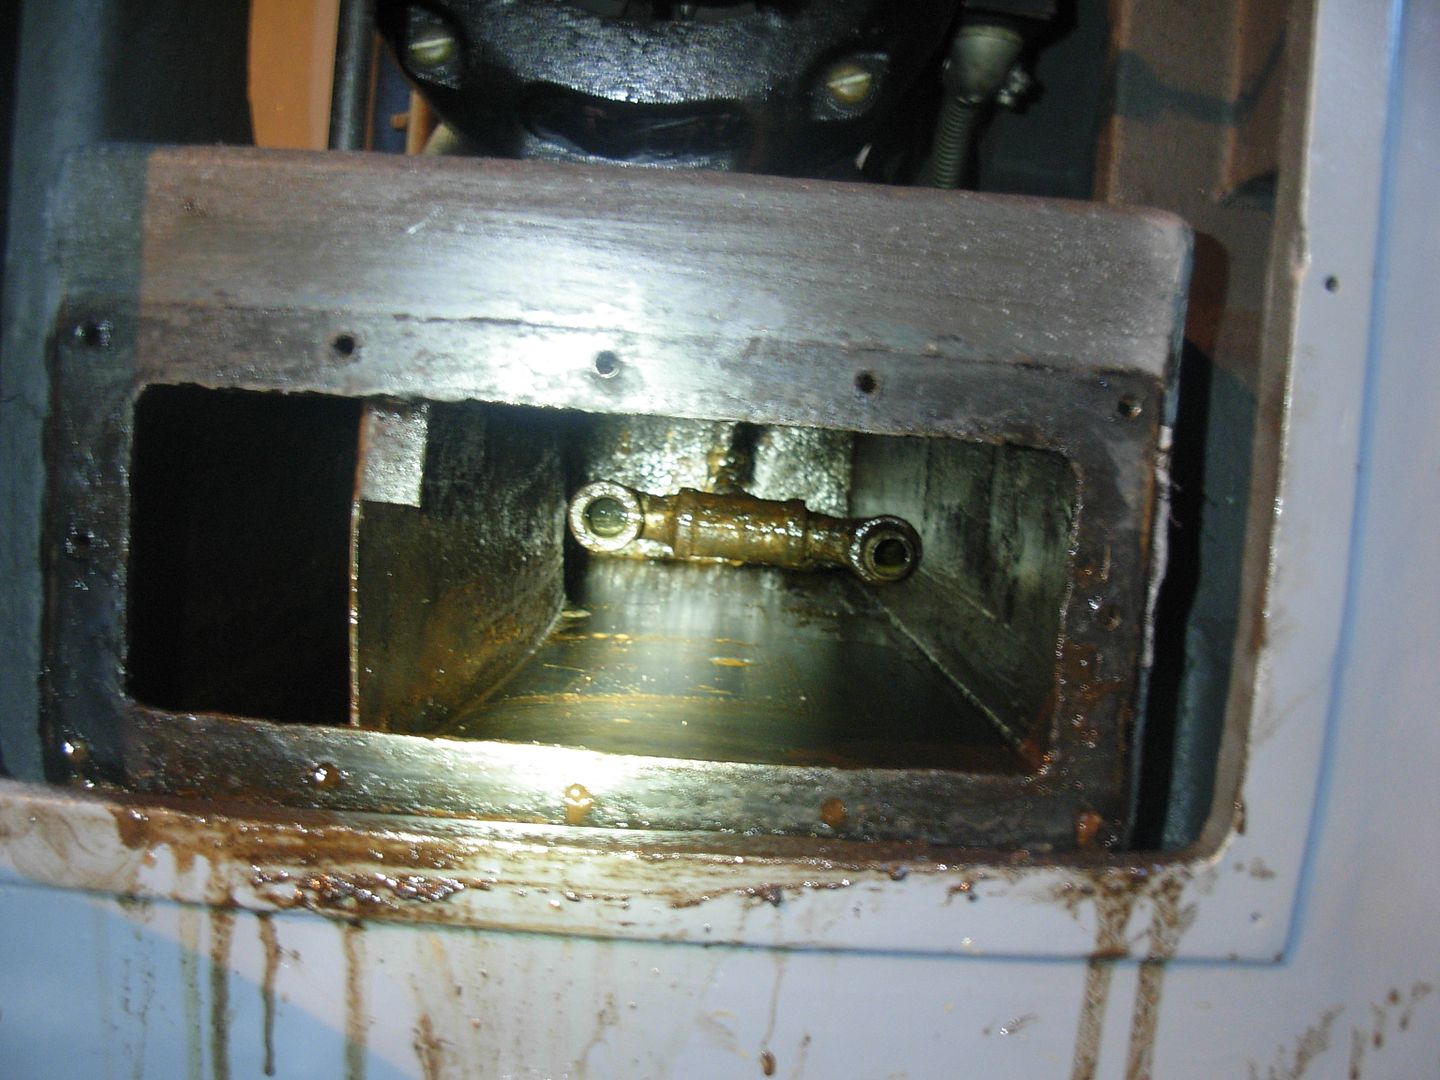
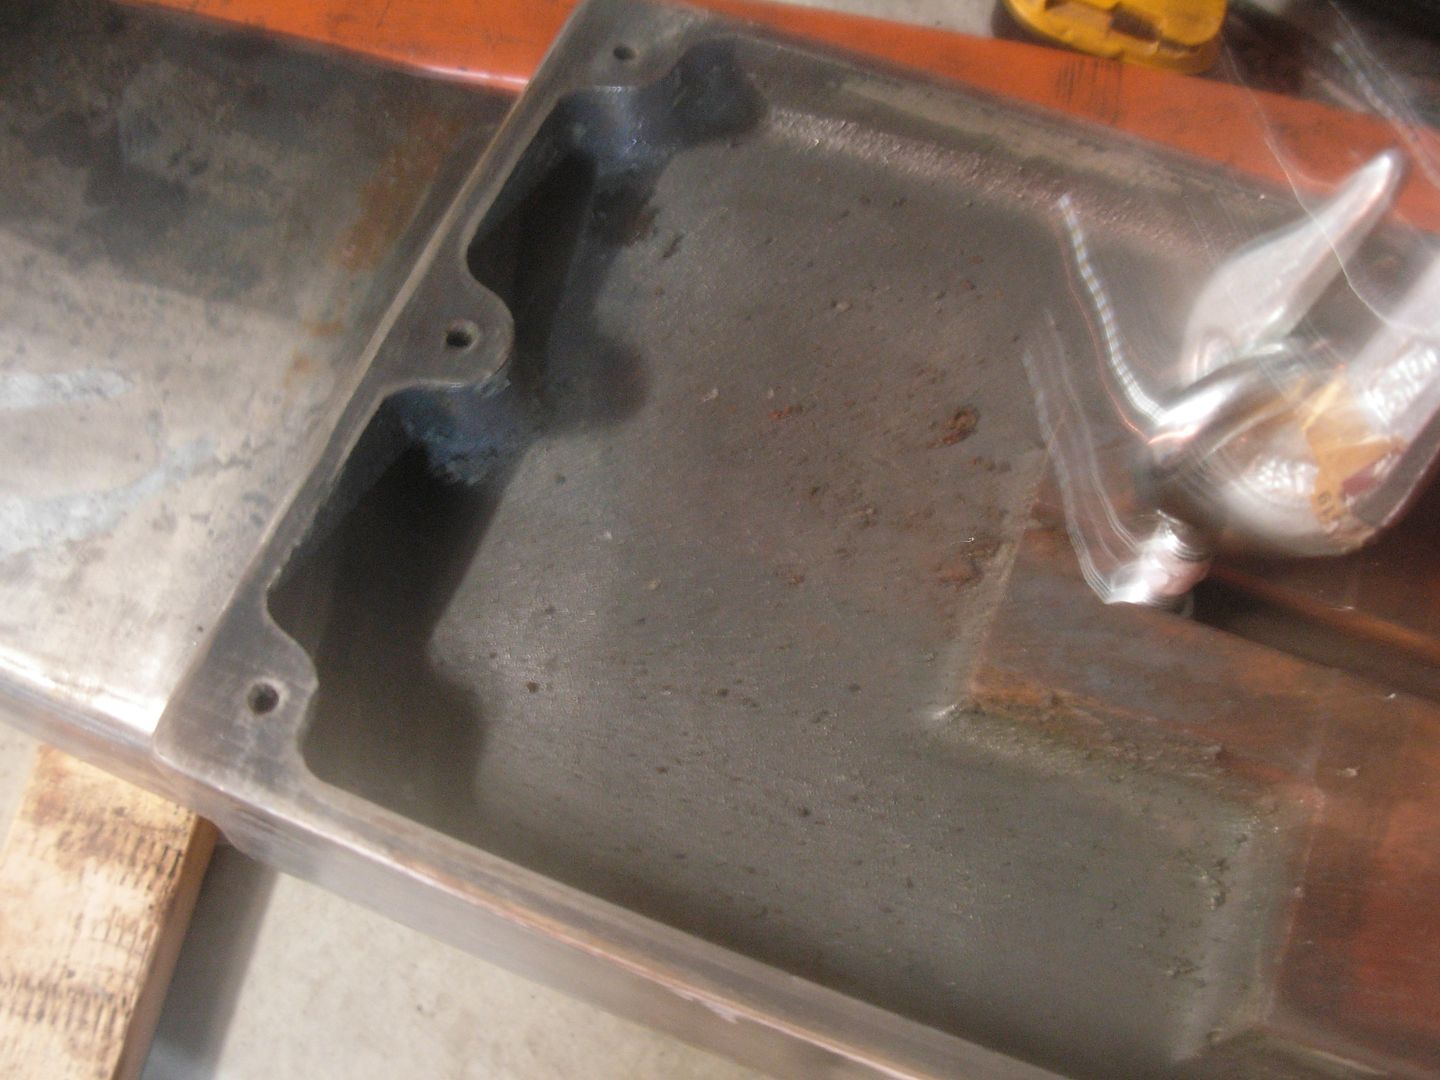
1st look inside the tank with the access door removed
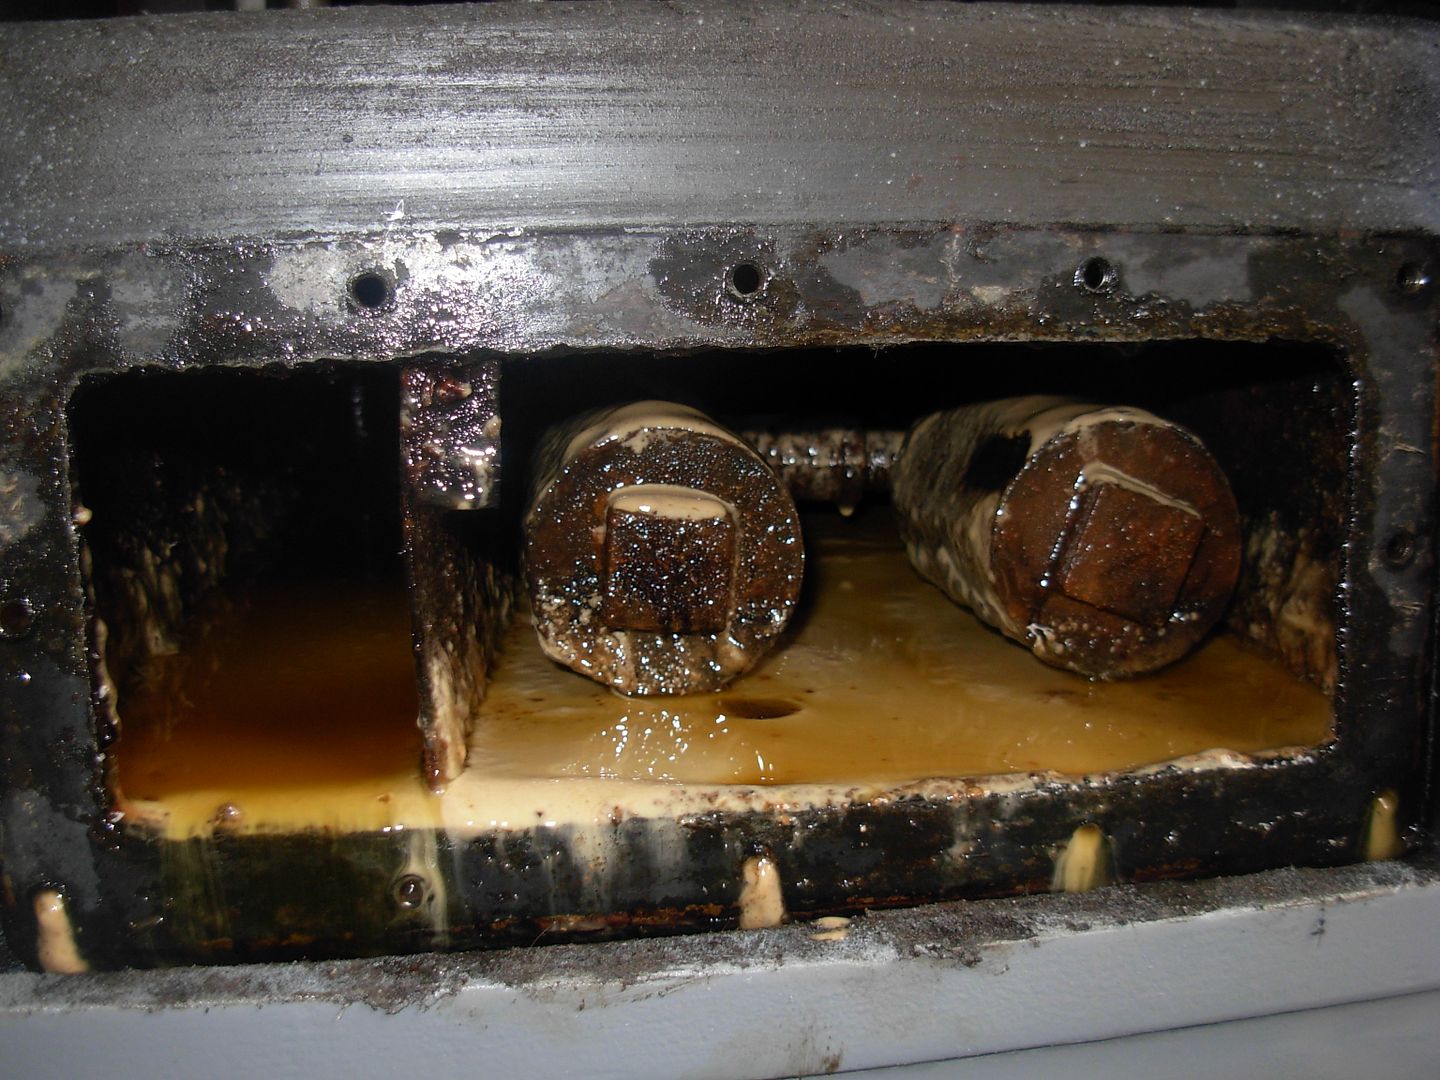
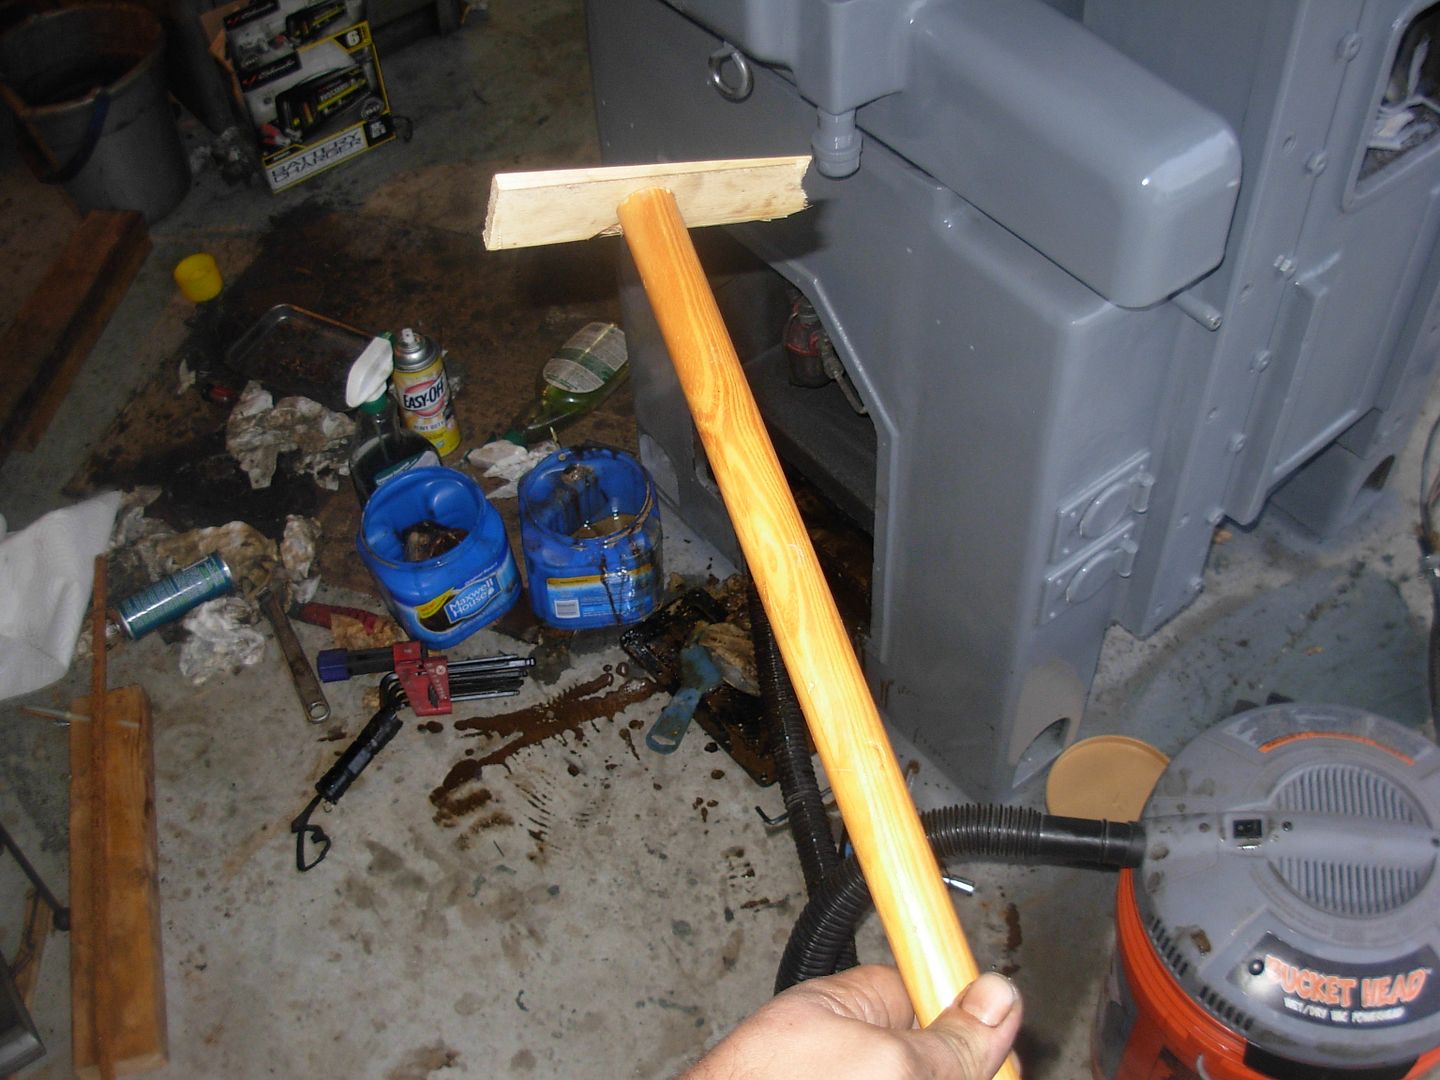
With the drain plug pulled there is still about an inch of sludge in the bottom. I started scooping it out with a little putty knife but that was for the birds. I figured I give my bucket head vac a try a sucking the sludge out and it actually worked fantastic.
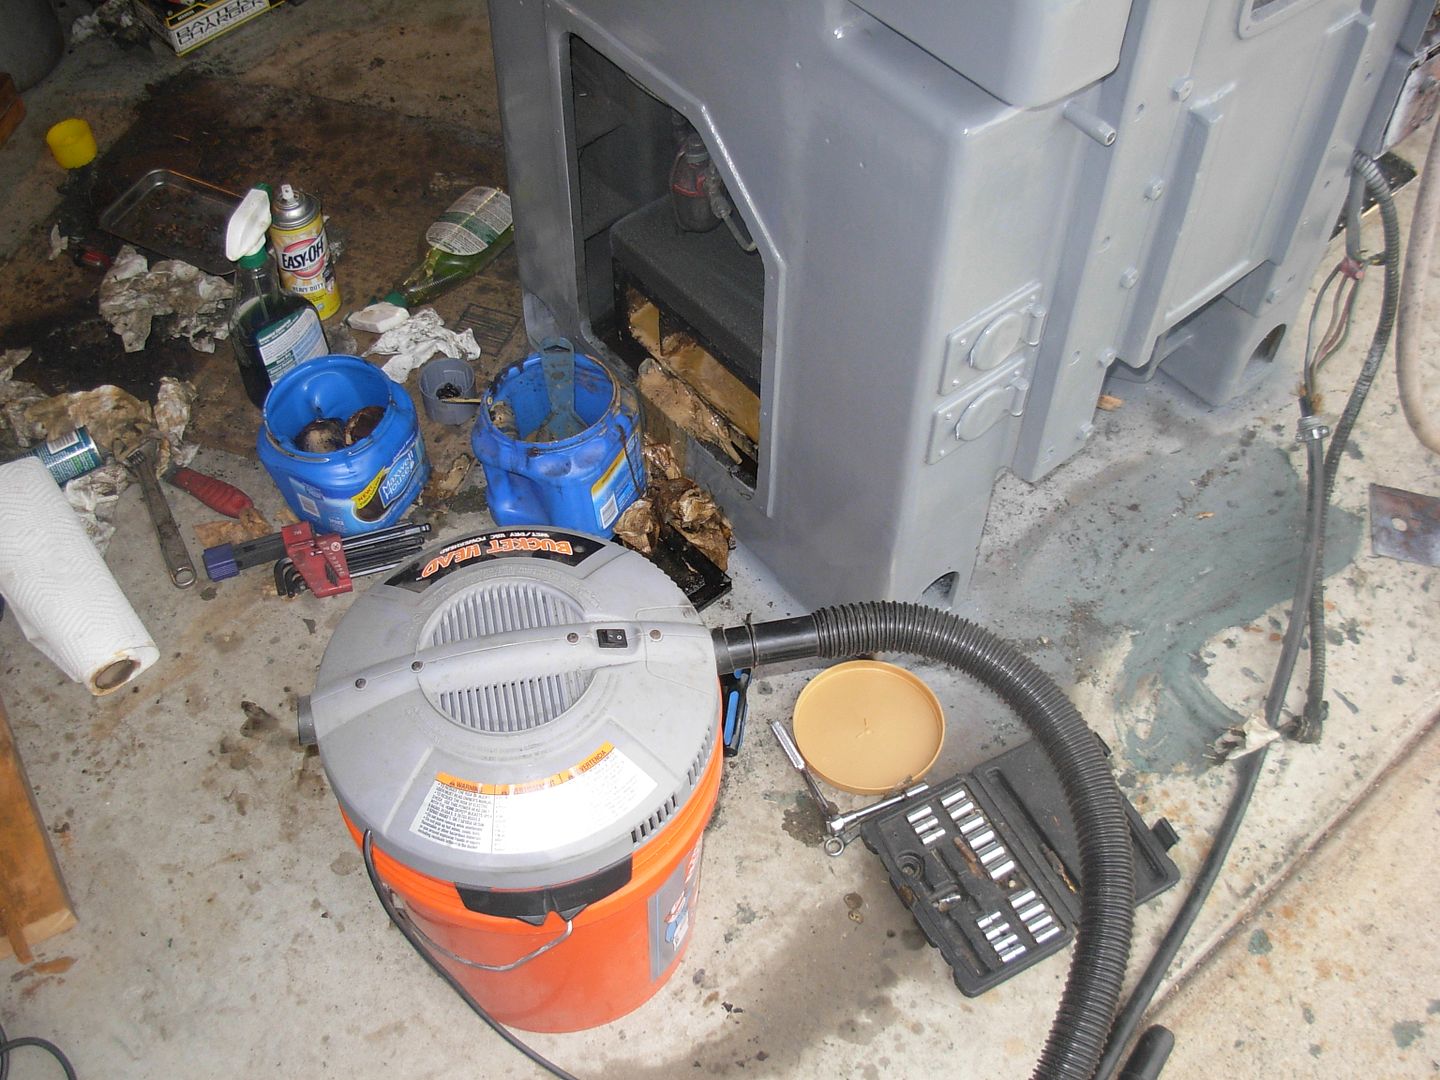
After vaccuming out the bulk of the sludge there was still quite a bit left to go so I made up this little sludge rake to scrape what was left up to the opening so I could get it with the vac
Filters removed and scraped clean
The filters are just steel mesh wrapped around a frame so they could be cleaned out for re-use. I gave them a half hearted cleaning so I could inspect them.
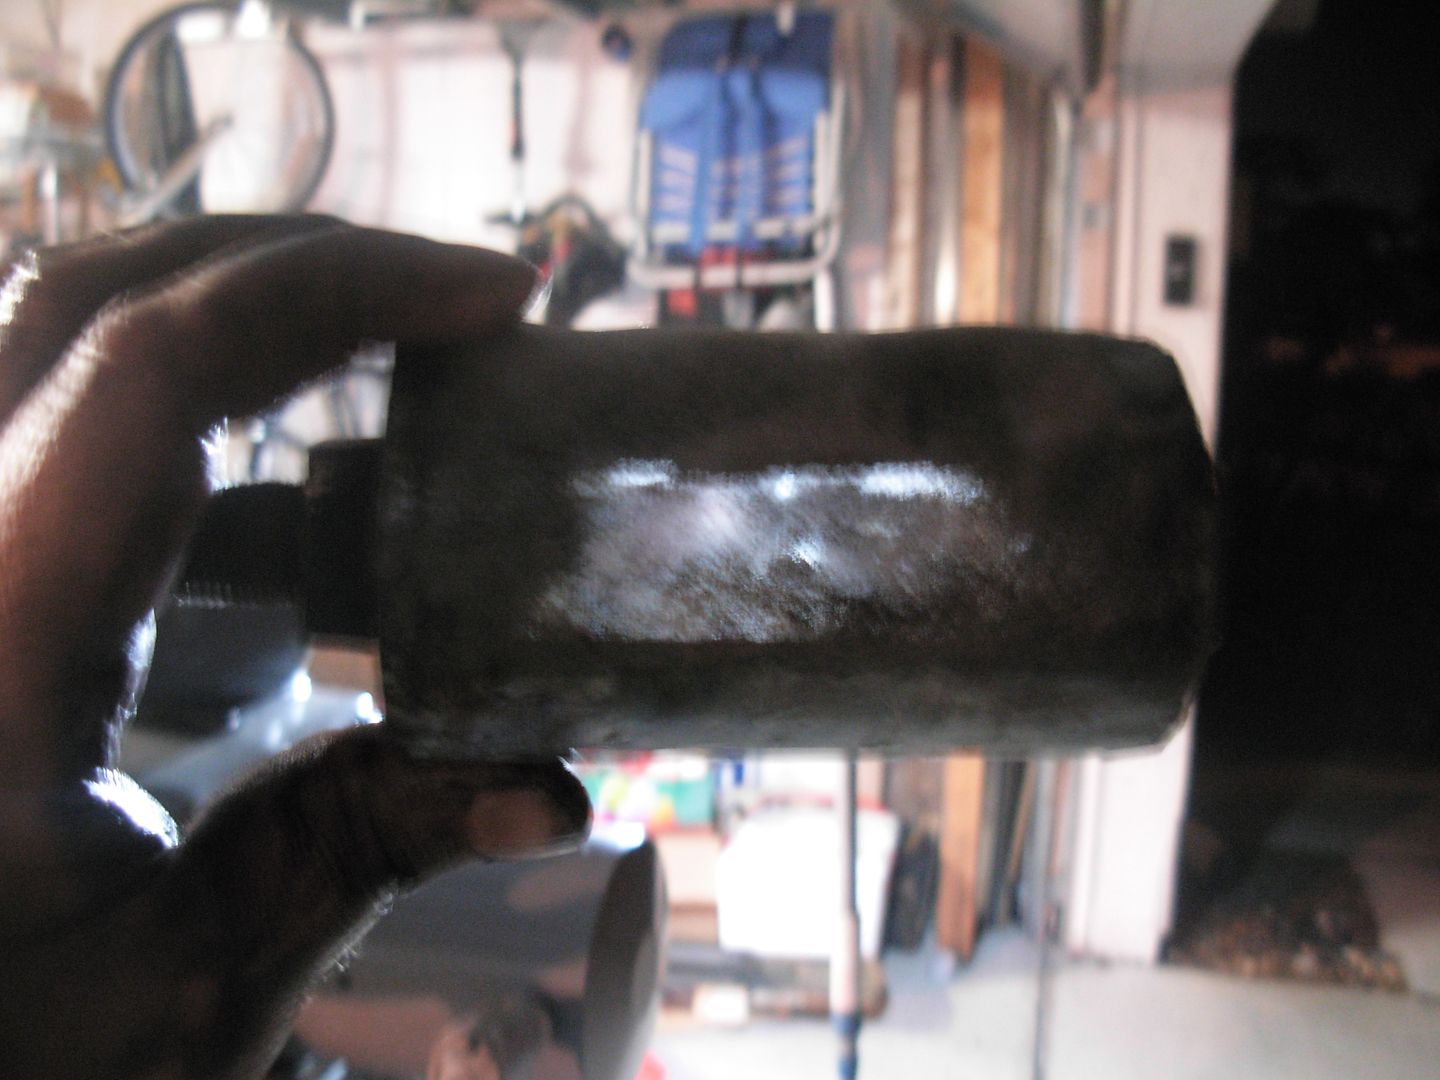
There's a couple places where the screen is pulled loose from the framework and this big tear in one so I don't want to rely on these for filtration. I think I'm going to eliminate these and covert to an external screw on filter.

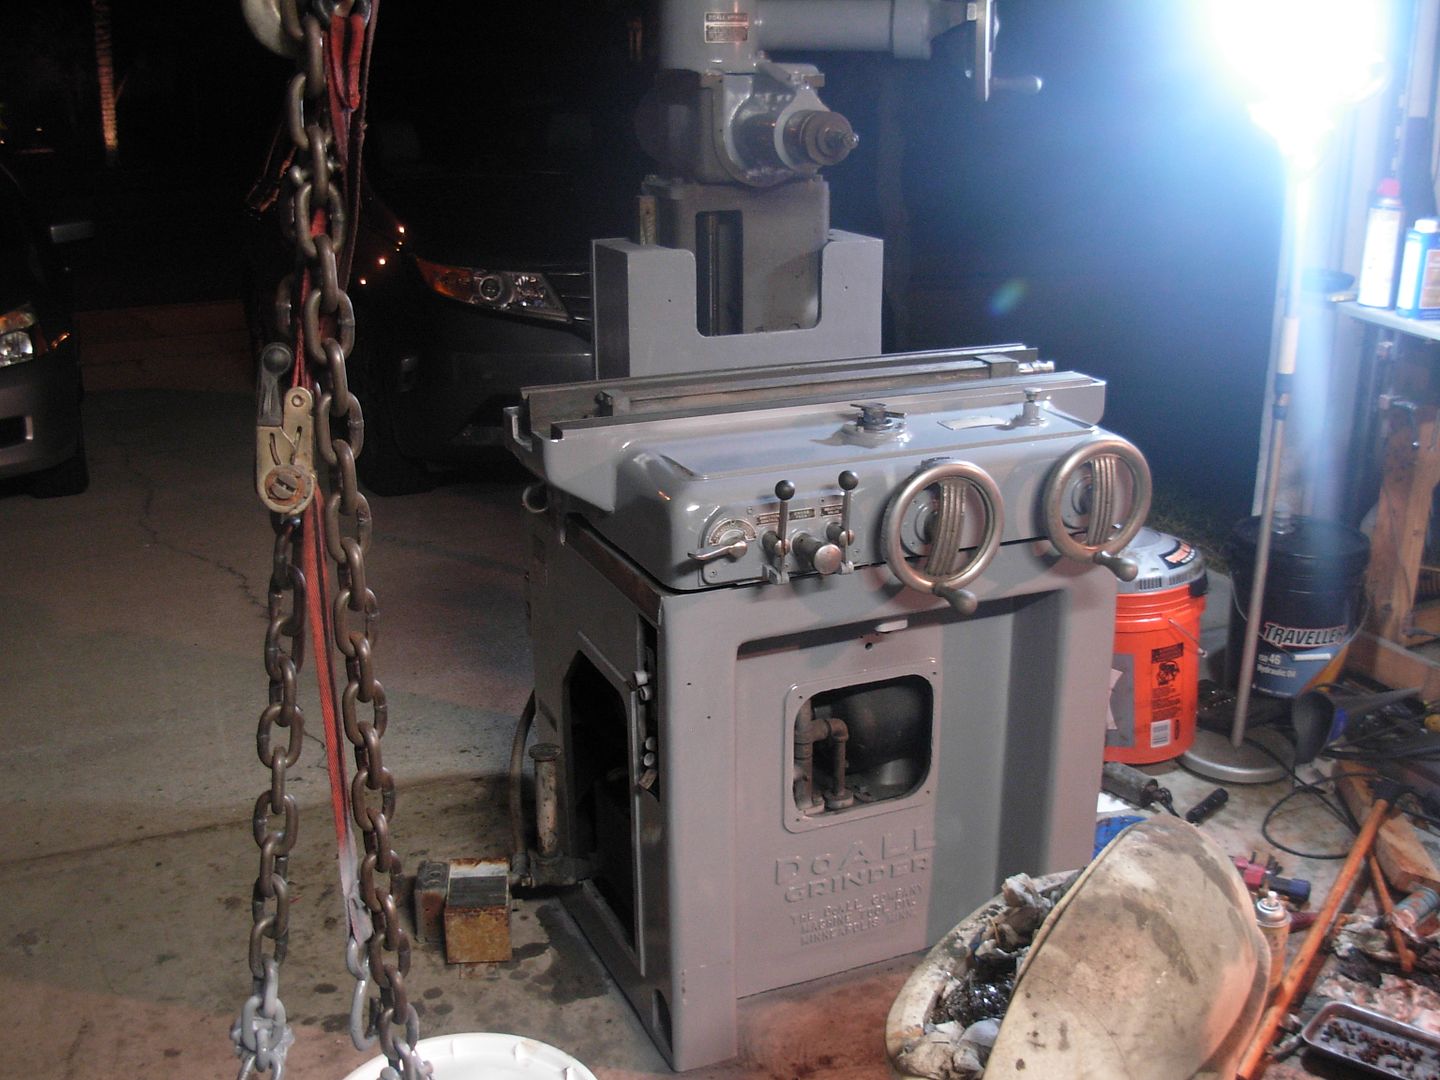
Parting shot for the night
-Josh
I picked up 5 gallons of hydraulic oil today so I could pre-lube the ways with it before reinstalling the saddle. This way I'm not sliding on dry ways before my fresh oil makes it through the system.
Getting it lined back up. It took a little fiddling with to get it in the right spot but I didn't skin my fresh paint too bad.
Back home with the levers, knobs, and handwheels back on
This is how the troff that got the electrolysis looks now
Ready to drain the tank. I've got a plastic under the bed storage container handy just in case I have trouble getting the plug back in. I didn't need it though and had no problem draining it one paint tray at a time
1st look inside the tank with the access door removed
With the drain plug pulled there is still about an inch of sludge in the bottom. I started scooping it out with a little putty knife but that was for the birds. I figured I give my bucket head vac a try a sucking the sludge out and it actually worked fantastic.
After vaccuming out the bulk of the sludge there was still quite a bit left to go so I made up this little sludge rake to scrape what was left up to the opening so I could get it with the vac
Filters removed and scraped clean
The filters are just steel mesh wrapped around a frame so they could be cleaned out for re-use. I gave them a half hearted cleaning so I could inspect them.
There's a couple places where the screen is pulled loose from the framework and this big tear in one so I don't want to rely on these for filtration. I think I'm going to eliminate these and covert to an external screw on filter.
Parting shot for the night
-Josh
Brad Lilly
Moderator and Awards Boss
Good idea on the external filter, they are much easier to change. In my experience screen filters they are hard to find replacements for, which leads to the temptation of using one that is damaged.
Great restoration Josh, your investing some time and effort on this one
Great restoration Josh, your investing some time and effort on this one
Josh Dabney
Moderator
I haven't made up my mind 100% on this filter relocation yet but this is how I'm leaning-
There is a coupler on the suction line between the pump and the pipe that enters the tank. I figure I can eliminate this coupler and go only with an elbow on the pump and on the tank tube and connect hoses to these elbows. Each hose will then connect to my filter housing and I should be looking good.
The part I'm thinking on is where exactly to locate the filter assembly. I've decided I just don't have the required space inside the cabinet for it so what I'm thinking about doing is running the hoses over to the right side of the machine and fabricating a combo bracket to mount above the access door. The bracket would have the filter housing mounted on it and have a simple hanger to hold the electric cord while it's not plugged in.
Of course to do this I'll have to drill two holes through the side of the cabinet for my lines to pass through but think I can handle that no problem, just trying to decide if I want to do that or not.
-Josh
Brad Lilly
Moderator and Awards Boss
I prefer the filters on the return line. The suction line is one line that should not have any restriction at all. Some pumps can fail if they do not have a unrestricted flow of oil, literally pulling there own sides in. Pumps can also create enough negative pressure that can collapse filters depending on the system. It is common to see pumps located below the oil tank so they never have to work for oil. Be careful with the pressure side again filters can fail once they have full pressure applied.
Josh Dabney
Moderator
Brad,
I understand exactly what you're saying only because I saw first hand a filter blow out on a press at a hammer in one time.
However... This hydraulic system isn't as simple as a single cylinder system like a press or log splitter set up. To filter the return side I would have to couple all 3 return lines together to filter all the oil going through the system. To go this route I would have to essentially disassemble and completely rework the entire inside of the cabinet which I'm not going to do.
The only filters in the machine are these 2 strainers from the tank and the $144 special for the way oiler system. There is no actual filtering beyond these two strainers really but I still think it would be beneficial to add one into the system.
I have discovered that these spin on filter housings come in two varieties - supply side or return side. The one I was looking at was of course a return side so I'll have to order it or dig deeper to find it locally. There is a Hydraulic supply place in town so they may be able to hook me up.
On another note I ran across this suction screen which would be a direct replacement for what came out of the machine. Two of these and I'd have basically the same set-up the machine has had for it's whole life
http://www.northerntool.com/shop/tools/product_200466911_200466911
Decisions decisions decisions Hmmmmmm
Josh
I understand exactly what you're saying only because I saw first hand a filter blow out on a press at a hammer in one time.
However... This hydraulic system isn't as simple as a single cylinder system like a press or log splitter set up. To filter the return side I would have to couple all 3 return lines together to filter all the oil going through the system. To go this route I would have to essentially disassemble and completely rework the entire inside of the cabinet which I'm not going to do.
The only filters in the machine are these 2 strainers from the tank and the $144 special for the way oiler system. There is no actual filtering beyond these two strainers really but I still think it would be beneficial to add one into the system.
I have discovered that these spin on filter housings come in two varieties - supply side or return side. The one I was looking at was of course a return side
so I'll have to order it or dig deeper to find it locally. There is a Hydraulic supply place in town so they may be able to hook me up.On another note I ran across this suction screen which would be a direct replacement for what came out of the machine. Two of these and I'd have basically the same set-up the machine has had for it's whole life
http://www.northerntool.com/shop/tools/product_200466911_200466911
Decisions decisions decisions Hmmmmmm
JoshJosh Dabney
Moderator
Just one lonely pic today.
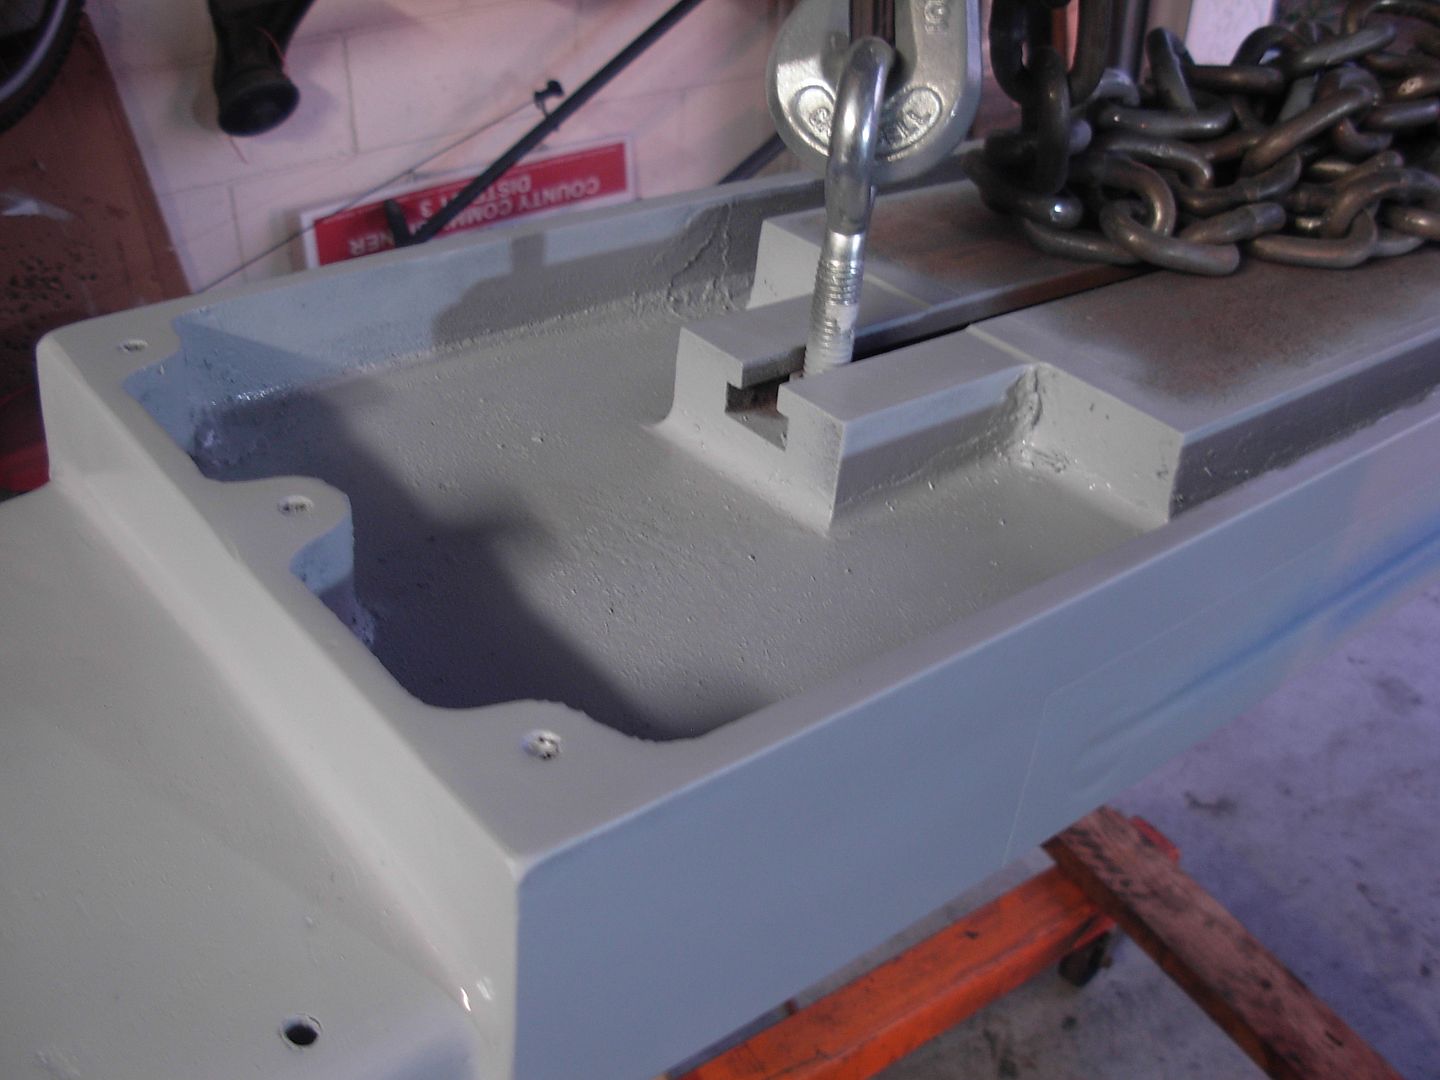
I got the entire table stripped to my liking with the angle grinder and flap wheel with the exception of the depressed area surrounding the chuck pad. There's not enough space down in there to get the flap wheel in and it seems they got really good paint adhesion at least in the floor part of this area. I did a quick round of oven cleaner and scraping to get the loose stuff but I also hosed it down heavily with the oven cleaner and left it overnight. It looks to be doing it's job so hopefully I'll get it stripped, primed, and painted tonight.
Most of the real estate was accessible to the flap wheel and the inside of the T-slots aren't in too bad of shape with minor surface rust only so I decided to skip the electrolysis on the table. I've got about $40 worth of supplies I bought to build a mega sized tank that I'm gonna return which is going to cover the bulk of the cost of replacing the suction screens with new ones.
-Josh
Josh Dabney
Moderator
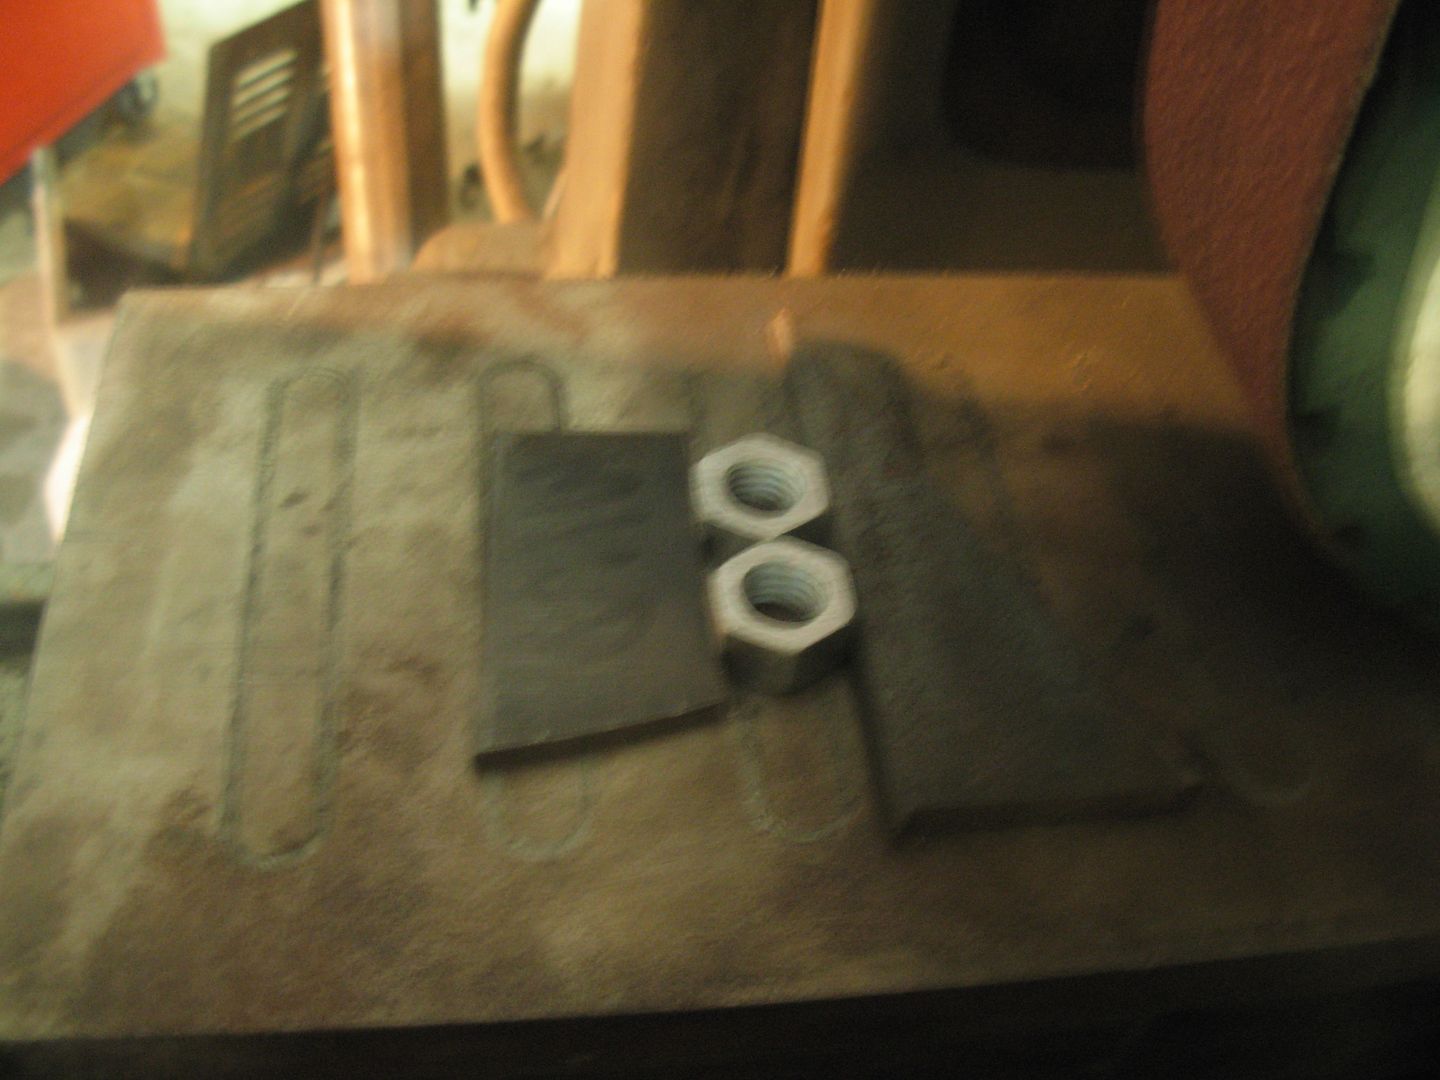
Grinding a couple 1/2" nuts down about .080 so they'll fit in the T-slot on the table. Going to use eyebolts to attatch the table to the hoist.
Got everything stripped and rigged on the hoist for cleaning and prime/paint

The overnight soak with the oven cleaner did the trick on the stubborn paint
Cleaned, taped off, and primed
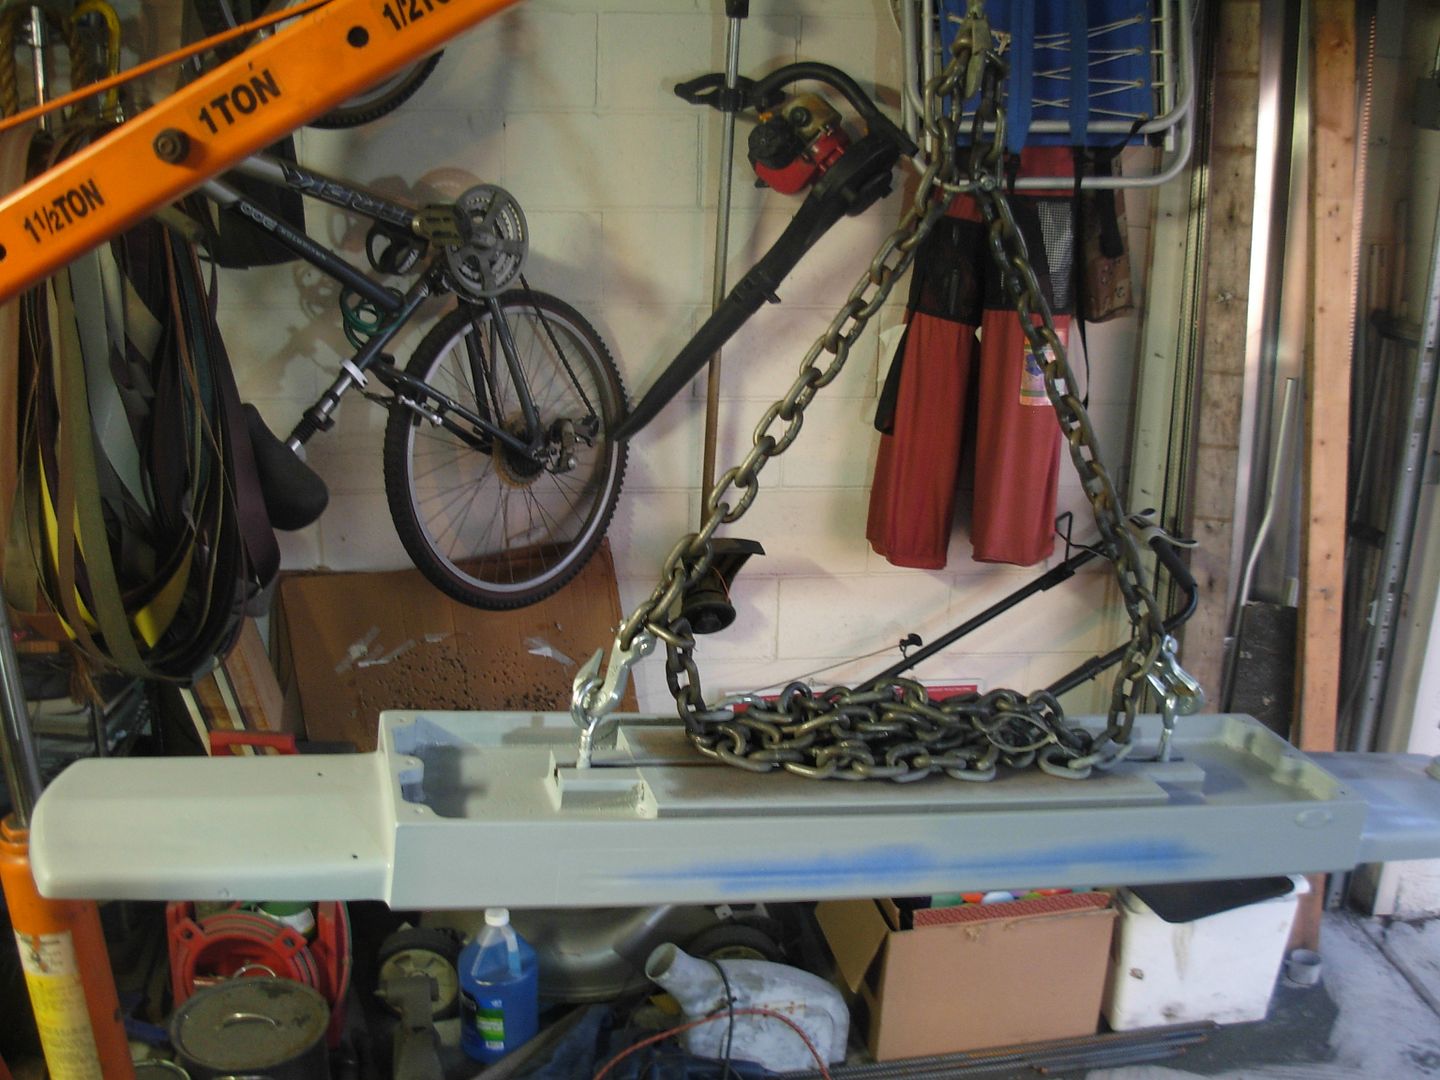
I rigged the table on the lift for painting so I could set it down in it's place on the saddle once painted
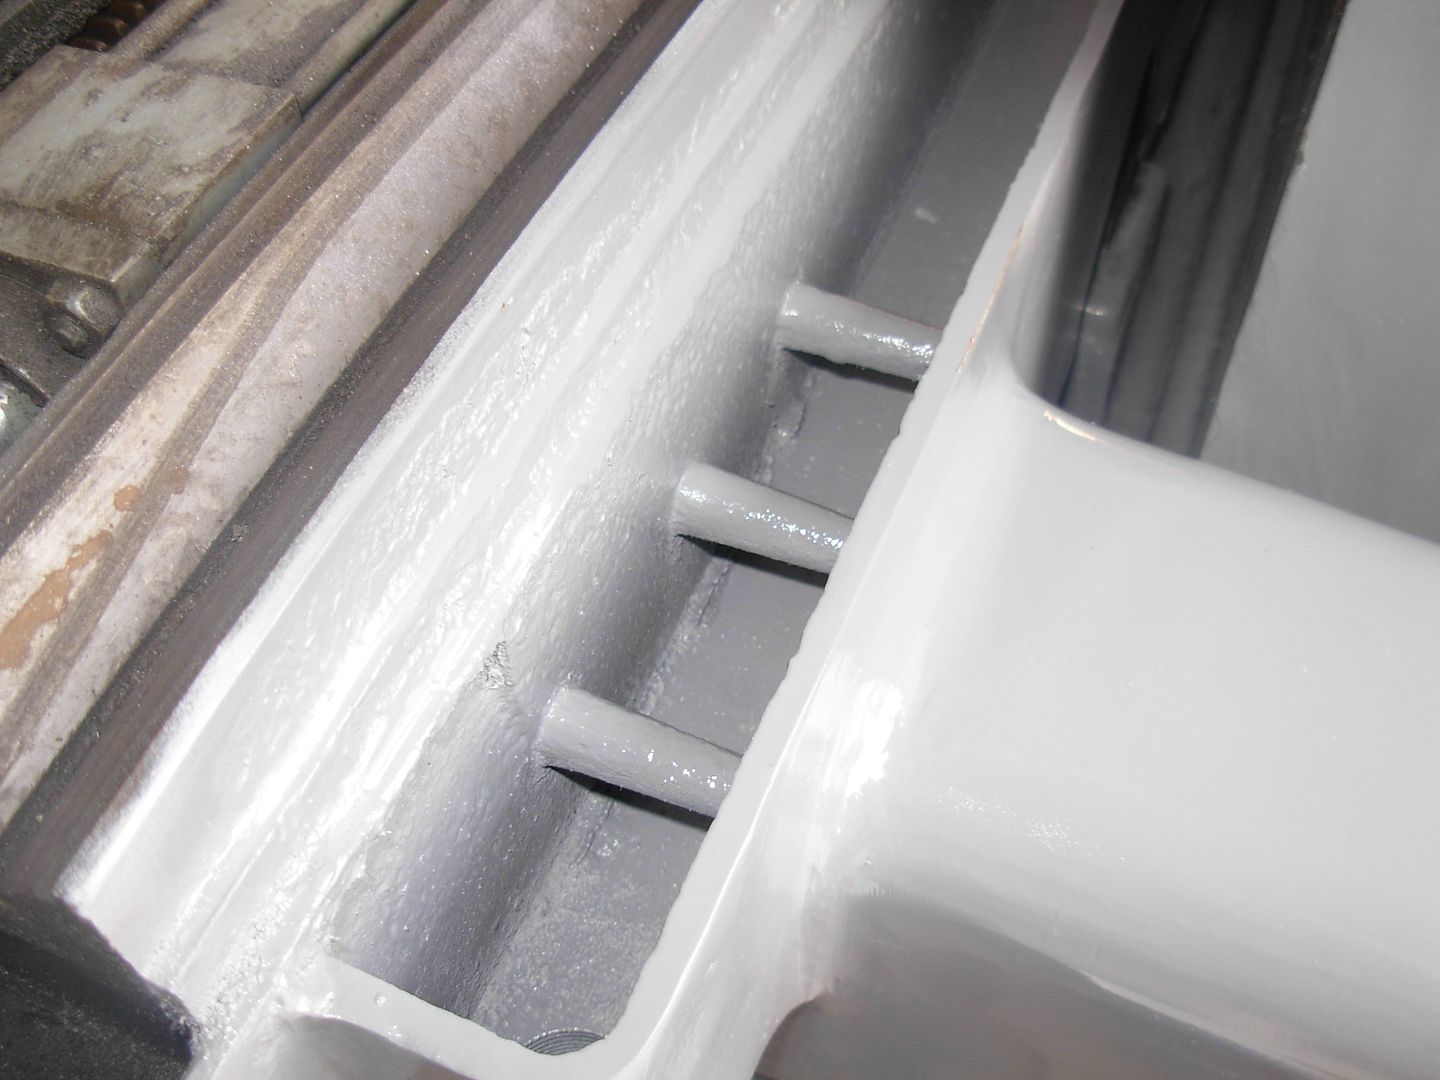
Got the area around the trip dogs T-slot cleaned up nicely. Went over it lightly with the angle grinder and did the final finish with a hand held belt sander
Just had to set the chuck on the table to see how it looked

I'll be tied up with some side work for the weekend but I'll come away with enough cash from that to grab the stuff I need to finish up my rehab including the belt conversion
I've made up my mind to just go ahead and replace the two suction strainers inside the tank. As Brad mentioned you don't want to reduce the flow to the pump on the suction side and the suction side filters are the same particulate rating as the strainers. (150 micron) The only benefit I can see to converting to a screw on filter would be the ability to change the filter without draining the tank. For $20 each I'll order up a couple replacements for the ones that came out.
-Josh
Got everything stripped and rigged on the hoist for cleaning and prime/paint
The overnight soak with the oven cleaner did the trick on the stubborn paint
Cleaned, taped off, and primed
I rigged the table on the lift for painting so I could set it down in it's place on the saddle once painted
Got the area around the trip dogs T-slot cleaned up nicely. Went over it lightly with the angle grinder and did the final finish with a hand held belt sander
Just had to set the chuck on the table to see how it looked
I'll be tied up with some side work for the weekend but I'll come away with enough cash from that to grab the stuff I need to finish up my rehab including the belt conversion
I've made up my mind to just go ahead and replace the two suction strainers inside the tank. As Brad mentioned you don't want to reduce the flow to the pump on the suction side and the suction side filters are the same particulate rating as the strainers. (150 micron) The only benefit I can see to converting to a screw on filter would be the ability to change the filter without draining the tank. For $20 each I'll order up a couple replacements for the ones that came out.
-Josh
Last edited:
Mike Martinez
Well-Known Member
:35::35::35::35::35::35:
Amazing work!
Amazing work!
Bruce Bump
Forum Owner-Moderator
Thats a "Robust Beauty"
Can't wait to see it operate.
Can't wait to see it operate.
Josh Dabney
Moderator
I've hardly had any time at all to work on her lately. I did get a bunch of the dust covers and access doors stripped but still need to prime and paint those and take care of some others with electrolysis.
I also still need to order the suction screens so I can get her back under power.
My side job has turned into another side job and two potential others. VERY difficult to turn a cold should to the prospect of making some cash Unfortunatle it's eating up all my shop time though.
Barry, Yes I will be converting to belts straight away. I'm going to build the conversion myself once she's up and running again.
Take care guys !
-Josh
I also still need to order the suction screens so I can get her back under power.
My side job has turned into another side job and two potential others. VERY difficult to turn a cold should to the prospect of making some cash
Unfortunatle it's eating up all my shop time though.Barry, Yes I will be converting to belts straight away. I'm going to build the conversion myself once she's up and running again.
Take care guys !
-Josh