Edit:
You posted while I was trying to get this all worked up too post! As soon as I saw your post, I have this post get rid of the regular BBQ pressure regulator the red one if is a high pressure regulator can't work properly because the small one is a low pressure regulator that won't generate enough pressure!!!!
Lets see if we can get you up and running before you start cutting apart and reassembling! Like Rudy says there is no need for two pressure regulators. If the red one is a high pressure regulator it can be run this way.
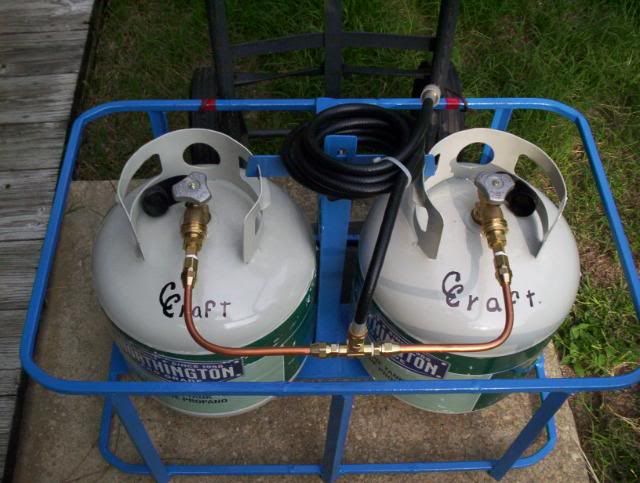
This is a rig I made up to manifold two small 20 lb. propane bottles at once to avoid freeze-up on the bottles. The hose in the pic hooks directly to the high pressure regulator just before it enters the forges gas lines. some of the pics were taken while still finalizing everything on this forge and I don't think it shows the regulator in the pic after the PID and gas valves were installed into the system. I don't store my propane tanks in my shop with all the grinding and welding I do their, they reside in a separate area until I want to fire the forge. both for safety and lack of space in my garage/shop. That blue rack I built if you look closely is sitting on a dolly. I can run up under it slap a bungie around the rack and no stress or strain to wheel it anywhere!
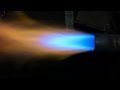
The picture of the flame in your forge looks close to what it should look! One thing that stands out is how big the flame is at the end of it. If you have ever used an acetylene torch you will understand this next explanation! You can hot up the flame on a torch by pouring the acetylene to it, however when you add the air to get the adjustment right the end of the flame will adjust out to almost a point.
I am not sure about your burners themselves the flame is close in color but that is a huge flame at the end IMO! Which makes me wonder about the design of the burner you are using!
Take a look at these sites I am posting here and some of the info within them!
http://kcrucible.wordpress.com/2010/07/28/the-propane-burner/
http://ronreil.abana.org/Hybrid.shtml
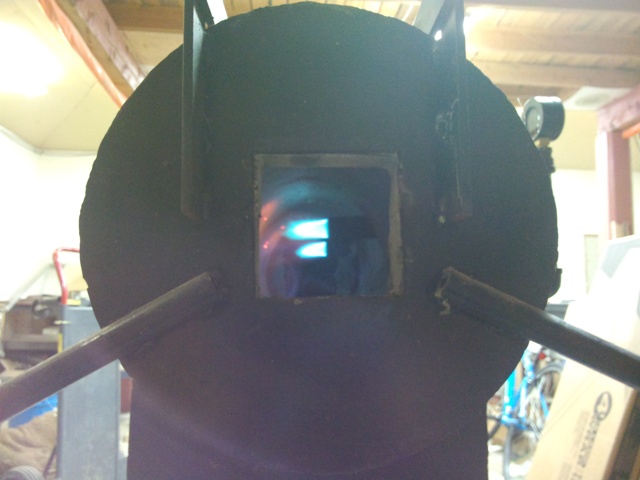
Here is a picture of T-Rex burner in use
As you will see the flame is cooking, however it is not tuned exactly right, notice the yellow at the end of the flame, that indicates too much oxygen or too much pressure on the propane! When you dial it back till the flame is almost all blue their is no waste of propane or the heat being created!
As for the vortex effect, in other words a swirl effect,
(basically eliminating hot spots) , you will eventually have to rip out and re-weld the tubes your burner enter the forge through. This will mean either a total re-lining or at the very least some patch work around the new burner tubes.
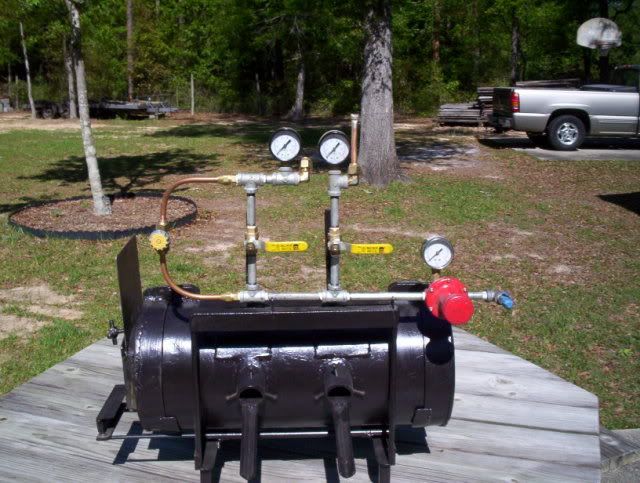
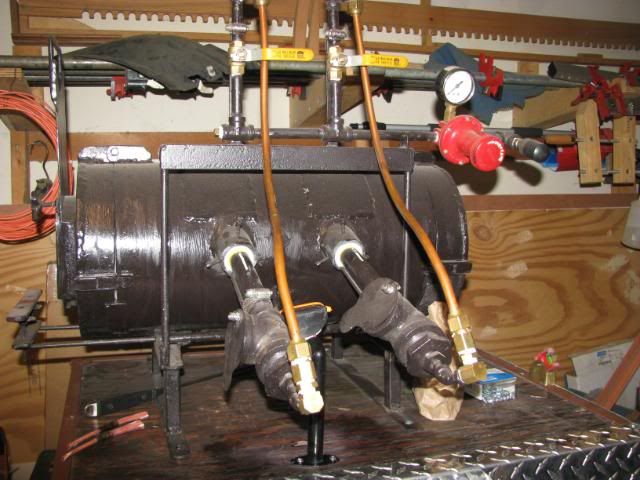
This was my original set-up,
if you
look closely right above where the burners are is where I originally had the burner tubes welded to the forge's outside, their is a patch welded on the outside of the forge above each burner. There were set-up just like yours 90* into the forge. Like I said MS Ed Caffery, was the one that clued me into what was going to happen with the hot spots and how an angled burner will create a vortex. This design was modified about three time before it got too where it is now. Even the plumbing is different in this photo!
I am not advocating that you to tear up your forge to fix this for right now! You can work with what you got for the time being! When you are heating a piece in the forge you may have to keep it moving around the forge to keep the piece from getting too hot in one area of that particular piece of metal
Your problem lays either in the the
design of your burners, or the fact that the forge is so large that the fuel to air ratio is off. IMO
There are many designs for burners out their and many variations of those designs! Just because you have a flame coming out of it doesn't mean it is a good design either if you can't get the adjustment out of the burner to get heat it ain't worth two cents.
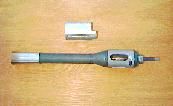
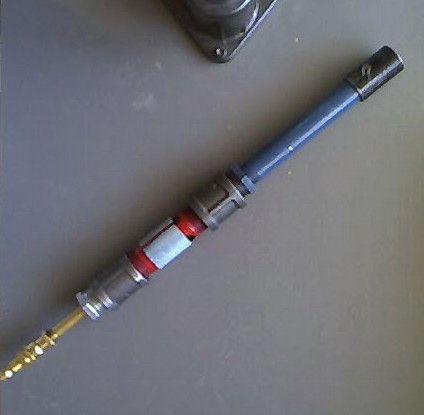
What Rudy was talking about is the key the air choke, look at this burner. It is a T-Rex.
Notice the slot in the back of the burner, that is the air choke for that particular model, The piece laying center of the picture is the choke plate it slids onto the burner and as it rotates around the burner it opens and closes that slot which regulates the air supply to the burner!
Here is a pic of a mongo burner,
look closely and you can see the edge of a round hole that has been drilled and the silver part slides up and down to accomplish the air regulation.
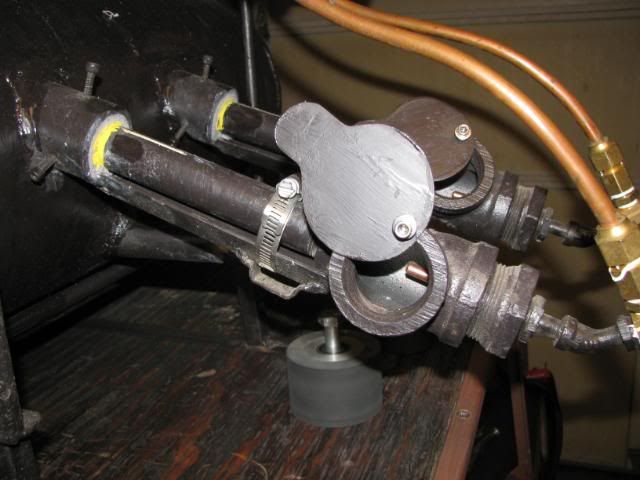
This is my burner I use a choke plate as you can see in this pic, the amount that it is opened and closed regulates the air flow.
So there is a lot of ways to make adjustment here on my burner, pressure, air flow and the burner I use can be adjusted also by how far up and down the tube it slides.
There is hours of reading in some of these threads on burner design and tuning!
http://ronreil.abana.org/design1.shtml
I think your first priority since you didn't build this forge yourself is too figure out exactly how the burner is constructed! I hope some of this info helps and its OK if you are feeling a bit overloaded with information but it kind of like trying to tell someone how to fix an engine problem when you don't know exactly what is under the hood! Figure out what your burner is and then advice can become more specific too your needs!

.jpg)
.jpg)
.jpg)
.jpg)


")