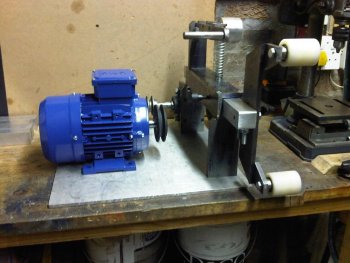
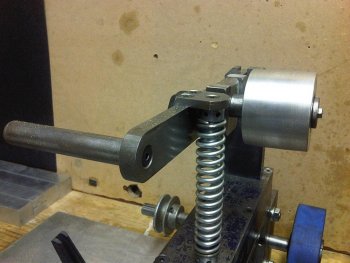
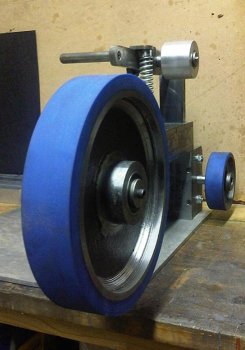
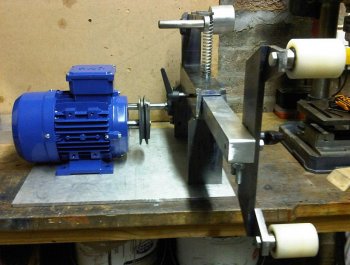
KMG Grinder build in progress

Hi Everyone

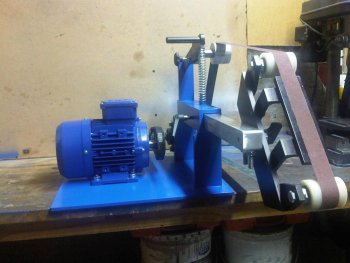
I was lucky enough to spend the morning yesterday in his engineering workshop with one of the guys from my knifeclub, he made up a stub axle for the "contact wheel", finished the drive shaft off by cutting the keyways, and made some end caps for the stub axles.

I was able to use one of the Bridgeport milling machines to drill and precision ream the toolarm for the contact wheel stub axle. It was a pleasure to use equipment so precise, compared to a small home drill press I have been working with till now.
I originally tried making the contact wheel toolarm during the past week however since my small drill press is not capable of drilling holes larger than 12mm, I was forced to used the 20mm holesaw, Unfortunately it was not able to go all the way through the 38mm aluminium, getting about halfway through, before getting bogged down and stopping, using the Bridgeport was an absolute pleasure - if only I had the budget and shop space to accomodate one.

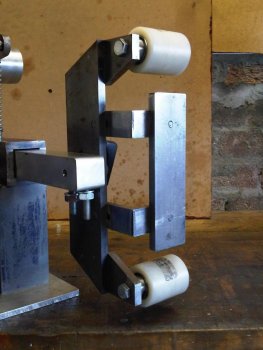
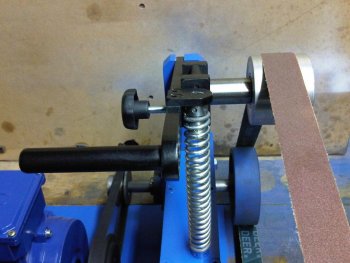
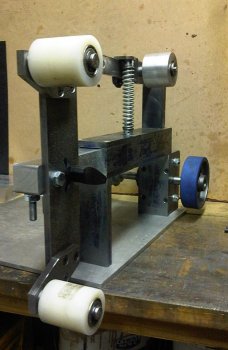
I am finished with the platten work surface, and am currently putting together an adjustable work rest for the platten. I still need to source a short drive belt and will then fit the motor and VFD (need to find an enclosure for the VFD), and will have to make some adjustments to the tracking wheel assembly, unfortunately it doesn't have enough movement in one direction, so i need to insert spacers or re-make the tracking mount, as well as extending the length of the tracking wheel stub axle to get the tracking wheel centered with the contact and drive wheels.

Bye for now
Cheers
Rick

KMG + platten.jpgKMG + motor testfit3.jpgKMG tracking wheel.jpgKMG + Wheels1.jpgKMG + motor placement 1.jpg
 
Last edited:
I recommend getting one of these "Power Twist Link" belts by Fenner Drive. They can be adjusted to size, and they do a fantastic job of reducing vibration that standard belts seem to exacerbate.

power%20twist%20big.jpg
 
Hi ARCustom

Thanks for the recommendation, I have found a local supplier for Fenner drive - Power Twist link belts, I will go there tomorrow and see if I can get one to fit.

Bye for now
Regards
Rick
 
Hi Everyone

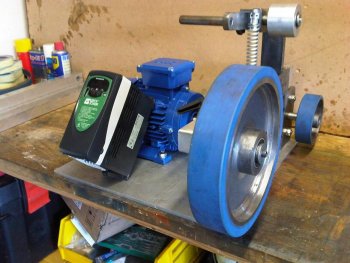
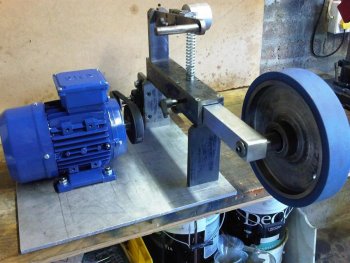
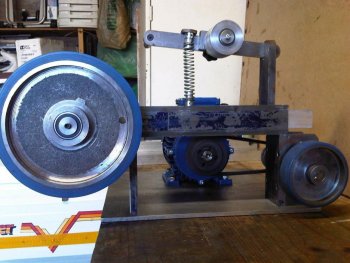
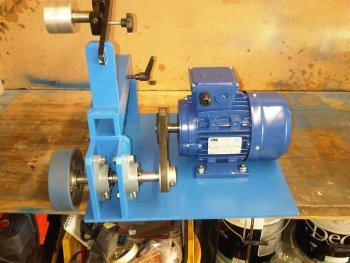
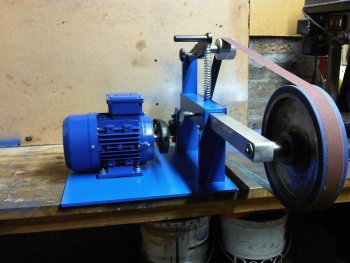
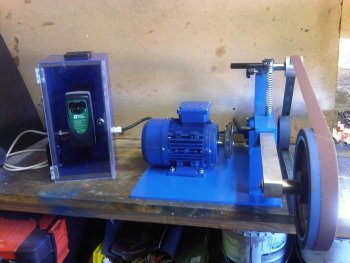
I wish I was able to tell you all that it is finally finished, however my day job interfered with my grinder build schedule and as a result I haven't done much this week on the grinder, I managed to mount the motor, and fit a drive belt (as you can see I didn't get one of the Powertwist link belts yet - I couldn't believe the price, a normal belt was R12 ~ $1.70, whereas the Powertwist belt was R689.00 ~ $98). I will have to see how the normal belt works out first.

I also finished the flat platten (although I'm not sure if the platten surface itself should be longer.

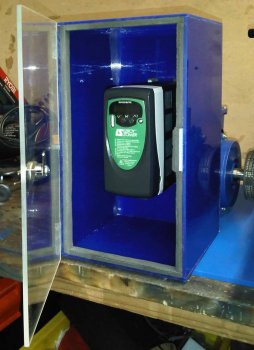
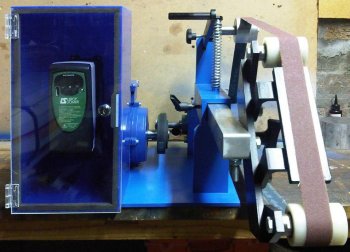
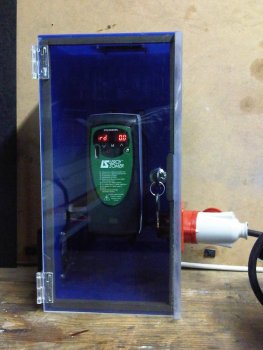
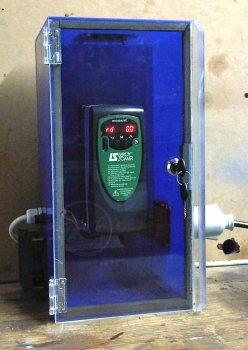
I am probably going to make a housing for the VFD - I have been to a few electrical wholesalers and the only enclosure I could find which was deep enough to fit the VFD (205x85x160mm), is about three or four times it's size(440x320x200mm), and costs almost as much as I paid for the VFD itself - for a plastic box!! I'm pretty sure I will be able to make one out of plexiglass. You can see the VFD in the second picture below. I am going to try getting this done this week, as I am now starting to get tired of building the grinder, and want to be able to use it and get to making knives.

Other than the VFD enclosure, I still have to get a new tracking wheel stub axle, to get the tracking wheel aligned with the drive and contact wheels, and then i will have to sand and paint the whole thing to prevent the rust which appears very quickly here at the coast.

KMG Flat Platten.jpgKMG + Motor + VFD + Contactwheel.jpgKMG + Motor1.jpgKMG + Motor + contactWheel.jpg
 
$98 for a power twist? I think I paid about $25 for 3 feet of the stuff from USAKnifemaker.com...

That's a BIG difference.
 
Hi ARCustom

I'm not sure why the price for the powertwist belt is so high, the exchange rate doesn't explain it, maybe "middle-man" markup? I tried to find if there are alternative manufacturers to Fenner who make similair link belts, as there seems to be only a single distributor of the Fenner belts in SA (maybe this is why the price is high), unfortunately with no luck.
I think I will just have to order from USAKnifemaker too - although I might wait until my next US trip, to save on shipping costs, which can also be pretty high to South Africa.
 
Looks great, hoss! That's almost exactly how mine turned out, except I didn't go with a VFD and still haven't finished the flat platten.

To enclose your VFD, think outside the box. Lunch pails, ammunition cans and small tool boxes can be adapted, and a bit of paint will make them blend right in with the rest.
 
Hi Everyone

A quick update on the build - I am currently busy making a perspex box for the VFD, despite a lot of searching I was not able to find a ready made enclosure which would fit the VFD - without being Grossly oversized, so the perspex option became reality. It was fairly cheap to have the perspex cut to size (accurately) and the box is currently halfway assembled and I am waiting for glue to dry.

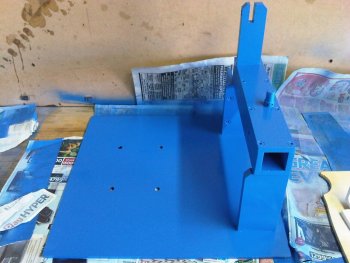
I had the new Tracking wheel stub axle made, and it is now fitted, along with a longer tracking arm tension spring. After finishing off these items I stripped the grinder down into it's parts, sanded it, primed and painted. It has subsequently been reassembled. And the last phase is now underway - making the VFD enclosure then mounting it, wiring the motor and programming the VFD. Then the grinding can begin (at least when I get some belts it can - I need to order some next week)

See below for some up to date pics

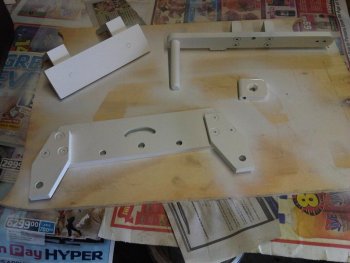
KMG - painting 1.jpgKMG Painting 5.jpgKMg-painted-trackingwheel.jpg
KMG painted 3.jpgKMG-Paint-platten2.jpgKMG-paint-contactwheel1.jpg
 
Hi Everyone
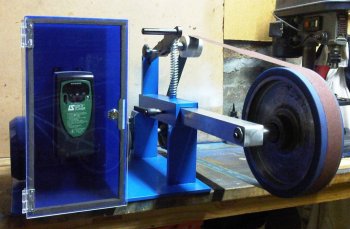
The perspex enclosure for the VFD is pretty much complete, although having heard from some guys who have similar VFD's I believe they can get quite hot - so I am going to add a computer power supply fan with filters to the enclosure to circulate cool air from outside through the box, to prevent the VFD overheating. I need to determine how I will mount the enclosure - 1) either screw it onto the baseplate or 2) construct a bracket and mount it on the motor. Either way the build should be complete within the next few days and then I can try it out.

KMG VFD Nclosure2.jpgKMG + VFD-Nclosure1.jpgKMG + VFD-Nclosure2.jpg
 
Rick
Nice build, you mention that you installed a longer tension arm spring.
Was the first one to short or not enough strength on the arm.
I'm slowly building my grinder and curious as to the length and weight of the spring.
 
Hi John

If you look back a few posts you will see that the tension arm spring was about 1/3rd shorter than the current one - you will see that with the shorter spring fitted the tracking arm rested almost parallel to the top of the grinder, whereas now it stands at about a 40 degree angle.

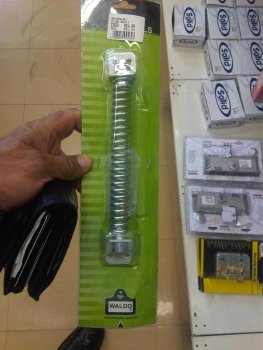
Both springs started out as the same thing (an automatic gate closer, which came complete with the two spring posts, and two right angle bracket which I cut off. I happened to see them in the local hardware store while wondering where I was going to buy springs. Luckily the gate closer turned out to be the perfect solution, and it was cheap R50 ~ about $7).

I thought that the original length of the spring was possibly too long (compared to the KMG tutorial pictures) so I shortened it, by cutting off about 6 or 7 coils. This had the effect of making the spring shorter and neater, however it also increased the spring tension. According to one of the guys at my knife club who has built a lot of grinders, the tension of the shorter spring was too high, and would have put too much stress on belts, particularly the finer grit belts which have a thinner backing.

So I bought another gate closer - and used the spring at it's original length. The spring tension feels just right now. Unfortunately I can't give you manufacturer details of the spring, however I will measure the spring tomorrow and send you details of the overall length, how many coils, thickness of the spring wire etc if this will help. I might have the packaging, if I can find it I will take a picture and send it.
 
Last edited:
Hi John

I dropped in at my local hardware store on the way home and took a picture of a "gate closer" in the packaging, exactly the same as the one I used for the tracking arm spring.
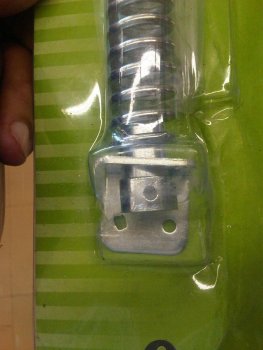
As mentioned above this was a lucky find - the only thing I needed to do was to cut of the right angle mounting brackets and about 8mm of either end of the spring (these ends were crimped into the spring bases to prevent movement. After cutting of these small pieces I heated the end coils and bent the "cut" spring ends flat, followed by lightly touching up the end surface on a bench grinder to ensure a flat end.

As for spring measurements I measured the original spring and the one I shortened, the diameter of the spring wire and the number of coils per spring, I hope this helps

Original spring length 155mm
Shortened spring length 115mm
Spring wire diameter 3.5mm
Original spring -# of coils = 21 + 2x 1/2 coils flattened at the ends
Shortened spring - # of coils = 16 + 2x 1/2 coils flattened at the ends

Spring - Gate Closer .jpgSpring Gate closer 2.jpg
 
rick
Thanks for taking the time to check on the spring
I will have to check around, It all depends on how I mount the spring.
Thank you.
 
Hi John

No problem at all. I hope you find the spring you are looking for.
Mounting the spring if you can find a similar gate closer is quite smple
BTW - if you find something similar to the "gate closer" the spring bases supplied were perfect for use & can be used to mount the spring. I drilled and tapped the aluminium spring bases and they worked perfectly.

Rick
 
Hi Everyone

I finally managed to finish the grinder. As per one of my last posts I was going to install a computer PSU fan with filters to ventilate the VFD enclosure which I have now done. I also added a 3phase + earth "welding socket" to the side of the enclosure and the corresponding plug to the motor, this will allow me to utilise the VFD to control multiple machines (I still plan to build a disc grinder, and possibly some others down the line). I may add a "remote control" to allow speed adjustment at the grinder without needing to go over to the enclosure and open the cover to adjust the control panel.

I also read something today which made me think that I must change the VFD-Motor cable to a Symetrical Shielded multicore cable. The document by ABB explains "Bearing currents in modern AC drive systems and how these currents can lead to premature wear / failure of motor bearings through EDM (electric discharge machining) when the currents only path to ground is via the bearings. The specified cable can reduce / negate this.

I will have to place an order for belts this week, so I can start using the grinder to get to the real business of Knifemaking!!!

Thanks for all the advice and feedback over the past few months while I was building it. The first shot shows the grinder before I added the welding plug/socket.

KMG + VFD 01.jpg
KMG VFD 01.jpg
KMG VFD 02.jpg
 
Hey Rick, that's one fine looking grinder. Thank you for sharing the build with us, it's been very interesting and educational.
 
Hi Denny

It was my pleasure to share the process. Looking back I almost wish I had done a complete step by step work in progress, which would have been nice to compile as a complete tutorial)
although that would have ended up in the build taking even longer (If I was stopping every step to take pictures. And there are complete step by step tutorials available - like the ones I referred to in my opening post.

I'm still not 100% complete - I keep finding bits and pieces to add on. Case in point - I added a remote (on/off, Forward/Reverse and Speed control box) to the grinder today. I still have to add a workrest to the contact wheel and I want to build a mini wheel attachment and make some mini wheels 12mm, 15mm, 18mm, 20mm & 25mm - for grinding finger grooves etc I will put some more pics up as these part progress.
 
Back
Top