Justin Presson
Well-Known Member
Ok guys, with the new anvil I have acquired I need to build a stand for it. Can you guys share your pictures of what you have made and your thoughts on different designs?
Thanks!
JP
Thanks!
JP
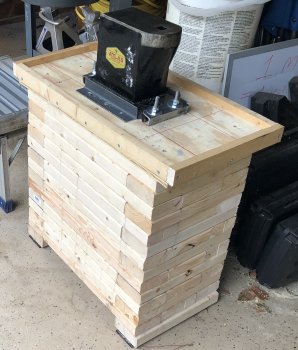
Got any pics?Mine is very simple. I took four 10 x 10 posts (I am lucky enough to have a friend with a sawmill) and ratchet strapped them together top and bottom. Then I mounted my anvil to the top and added hooks and stuff to hang my hammers. Then a wrapped a piece of logging chain around the base and went to beating hot steel. I get no ring and it barely moves even when I use my big hammers. Will your anvil be indoors or open air?


Hey John if you got a bickern for the hardy hole then you could forget about a horn for most work. The main thing you cannot do on the bickern is draw material out like you can on the horn but most of the rest a bickern will do well.No horn, so limited usefulness in general blacksmithing.
Hey John if you got a bickern for the hardy hole then you could forget about a horn for most work. The main thing you cannot do on the bickern is draw material out like you can on the horn but most of the rest a bickern will do well.

")


Holly cow that is a beast of an anvil!Wood is the only way to go IMO....and if you can in any way get your hands on it..... hardwood such as Ash, Oak, or Hickory!
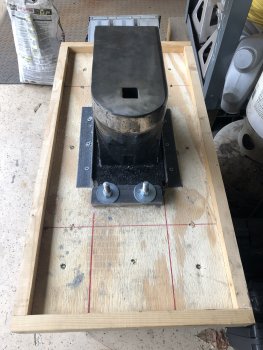
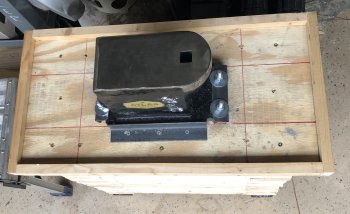
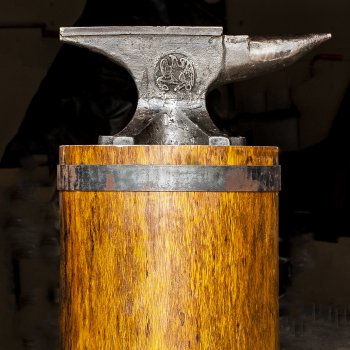
4- 6" square whit oak ties, surrounded by 2" thick X 6' wide white oak board. About 12lbs of 5/16" deck screws, and them metal banded. After I got it all done, I found an old can of teak oil, dosed it down, and let it dry for about 3 days. Love it!
(That's the 509lb Peter-Wright sitting on it)
The hold downs......
And the final setup, with all the hammers hanging.....
That anvil is so big it makes the hold down chains look like those cheap wire made dog tether chains hahaWood is the only way to go IMO....and if you can in any way get your hands on it..... hardwood such as Ash, Oak, or Hickory!
4- 6" square whit oak ties, surrounded by 2" thick X 6' wide white oak board. About 12lbs of 5/16" deck screws, and them metal banded. After I got it all done, I found an old can of teak oil, dosed it down, and let it dry for about 3 days. Love it!
(That's the 509lb Peter-Wright sitting on it)
The hold downs......
And the final setup, with all the hammers hanging.....
Go to blacksmithsdepot.com and search bickern.Thank you! I had no idea what that was called. I figured something like that must already exist!


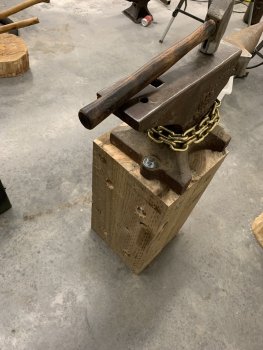
I have been looking at the Kanka Anvils what do you think about it? Does it work as well as other ambles you have usedI used 2x12 pressure treated lumber, with 4 threaded rods running through them to lock them together. I also added drop down casters to be able to easily move the anvil around when needed.
View attachment 71442View attachment 71443