The Great Bruce Bump File Guide Give Away Contest!

I am going to post it right here! Can anyone think of a better place to do it? I figured I would just continue
on this same thread.


WORK IN PROGRESS, On Aarons knife.

I start with a blank I have had water
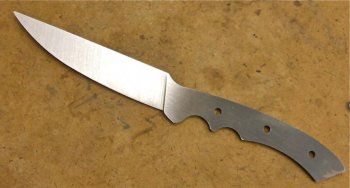
jet cut out of 1/8" 440C Stainless. The blade is 1" tall at the ricassio or where the Plunge line will be.
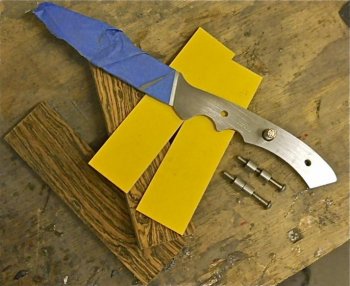
I have Picked out a nice block of Bocote wood, Stabilized by "Faron Moore"
for the scales and some yellow fiber board for the liners along with two Bob Loveless type bolts that are also stainless. For me in the kitchen I want all stainless steels whenever possible.

After clean up and drilling the holes the blank is then H-ted by
Paul Bos Heat treat by Buck Knives to a RC of 59 points.
View attachment 38969


Next it is time to use my Bruce Bump File guide that was the first Stainless one made out of his shop!:biggrin:

This 5" Paring/Utility with be more in the Japanese Petty Knife style vs the 3" Paring knife I started the contest with.
I do a full vee flat grind all the way to the spine so there is no resistant wedge at the top like can happen with hollow grinding a blade like this. I will also distal taper the blade starting at just a tad under the 1/8" thickness of the steel down to as thin as I can get the tip..

I should have time to grind out this blade tomorrow so I will add a picture and comments after that's done.

Thanks everyone!

Laurence

www.rhinoknives.com


Here is the next set of steps I take when making one of my 5" Petty knives.

The handle and ricasso area are cleaned up on a 120 Grit MSA belt on the flat platen of my Hardcore Products 1 1/2hp variable speed grinder. I run 120 and finer grit belts at no more than 25-30% on the dial.

Every belt has a sweet speed where I feel the best balance of cleaning and finish.
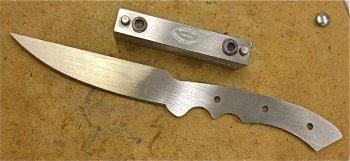
DSCN1311.jpg

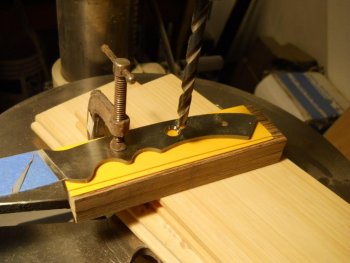
Then it's time to tighten down my Bruce Bump File guide. I have a slight angle from the top of the thumb ramp to the bottom of the Ricasso were I start the plunge line grind.
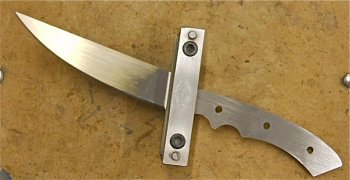
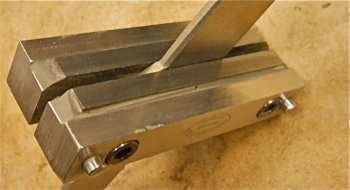
DSCN1312.jpgDSCN1313.jpg

And now it's to the grinder for a full vee grind on both sides, I don't mark off my center lines. I did it a few times when I started in 1996 and have just ground my center by eyeball ever since.

It may not be the fastest or most exact but it has worked for me.
DSCN1314.jpgDSCN1316.jpg

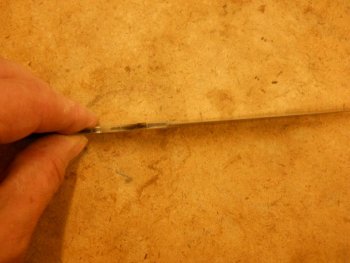
I use MSA ceramic belts in a 36grit belt and do 90% of the grinding I want, Then it's to a 50 grit, Then I finish up my last 5% with a 120 grit. After that I use cork belts at 220 - 600 grit depending on the finish I am after. For culinary I like a brush satin look and this seems to cover scratches etc the best. Also a mirror finish can make food even more likely to stick so there is a practical reason for my choice of this finish.

I go for about a 1/3 to 1/2 the thickness of a new penny for my knives. on this one I am at a 1/3rd.
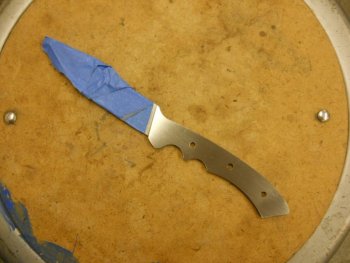
DSCN1317.jpg

The last picture shows us all taped up and ready for some handle work!:cool:

Questions and comments are always welcome.

Thanks for watching.

Laurence

www.rhinoknives.com
 
Last edited:
Laurence, this is exciting. I really like the shot of the blank with the file guide clamped on :)

Oh, when you talk about "1/3rd of a penny thickness" are you talking about the edge before the heat treating?
 
Laurence, this is exciting. I really like the shot of the blank with the file guide clamped on :)

Oh, when you talk about "1/3rd of a penny thickness" are you talking about the edge before the heat treating?

Bruce,
Thanks for bringing that up so I can clarify it.
After I get my blanks from water jet cutting I clean them all up to 220 grit and it's off to HTment.
Then I clean off the scale on the flats of the tang and up pass the Recassio area.
Then I grind my bevels.

So my final 1/3rd of a penny thickness is after heat treatment.

Laurence

www.rhinoknives.com
 
Hello Dogsters!

I have a surgery to correct a trigger finger to be done Monday at 12 so I will be back with more of the WIP on Aaron's new Rhino 5" Petty knife as soon as I can work comfortably in the shop again. I may lose a day or two?

Thanks.

Laurence

www.rhinoknives.com
 
Wife Kaye needs that done too. She had a thumb fixed once and didn't complain much. Be sure to take the doctors advice.
 
Laurence, this is as great WIP! Thanks for sharing. I've never done the grinding on heat treated blank, but with 1/8"l steel maybe that's a good idea. I'm learning a lot, especially the use of cork belts for most finish grinding. I like that idea. Good luck with your recovery! Looking forward to seeing you back on the job. :)

PS - I think I'd be very uncomfortable not marking the center line, but that's probably an experience issue. All of your knives have always been dead center as far as I could tell. That's a real skill.
 
Hey. Laurence when is your surgery? Can't you grind with a band aid on? :)

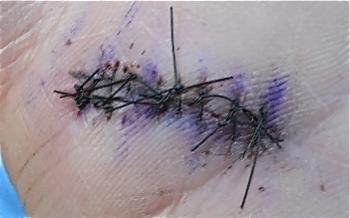
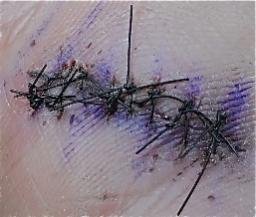
Yep! I had it done on Monday and YES! I am back to the GRIND! The incision isn't that long, only about 3/4" with 5 double stitches in it. All is well again!

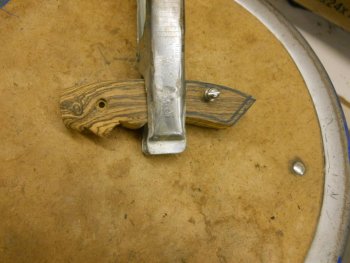
The next step is to book match cut that nice piece of Bocote, the liners and I decided to put a piece of Mosaic pin in the middle for a sparkle!DSCN1329.jpg Then we go to the 6 x 48 sander to clean up the book matched scales, then we are over to the drill press to get our counter sunk Loveless bolt holes and a oversized 0.261 hole drilled in the middle for the Mosaic.DSCN1332.jpg
Last, on this entry on our build I shape out the scales, tapering them towards the front and then the back before I epoxy things up.DSCN1338.jpg I finish the front of the scales where the ricassio is to 1000 grit and load up the buffer with Fabulustor white rouge to buff up the front so I can see what it will look like and you don't want to have to go back in there later to do any sanding. Also I find the rouge helps keep any epoxy from sticking to the wood than might squeeze out of get on the front of the scales while I put things together.

Dave,
Most scribe their lines? I just started doing this way and I slow down when I get from 36 grit to the 50 Grit and then even and finish the edge grinding with the 120 grit. I do about 90% of the grinding with the 36Grit and then clean and even up with the 50 grit then more so with the 120G and I am on to the cork belt.

More soon! Thanks for watching. :happy:

Laurence

www.rhinoknives.com
 
Laurence I,m glad you're on the mend. I bet your stitches would look cool if you use a macro lens and post it high res and full screen.
 
Laurence I,m glad you're on the mend. I bet your stitches would look cool if you use a macro lens and post it high res and full screen.

WARNING! SMALL KNIFE PUPS MAY FIND THESE PICTURES TROUBLING?

Alright Bruce,
You asked for it! My right palm just before the small finger starts.DSCN1350.jpgDSCN1351.jpg The swelling has finally gone down , It still aches a bit and my experience is that is always fine the first couple of days after a surgery when you still have the local and other meds they give you in your system.
The real discomfort and smarts always start about tonight "3 days later" when the nerves start to heal!:biggrin: I just keep doing the hand opening and closing exercise that the doctor showed me.

Laurence

www.rhinoknives.com
 
Thats Gross! I was just kidding!
Wow, the doctor could use fly tying lessons. I bet he wasn't a Boy Scout with knots like those.
Kaye goes in next week to see about hers. What advice do you have for her?
 
The best advise for your wife kaye is to go get the finger fixed ASAP and to do exactly what the surgeon says to do as far as hand exercises and what meds to take. As soon as he was done with the surgery I was told to start my hand flexing exercises on the way to the pharmacy to get my antibiotics and some pain meds if needed.

Many people these days decide to practice their own medicine because they think Antibotics are evil or bad or something? After a surgery is exactly when you do want to take them to avoid infection etc..
Hospitals and operating rooms are where many of the worst bacteria can grow in that nice clean environment. So make sure she takes the medicines the doc prescribes.

It still throbs and aches a lot but it is so much better than the pain I had and the hassle of my pinky finger not working right. My whole hand would seize up sometimes.

The Doc said I will be a member of his ten finger club someday :biggrin:because of the work I do, Two fingers done and eight to go! I will wait till they each become bothersome enough and get them done then.

Laurence

www.rhinoknives.com
 
LOL! Laurence I think you made our "small knife pup" Bruce a little squeamish! :D You are smart to do the physical therapy exercises, too. That will keep everything working and help keep the discomfort down to a shorter length of time.

I think it's great that you can grind to a perfect center by eye. In fact my first few knives that's what I did and they came out okay. But ever since I learned about a center scribe I made one and been using it for confidence ever since. I use a little thicker steel on most of my knives too, 3/16", which would make it harder for me to eyeball the center as I'm grinding. But yours turn out perfect. Good stuff!

I don't remember - did you say what steel you're using? I'm presuming stainless but that's always a risk. :) I like that you HT the blade before grinding. I'm going to try that on my next set of three piece knives and see how it goes. I've been having some warping issues when I quench (O1).

Thanks for a great WIP Laurence!

Well first of all I don't know about the "Perfect" part! :what!: But they do cut well.

I had a batch of about 100 of those 5" utility knives water jet cut out of 440C.
The next batch will most likely be CPM-154. Both steels work great for culinary and cutlery in general. Once you get the hang of center grinding the edge the thickness really doesn't matter, If you are a bit unsure? just slow down the grinder or use a little less pressure on your passes if you have a single speed.

I hope little Bruce survives the trauma! lol.

Laurence

www.rhinoknives.com
 
Last edited:
Back
Top