"W"s from Walla Walla

Bruce Bump

Forum Owner-Moderator
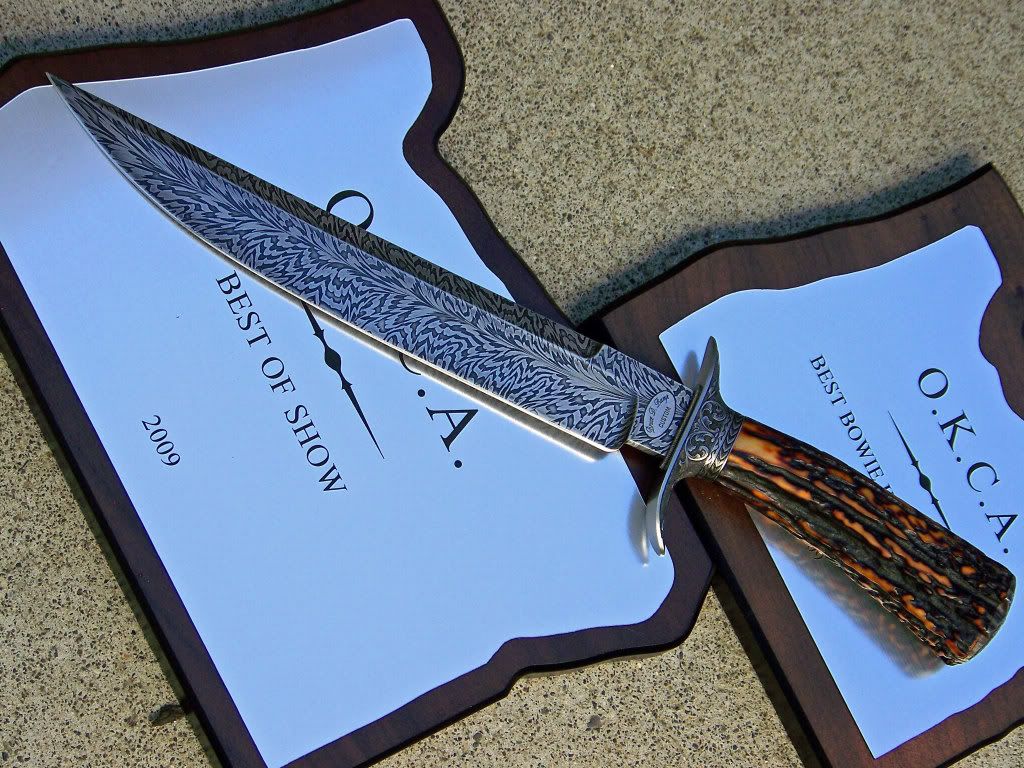
I have some orders to fill that need a "W" pattern damascus blade so I thought I could post some pics here especially if it goes as planned.

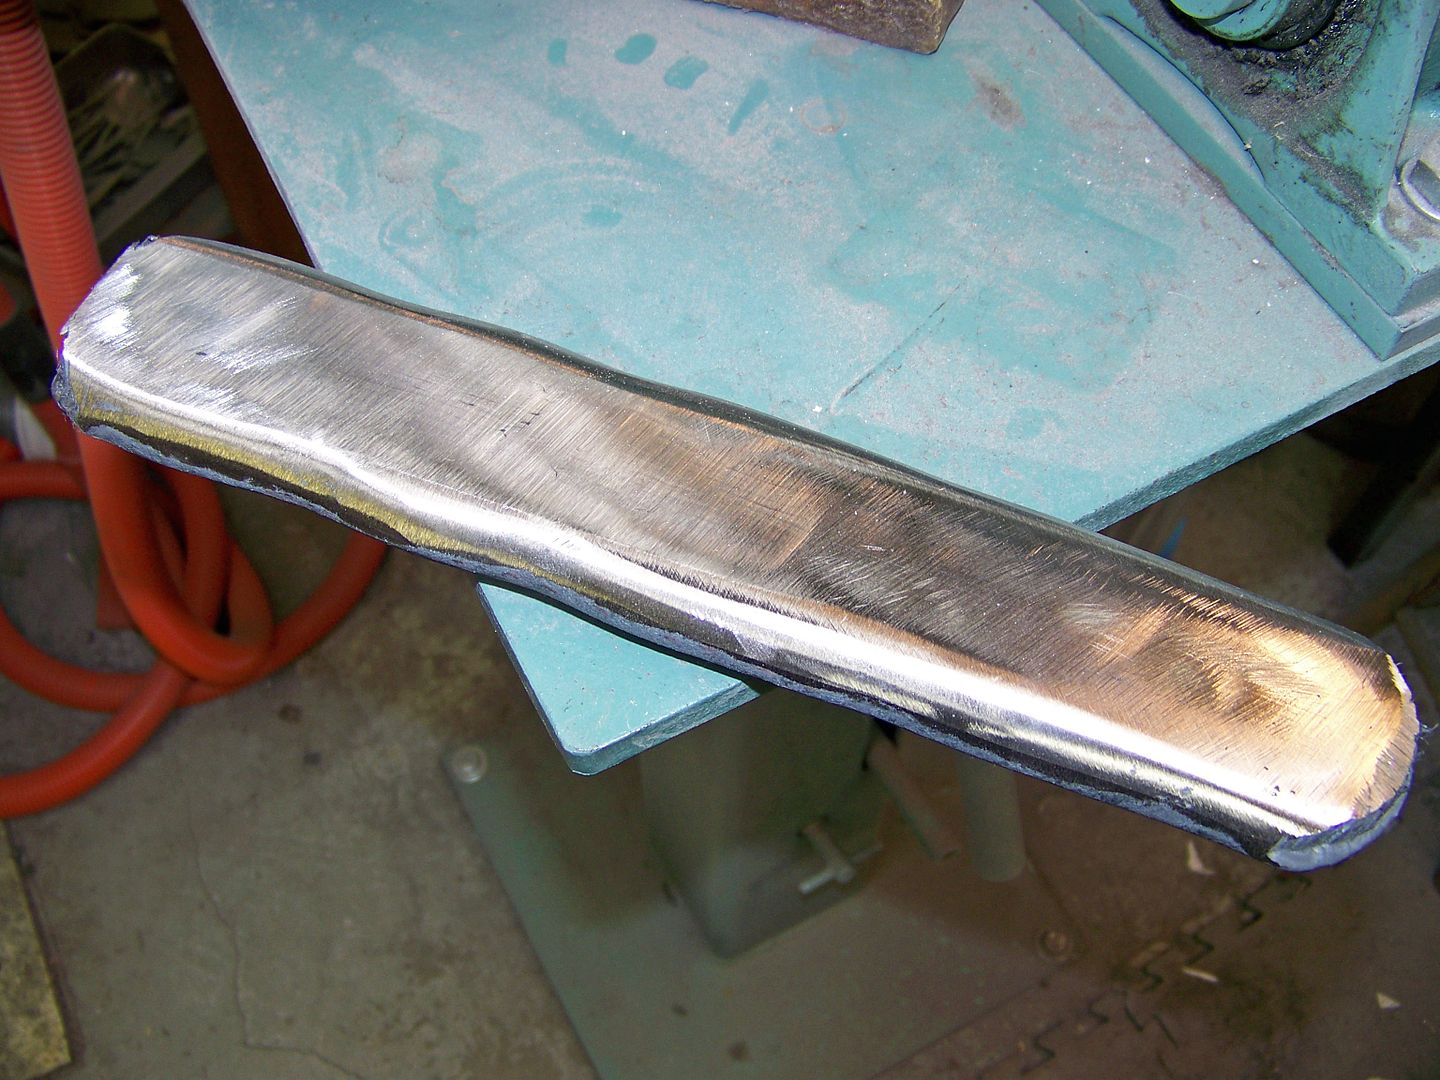
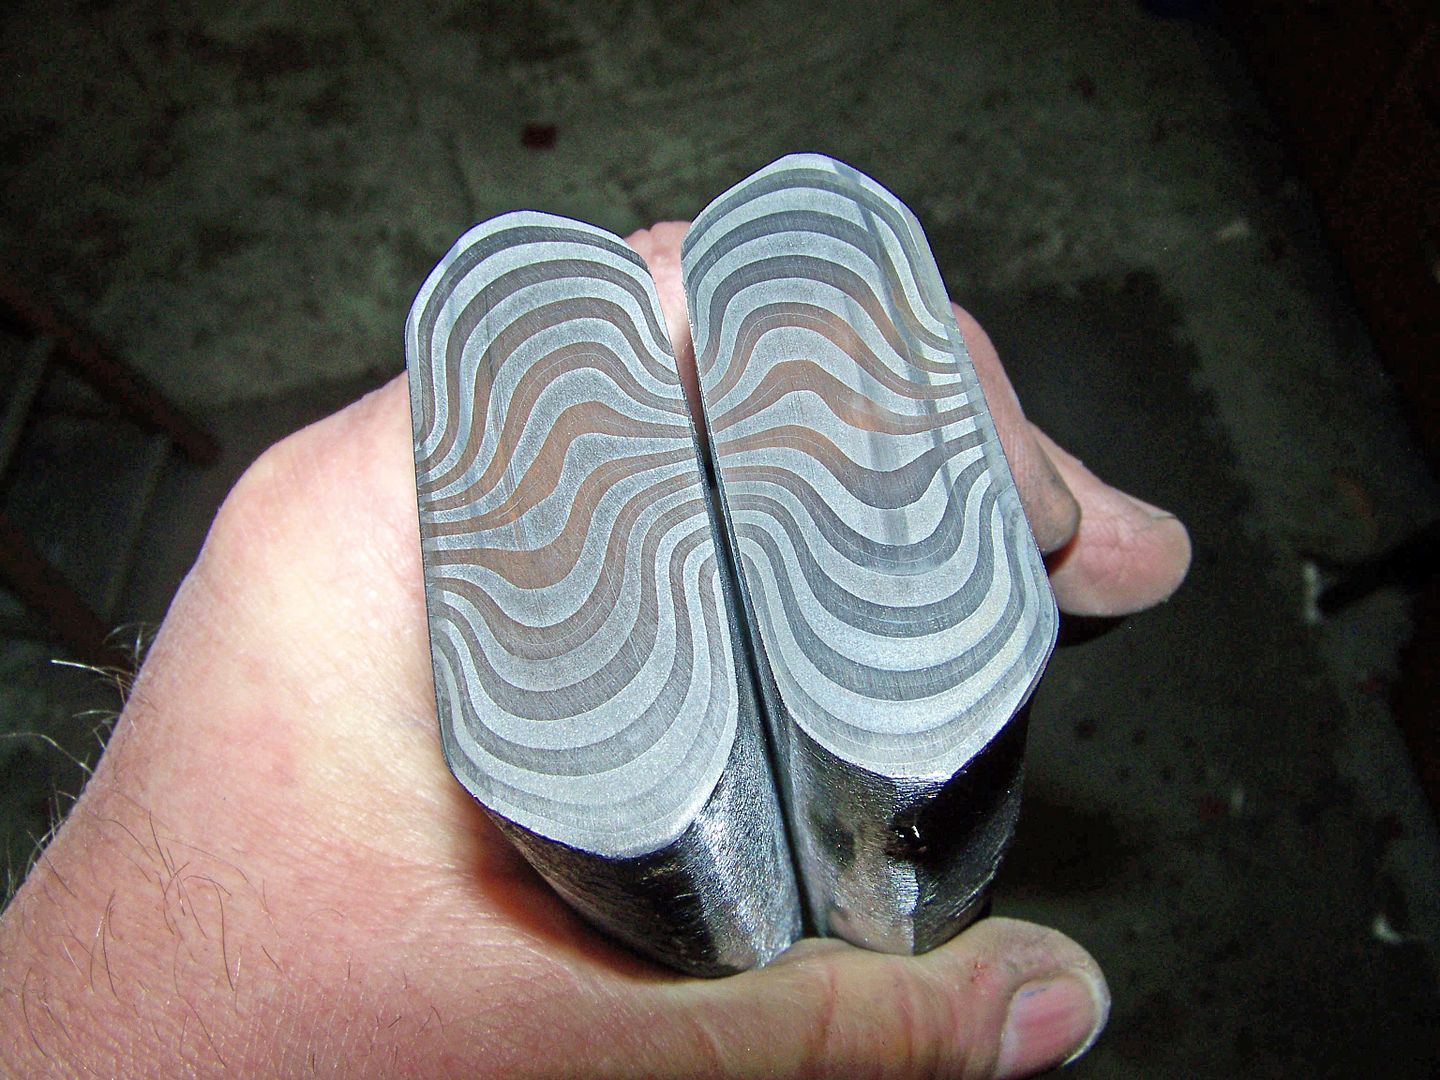
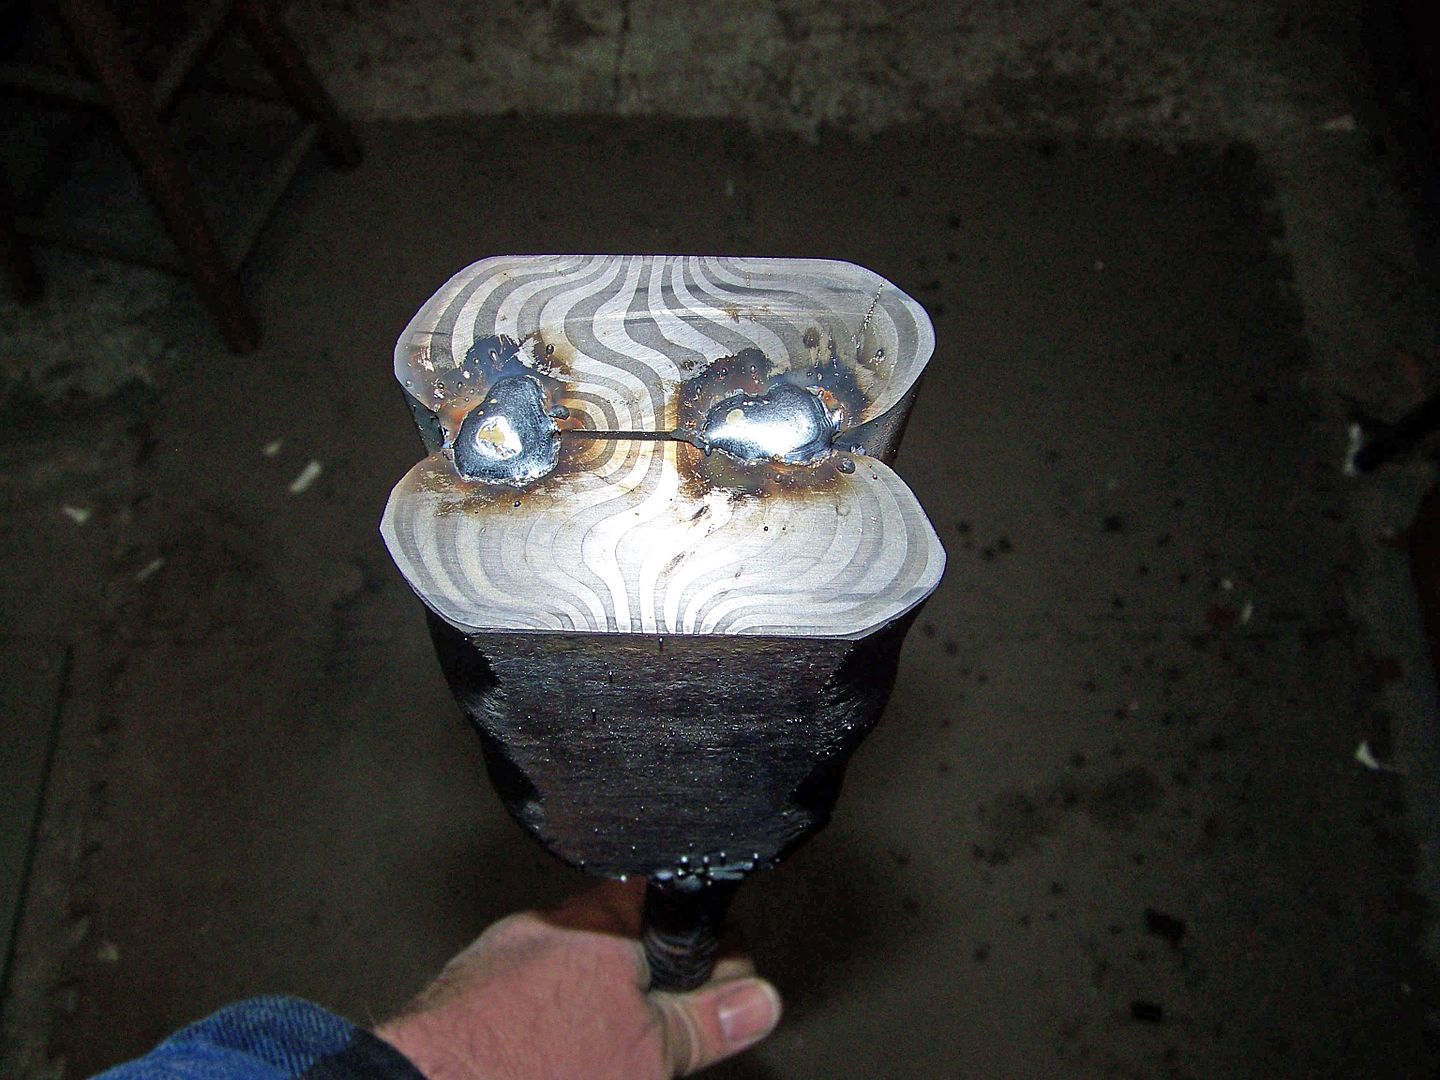
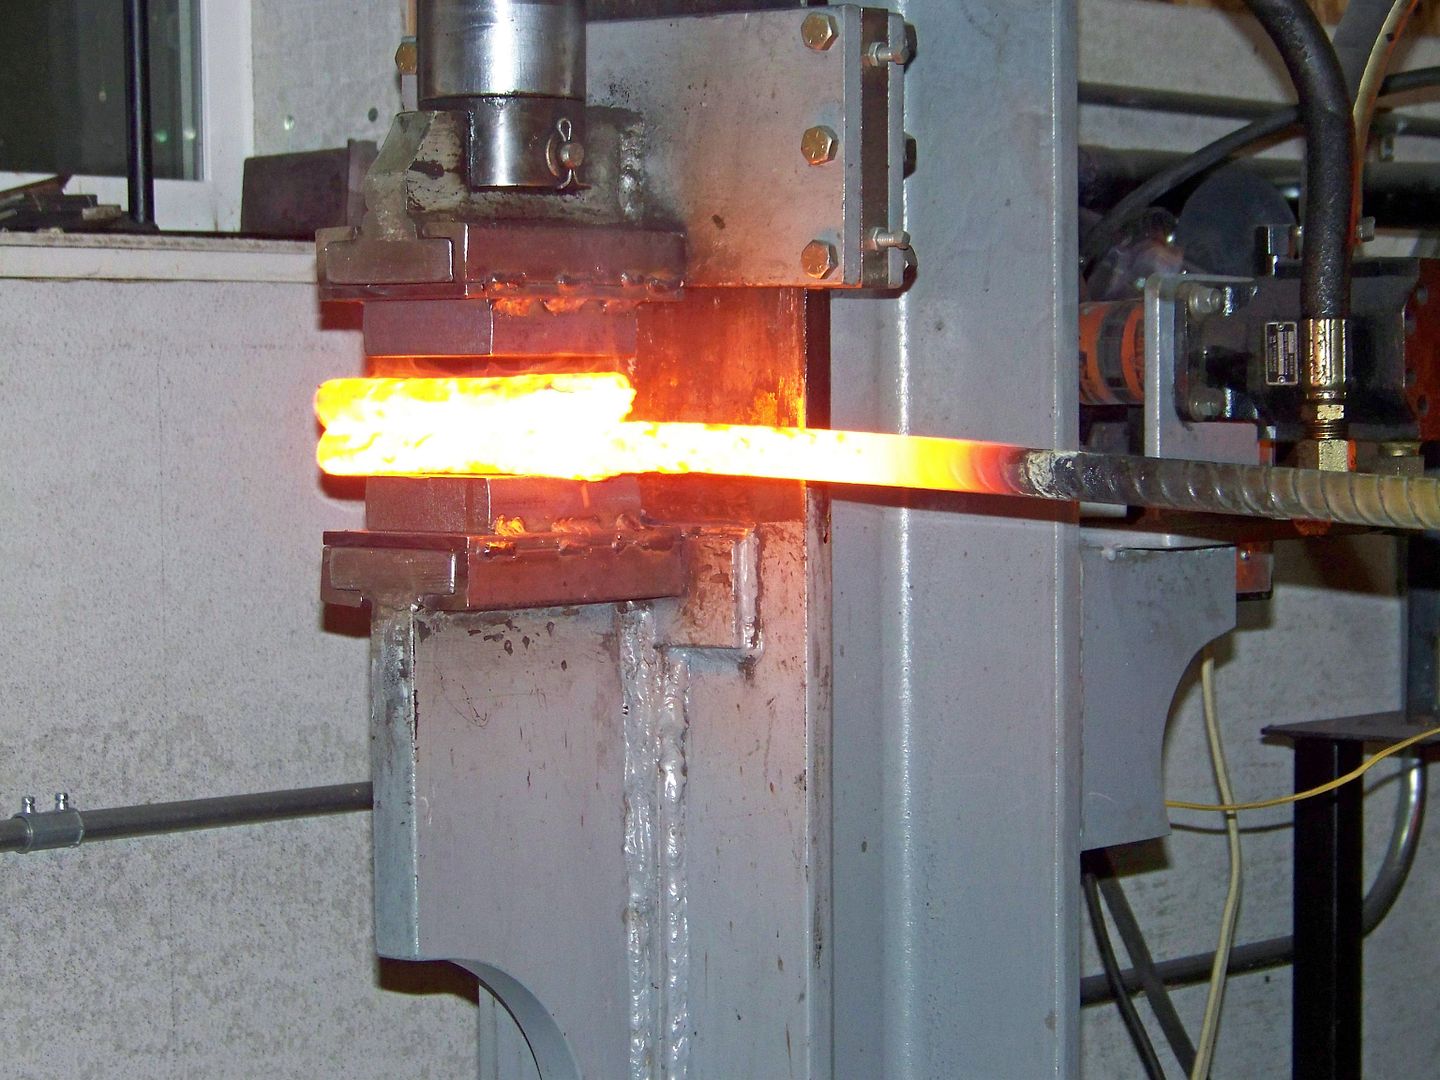
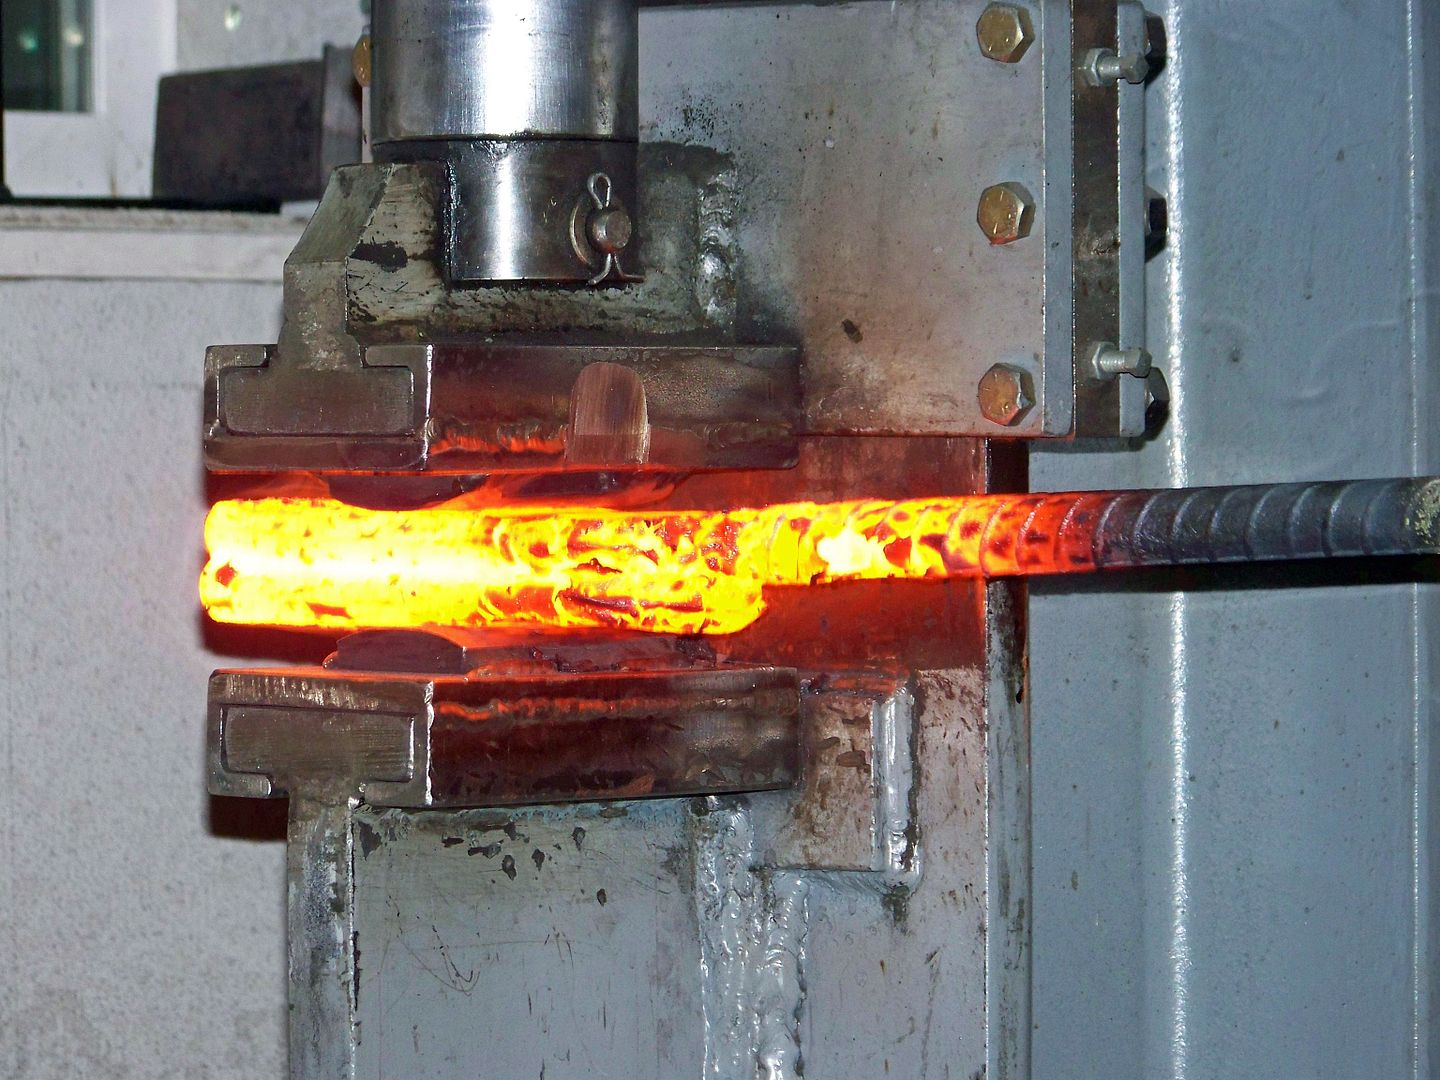
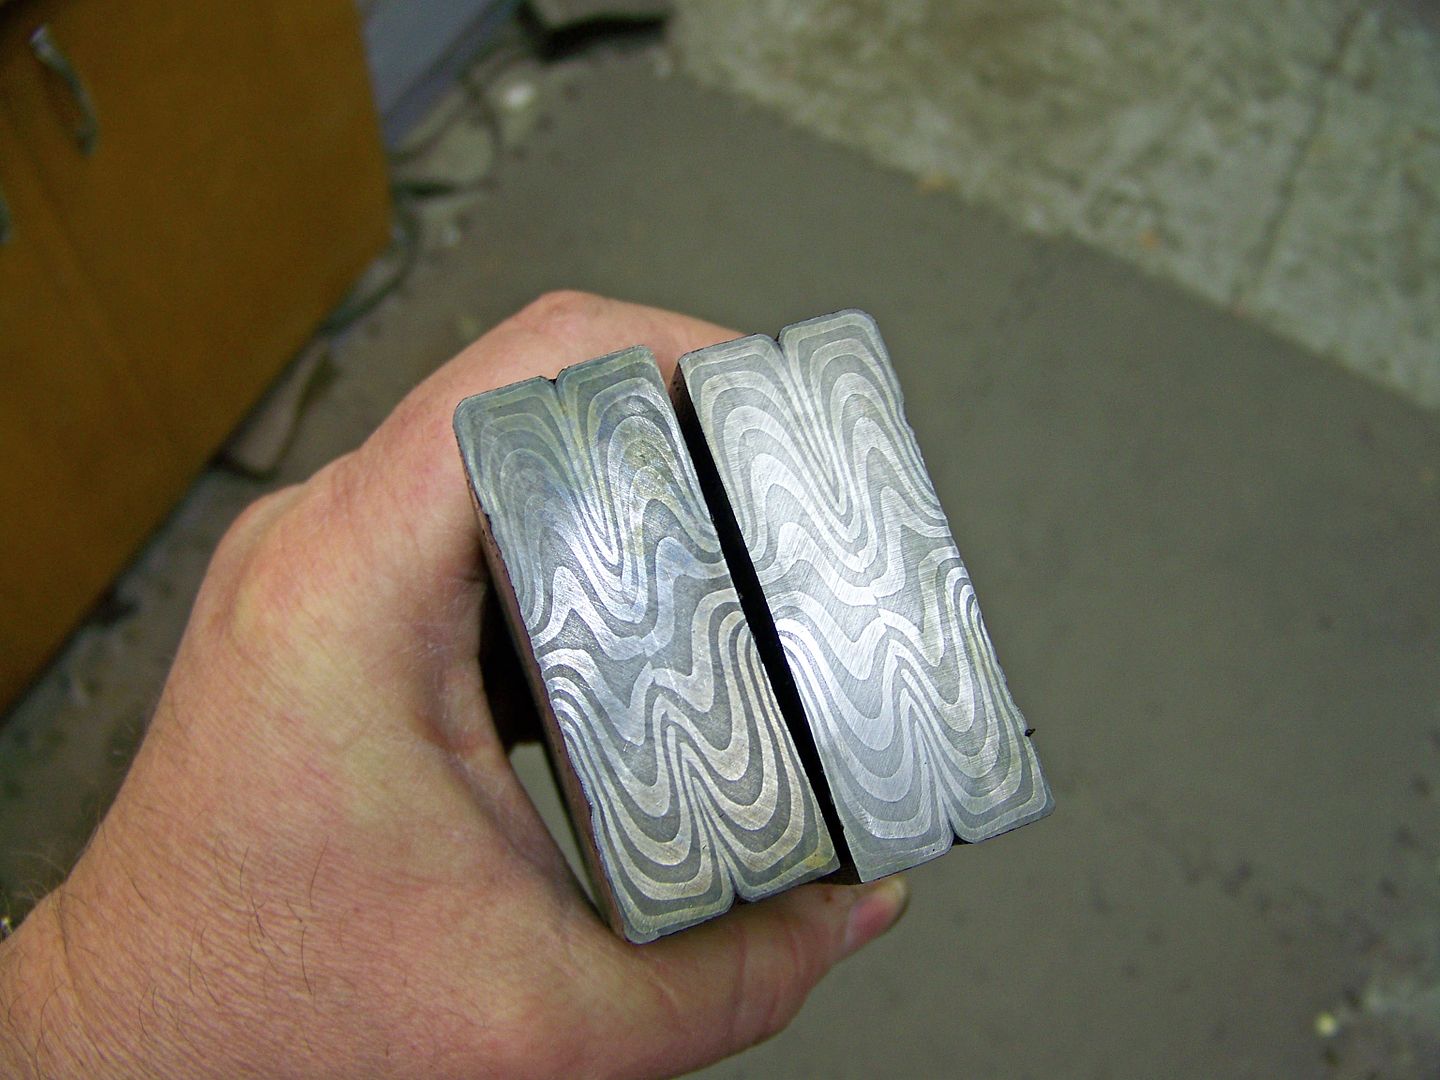
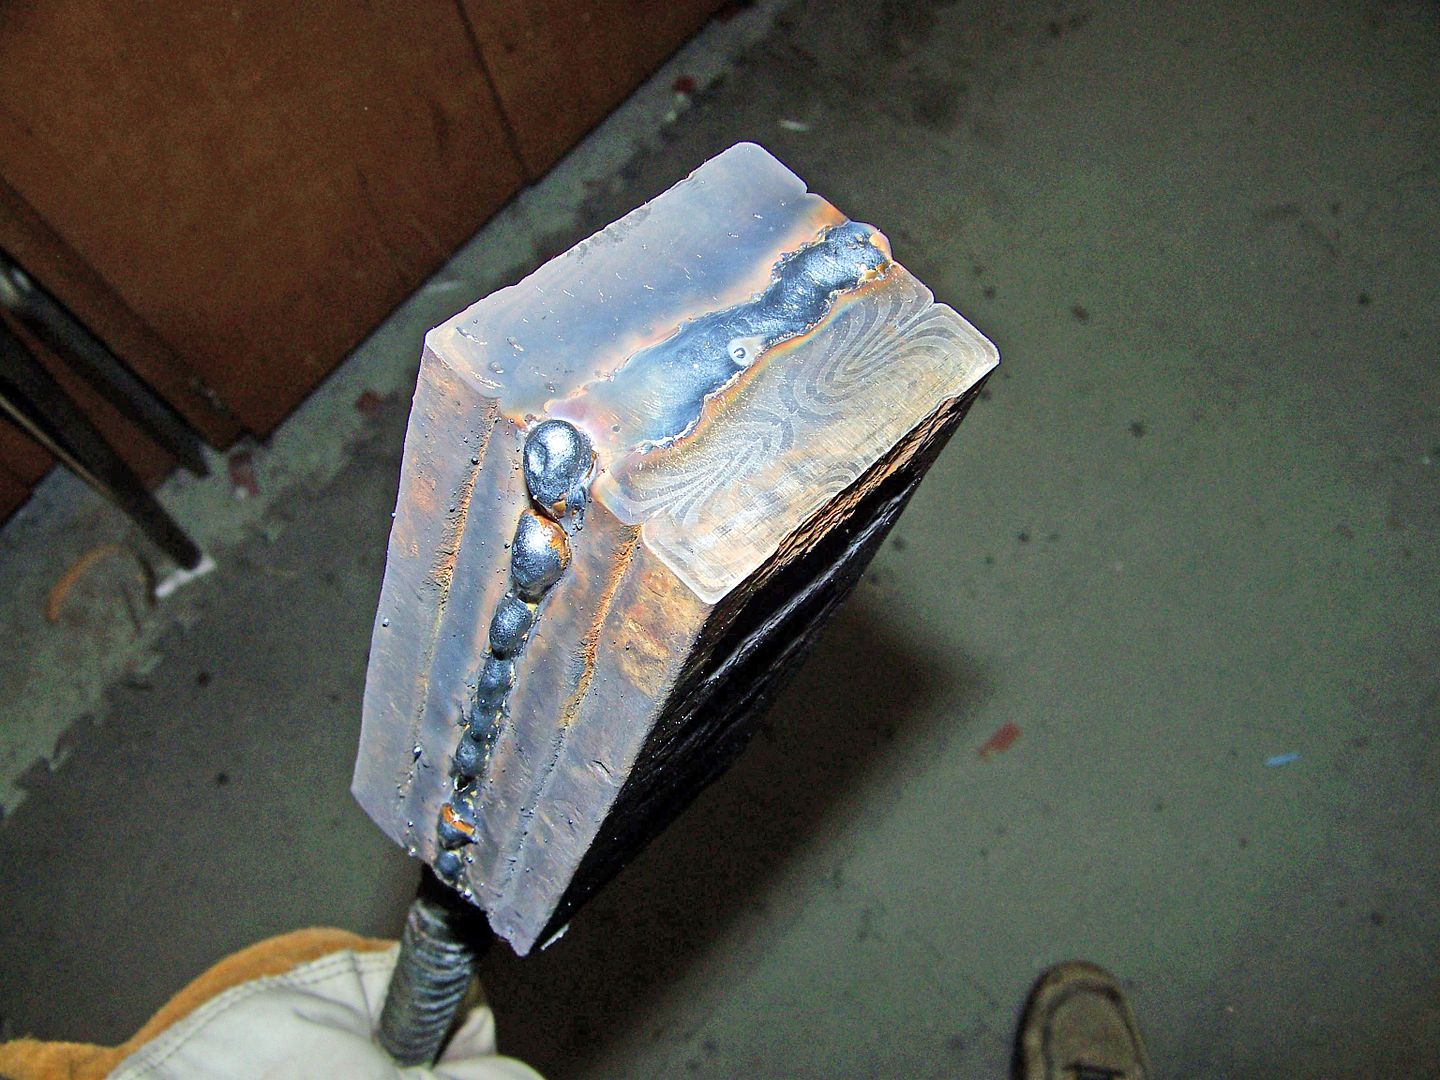
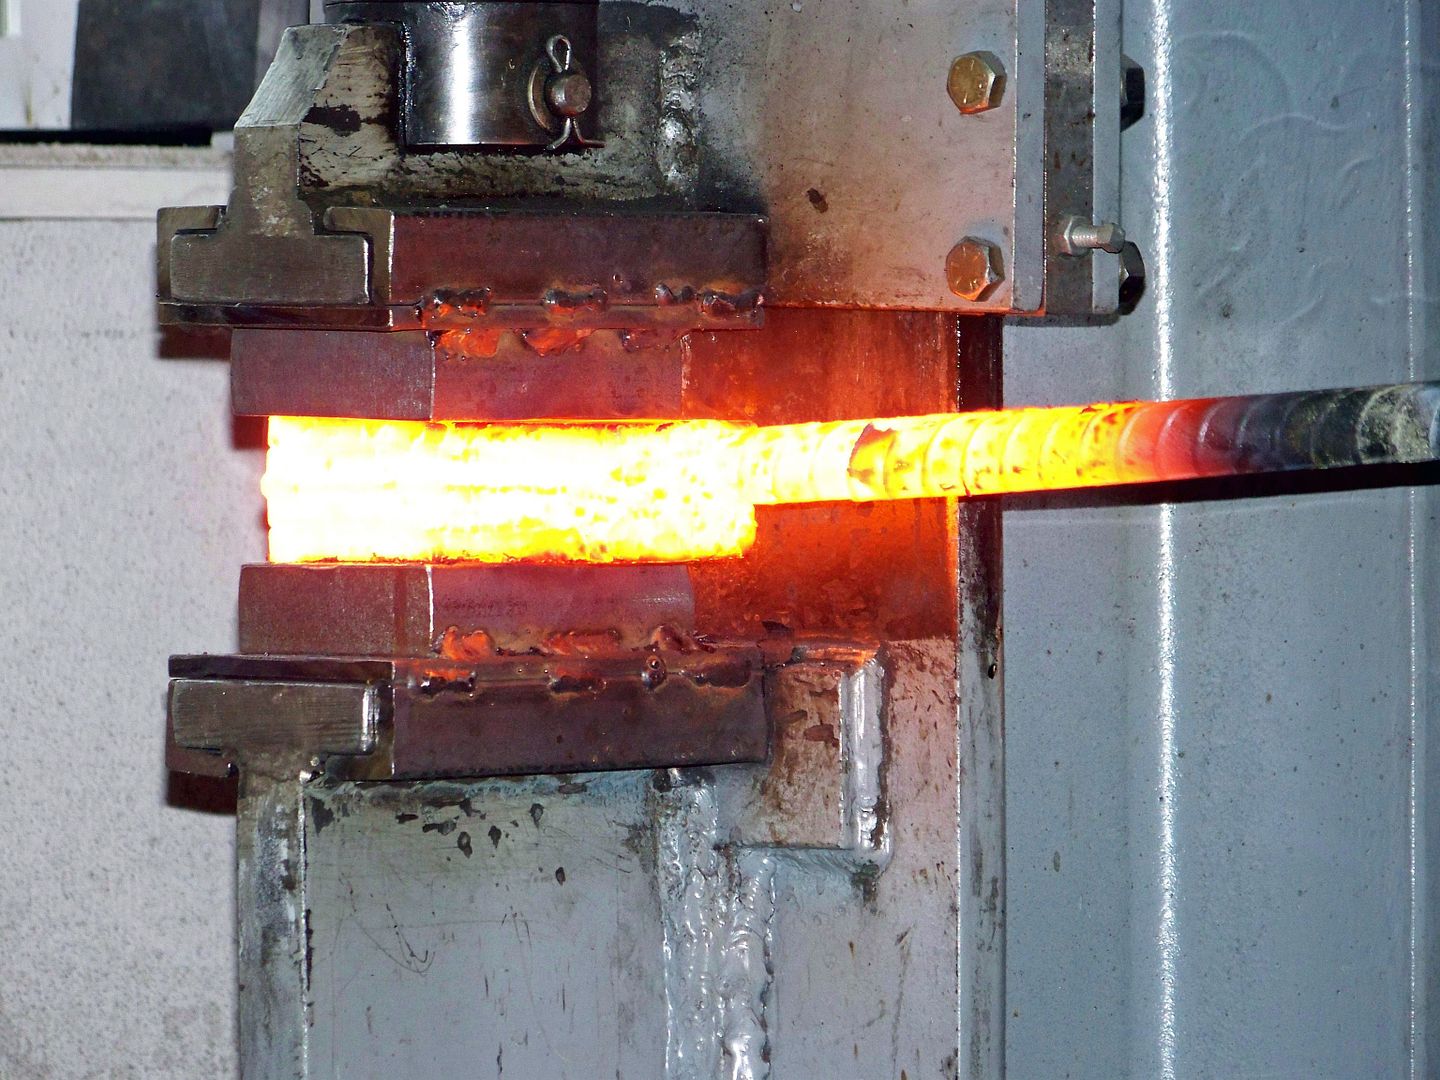
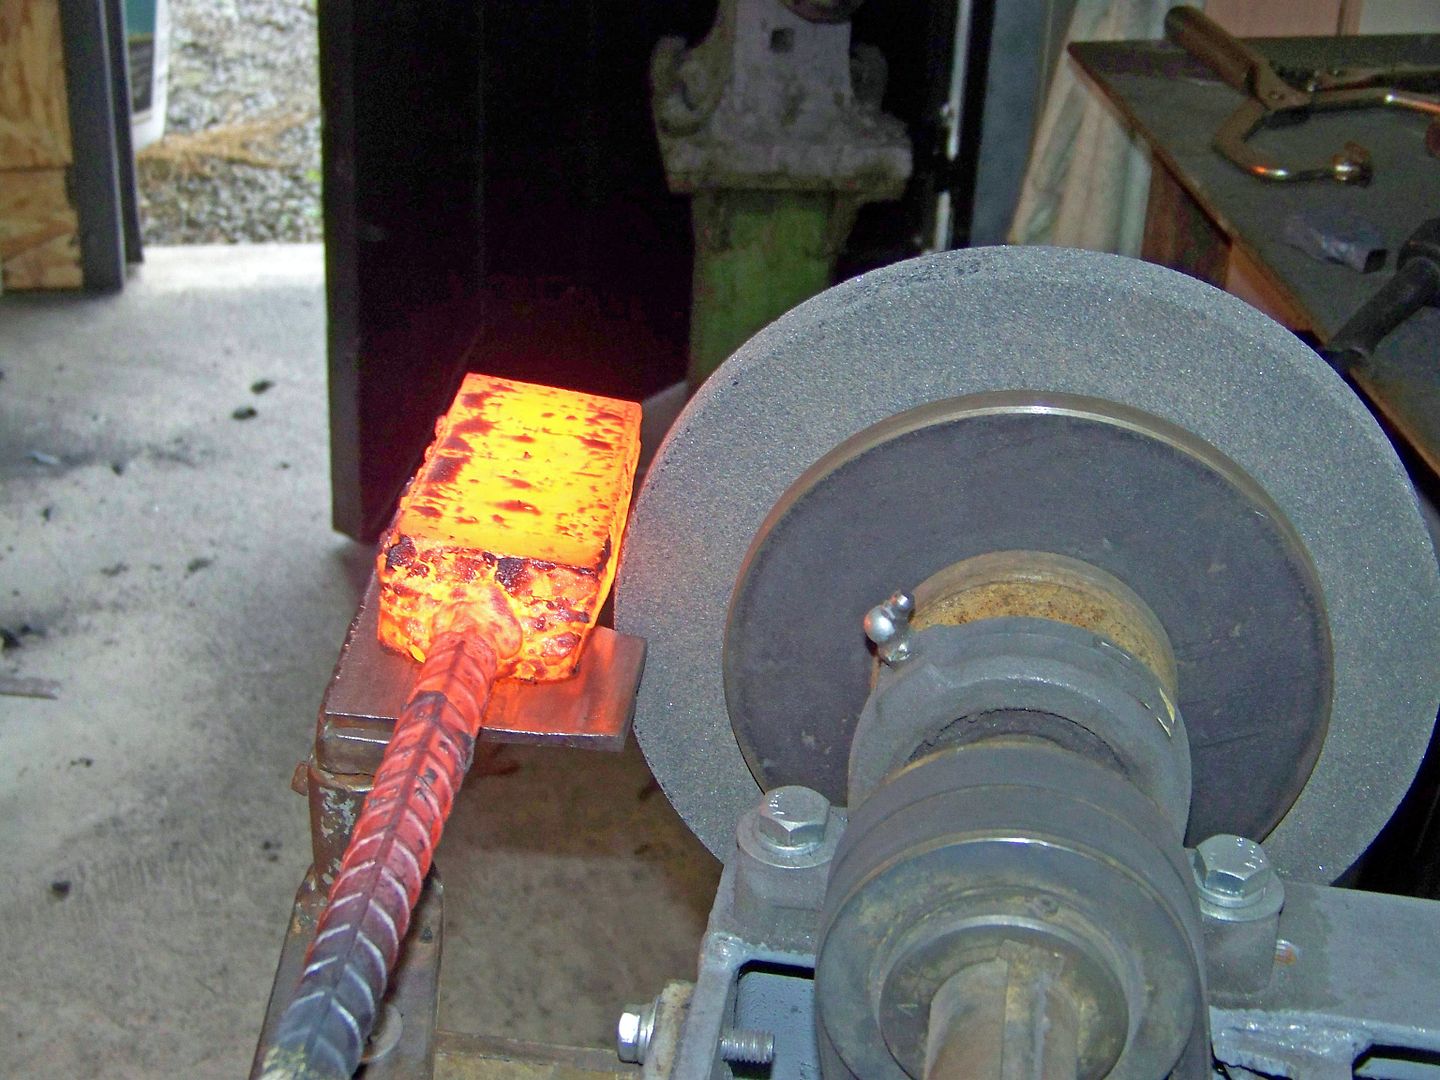
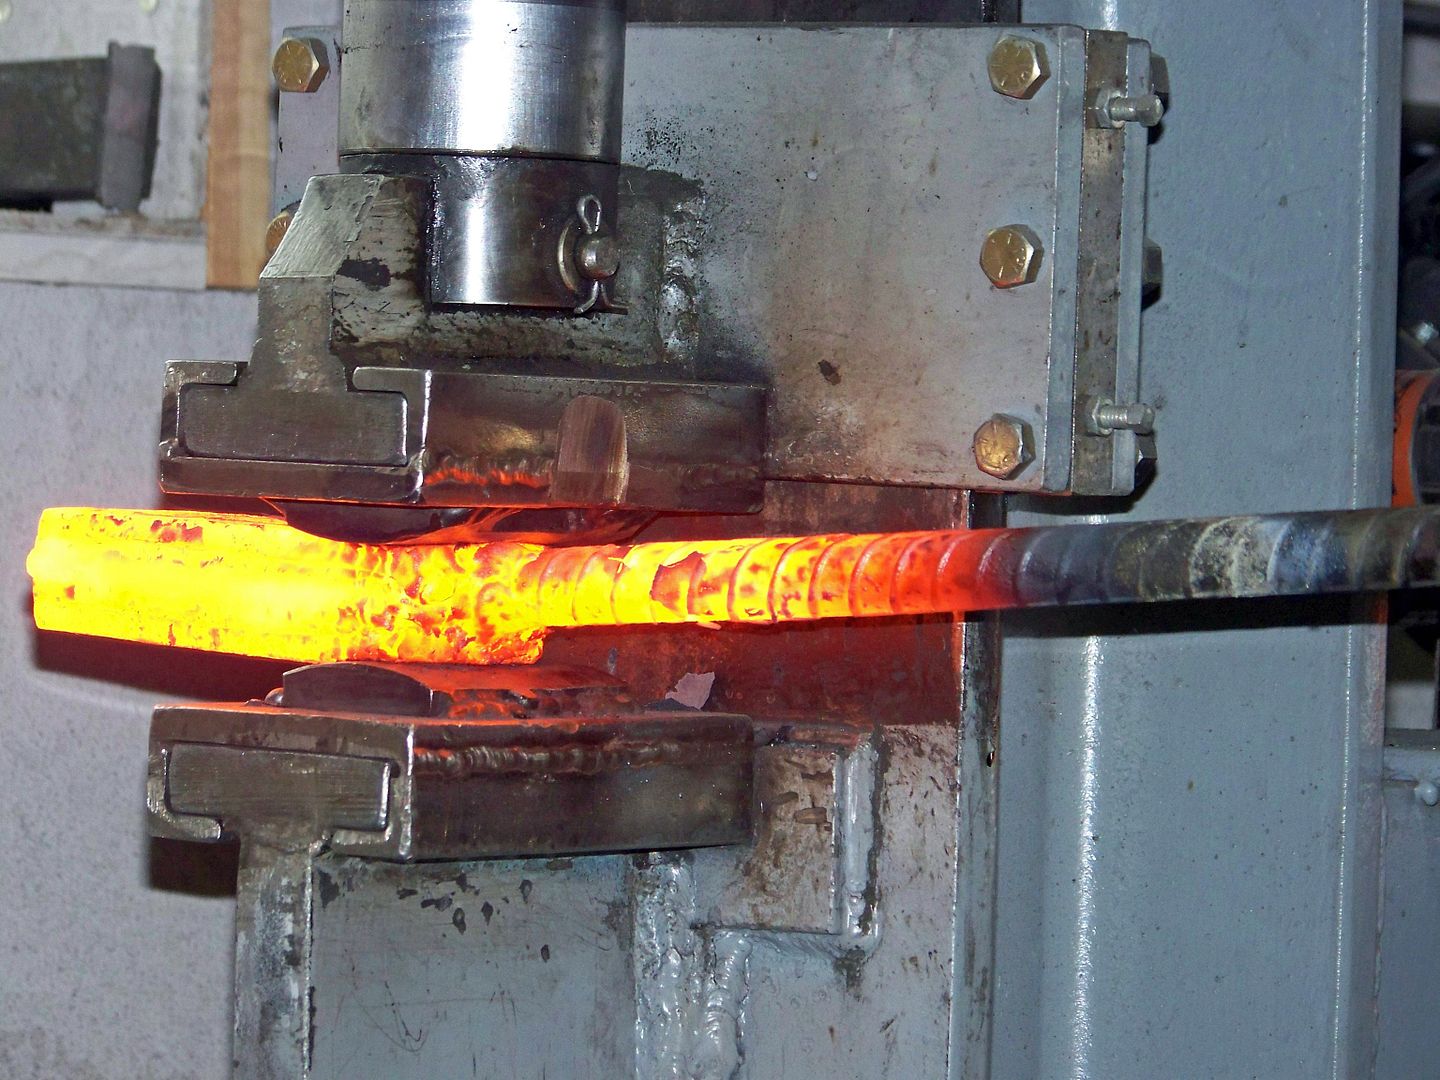
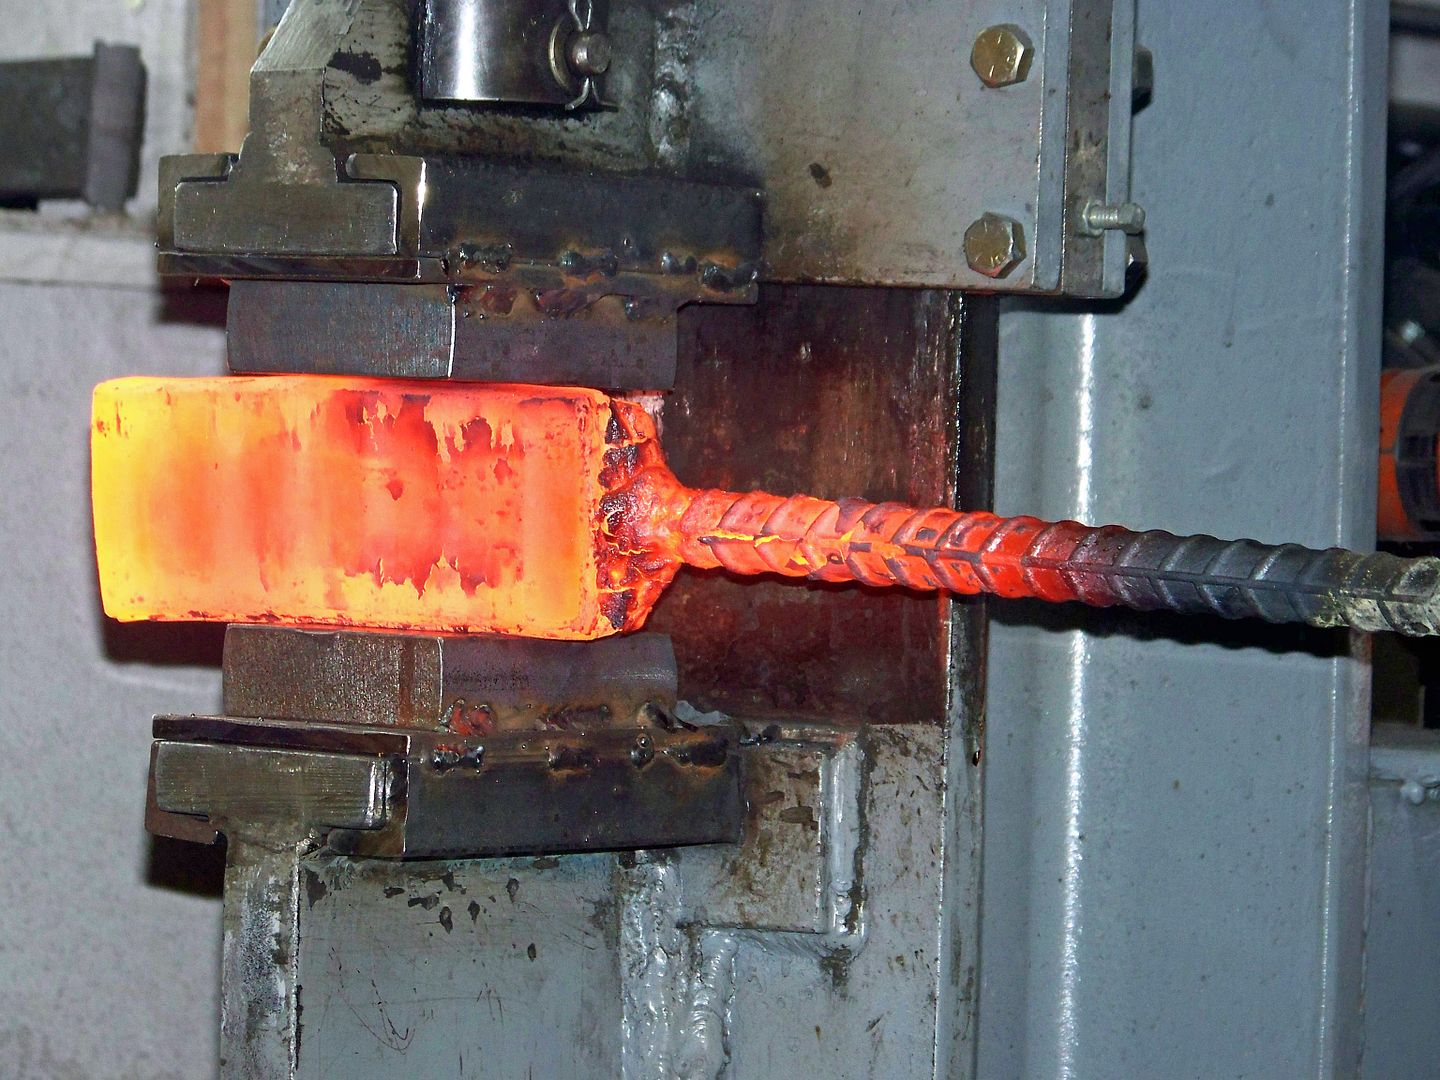
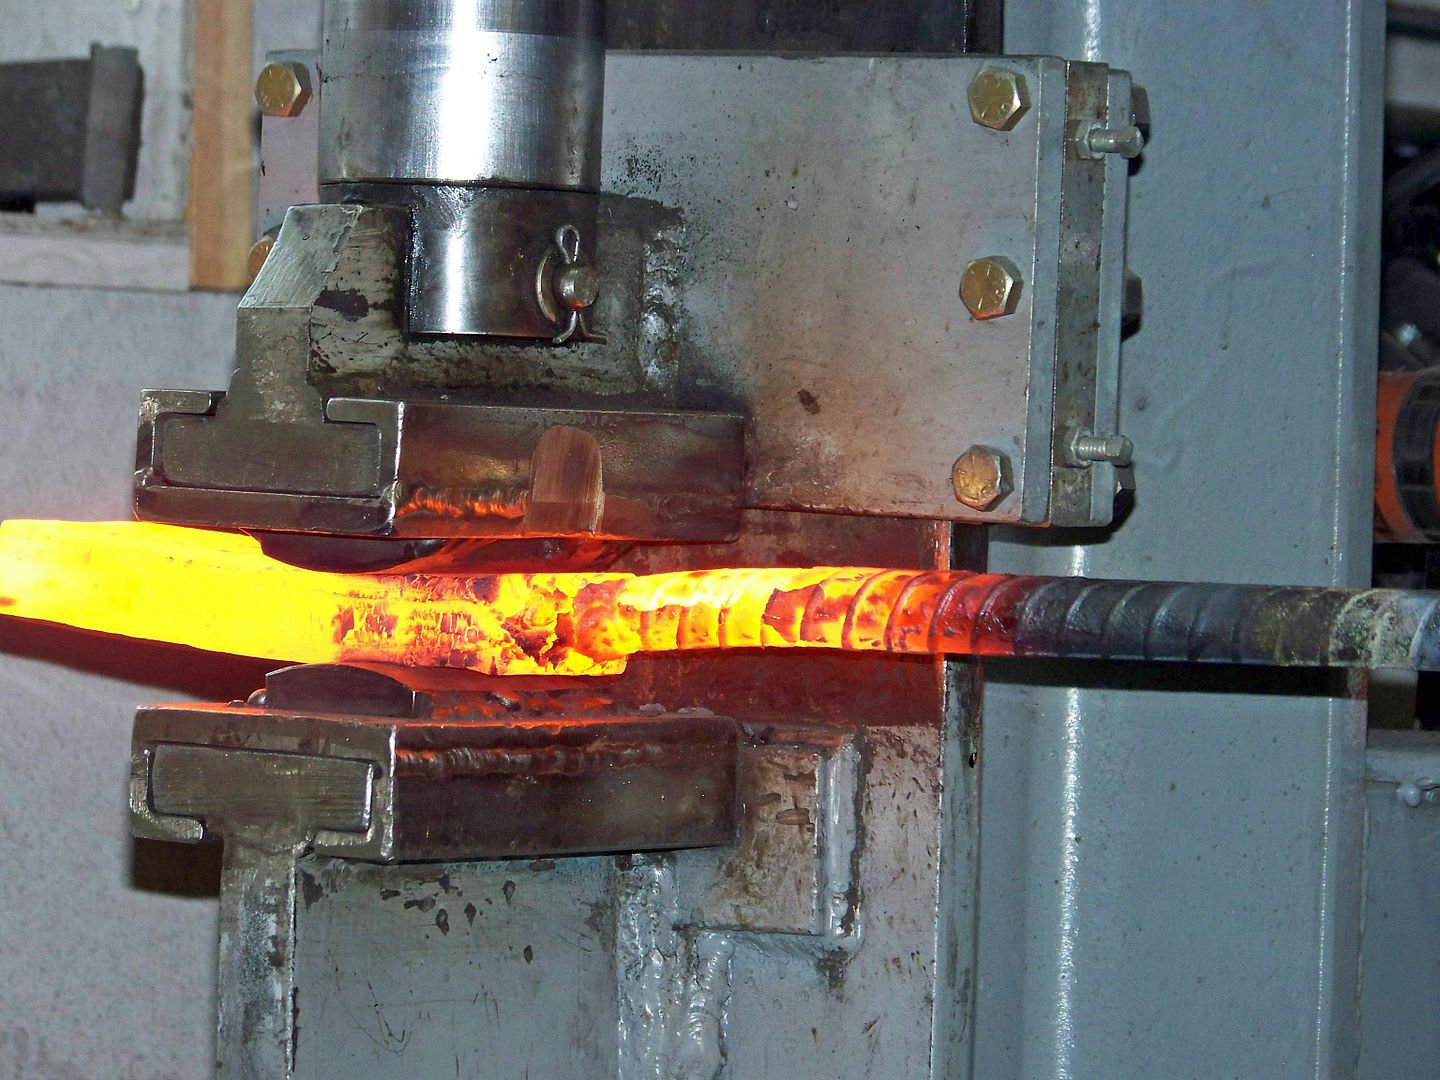
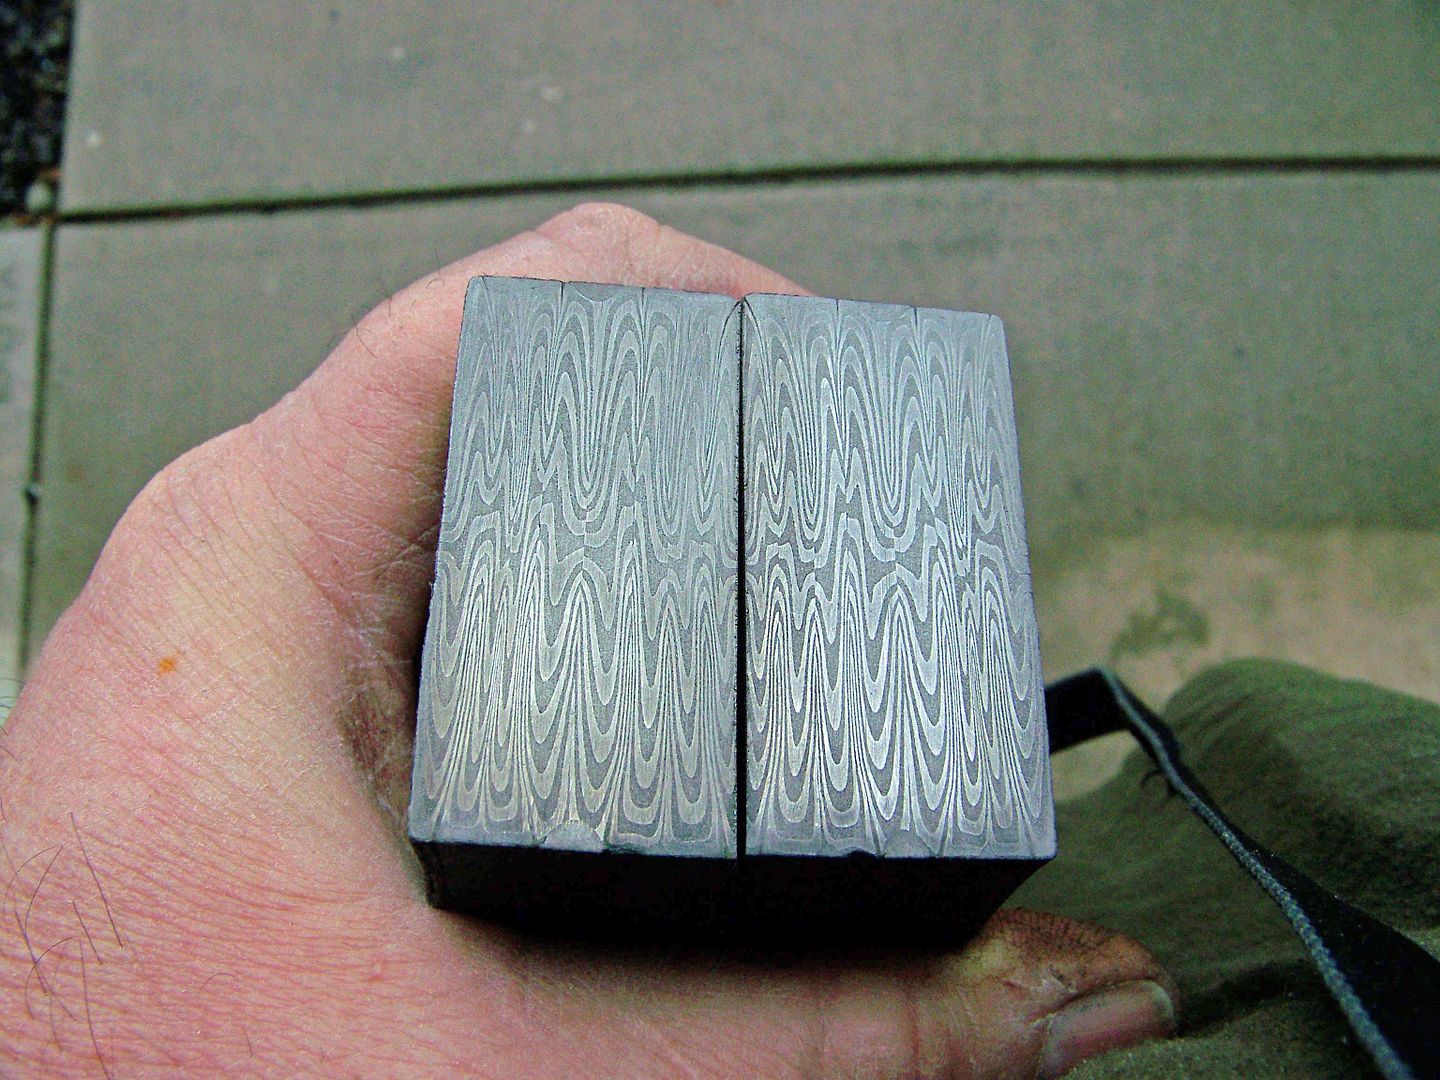
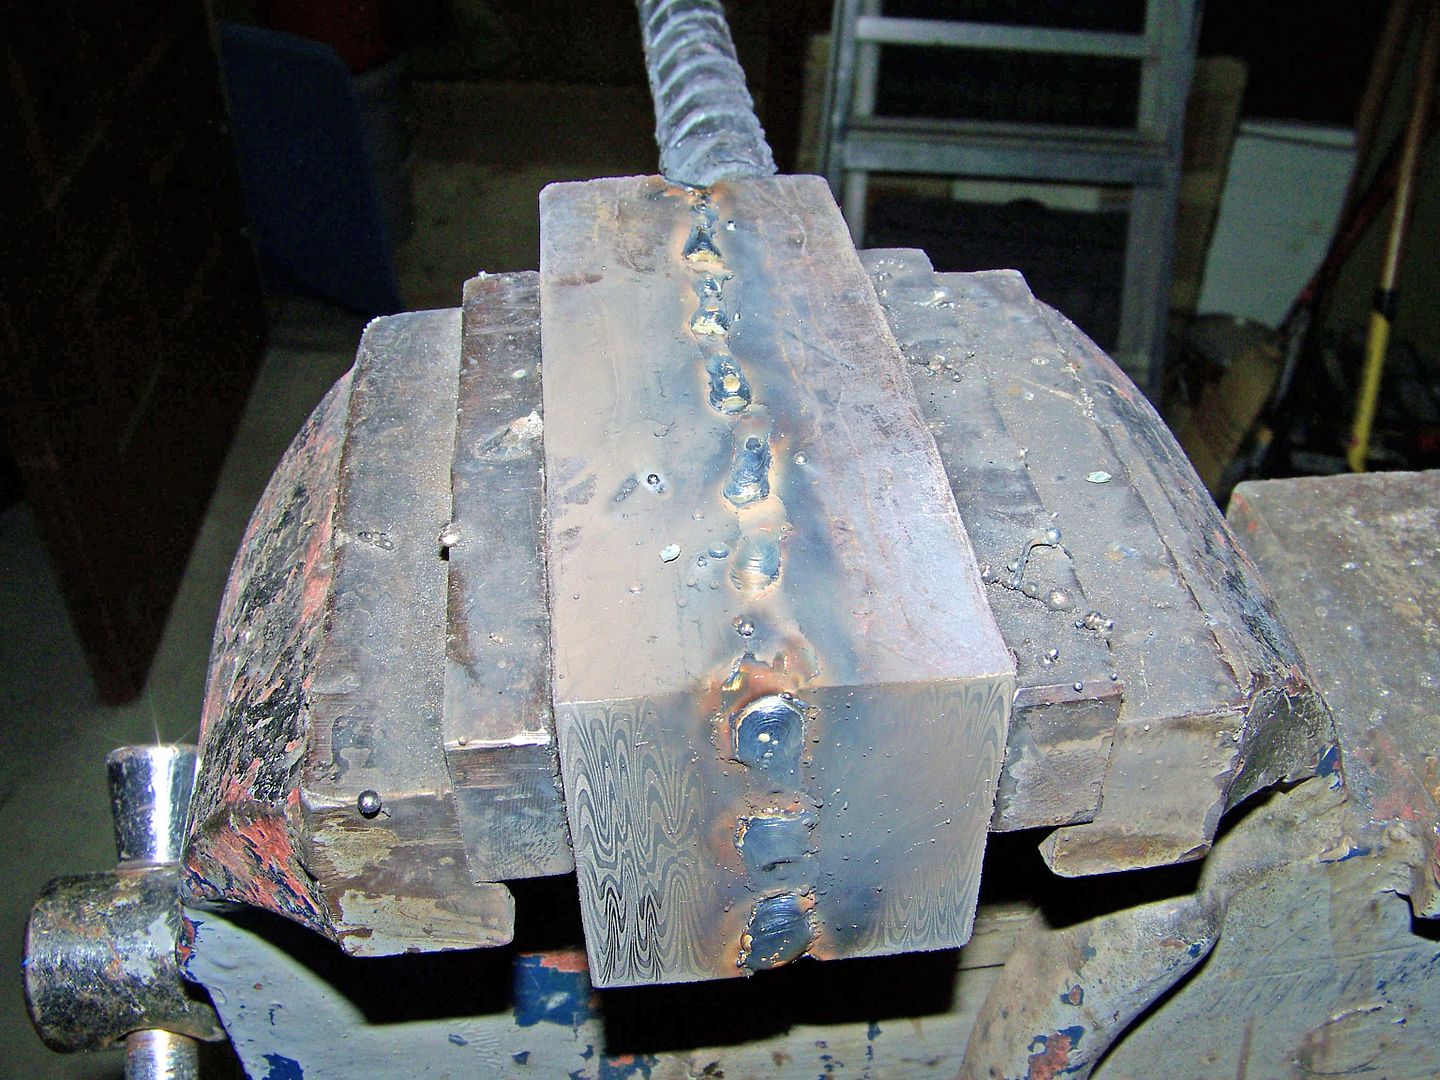
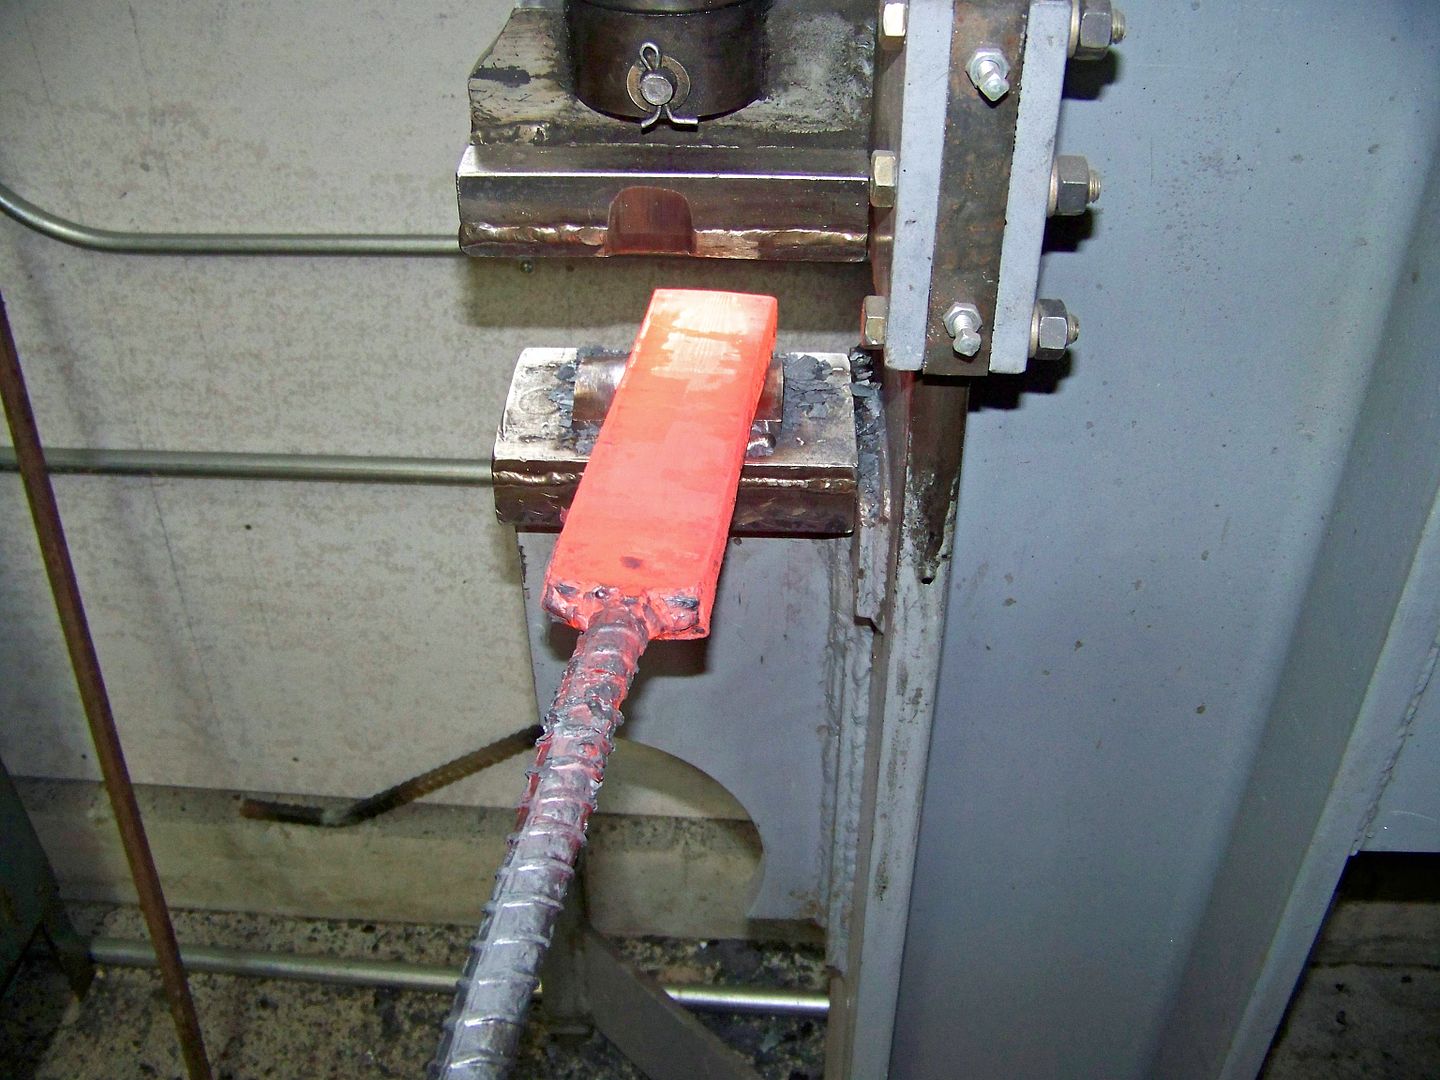
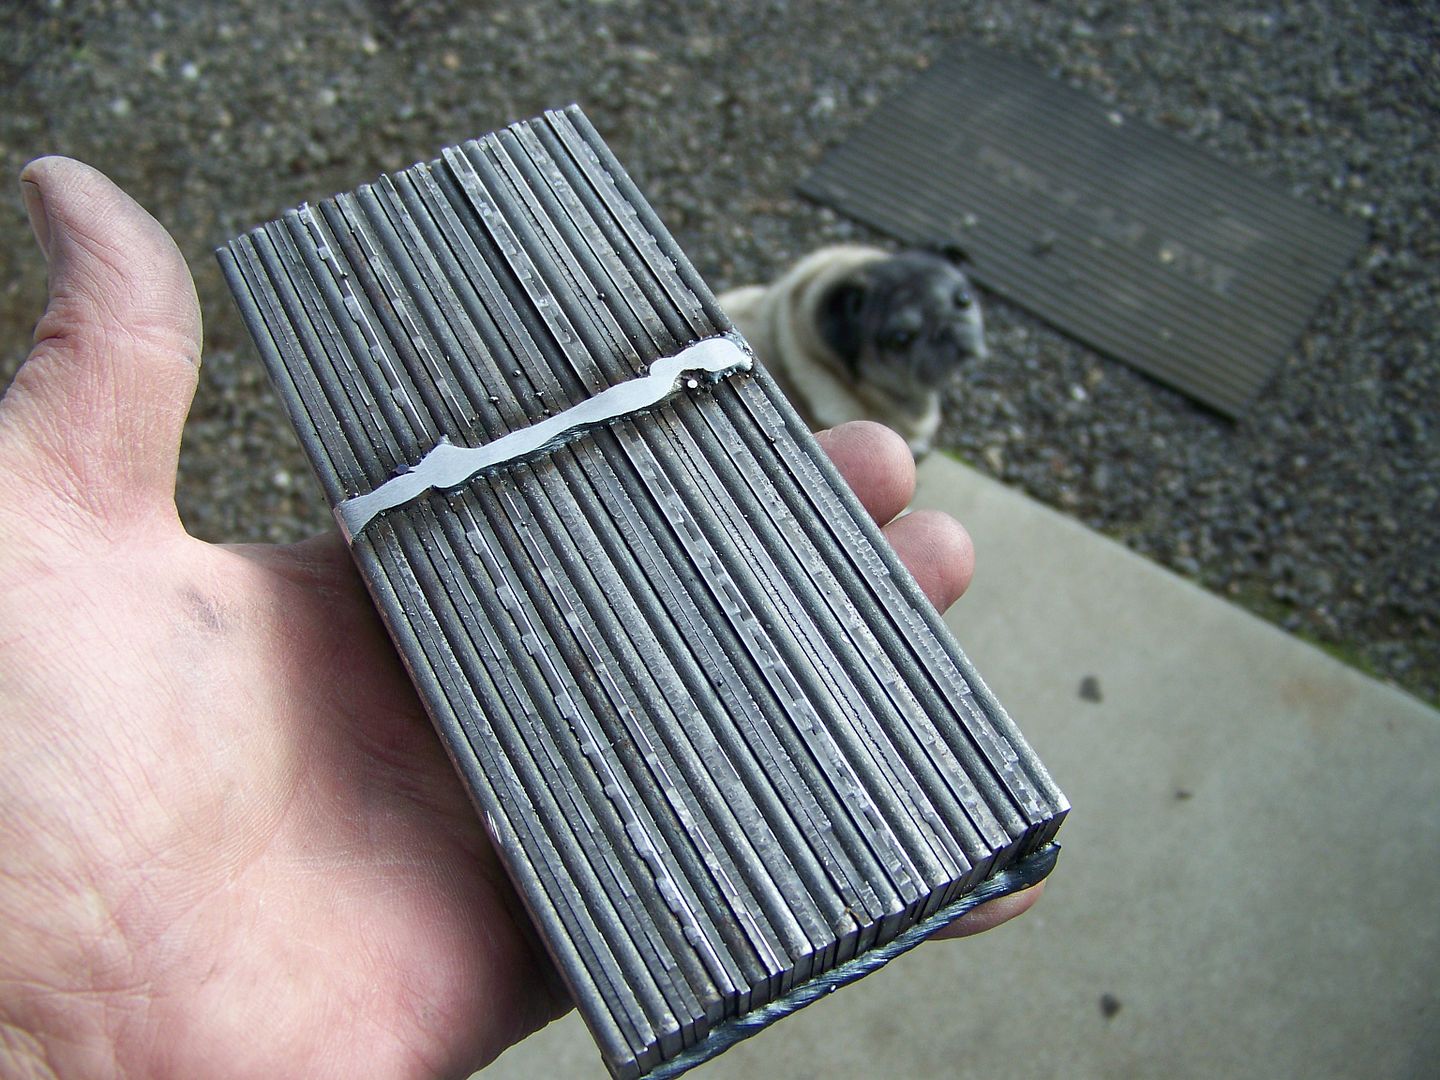
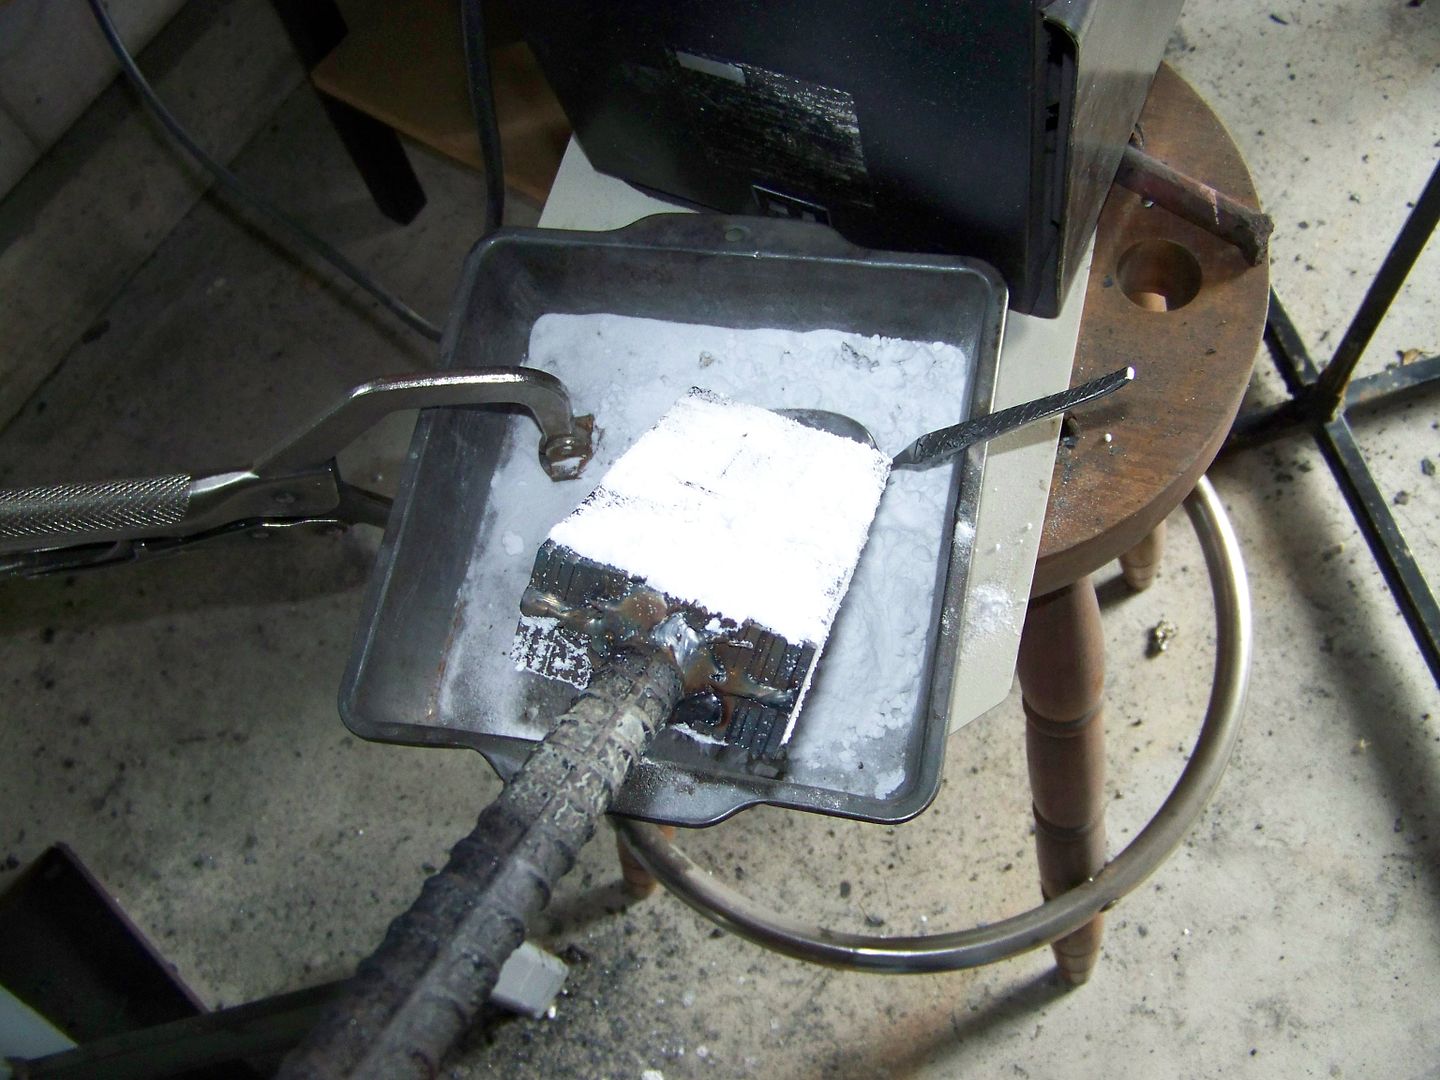
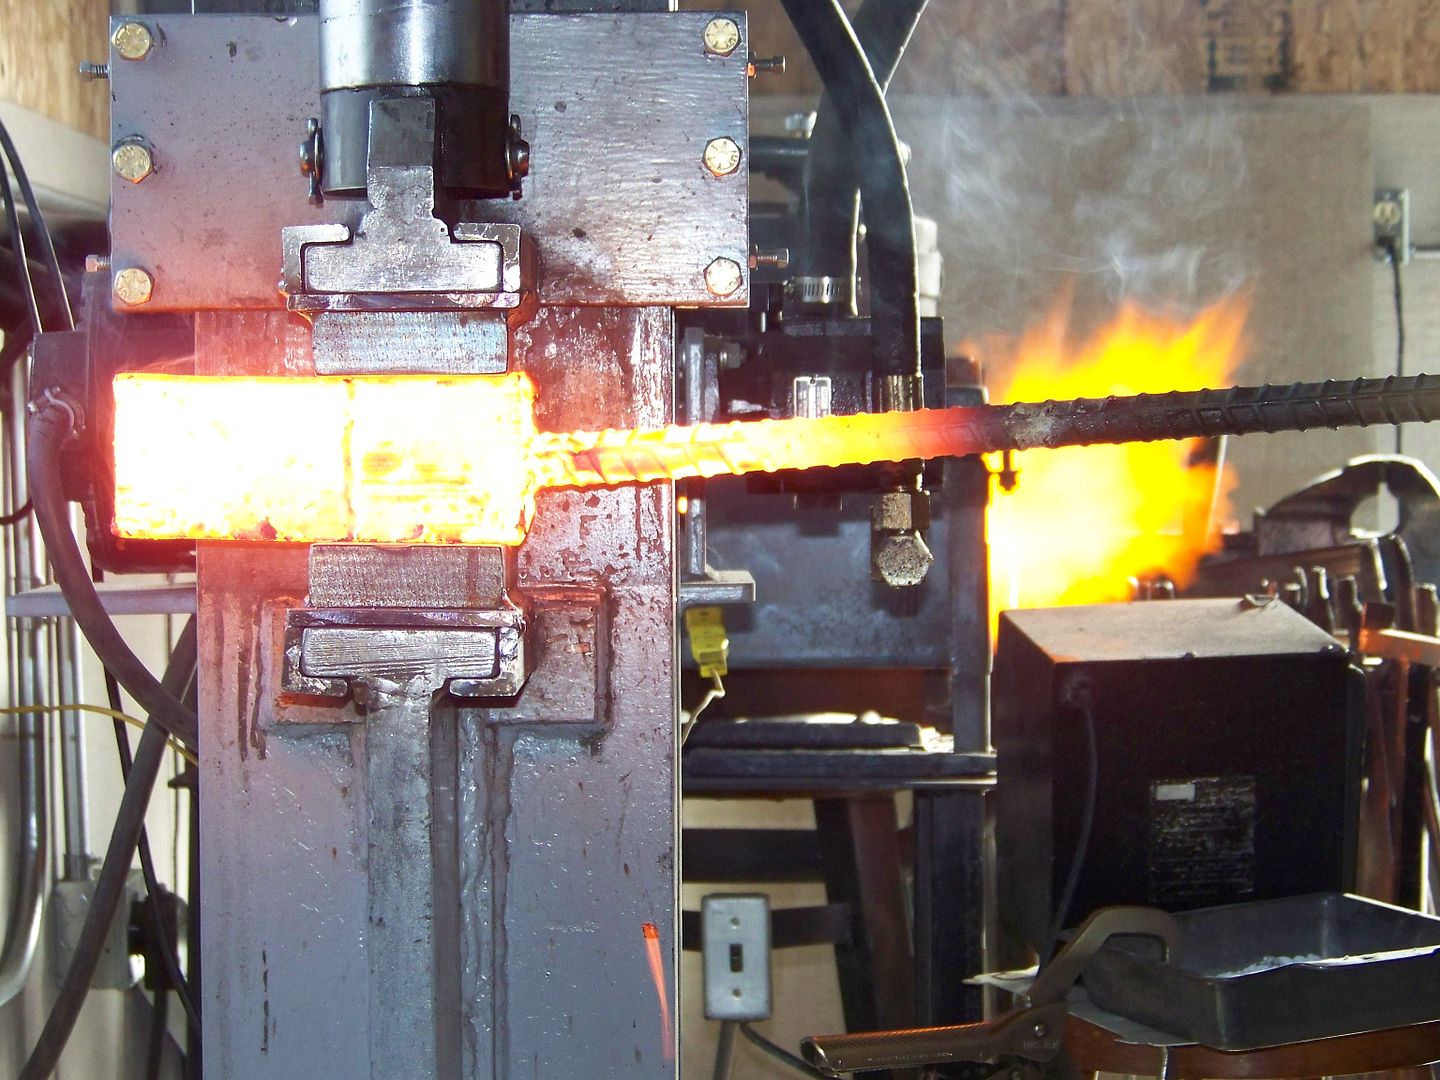
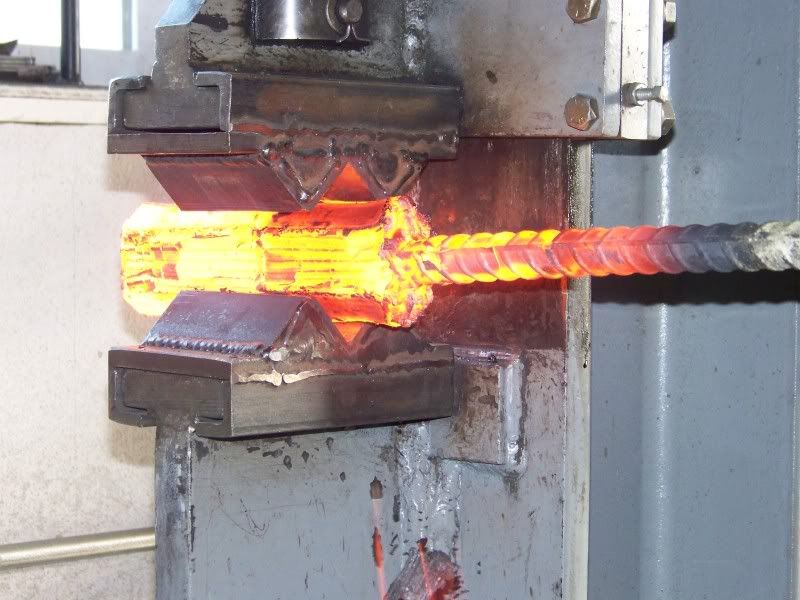
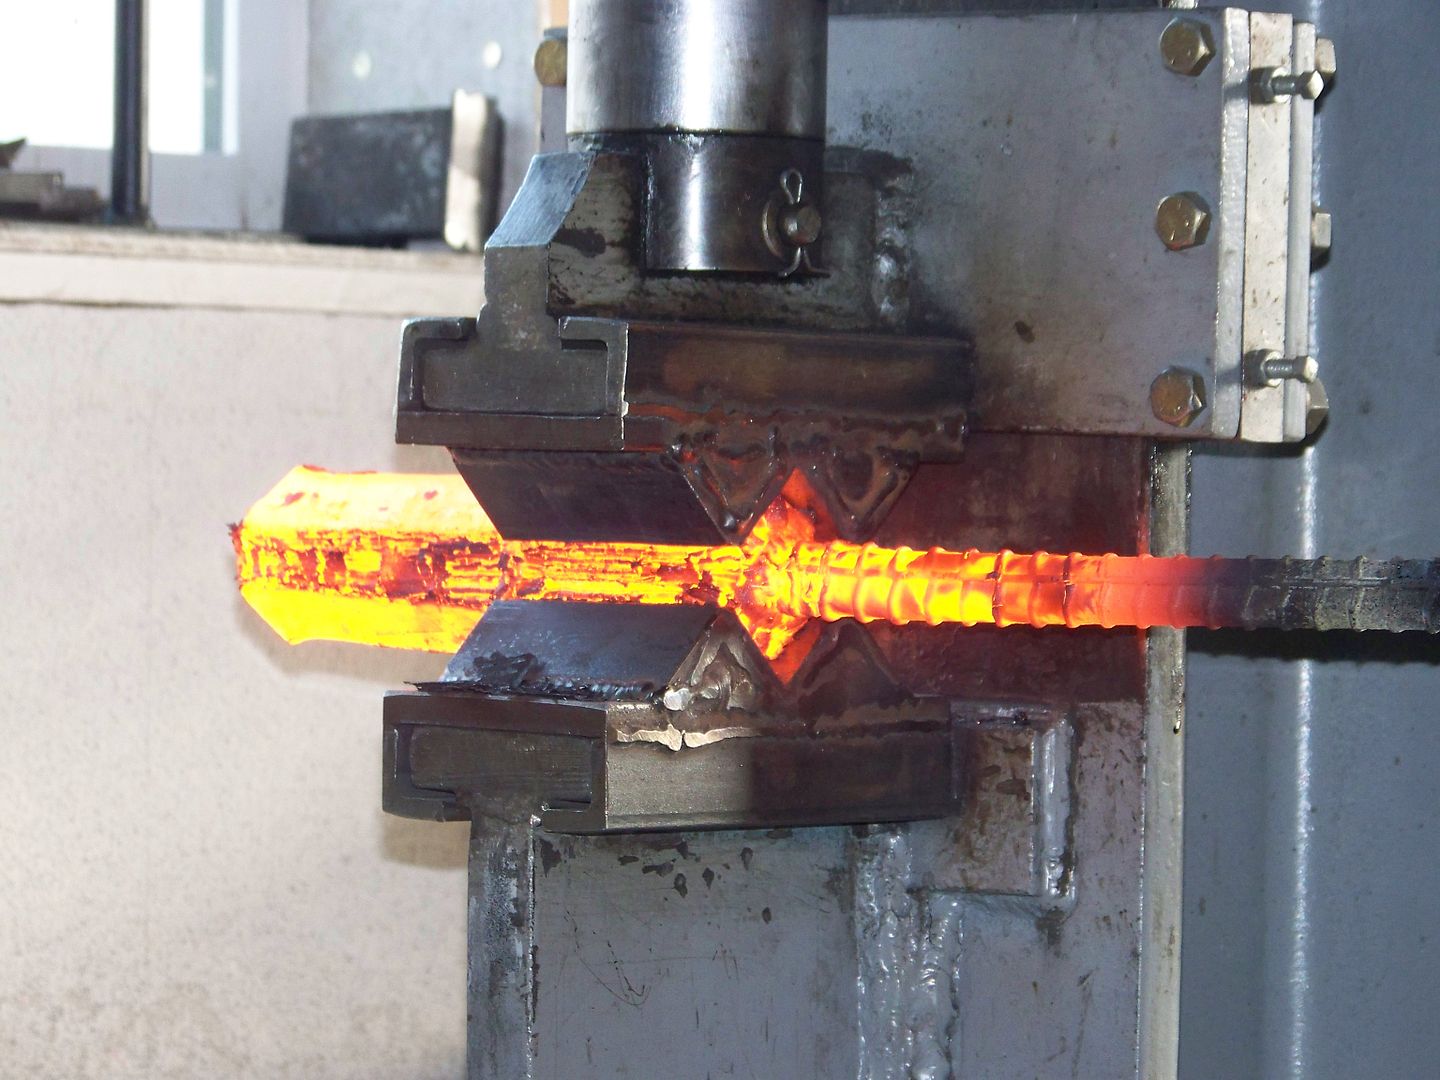
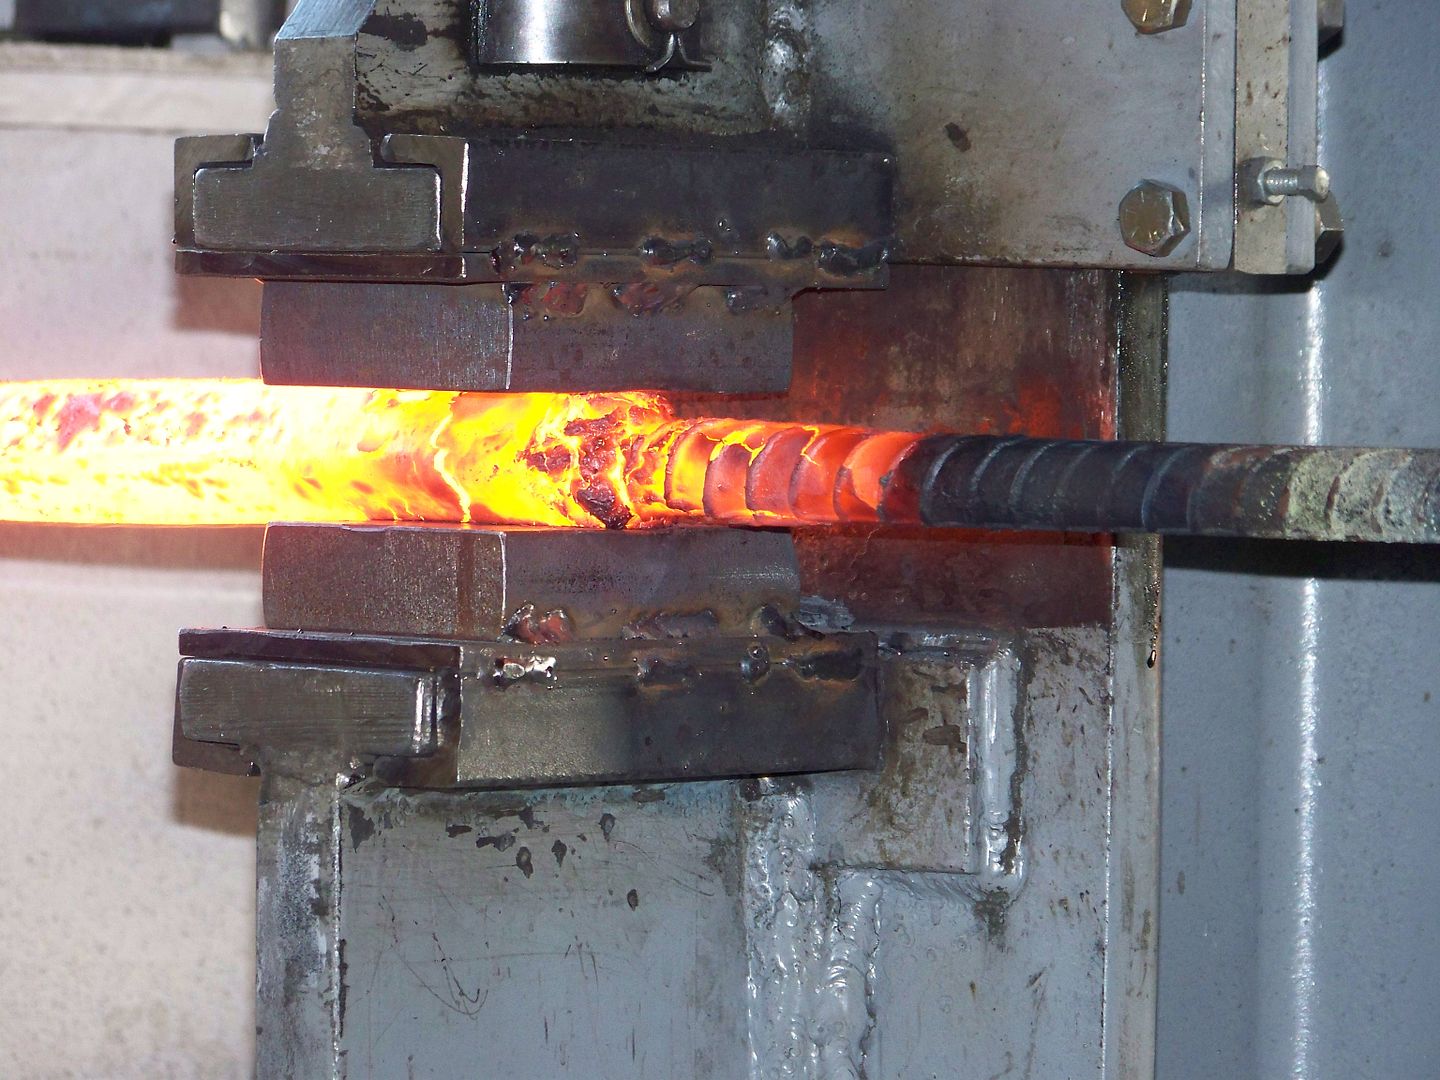
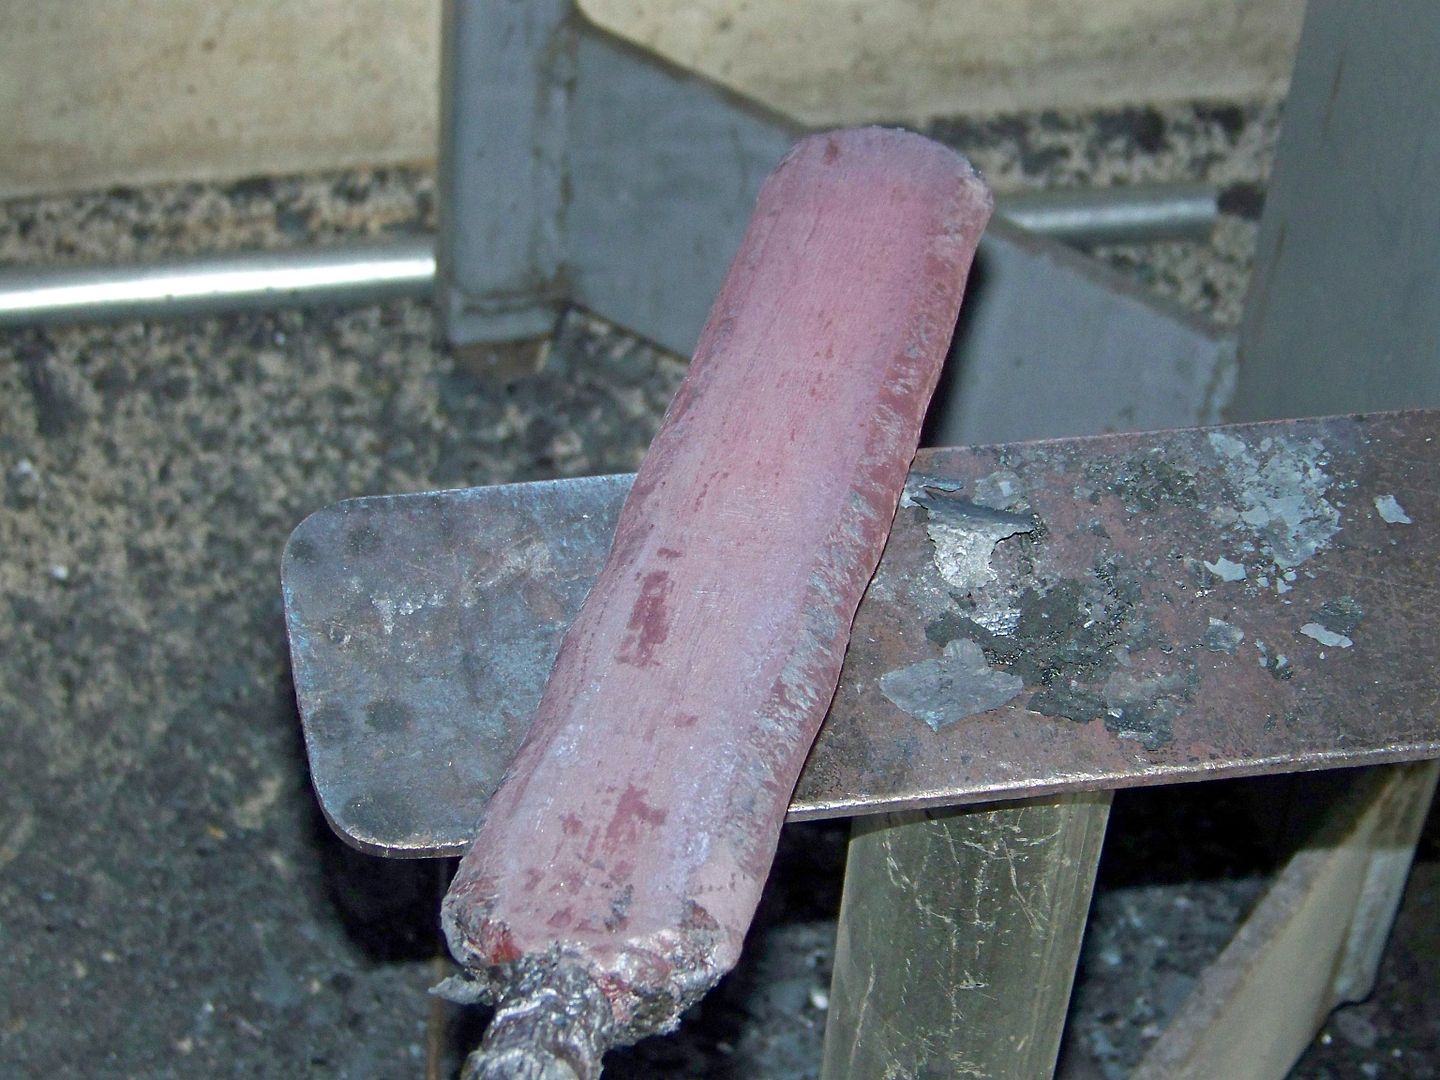
I started out with about 30 layers of 1.25" wide by 6" long alternating 1084 and 15n20 steel. I had to double up on the 15n20 to make them at least as thick as the 1084. That will give me a brighter silver blade when etched and help with the pattern too. If all goes well I will split this in two and reweld for the feather pattern.

101_5417.jpg


101_5418.jpg


101_5419.jpg


101_5420.jpg


101_5422.jpg


101_5424.jpg


101_5425.jpg


101_5427.jpg


101_5428.jpg


101_5430_edited.jpg
 
I cleaned it up and dome shaped the sides so it wont trap flux. I cut it in half and etched the ends to see my pattern. Those squaring dies really made the outside layers bend. I intentionally left the billets oval shaped instead of the usual squaring the billet sides in hopes the "C" shapes remain. I've never done it this way so we will see if it helps.

101_5433_edited.jpg


101_5435_edited.jpg


101_5436_edited.jpg


101_5439_edited.jpg


101_5440_edited.jpg
 
Looks like a great way to stay warm on this cold clammy day! Fun to see how these blades begin.
 
Bruce, your posts are like those serials I watched as a kid on Saturday morning t.v. Just when it's getting real, real good and the hero is falling off a cliff they'd say, "Stay tuned for next week's episode." I have just as hard a time waiting as I did back then. I hope the hero makes it.
 
I cut the bar in half and welded both halves together. This time I used the wire MIG and welded all the way around the seam to keep air out or trapping flux in. This is referred to as a "dry weld" because there is no flux used.

101_5441_edited.jpg


101_5443_edited.jpg


101_5451_edited.jpg


The billet is getting too wide and I need to narrow it down but I cant press on the edges without first taking off the MIG weld otherwise it will disrupt my pattern somewhat along the edges.
101_5452_edited.jpg


101_5454_edited.jpg


101_5455_edited.jpg


101_5457_edited.jpg


Stayed tuned for tomorrows episode entitled "Whackin n Stackin"
 
Last edited:
Bruce, That is interesting how you squared then ovaled the billet. Have you done this procedure before ? Are there other patterns you can develop from this start? I see the possibilities of this for another Bruce Bump WIP:)

Thanks for sharing

Bing
MLazyB Custom Knives
 
Bruce, That is interesting how you squared then ovaled the billet. Have you done this procedure before ? Are there other patterns you can develop from this start? I see the possibilities of this for another Bruce Bump WIP:)

Thanks for sharing

Bing
MLazyB Custom Knives

Hi Bruce,
I havent welded two ovals together. The only problem I see is a gap between the billets that wouldnt be there if I squared the billets. Live and learn, the worst that can happen is some wasted material on the sides but I really like how the layers are even and most all of them are "C" shaped. I'm counting on nice looking long and uniform feathers.

This is a basic start for the "W" pattern. From here you can do a hundred different patterns I bet. I like to build these layers to about 32 cut them into square crackers and stack the crackers, weld and then split them in two. Them simply reweld the two parts therefore giving a feather pattern.

It should like very much like this one.
100_2843_edited.jpg
 
You know Bruce, I was enjoying this thread of yours until that last picture. Just another reminder that I lost!

Seriously, this is an interesting WIP.

David
 
You know Bruce, I was enjoying this thread of yours until that last picture. Just another reminder that I lost!

Seriously, this is an interesting WIP.

David

Oh thats right. This knife beat your crazy cool subhilt in the Bladeforums Best Bowie. :D I never did get a prize for that :(
 
Here is what it looks like with 8 layers.
101_5498_edited.jpg


Here is the billet ready to forge weld. I will then have 16 layers. Just one more time and I will be at 32 layers and I can cut it into crackers and stack em.
101_5500_edited.jpg


101_5503_edited.jpg


101_5505_edited.jpg
 
Last edited:
Bruce, I am liking how this is developing. It doesn't look like there was much loss on the oval. By the way does that grinding stone on your right angle grinder remove the scale faster/ better than a disc?

Thanks
Bing
MLazyB Custom Knives
 
Bruce, I am liking how this is developing. It doesn't look like there was much loss on the oval. By the way does that grinding stone on your right angle grinder remove the scale faster/ better than a disc?

Thanks
Bing
MLazyB Custom Knives

Hi Bing,
I like the pattern too but am watching those dang ovals. Its a shame to lose any at all on the edges. I should have squared them and dry welded each time. Time will tell if that was a big mistake but how else am I going to know this stuff.
Yes that big rock cuts like mad!
 
Last edited:
Bruce - you gonna be at the OKCA show this year? This will be my first year attending (and only major show since Blade West is no more) and would love to get to see some of your work in person!

BTW - I absolutely love your WIP threads!
 
Back
Top