Sean,
As we mentioned over the PM, I'm going to have to post the stuff about my 'method'(I use the term loosely!) for making rings from Moku-ti bar stock. PM's won't let me post pictures! I'm gonna have to do this in parts, mostly because I only have pictures of parts of the process at the moment. Am going to start another one soon, so that'll be a good chance for more detailed pics.
As I mentioned, I cut and shape my rings from bar stock Moku-Ti using hand tools, as well as a power drill and dremel tool. More recently I've started 'cheating' by getting a small bench sander to handle the bigger stock removal portions. With my first ring, I actually thinned down a piece of Ti from 10mm to 8mm using only a hand file! Can you say bruised finger tips? ;P
For those of you who make rings professionally or with proper equipment, try not to laugh *too* hard when you see this

I dabbled with the idea of getting a lathe or mill, but space (and cost!) limitations prevented any of that. Besides, now I get to tell people I make these rings by hand..muahaha!

Yeah, well, anyway...
the principles I use are reasonably simple - in fact, I adapted them from The Absolute Cheapskate Way to Start Making Knives by Scott Jones. I actually made a couple of decent knives in S90V using that method, and tried my first ring along with that second knife.
So the first step is to figure out the intended ring size. Then I use a chart like
this to convert the ring size to an actual diameter in millimeters. I then mark the layout of the ring on whatever material I'm going to use. I tend to make odd shaped rings, so the layout can look rather weird, but if you're just going to make a 'regular' round wedding band, then you really just need to layout one circle for the inner circumference, and one for the outer.
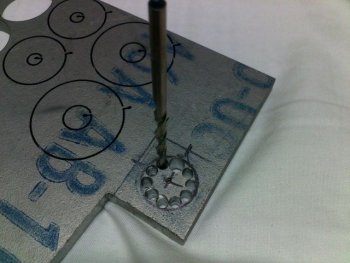
The picture above shows a few things. Firstly, the layout of the ring 'blank'. The one was going to be a bit squarish/spikey. Hopefully you can see the center marks, etc that i've made. After figuring out the center, I mark it with a punch. I then draw the circles with either a fine sharpie or scribe, held in a pair of mathematics compasses. In you case, you could pretty much just estimate a center, punch it, and then draw the circles.
The picture also shows the next step - I drill holes inside the inner circumference of the ring. The 'trick' here is to drill one larger hole (in this case 3/16") and the rest as smaller holes (I use 1/8"). The larger hole will allow you to just slip a coping saw blade through it, from which you can start cutting out the inside of the ring. When I started, I drilled these freehand with the power drill. That was an experience ;P Now I use the same drill but with a cheapish drill guide. Still requires a whole lot of weight put into it for it to go through, and I go through cobalt bits like mad! Have recently invested in a bit sharpener though. It should be much easier with the drill press you have. After all the holes are drilled, you basically get your coping saw blade in the larger hole, set it up in the saw frame, and then 'join the dots'.
You should end up with something like the next picture. Another note is that up to this point, I haven't actually detached the ring 'blank' from the rest of the Ti sheet yet. It makes it a whole lot easier to attach to a vise and cut. After all the cutting of the inside is done, I basically take a hacksaw to it and cut the blank out. Bear in mind that at this point, it probably still looks more like a hunk of metal with a hole in it, rather than a ring blank!
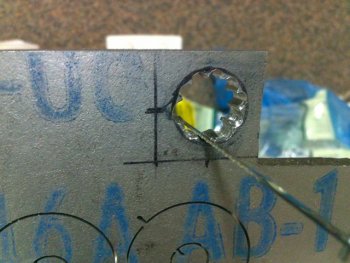
At this stage, I then use a round hand file to file down the 'teeth' on the inside, but being careful not to go outside the marked area. As you know, it's always much easier to take material off later rather than kick yourself for taking off too much! Don't worry too much about getting a perfect circle with the file at this point. You'll do that later with the dremel. To get a *sorta* even circle(after the 'teeth' are gone), I file the lowest part of the circle a certain number of times, rotate the piece 45deg in the vise, and repeat. After making a complete circle, I then flip it back to find and do the same from the other side.
Depending on the ring size, the next step is to use either dremel attachment 407(1/2" sanding drum) or 430(1/4" sanding drum) to even out the inside surface of the ring. The 407 really needs a minimum of 16mm to fit into the inside of the ring. i'll have to continue about that later, after I take some pictures during the next project.

