Taking the dive into knife making

Got some more work done today, still down to the wire. I have work in four hours, then hitting the grinder again right when I get home.

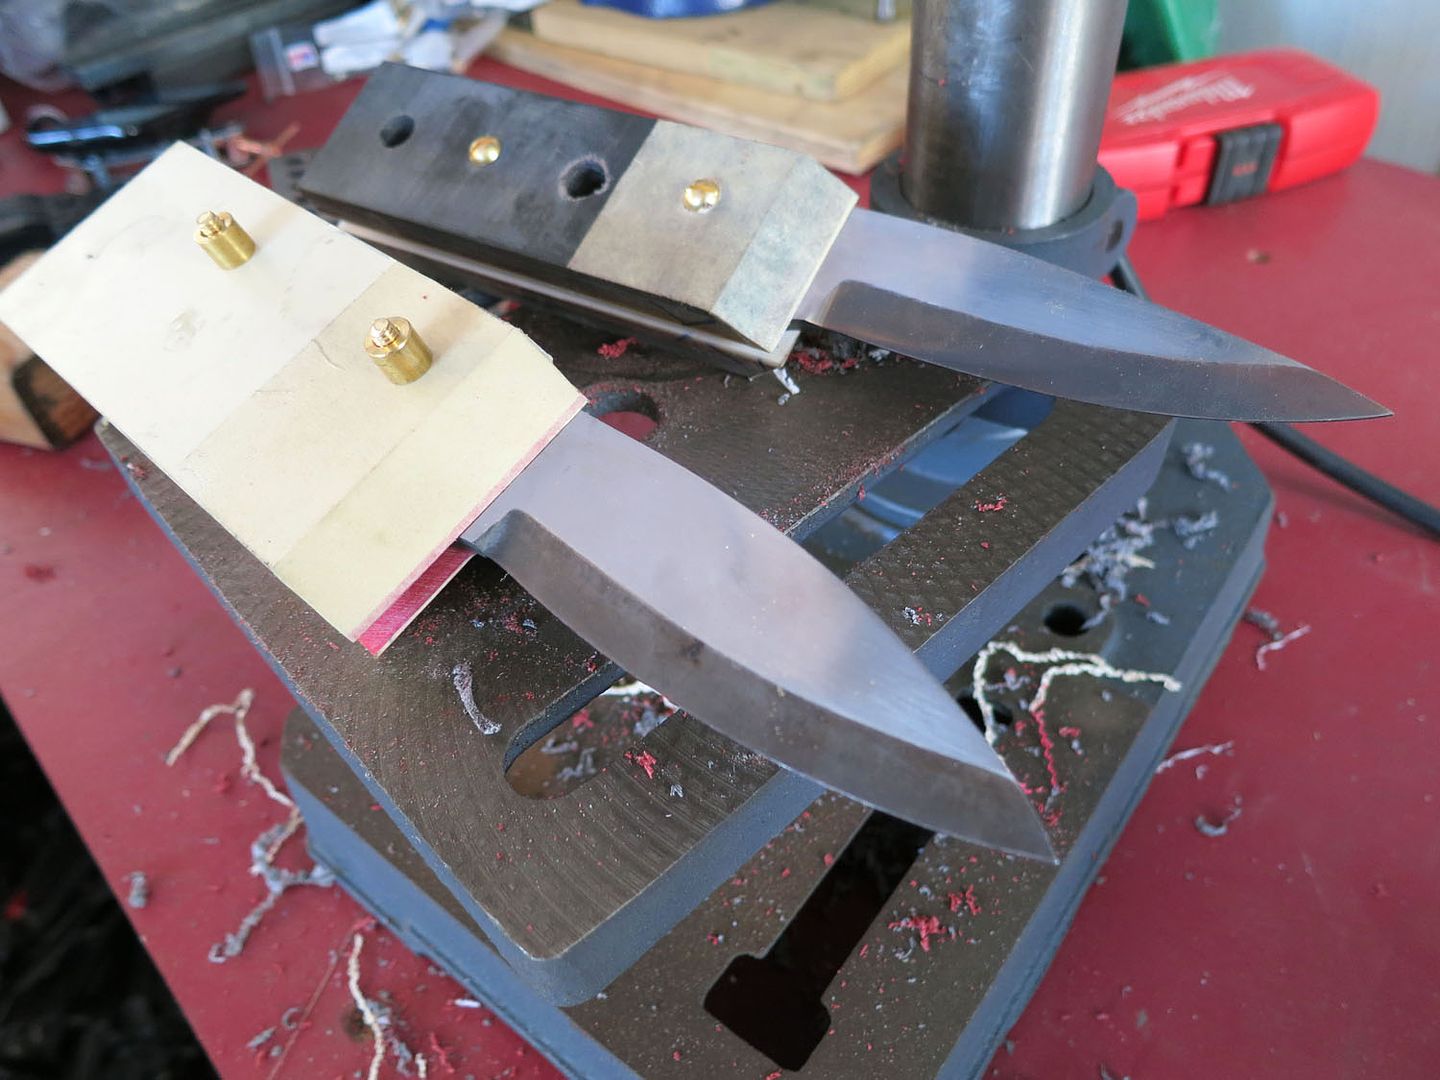
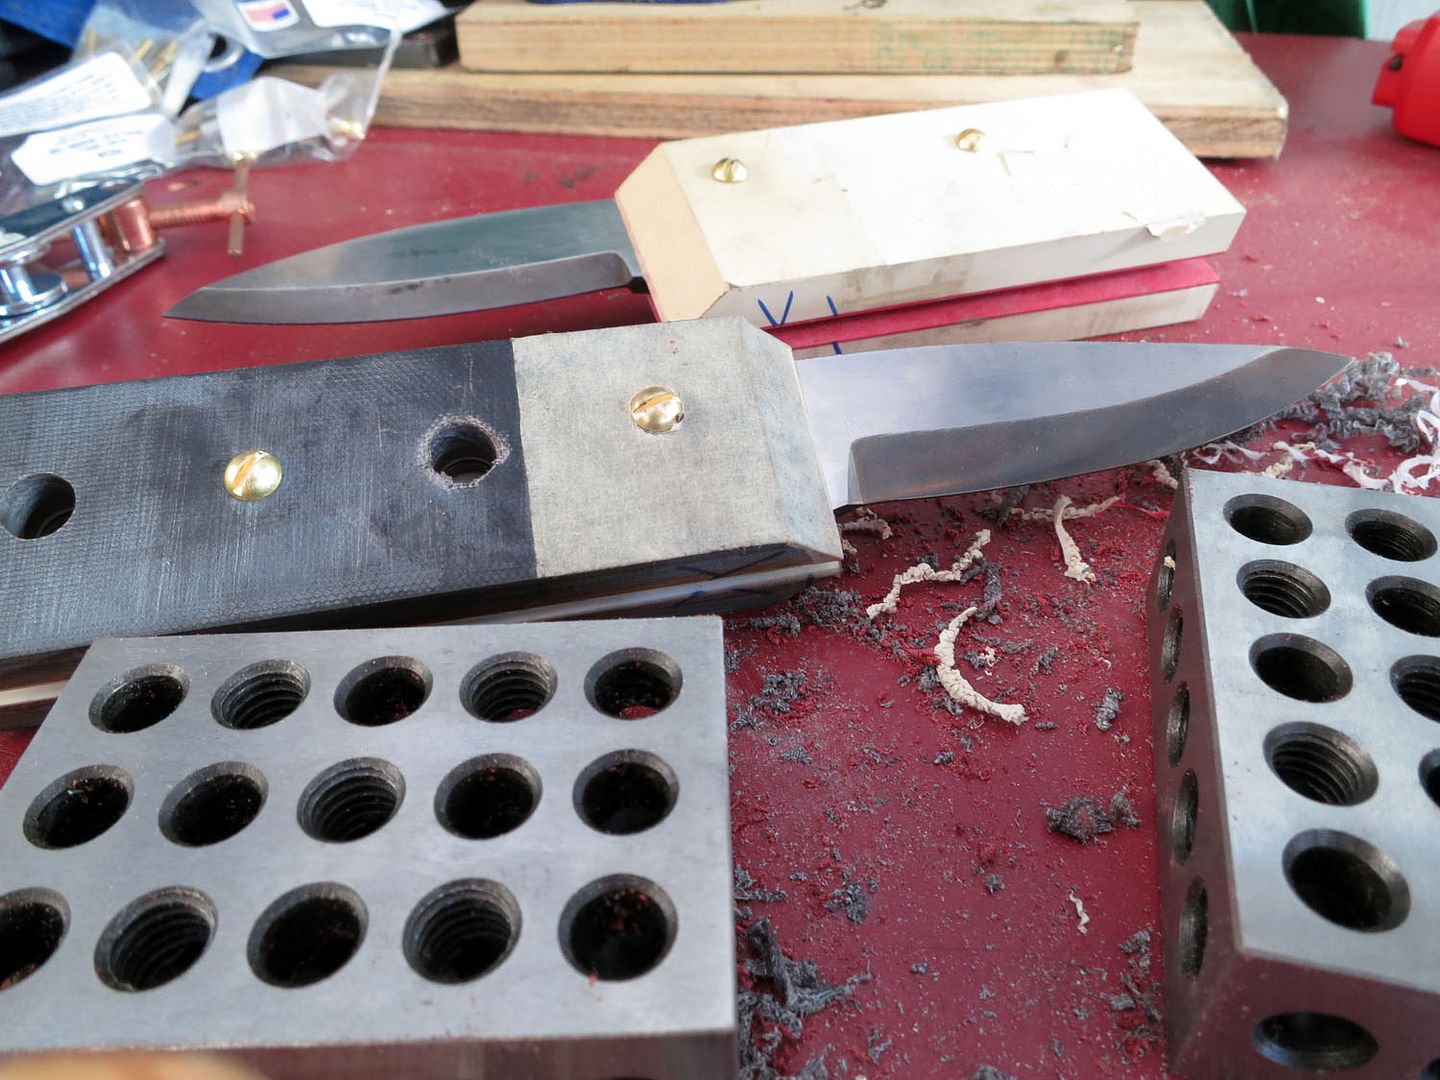
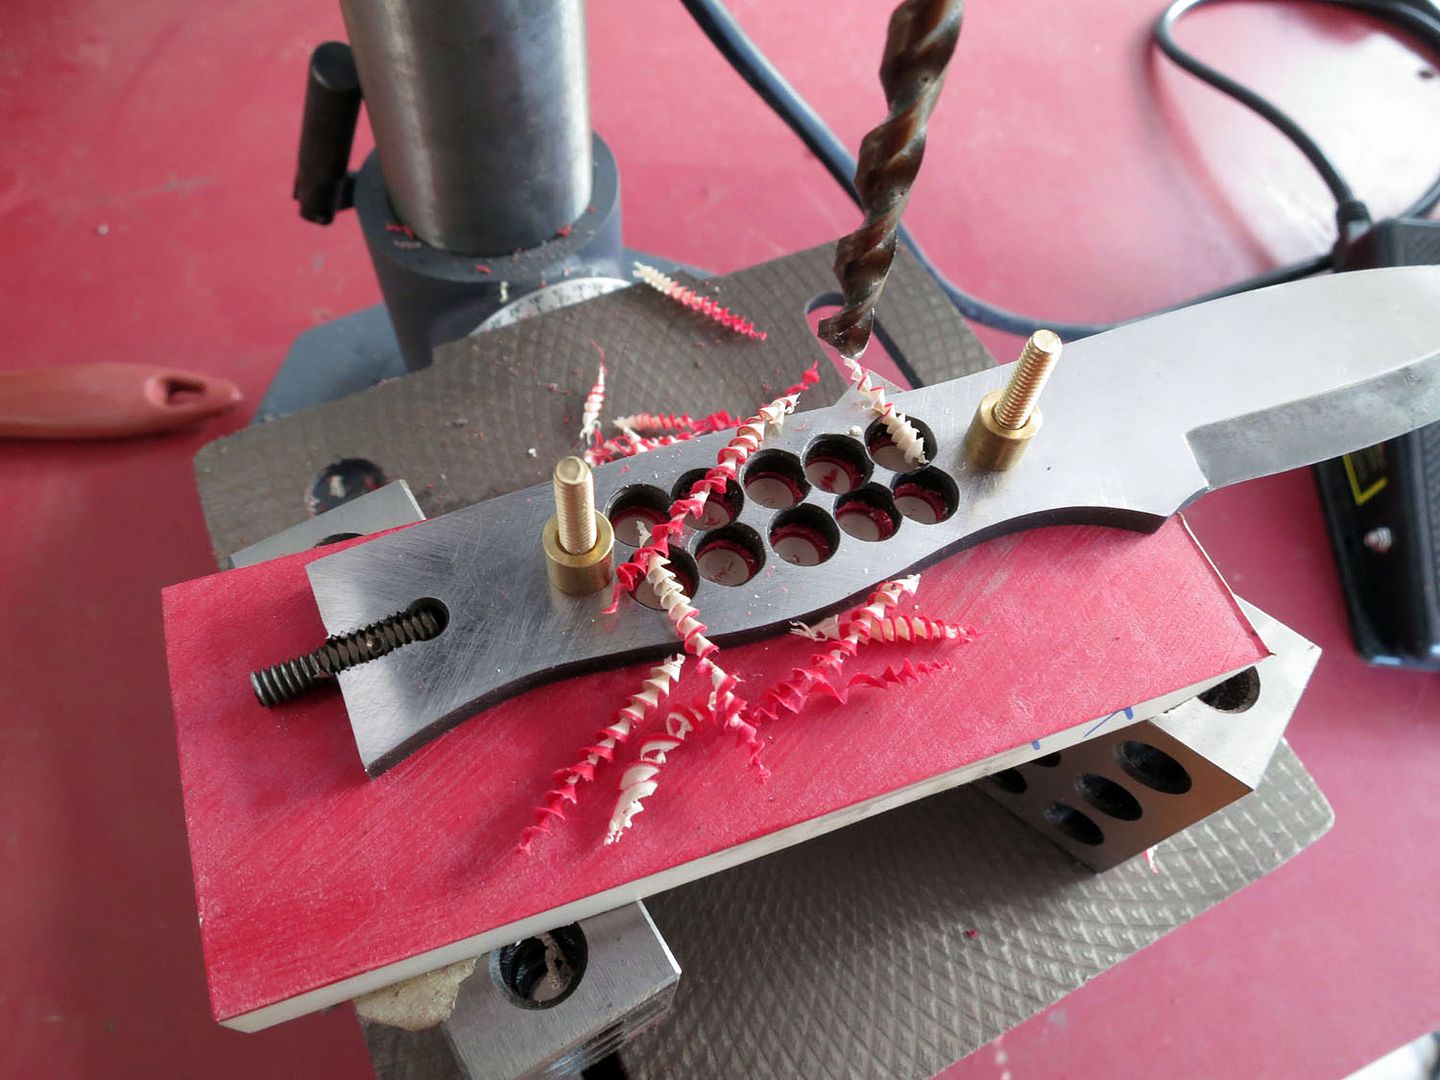
Drilled out holes for Loveless bolts and pins.
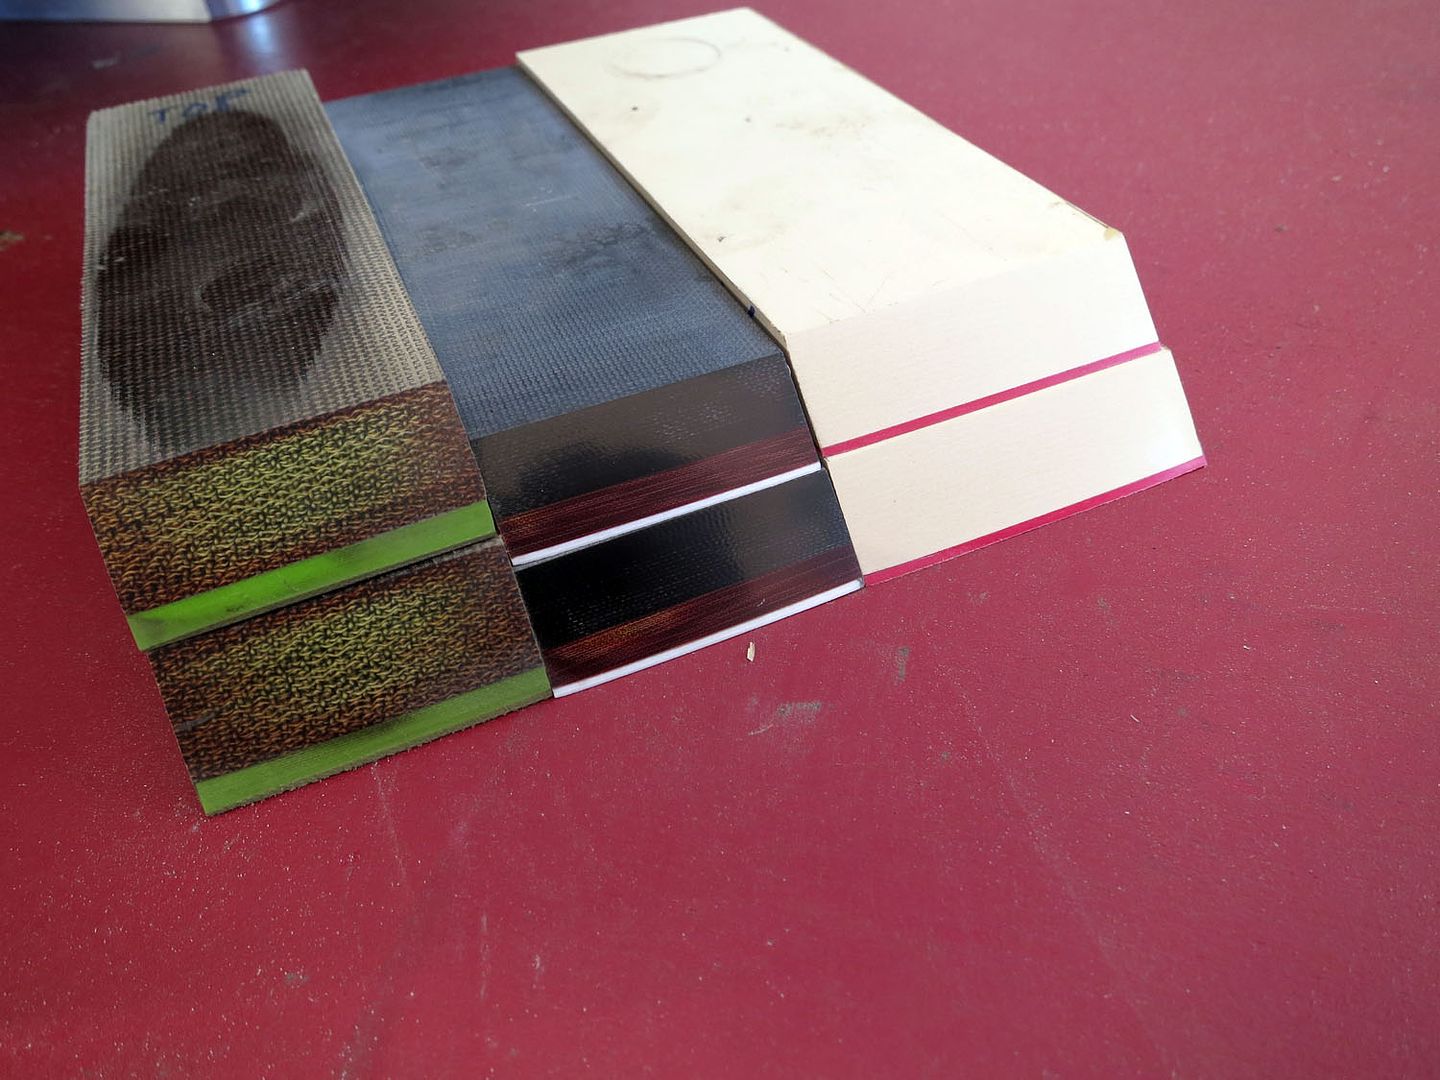

Handle material.
Toxic green liner with green canvas micarta, white and maroon liners with Black linen micarta, red linder with Ivory paper micarta


Drilling out handles a little the give epoxy a bit more of a lock in.


Sawing scale closer to actual size, to save on grinding/sanding time.


Final edge: I noticed the A2 was much easier to grind, quite noticeable in fact. Although the hardness is the same on both the A2 and O1. I wonder why it's such a noticeable difference.


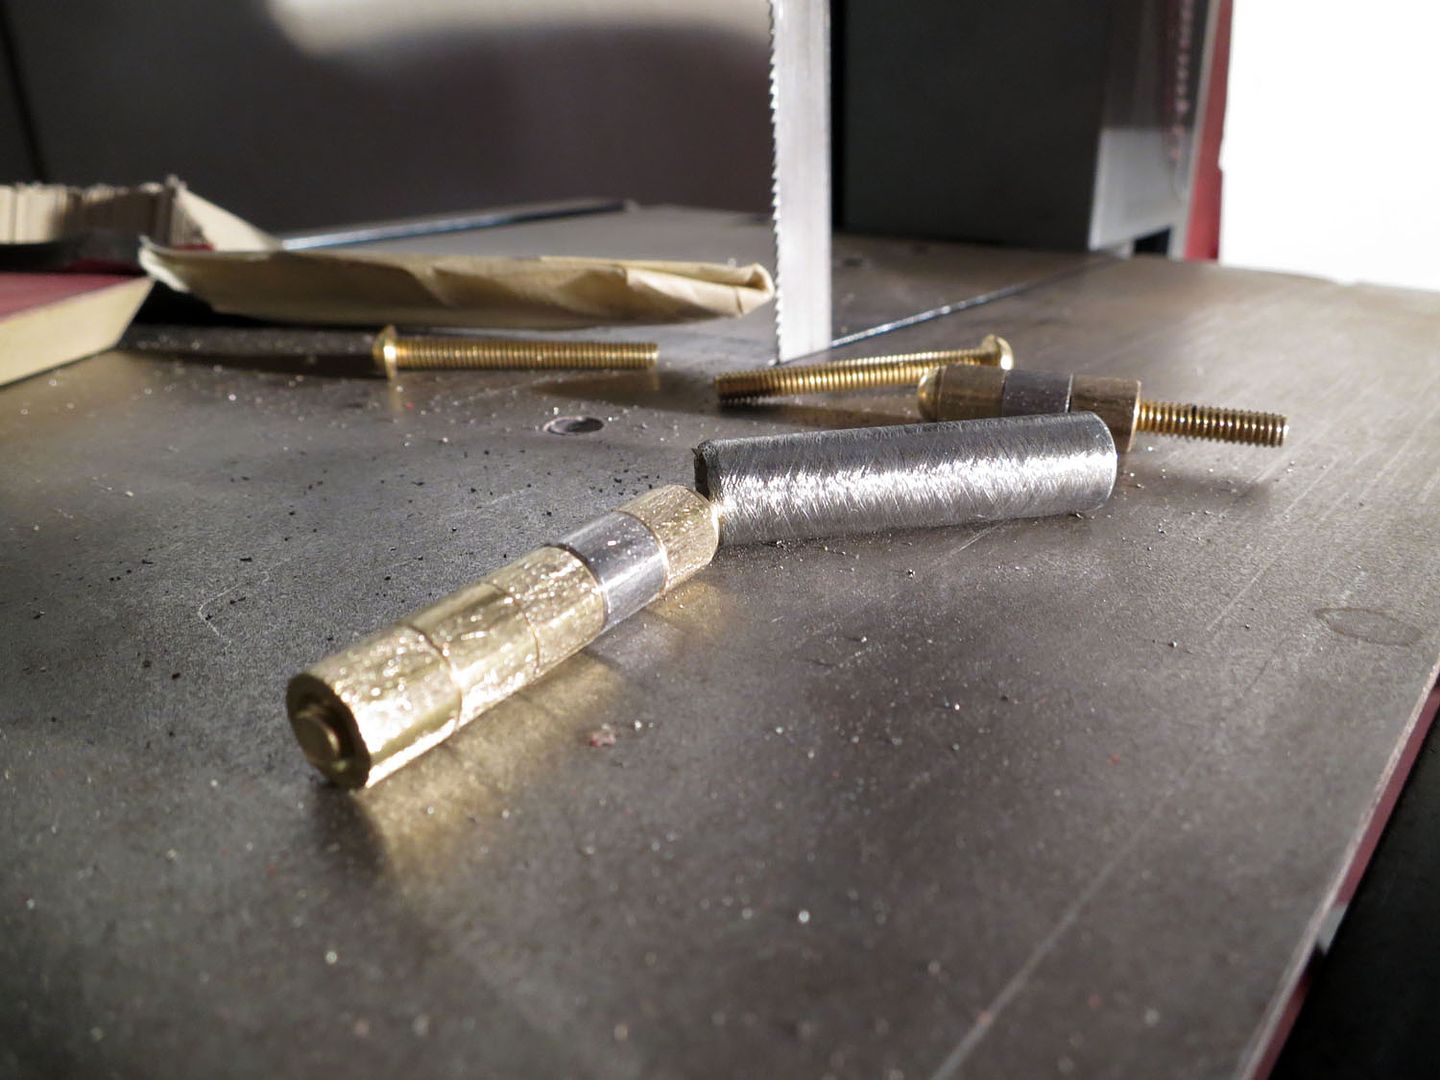
Roughing up Loveless nuts and 3/8'' tube


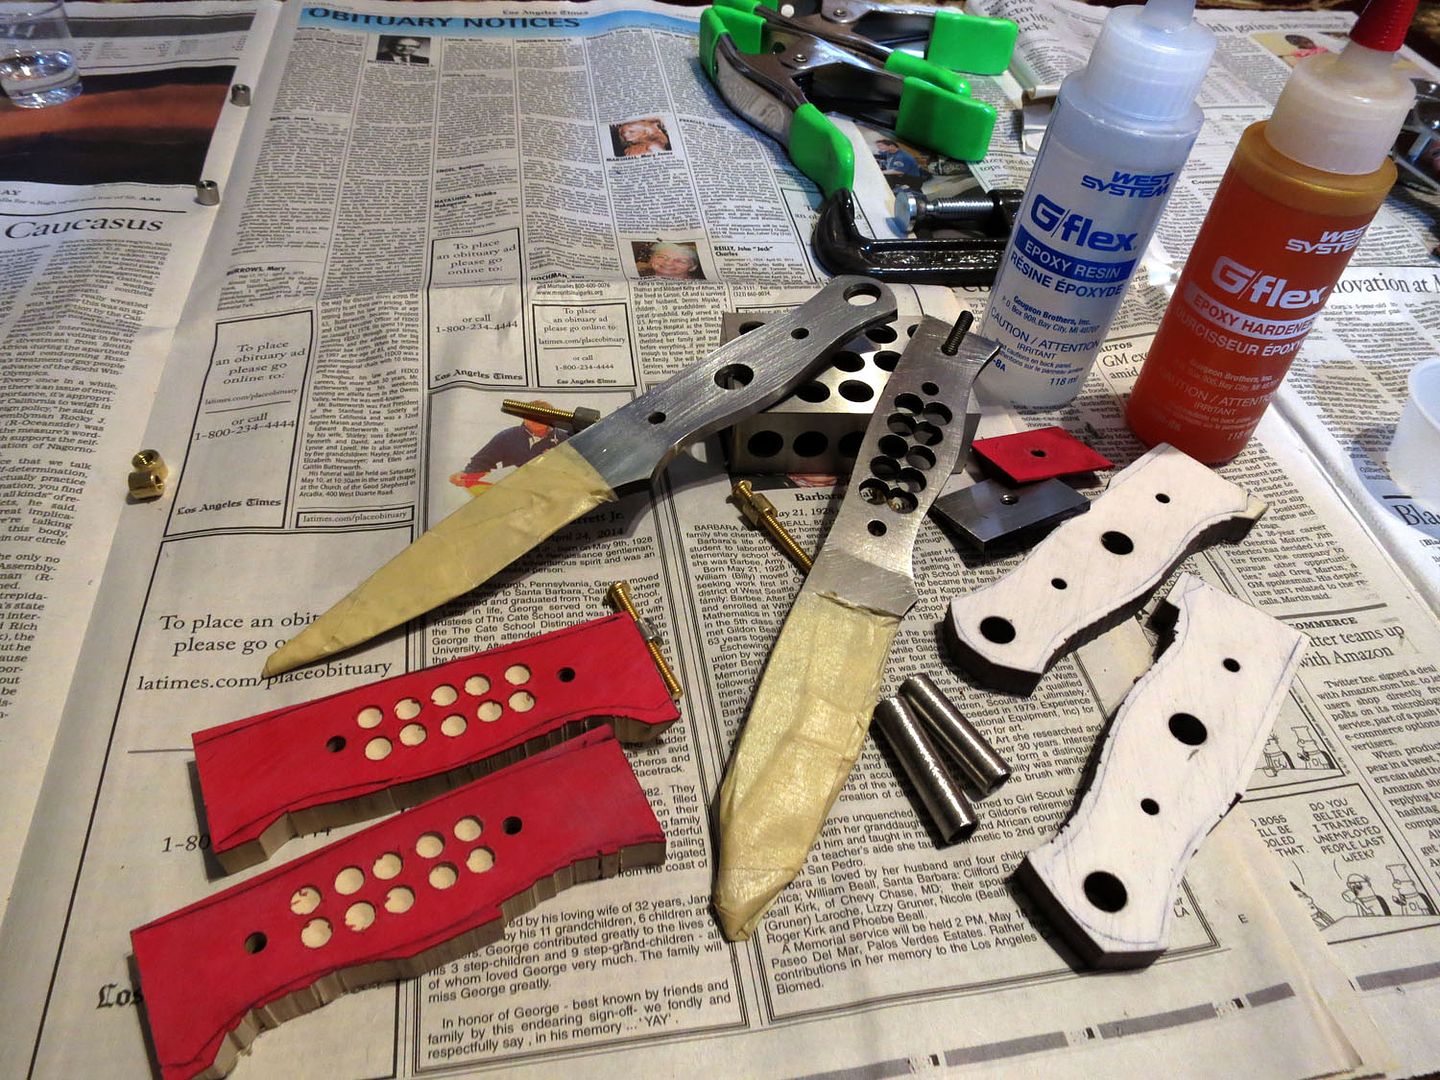
Setting up for gluing


Clamped and glued


Hoping to finish these knives on Monday. I have been pleased with everything except the plunge lines. I struggled A LOT with plunges on all 15+ blanks, none of them look half decent. More like a baboon did it while being blind folded and drunk. I know good plunges will come with time- but aside from that, these are looking good so far. Especially for my very first knives.

Another issue is with the steel becoming magnetic, so a demagnetizer is in order when I return from my trip.
 
Everything looks to be coming along nicely. I've found out, it doesn't matter how nice you want your plunge or grind lines, no matter how hard you try to get them right, experience and repetition is what the answer is in the end.

I have no idea about the hardened A2 grinding easier than O1. I'll be curious if any one has a reason for it. Does True grit do the tempering also? Do the check the hardness?

Knives are gonna turn out great, especially for your first ones.
Thank you. Yes, I really hope to improve my plunges with time.

Not sure either, I found it really strange. Although I do have more A2 blanks of the same pattern that were heat treated, I'll confirm if it is indeed the same issue when I get the chance.

Yes TruGrit does the tempering and checks the hardness. In the previous photos you can see where they were tested and numbered with the hardness.

Thanks, I'm excited but bummed at the same time. I can't get over how bad my plunges are. haha
 
I've never made any scandis. Just flat or convex grind, and I use a plunge guide. May help you out.

I'm using a flat platen, are you using a rotary platen? I guess a plunge guide would work just the same on that.

My first one I used, I made out of mild steel and it worked just fine.
 
I have a file guide from Bruce Bump, but it's too large to work with the jig I use. I'm going to get a smaller one from him after Blade. The guide would help me get even starts to the plunge, but most of my issue is with a smooth even transition into the actual cutting edge. Where one side looks almost like a right angle, instead of a nice radius that I was aiming for. I've tried over hanging my belts a little, but they might be too stiff (VSM). It just occurred to me that I do have Jflex belts- these might be a better solution for the plunge areas itself?

For the bevels, I use a flat platen, but also have a rotary platen, small wheel attachment, and 10'' wheel.
 
I've never made any scandis. Just flat or convex grind, and I use a plunge guide. May help you out.

I'm using a flat platen, are you using a rotary platen? I guess a plunge guide would work just the same on that.

My first one I used, I made out of mild steel and it worked just fine.

Redmach,
If you do have one of the tank track rotary platens for the KMG be very careful using it with a file guide on a blank.

I had the the file guide grabbed rubber belt and spin the tip into my hand. I needed stitches for that that one :sad:

I was going to to cut out the frame on the rotary platen, but ended up selling the whole machine months later.
 
I have a file guide from Bruce Bump, but it's too large to work with the jig I use. I'm going to get a smaller one from him after Blade. The guide would help me get even starts to the plunge, but most of my issue is with a smooth even transition into the actual cutting edge. Where one side looks almost like a right angle, instead of a nice radius that I was aiming for. I've tried over hanging my belts a little, but they might be too stiff (VSM). It just occurred to me that I do have Jflex belts- these might be a better solution for the plunge areas itself?

For the bevels, I use a flat platen, but also have a rotary platen, small wheel attachment, and 10'' wheel.

Mudman,
Try this. Take your platen out and radius your edge just a little on a slack belt, then using a J-flex run it over each side about 1/8-1/4" to clean up your plunges.
I am working on my first grinding rest jig and have made if for the smaller of the two guides B.B. makes. I will make one for the larger size after I get the first one working this week. You don't need to buy the smaller one unless being the tool junkier that you are, You want one? LOL
Thanks Laurence,

I did radius the corners of the platen a while back. But what I haven't done is use the jflex, forgot I had them. Also haven't used near enough over hang on the belts, that just might be my actual problem. Will give it a go and report back on the next knives. These ones are already glued up, and I don't want to do any more tinkering with the plunge. I'm afraid to get carried away and botch the whole thing up.

The file guide works for one side, but hits my flat platen on the other side. A smaller guide would be the easiest solution, since I plan to make blades mostly only the smaller side. The issue lies within my current jig setup, if I lower the work rest 2-3'' it would work just fine. But that a whole different project I want to tackle later.

and yes I want one! Tool Junky? Yes that's me. :biggrin:
 
MM,

As mentioned on B&B, Good job. I'm enjoying watching your knife build.
Ha your on here too! Thanks, I love hearing feedback from people. Trying to document everything is rather time consuming, but serves to help me memorize things to improve upon down the road.

Looking back on it, even though these are my first knives- I can't imagine anything better than a paper weight, had it not been for all the great info from the very knowledgeable people on here, and other forums sharing their know-how. Everything I've learned has set a very good foundation for me, having fancy tools doesn't make a replacement for skill.

Even though I haven't completed a single knife, I can't thank all the people who have helped me in one way or another. The internet is not as Evil as I thought. :biggrin:
 
Blades are pretty much done. I left the handle rough shaped, wanted to use them first to make sure it's what I want before final finishing.

Glue dried up.


Cutting excess on the bandsaw to minimize generated heat from grinding


It's crazy just how thin this saw can cut!


Sanded flat on the flat platen


Rough sanded


Top view


Bottom


Pommel plate was attached via 10-24 stainless thread and G-Flex epoxy. Pommel itself is 416 stainless


Top View


Bottom


Black linen micarta, maroon micarta, white fiber liner


Paper ivory micarta, red fiber liner


Added my logo


Great job Mudman!

Where did you get your logo made?

Thanks, I got them made by Ernie at blue lightning I think? I'll have to look him up when i get to a desktop.

He got the stencils to me three days after paying.

Sent from my SPH-D710 using Tapatalk
 
Congrats Mud, I know you've got a lot of work and time and preparation in these. They look great. What steel are these first two, O1 and A2?
 
Gary,
Double congrats! It was just a month or so ago you came by the shop to talk! Great job on the steel plate. If you want to clean up that white handle a little more use the garnet wood paper instead of the black wet & dry stuff. The lighter handles are always a challenge to come out clean.

Now its time to use these and learn how to make the next one better. :3:
 
Congrats Mud, I know you've got a lot of work and time and preparation in these. They look great. What steel are these first two, O1 and A2?
Thank you very much. Yes, the white handled knife is O1 and the black handle is A2.
Gary,
Double congrats! It was just a month or so ago you came by the shop to talk! Great job on the steel plate. If you want to clean up that white handle a little more use the garnet wood paper instead of the black wet & dry stuff. The lighter handles are always a challenge to come out clean.

Now its time to use these and learn how to make the next one better. :3:
Thanks! I payed close attention and took notes while I was at your shop.

Testing has already begun, I am here in TN. Working out the knife, then going to an outdoors class mid week.

I very much appreciate all the advice you have given me brother! It really played a major roll in my knife not being a complete failure.


Sent from my SPH-D710 using Tapatalk
 
Gary,
You are very welcome. Have fun living up to your name of Mudman rolling around in it and I will always be glad to help if I can?
 
P.Rollins helping me out with some testing.


Putting the pommel to work.


Mr. Rollins only uses the freshest dead wood.


Looks like a interesting and fun class. I'm sure you learned a lot! When you get a chance, bring the knives by when you get home.
 
Looks like a interesting and fun class. I'm sure you learned a lot! When you get a chance, bring the knives by when you get home.
Oh this isn't the class yet, there will be A LOT more knife work at the class. The photos are just us messing around in the woods.

I'll bring them by for sure.
 
Back
Top