Basket Weave Damascus in a Canister

Thanks everybody,
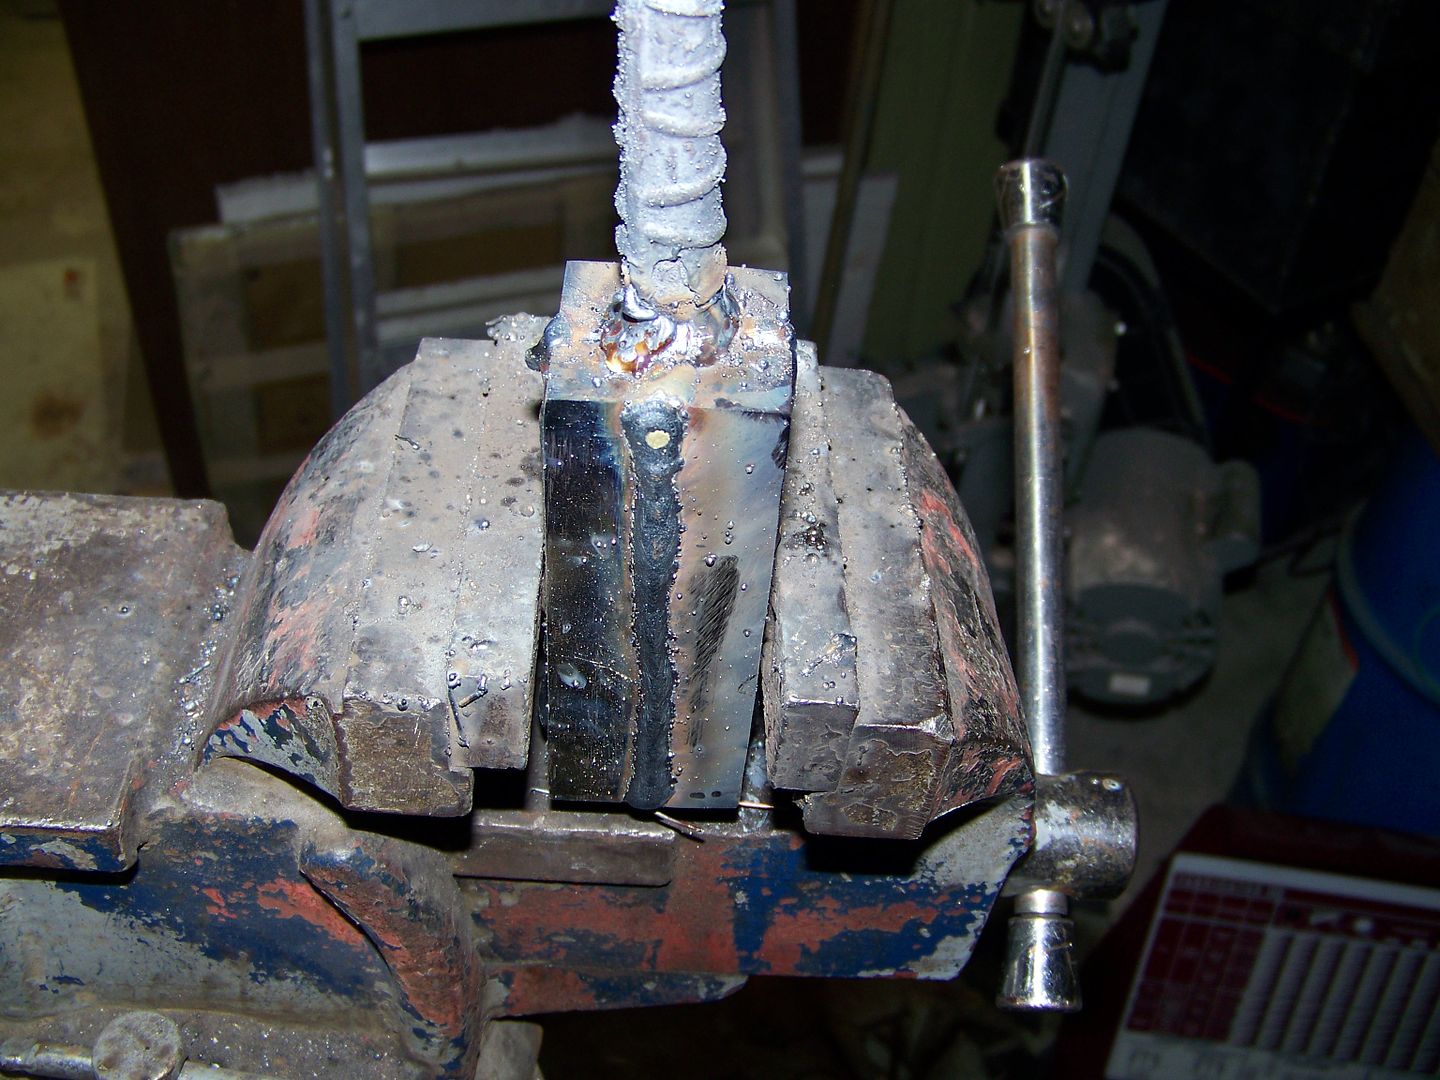
Sean, yes its a good idea to either drill a hole or let me weld it because I cant weld very good. Dont buy a hand made boat from me. :)
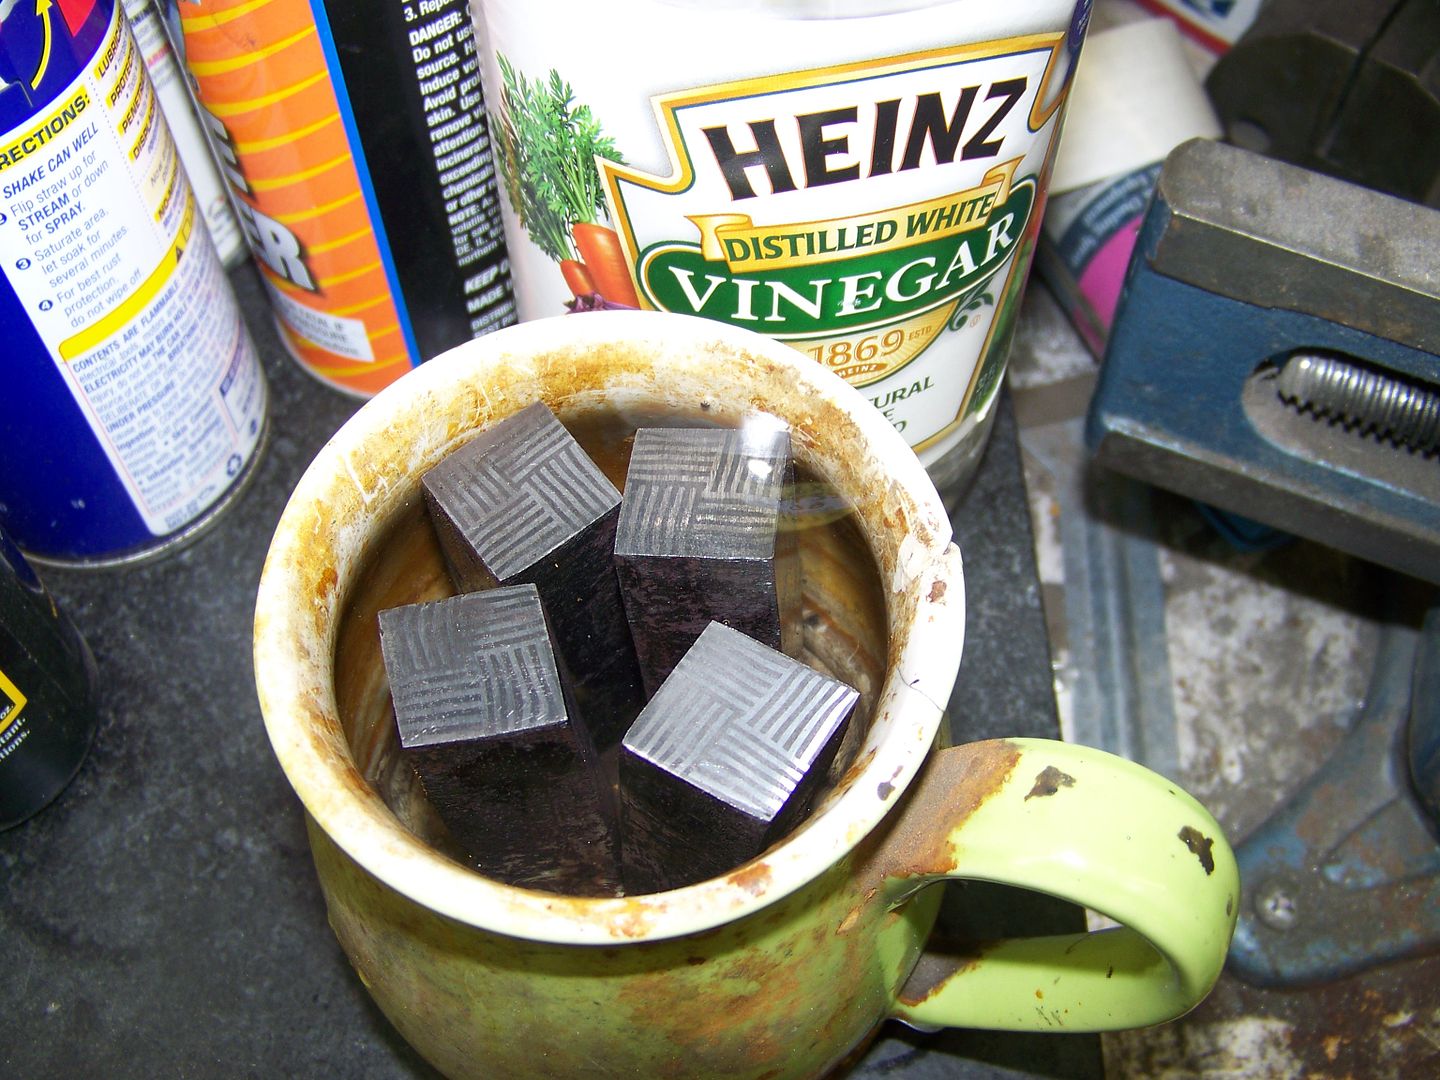
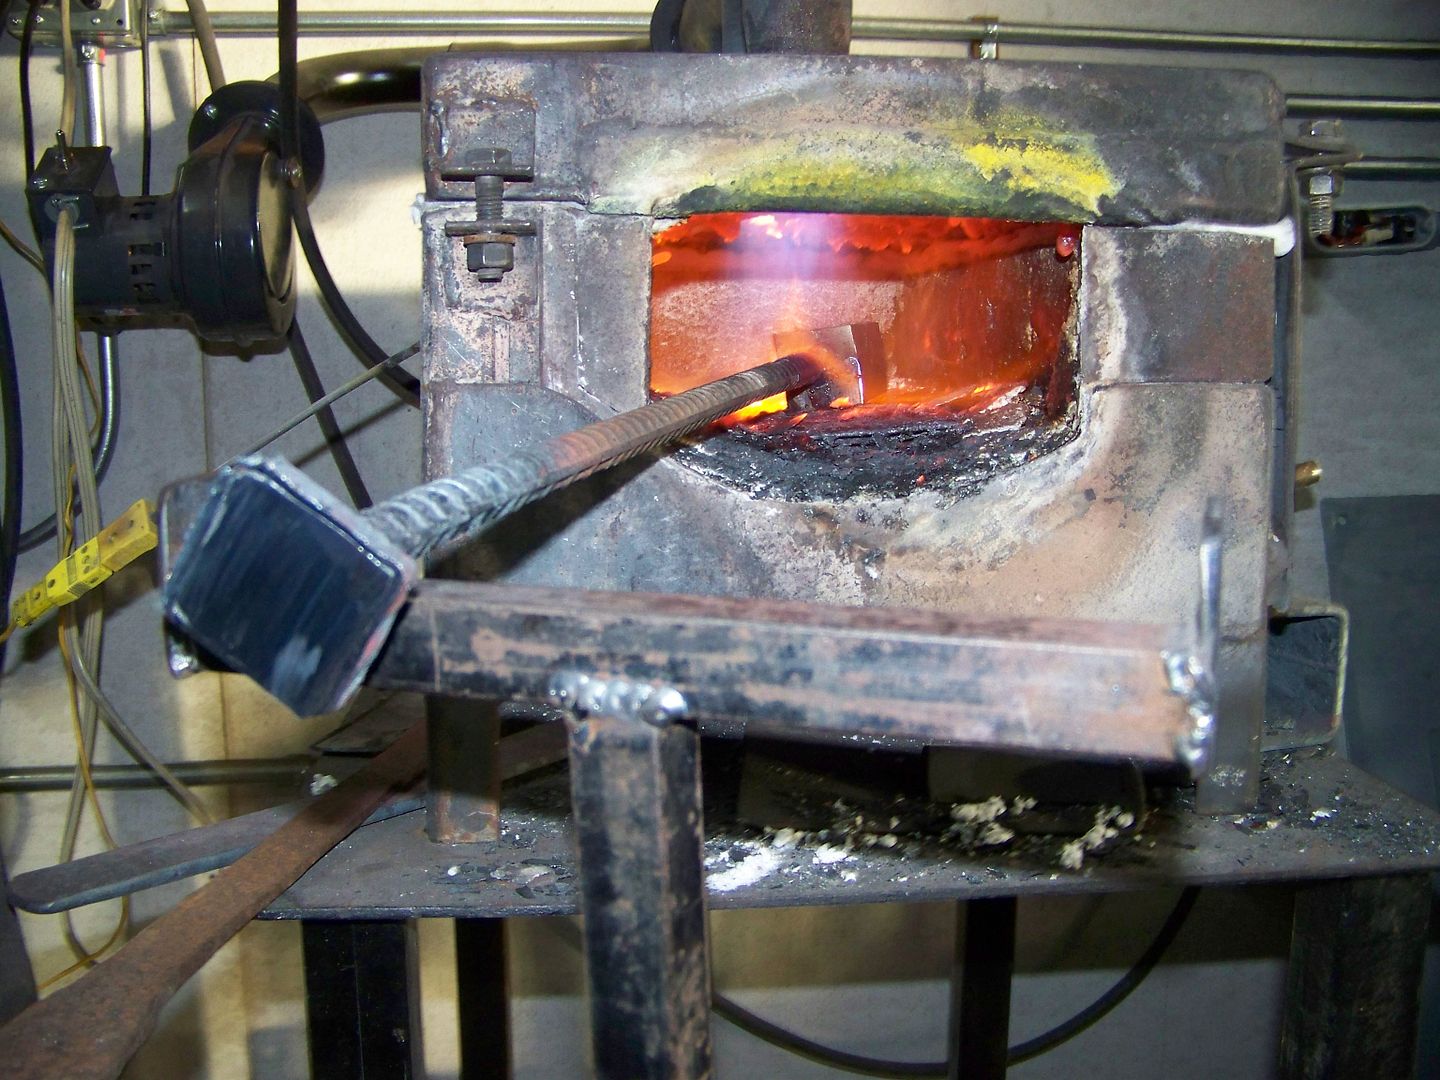
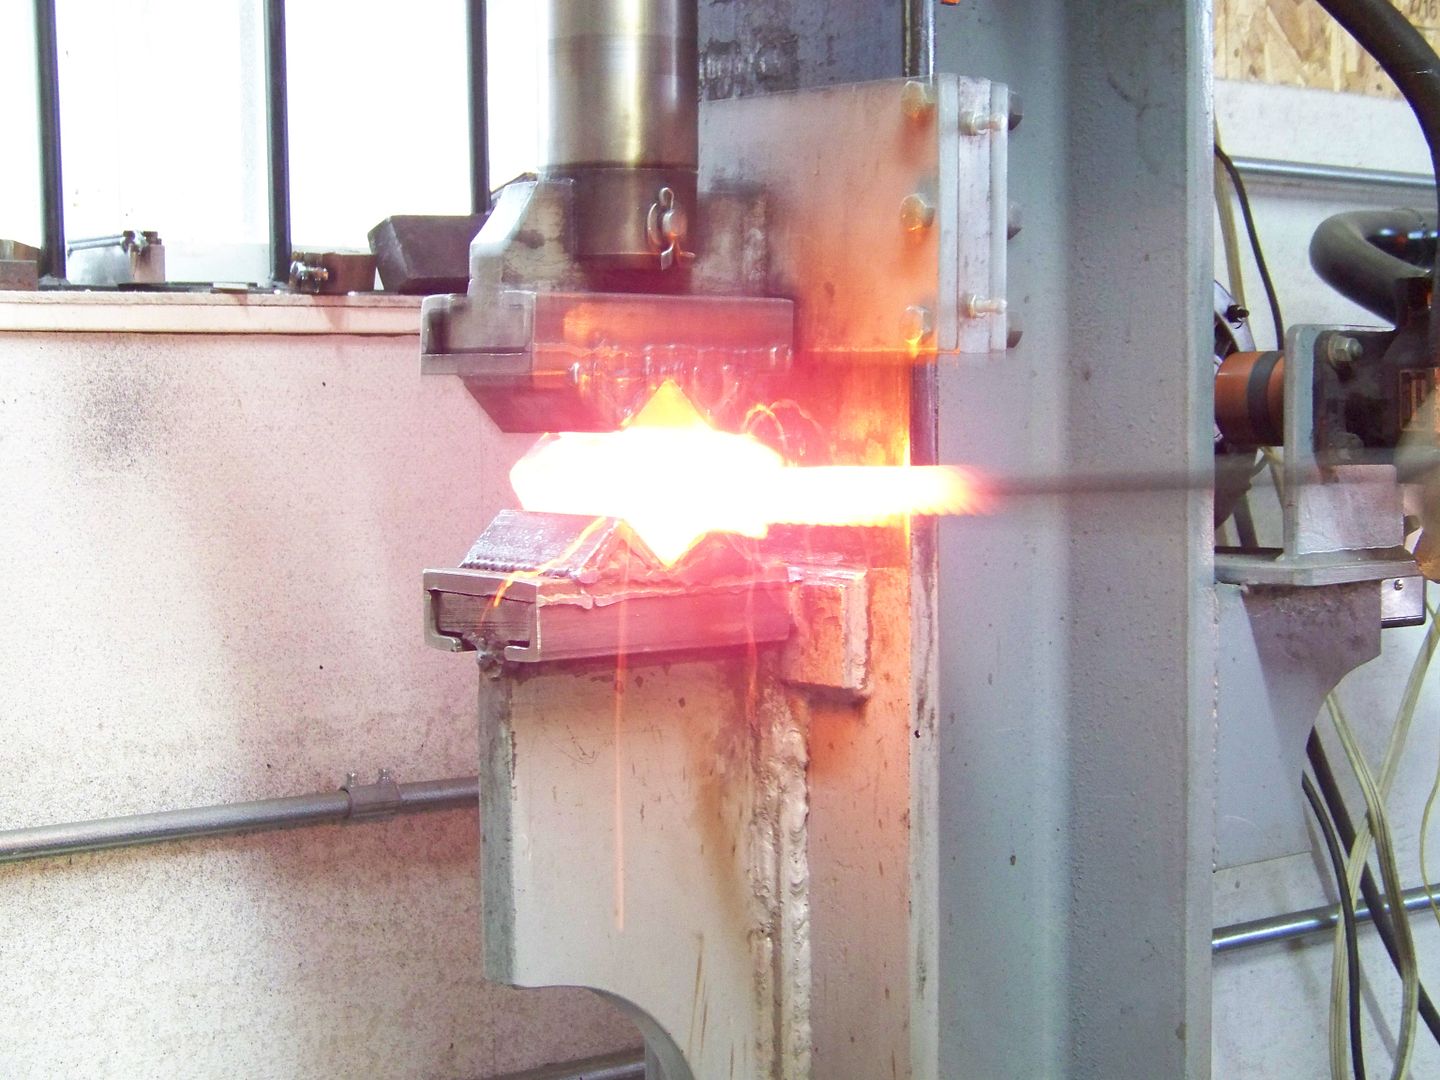
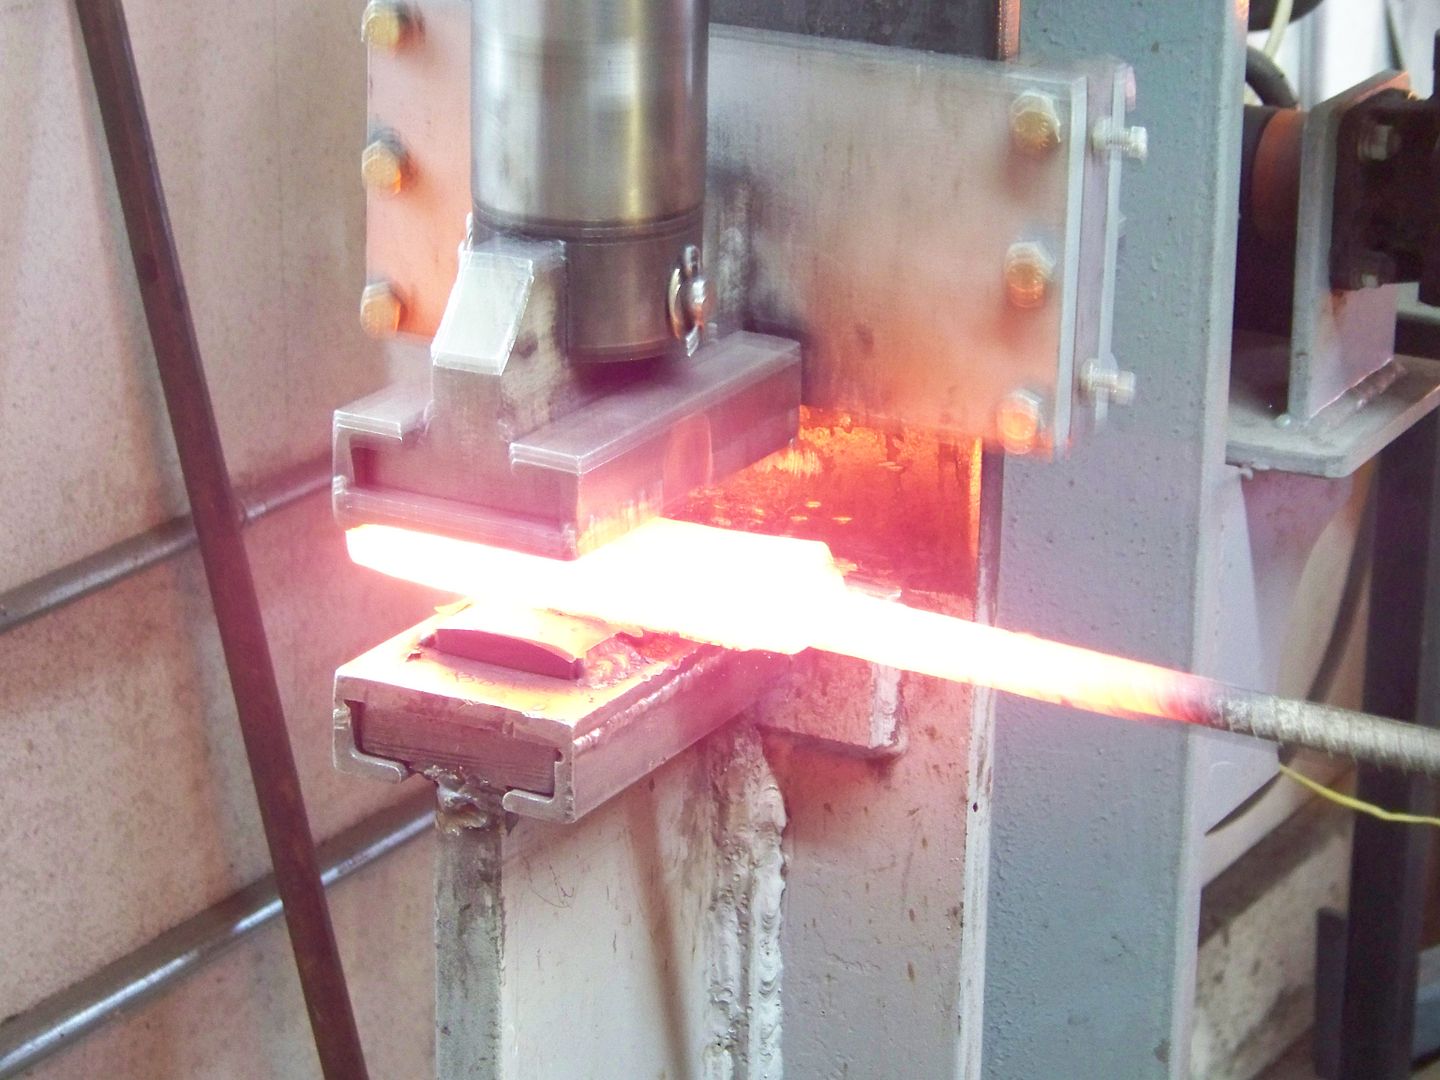
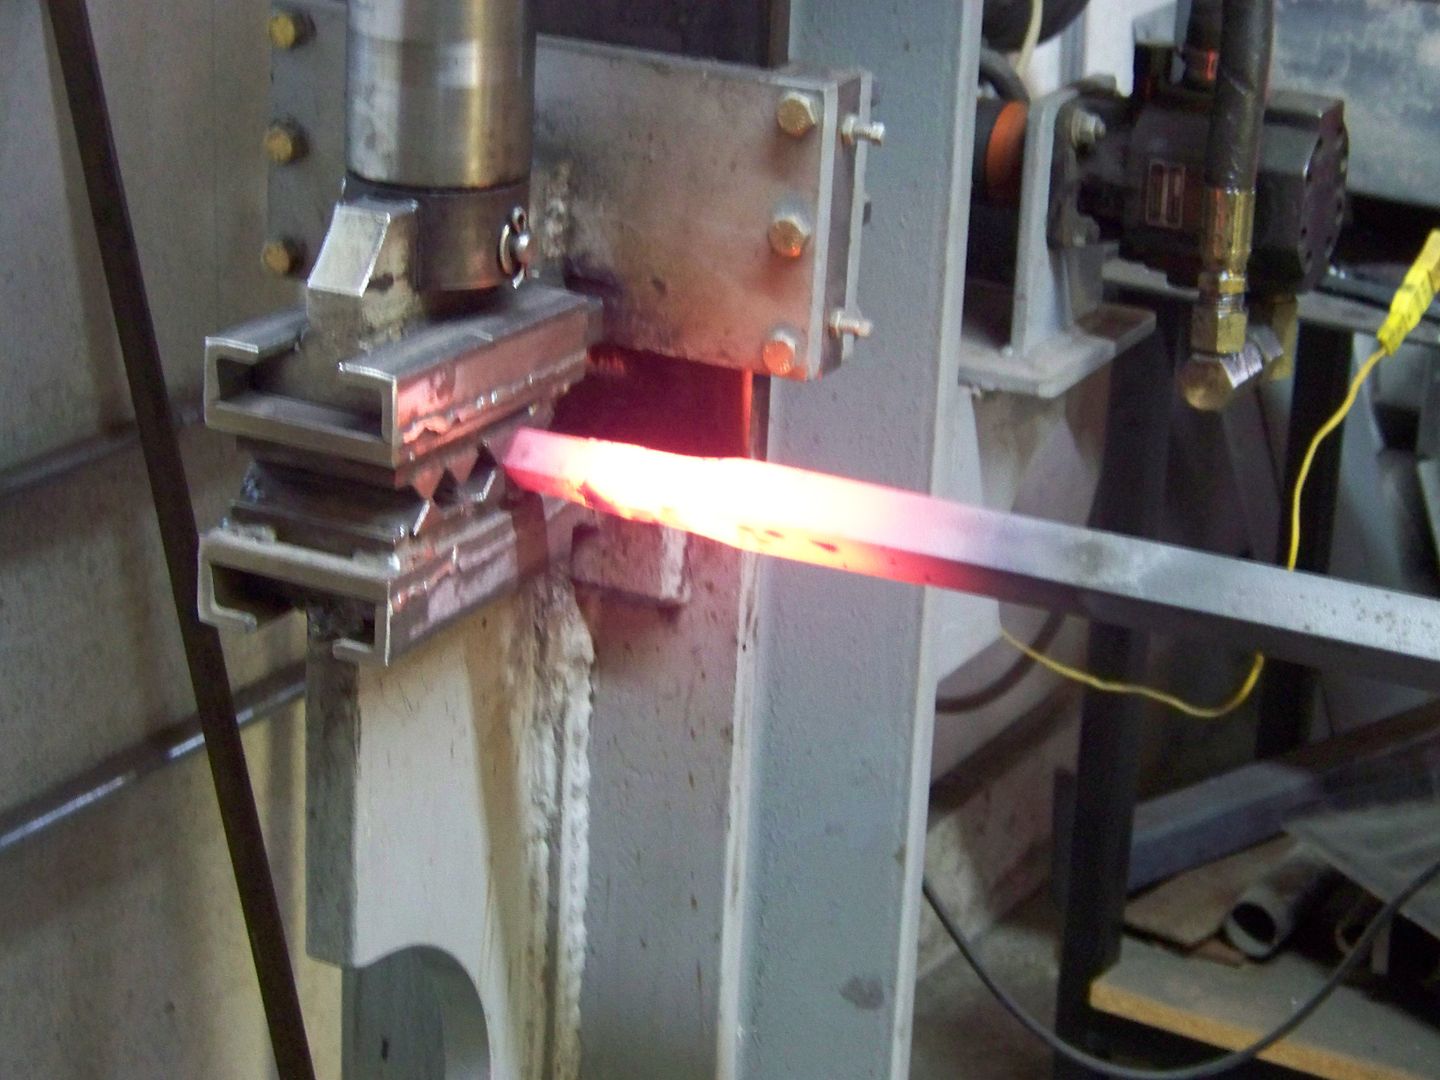
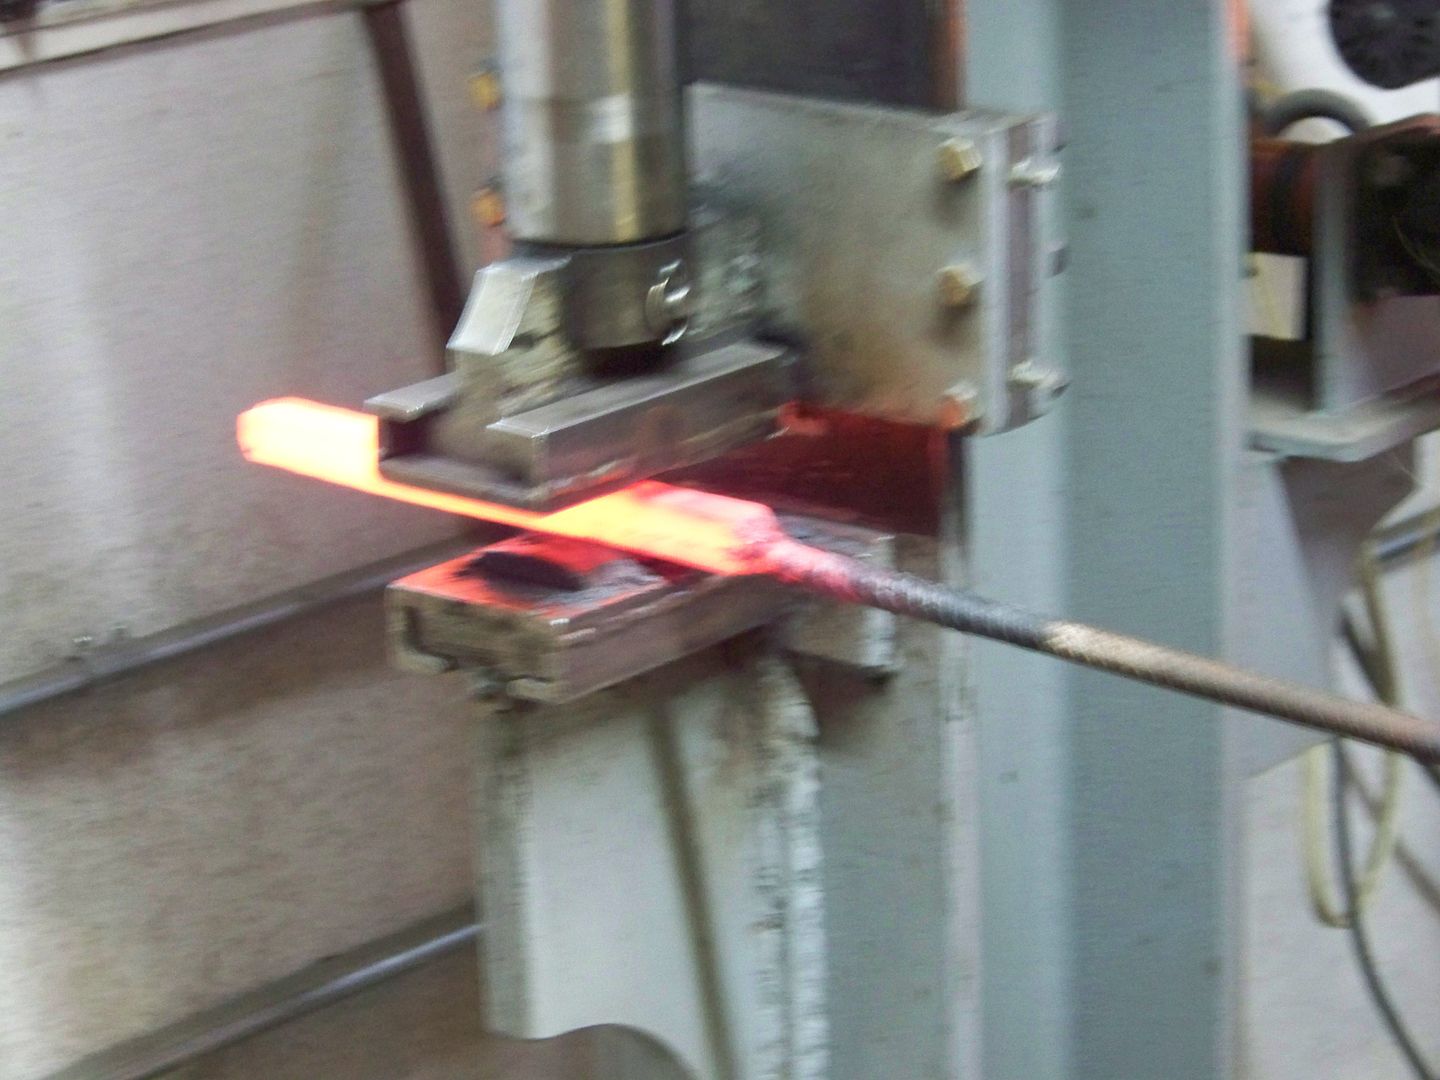
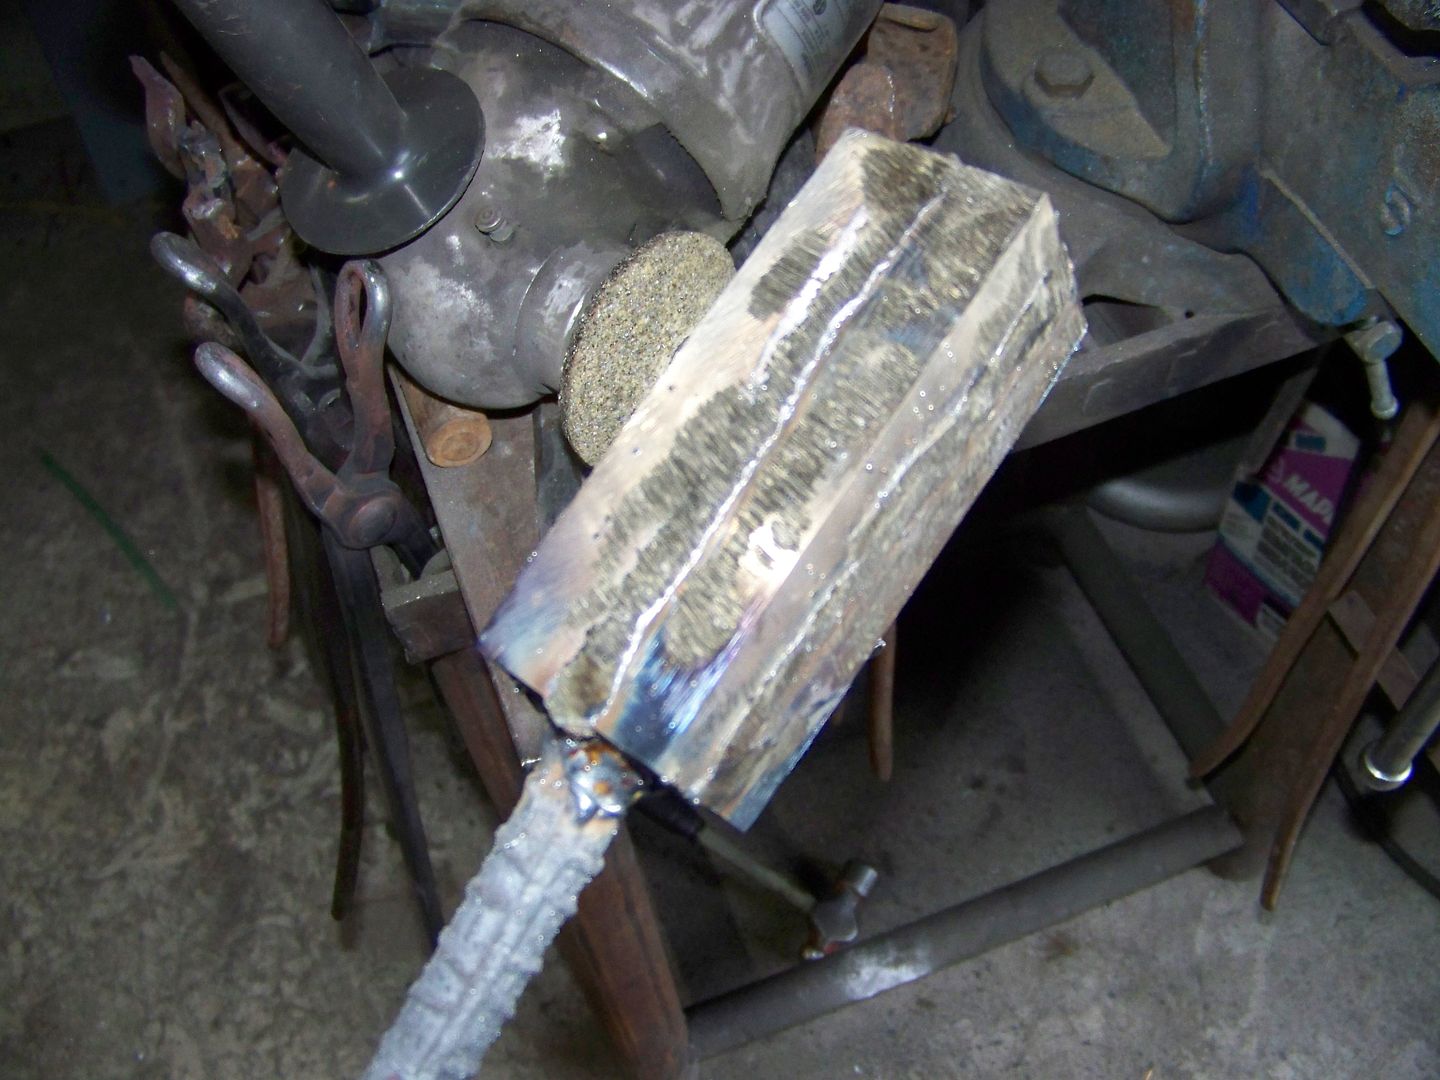
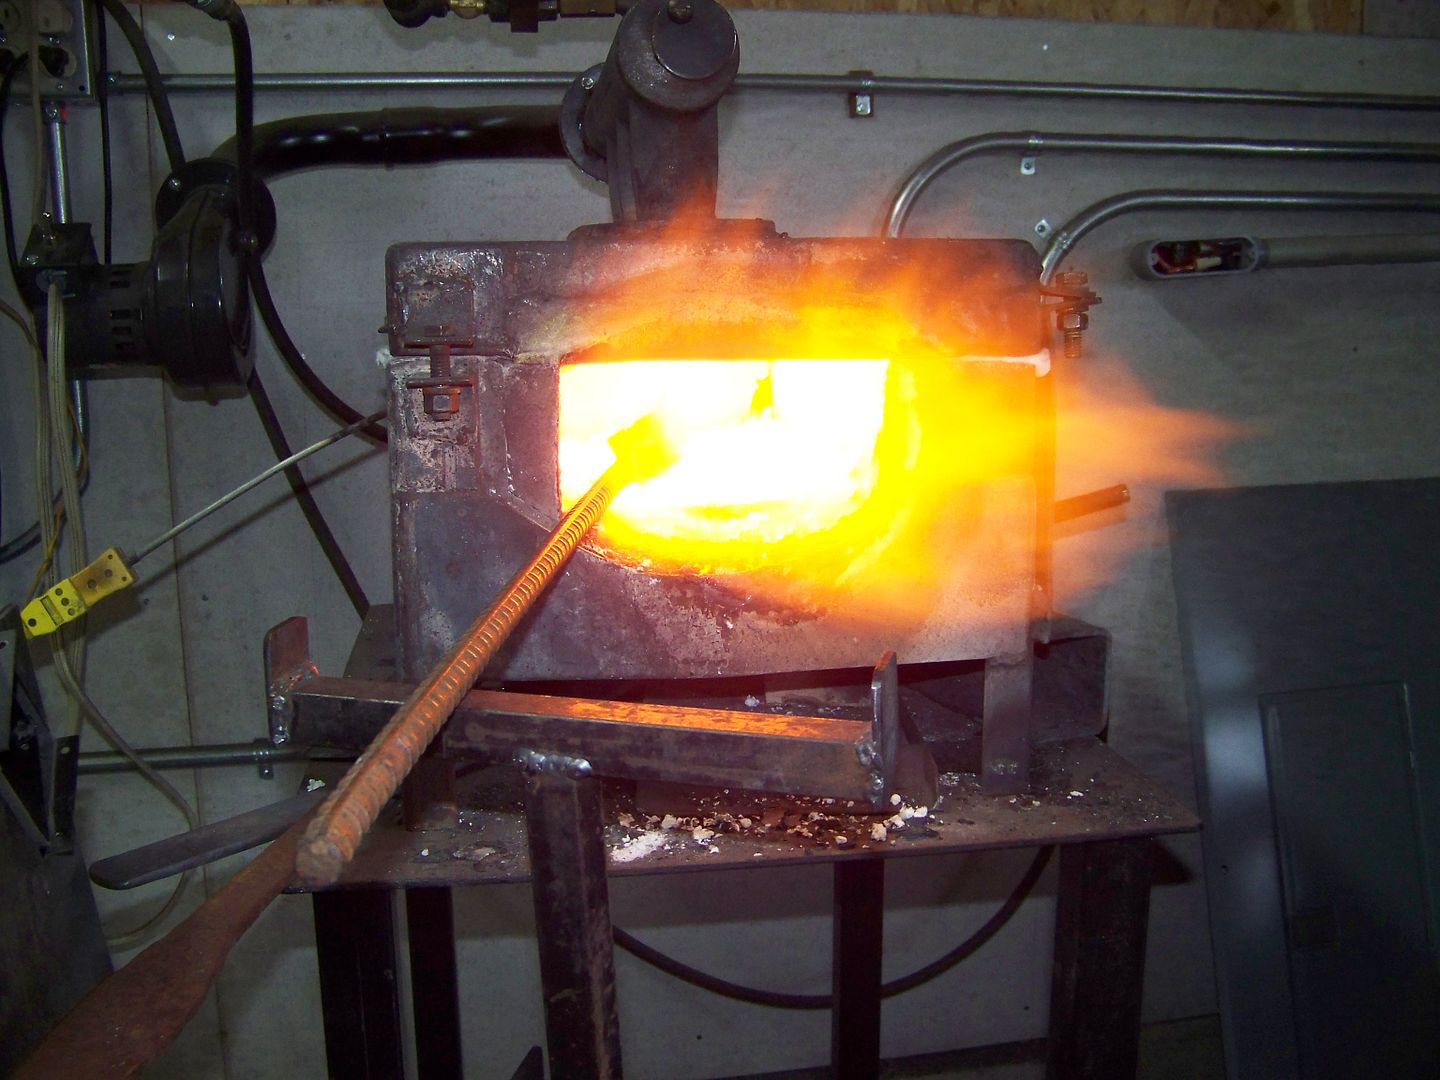
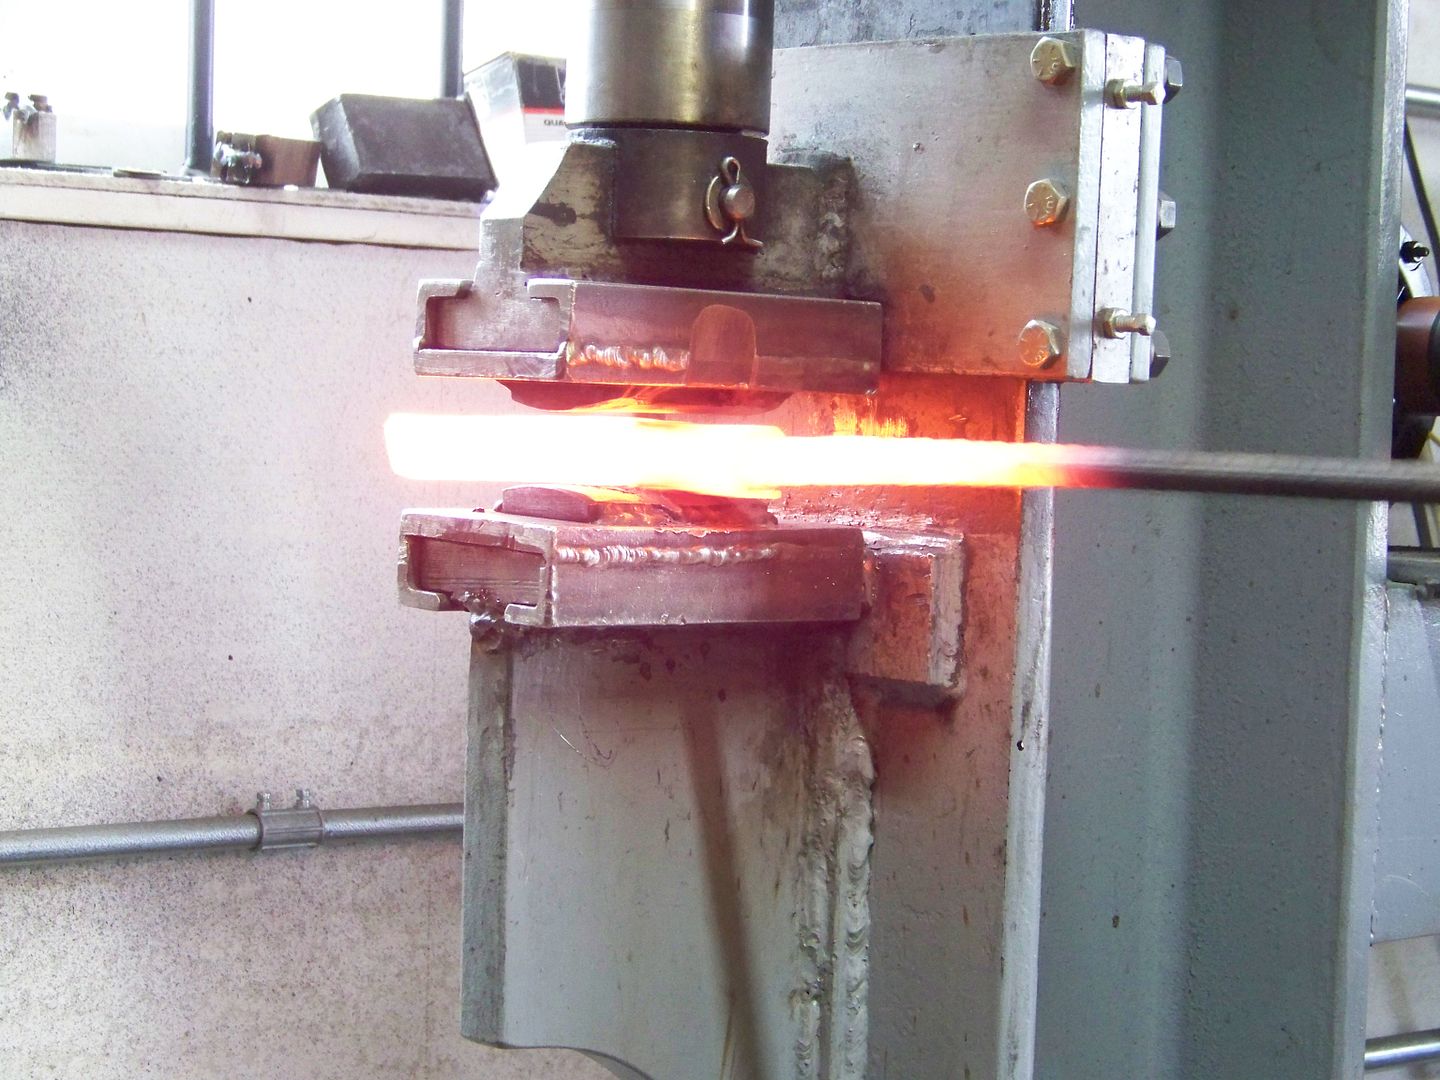
There should be something flameable inside a closed canister like this simply to burn off any trapped air. I've never seen it but have heard of them blowing up like a balloon. I did leave too much wd40 inside one and it spewed sparks from the powder metal through a pinhole. Looks like the 4th of July so I called that blade "Independance Day" hehehe
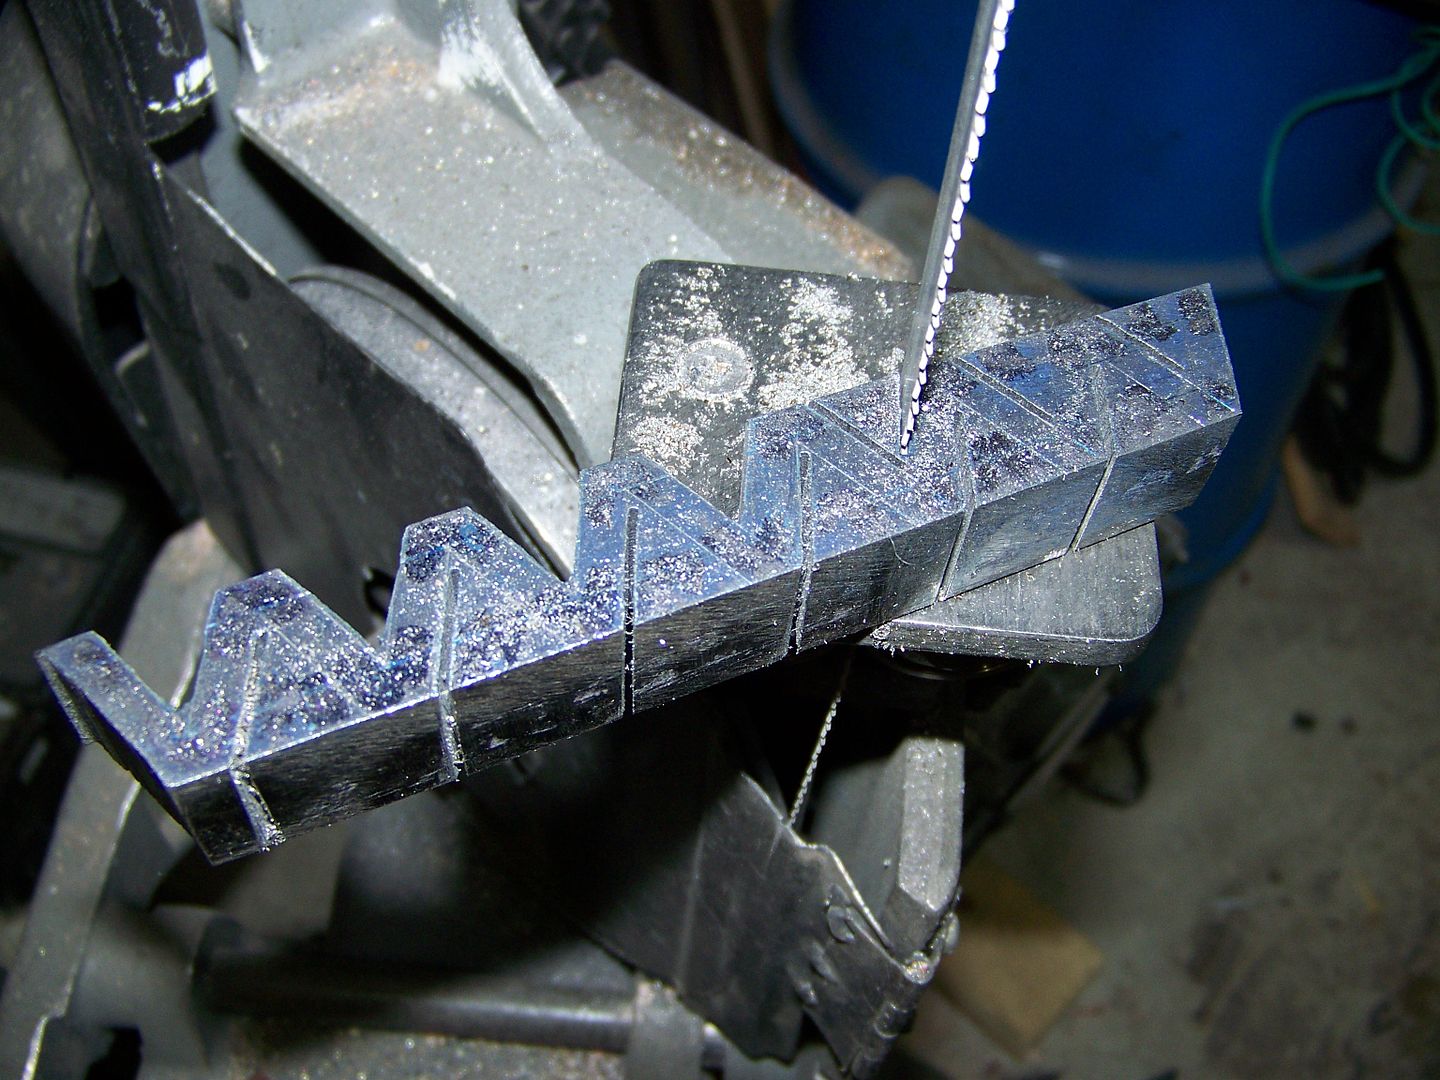
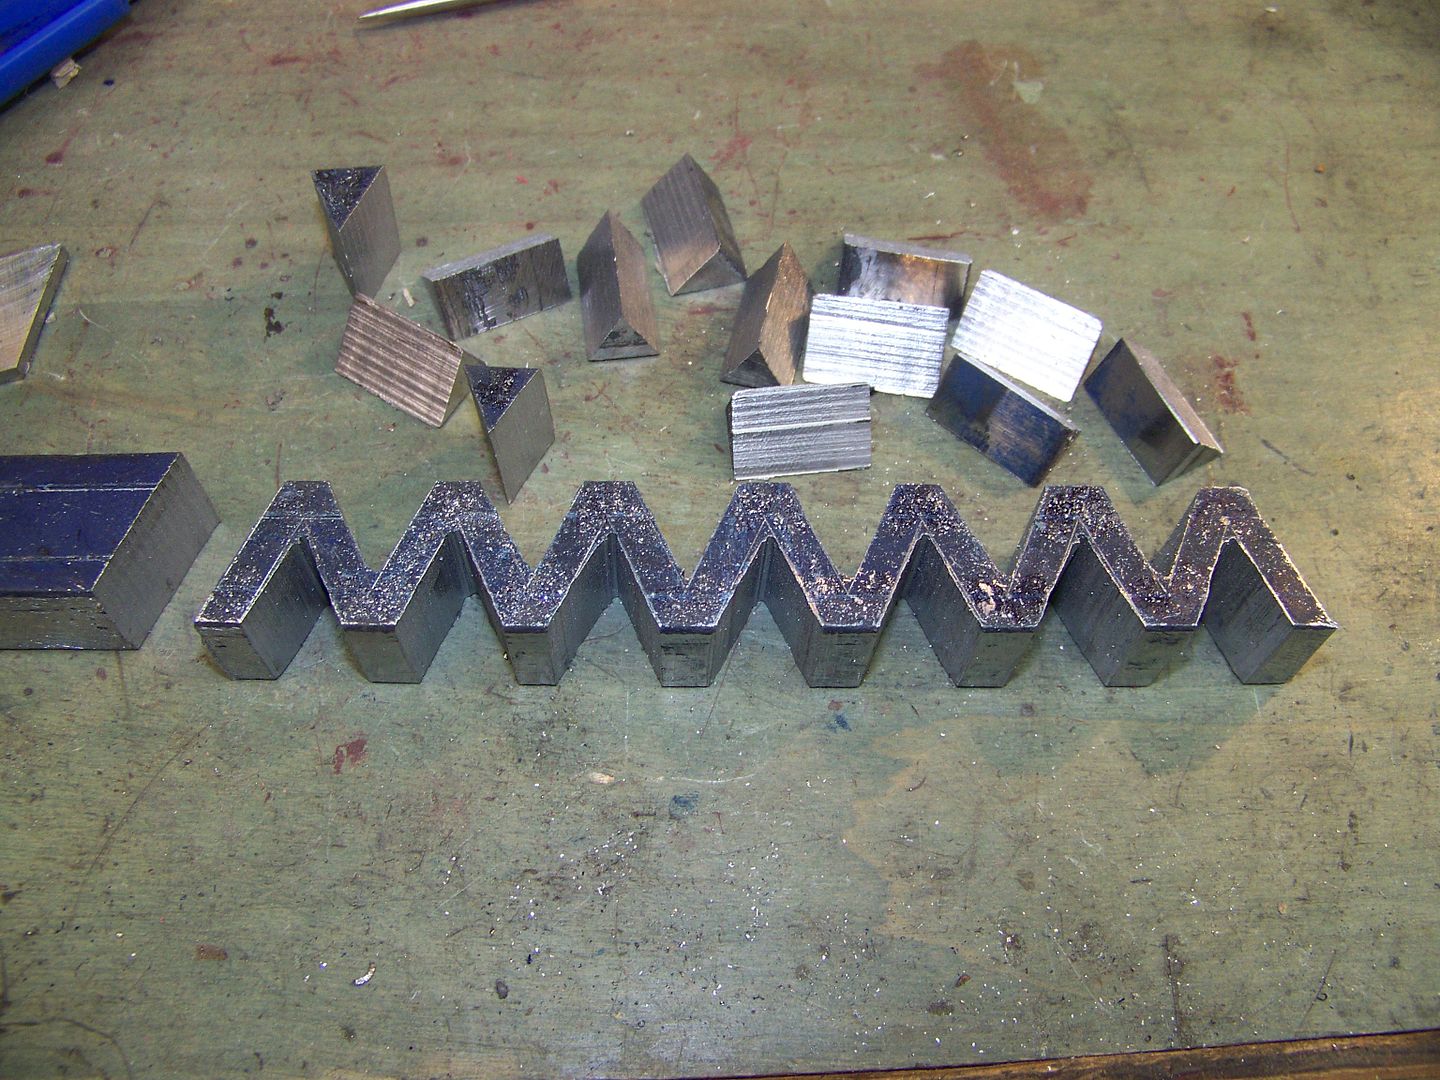
Looking good Bruce.
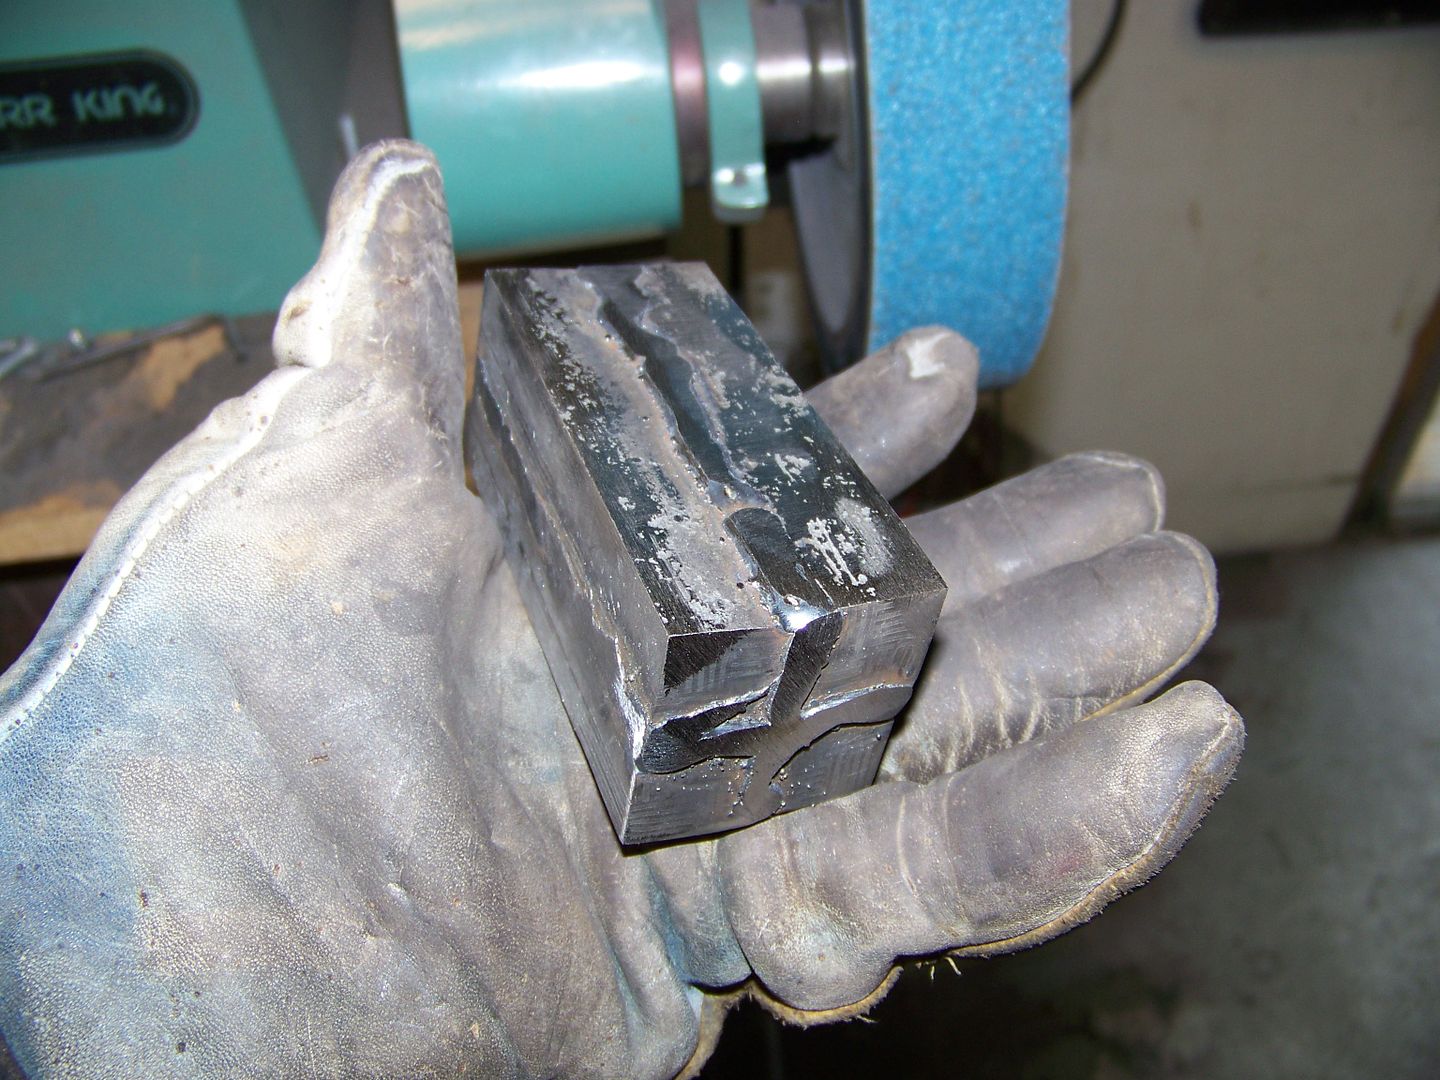
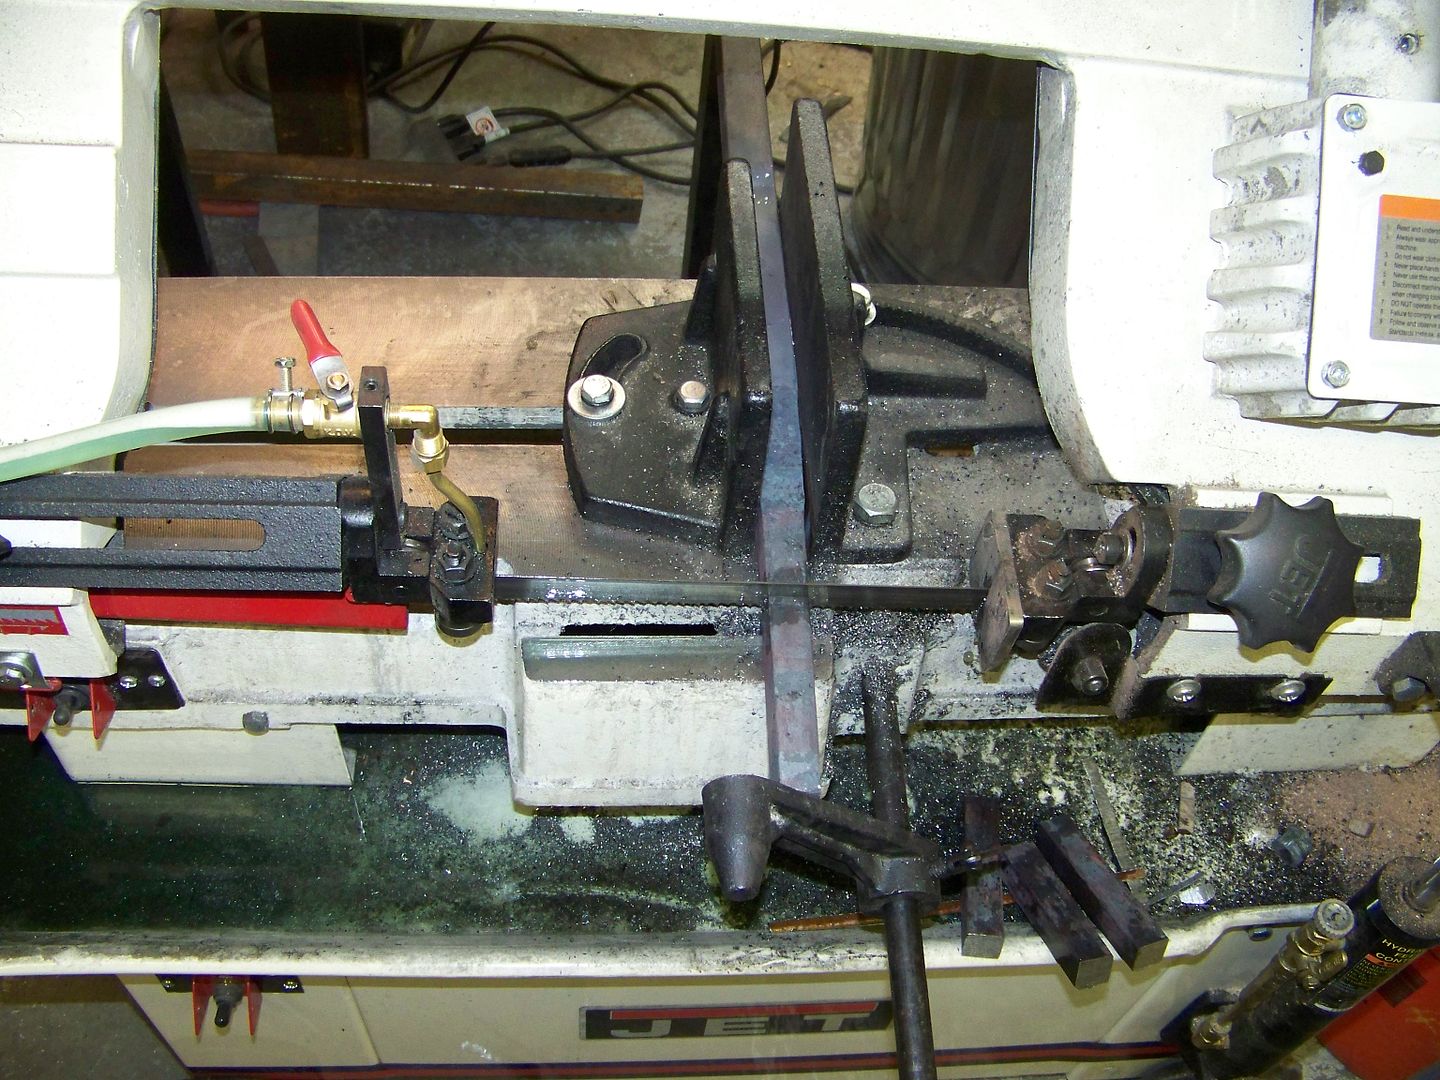
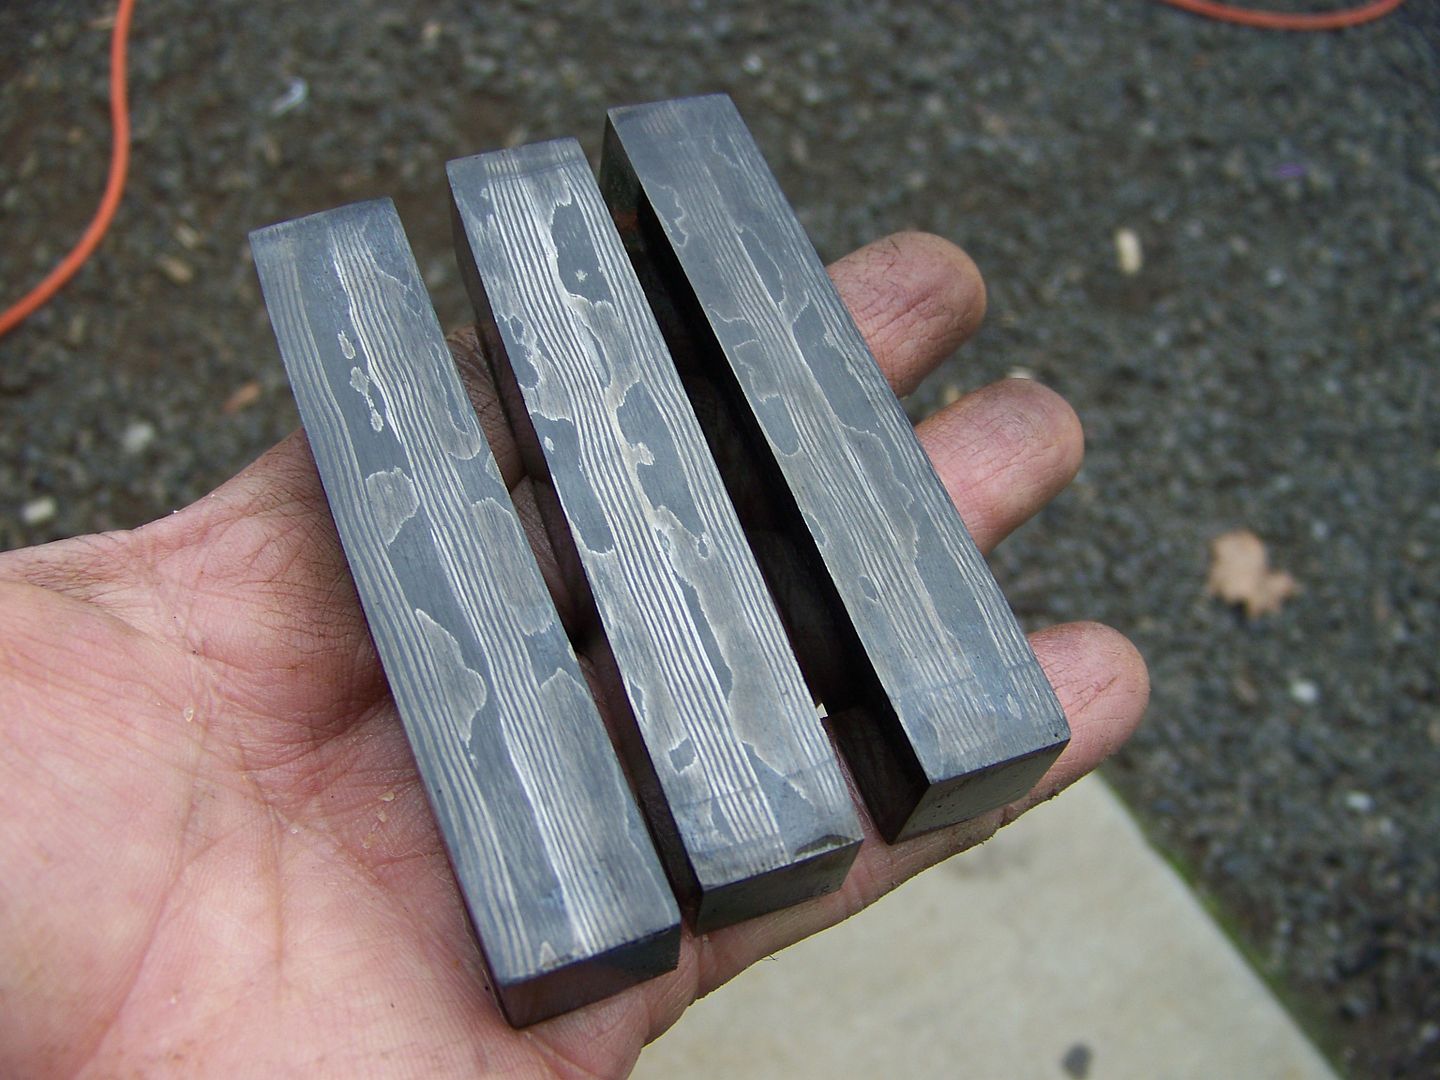
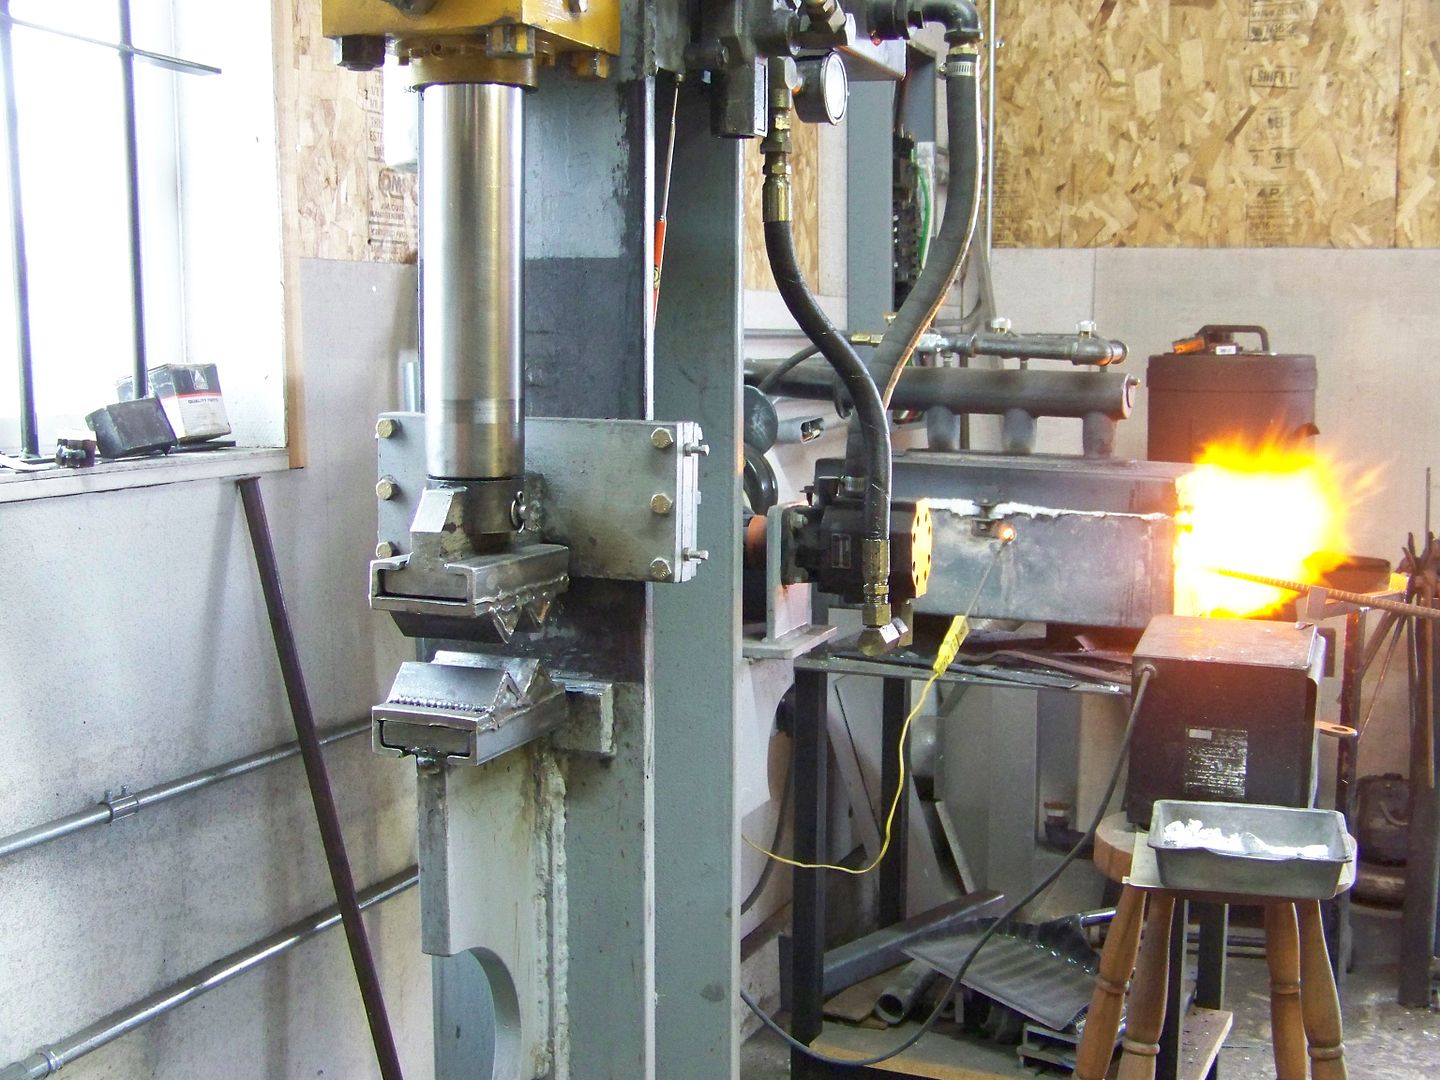
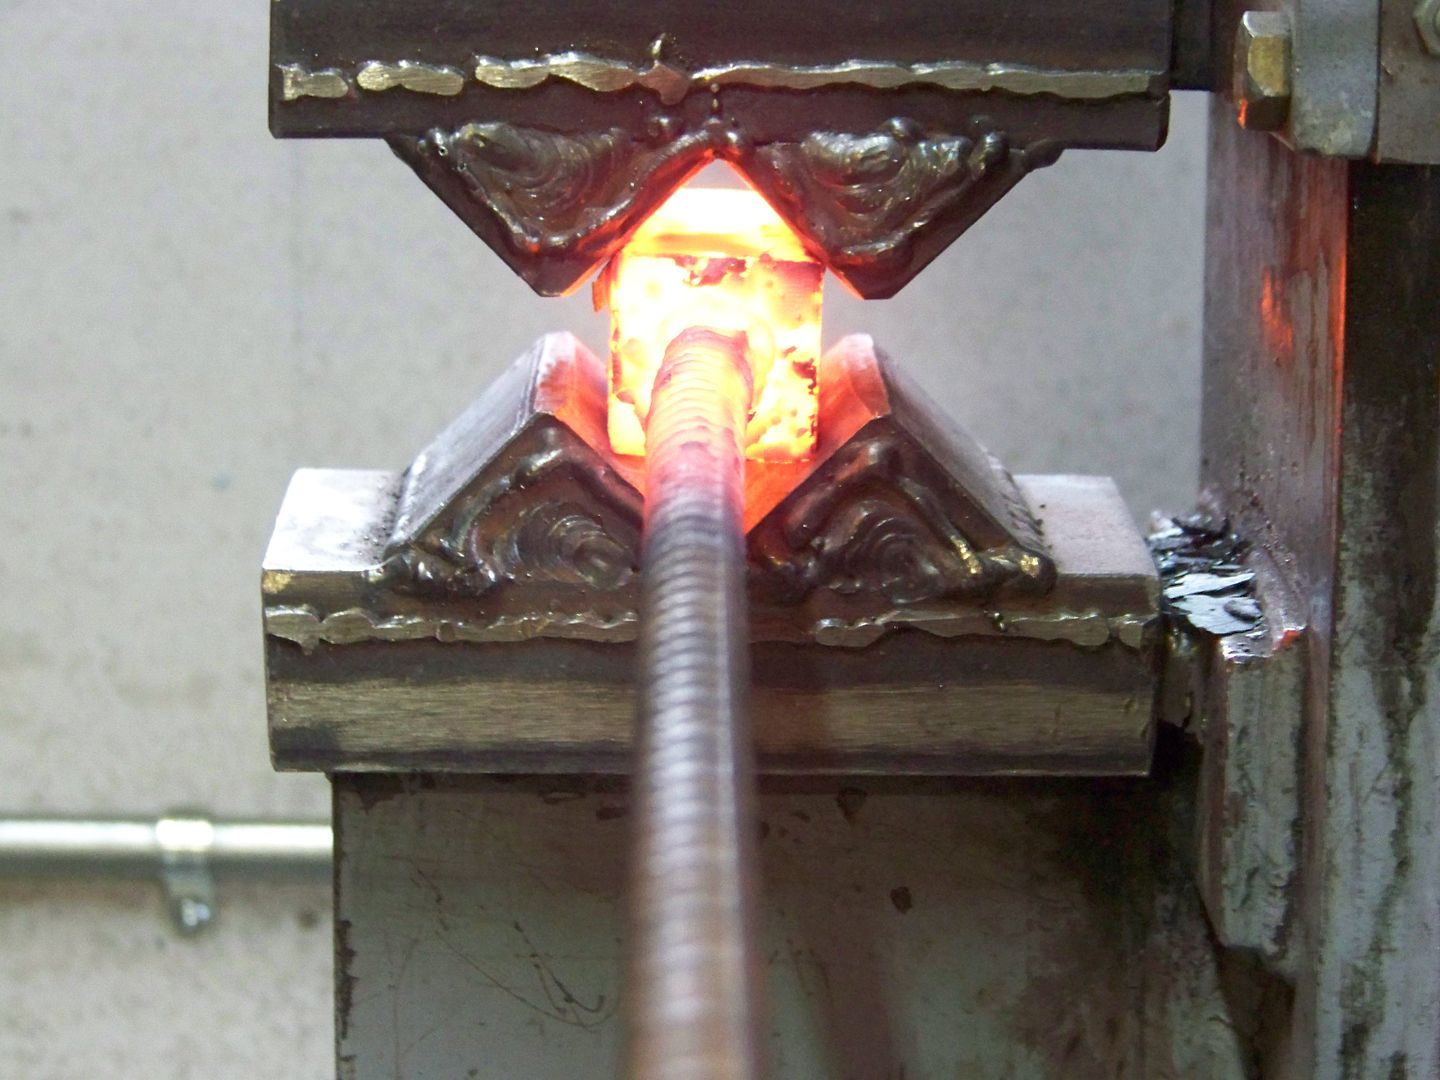
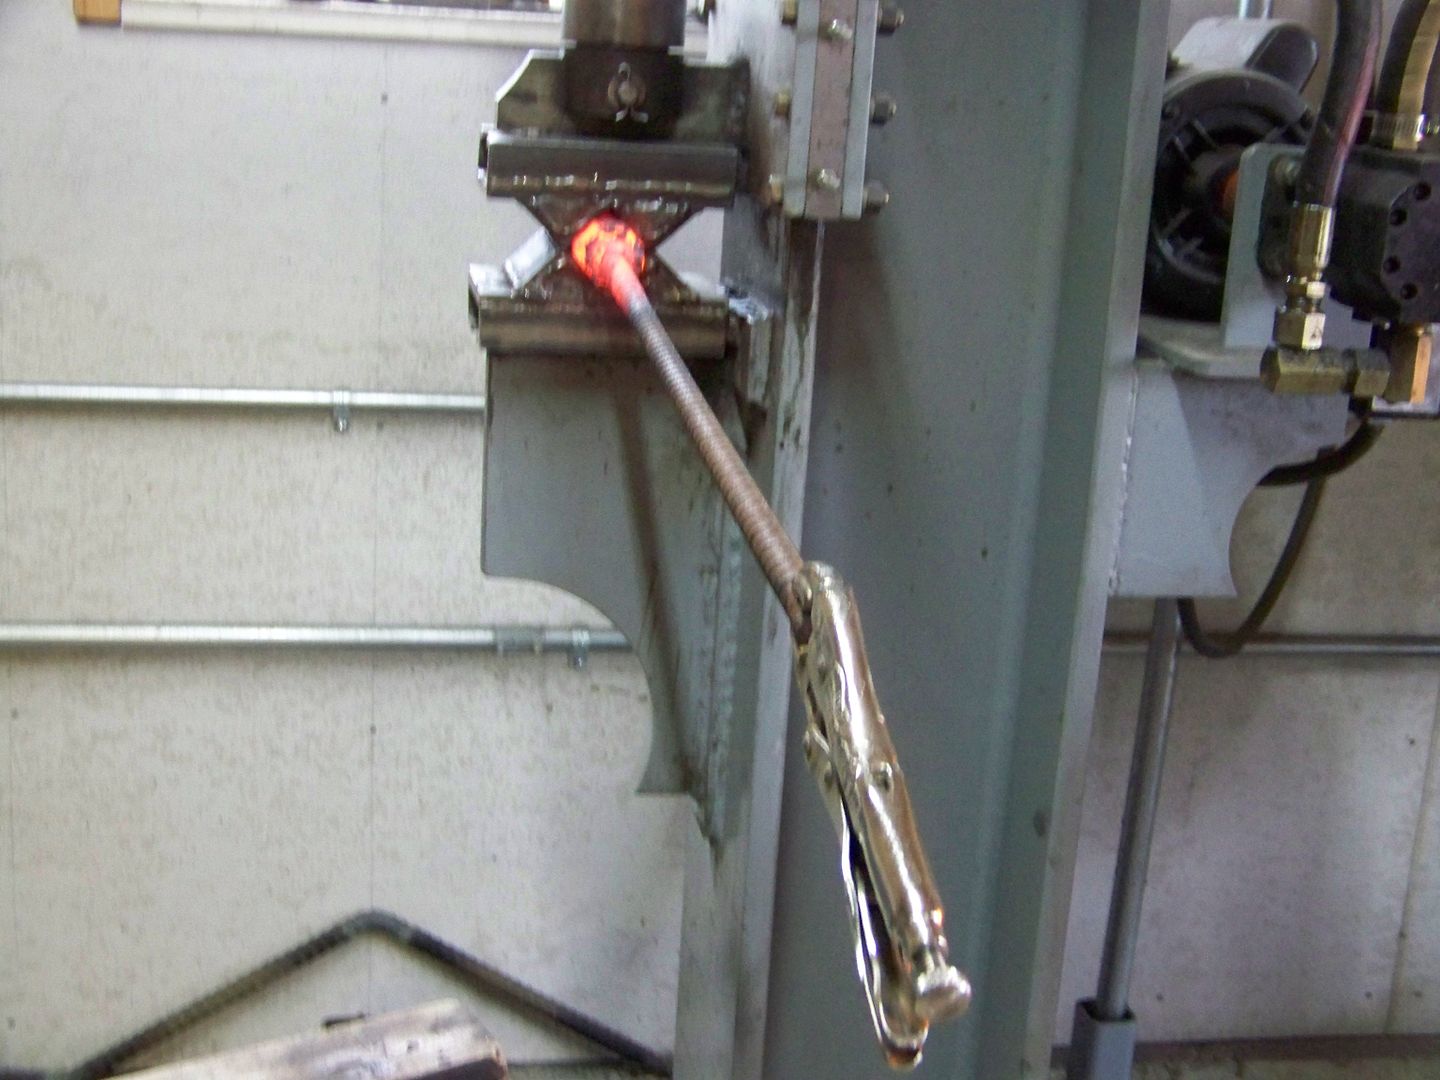
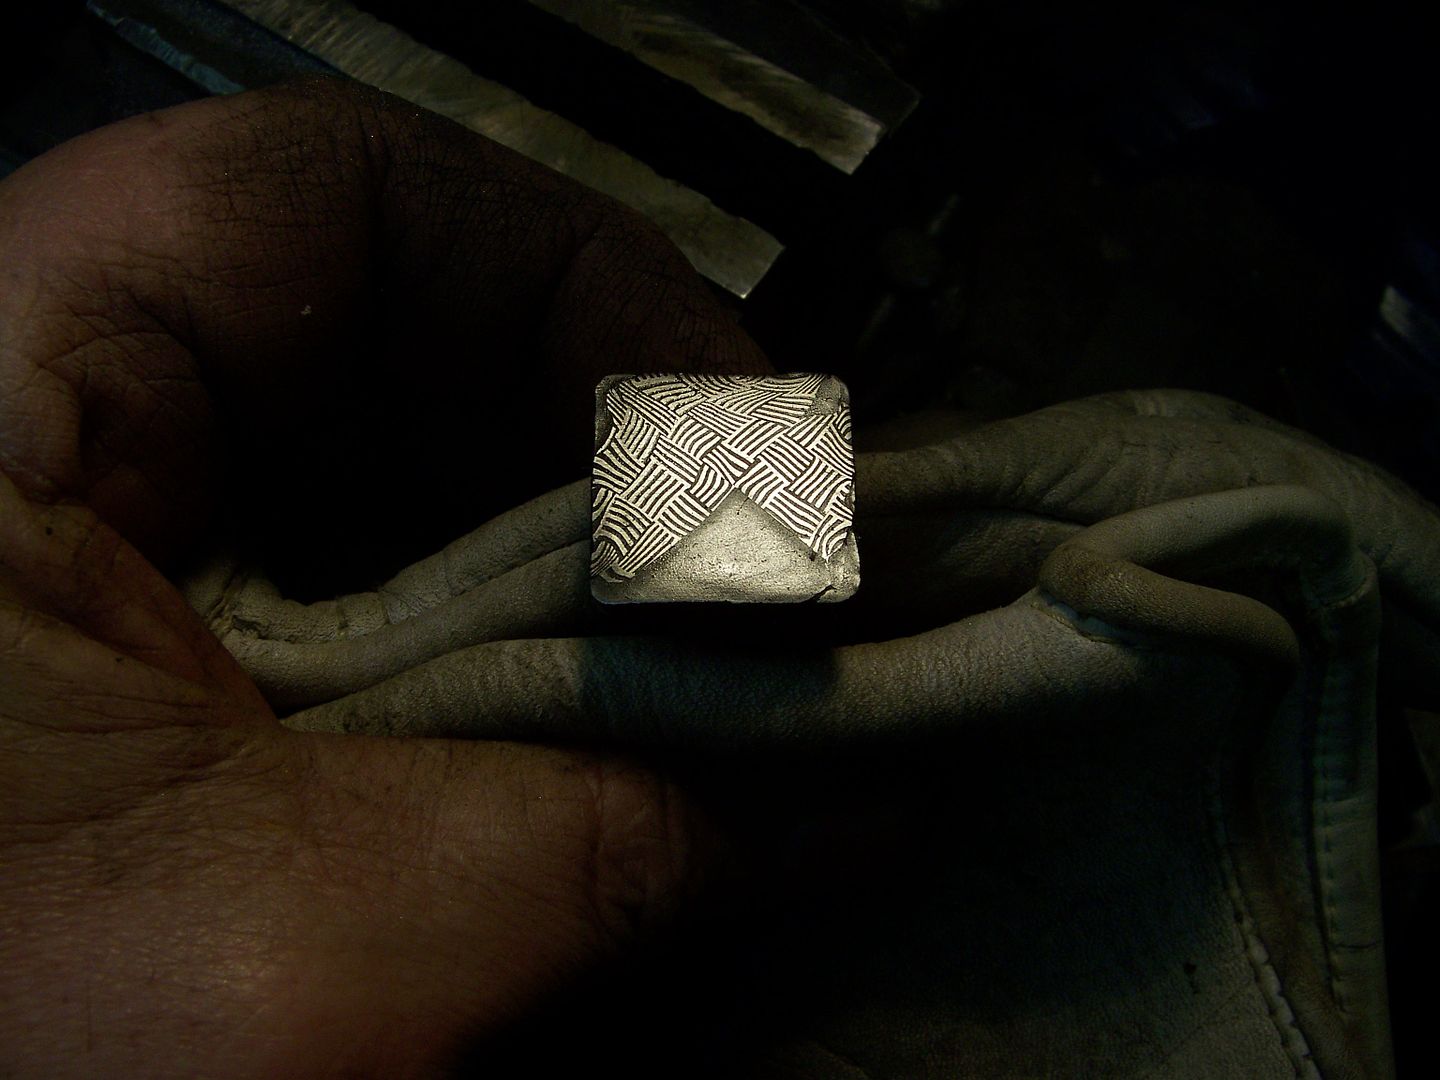
I have yet to try a "canned" pattern, the way you are doing it looks to be the most straight forward way I have seen.
Question, is it a good idea to drill a small hole in the end to let out the gasses? Like the pic you have posted with the flames coming out of the canister.
 
Last edited:
Today I cut this square bar into 4 even length sections actually 3 3/8" long each on my bandsaw. I have a chop saw but the bandsaw can be set to cut each piece the same length. Its a Jet 7 x 12" with liquid coolant, a real step up from my old 4 x 6" that is on its last leg with the gear box almost shot.

001.jpg


005.jpg


I dont want to grind the scale off anymore than neccesary because it will affect the pattern so I soaked them in white vinegar all night to remove the scale. It practically dissolved all of it but there are some pits that still had scale in them so I bead blasted them clean. I had to drive downtown to use my friends bead blaster otherwise I would have not messed with the vinegar at all. The steel cant have any scale although it can have pits and dips etc. to forge weld back together. With them all clean I restack them and mig weld them together. Being sure to arrange them to align the basket weave pattern. Both ends need to be etched enough to see the pattern.

006.jpg


After the seams are mig welded closed I ground off most all the excess so it wont get pushed into my pattern. I thought about putting it back in another canister instead of mig welding the seams but decided to grind the left over mig welds later. The mig weld is considered foriegn material if not removed. It is low carbon steel and wont harden and also just plain looks bad if left in the pattern.

008.jpg


012.jpg


I welded the rebar handle back on and back in the fire it goes. Up to 2300 deg. f again and into the squaring dies for the weld. I drew it out to about 12" long and at the same time drew out a piece of 1084 to include in the billet later. You will see that in a minute.

013.jpg


014.jpg


018.jpg


022.jpg


030.jpg


026.jpg


Both the basket weave billet and the plain 1084 are drawn out to 3/4" square and ran through the 3/4" squaring dies.
 
Last edited:
032.jpg


The basket weave bar is cut into 3 parts and the 1084 get cut into 1 piece the same length.

035.jpg


037-1.jpg


038-1.jpg


040.jpg


Here is a shot of the pattern that is in each of these 3 bars. The 4th bar is simple 1084 high carbon steel that will eventually be the cutting edge of the blade(s). There are 16 sections in each bar so if I stack them into another 4 way that will be 48 sections of basket pattern plus the plain bar all compressed into about a 1" square bar. That is some small baskets eh? I'm on the edge of my seat. (dang I hope this works)

042.jpg
 
Last edited:
Man O Man. Really good stuff.
That last picture Bruce, with the dark surrounding the end on view of you holding the billet,
would look really neat framed IMHO.
Dozier
 
Man O Man. Really good stuff.
That last picture Bruce, with the dark surrounding the end on view of you holding the billet,
would look really neat framed IMHO.
Dozier

Yeah! A cut off tile of that would be awesome.
 
Man O Man. Really good stuff.
That last picture Bruce, with the dark surrounding the end on view of you holding the billet,
would look really neat framed IMHO.
Dozier

Its a cool picture. The flash usually washes out the patterns so I turned the flash off for this one. This tile is the waste off the end and still welded to the handle. Its etched very deep and shows well the pattern. Feel free to hang this one on your wall.
 
Last edited:
Today I'm back on this project.
I cleaned up all 4 pieces and dipped the damascus one in strong ferric cloride so I can see where the mig welding is. Sure enough each one still had some left because of the penetration of the mig welding. I tried to turn the welder down so it wouldnt penetrate very deep but it still does, anyway it cant remain in this billet. I ground it off on all sides and re-etched about 10 times before it finally disappeared completely. I didnt want to take off any more pattern than neccesary to remove the mig welds otherwise the pattern is compromised too much.

Here they are etched for the last time with no grey mild steel (mig weld) left.

003.jpg


Next the 4 pieces need to be oriented so the basket weave pattern flows. If one piece is upside down the lines will not look right. The plain jane 1084 is in one corner. I wish this picture was better so you can see what I'm talking about. My auto-focus likes the dogs better than the bars.

004.jpg


So they get welded together at the seams to keep air out (dry welding method) and most of the mig weld gets ground back off again so it wont get pushed into the pattern any further than neccesary.

007.jpg


008-1.jpg


Back into the forge and ramped up to 2300 deg f for the weld. I'm using the square dies to weld it again. It has to be pushed from all 4 sides at once to drive the patterns together.

009.jpg


011-1.jpg


Here is the weld in the squaring dies. Notice the color is lemon yellow? Thats some hot steel right there.

012-1.jpg


I welded it a couple more times and drew it out enough to fit in these dies but will now re-orient or re-square the billet. This will force the pattern from square to diagonal and also push the 1084 to one side instead of in a corner. This shows really well later.

015.jpg


OK its really easy to get confused and go back to the original square when it is octagoned so I clamped my vice grips on the handle straight up so I can go back into the dies the same way each time until it is completely re-squared. I've screwed this step up before and dont ever want to do that again especially after 3 days and 15 gallons of propane.

017.jpg


Now its square again so I simply draw the billet out until they fit my 1" square dies. Its all just simply that easy. hehe

021-1.jpg


Right now its at just under 1" square and about 12" long. I want to accordian cut this one and make some smallish blades, possible a folder or two. Maybe a two blade gents lock back.
 
Last edited:
I'm right here with my coffee enjoying the heck outta this Bruce !!

A GREAT early Christmas gift for us Dogs

I'm begininng to think we ought to rig your whole shop with webcams everywhere and create the 1st REAL knifemaking Channel. I'd subscribe for $9.99 a month.

Josh

Edited to add- It'd be the best money I ever spent on my education :) An I've spent quite a bit, LOL
 
I would have to shave and wear better clothes if I was on web cams. Heck I might forge in shorts and no shirt just to get more subscriptions.
I'm right here with my coffee enjoying the heck outta this Bruce !!

A GREAT early Christmas gift for us Dogs

I'm begininng to think we ought to rig your whole shop with webcams everywhere and create the 1st REAL knifemaking Channel. I'd subscribe for $9.99 a month.

Josh

Edited to add- It'd be the best money I ever spent on my education :) An I've spent quite a bit, LOL
 
LMAO

Welcome to the down and dirty knifemaking channel with MS Bruce Bump & pups. Rated PG-13 for exposed hairy chest and legs !

It could be kinda like The Dukes of Hazzard with cameos of travelling knifemakers :53:

:s11798:
 
Looking great, as always Bruce. I'm interested to see what that big 1084 will do to the pattern.

As far as the web cam suggestion goes, it's not an entirely new concept. I've actually done a few live web broadcasts from my shop in the past. Some of the old recordings are on my website. They aren't the greatest since it was me, with a desktop computer on a cart, trying to setup the shots, and answer questions from the online folks and what not, all while actually trying to forge something, lol. I stopped doing them due to lack of time, and the need for a laptop (dragging the desktop out to the shop got old, fast). I might do some more over the holidays or something when things slow down a bit and I get some more shop time, but we'll see.

We could probably get Bruce setup quite easy!
 
Well Graham, you're young and probaly look cute on a video. The only way I'm going to attract attention is to show off my slightly whiteing chest hair. I bet you dont even have chest hair yet. hehe

Looking great, as always Bruce. I'm interested to see what that big 1084 will do to the pattern.

As far as the web cam suggestion goes, it's not an entirely new concept. I've actually done a few live web broadcasts from my shop in the past. Some of the old recordings are on my website. They aren't the greatest since it was me, with a desktop computer on a cart, trying to setup the shots, and answer questions from the online folks and what not, all while actually trying to forge something, lol. I stopped doing them due to lack of time, and the need for a laptop (dragging the desktop out to the shop got old, fast). I might do some more over the holidays or something when things slow down a bit and I get some more shop time, but we'll see.

We could probably get Bruce setup quite easy!
 
Here is the waste end of the billet so to show the pattern now. The 1084 does look big but from a side view after the blade is straighten out from the accordian it shouldnt be full sized like it is in an end view like this. We will see tomorrow.

I laid out about half the bar with .185" wide blade. The trick now is to heat it hot enough and flatten out the accordian without ripping or tearing it apart. I've ruined tham before but it was from trying it too cold. I'm going to practically welding temp and fluxing it to keep it wet while flattening it slowly with the hammer by hand and fianally in the press with flat dies. Notice I only cut up half the bar? If this doesnt work I still have the other half to try something else. The worst that can happen is I end up with short blades, really short blades.

There is talk that the accordian method wastes steel but if I were to press a pattern into a bar and grind off the high spots, that wastes steel. This way I still have all these little wedged shapes I could toss into a canister someday and see what I get.

025-2.jpg


026-1.jpg


027-1.jpg


029-1.jpg


030-1.jpg
 
Another question Bruce. Looking at the accordian something Ive always wondered, dont the sharp angles on the inside of the cuts create stress areas when flattening? Or do you round them some first?
Thanks, sitting on the edge of my seat to see how this one comes out.

BTW
I would love to see the webcam, but Ill buy you some long pants and a shirt if you need them. ;)

Sean
 
Hey Sean,
the inside is more apt to shear than the outside one. They will get a small radious so there is no bandsaw marks that can cause a stress fracture. If I open it up too cold it will surely rip there. Good question, thanks

Another question Bruce. Looking at the accordian something Ive always wondered, dont the sharp angles on the inside of the cuts create stress areas when flattening? Or do you round them some first?
Thanks, sitting on the edge of my seat to see how this one comes out.

BTW
I would love to see the webcam, but Ill buy you some long pants and a shirt if you need them. ;)

Sean
 
Back
Top