Sub Hilt fund raiser WIP

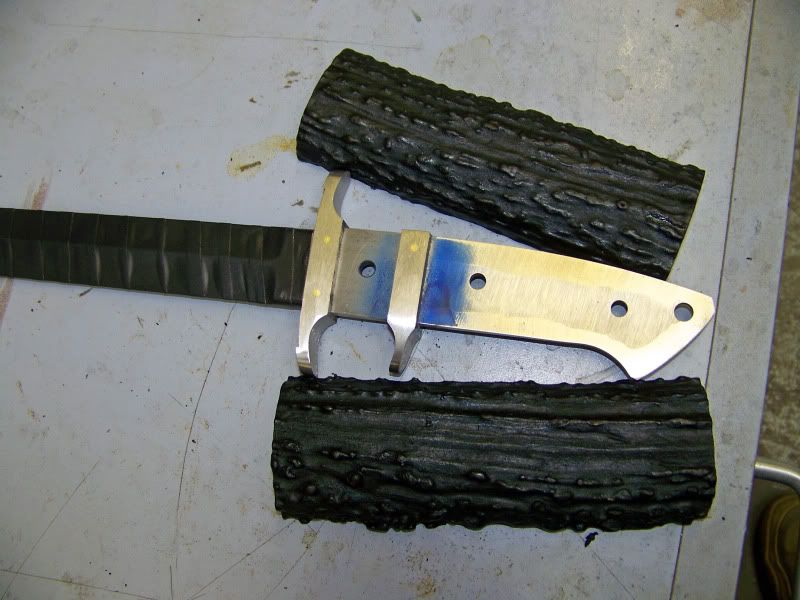
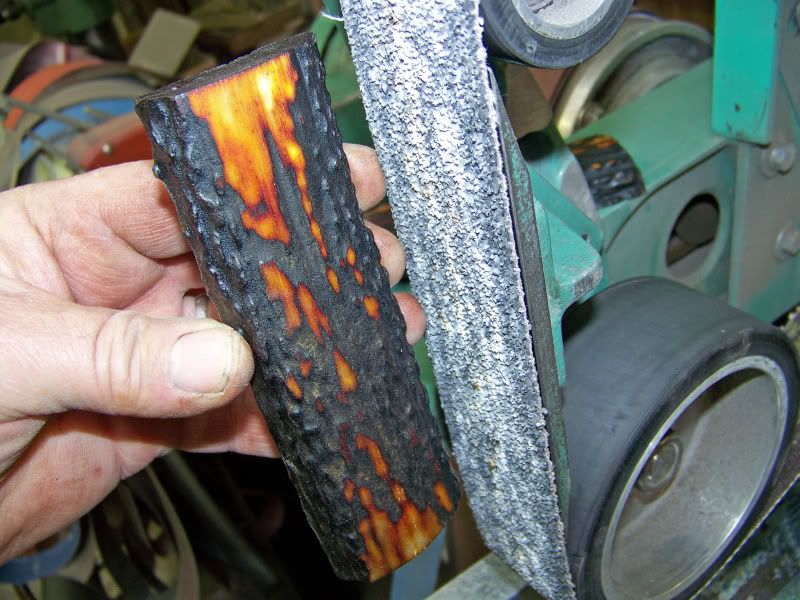
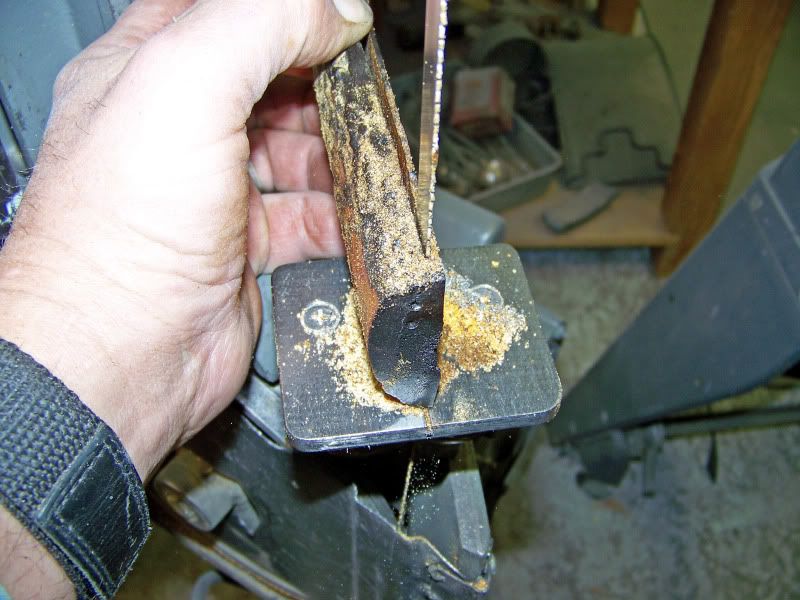
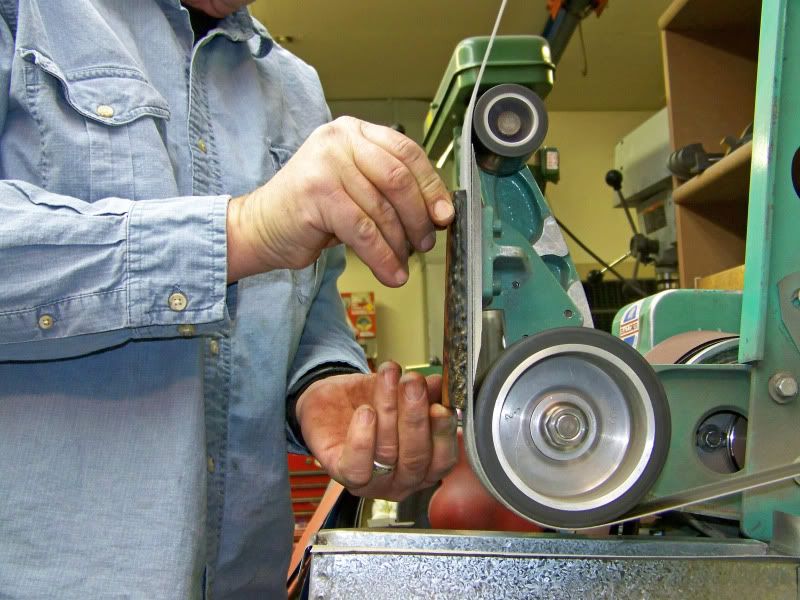
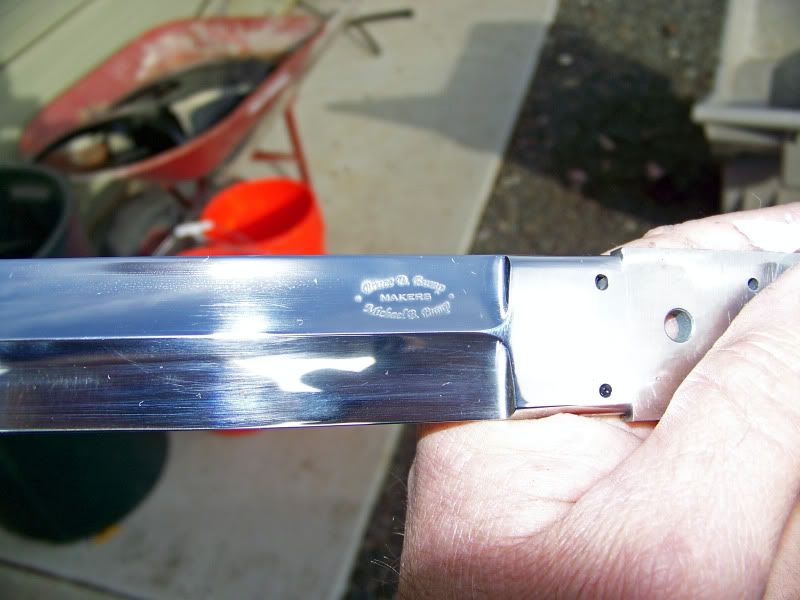
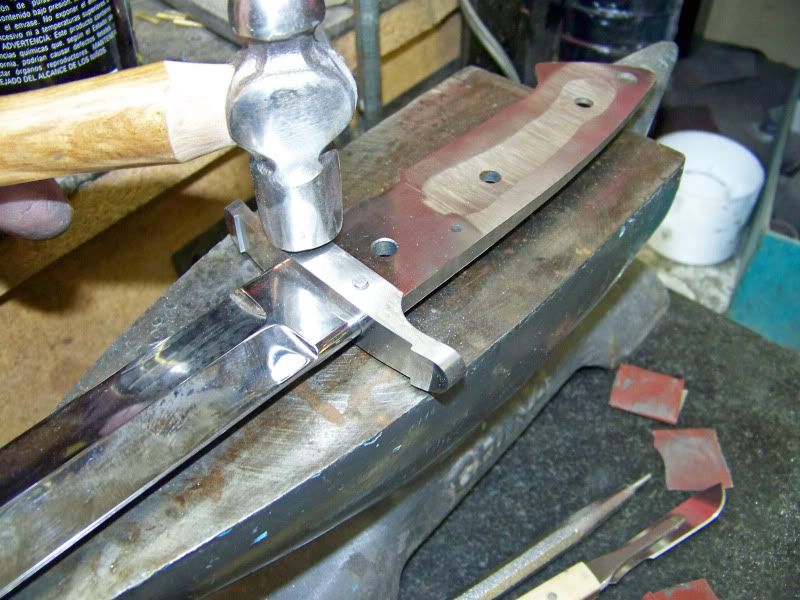
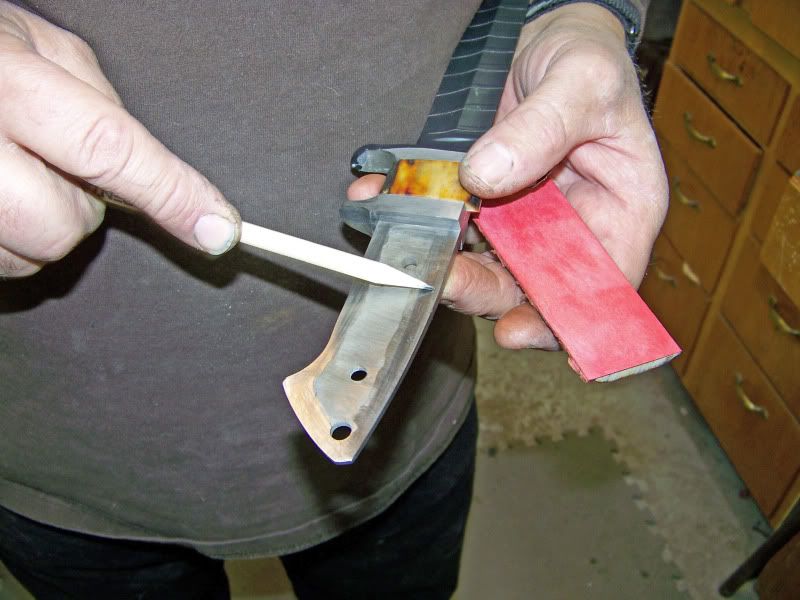
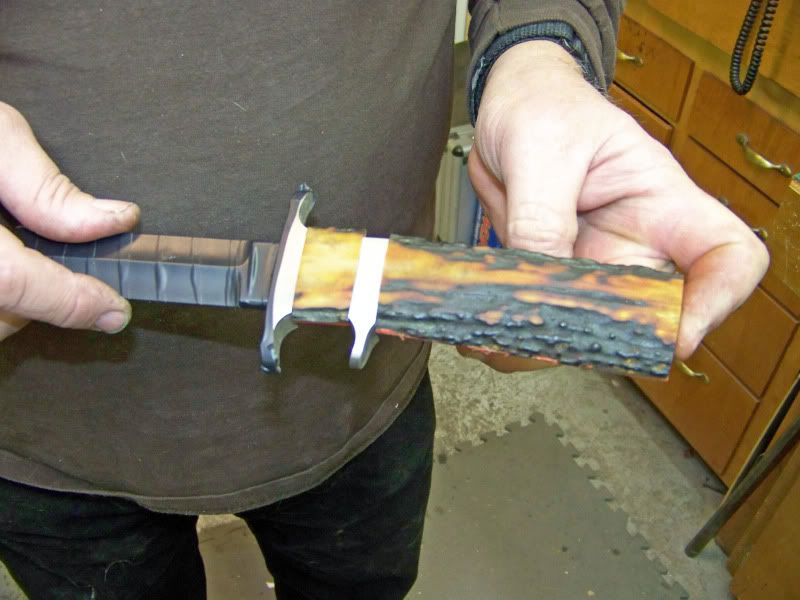
A note to Mike, Ken and Paul: Guys I am really sorry that I neglected to add your contributions to my little note to PayPal. You should all have been included, might have had greater impact had I been awake and alert when I wrote it. My only excuse is that it was way early in the morning and I have the flu, not feeling too dang good. But that's a lame excuse. Your work on this knife is equal to Bruce's and I should have included you. Maybe someone from PayPal will actually take a look at this thread and realize the true generosity of all of the professionals involved in this project.
 
Thats a well written letter especially for somebody that is home sick with the flu. Lets hope they adopt a policy that allows legitament chaities like this one. I would pay the fee they require. They cant be expected to get onboard with every charity that comes through their system but they could be money movers and get their fair share. I suppose we should have all clicked the "Payment" and not the "gift" button.

Get well Dave! Sorry to hear you're under the weather.
 
Yep, You guessed it, Culpeppers sent the scales and I'm working em over. The front needs to be flat where the guard is and the pommel needs to be round. Both scales need to taper to account for the tapered tang other wise the pommel will be too narrow. I need that flair there to look right.

101_4492_edited.jpg


101_4494_edited.jpg


101_4495_edited.jpg


101_4497_edited.jpg


101_4501_edited.jpg


101_4499_edited.jpg
 
I guess we'll see soon, but I'm wondering whether you'll remove the width of the subhilt from the scales, or simply separate them there.
 
Good question indeed... Always wondered about that point regarding subhilts.
 
I guess we'll see soon, but I'm wondering whether you'll remove the width of the subhilt from the scales, or simply separate them there.

Were I a betting man, my money would be on removing the width of the subhilt from the scales. That way the taper is right-on without modification. 'Course my wife doesn't let me bet anymore since I lost our second child to a Swedish sailor in a game of lawn darts. :D

Bruce... this thread is the best. I really appreciate it when talented makers take the time to document their progress/process in such detail. For me it is both instructional and inspiring. Thanks. 2thumbs

Erin
 
I think I will remove the width of the sub hilt from the scales so the grain will flow naturally. Some of it depends on the thickness of the scales as I cant remove much more off the gaurd. It is around 1/2" wide and tapers to 5/8" at the sub hilt. I left the scales about .030" too thin there so I could put a .030" fiber liner under them. Luckily these scales are plenty long enough to move them forward or back to get my hieghts level with the guards.

I have the scales and liners glued up and will post that on my next coffee break. Ya,all come back.
 
Paul Long called tonight and was wondering where the wooden knife is? So I glued some more parts on it and will finish it in the morning and get it sent to him for a sheath. I figure we are running about a week behind in this thing. We are still going to draw the winner on Nov. 6th

101_4506_edited.jpg


Back to the stag scales.
I glued red fiber on the back side using super glue and cut a section out for the sub hilt.
Mike got the front guard cleaned up on the front side and I reground the blade a little and hand rubbed it to 2000 grit. This model gets buffed and I am buffing it. I very rarely buff blades but Steve Johnson and Bob Loveless buff blades therefore Bruce Bump buffs blades (at least on this one)

101_4505_edited.jpg


101_4515_edited.jpg


101_4519_edited.jpg
 
Bruce,
Have you heard that Congress is considering enacting new legislation ? Somthing about "Mr. Bruce Bump will at all times have a WIP thread underway at KnifeDogs or face the wealthy knifemaking skills tax"

Seriously though thanks alot for taking the time and effort to do WIP threads. You've got the skills and we've got the desire to learn and that is a great combination ! :)

-Josh

I'm busily doing my part to avoid the tax. Two at once :D
 
I had some time today so I reamed and peened the guard pins and soldered the guard. The soldering came out OK but the pictures didnt. I do have a picture of me taking excess solder off with a brass push chisel. I found that the brass will scratch the 416 guard so I spent over an hour resanding the face of it. Now I remember why I usually epoxy my guards on but the original is soldered so I solder.

Also put our logo on. I've been buying my stencils from Ernie. Great guy and the best quality around for the fixed price of $35. Thats a good deal considering the art work and shipping is included and it only takes a couple days to get it. I cant believe he can do it and make any money. Anyway I think you can see his address in this picture, if not email me if you want any stencils made.

101_4522.jpg


101_4524_edited.jpg


101_4527_edited.jpg


101_4529_edited.jpg


101_4532_edited.jpg
 
That's a beautiful knife Bruce. I'm curious your soldering method. Like you said, soldering is such a pain that JB Weld is a wonderful alternative.

For whatever reason, I can never get solder to flow. It just beads up on the face of the guard. I'm sure it's because I don't get the parts clean enough, but I sure do try. I probably also overheat the flux. Can you share your method when you have time? I sure understand why there were no pictures! :D Too many timing issues, stressful enough without a camera involved.

Thanks for this great WIP. 2thumbs

Mike wasnt here to take a picture of the process and my picture was out of focus because it takes two hands to solder.

Basically soldering needs to have just the right amount of heat without going too hot. I used the hot air gun and the propane torch to preheat it. It tried to ball up and needed extra flux dripped on to clean the parts. Steve Johnson shows the process in his DVD but you can see the heat gun has trouble keeping up. I finished this one with the propane torch turned way down and just played it from underneath. You can see the solder melt and flow. Use a solder brush to move it around and if there is a void that wont take it just use a steel scribe to scoot it all the way around the joint. It takes practise but the killer is just too much heat. If the flux turns black you may need to start again. Touchy here because I had it pinned permanatly and couldnt dissasemble to clean it.
Call Pops knife supply and he will explain it better than I and sell you the correct flux and solder for this low temp application. Hows that for passing the buck?:D
 
Thanks Bruce. From your description, I probably overheat. Impatient? Just too nervous? Dunno. Probably would make sense to practice practice practice on similar scrap material before I go screwing up any more ricassos. ;)
 
Bruce

Have only just joined KD - would love a chance at this Bob Loveless tribute but can't find the raffle. Please PM me the link. That is one very sweet knife

Many Thanks
Antonio
 
Mike has the scales fit to the knife now. I used a pencil on the steel and the lead will mark the red fiber spacer to show the high spots. Simply remove the high spots on the tang until it is a flat fit.
We clamped it end to end to make sure its tight against the guard and then from side to side tight to the tang. The small stag is jammed in because it is ever so slightly tapered between the guards and then clamped to the tang. Super glued wicked in all around and in the holes and quickly clamped. I like this brand of super glue because it doesnt instantly dry. Ya get a couple seconds or more to reach for the clamps.

101_4545_edited.jpg


101_4546_edited.jpg


101_4547_edited.jpg


101_4548_edited.jpg


101_4549_edited.jpg
 
Back
Top