You are using an out of date browser. It may not display this or other websites correctly.
You should upgrade or use an alternative browser.
You should upgrade or use an alternative browser.
Matchlock Axe/Pistol
- Thread starter Bruce Bump
- Start date
McClellan Made Blades
Well-Known Member
Bruce
I was watching Cajun Pawn Stars the other day, a guy brought in something that immediatley made me think of you!
I wanted to see if you ever heard of it, it was built in either the 16 or 17 century, it was called the ' Apache'. Made in France and carried by street gangs. Although, it isn't as fine as yours, I thought it was amazing work for the era. And they kind of trumped you a little, theirs is a gun, knife & brass knuckles. It was so cool, google it, pretty amazing work! Rex
BTW, LOVING THIS ONE!!!!
D. Crawford
Well-Known Member
Always a treat to read your WIP's Bruce. Thanks for taking the time to do this.
Thanks to Roger T also for showing us some fine woodworking on the case.
Nice work guys,
David
Thanks to Roger T also for showing us some fine woodworking on the case.
Nice work guys,
David
Bruce Bump
Forum Owner-Moderator
Hi Rex,
I didnt see that episode. I've always stood on my soap box and preached about all the other weapons we can make besides knives. Dont get me wrong, I love knives but we have more tools than most of the craftsmen back then, so we should broaden out imagination and forget making something like everybody elses. Has the last 70 years of television ruined our imaginations completely?
Please click here if you havent already and look at some of the very unique and classic cut and shoots made hundreds of years ago. http://knifedogs.com/showthread.php?12004-Guns-Cut-N-Shoots-and-other-dual-threat-weapons
Bruce
I was watching Cajun Pawn Stars the other day, a guy brought in something that immediatley made me think of you!
I wanted to see if you ever heard of it, it was built in either the 16 or 17 century, it was called the ' Apache'. Made in France and carried by street gangs. Although, it isn't as fine as yours, I thought it was amazing work for the era. And they kind of trumped you a little, theirs is a gun, knife & brass knuckles. It was so cool, google it, pretty amazing work! Rex
BTW, LOVING THIS ONE!!!!
Last edited:
Bruce Bump
Forum Owner-Moderator
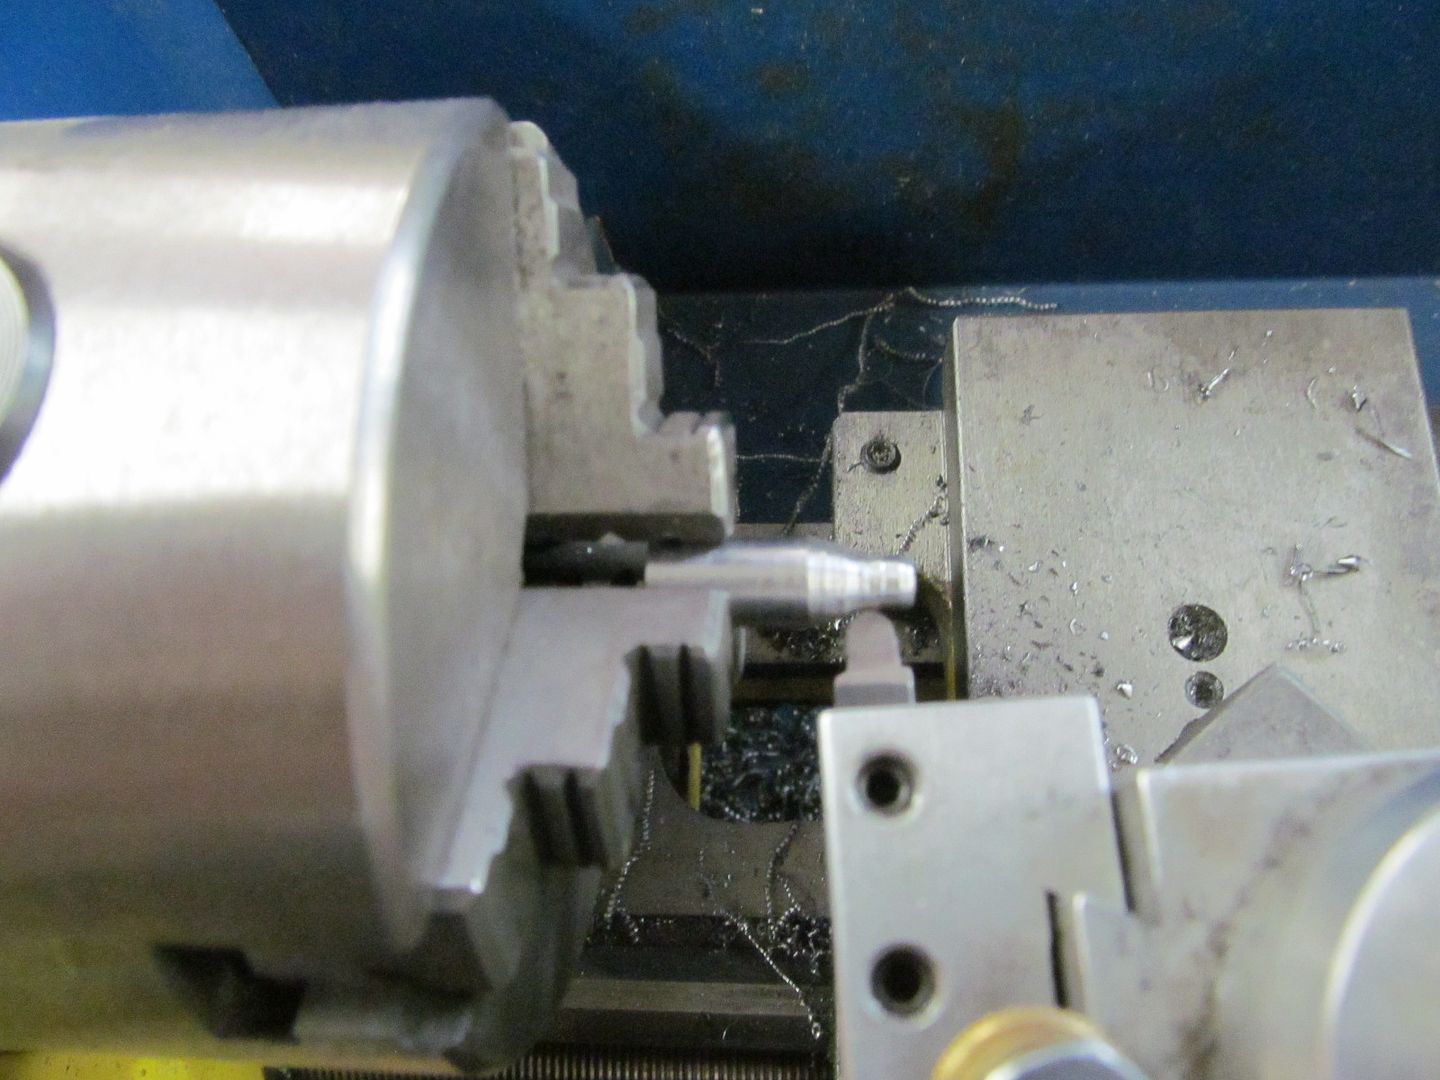
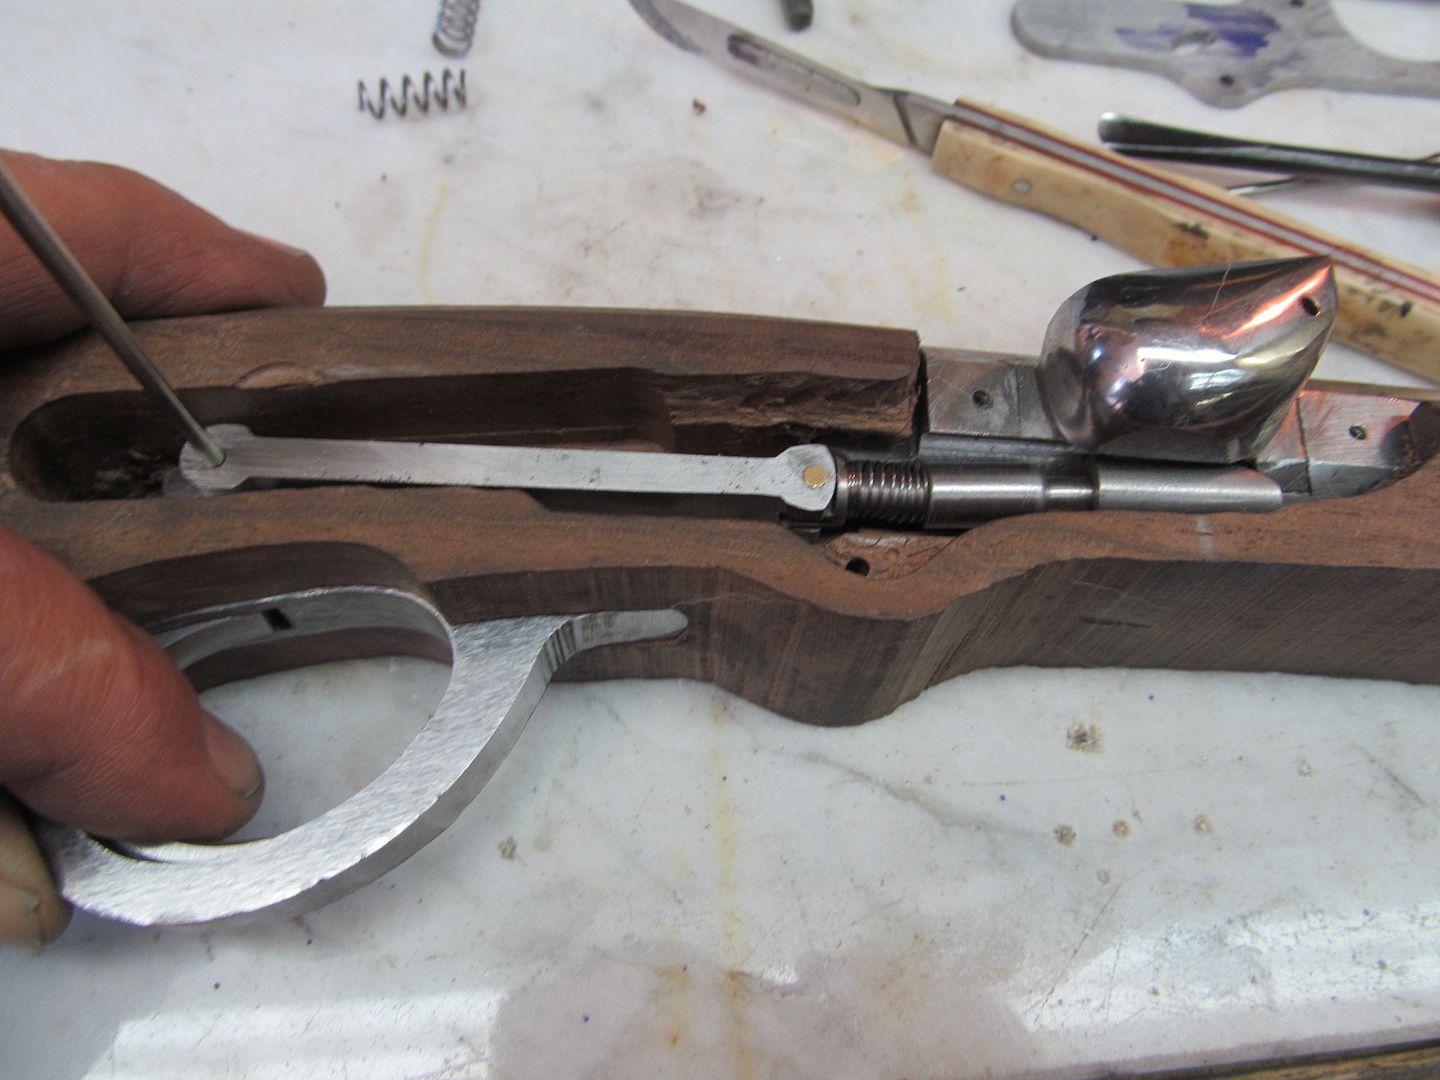
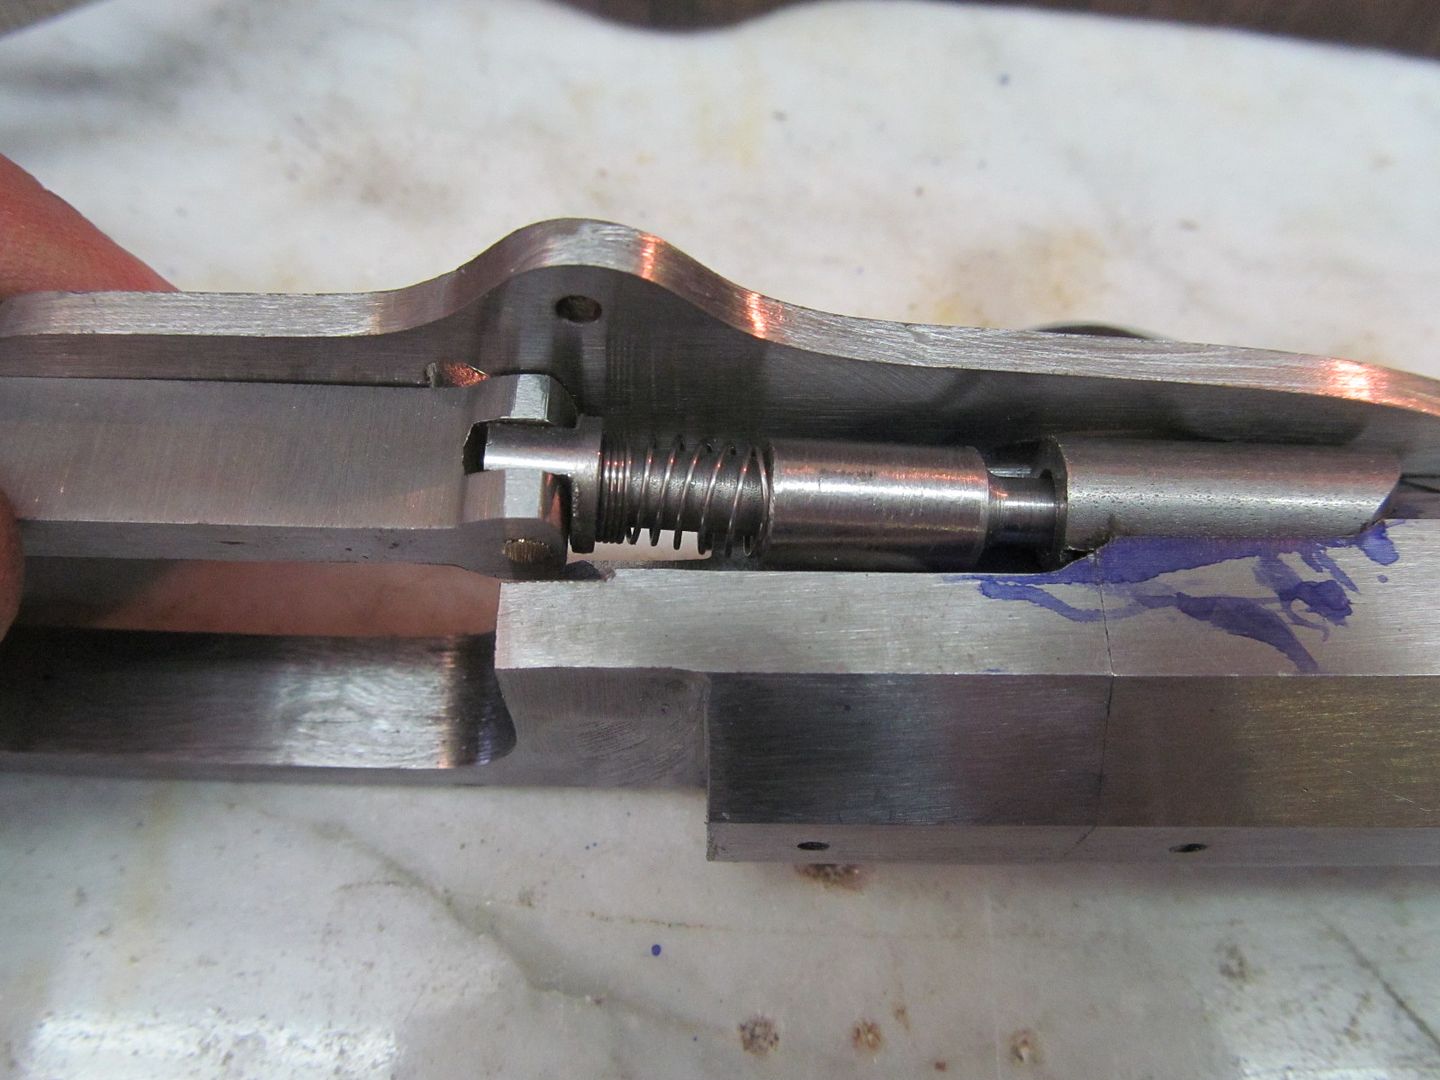
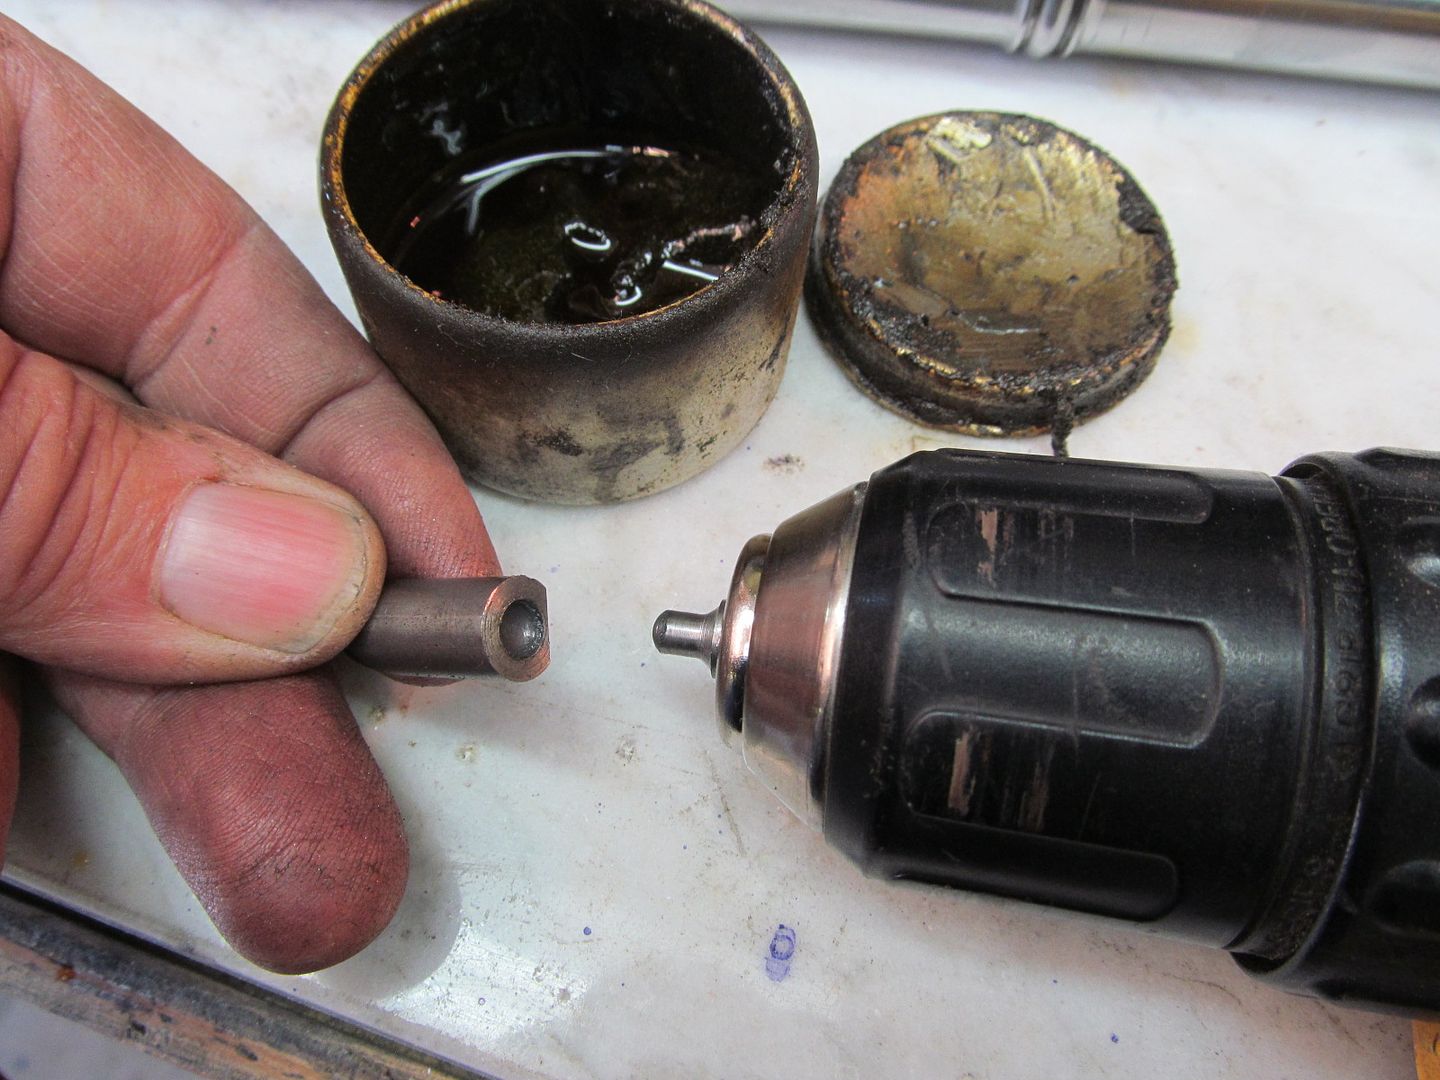
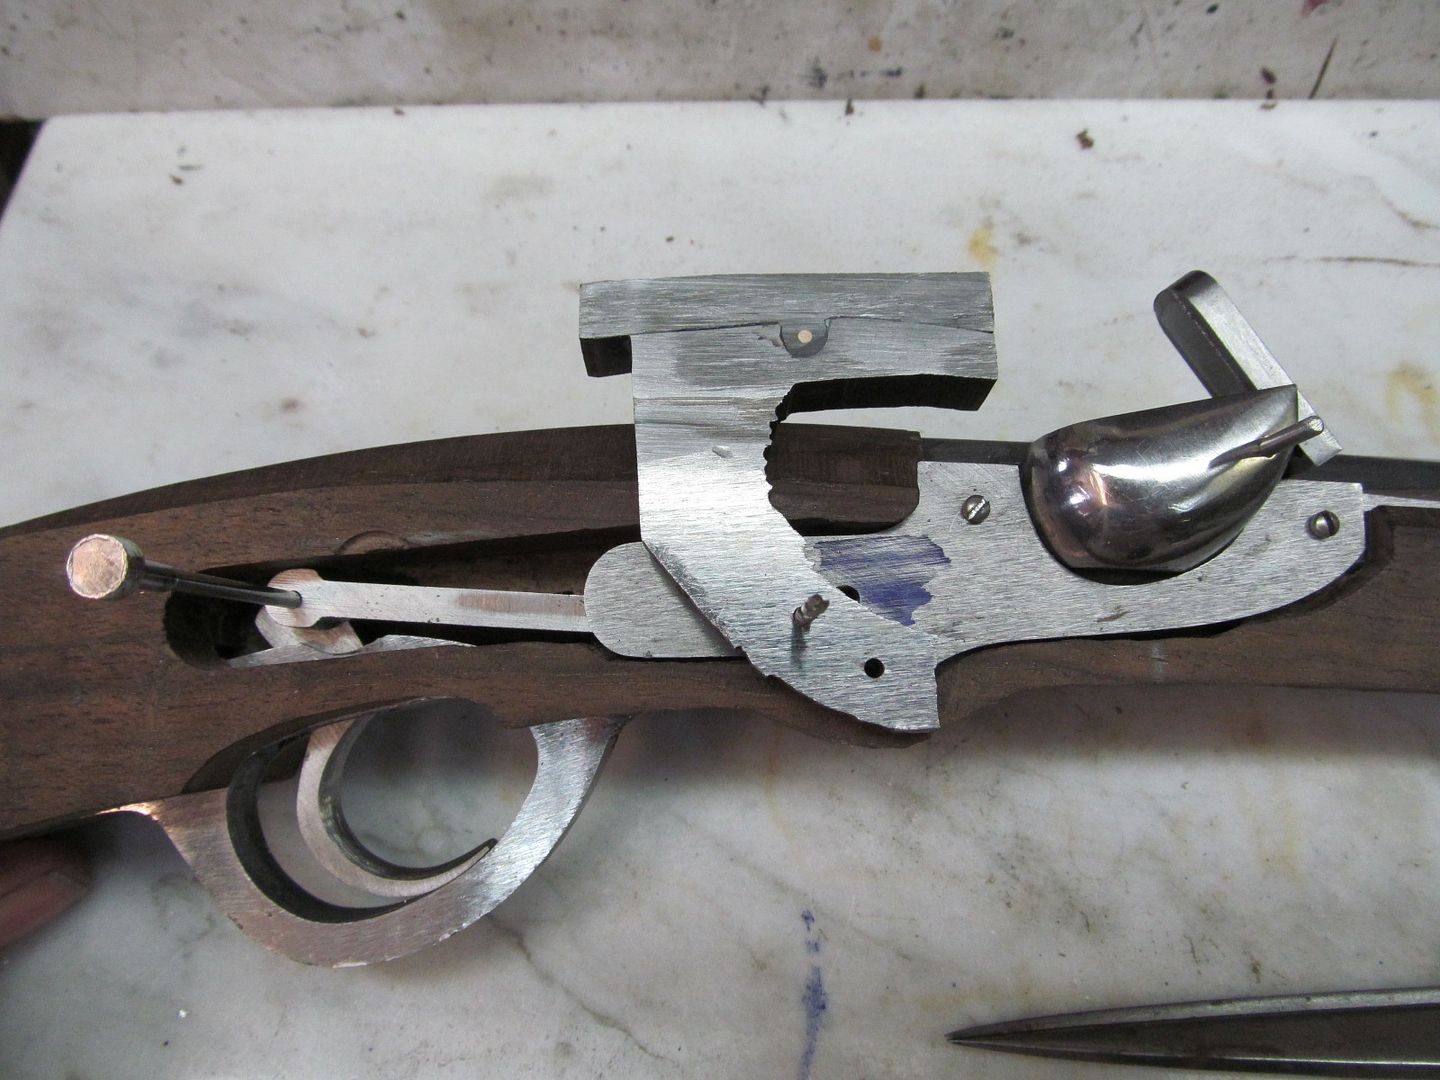
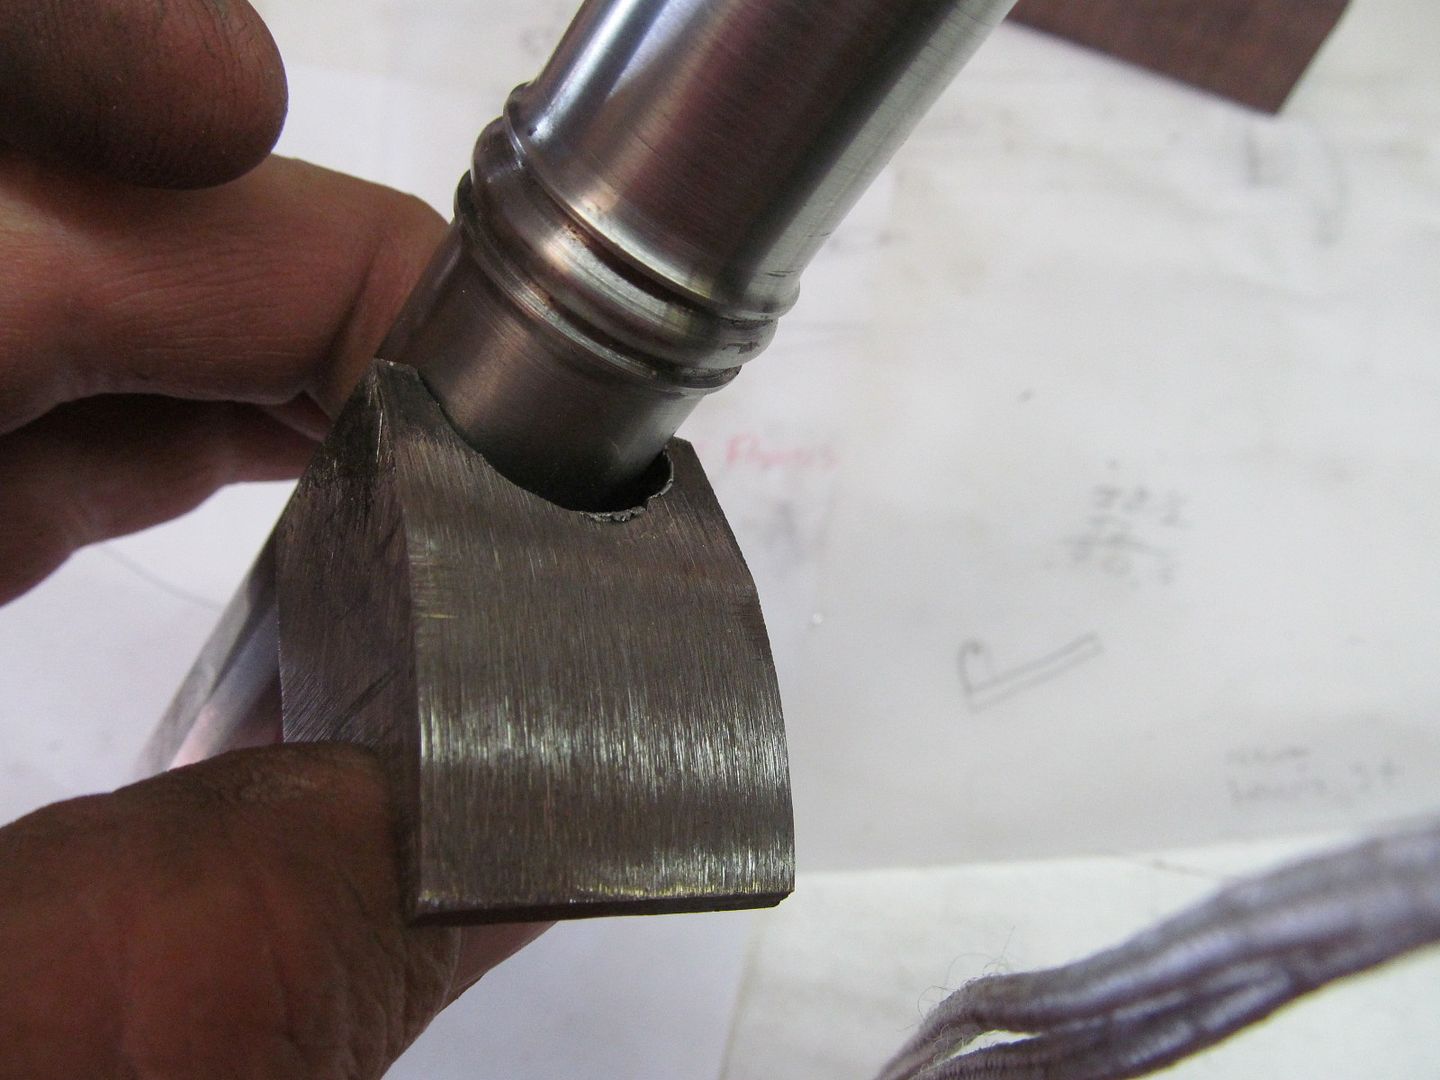
I spent time on the serpentine today but first I had to finish up the linkage and return spring. The barrel needed to be relieved on the breech plug to make room for the spring and socket. The side plate holds it in place.
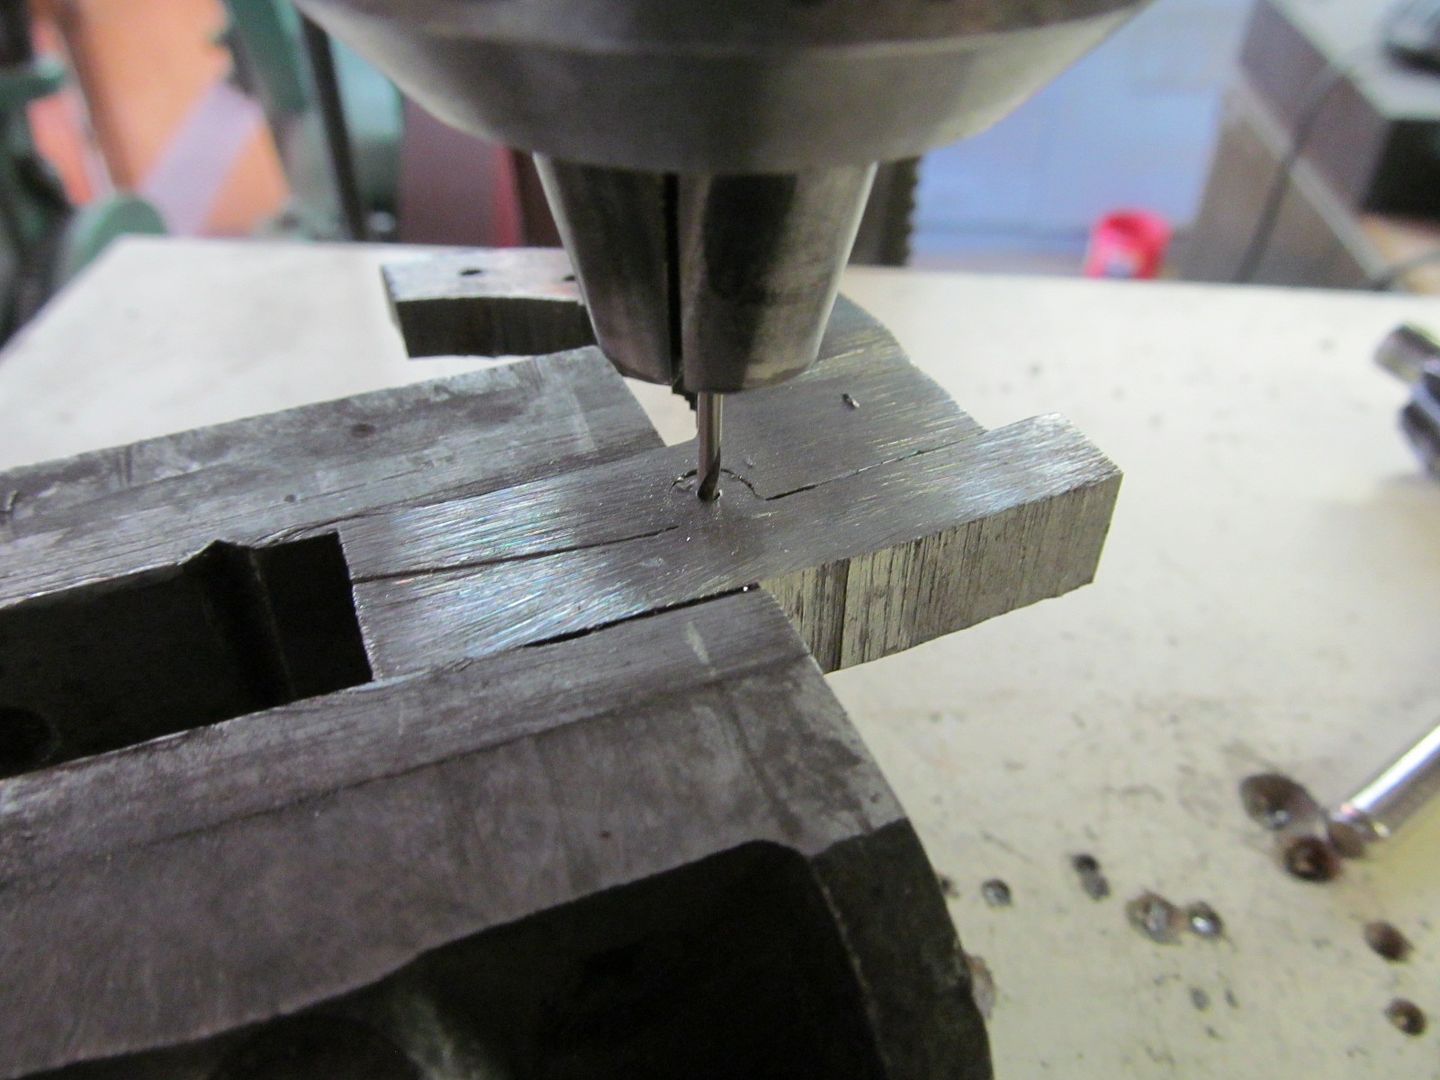
The serpentine is roughed out from 1/2" thick mild steel and has a pivot for the jaw to open and hold the cotton cord (slow match). I used the template and drilled the steel plate for the serpentine pivots and rough sawed the thing out. I pressed the jaw into the main part for a press fit and super glued the two together for drilling as a single unit. I drilled at an angle so the cotton cord will come out the side for ease in adjusting the burning cord. This gun is so slow and difficult to shoot it will not be the weapon of choice for any street gang in America.
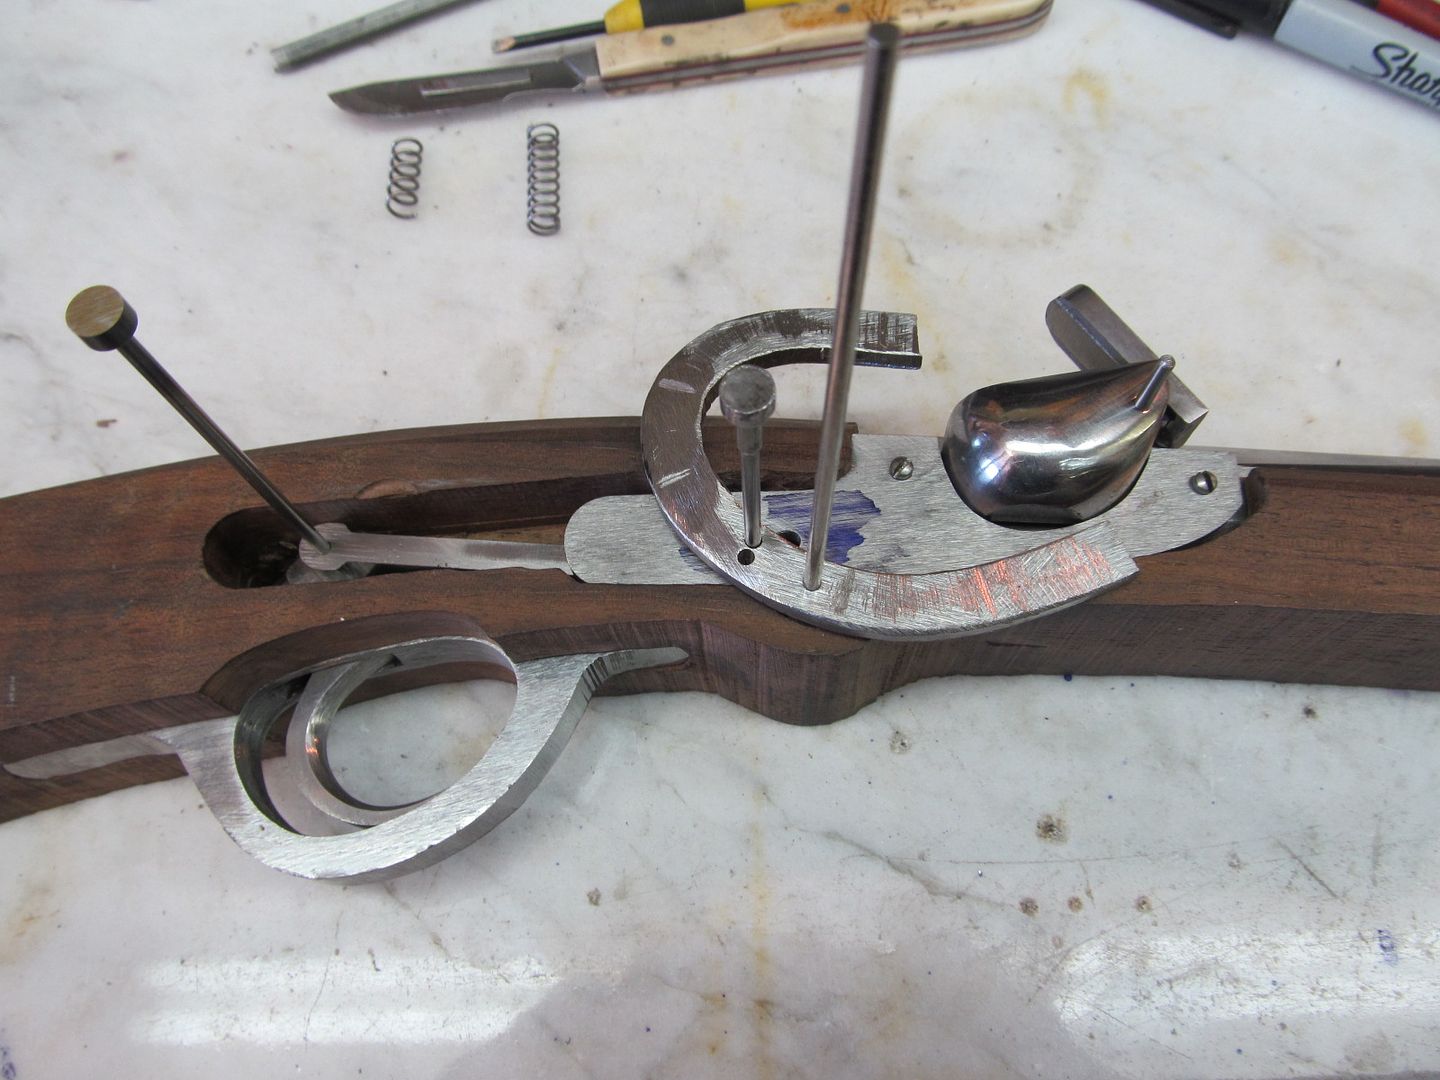
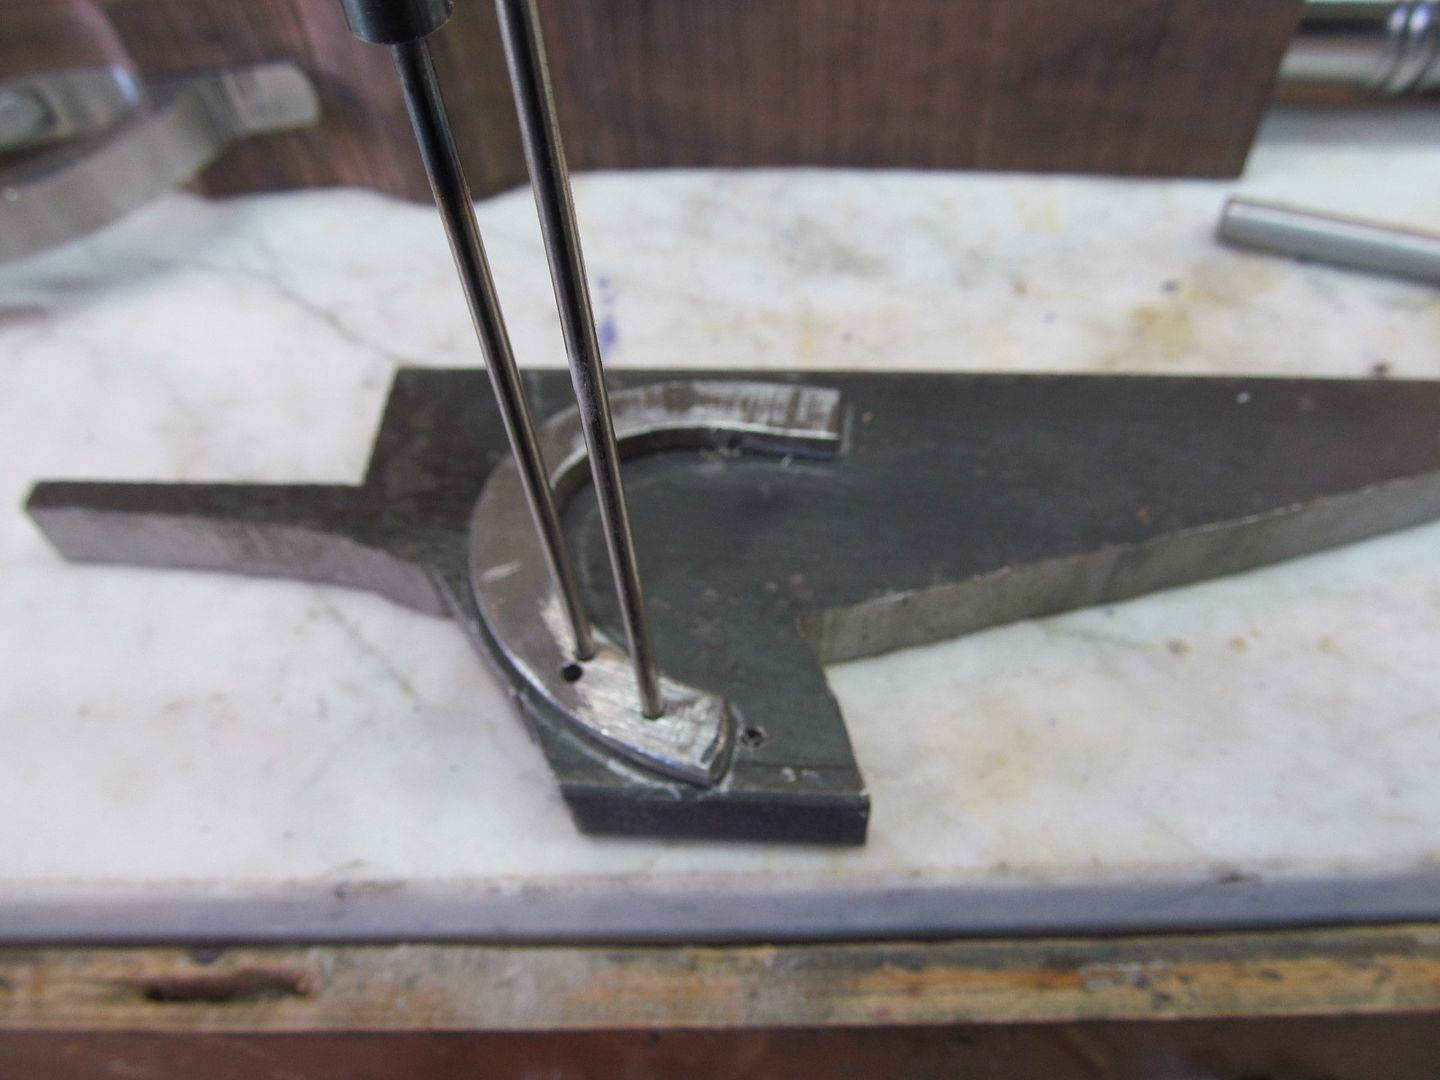
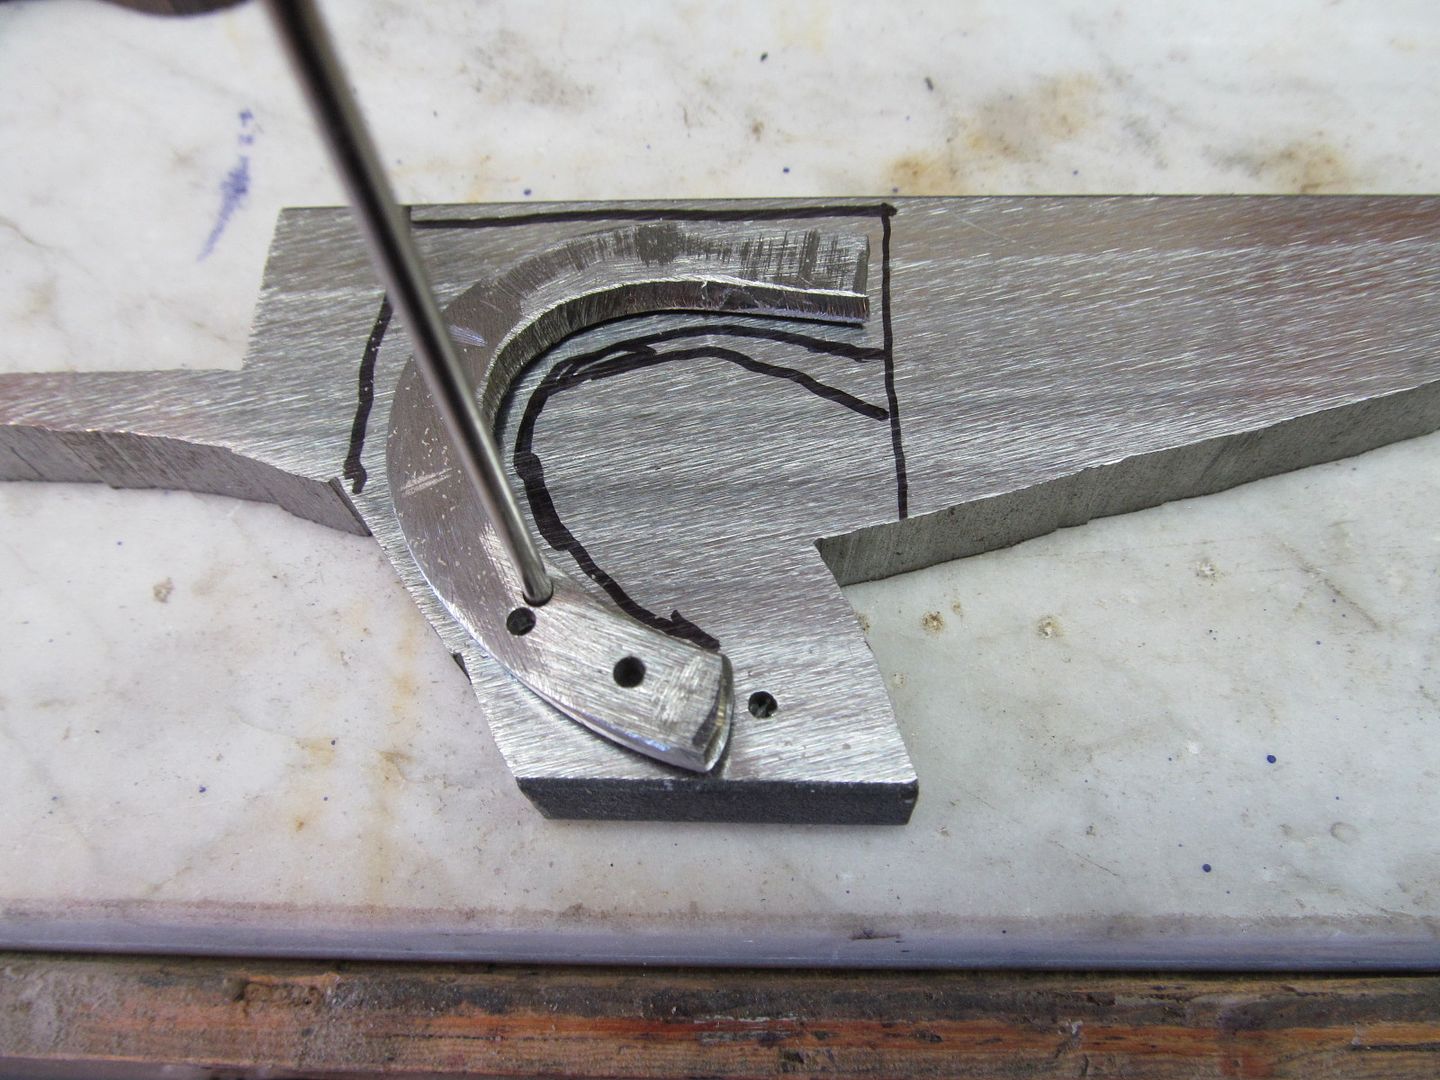
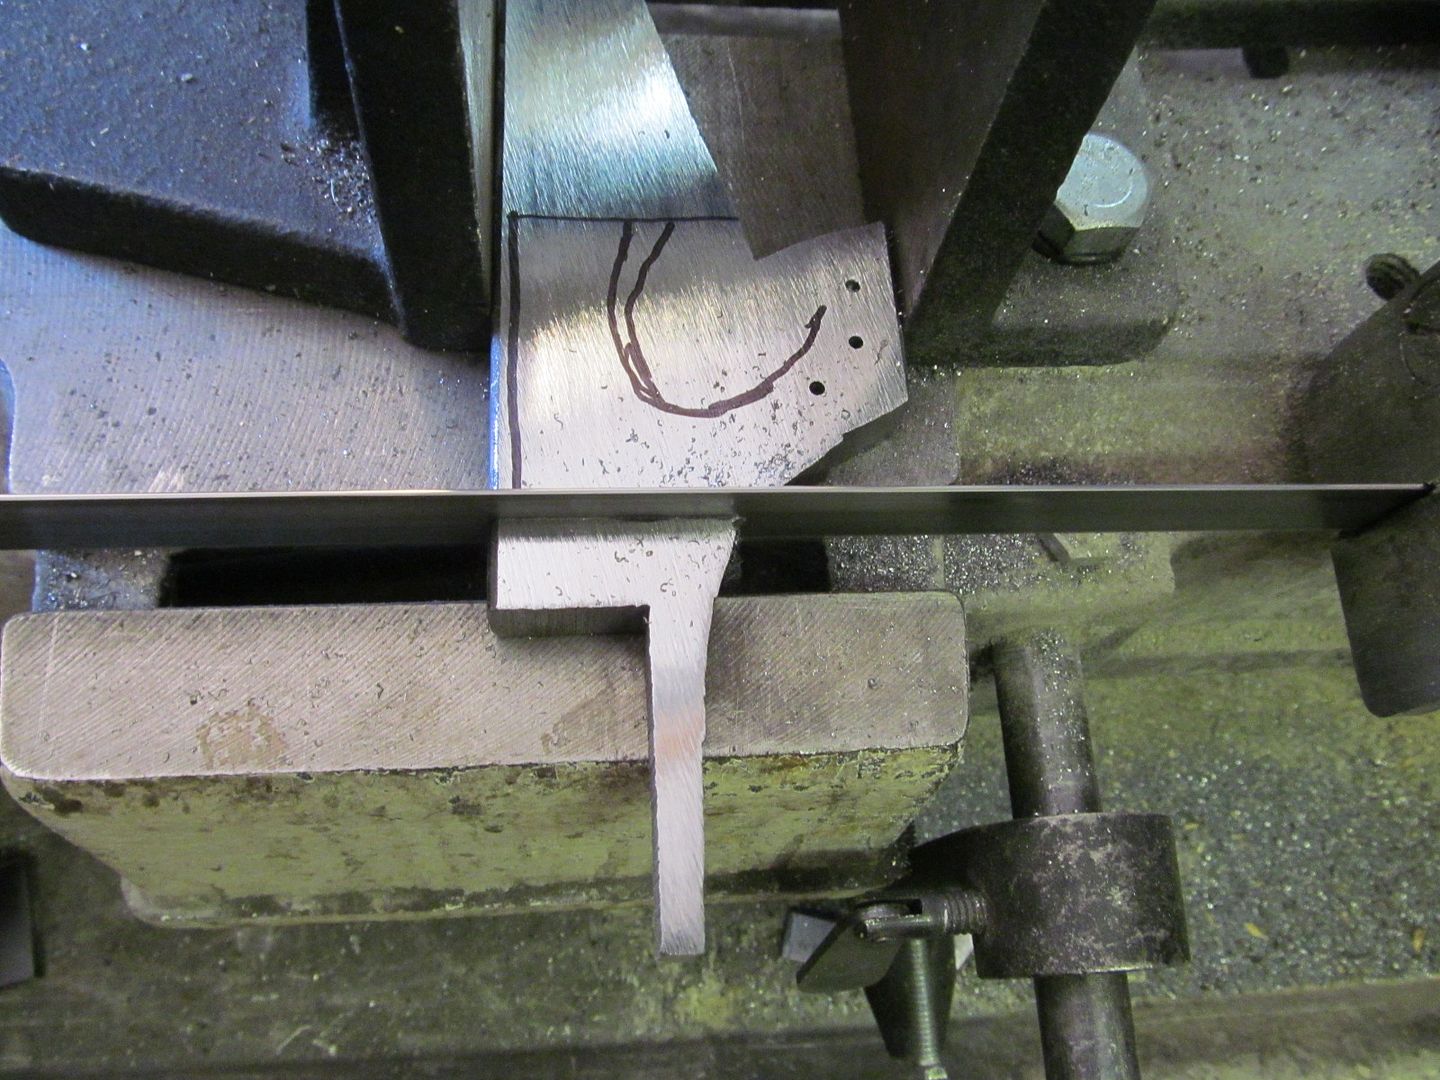
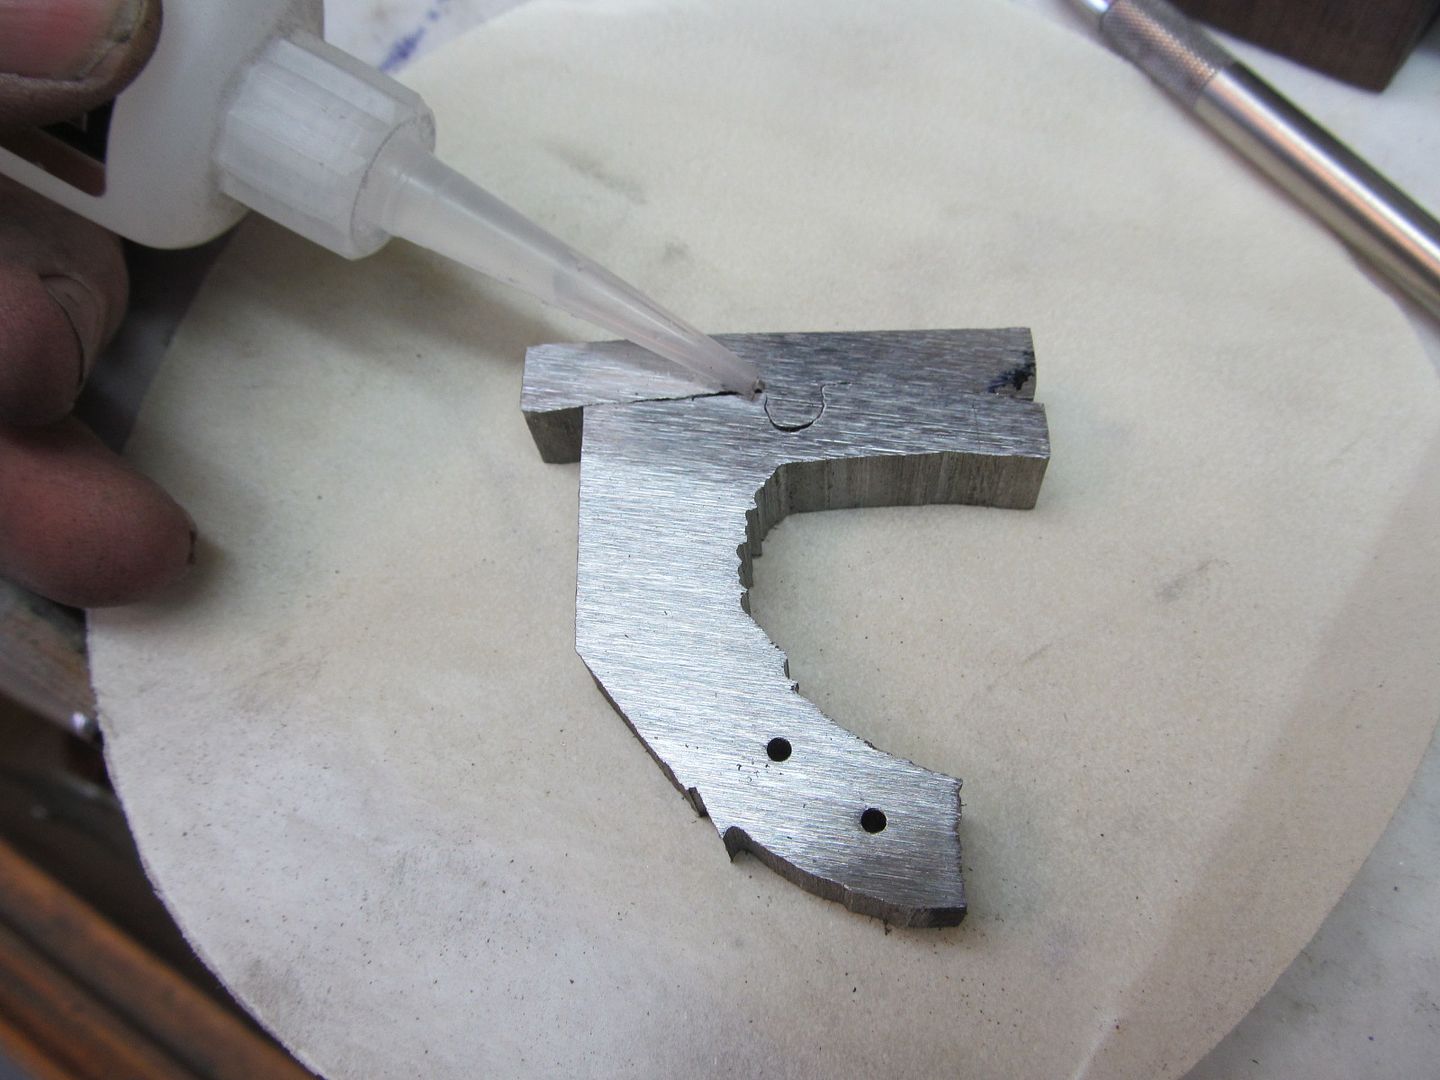
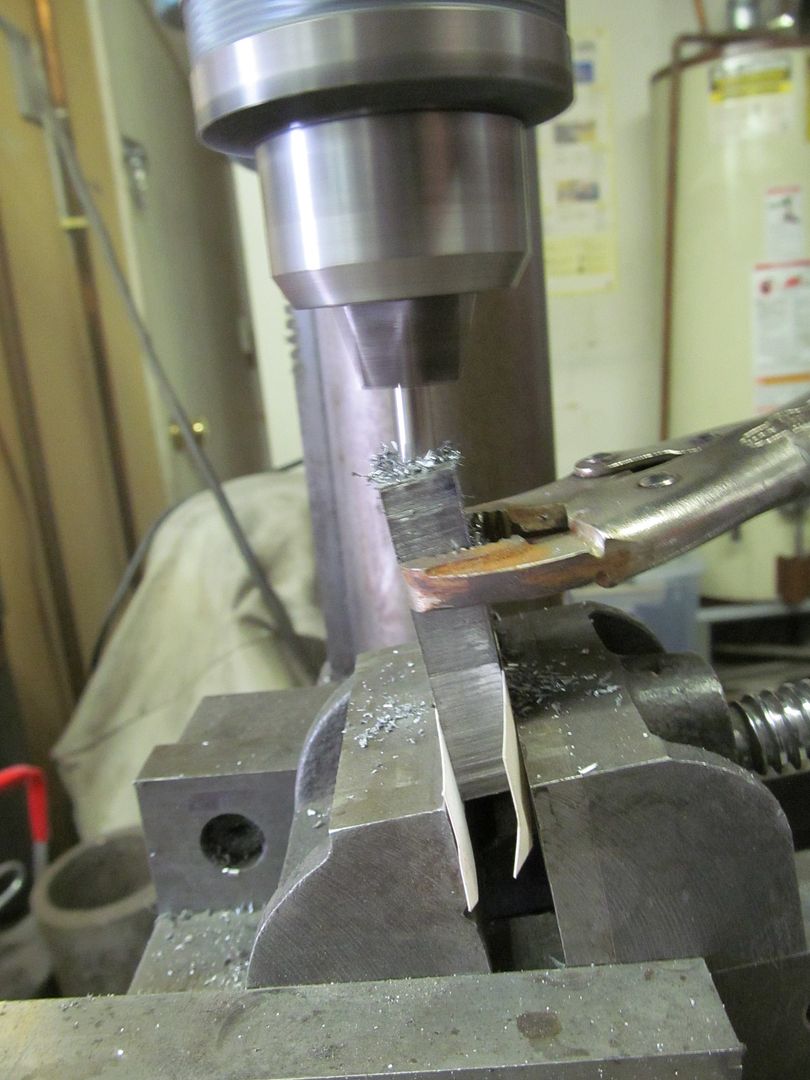
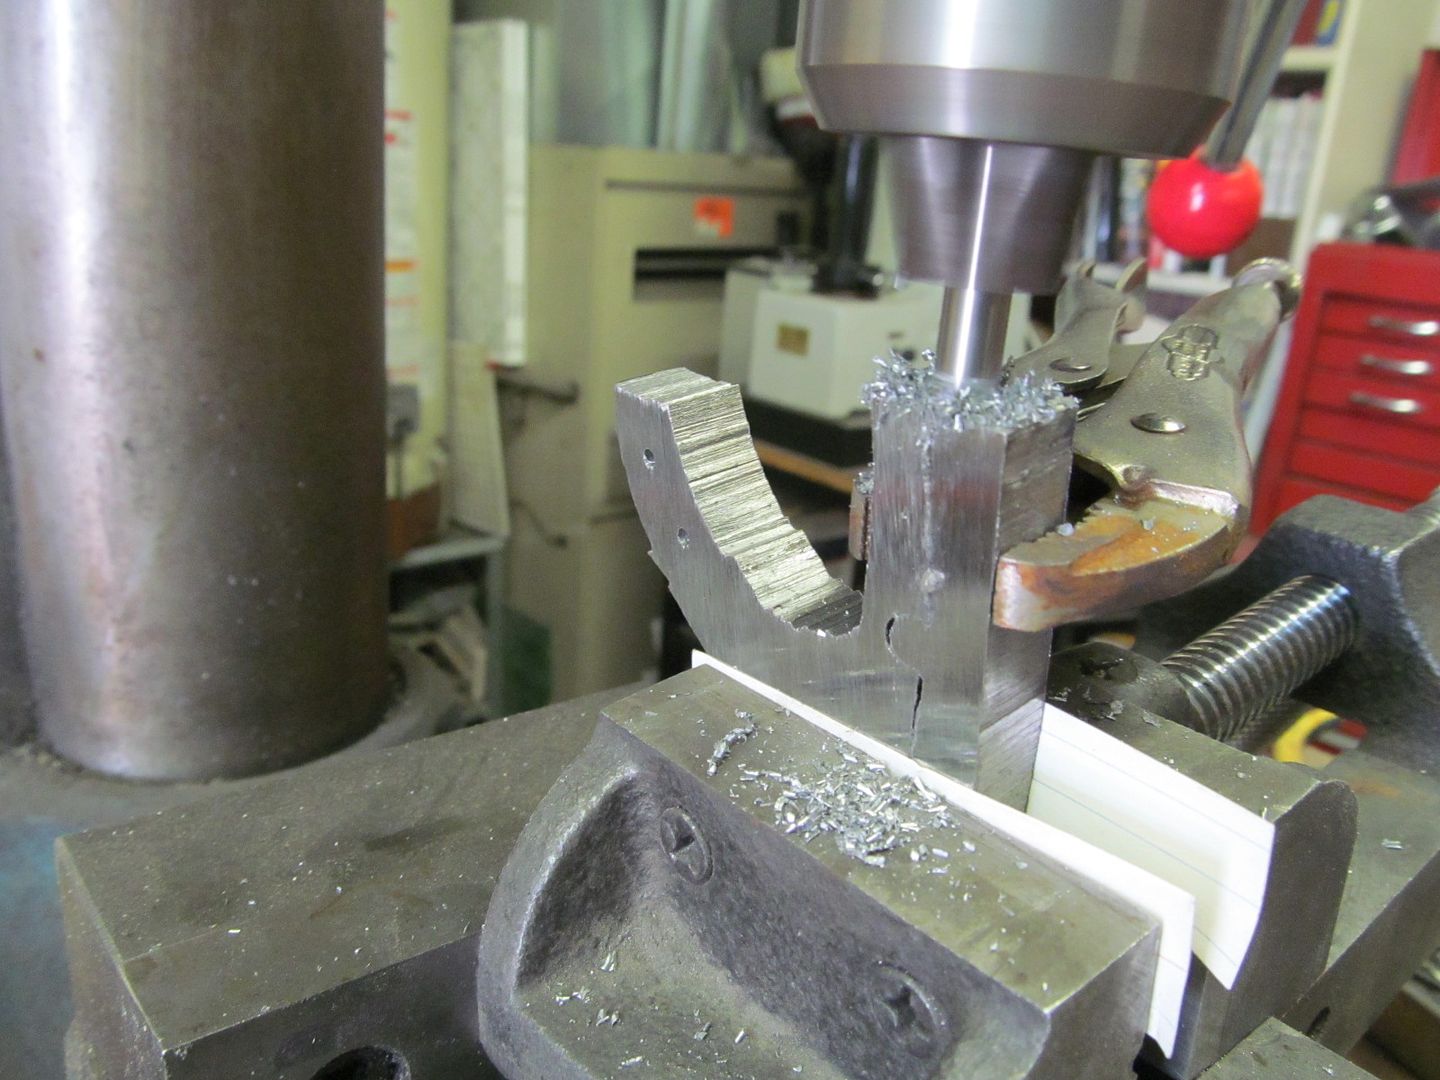
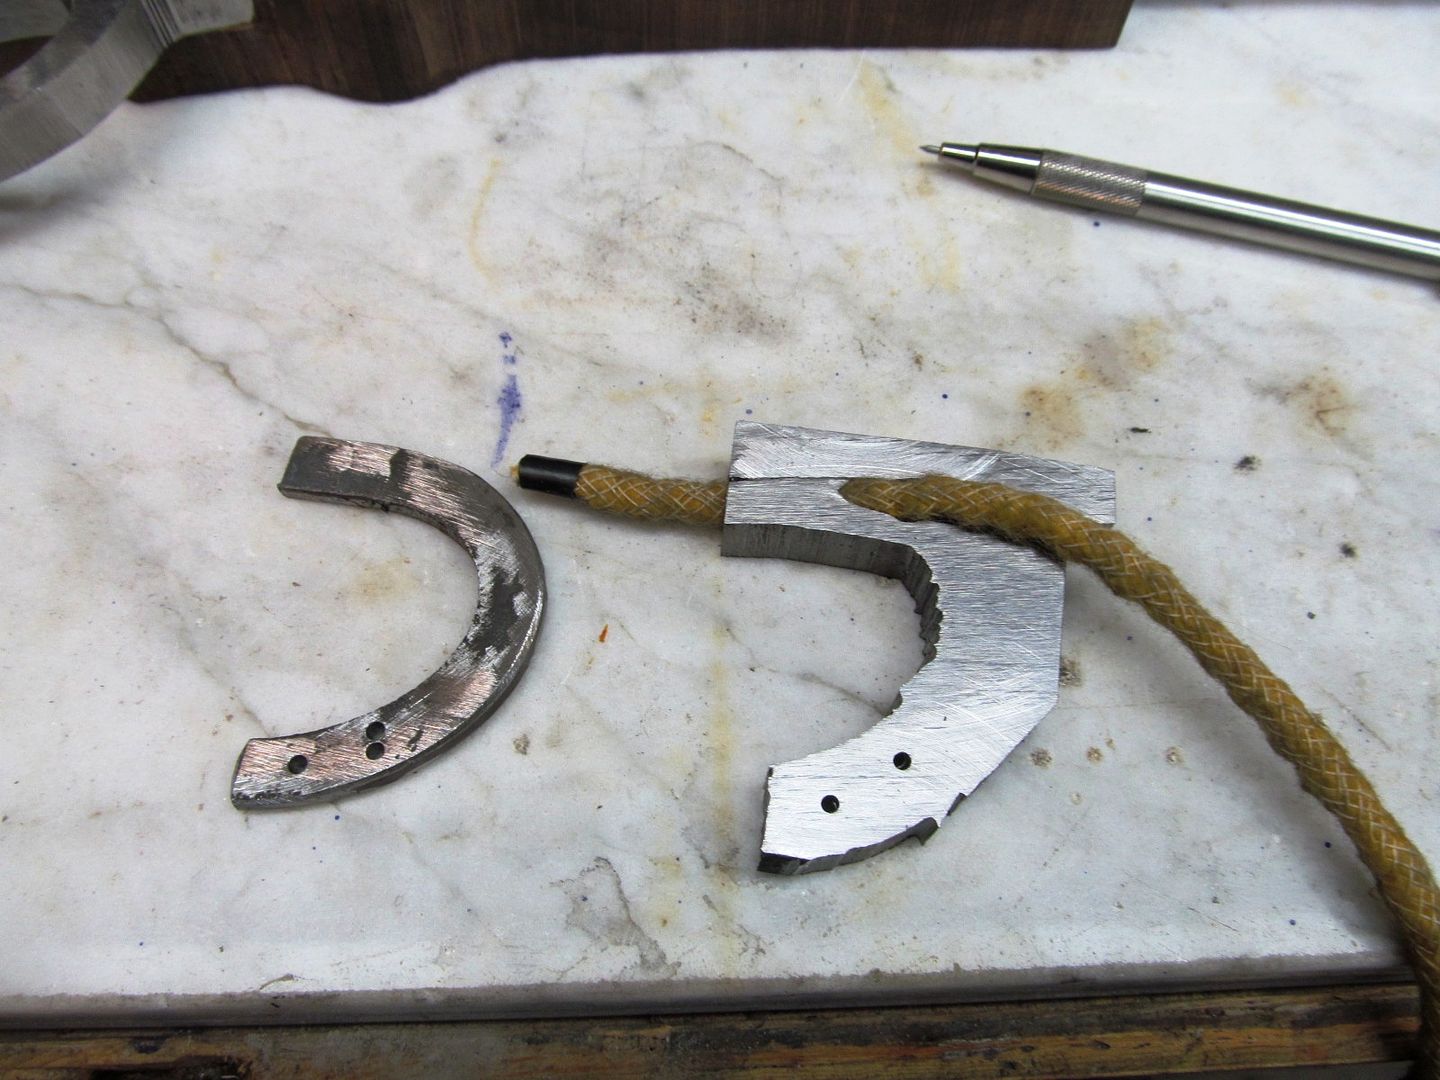
The serpentine is roughed out from 1/2" thick mild steel and has a pivot for the jaw to open and hold the cotton cord (slow match). I used the template and drilled the steel plate for the serpentine pivots and rough sawed the thing out. I pressed the jaw into the main part for a press fit and super glued the two together for drilling as a single unit. I drilled at an angle so the cotton cord will come out the side for ease in adjusting the burning cord. This gun is so slow and difficult to shoot it will not be the weapon of choice for any street gang in America.
Erin Burke
Well-Known Member
I only show you the good photos, not the ones that have parts flying across the shop.
Hahahahaha!!! :s12137:
I don't know why this makes me smile, but it does. :biggrin:
Awesome work so far Bruce.
Erin
Bruce Bump
Forum Owner-Moderator
Hey Bruce,
Why not give that serpentine a scorpion's tail and have it hook a lever on the primer box lid just as the match gets close? Just because I'm such an expert on these things. :lol:
Roger
Not a bad idea Roger
I've been giving it alot of thought and have decided to open it manually. The reasons are for safety purposes and less complications with linkages and spring. There is no mechanical "safety" of any kind if the door opens with the trigger unless I add a block for a trigger safety. Manually opening the powder primer box will be easy enough with the left hand and cant accidently discharge.
Last edited:
ddavelarsen
Well-Known Member
Not a bad idea Roger
I've been giving it alot of thought and have decided to open it manually. The reasons are for safety purposes and less complications with linkages and spring. There is no mechanical "safety" or any sort if the door opens with the trigger unless I add a block for a trigger safety. Manually opening the powder primer box will easy enough with the left hand and cant accidently discharge.
I'd been wondering about the safety myself Bruce. Sounds like a perfect and probably historically accurate solution.
Bruce Bump
Forum Owner-Moderator
I agree, it seems like a natural thing to do to prepare to fire the weapon. Its an attention getter I bet to open up the lid to a primer box filled with gun powder with a red hot smoldering match hovering just above it.
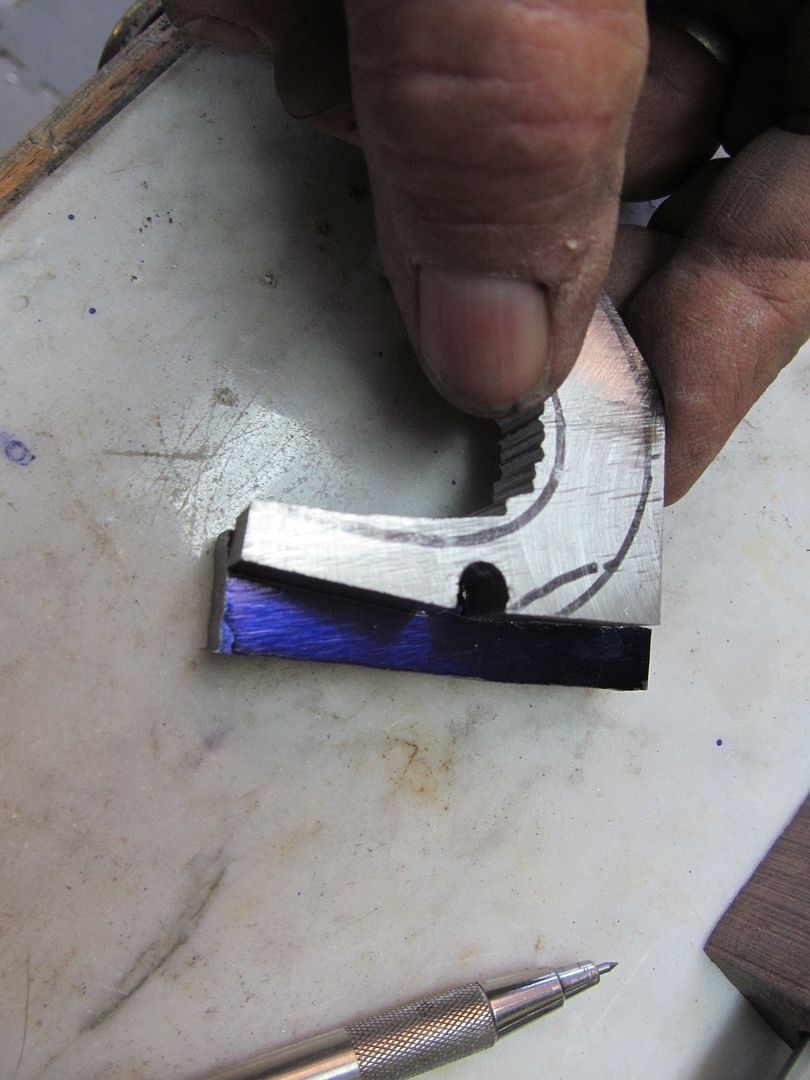
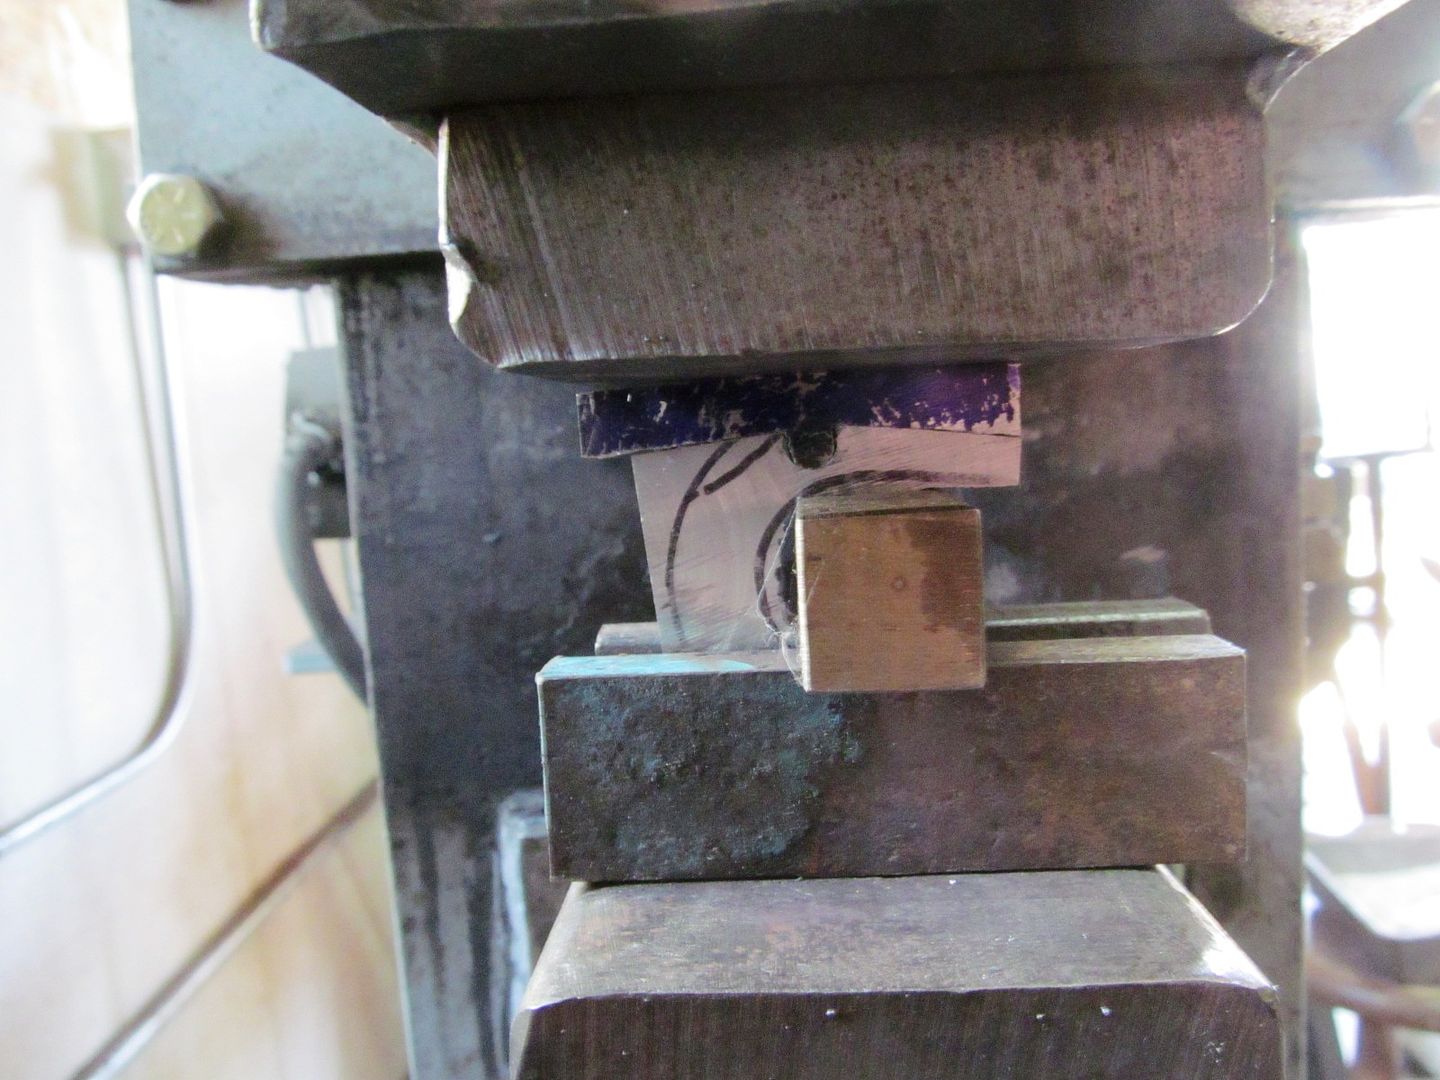
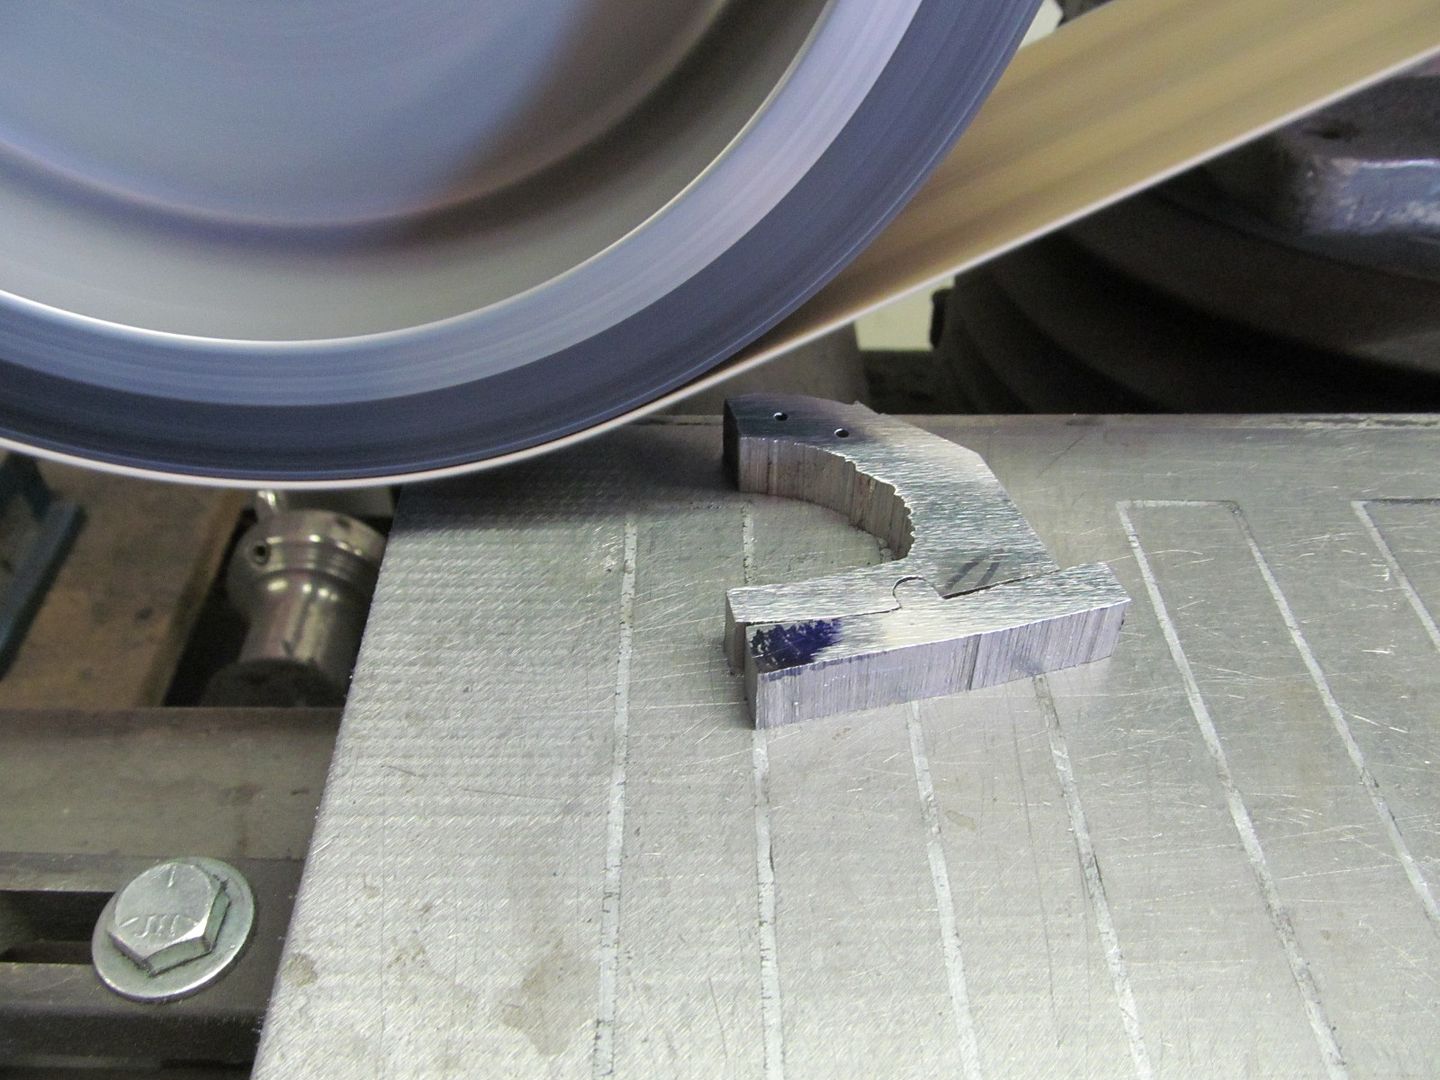
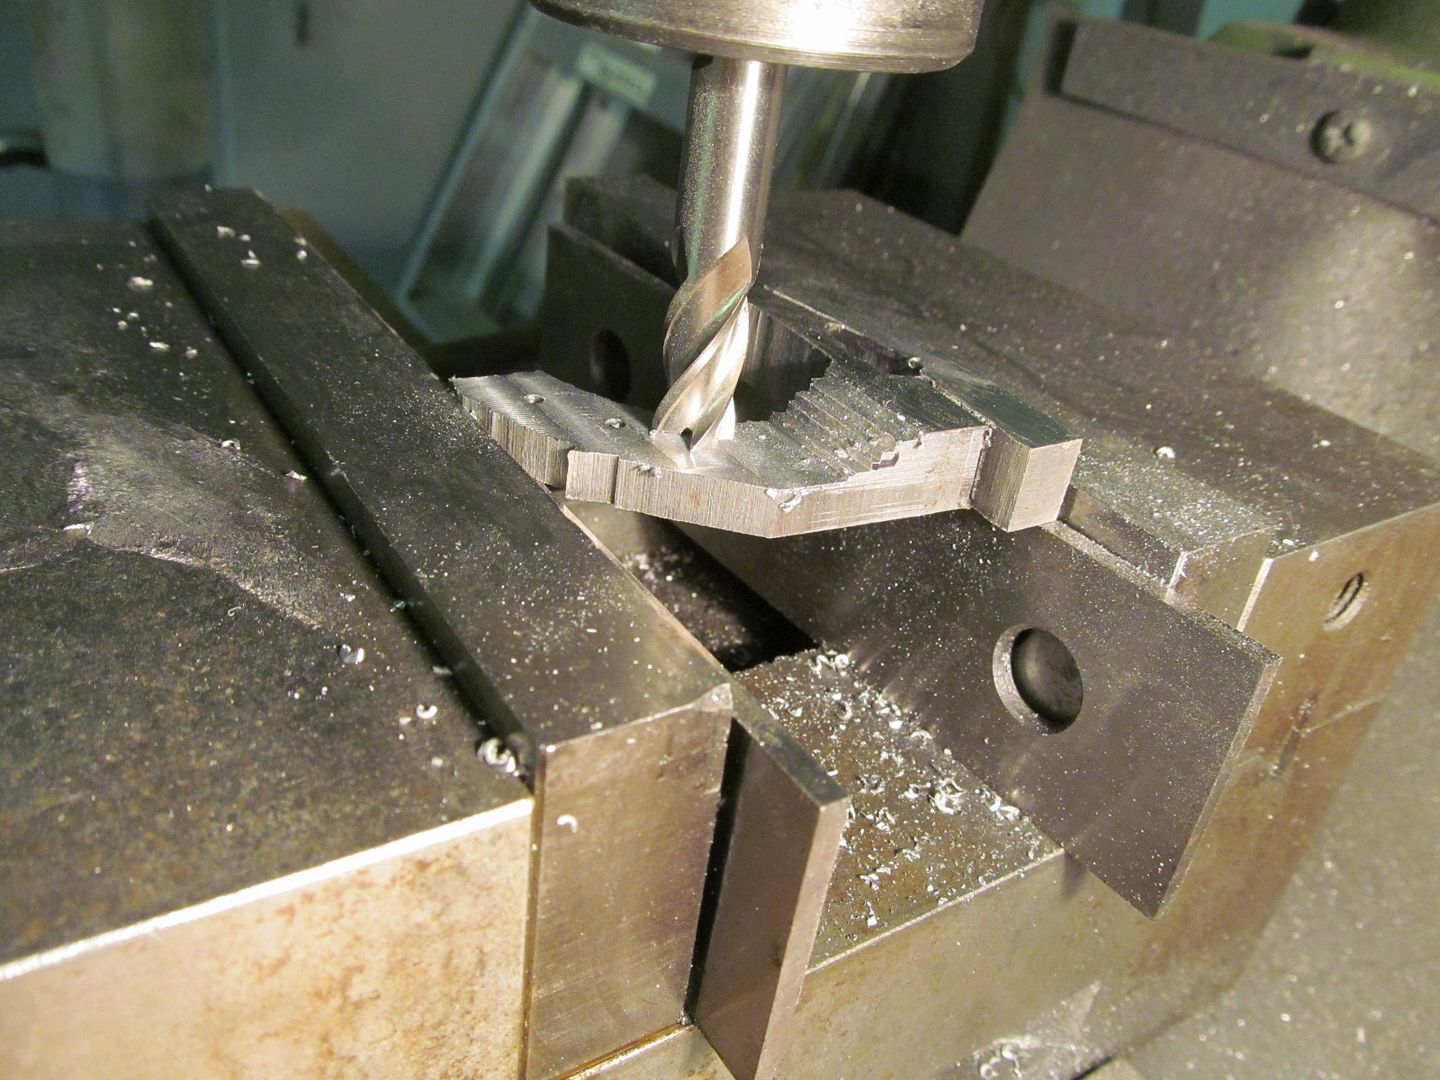
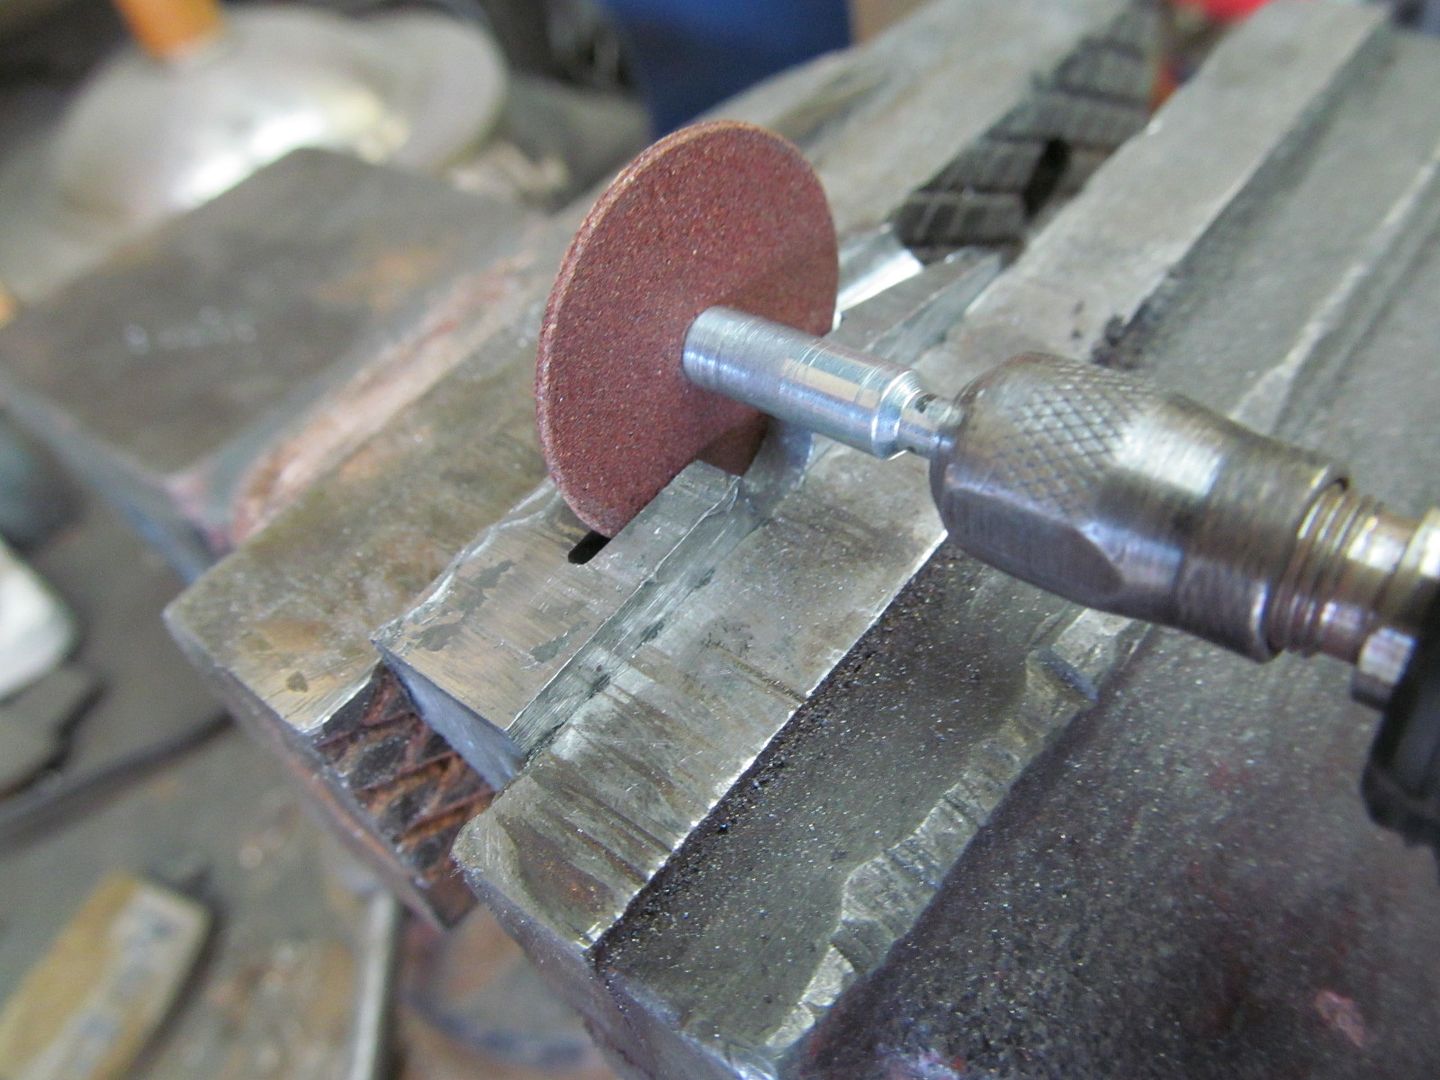
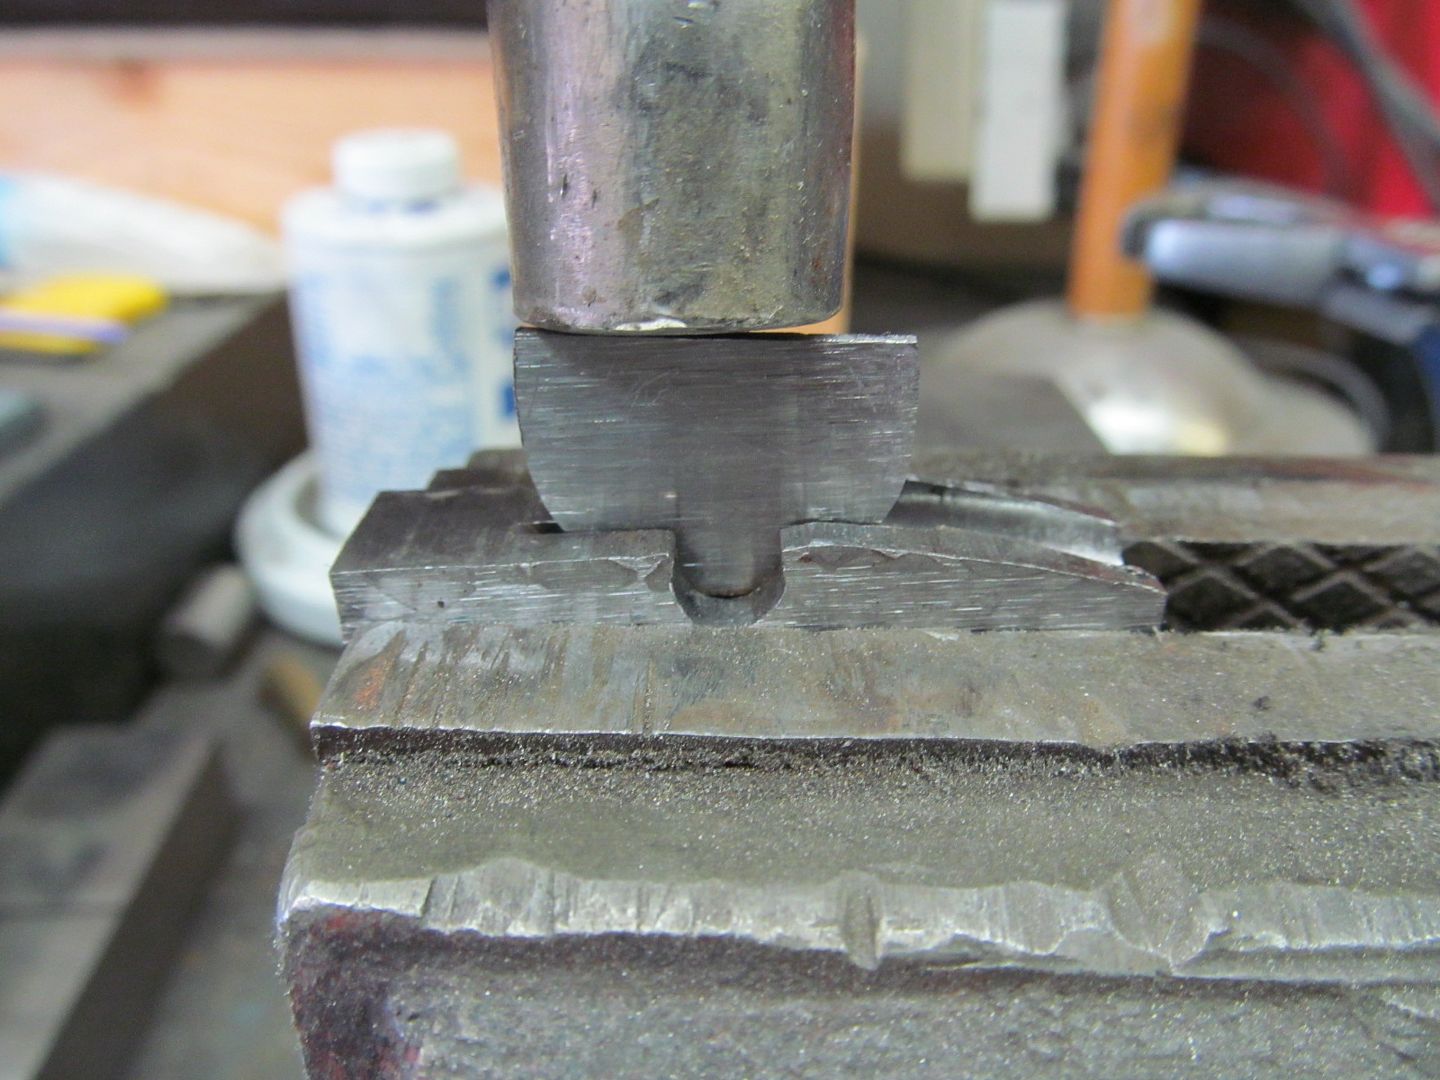
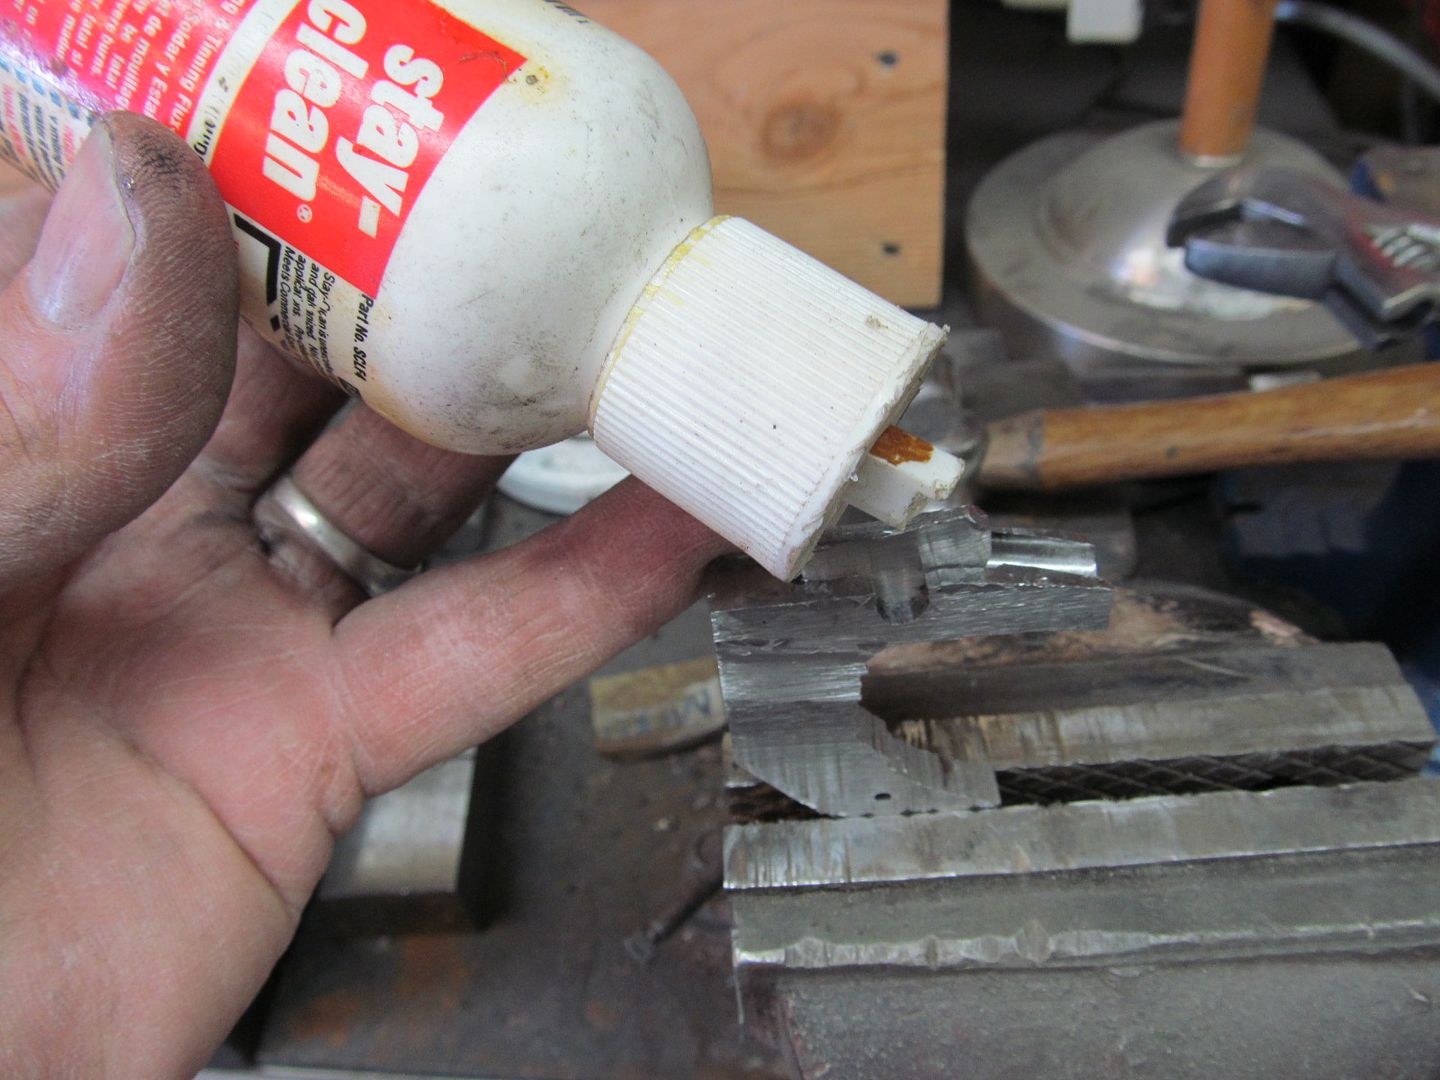
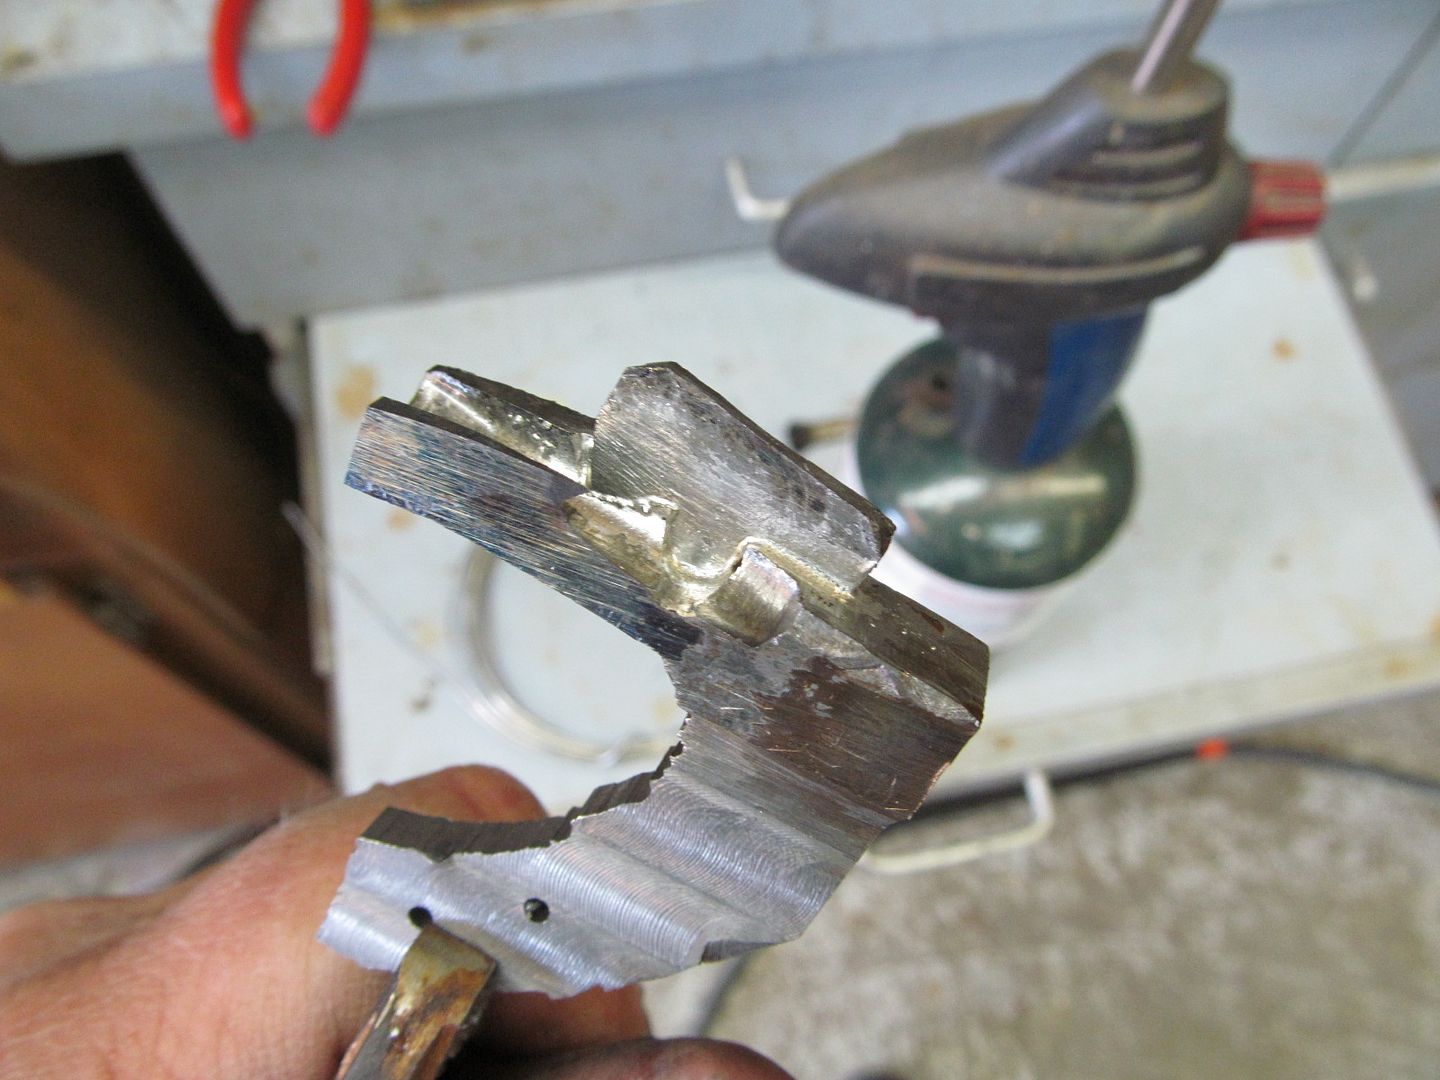
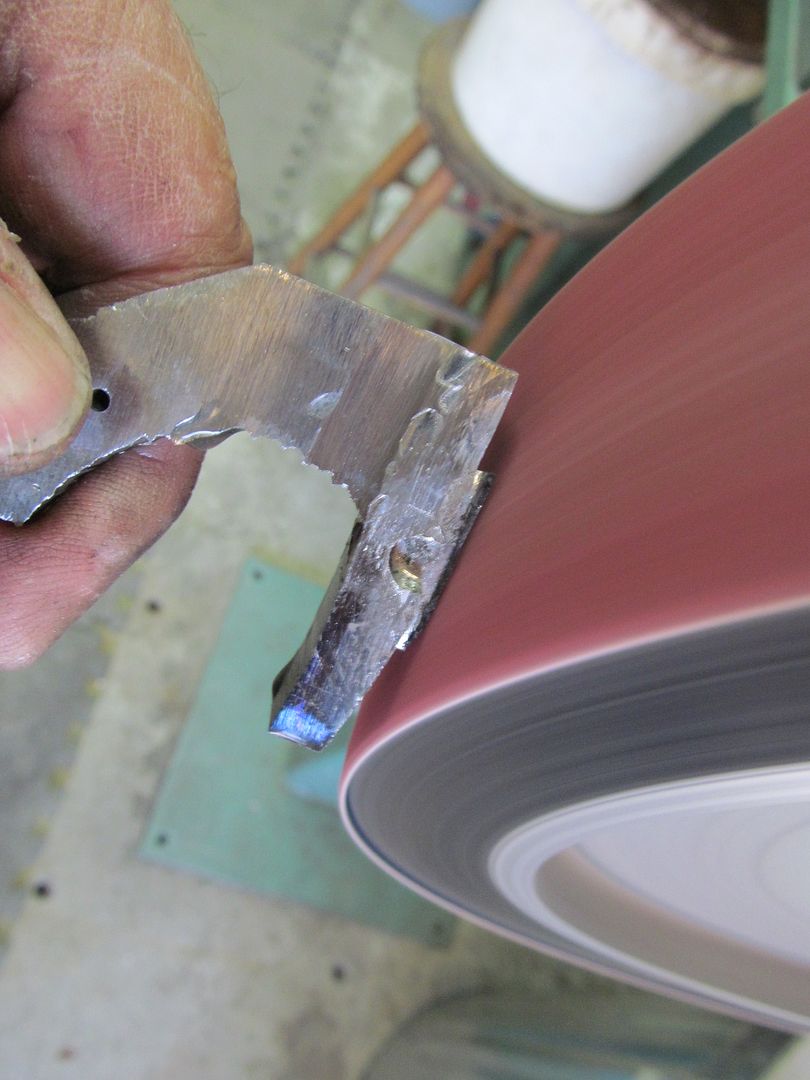
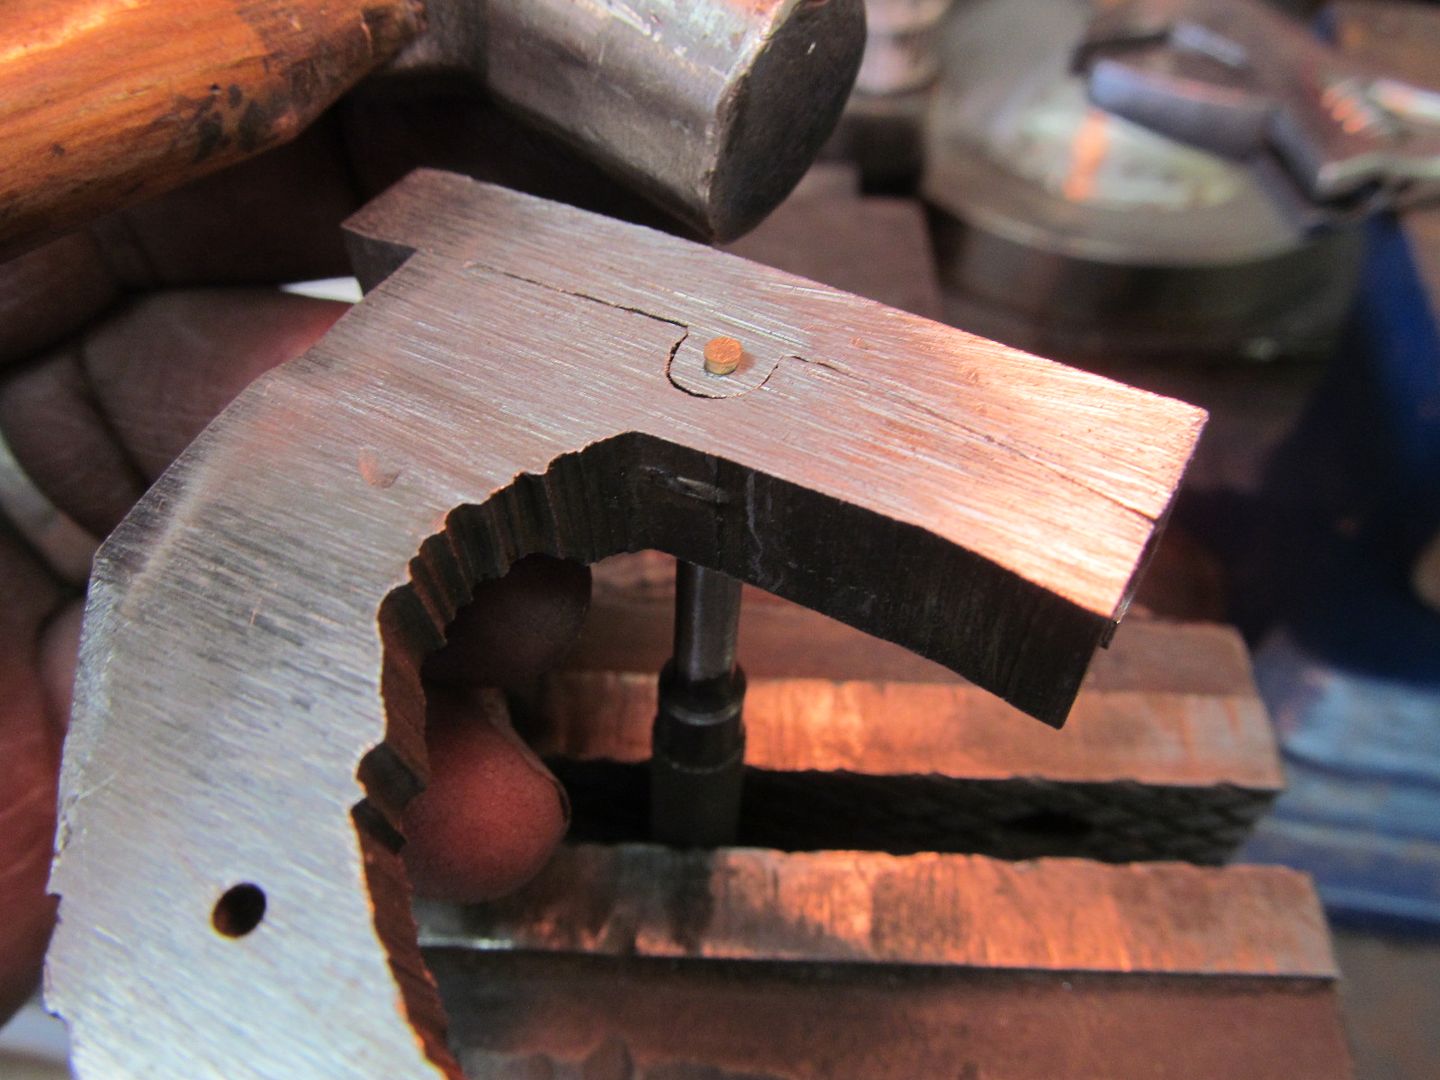
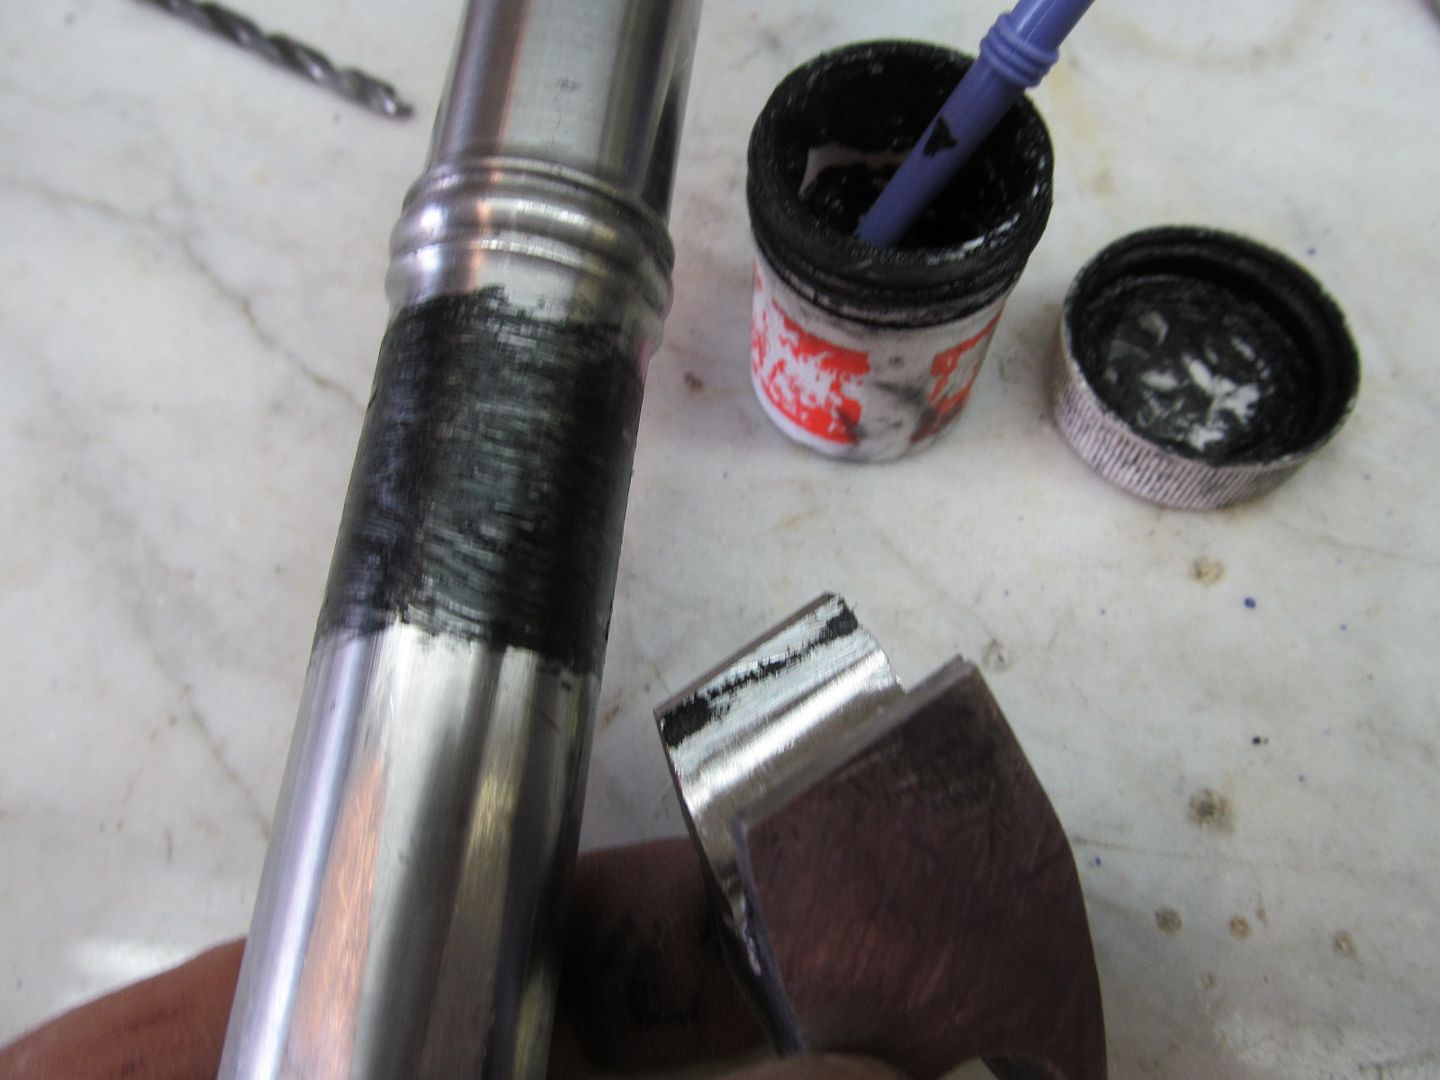
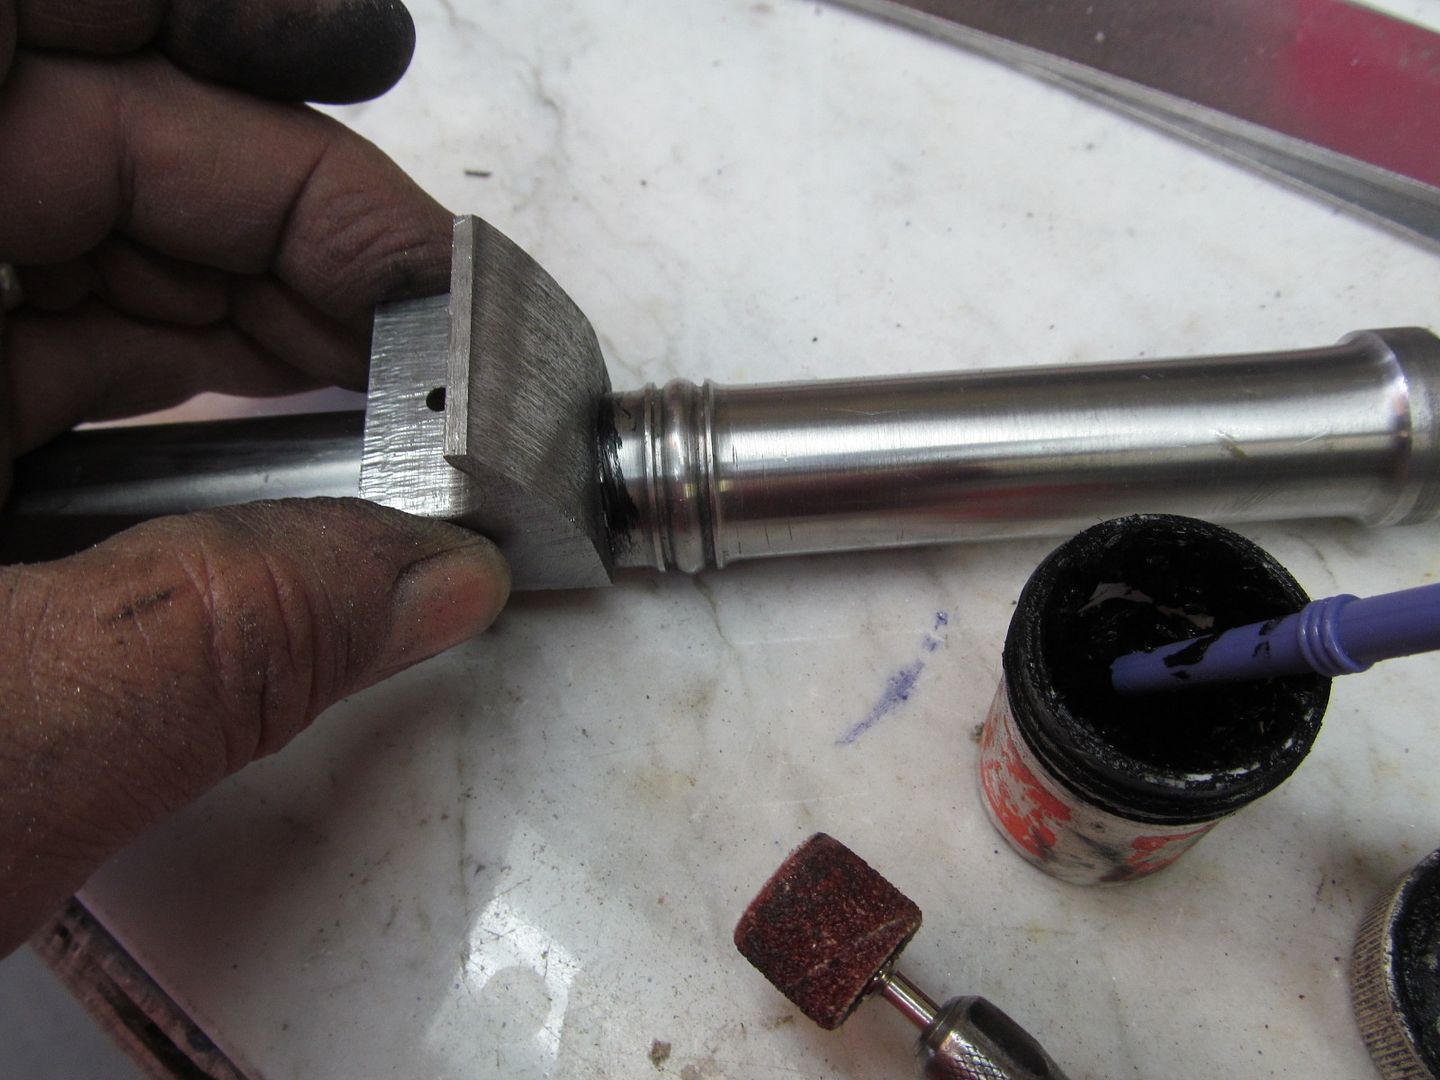
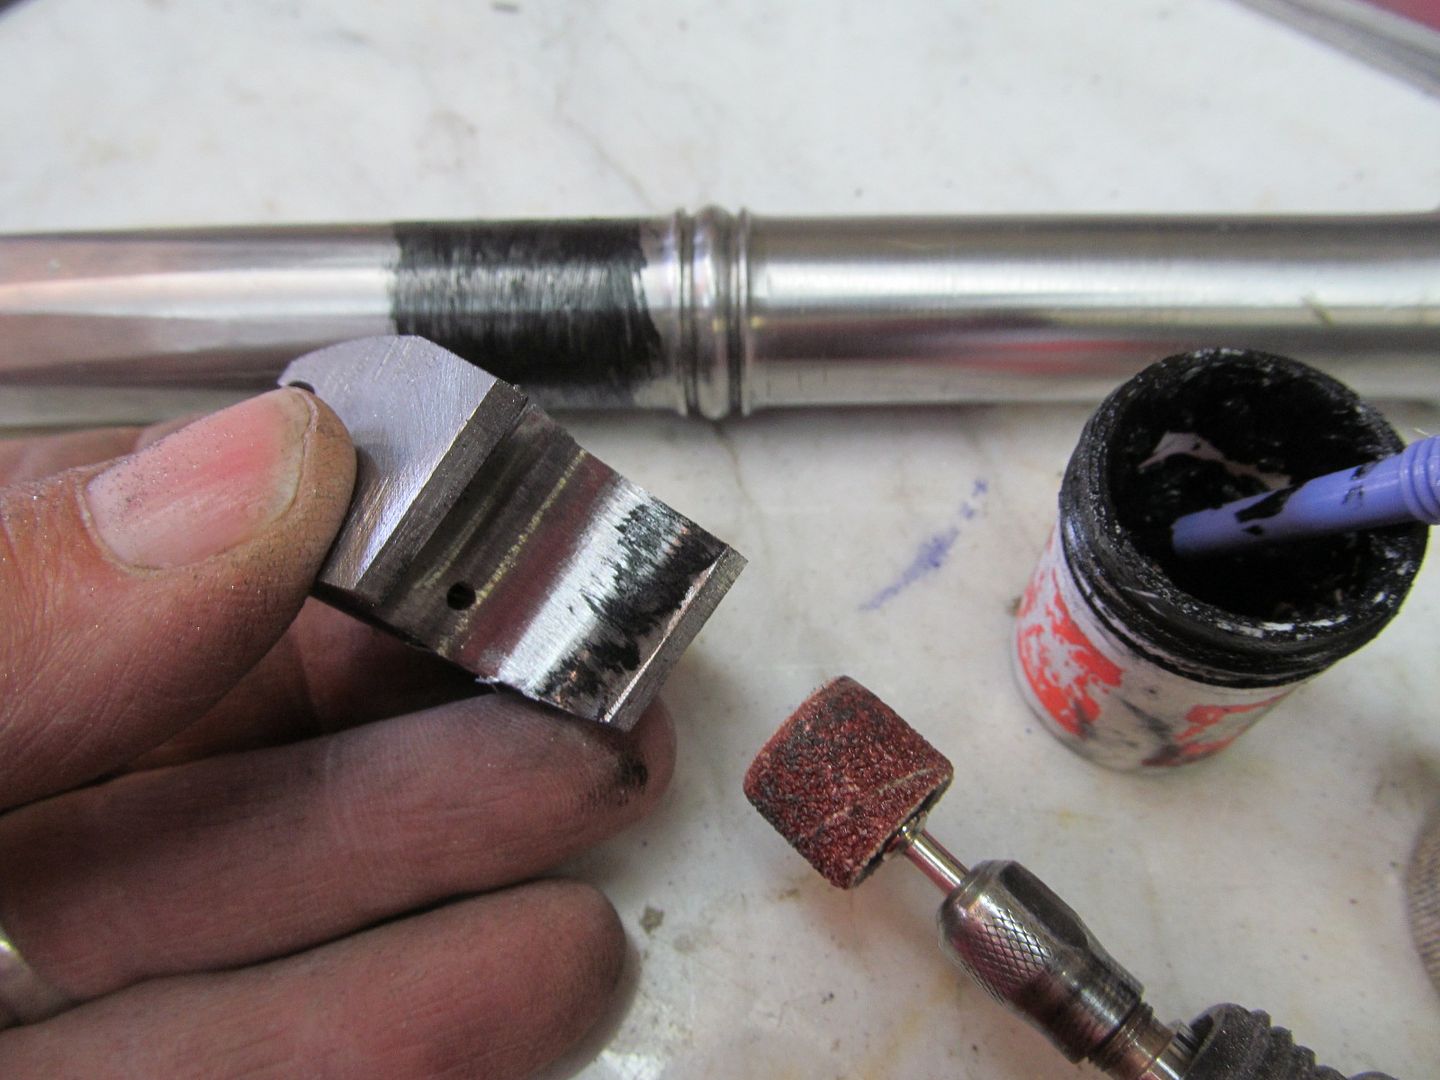
I worked on the dragons head today. It needs a hinged jaw to hold the slow match (cotton cord) so I had to add a separate plate inside for the hinge pin. I cut the slot for the plate with a dremel with 2 discs width and surfaced the plate to fit the slot. Also silver soldered it in place and ground off the excess. I had to slot the top jaw to fit down flush again and superglued it all together, drilled it to .063" and pinned it temparary with a brass pin. Now I just need to make it look like a dragon.
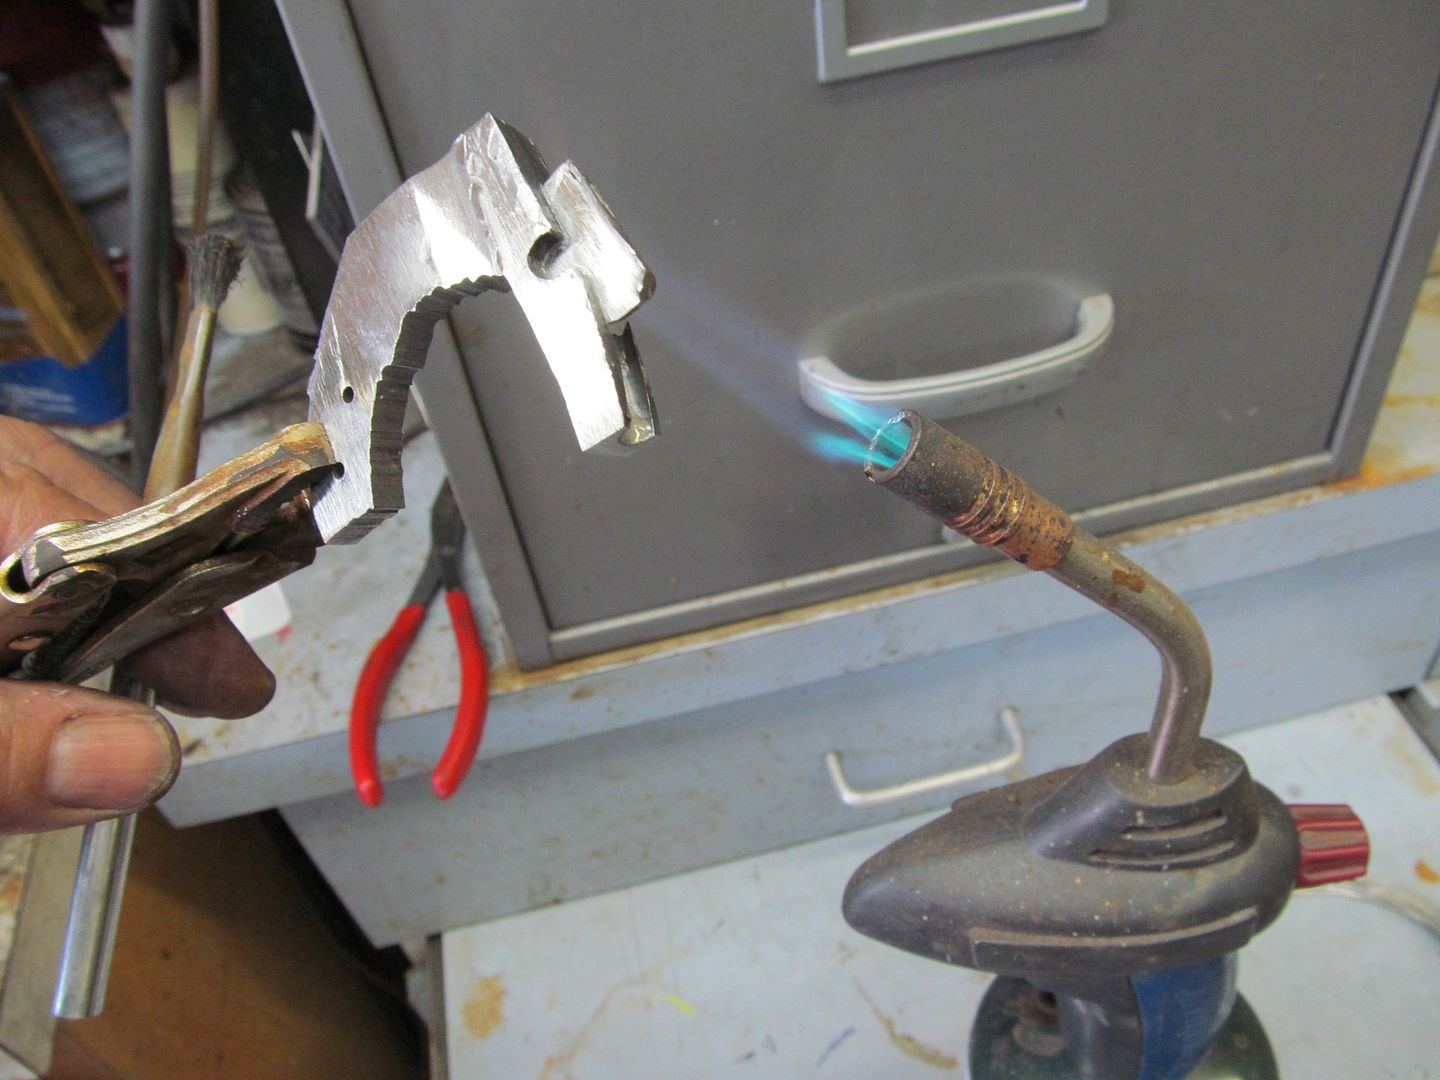
Sounds like a good idea to flip open the primer box by hand. Come to think about it...that's no different than being required to flick the safety lever on a modern weapon.
I worked on the dragons head today. It needs a hinged jaw to hold the slow match (cotton cord) so I had to add a separate plate inside for the hinge pin. I cut the slot for the plate with a dremel with 2 discs width and surfaced the plate to fit the slot. Also silver soldered it in place and ground off the excess. I had to slot the top jaw to fit down flush again and superglued it all together, drilled it to .063" and pinned it temparary with a brass pin. Now I just need to make it look like a dragon.
Last edited:
Bruce Bump
Forum Owner-Moderator
Hey Brad,
The Boss has been staying up late hasnt he? I'm not worried because I have another batch coming that should put me back in the lead.
The Boss has been staying up late hasnt he? I'm not worried because I have another batch coming that should put me back in the lead.
This is more excitin' than that 50Shades book!!! HAHAHAHAHAAAA!!!!
Ok, no... I have never even seen a copy of that book, just to clear things up...
And Boss is trying to rival you for "Current Thread with the Most Images", with his stabilizing thread.")
Roger T
Well-Known Member
Back to Woodwork
We interrupt this high-level metalworking thread to get back to some more basic woodworking. Thank you for your kind comments as I attempt this sort of pictorial documentation for the first time.
The new hinges arrived and the grandkids went home, so now I'm back to work on Bruce's box.
First I positioned the hinges and clamped them in place. Then drilled pilot holes with a self-centering Vix bit and surface-mounted them on the back of the box.


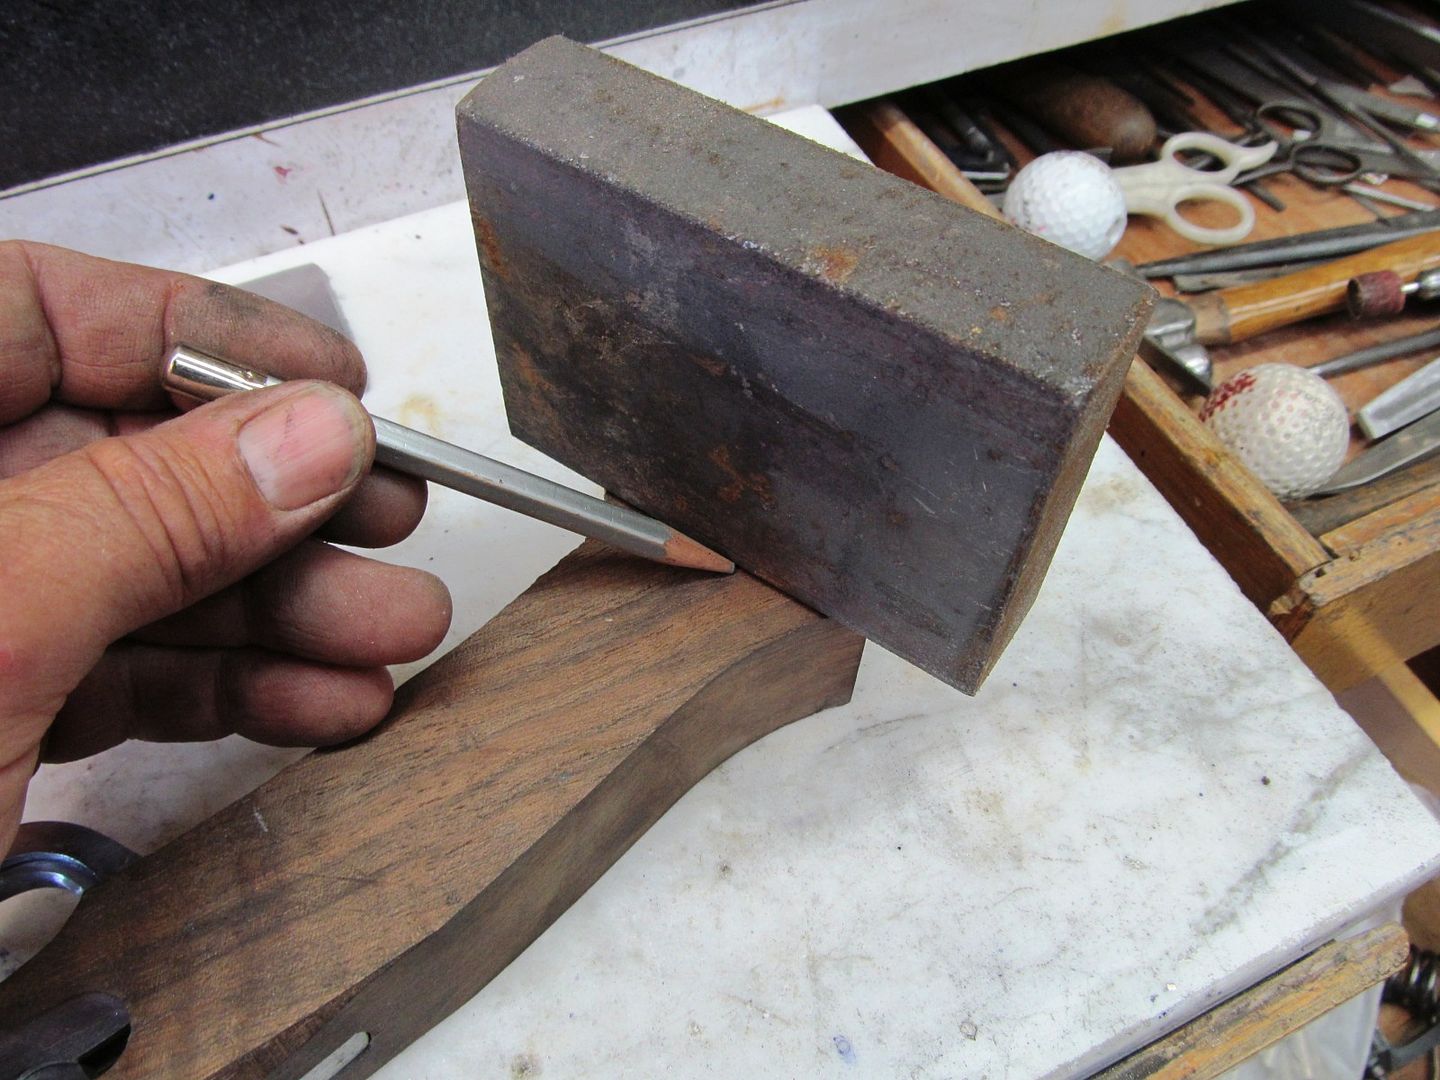
A sharp knife scores the outline of the hinge.

Setting my small router to match the thickness of the hinge leaf.

I use mdf and shims to build a platform in the box flush with the top edge and clamp a block on the outside to match. With double-sided tape I stick on some fences so I can't go beyond my score-lines, and then rout out the hinge recess. I finish by paring out to the marked outline with a hand chisel.


More Soon!
We interrupt this high-level metalworking thread to get back to some more basic woodworking. Thank you for your kind comments as I attempt this sort of pictorial documentation for the first time.
The new hinges arrived and the grandkids went home, so now I'm back to work on Bruce's box.
First I positioned the hinges and clamped them in place. Then drilled pilot holes with a self-centering Vix bit and surface-mounted them on the back of the box.
A sharp knife scores the outline of the hinge.
Setting my small router to match the thickness of the hinge leaf.
I use mdf and shims to build a platform in the box flush with the top edge and clamp a block on the outside to match. With double-sided tape I stick on some fences so I can't go beyond my score-lines, and then rout out the hinge recess. I finish by paring out to the marked outline with a hand chisel.
More Soon!
I am not worried. At some point you will be done with this bean shooter. I still have dozens of more failures to go...
Hey Brad,
The Boss has been staying up late hasnt he? I'm not worried because I have another batch coming that should put me back in the lead.
Roger T
Well-Known Member
A Lid - L Progress
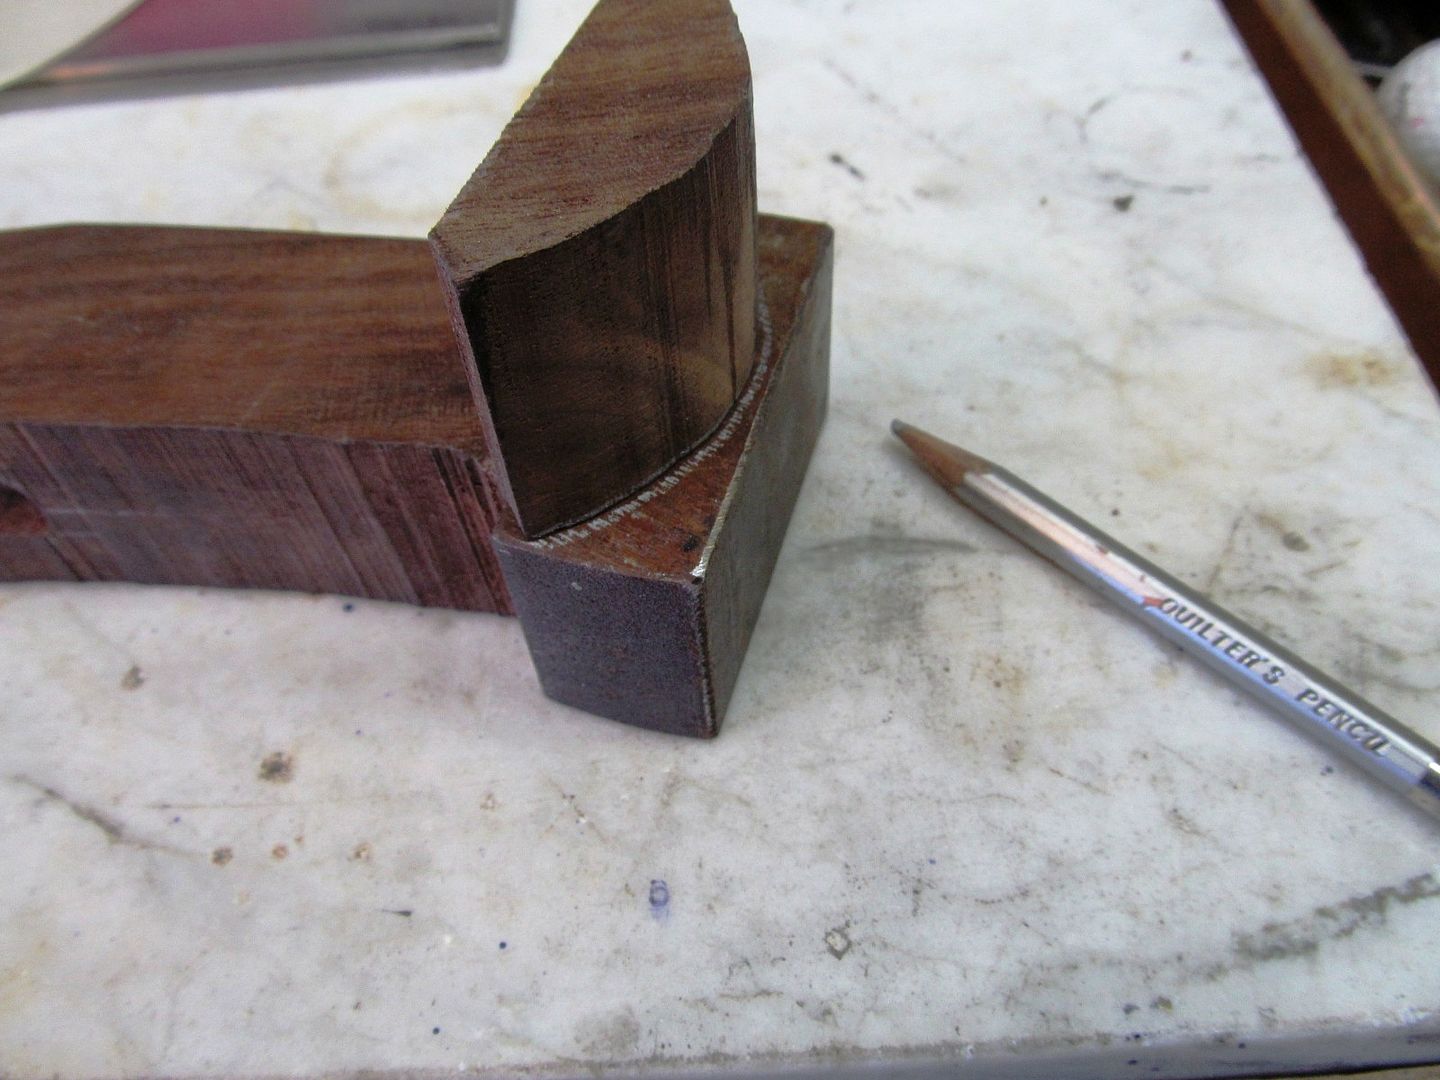
I placed the box on its lid, marked out hinge locations and mortised them in just like before. I left an overhang on the back that will be utilized as a stop to hold the lid in the open position.


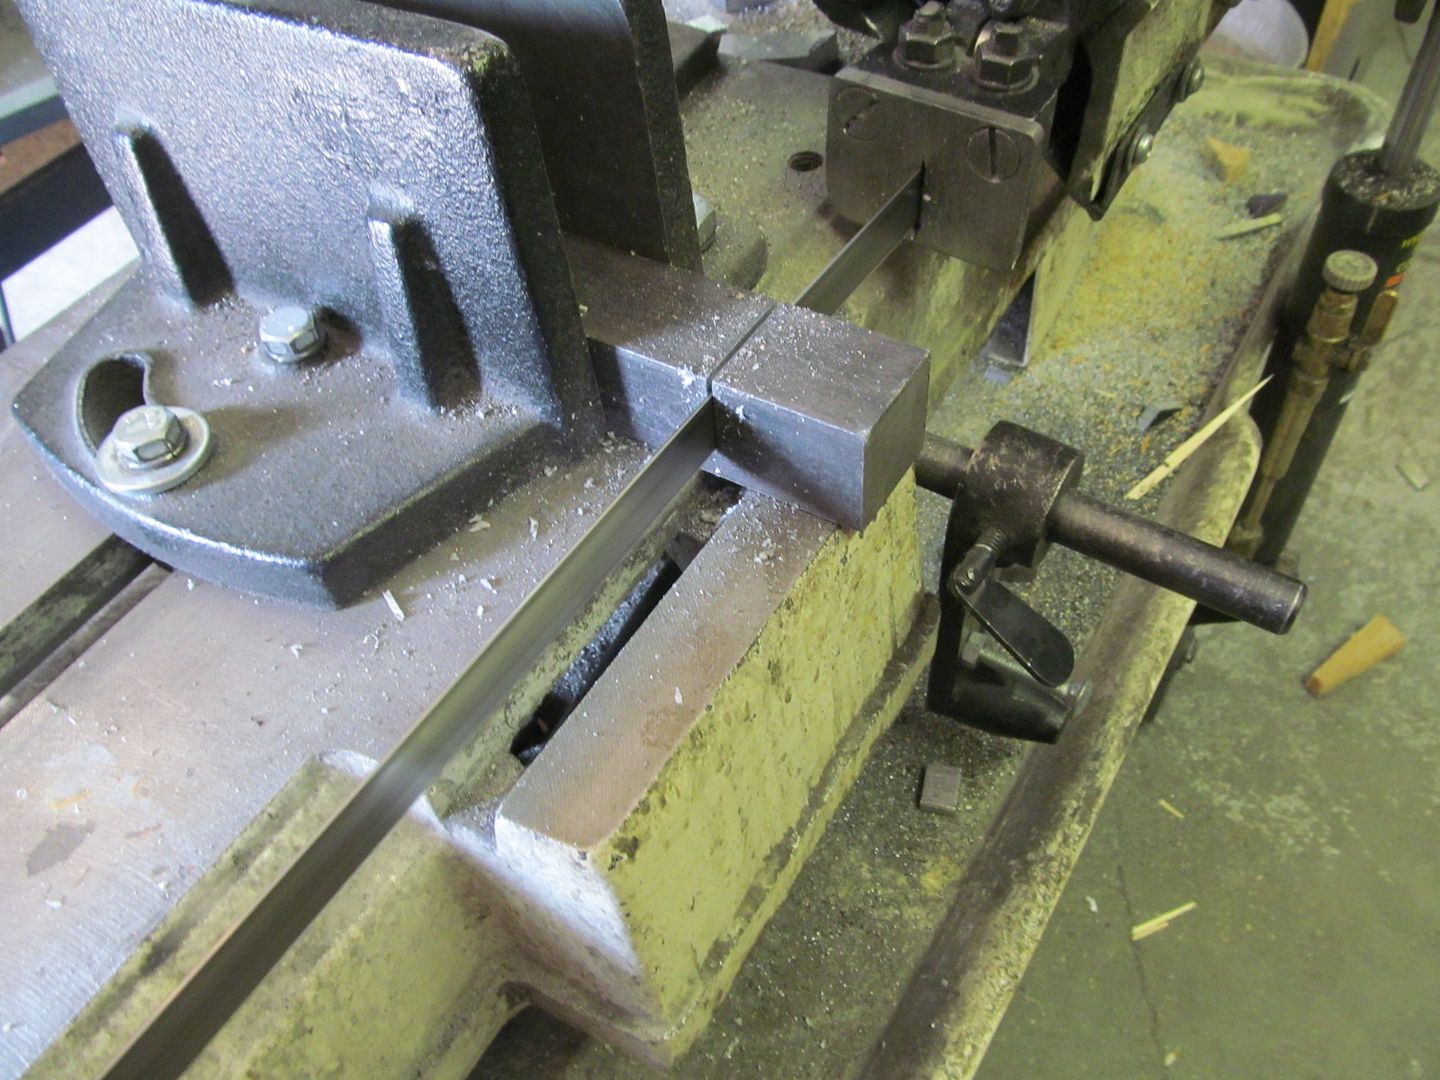
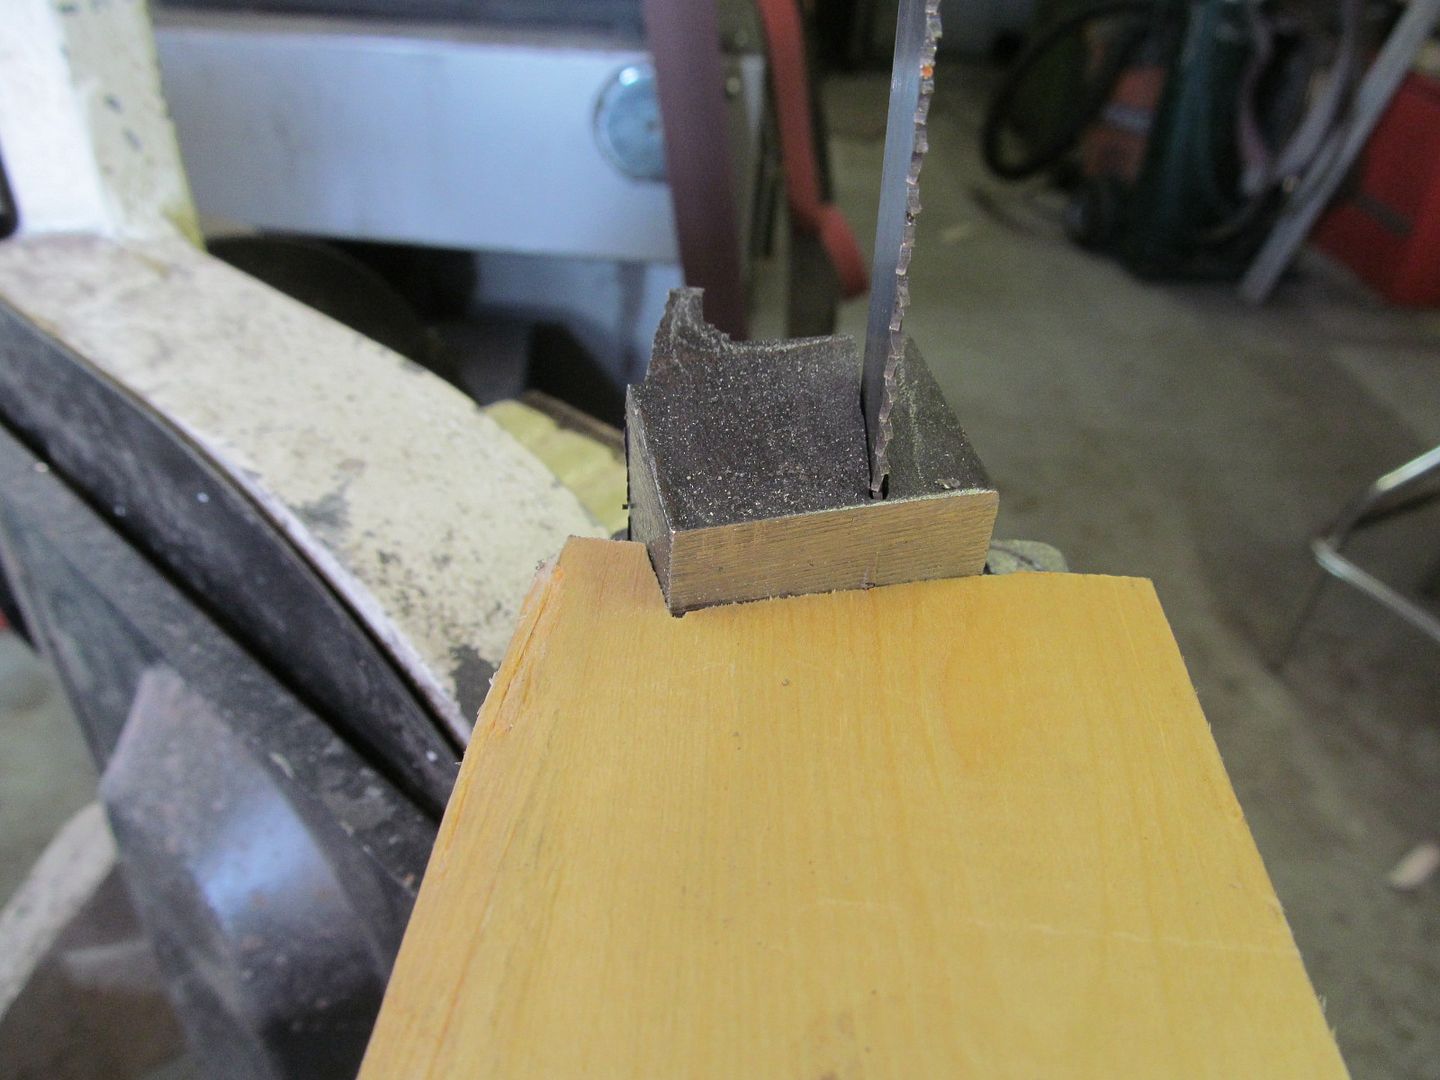
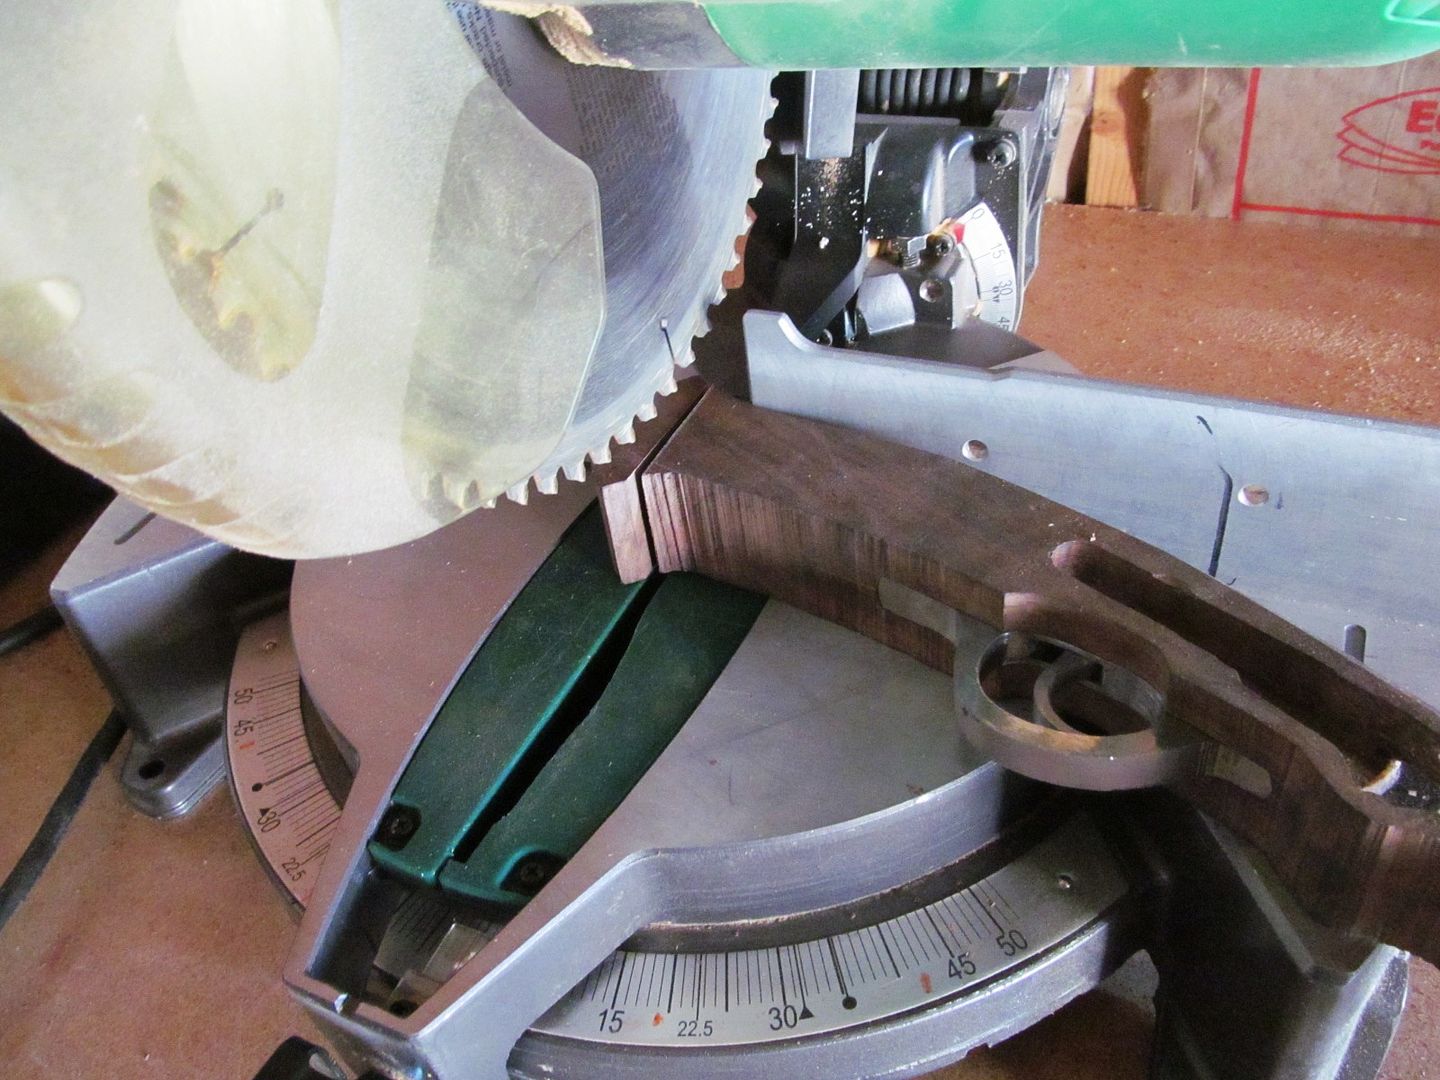
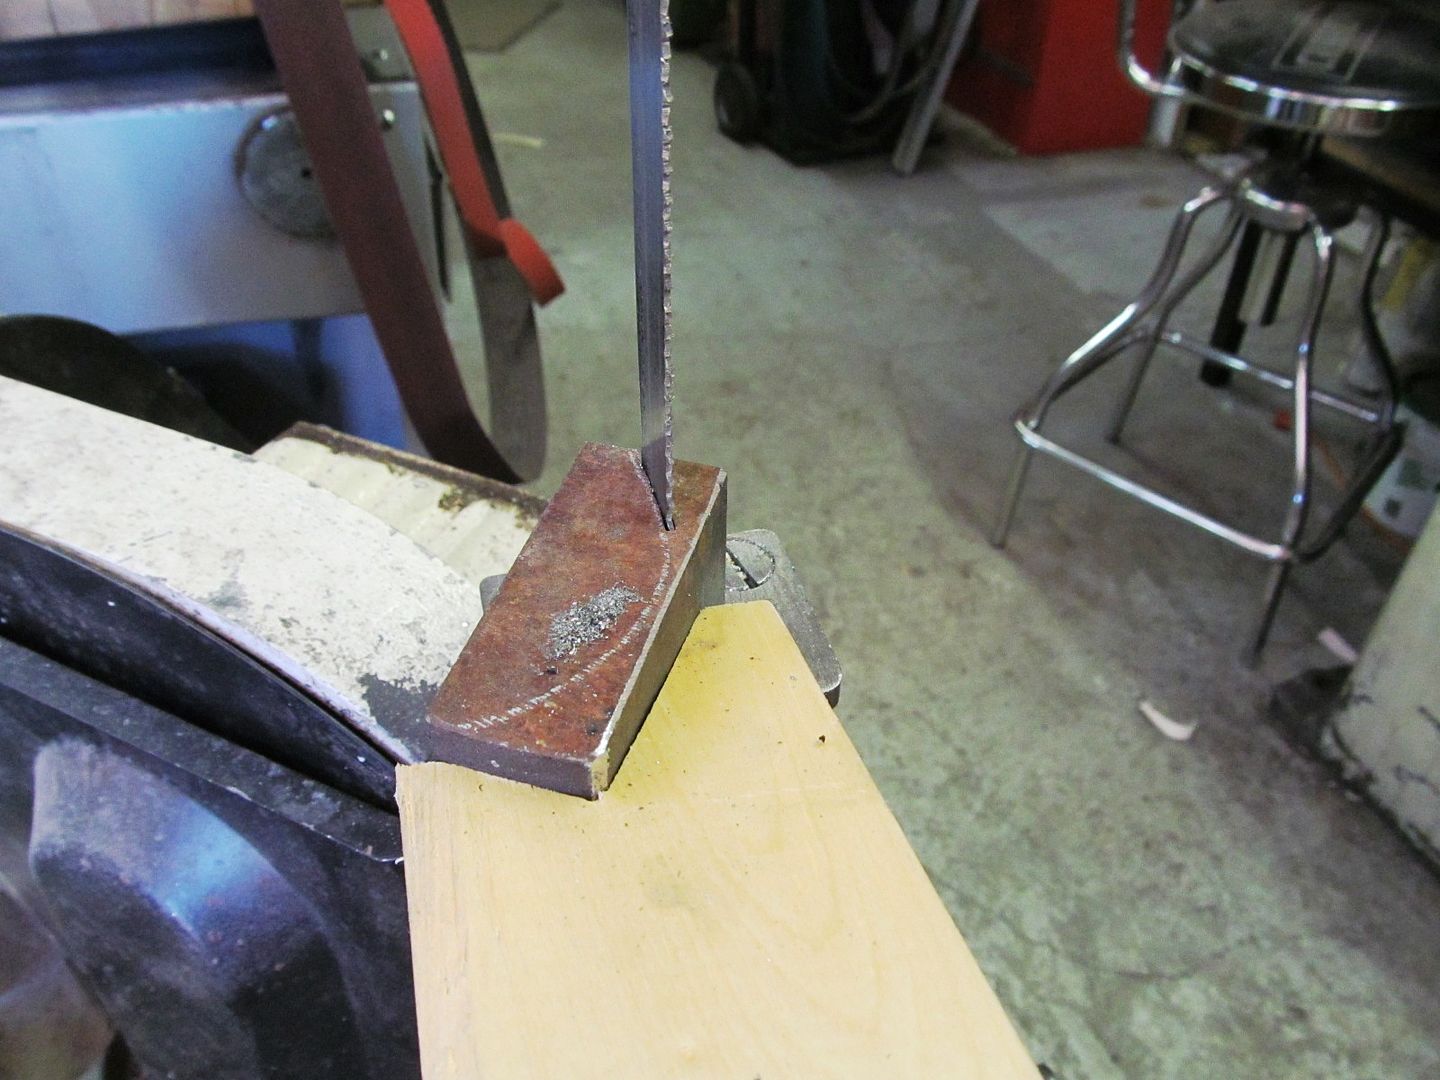
I marked out the shape of the box an eighth inch oversize to leave a lip for opening it, marked out an arc on the back for the lid stop, cut it out on the bandsaw, sanded it to shape and routed a profile on the edges.


I want the top to be arched, so I drew some lines that divided it roughly into thirds and planed and sanded it to shape. The straightedge shows a flat spot to work out.


Now its finish sand, fill pin knots and apply finish coats. I'll show you the results when I get there.
I placed the box on its lid, marked out hinge locations and mortised them in just like before. I left an overhang on the back that will be utilized as a stop to hold the lid in the open position.
I marked out the shape of the box an eighth inch oversize to leave a lip for opening it, marked out an arc on the back for the lid stop, cut it out on the bandsaw, sanded it to shape and routed a profile on the edges.
I want the top to be arched, so I drew some lines that divided it roughly into thirds and planed and sanded it to shape. The straightedge shows a flat spot to work out.
Now its finish sand, fill pin knots and apply finish coats. I'll show you the results when I get there.
Bruce Bump
Forum Owner-Moderator
Roger the display box is amazing. The accuracy you are able to pull off shows you are a true professional at your craft. I love the domed top!! Can't wait to see this in the flesh.
Thanks for posting the pics and explanation.
Thanks for posting the pics and explanation.
Bruce Bump
Forum Owner-Moderator
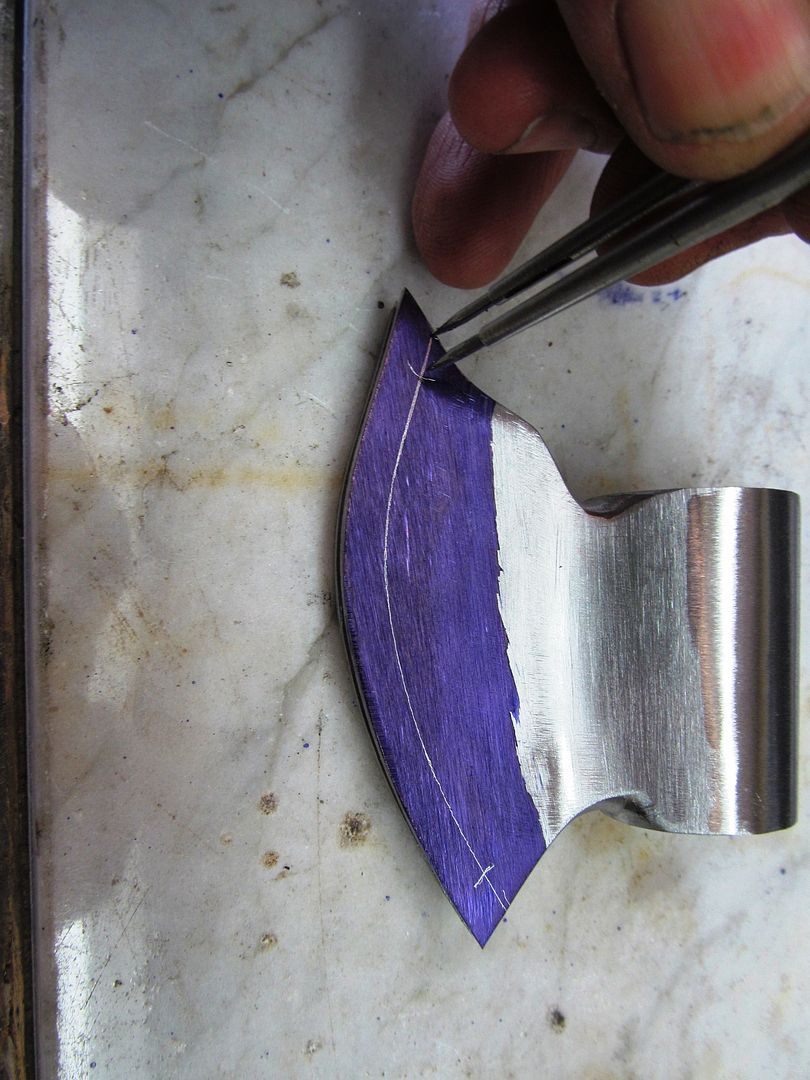
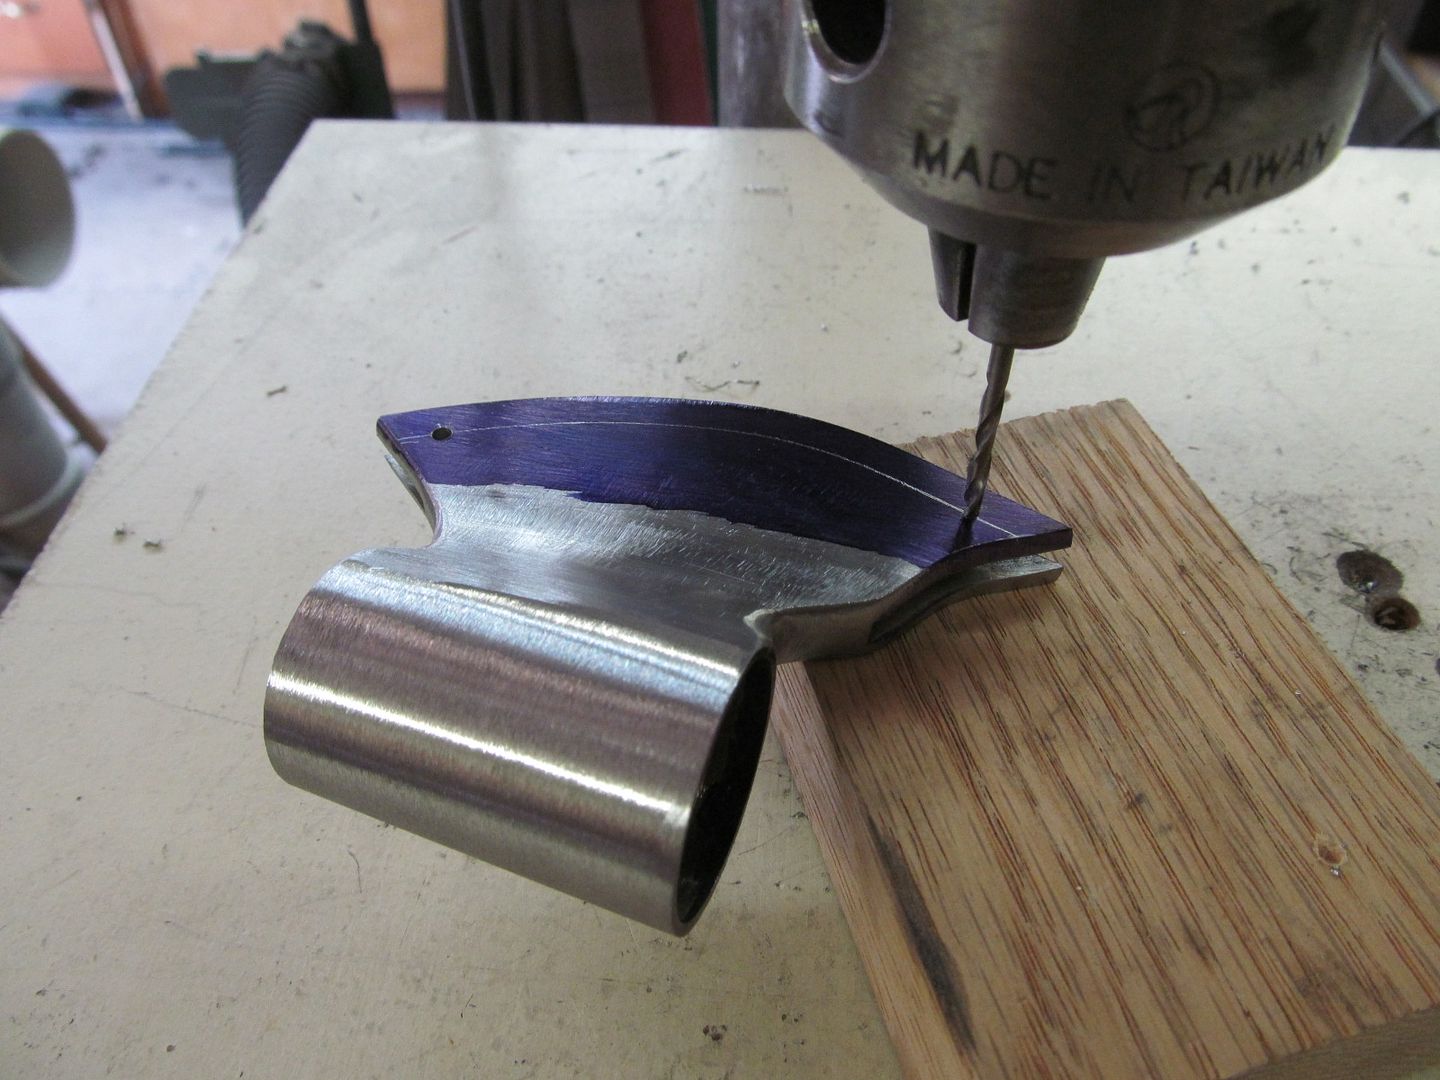
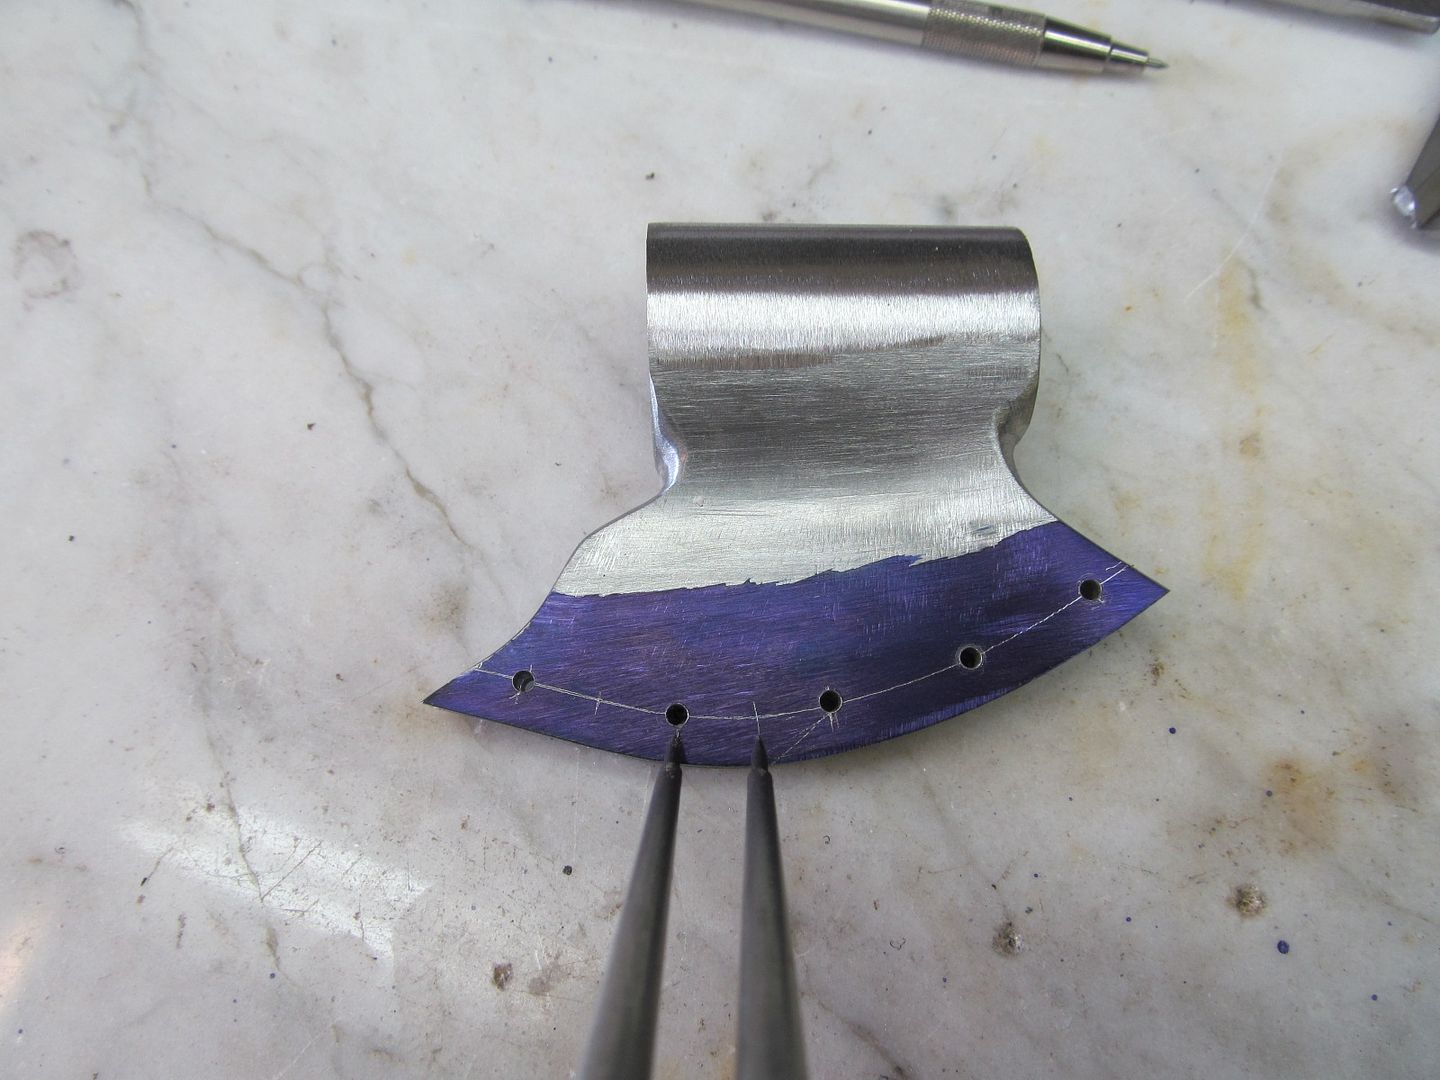
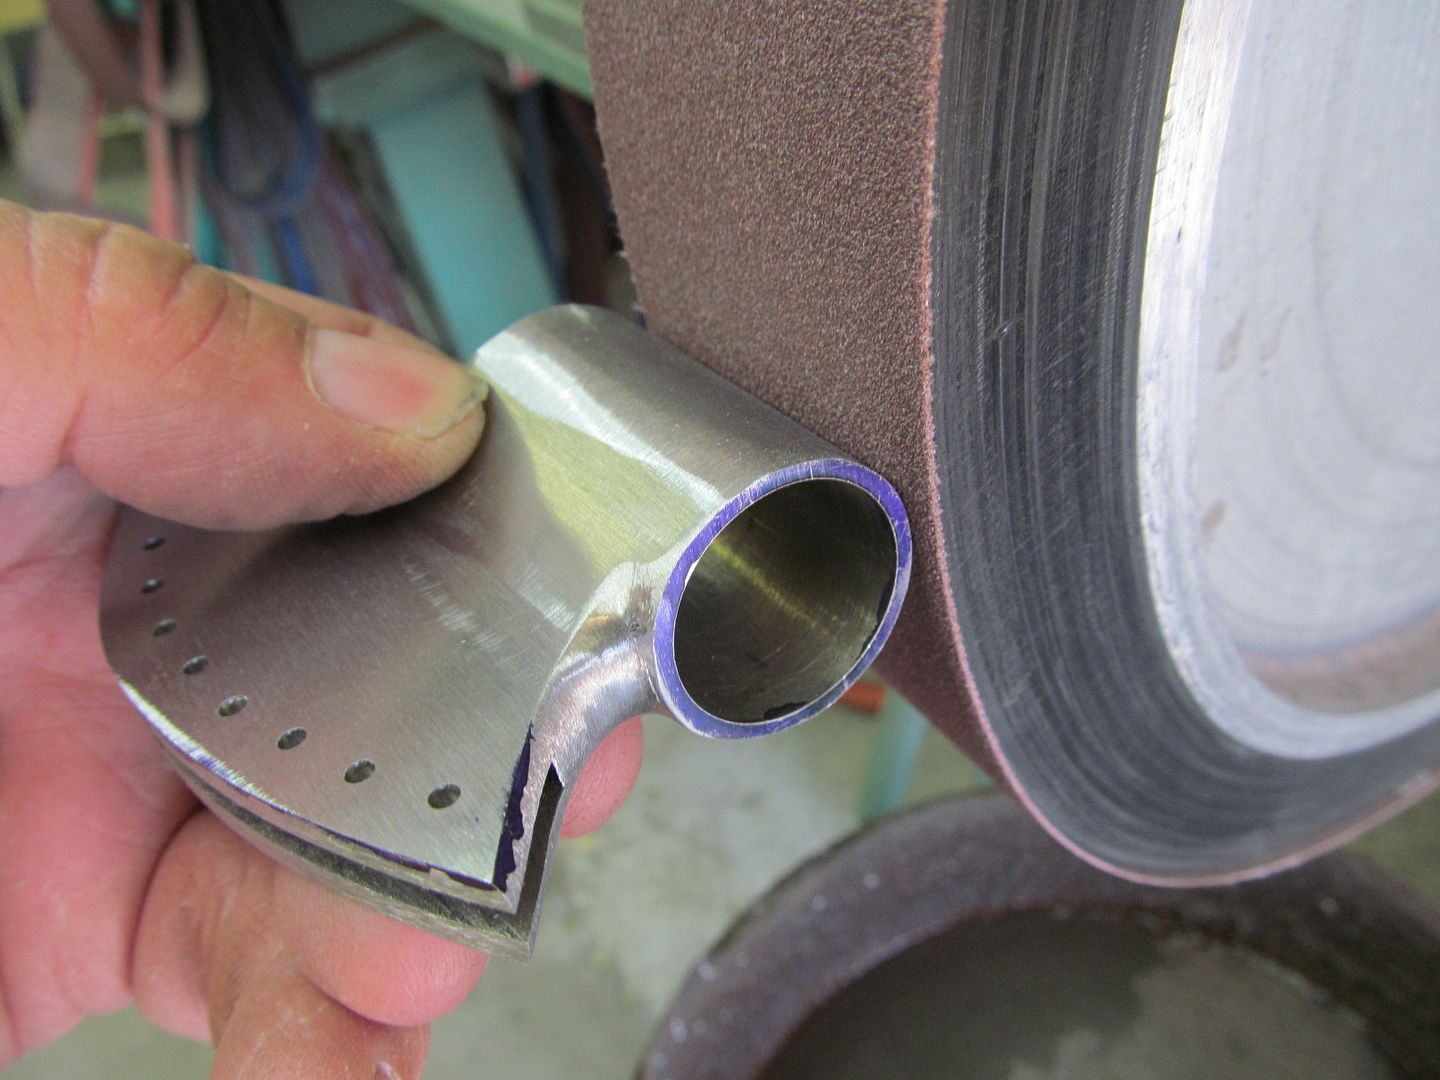
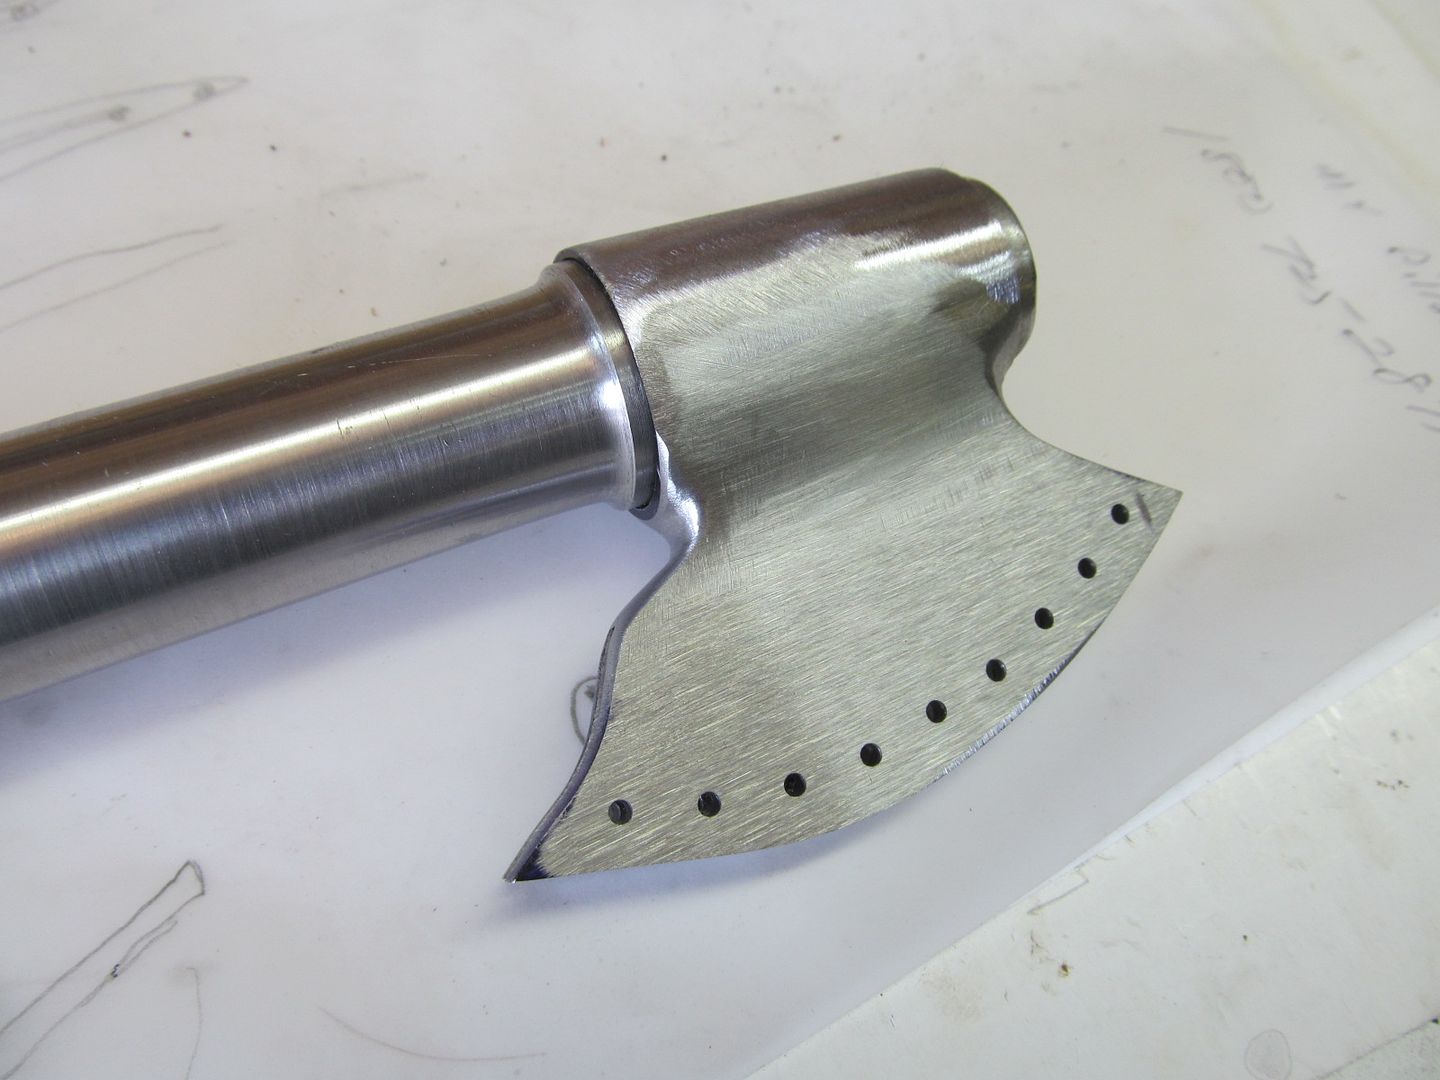
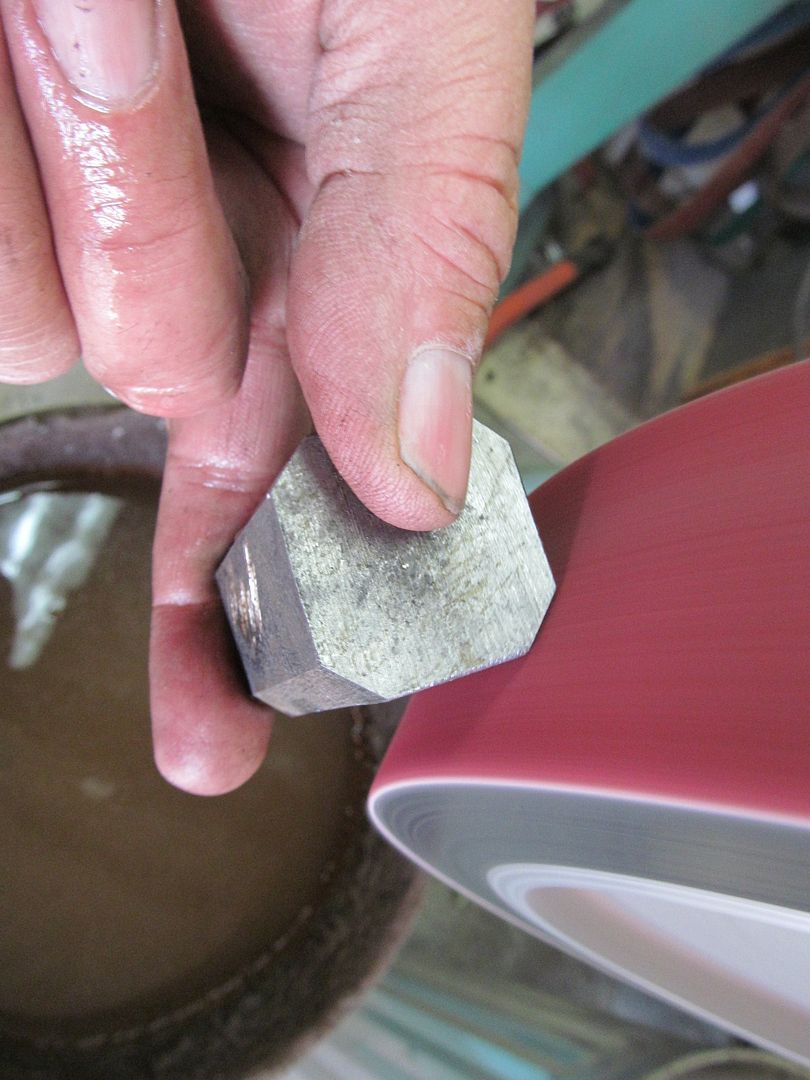
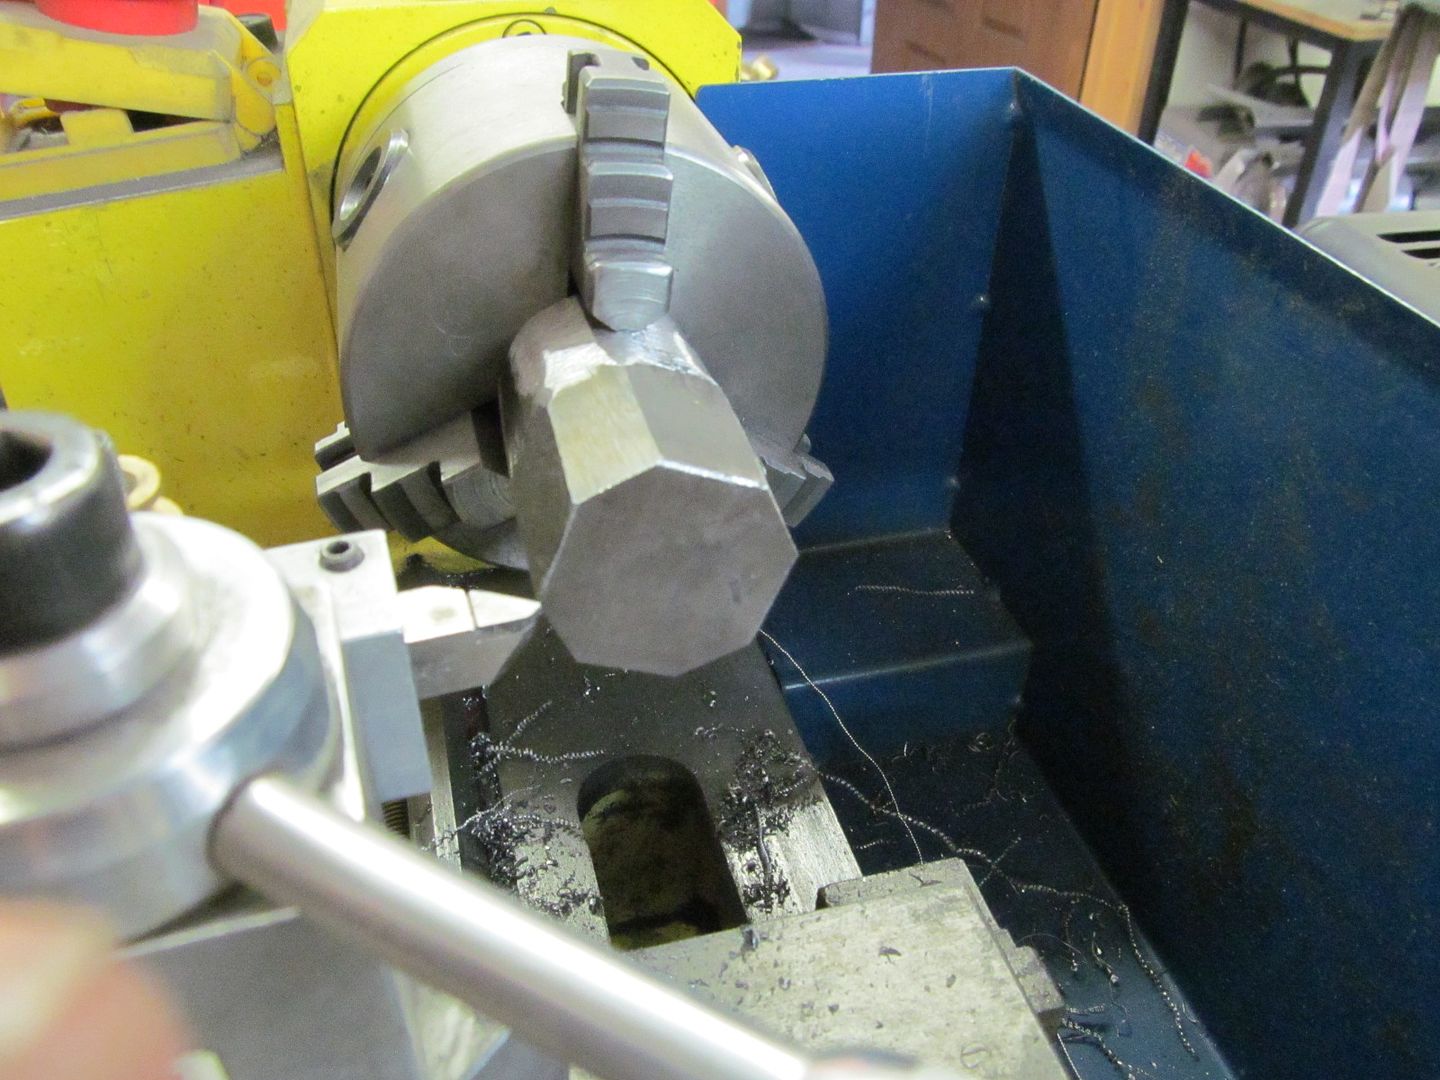
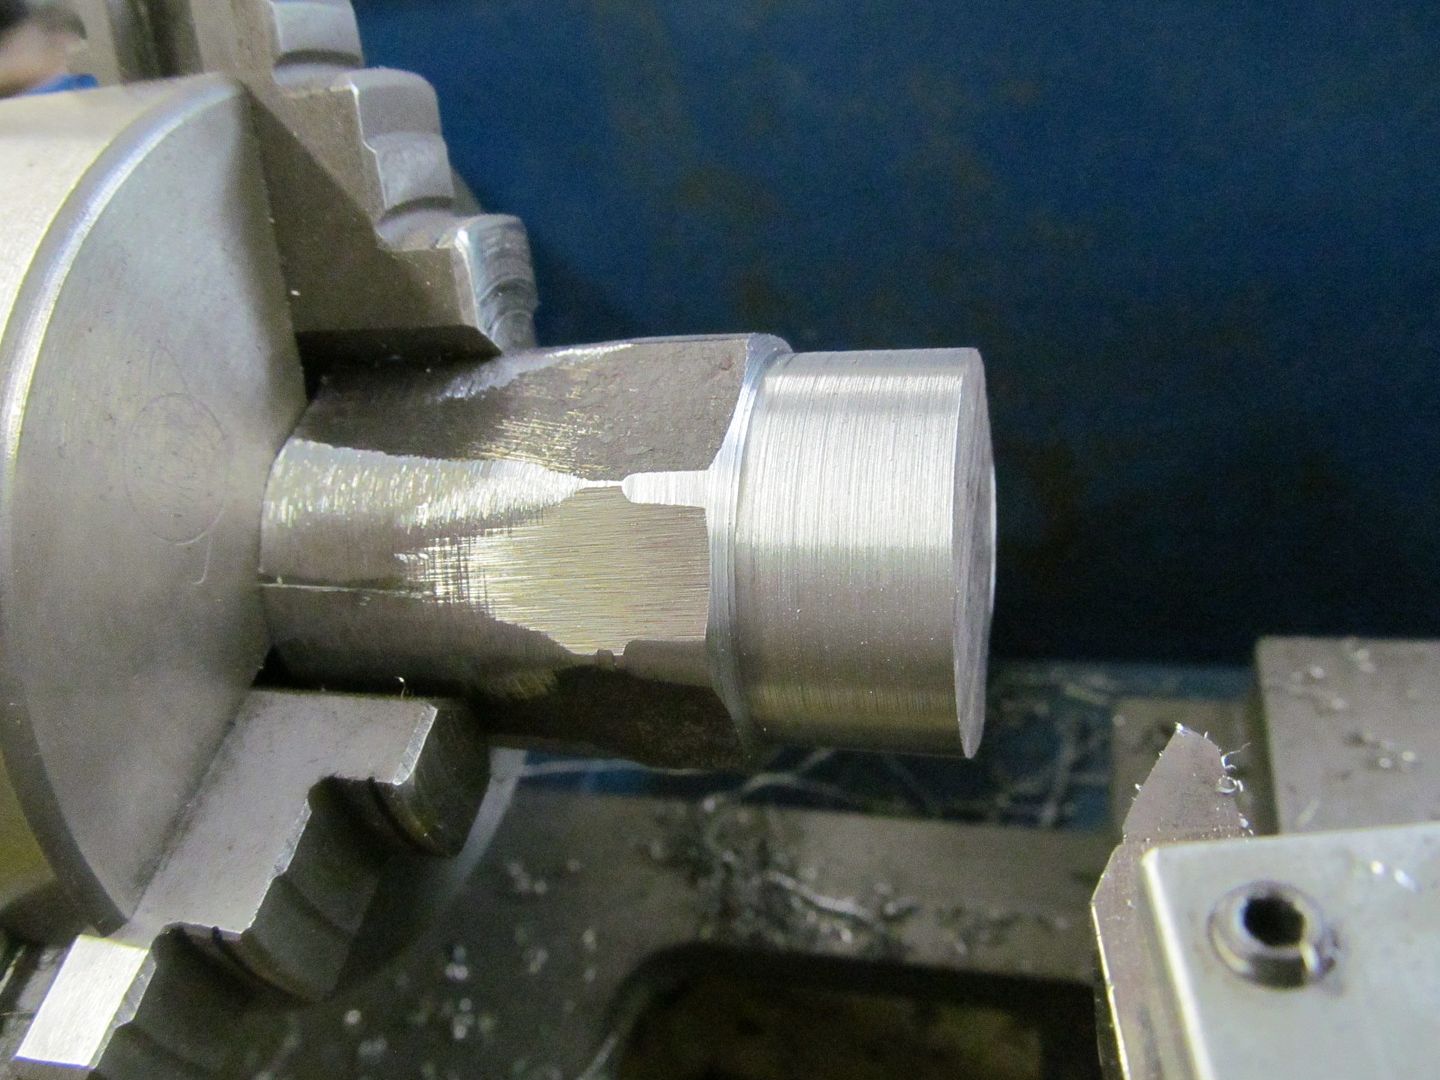
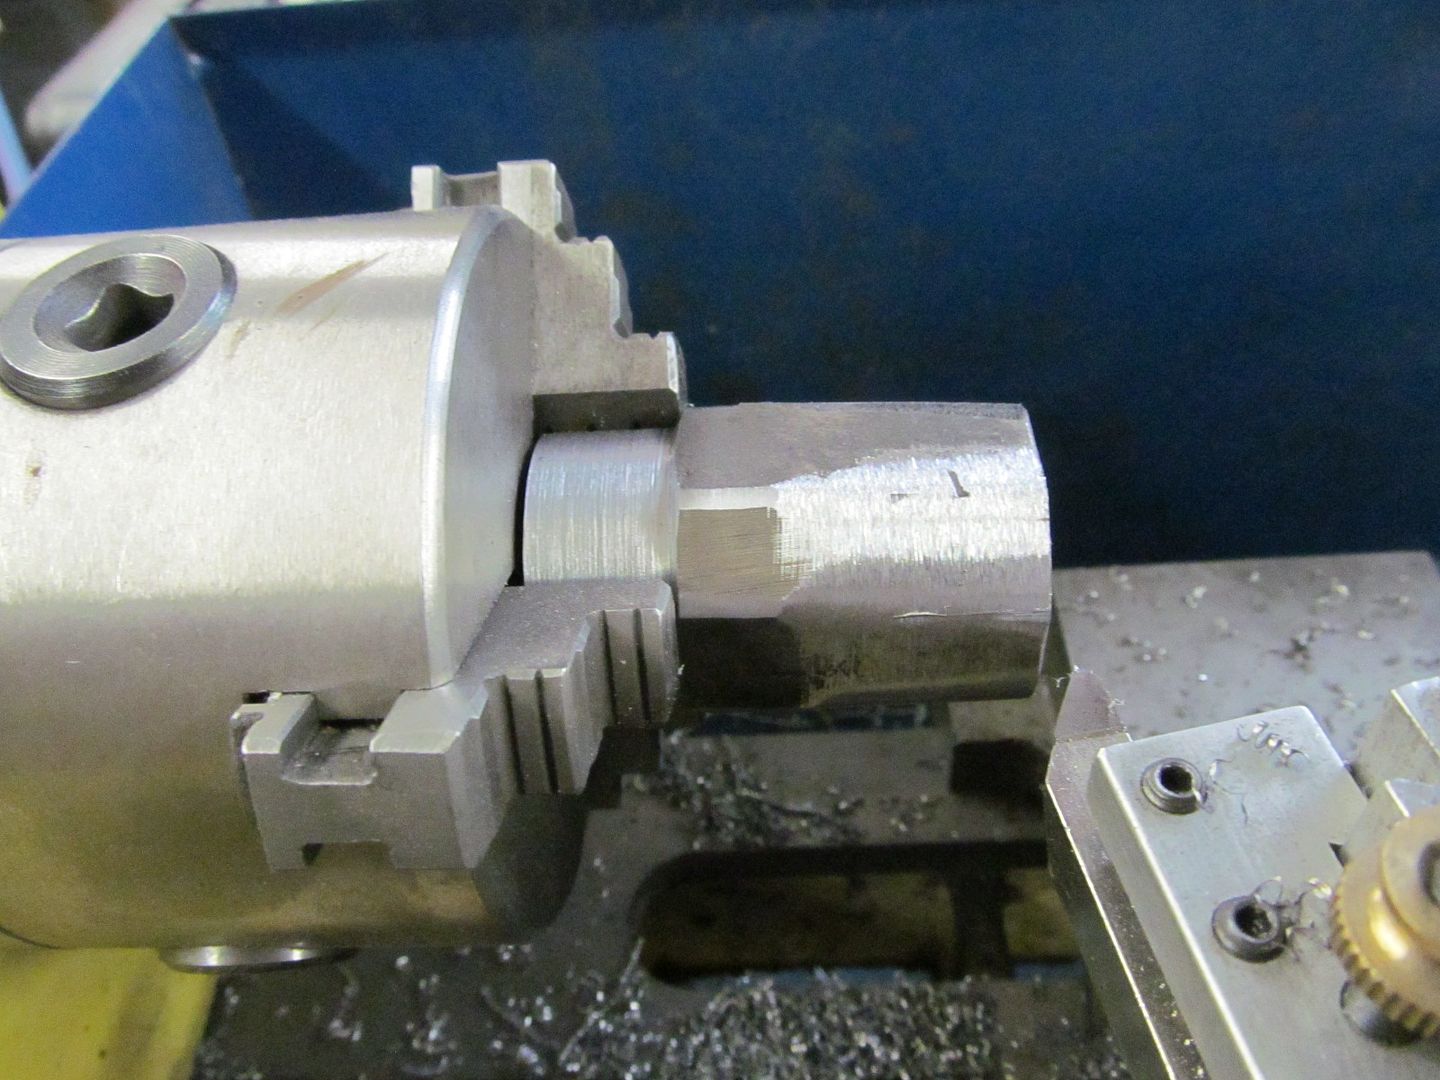
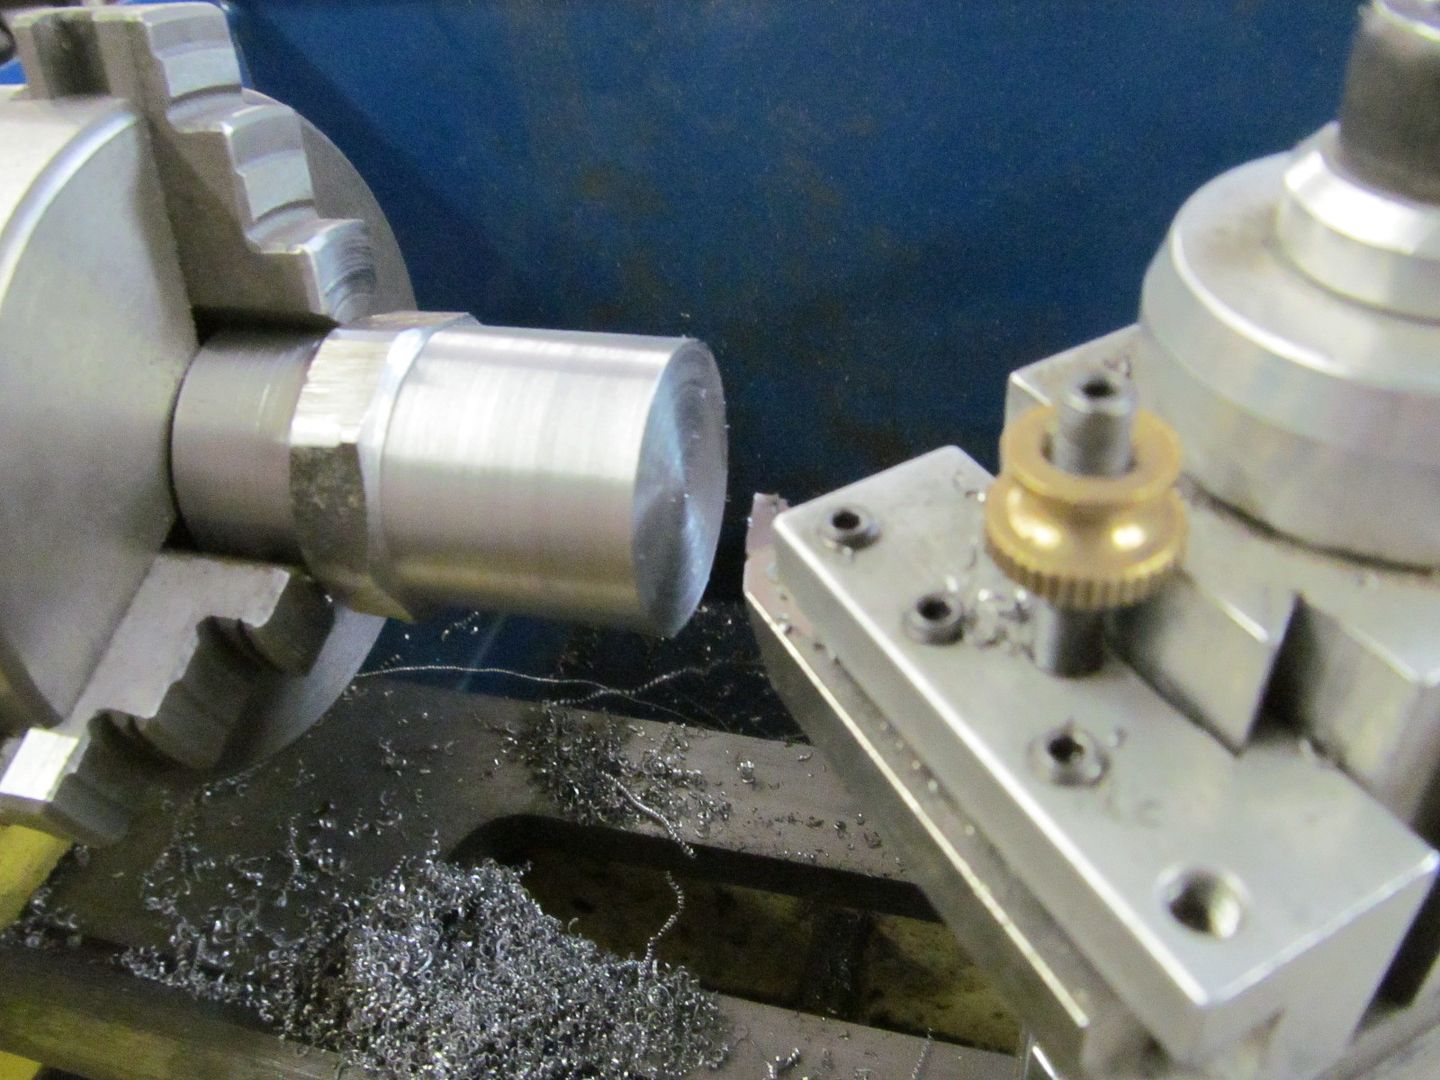
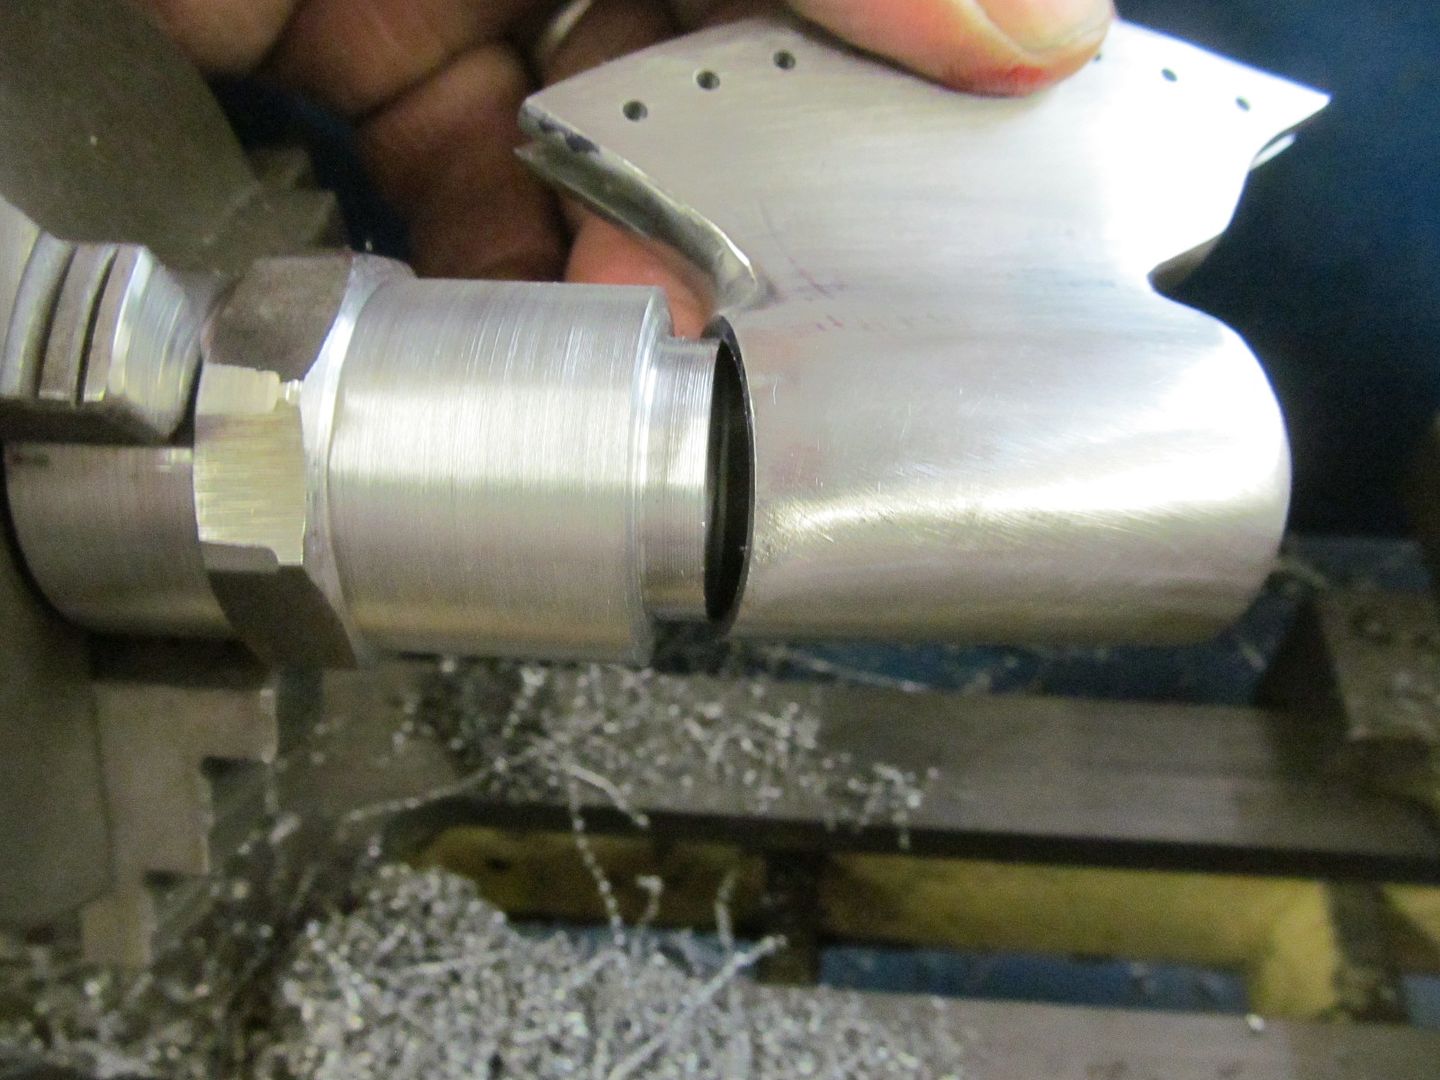
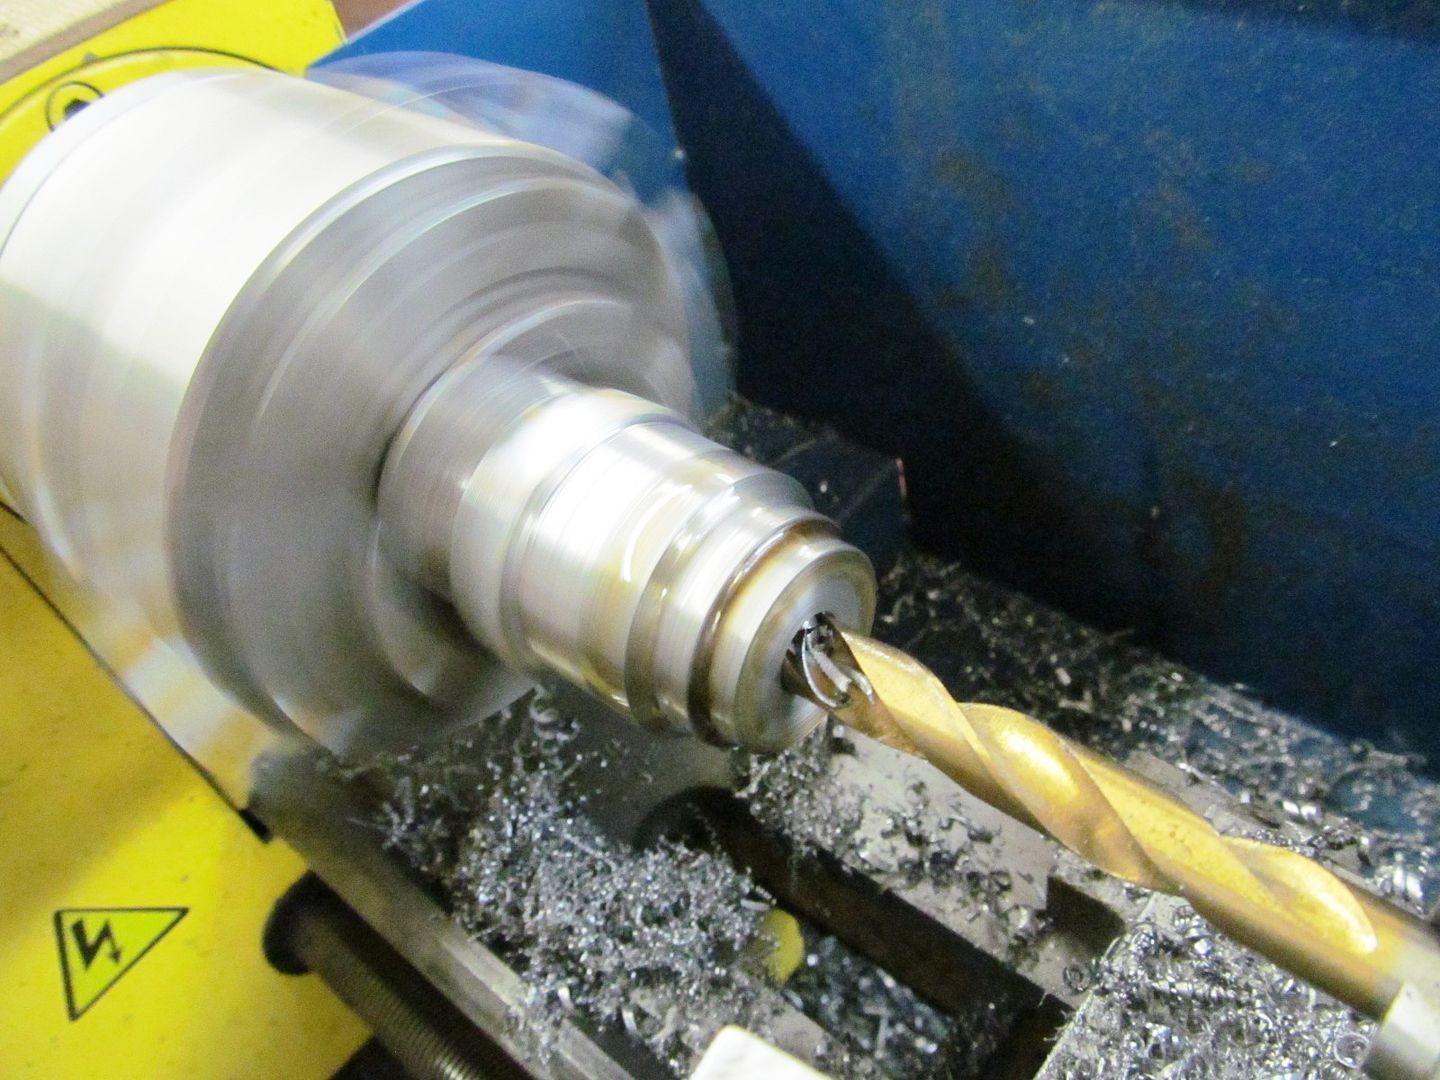
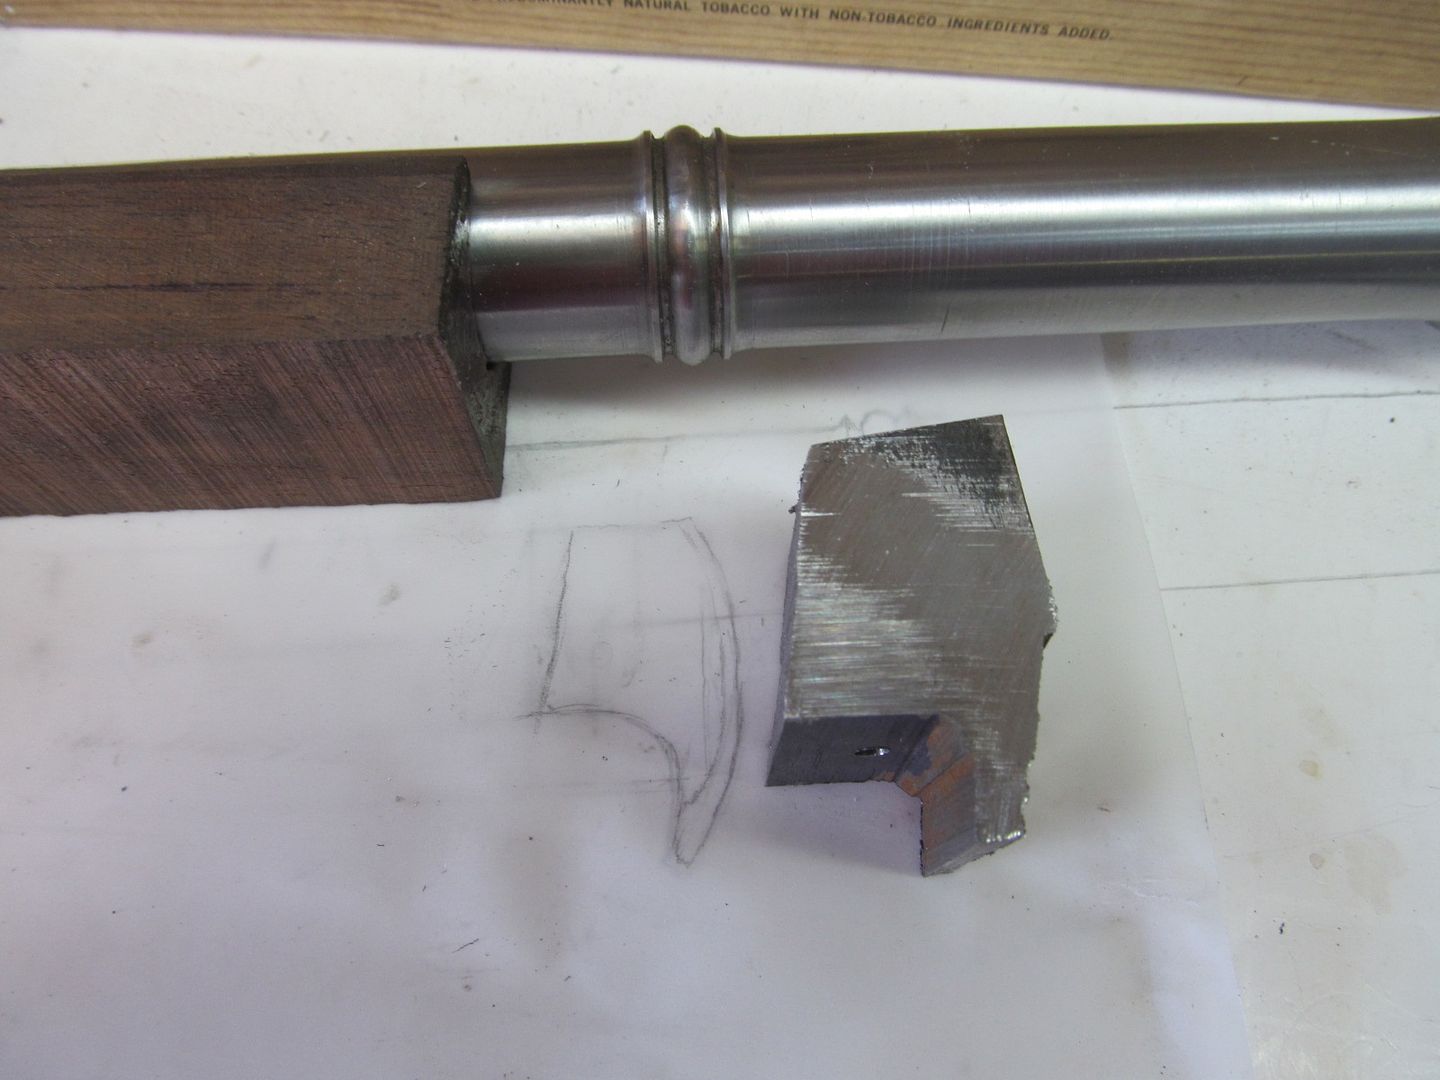
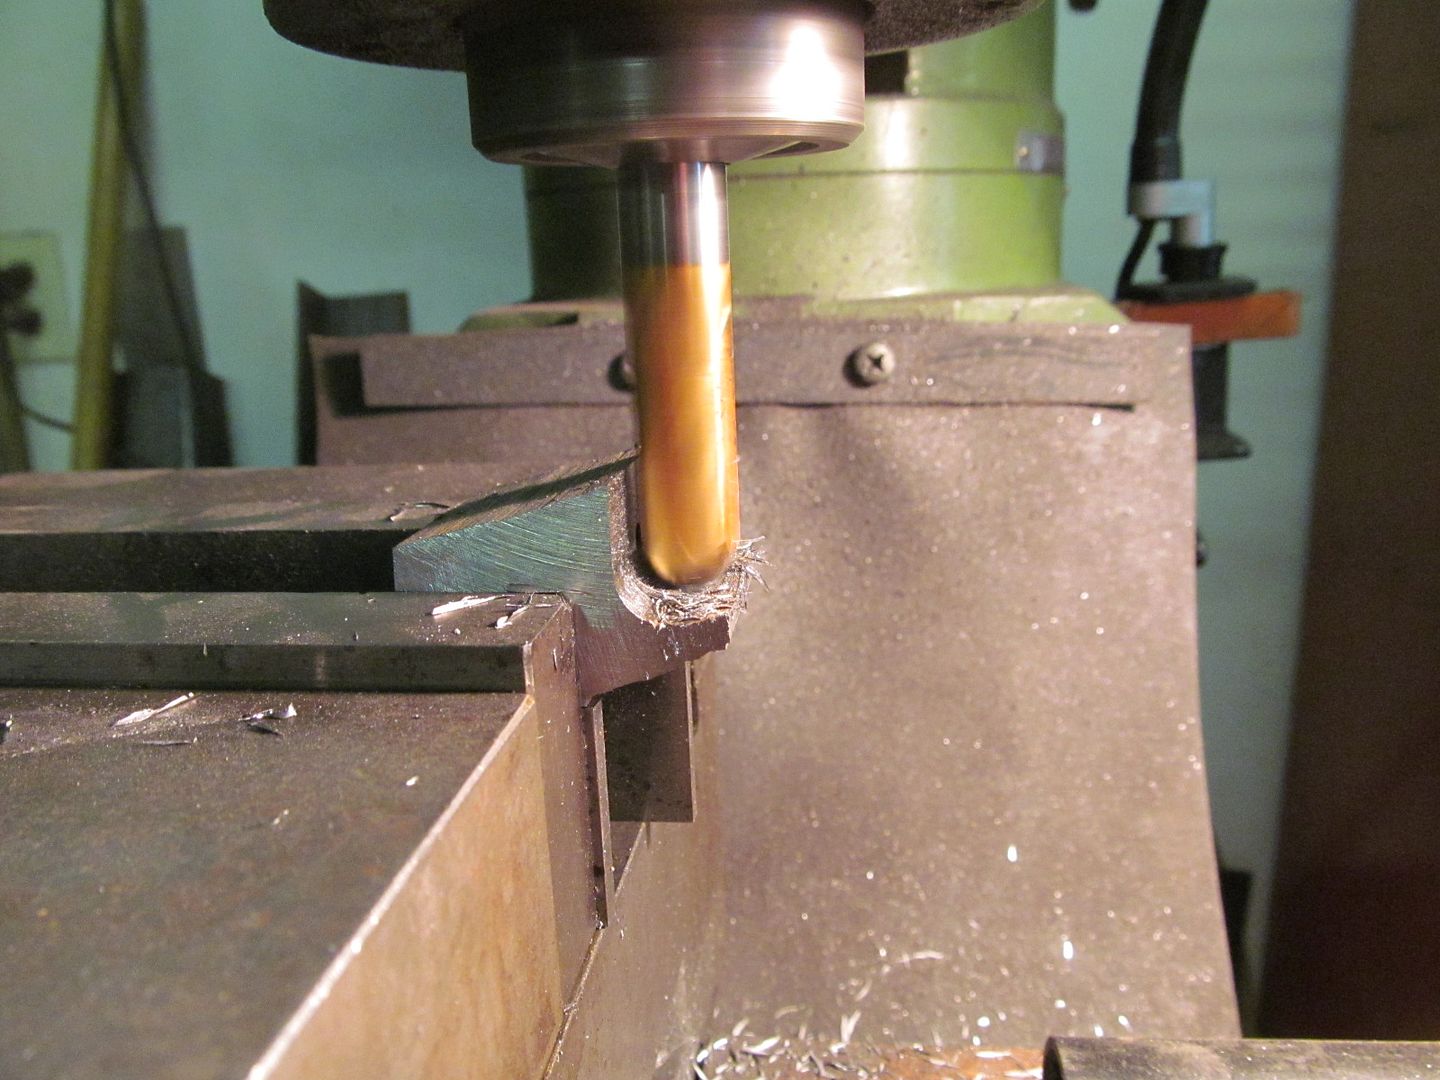
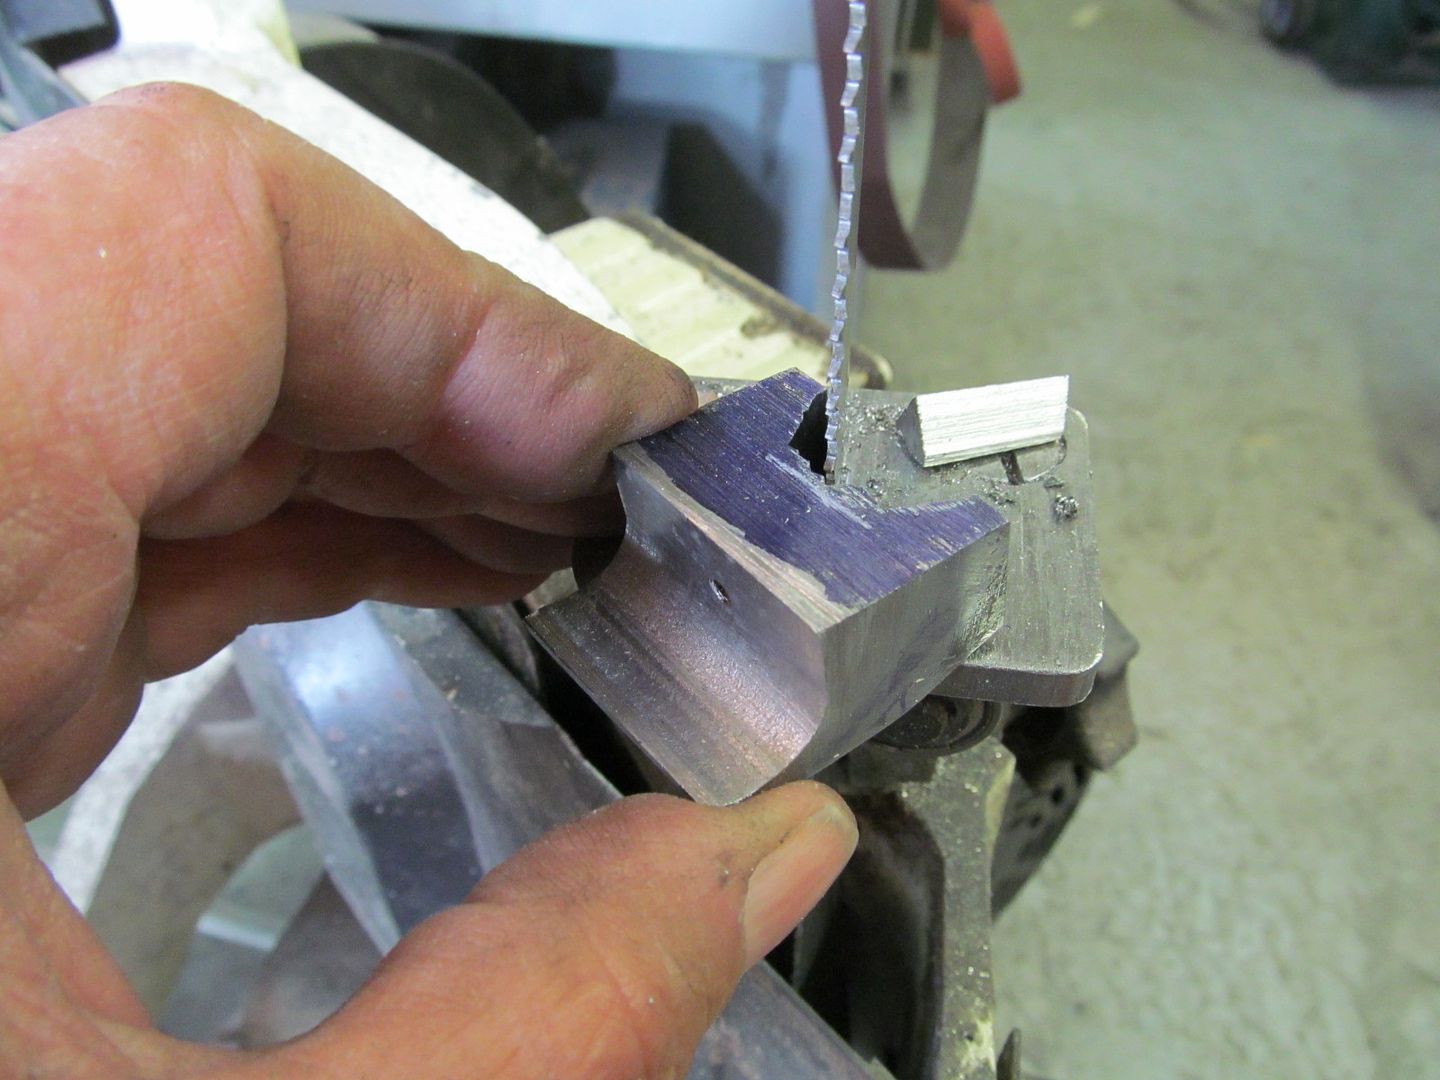
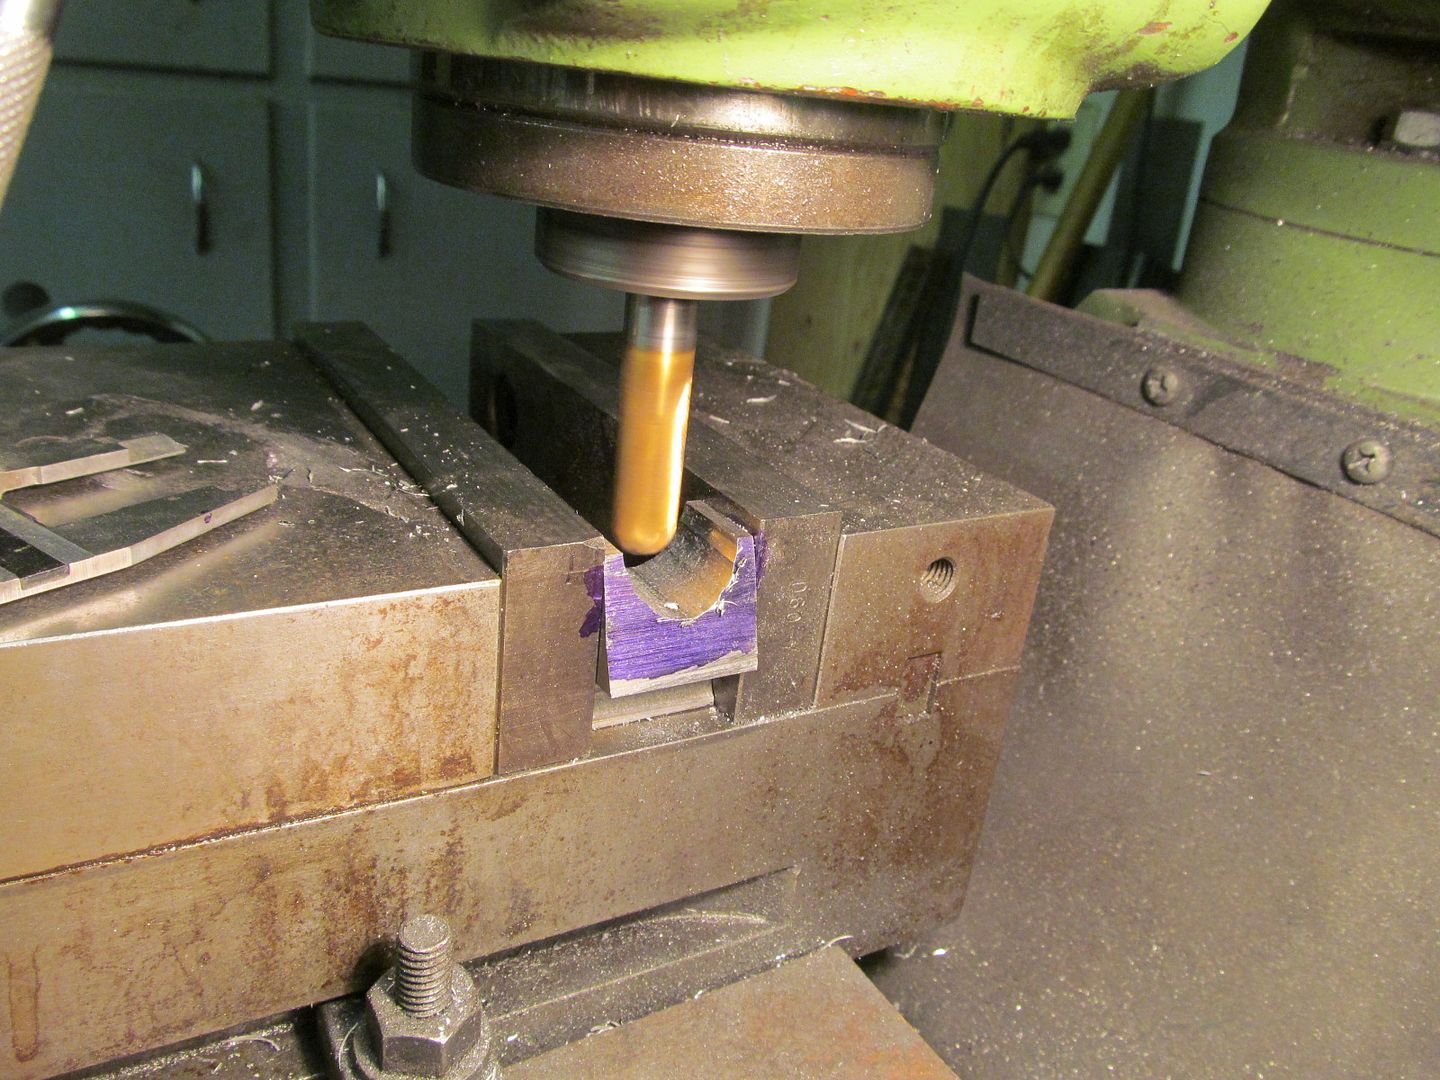
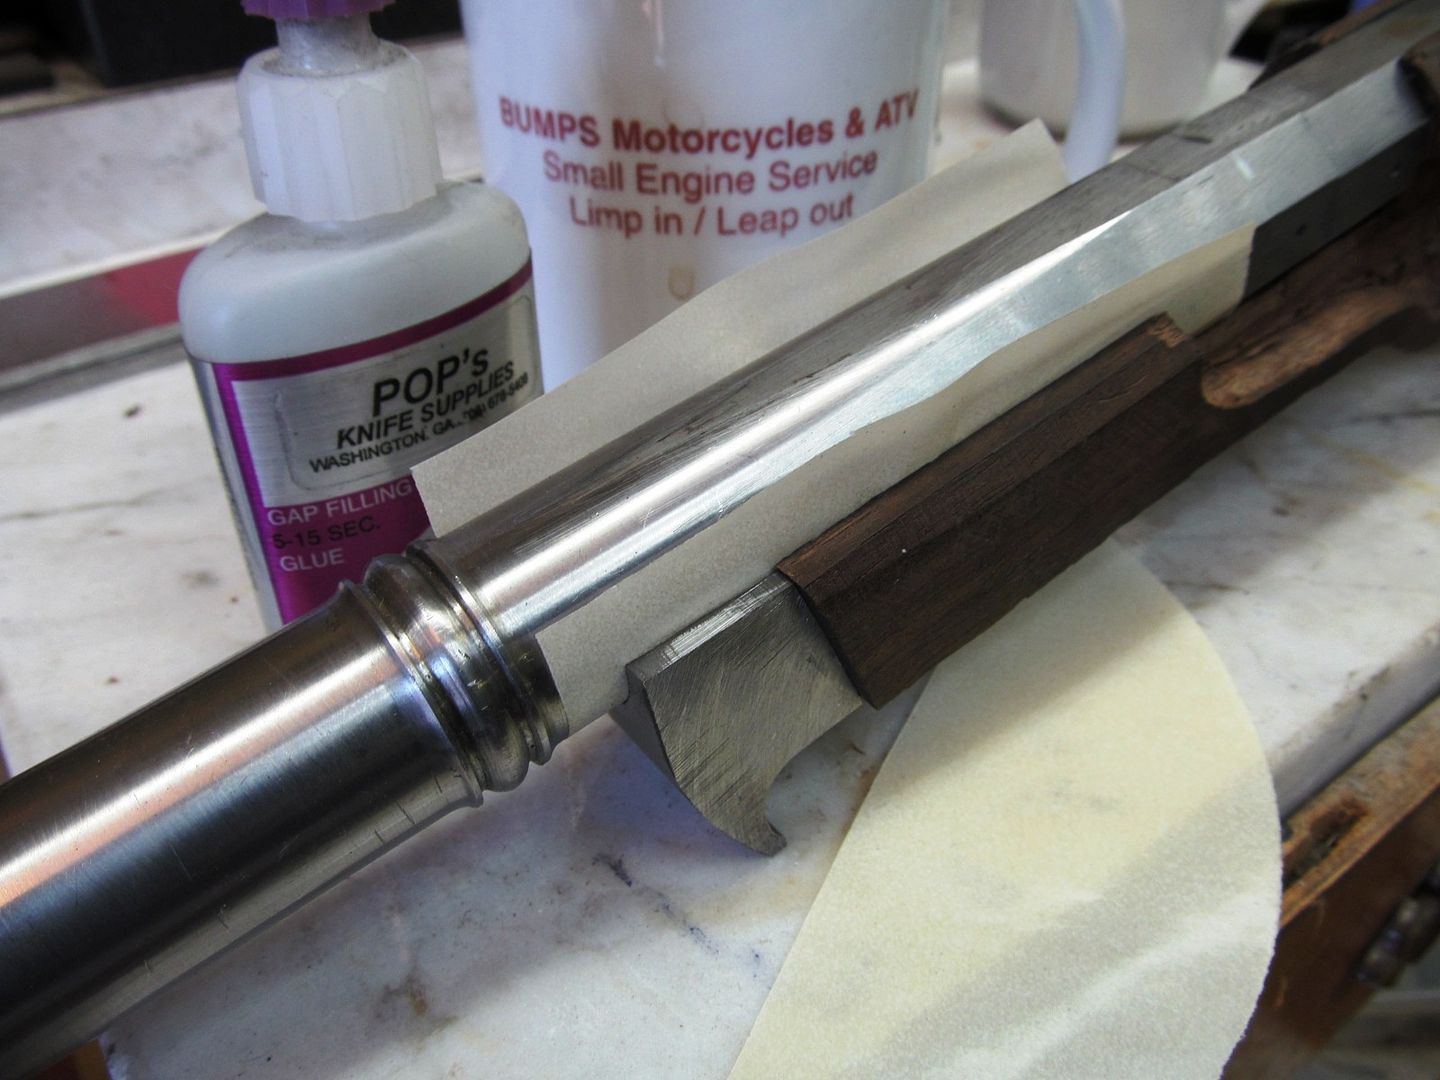
Took a break from the serpentine and worked on the axe blade adapter today. I removed allot of steel and weight from the top and contoured the front and back edge. Also drilled some rivet holes for the inserted blade (havent made the blade yet) and turned down a square piece of mild steel for the muzzle nut that will hold the axe head on the barrel. I still need to drill the nut to barrel bore size of .500" and counter bore it and thread it and the barrel muzzle.

ddavelarsen
Well-Known Member
Man, it's great to watch a master woodworker at work! This is beautiful and so inspiring I almost wet my pants. I tried woodworking once - gave it up as too hard! Thanks for sharing your wonderful skills and fantastic photos.
Thanks for sharing your wonderful skills and fantastic photos.Bruce Bump
Forum Owner-Moderator
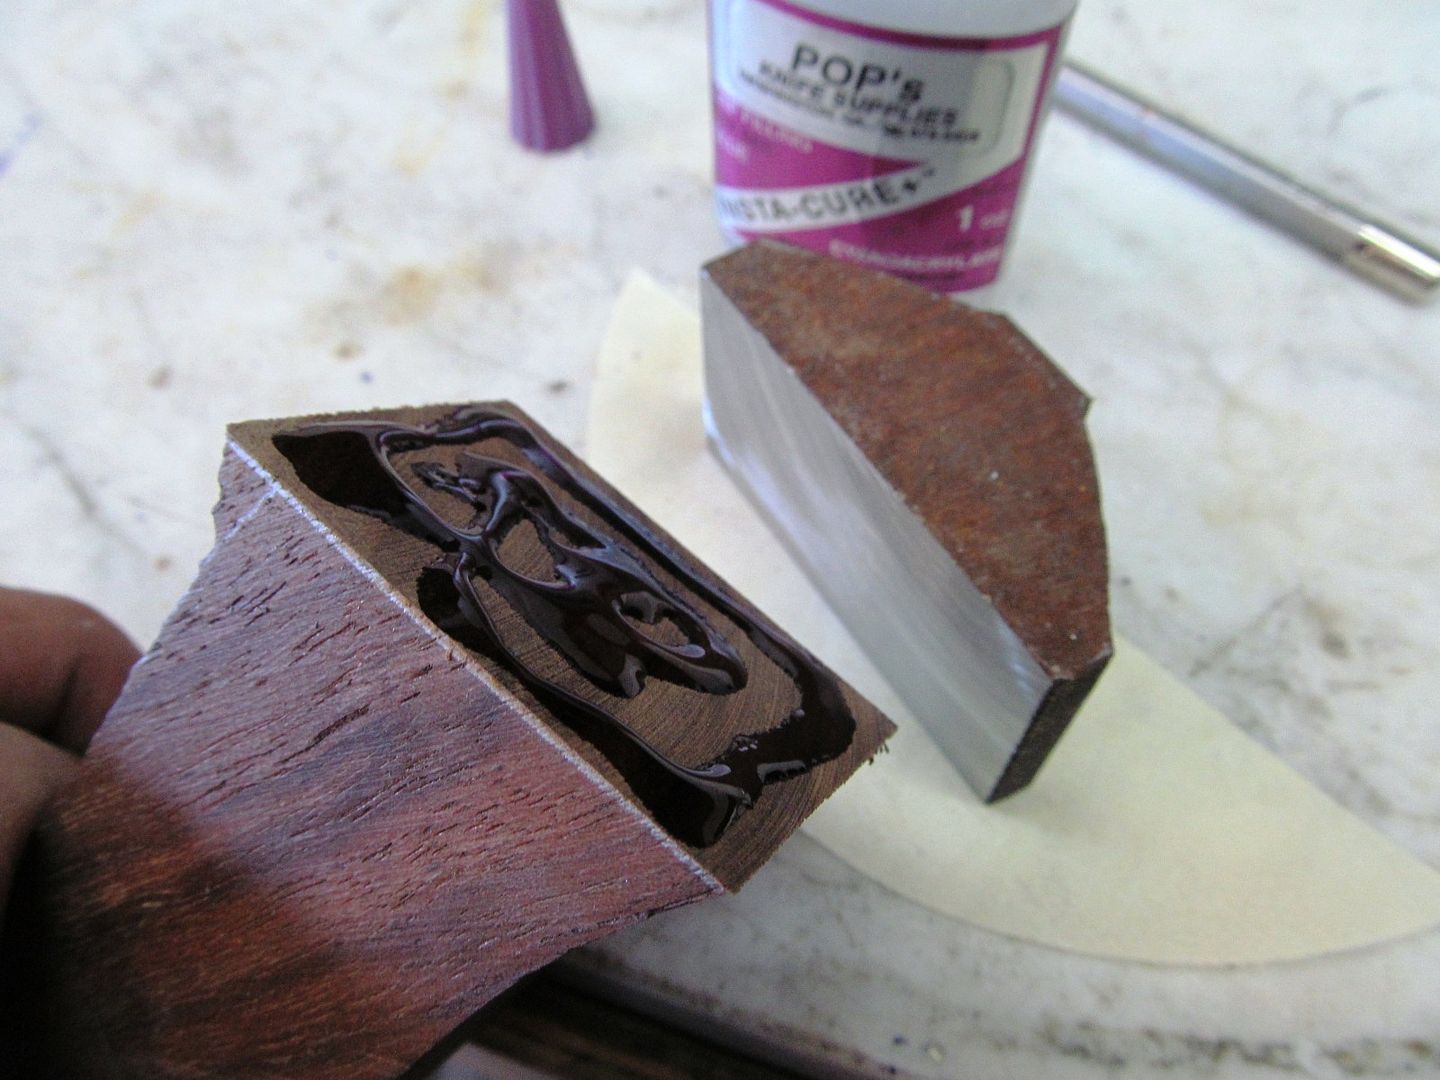
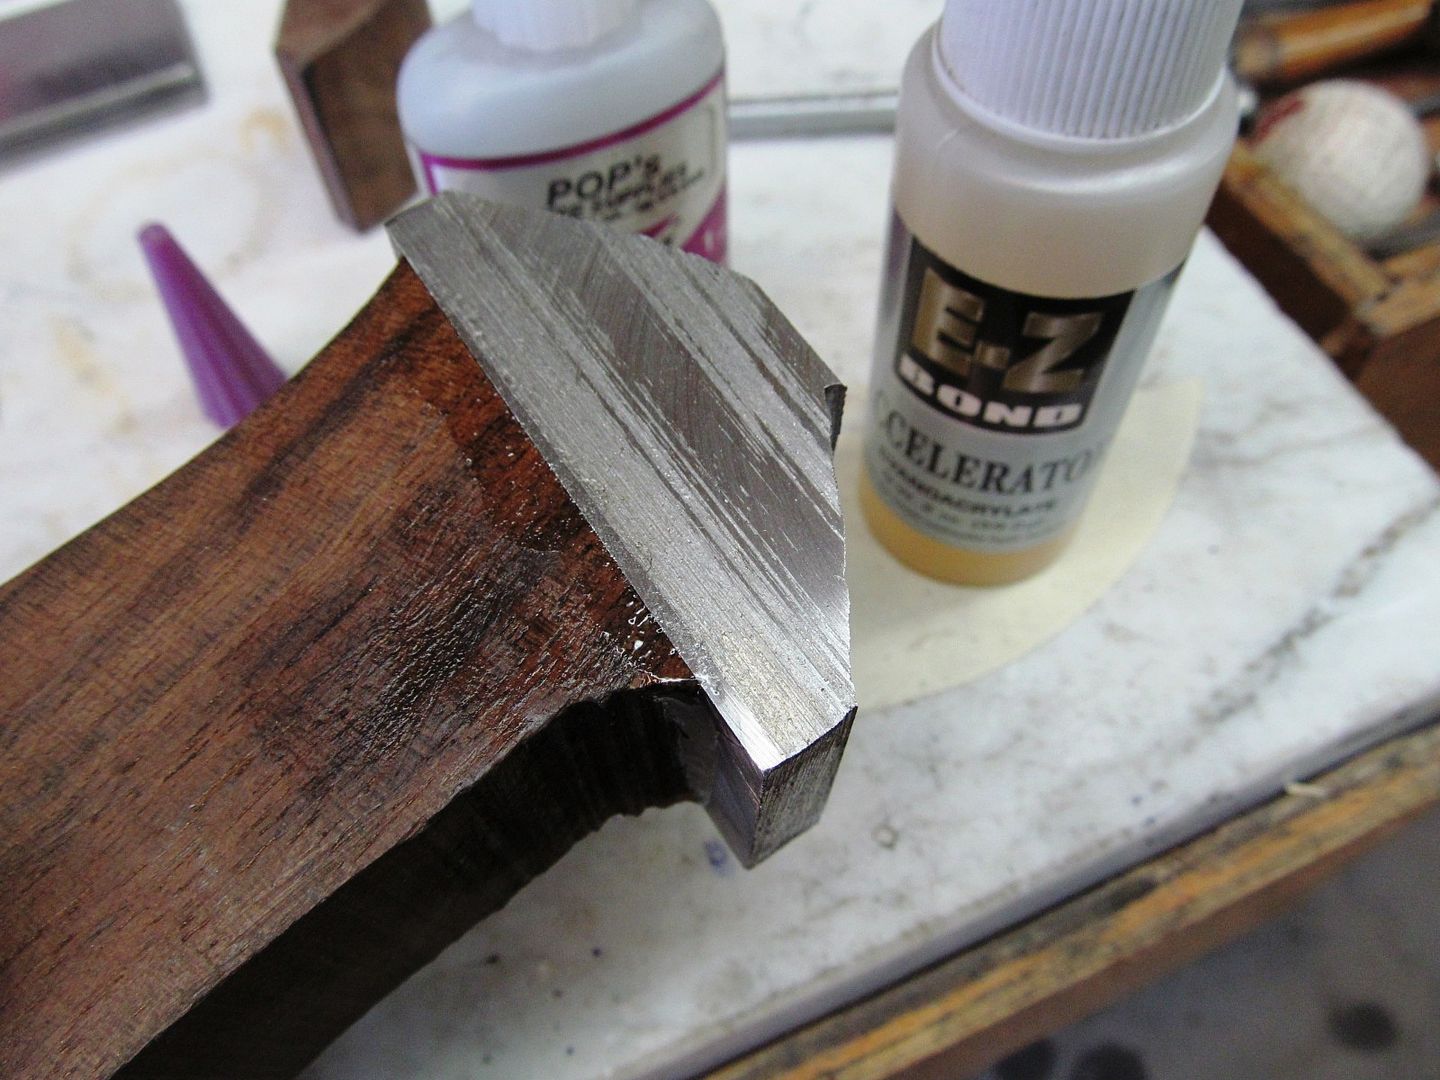
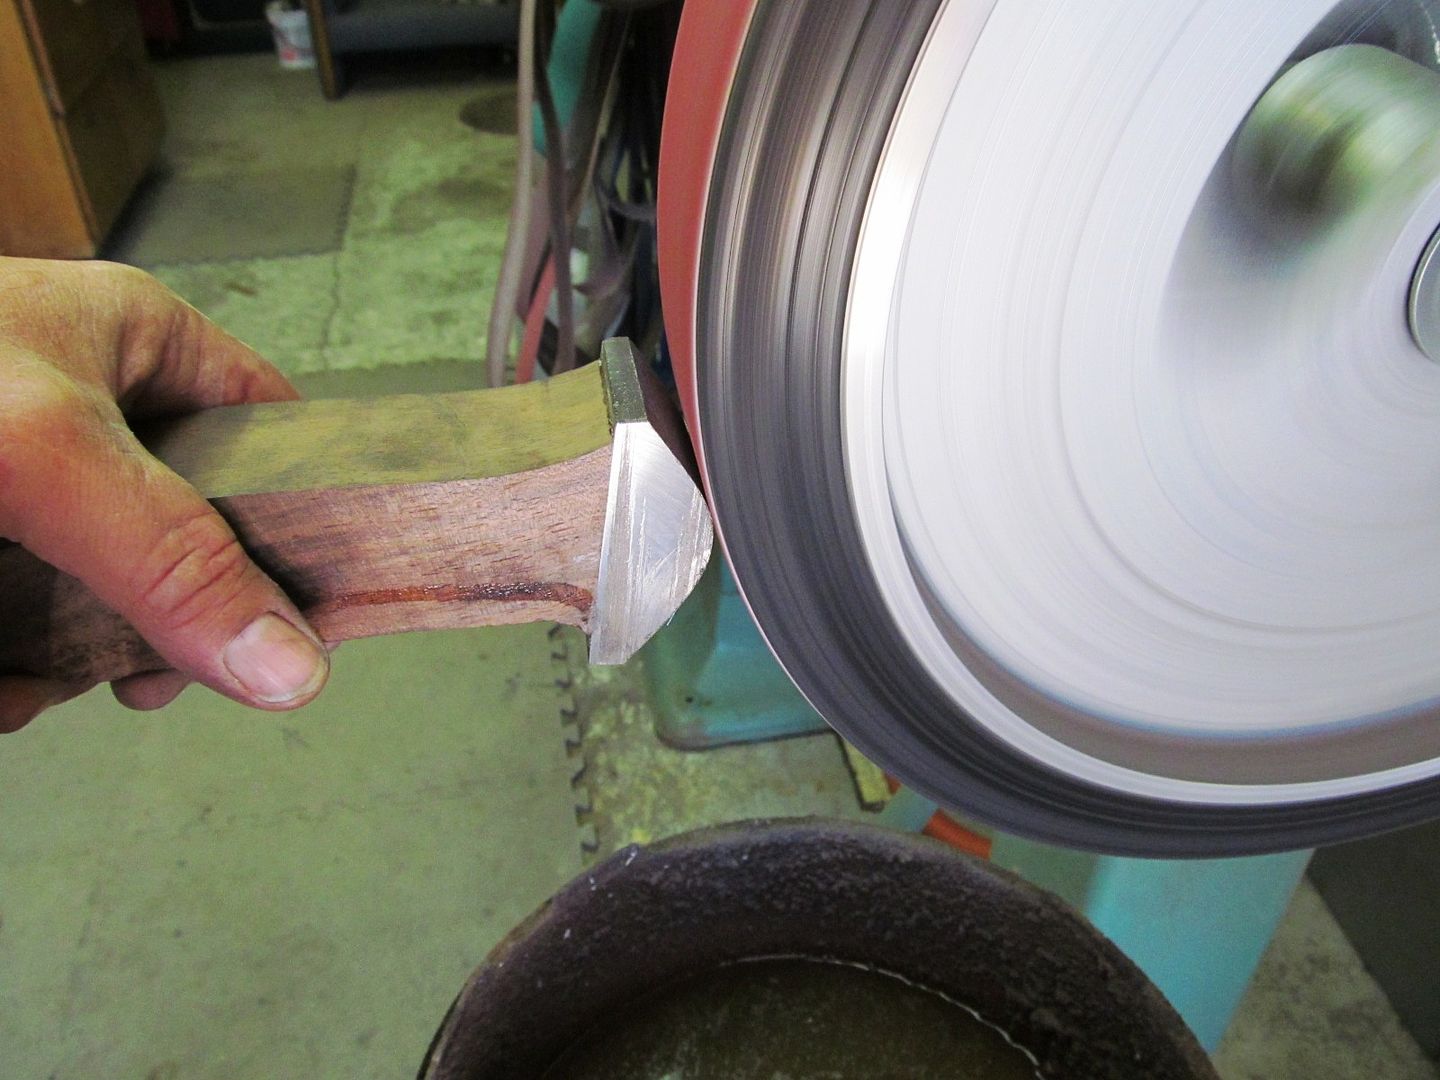
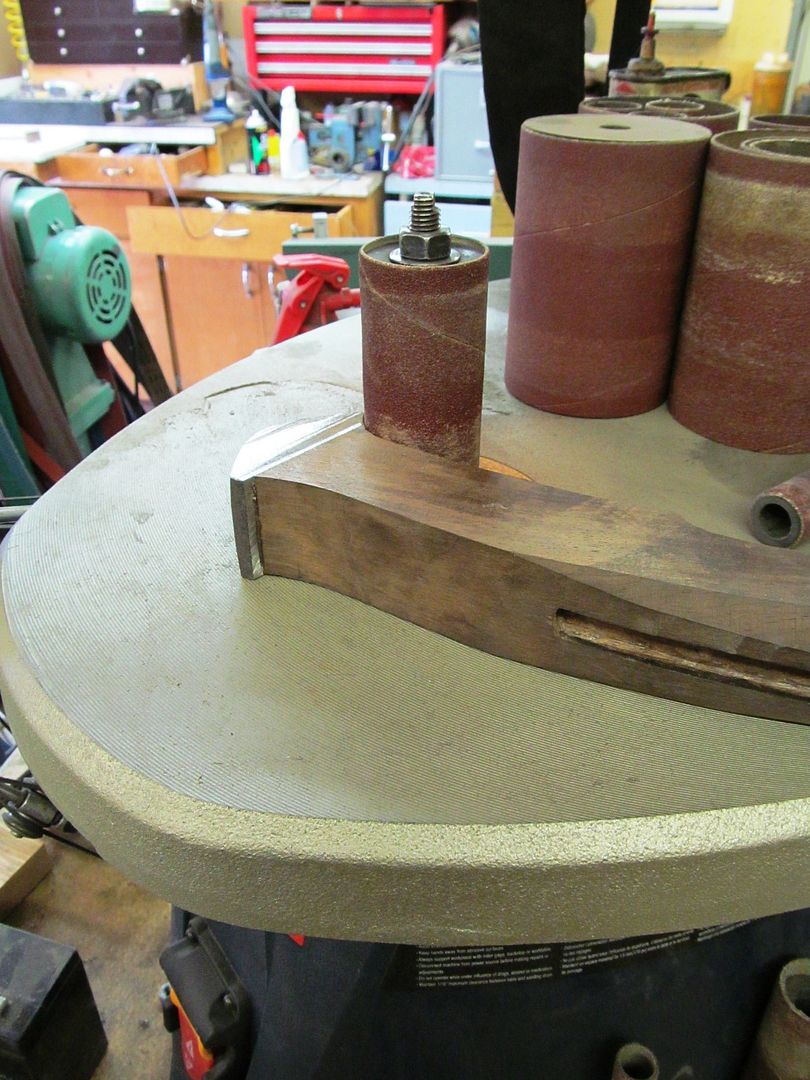
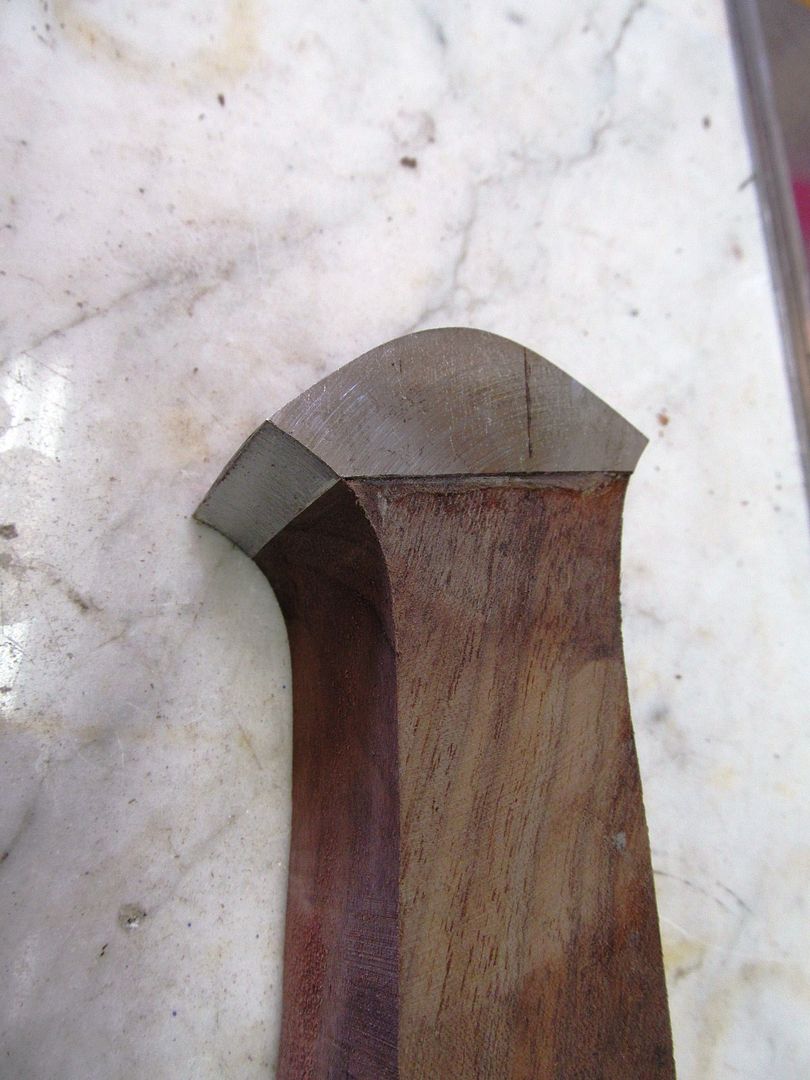
Moving forward I worked on both ends of the wooden handle. The forearm stop I feel is needed to keep the left hand from getting speared by the axe blade so I put a hook on it for a secure feeling. It also should save money on bandaids. It and the pommel are cut from mild steel and super glued to the walnut so I can rough shape them. Again I'm glad this piece of wood is only temporary because it is sure getting a workout.
I also didnt take pictures of turning the barrel down for threading and the axe adaptor nut thread tapping. I had to order a die for the barrel. With the 1/2" bore and the 1" outside diameter it made good sense to use a 3/4" tap and die. More on that next week when the die arrives.
Thanks so much for tuning in for this WIP. I know it is long and so far almost 300 pictures to sort through but I see many of you guys are viewing nearly each day and that makes all this worth while.
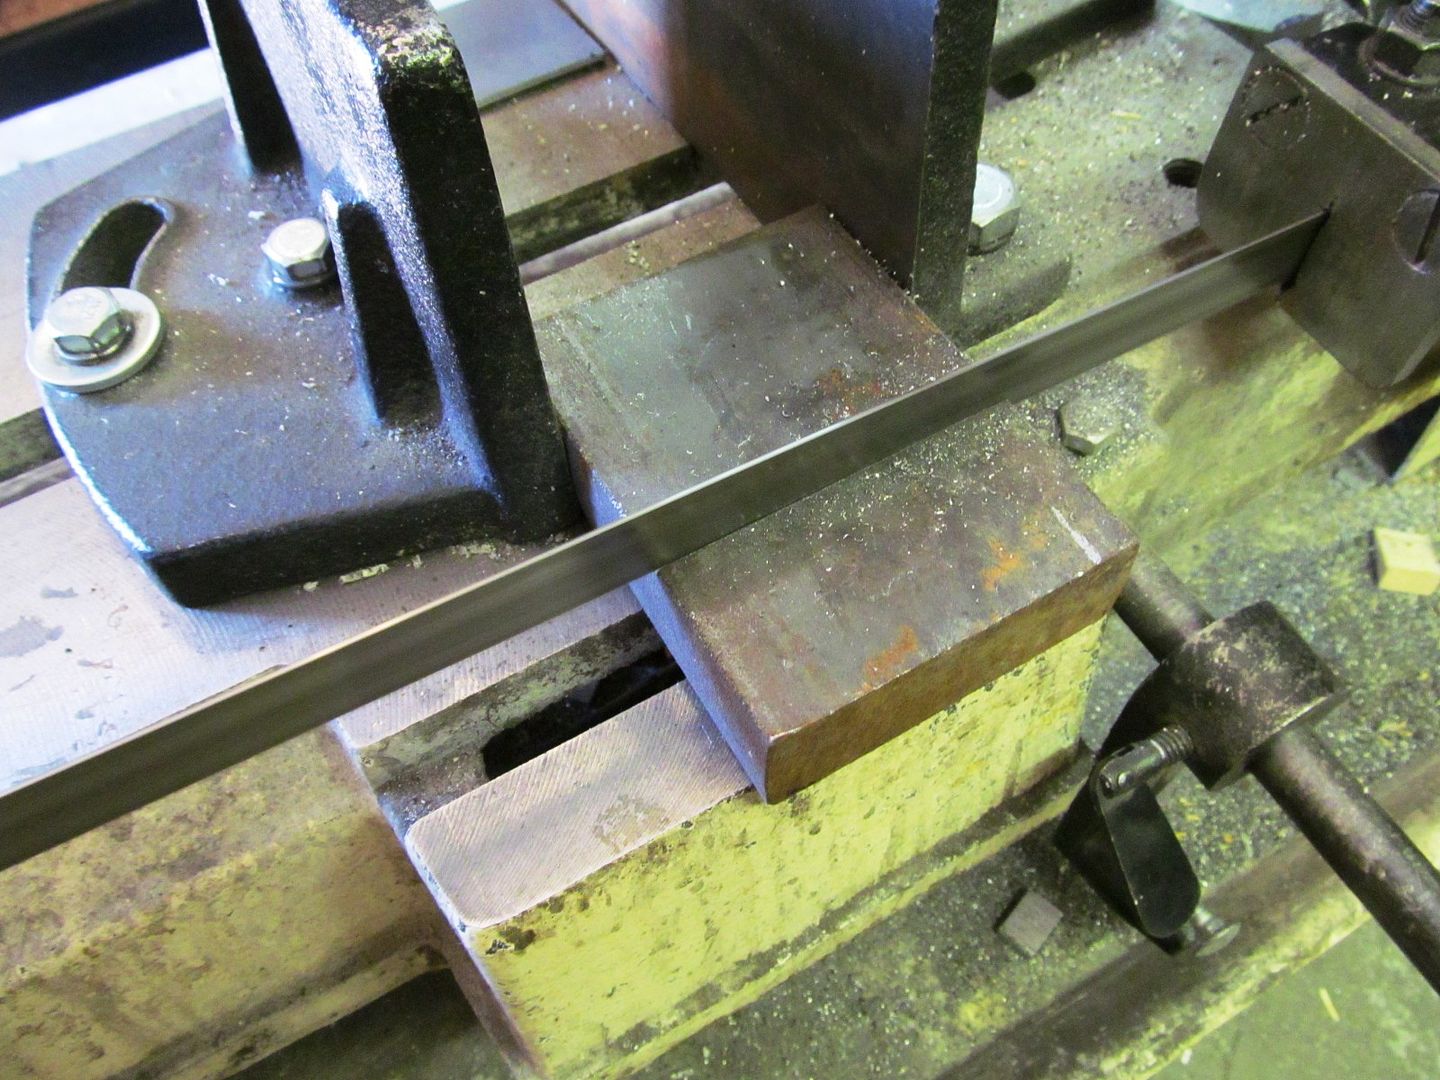